How to get started with Sticky Notes 3.0 on Windows 10
Here's everything you need to know to start using and get the most out of Sticky Notes 3.0 on Windows 10.
All the latest news, reviews, and guides for Windows and Xbox diehards.
You are now subscribed
Your newsletter sign-up was successful
On Windows 10, Sticky Notes is an experience that allows you to create notes rather than sticking pieces of papers around the monitor or across your desk.
The app has been around since Windows Vista, but starting with the October 2018 Update (version 1809), Windows 10 introduces Sticky Notes 3.0 with an improved design (retaining the familiar look and feel) and a new home experience to organize and find all your notes. Also, this new version introduces the ability to sync your notes to the cloud, which allows you to access your notes across devices, including to your Android phone.
In this Windows 10 guide, we'll walk you through the steps to get started using Sticky Notes 3.0 across devices.
- How to connect Sticky Notes with your Microsoft account
- How to use Sticky Notes on Windows 10
- How to use Sticky Notes with keyboard shortcuts
- How to enable Sticky Notes insights
- How to export Sticky Notes content
- How to manage delete Sticky Notes settings
- How to sync Sticky Notes with Android
How to connect Sticky Notes with your Microsoft account
Starting with this version, you can sign in to Sticky Notes using your Microsoft account to sync your notes across your devices and keep them backed up in the cloud. Here's how:
- Open Start.
- Search for Sticky Notes, click the top result to open the experience.Quick Tip: The new version of Sticky Notes is compatible with Windows 10 version 1803 (April 2018 Update) and later. If you can't find the app on your installation, you can download it from the Microsoft Store.
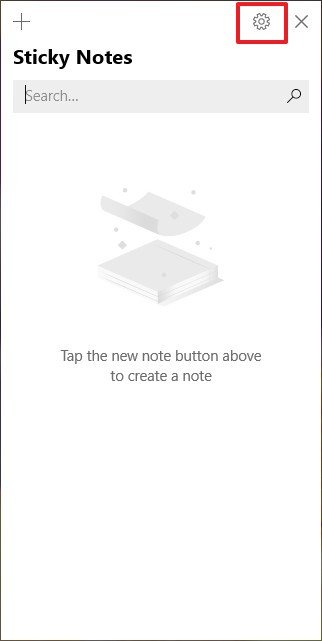
- Click the Settings (gear) button in the top-right corner.
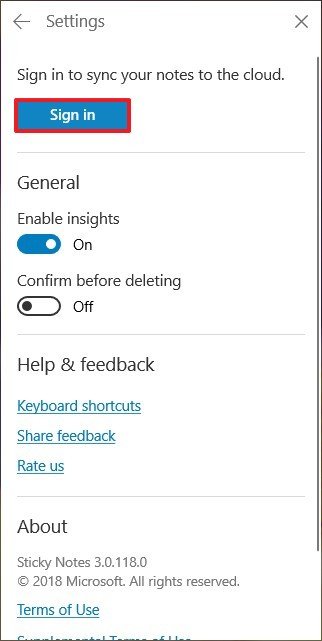
- Click the Sign in button. (Or the Sign out button if you want to stop syncing your notes.)
- Select the Microsoft account you're using on Windows 10.
- Click the Continue button.
Once you've completed the steps, your notes will upload to your Microsoft account, and they will sync across devices (including to your Android phone).
Using a Microsoft account is a requirement to backup and sync your notes, but it's not a mandatory step to use the app. However, if you start using the app without signing in, and then you link your Microsoft account your notes will upload to the cloud, and if you sign out your notes will no longer be available unless you sign back in.
How to use Sticky Notes on Windows 10
Although Sticky Notes version 3 remains similar to the legacy app, the experience has been updated with new interface changes and features.
All the latest news, reviews, and guides for Windows and Xbox diehards.
To get started creating, editing, deleting, and organizing your notes, use the following steps:
Creating, editing, and deleting notes
- Open Start.
- Search for Sticky Notes, click the top result to open the experience.
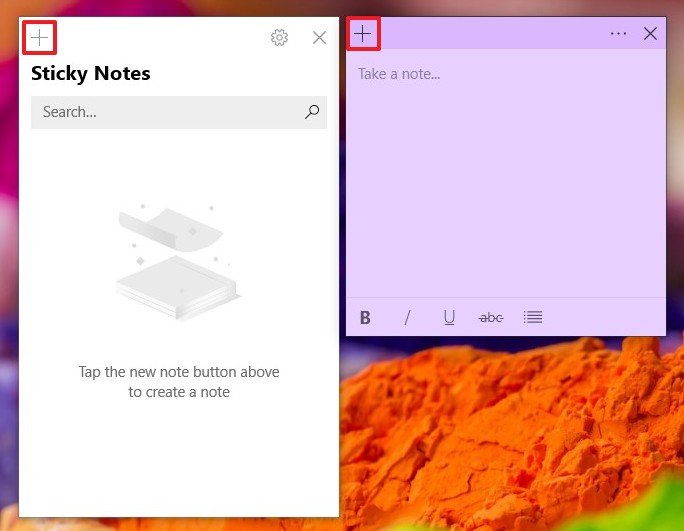
- Creating a new note: Click the plus (+) button in the top-left corner of a note, or in the home experience.
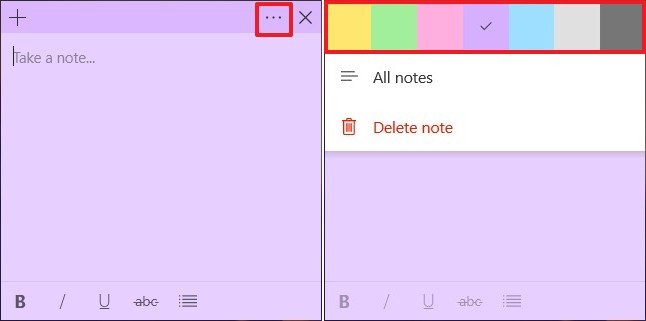
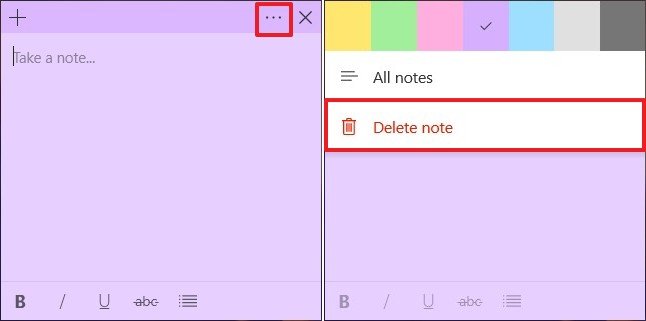
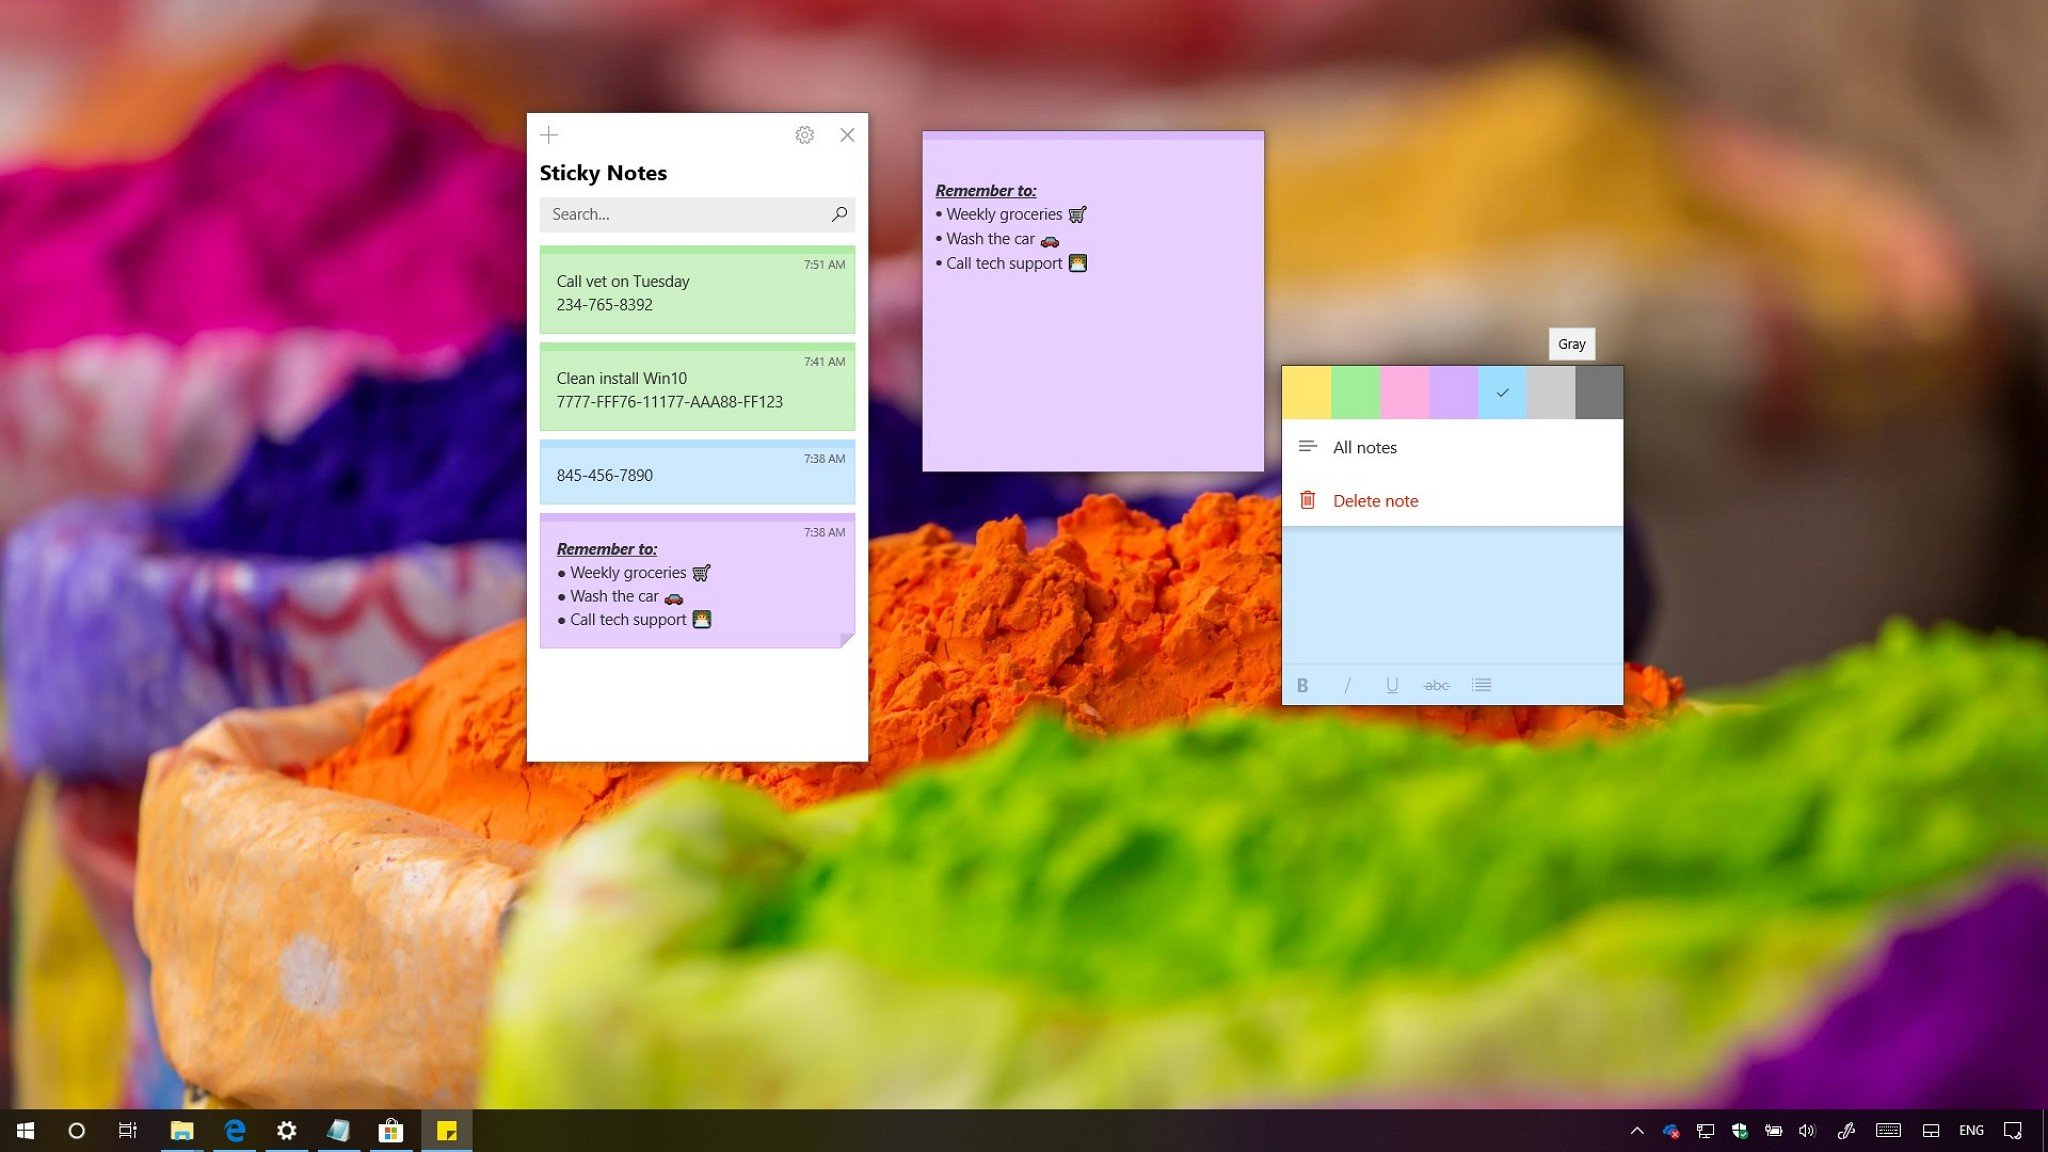
- Changing a note color: Click the menu (three-dotted) button in the top-right corner of the note, and select the color you want (including yellow, green, pink, purple, blue, gray, and charcoal).
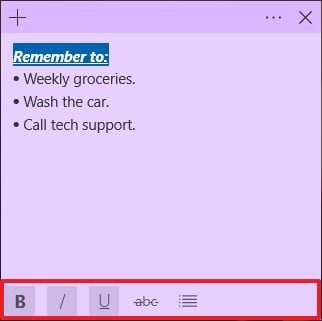
- Formatting a note: Type your note, and use the toolbar at the bottom of the note to format the content. Options available, include bold, italic, underline, strikethrough, and bullets.
- Deleting a note: Click the menu (three-dotted) button in the top-right corner of the note, and click the Delete note option.
In addition to adding content with the keyboard, Sticky Notes 3.0 includes support for Windows Ink, which means that on touch-enabled devices, you can use natural handwriting with a stylus to create notes.
Sticky Notes home
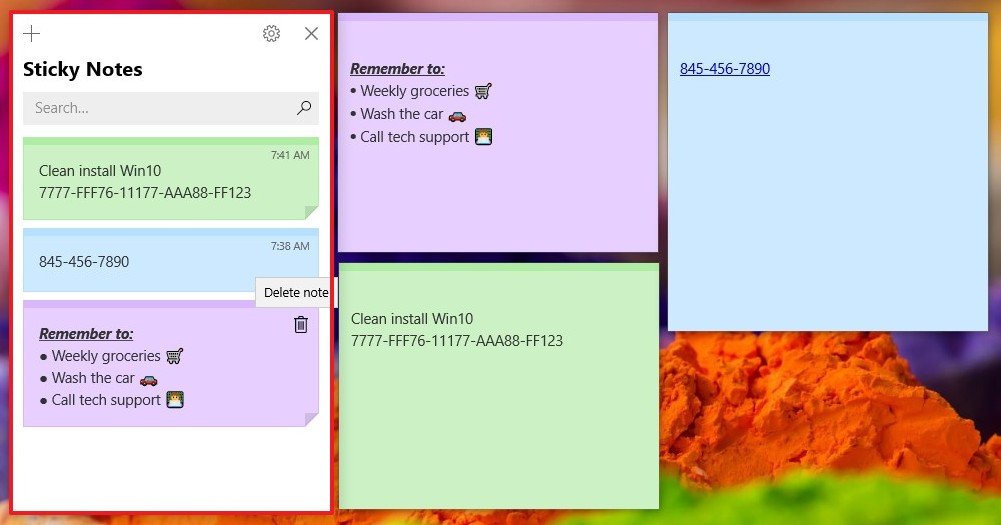
If you use Sticky Notes on a daily basis, it's easy for your desktop to get clutter with notes, and for that reason, starting with version 3.0, the experience also includes a new home to organize all your notes.
The new home is straightforward, as you create new notes, they will appear in a chronological order.
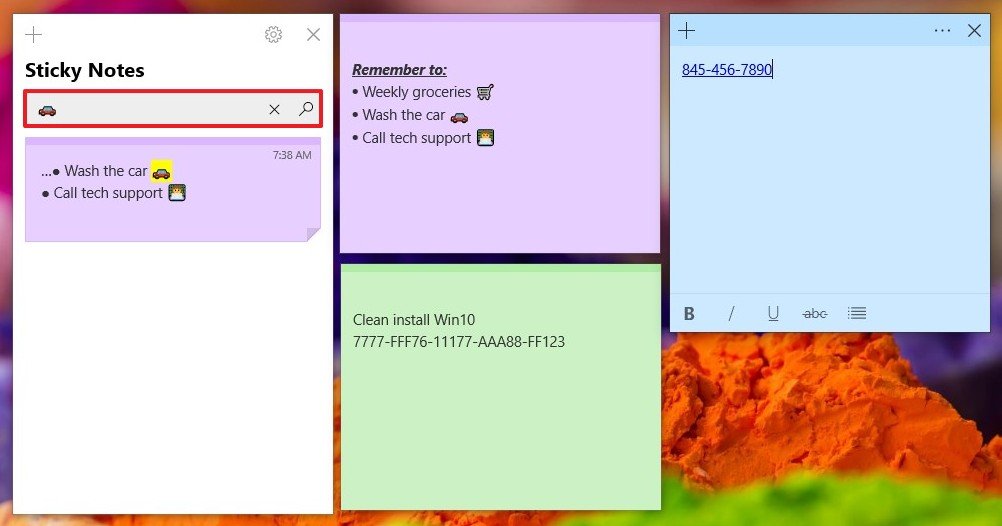
If you can't find a note, you can use the search box to find a particular note. (And yes, a emoji is also a keyword.)
If you want to edit the note, double-click it. Or click the Trash can button to delete it.
As we outlined above, at the top, you'll find a toolbar to create new notes, access the settings, and close the experience.
How to use Sticky Notes with keyboard shortcuts
Similar to previous versions, you can use keyboard shortcuts to work faster and more efficiently with Sticky Notes.
Here's the full list of keyboard shortcuts that you can use with Sticky Notes on Windows 10:
| Action | Keyboard shortcut |
|---|---|
| Create new note | Ctrl + N |
| Delete current note | Ctrl + D |
| Close current note | Ctrl + W |
| Move to next note | Ctrl + Tab |
| Move to previous note | Ctrl + Shift + Tab |
| Select all text on note | Ctrl + A |
| Cut the selected text | Ctrl + X |
| Copy the selected text | Ctrl + C |
| Paste the text | Ctrl + V |
| Undo action | Ctrl + Z |
| Redo action | Ctrl + Y |
| Move one word left | Ctrl + Left arrow |
| Move one word right | Ctrl + Right arrow |
| Move to beginning of line | Home |
| Move to end of the line | End |
| Move to beginning of note | Ctrl + Home |
| Move to end of note | Ctrl + End |
| Delete next word | Ctrl + Delete |
| Delete previous word | Ctrl + Backspace |
| Close Sticky Notes | Alt + F4 |
| Bold selected text | Ctrl + B |
| Strikethrough selected text | Ctrl + T |
| Underline selected text | Ctrl + U |
| Bulleted list | Ctrl + Shift + L |
| Italic selected text | Ctrl + I |
| Right-align selected paragraph | Ctrl + Right Shift |
| Left-align selected paragraph | Ctrl + Left Shift |
How to enable Sticky Notes insights
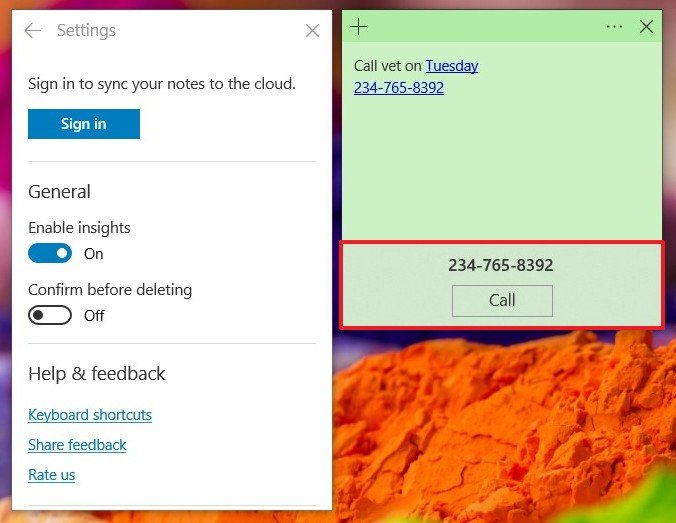
Insights for Sticky Notes is a feature that allows Cortana to scan your notes for information (such as dates, times, phone numbers, addresses, websites, stock symbols, flight numbers, and more), which can help you to quickly create reminders or take action based on the content that you wrote.
If you want to enable or disable insights, use these steps:
- Open Start.
- Search for Sticky Notes, click the top result to open the experience.
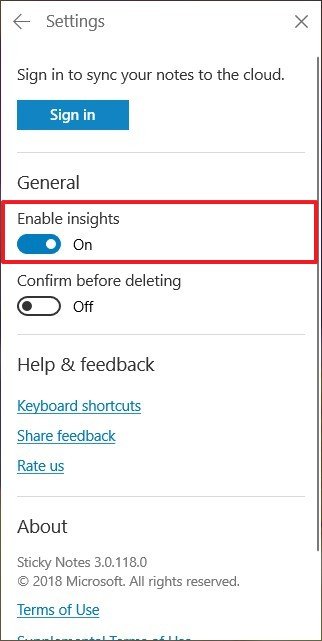
- Click the Settings (gear) button in the top-right corner.
- Under "General," turn on or off the Enable insights toggle switch.
After completing the steps, every time that you create content with specific data, the text will turn blue and clicking that text, you'll notice an Add Reminder, Call, View Address, or another similar option, depending on the information to take action with Cortana.
How to export Sticky Notes content
If you're about to start with a fresh copy of Windows 10, it's no longer necessary to resource to workarounds to backup your notes, thanks to the Sticky Notes' ability to sync your content to your Microsoft account (more specifically to Outlook). However, it's still possible to export your notes for safekeeping, using these steps:
- Open Outlook on the web.
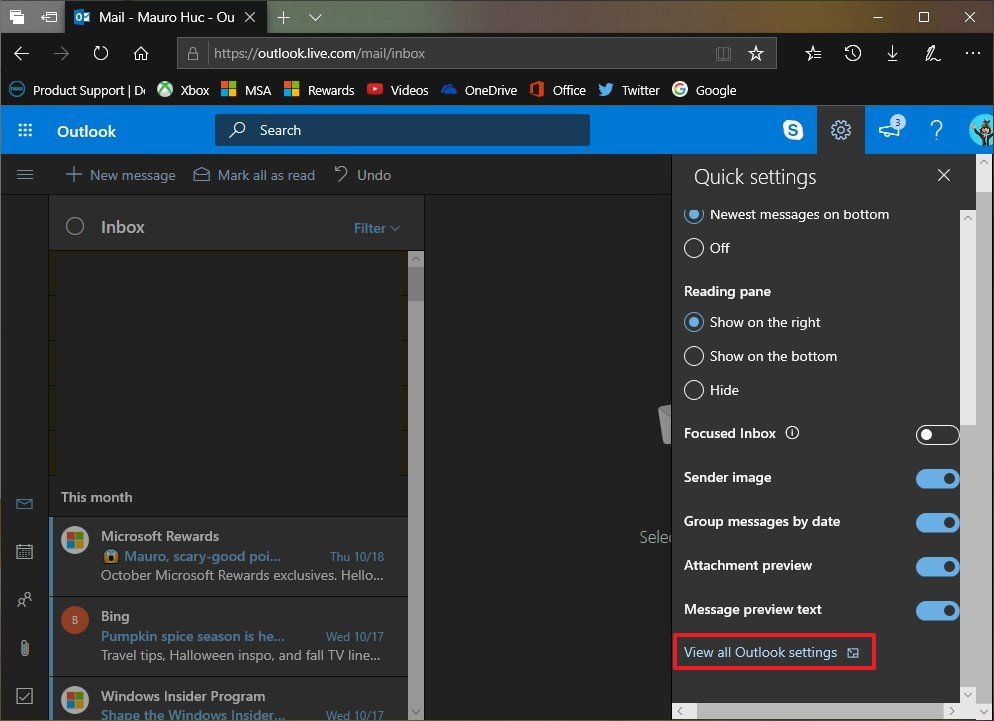
- Click the Settings (gear) button in the top-right corner.
- Click the View all Outlook settings link.
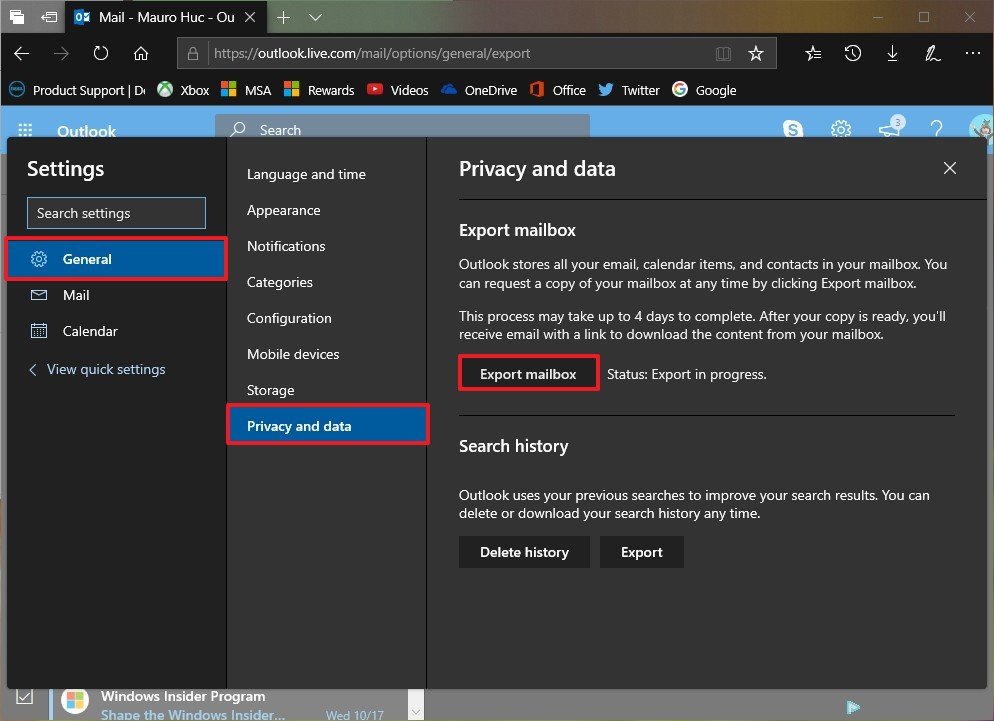
- Click on General.
- Click on Privacy and data.
- Click the Export mailbox button.
Once you've completed the steps, it could take up to four days for the process to complete. After the backup is ready, you'll receive an email with the link to download the Outlook content, which also includes your sticky notes content.
How to manage Sticky Notes deletion settings
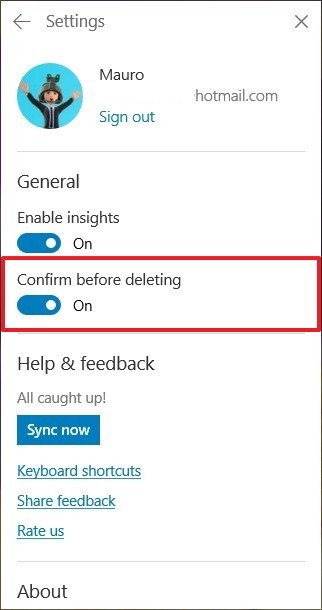
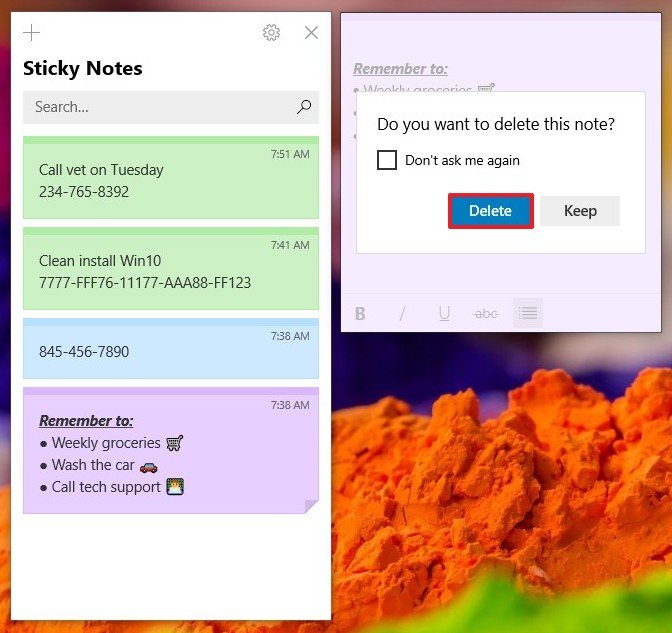
Using the experience, you can delete notes with one click, or you can use a confirmation dialog to prevent removing notes accidentally.
To enable or disable deletion confirmation on Windows 10, do the following:
- Open Start.
- Search for Sticky Notes, click the top result to open the experience.
- Click the Settings (gear) button in the top-right.
- Under "General," turn on or off the Confirm before deleting toggle switch.
After completing the steps, every time you try to delete a sticky note, a confirmation dialog will appear depending on the settings you configured.
How to sync Sticky Notes with Android
In addition to syncing your notes across other Windows 10 devices, starting with Sticky Notes 3.0, you can also sync your notes to your Android phone using OneNote.
The process to sync your notes across devices is a straightforward process, you only need to be using the same Microsoft account on the devices that you want to access your notes.
Quick Tip: You can always double-check that you're using the same account on your Android device by tapping the Settings (three-dotted) > Account on OneNote.
To access your sticky notes using Android, do the following:
- Open OneNote.
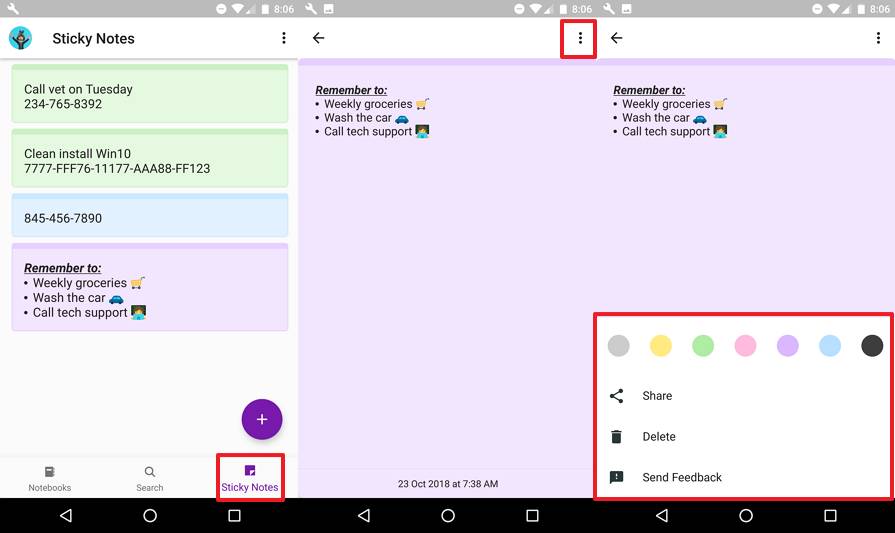
- Click the Sticky Notes button in the bottom-right corner.
Once in the "All notes" interface, you can tab the note to interact with its content.
You can tap the Settings (three-dotted) button in the top-right corner to change the background color, share, or delete the note.
If you want to create a new note, click the plus (+) button, and use the toolbar at the bottom of the note to format the content.
After completing the steps, any changes that you made to Sticky Notes will sync automatically across devices.
Important: At the time of this writing, Sticky Notes for Android is only available in beta. This means that to use this feature, you must install the latest pre-release version of OneNote for Android. You can sign up on this Google Play website.
More Windows 10 resources
For more helpful articles, coverage, and answers to common questions about Windows 10, visit the following resources:
- Windows 10 on Windows Central – All you need to know
- Windows 10 help, tips, and tricks
- Windows 10 forums on Windows Central

Mauro Huculak has been a Windows How-To Expert contributor for WindowsCentral.com for nearly a decade and has over 22 years of combined experience in IT and technical writing. He holds various professional certifications from Microsoft, Cisco, VMware, and CompTIA and has been recognized as a Microsoft MVP for many years.
