


If you use Linux or WSL, you can install software by downloading installers from the web, but the more common approach is using a package manager. This allows the swift, silent installation of software from the command line, literally by typing out a command to install whatever it is you want. There are many repositories you can add, but the process remains the same.
You could already do something similar on Windows with Chocolatey, a community-supported repository of packages and a companion installer that allows you to manage your Windows software installs from within PowerShell or Command Prompt. But Microsoft now has its own, the Windows Package Manager, and it's available in preview right now.
Before you begin
Anyone can try out the Windows Package Manager, but there are still some prerequisites that need to be met if you wish to get access through the Microsoft Store and have automatic updates.

- The client only supports Windows 10 version 1709 (build 16299) or later.
- Install a Windows 10 Insider build
Or
- Join the Windows Package Manager Insiders Program.
How to install the Windows Package Manager Client
If you meet the requirements above, then the Windows Package Manager Client (also known as winget-cli) will be distributed through an updated version of the App Installer which is available through the Microsoft Store. You need to ensure that if you signed up for the Insiders Program, your Microsoft Account there is the same as the one you access the Store with.
Once updated, you should have access to the Client and be able to install packages with this command:
wingetYou can also manually install from GitHub. This is the same version as released through the Microsoft Store, but you won't get automatic updates; you'll have to do it yourself.
To install manually:
- Go to the Windows Package Manager Client releases page on GitHub.
- Download the appxbundle for the latest release.

- Open the downloaded file.
- Click Update to start the installation.

The winget-cli update will now be applied to the already installed App Installer for you to use on your PC. It's a good idea to keep the releases page bookmarked, as to update winget-cli, you'll need to follow the steps above again when a new version is released.
You can also build it yourself if you're brave or familiar with Visual Studio 2019. For more details on this, check out the GitHub page.
Once installed, you're ready to start grabbing packages. You can use either the old-school Command Prompt, Windows PowerShell, or the newer PowerShell 7 to interact with winget-cli.
To verify it's all installed correctly, open either of the shells mentioned above and type:
winget --infoAssuming all is well, you'll see some blurb on the version you have installed.
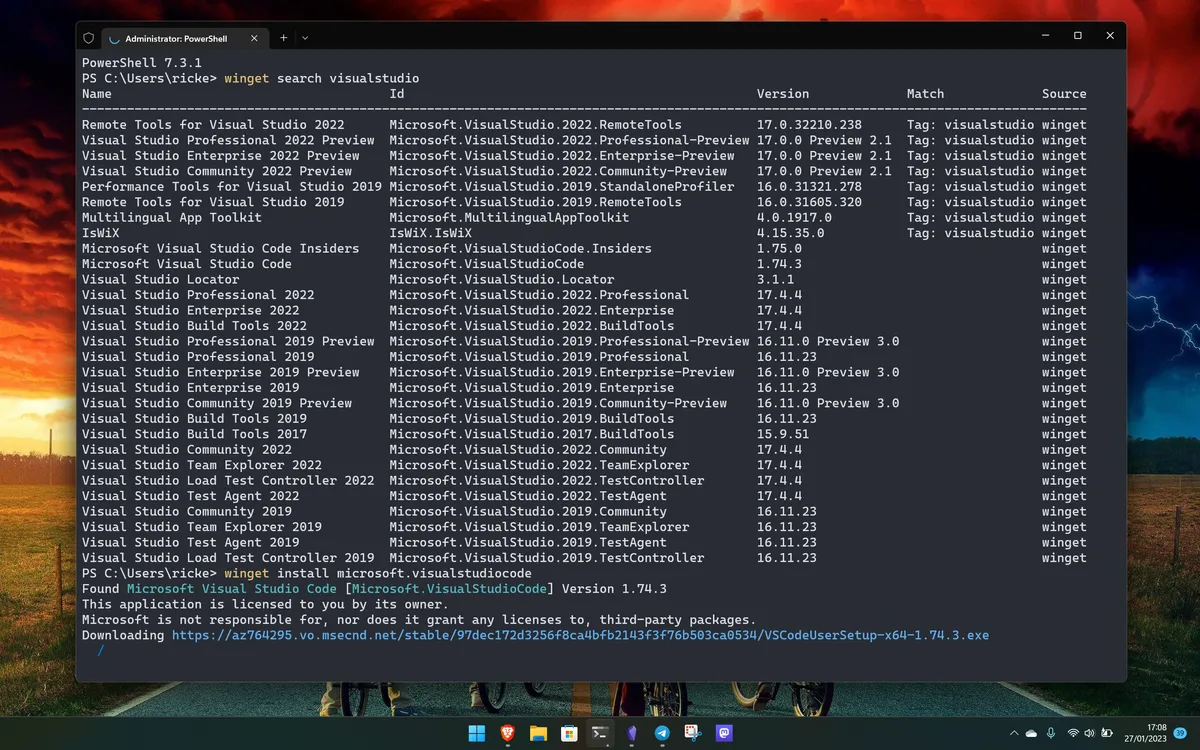
As for packages, on the winget-pkgs GitHub repository, there's a pretty hefty catalog of things you can install, or you could try the excellent third-party resource, winstall.app. The basic command you need to know is:
winget install <nameofpackage></nameofpackage>This template is all you need to install an app with the Windows Package Manager. The naming structure takes a little getting used to, but it's nothing too complex.

