How to manage Sound settings on Windows 10 April 2018 Update
The Windows 10 April 2018 Update brings the sound options to the Settings app. These are the steps to manage them.
All the latest news, reviews, and guides for Windows and Xbox diehards.
You are now subscribed
Your newsletter sign-up was successful
Adjusting the volume and changing the system sound settings on Windows 10 has always been a straightforward process, but you were only able to manage them using Control Panel.
However, starting with the Windows 10 April 2018 Update, you can now manage speakers and microphones settings, and it's also possible to adjust the volume on apps and system sound individually using the Settings app.
In this Windows 10 guide, we walk you through the steps to change the sound settings using the new options available starting with the April 2018 Update.
- How to manage Windows sound options using Settings
- How to manage Windows microphone options using Settings
- How to manage Windows advanced sound options using Settings
How to manage Windows sound options using Settings
To set your default output speaker, adjust the master volume, and fix common sound problems, do the following:
- Open Settings.
- Click on System.
- Click on Sound.
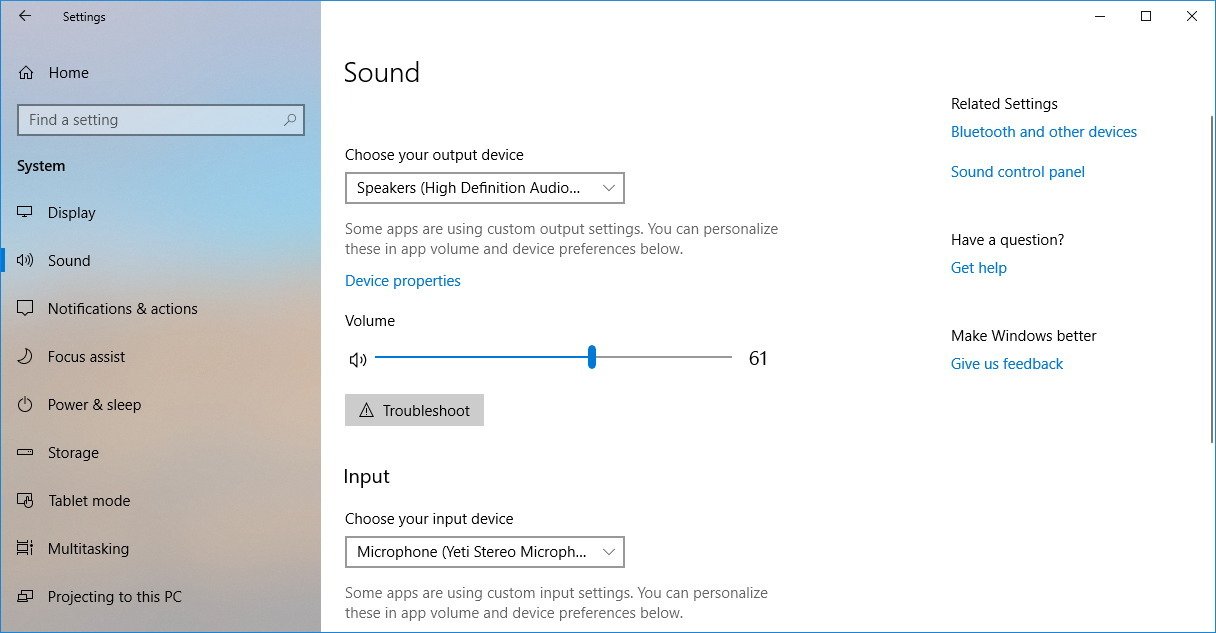
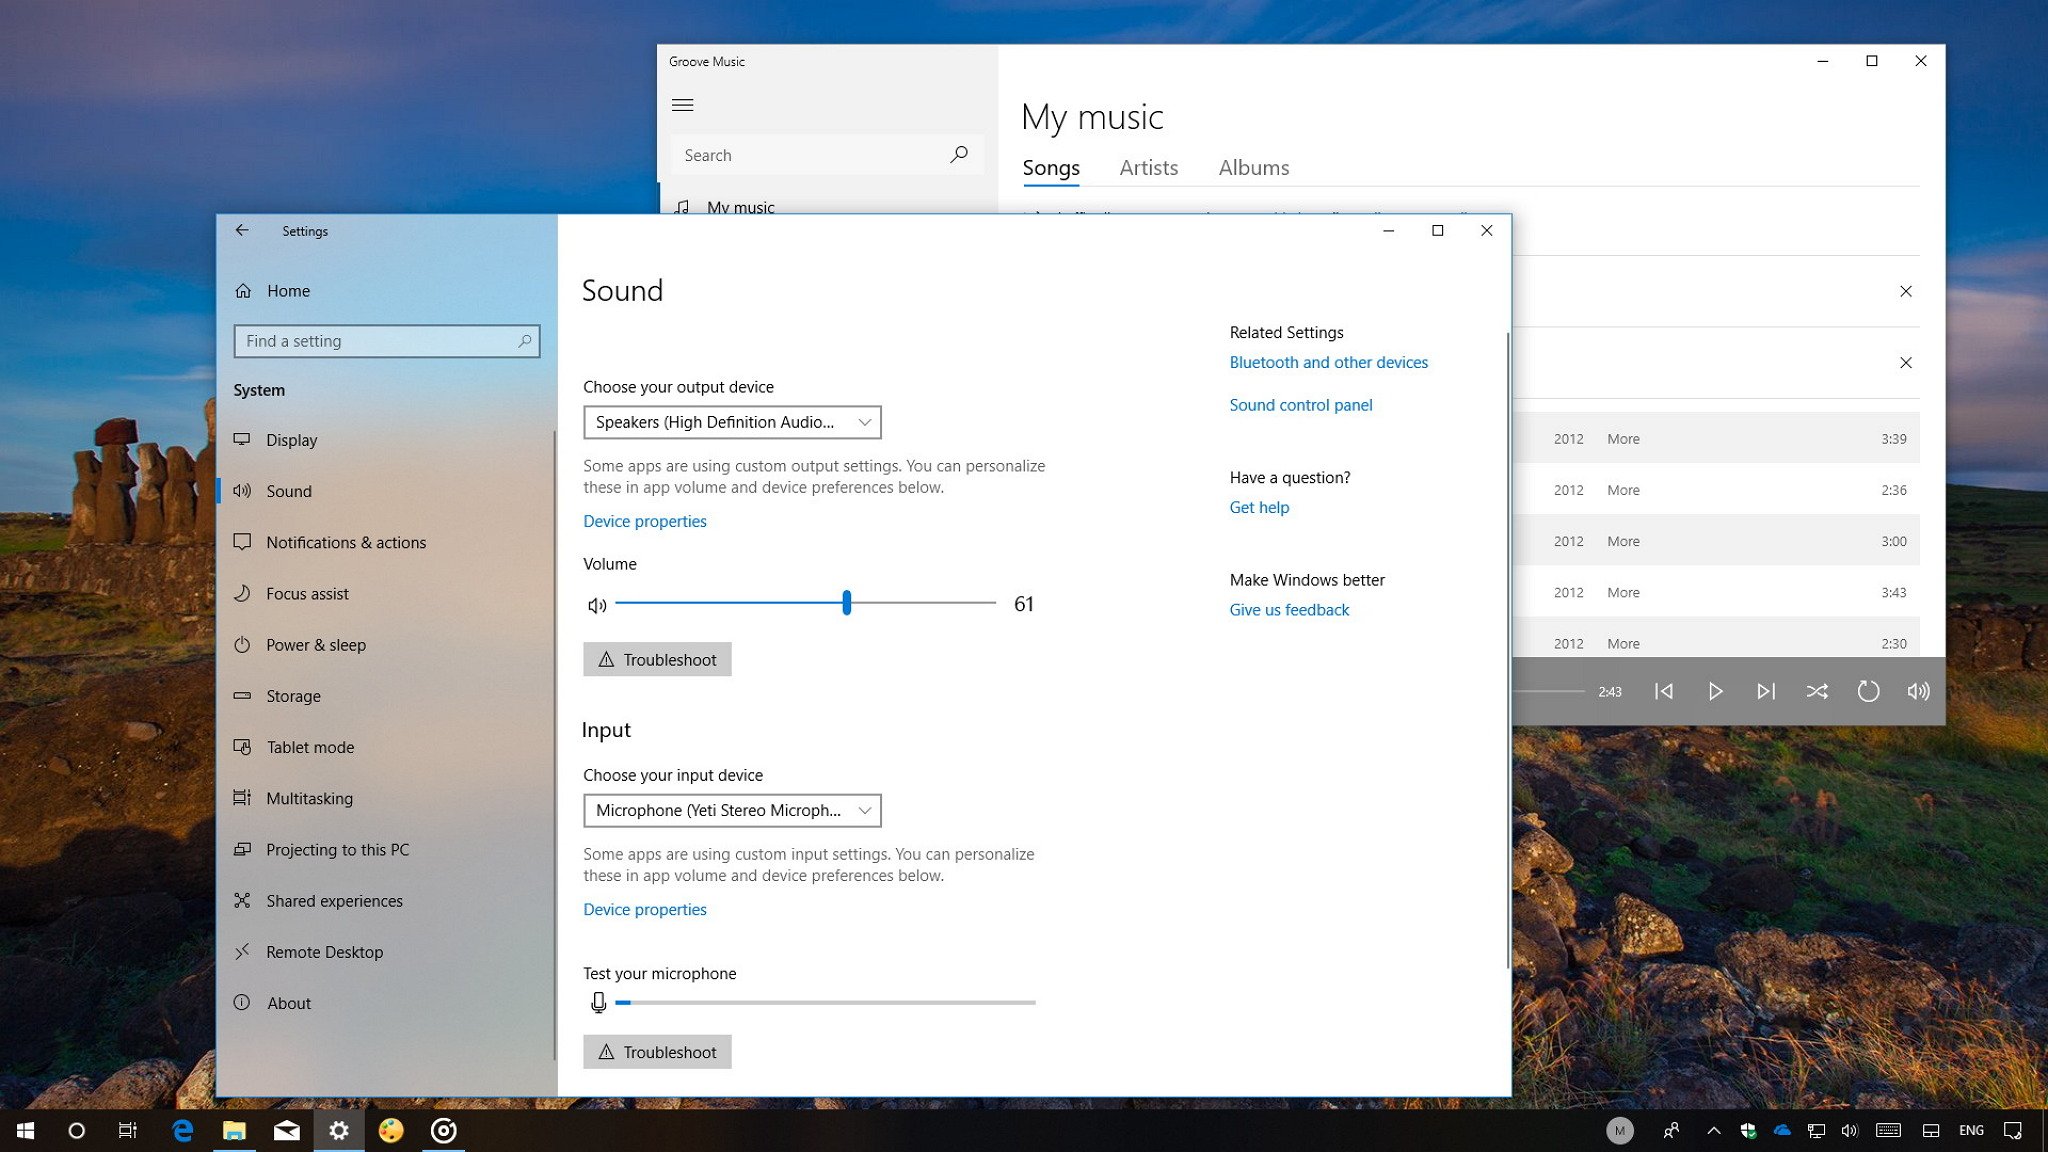
The Sound page includes two sections separating the output and input options. At the top of the page, you'll find your output options.
Using the Choose your output device drop-down menu, you can quickly change the speakers you want to use as the default.
You can also click the Device properties link, which opens additional speaker settings using the Control Panel experience:
All the latest news, reviews, and guides for Windows and Xbox diehards.
- General — You can enable or disable the speaker and access audio driver information.
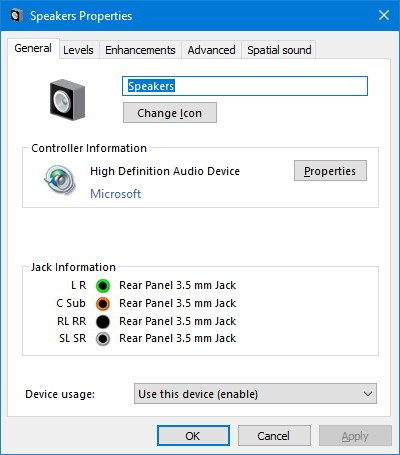
- Levels — Allows you to adjust master volume and balance settings.
- Enhancements — Includes settings to enhance audio with special effects.
- Advanced — Allows you to change default sample rate and bit depth.
- Spatial sound — Includes the options to use Windows 10's spatial sound format, including "Windows Sonic for Headphones" and "Dolby Atmos for Headphones."
Similar to using the speaker icon in the taskbar, on the Sound page you can also change the system master volume with the slider.
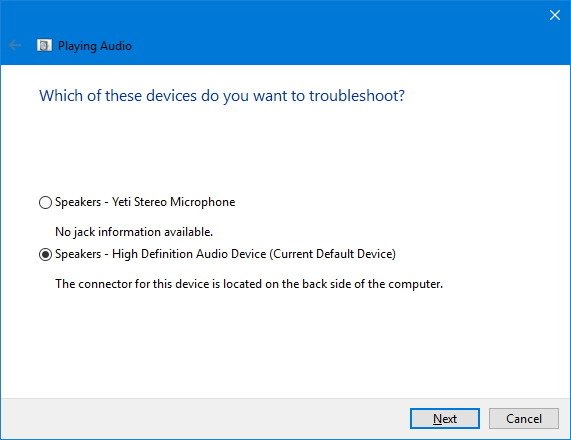
You'll also find a Troubleshoot button that starts the audio troubleshooter to fix common sound problems automatically.
How to manage Windows microphone options using Settings
To set a microphone as your default, test if it's working, and customize its properties, do the following:
- Open Settings.
- Click on System.
- Click on Sound.
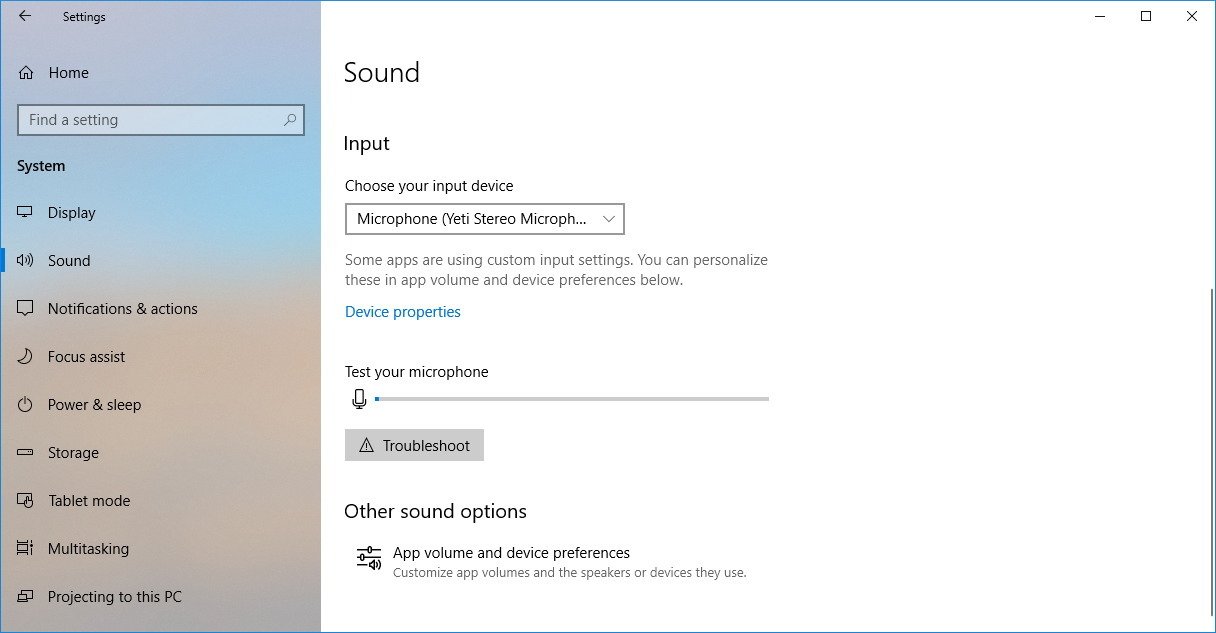
Under "Input," you'll find the options to configure your microphone.
Using the Choose your input device drop-down menu, you can quickly select the microphone that you want to use as your default.
You can also click the Device properties link to open additional microphone settings using the Control Panel experience:
- General: You can enable or disable the speaker and access audio driver information.
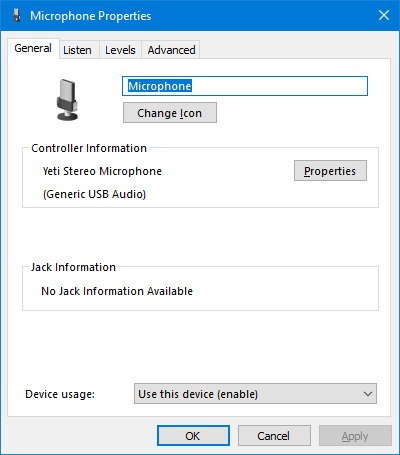
- Listen — Lets you allow or deny the microphone to listen to your speakers, and you can customize power options.
- Levels — Allows you to adjust the volume and balance settings for the microphone.
- Advanced — Allows you to change default sample rate and bit depth.
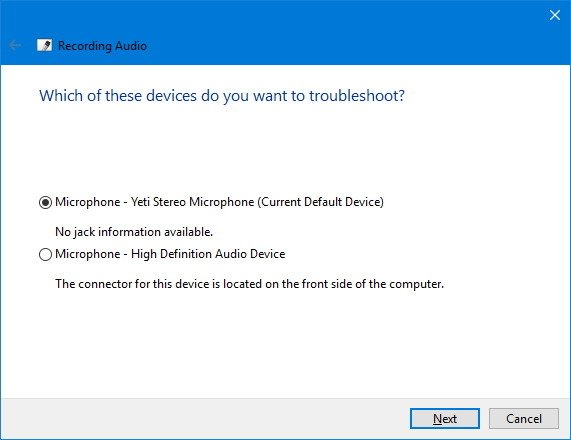
The Input section also includes an indication to test if your microphone is working, and if it's not, you can click the Troubleshoot button to open the microphone troubleshooter to fix common problems.
How to manage sound settings from the taskbar
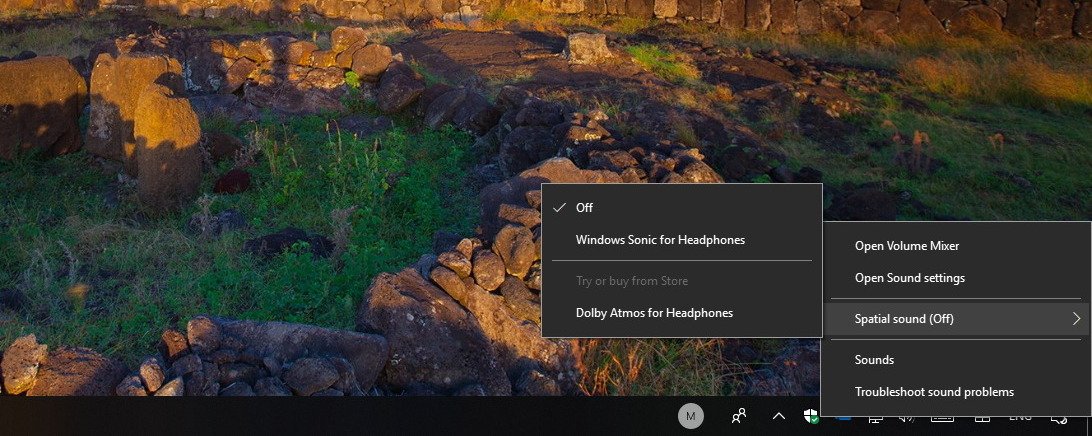
Alongside the new Sound page in the Settings app, you can still adjust the master volume and access sound settings from the taskbar.
Starting with the Windows 10 April Update, the sound context menu has been updated with a new modern look, and now it also includes quick access to the new Sound settings and removes the "Recording devices" option.
You'll notice that the "Volume Mixer" is still accessible, but it'll eventually go away as these settings can now be found in "App volume and device preferences" page.
How to manage advanced Windows sound options using Settings
The new Sound settings also include a number of advanced options to control volume and input and output devices. (This experience replaces the Volume Mixer, which is still available in the April 2018 Update.)
To access and customize app volume and device preferences, do the following:
- Open Settings.
- Click on System
- Click on Sound.
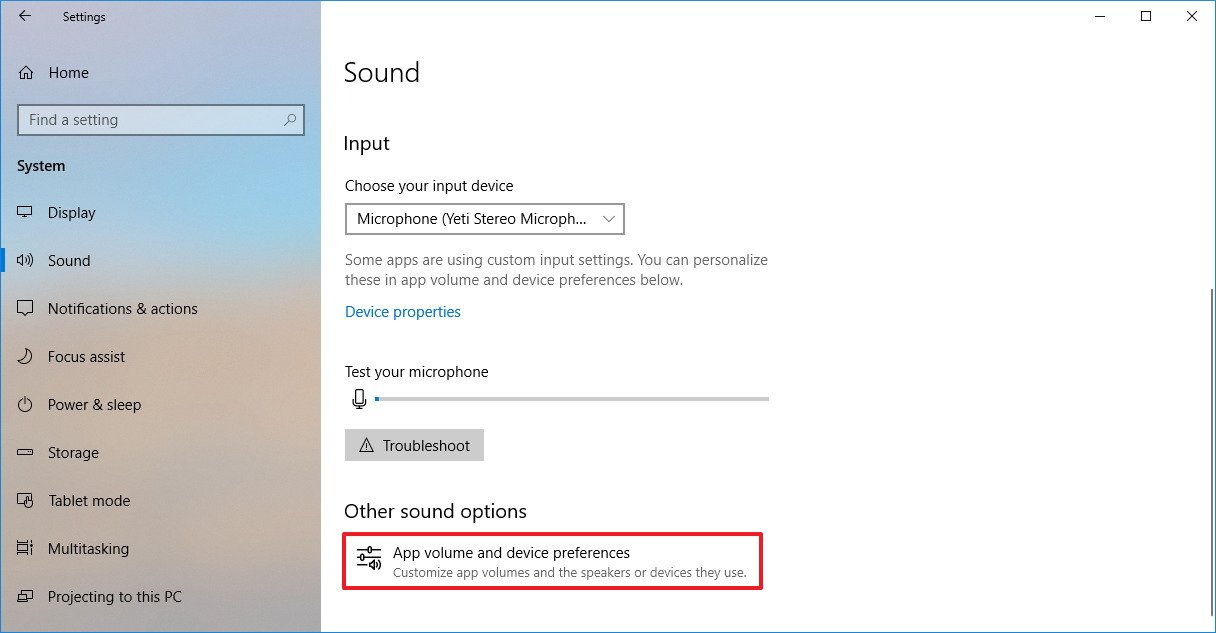
- Under "Other sound options," click the App volume and device preferences option.
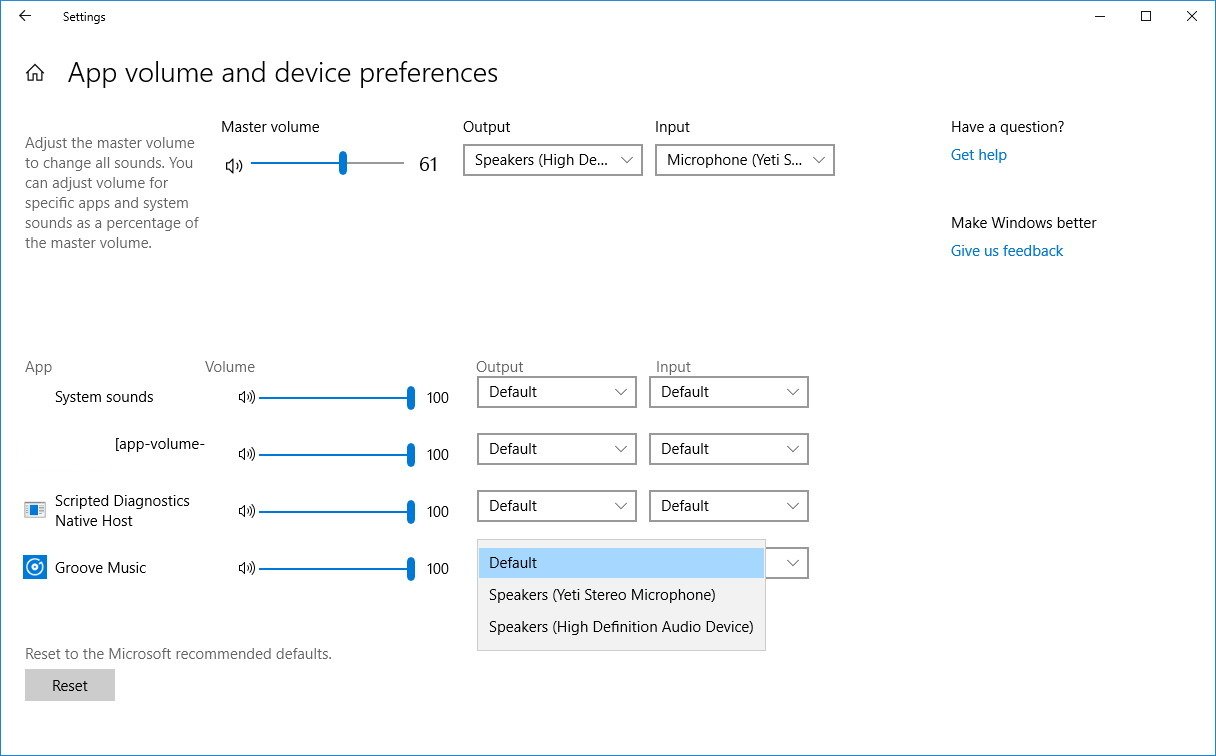
The first thing you'll find on this page is the slider to control the system master volume and adjust all sounds. On the right, there are two drop-down menus to select the default speaker and microphone, which are the same settings that you can customize in the Sound page.
At the bottom of the page, you can adjust volume for specific apps and system sounds as a percentage of the master volume.
Alongside the ability to change the volume for apps and system individually, this page also allows you to select the default output and input device if you have multiple speaker setups and microphones.
If you want to revert all your changes, you can use the Reset button to roll back to Microsoft's recommended sound settings.
Wrapping things up
Although the April 2018 Update finally ports the sound options to the Settings app, you'll still need to use the Control Panel experience to change more advanced properties. However, eventually, those options are also expected to move in some form to the Settings app.
More Windows 10 resources
For more helpful articles, coverage, and answers to common questions about Windows 10, visit the following resources:
- Windows 10 on Windows Central – All you need to know
- Windows 10 help, tips, and tricks
- Windows 10 forums on Windows Central

Mauro Huculak has been a Windows How-To Expert contributor for WindowsCentral.com for nearly a decade and has over 22 years of combined experience in IT and technical writing. He holds various professional certifications from Microsoft, Cisco, VMware, and CompTIA and has been recognized as a Microsoft MVP for many years.
