How to remove Chat from Microsoft Teams on Windows 11
If you don't care about the new Chat app on Windows 11, you can remove it quite easily, and here's how.

All the latest news, reviews, and guides for Windows and Xbox diehards.
You are now subscribed
Your newsletter sign-up was successful
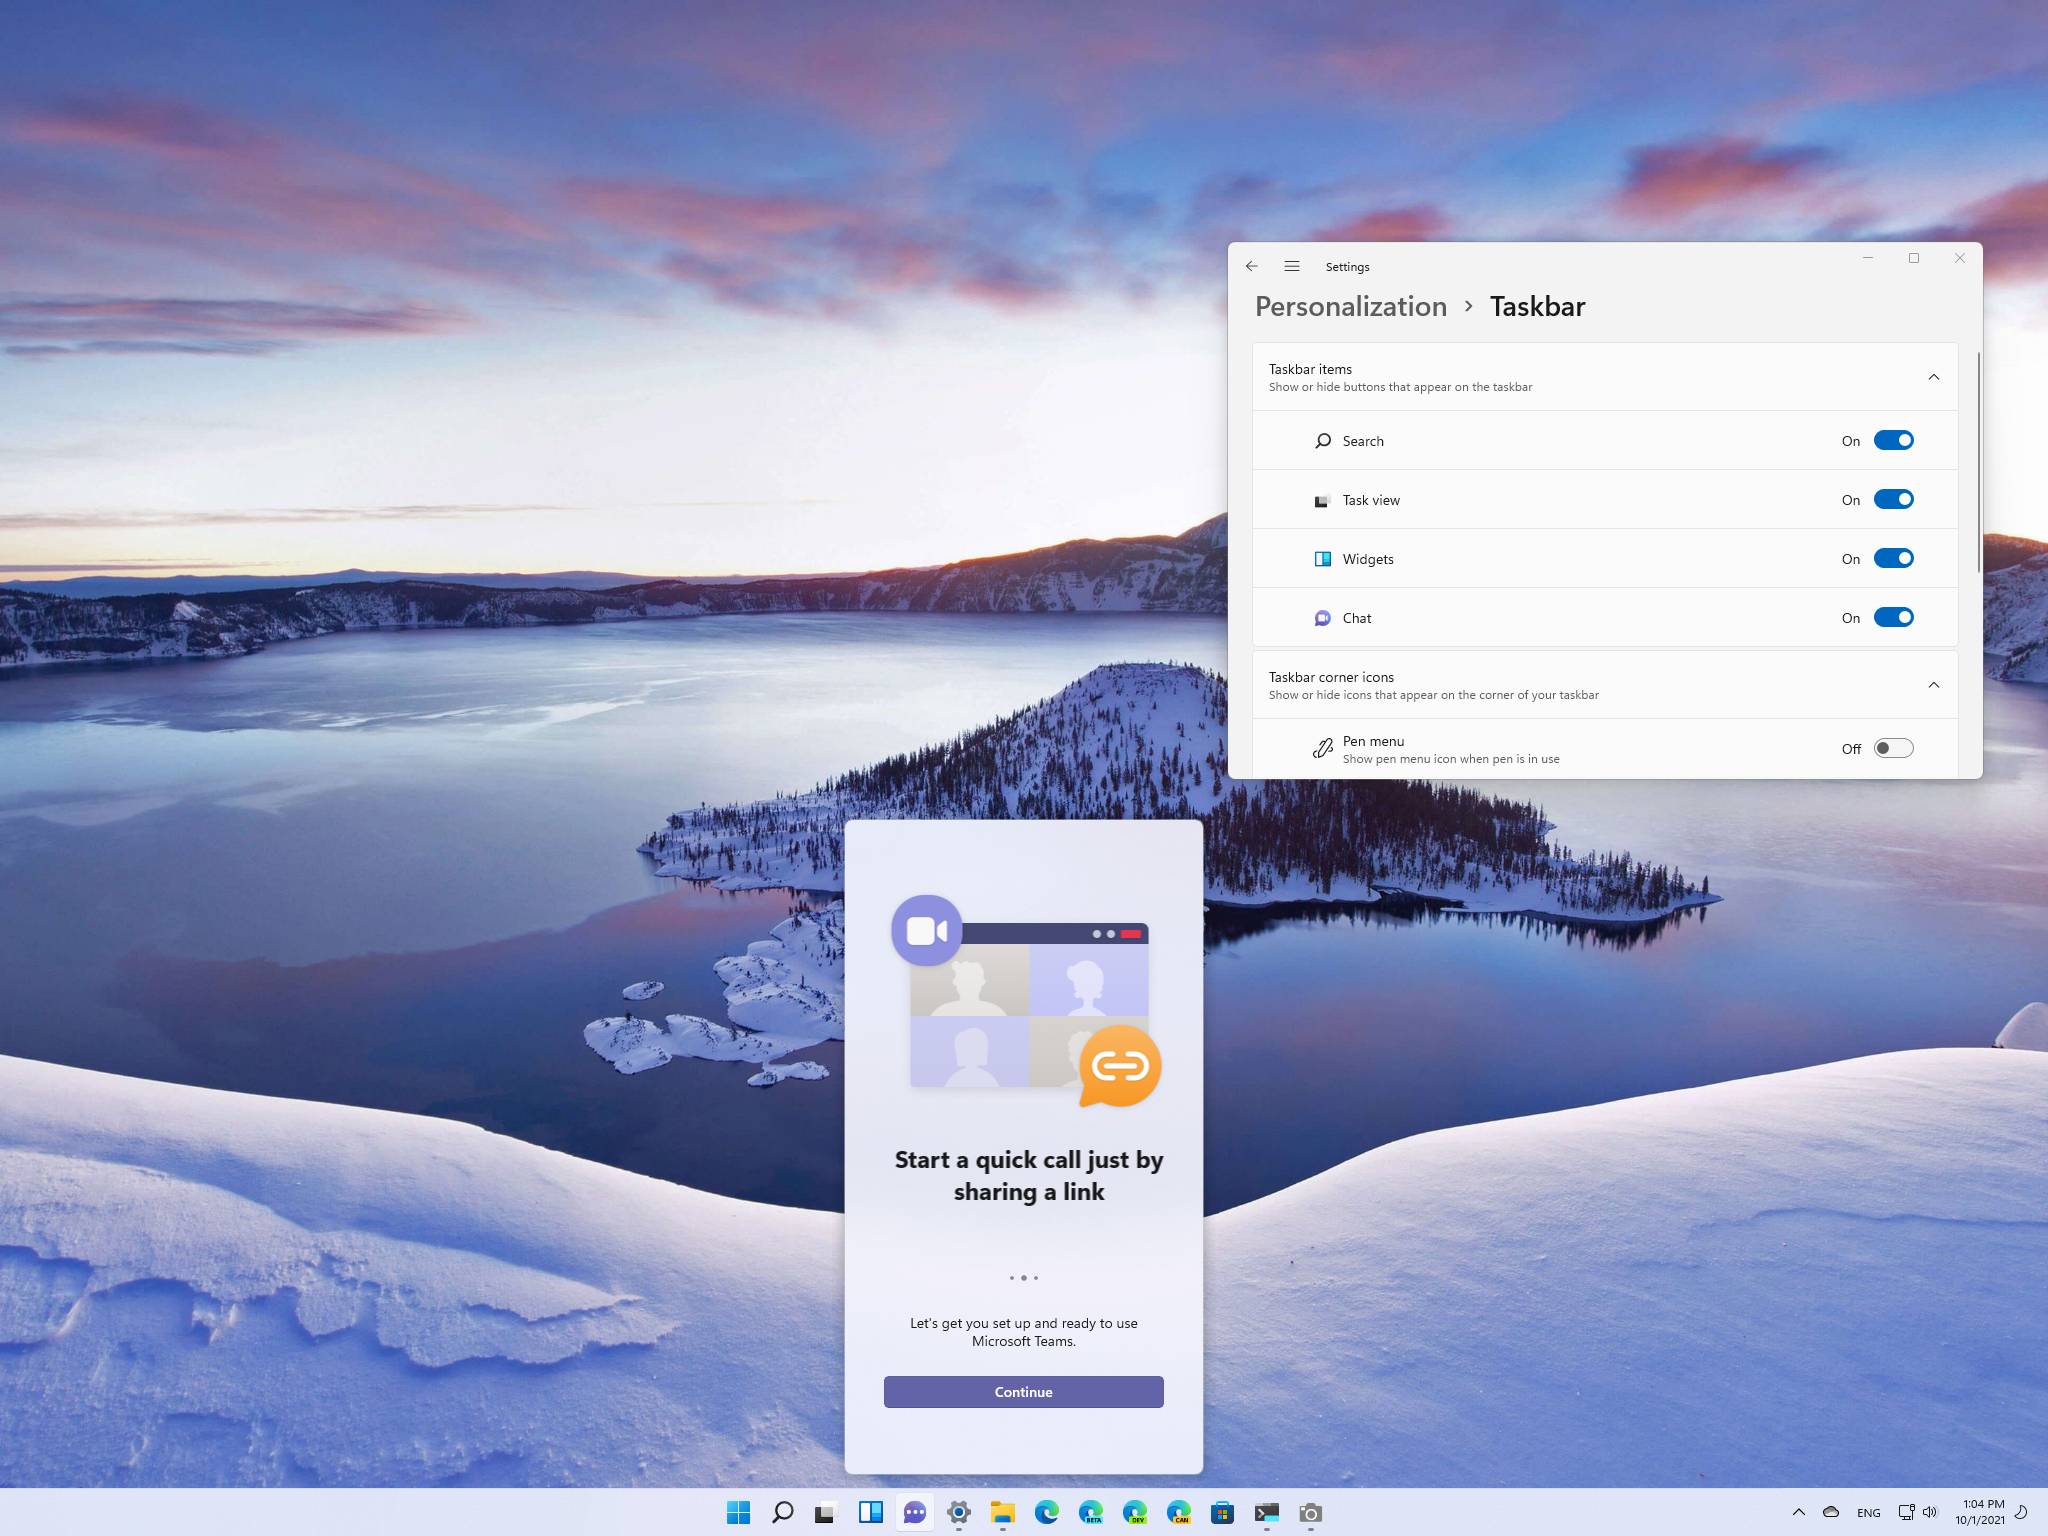
On Windows 11, alongside the redesigned experience, you will also notice that the new Taskbar has a purple button, which is the icon for the new Chat app.
The experience is actually part of the consumer version of Microsoft Teams that comes integrated by default on Windows 11. The idea with this integration is to bring an easy-to-use interface to quickly connect with family and friends with video calls and text messages without downloading another application.
Although the feature may work for many users, Chat from Microsoft Teams is not for everyone since many people already have their chat platform of choice. If you are among those who do not need another communication app, you can hide or remove the app to make more space in the Taskbar and prevent the app from running in the background every time you start the computer.
In this Windows 11 guide, we will walk you through the steps to remove the Chat button from the Taskbar and uninstall the consumer version of Teams.
How to remove Chat from Teams button from Taskbar on Windows 11
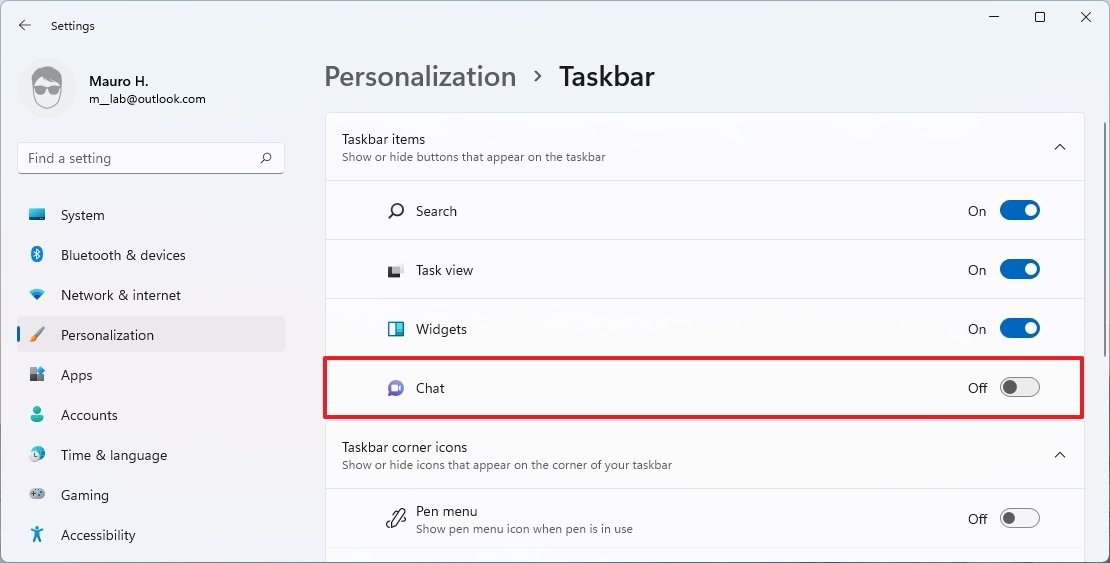
To hid the Chat button from the Taskbar, use these steps:
- Open Settings.
- Click on Personalization.
- Click the Taskbar page on the right side.Quick note: You can also right-click the Taskbar and select the Taskbar settings option to access the settings page.
- Under the "Taskbar items" section, turn off the Chat button.
Once you complete the steps, the button will no longer be available in the Taskbar, but the application will still be available.
If you never set up the application, you don't need to do anything else. Otherwise, after removing the Chat button, the Teams app will continue to run in the background. If you want to keep the app, but you don't want to run in the background, open the Microsoft Teams app, click the three-dotted menu button, select the Settings option, and clear in the General tab the Auto-start Teams option.
All the latest news, reviews, and guides for Windows and Xbox diehards.
How to uninstall Chat from Teams on Windows 11
On Windows 11, there are at least two ways to uninstall the Chat from Microsoft Teams integration using the Settings app and PowerShell commands.
Settings app method
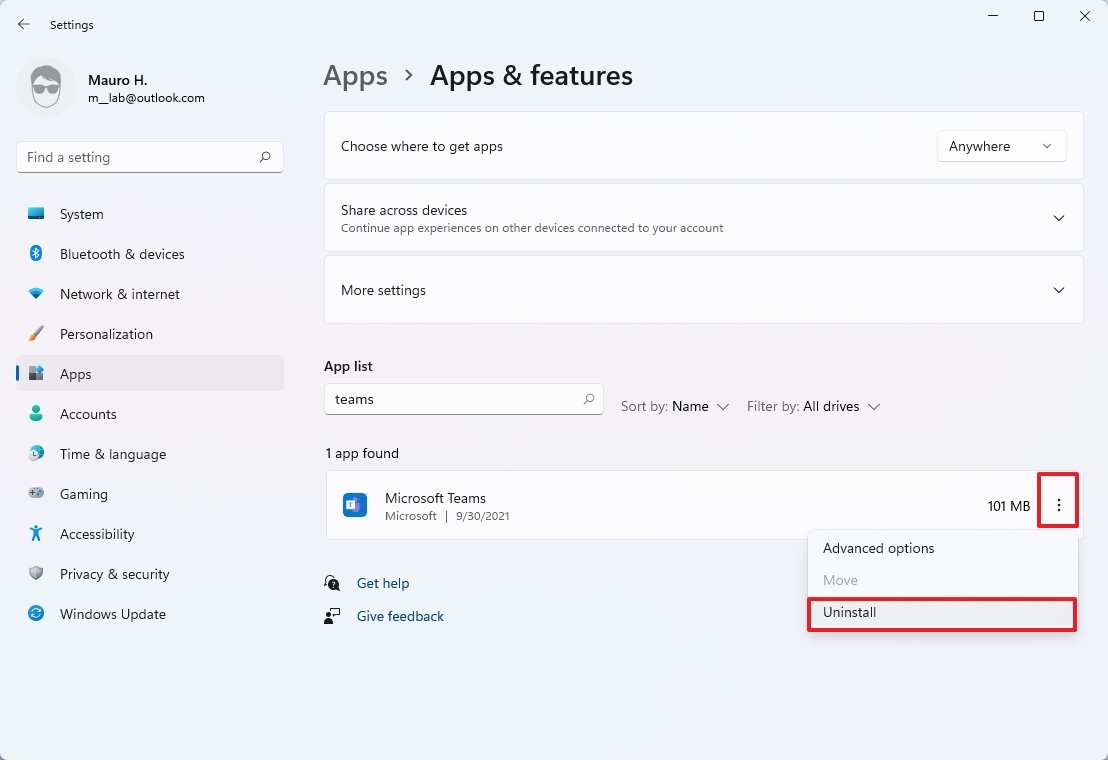
To completely remove the Chat from Microsoft Teams with the Settings app, use these steps:
- Open Settings.
- Click on Apps.
- Click the Apps & features page on the right side.
- Select the Microsoft Teams app.
- Click the three-dotted button next to the app and select the Uninstall button.
- Click the Uninstall button again.
After you complete the steps, the app will be removed from the system, and the last thing left to do is remove the Chat button from the Taskbar with the instructions outlined below.
PowerShell command method
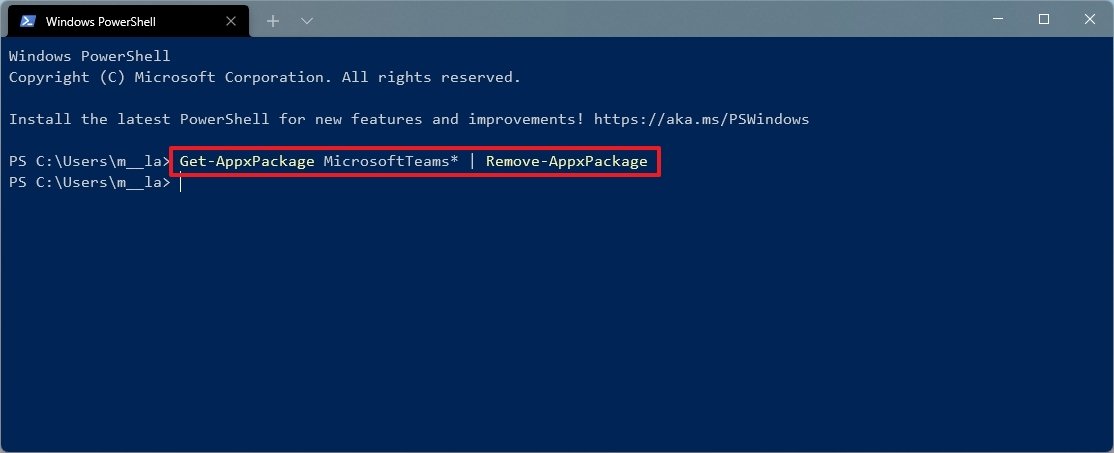
To uninstall Teams with commands, use these steps:
- Open Start.
- Search for PowerShell, right-click the top result, and select the Run as administrator option.
- Type the following command to uninstall Teams and press Enter:
Get-AppxPackage MicrosoftTeams* | Remove-AppxPackage
Once you complete the steps, the consumer version for Microsoft Teams to use Chat will be removed. You will still need to use the instructions below to hide the Chat button from the Taskbar.
Remove Chat button from Taskbar
To hide the Chat button from the Taskbar, use these steps:
- Open Settings.
- Click on Personalization.
- Click the Taskbar page on the right side.
- Under the "Taskbar items" section, turn off the Chat button.
After you complete the steps, the Chat from Microsoft Teams integration will no longer be available on Windows 11.
If you ever want to revert the changes, enable and click the Chat button and click the Continue button. This action will reinstall it again on the computer.
More Windows resources
For more helpful articles, coverage, and answers to common questions about Windows 10 and Windows 11, visit the following resources:
- Windows 10 on Windows Central — All you need to know
- Windows 10 help, tips, and tricks
- Windows 11 on Windows Central — All you need to know

Mauro Huculak has been a Windows How-To Expert contributor for WindowsCentral.com for nearly a decade and has over 22 years of combined experience in IT and technical writing. He holds various professional certifications from Microsoft, Cisco, VMware, and CompTIA and has been recognized as a Microsoft MVP for many years.


