How to manage fonts on Windows 11
Windows 11 allows add, preview, and remove fonts right from the Settings app, and here's how.
All the latest news, reviews, and guides for Windows and Xbox diehards.
You are now subscribed
Your newsletter sign-up was successful
On Windows 11, you have tons of fonts from which to choose to make your documents and presentations stand out. However, you can also install additional font families that you can then use with your favorite apps, such as Microsoft Word, PowerPoint, and even Adobe Photoshop.
It's all possible through the Fonts settings that make it easy to download and install, preview, and remove fonts on Windows 11 with ease.
You can still manage fonts from the legacy Control Panel, but using the Fonts page in the Settings app is the recommended method to manage fonts moving forward.
In this guide, we will walk you through the steps to manage fonts on Windows 11.
How to install fonts on Windows 11
On Windows 11, you have multiple ways to install font faces. You can do this from the context menu or double-clicking the file using the Microsoft Store and external sources. The system even includes an option to download all available fonts for every supported language (this could take a lot of space).
Add fonts from Microsoft Store
To install fonts from the Microsoft Store on Windows 11, use these steps:
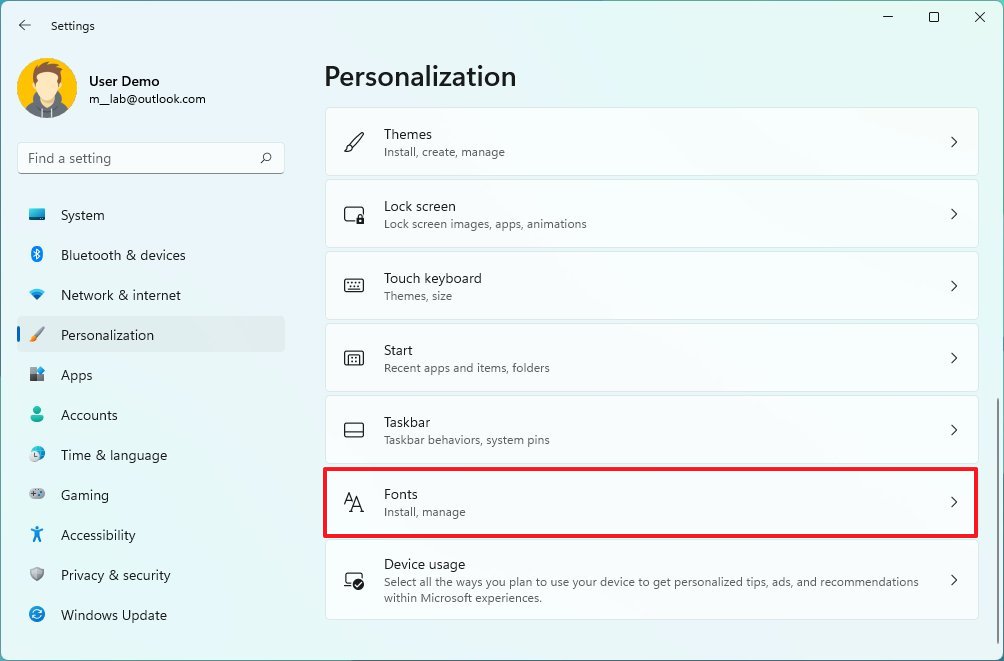
- Open Settings.
- Click on Personalization.
- Click the Fonts page on the right side.
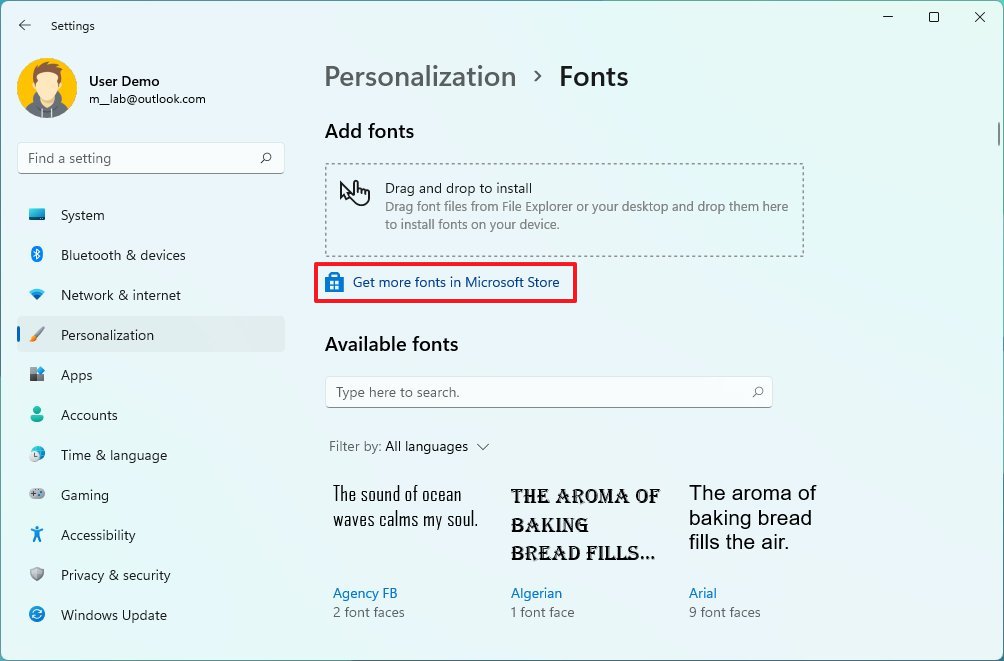
- Click the Get more fonts in Microsoft Store option.
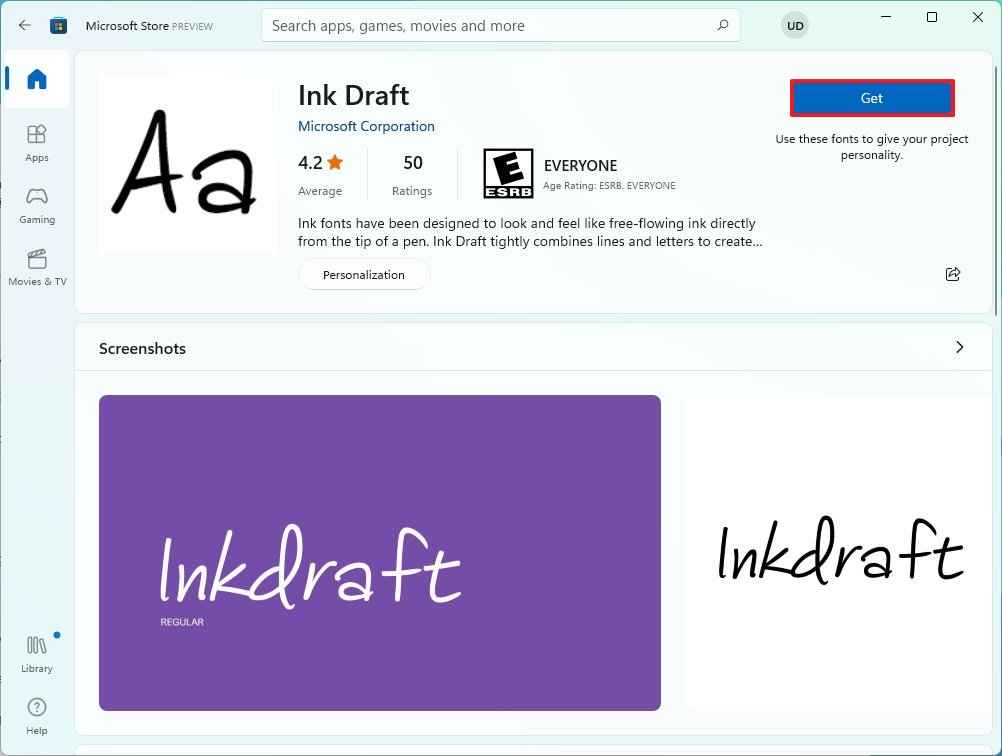
- Select the font family.
- Click the Get button.
Once you complete the steps, the font family will be installed and available in the system and apps.
All the latest news, reviews, and guides for Windows and Xbox diehards.
Download all supported fonts
To download fonts for all supported languages, use these steps:
- Open Settings.
- Click on Personalization.
- Click the Fonts page on the right side.
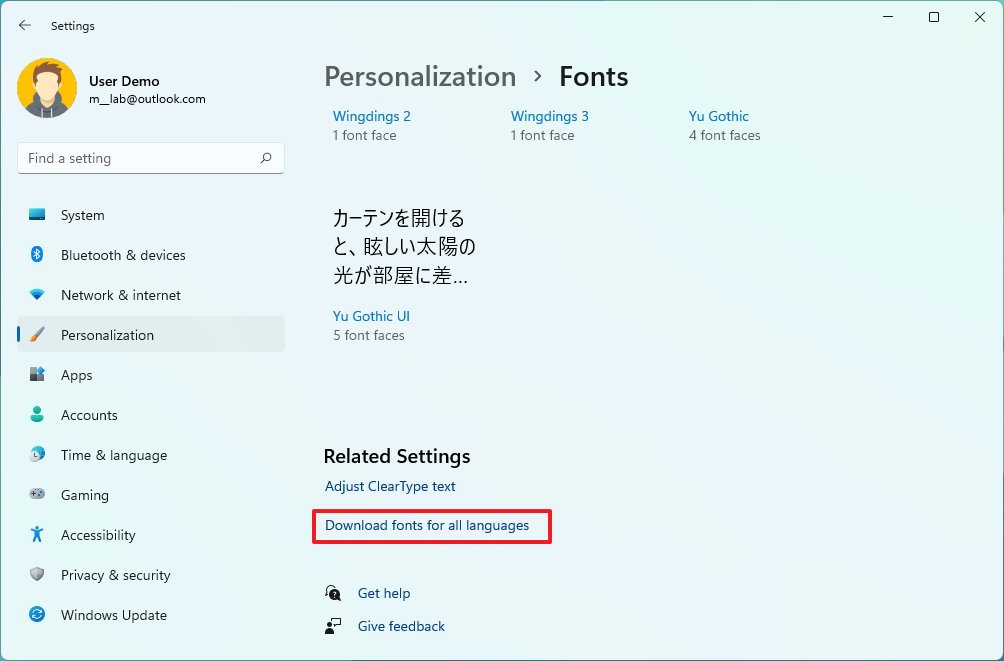
- Click on Related settings.
- Click the Download fonts for all languages option.
- Click the OK button.
After you complete the steps, Windows 11 will download the fonts for all the supported languages. This option could take a long time to download, take a lot of space, and be difficult to undo the changes.
Install fonts from external sources
You can also download and install fonts you may have acquired from external sources, such as Google Fonts or Adobe.
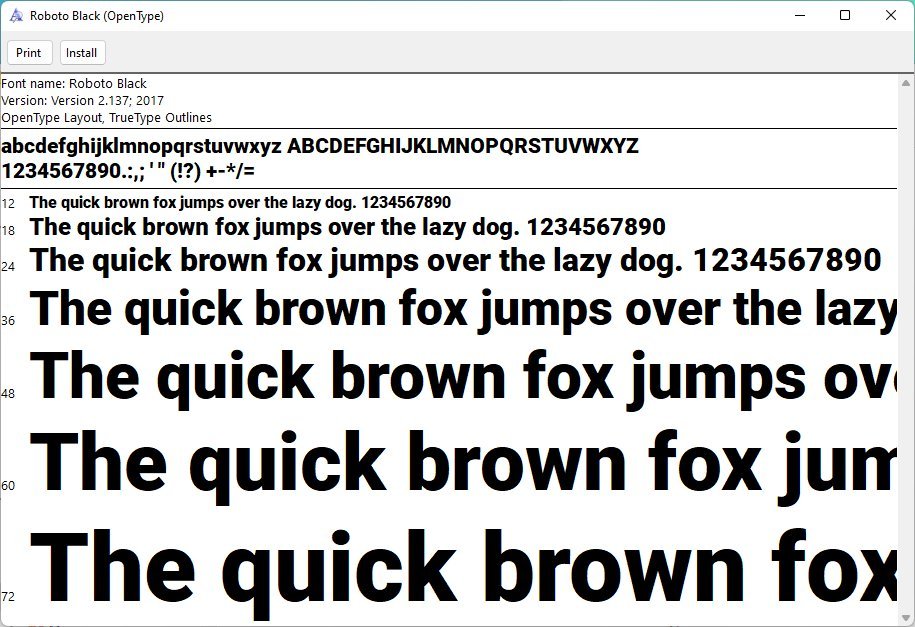
The easiest way to install font files is to double-click them to preview them and then click the Install button. However, there are other ways to install them.
Context menu
To install fonts from external sources on Windows 11, use these steps:
- Open File Explorer.
- Browser to the folder downloaded the font files.
- Quick tip: If you downloaded a Zip folder, you can use these instructions to uncompress the files.
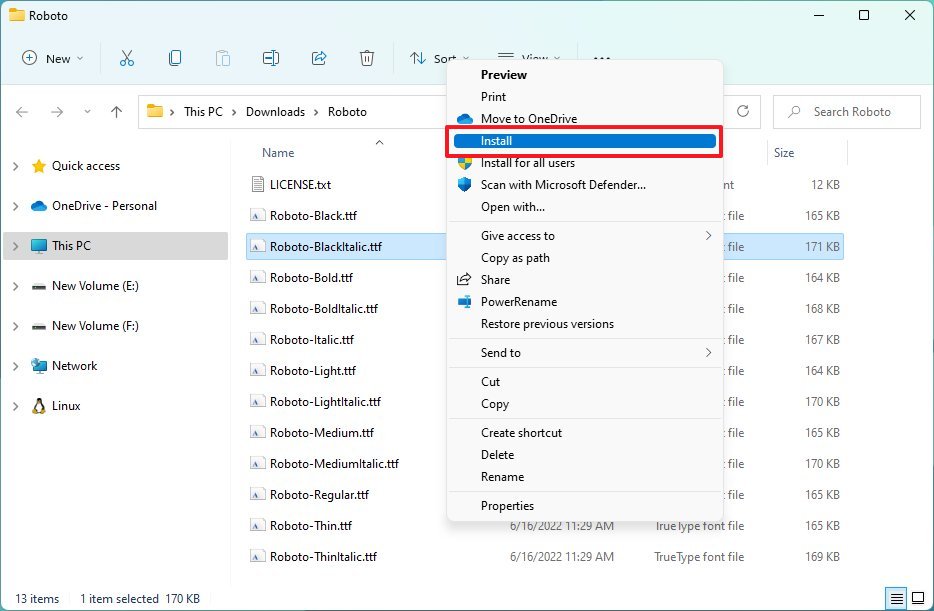
- Right-click the font file and click on Show more options.
- Select the Install button.
Fonts settings
Also, you can install fonts from the Fonts settings page. Here's how:
- Open Settings.
- Click on Personalization.
- Click the Fonts page on the right side.
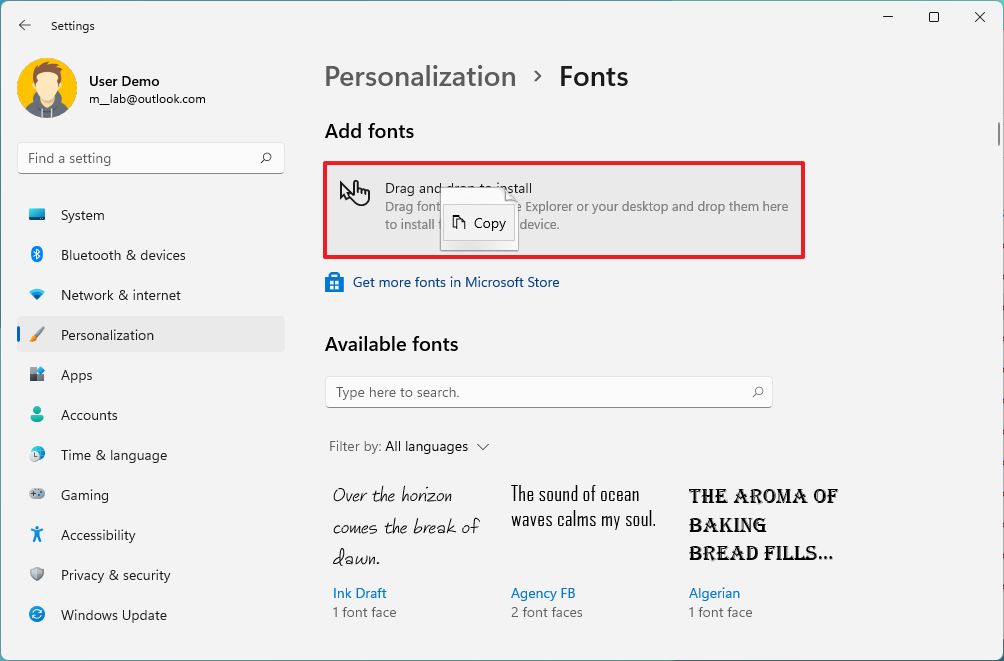
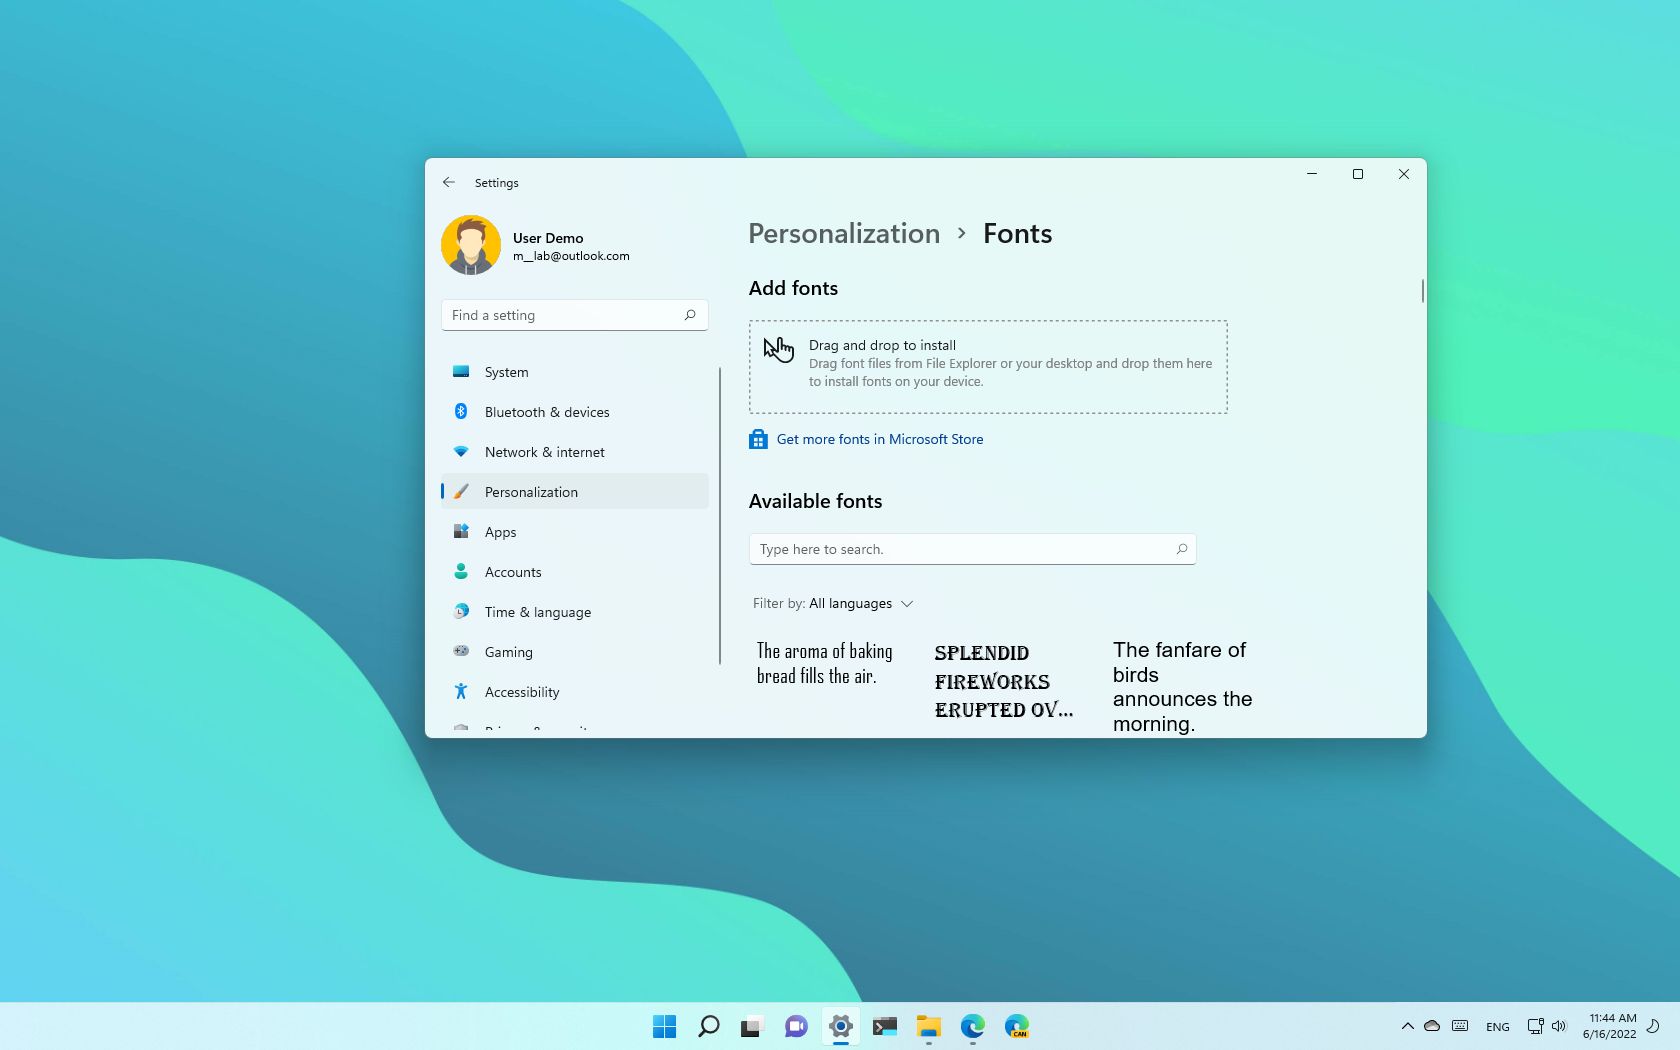
- Drag and drop the file in the designated area of the Fonts settings to install the fonts.
Once you complete the steps, the font will install on Windows 11.
How to uninstall fonts on Windows 11
To uninstall font families on Windows 11, use these steps:
- Open Settings.
- Click on Personalization.
- Click the Fonts page on the right side.
- Under the "Available fonts" section, select the font to remove.
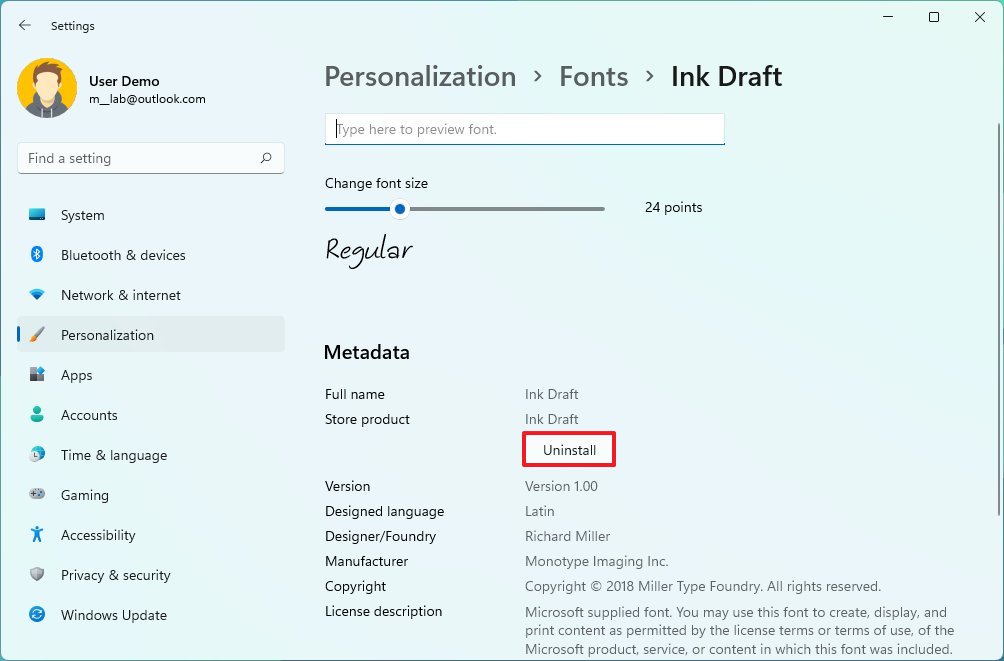
- Under the "Metadata" section, click the Uninstall button.
Once you complete the steps, the font face will be removed from the computer. You may need to repeat the steps to uninstall additional fonts.
How to preview fonts on Windows 11
To preview a font size, style, weight, and other details, use these steps:
- Open Settings.
- Click on Personalization.
- Click the Fonts page on the right side.
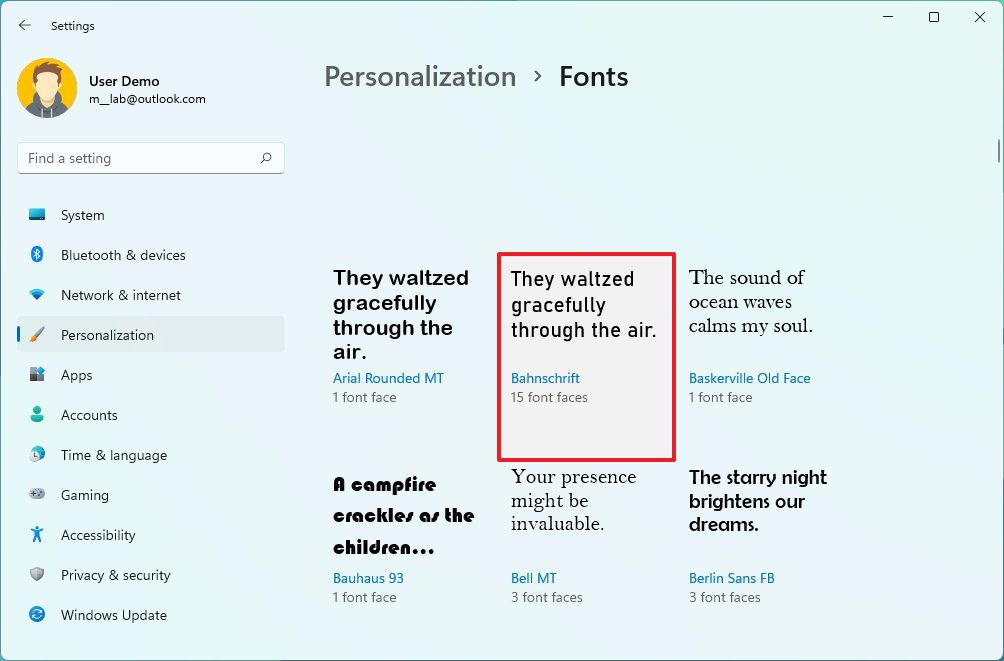
- Under the "Available fonts" section, select the font you want to preview.
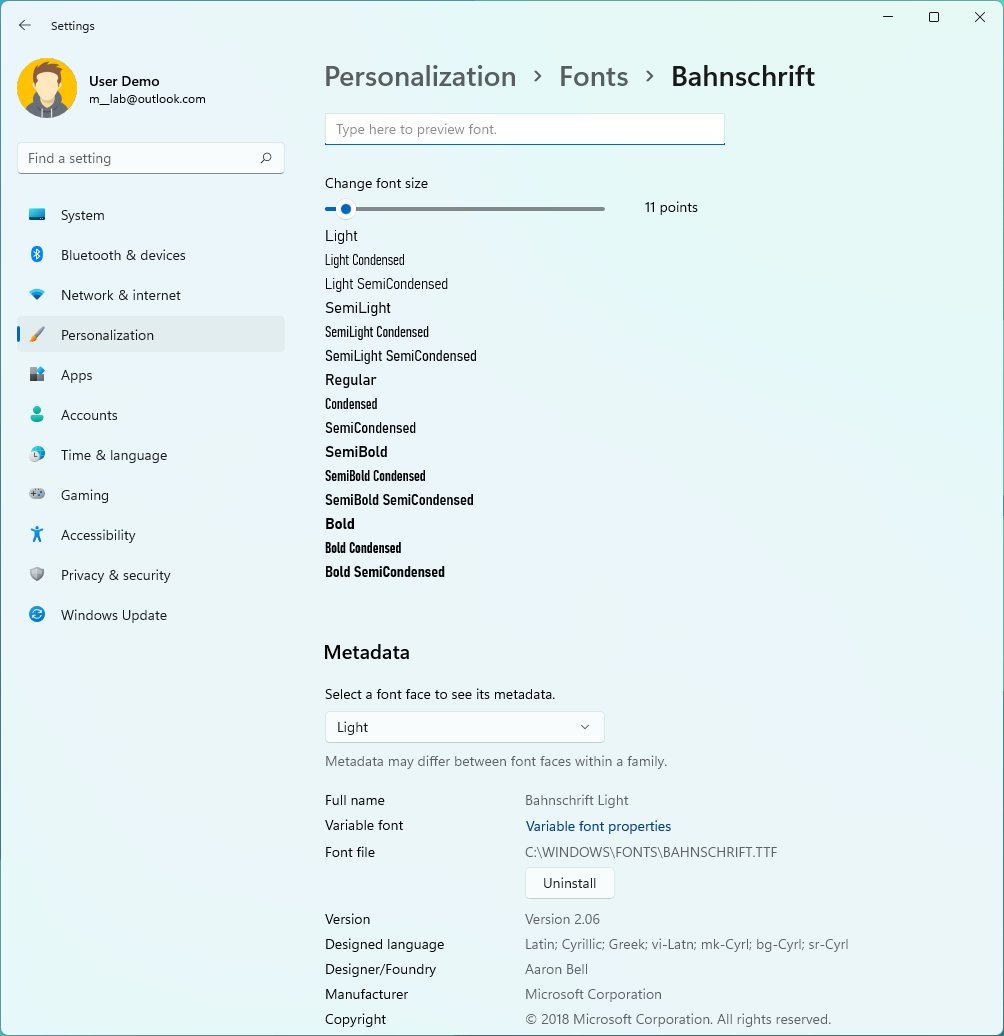
The preview page has two parts. The one at the top includes a box to input some text to view how typography appears on every font face (regular, bold, italic, etc.). You can also use the slider to preview the text size.
In the "Metadata" section, you will find details about the font face, such as its full name, the path to the file, version, supported languages, licensing, and more. (You can also use the drop-down menu to view details about the other font faces.)
You can also uninstall a specific font from this page.
The page will show an option to access additional properties if you are viewing an OpenType Variable font family (such as Microsoft's Bahnschrift).
On the "Variable font properties" page, you have several tools to view axis details and preview other font variations only available on OpenType Variable fonts like on Windows 10.
More Windows resources
For more helpful articles, coverage, and answers to common questions about Windows 10 and Windows 11, visit the following resources:

Mauro Huculak has been a Windows How-To Expert contributor for WindowsCentral.com for nearly a decade and has over 22 years of combined experience in IT and technical writing. He holds various professional certifications from Microsoft, Cisco, VMware, and CompTIA and has been recognized as a Microsoft MVP for many years.
