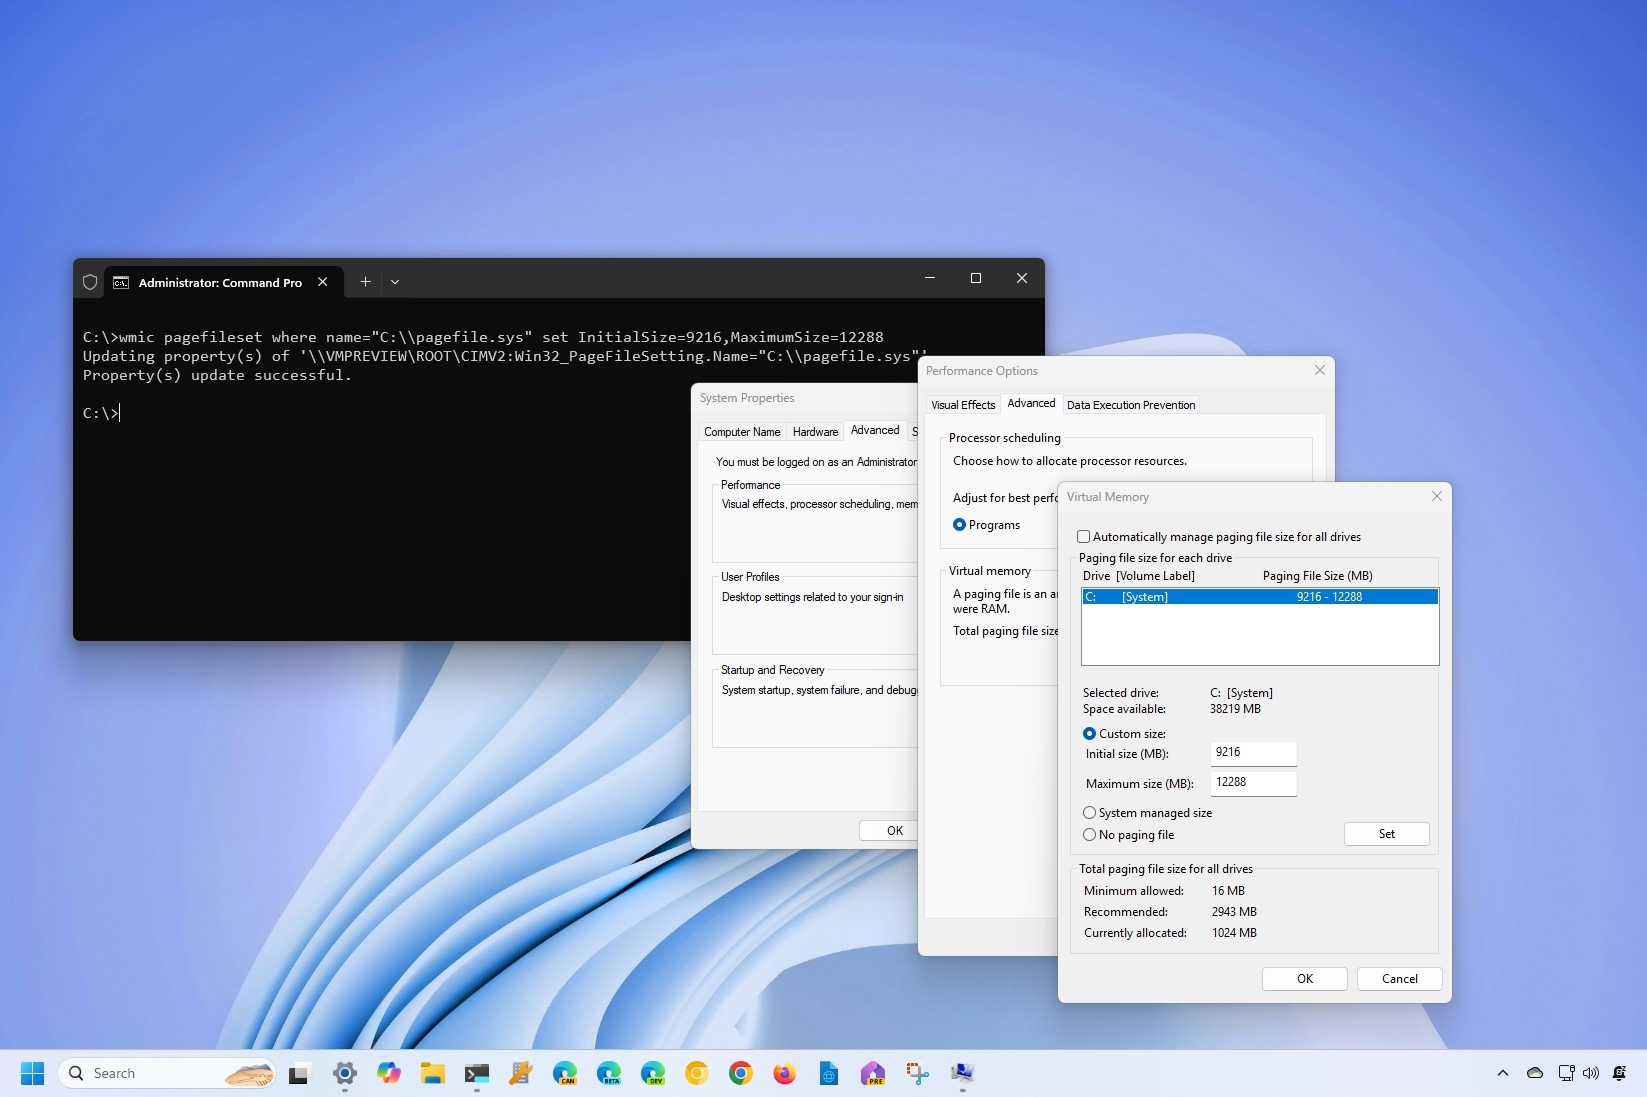
How to manage virtual memory on Windows 11
Is your PC running out of virtual memory? If so, use these steps to increase the capacity on Windows 11.
All the latest news, reviews, and guides for Windows and Xbox diehards.
You are now subscribed
Your newsletter sign-up was successful
On Windows 11, virtual memory is a feature that temporarily stores less frequent paging files loaded into RAM (Random Access Memory) onto the hard drive. The feature allows the operating system to use faster physical memory for running apps and processes, resulting in better performance while preventing the system from freezing up if memory runs out.
The system can manage the paging file size automatically. However, in some situations, you may need to manually change the default virtual memory settings. For example, when the computer is exhibiting performance issues, an application requires specific memory settings to work correctly, or you stumble upon the "Your system is low on virtual memory" message.
Whatever the case, Windows 11 includes at least two different methods to increase the virtual memory capacity using the Settings app and Command Prompt to overcome system memory limitations.
In this how-to guide, I'll explain how to increase the virtual memory size on your device to make it faster. However, it's important to note that even though nothing stops you from changing the paging file size, you should only use these instructions if you have a good reason and know what you're doing.
How to increase virtual memory through Settings
To modify the virtual memory settings on Windows 11, use these steps:
- Open Settings.
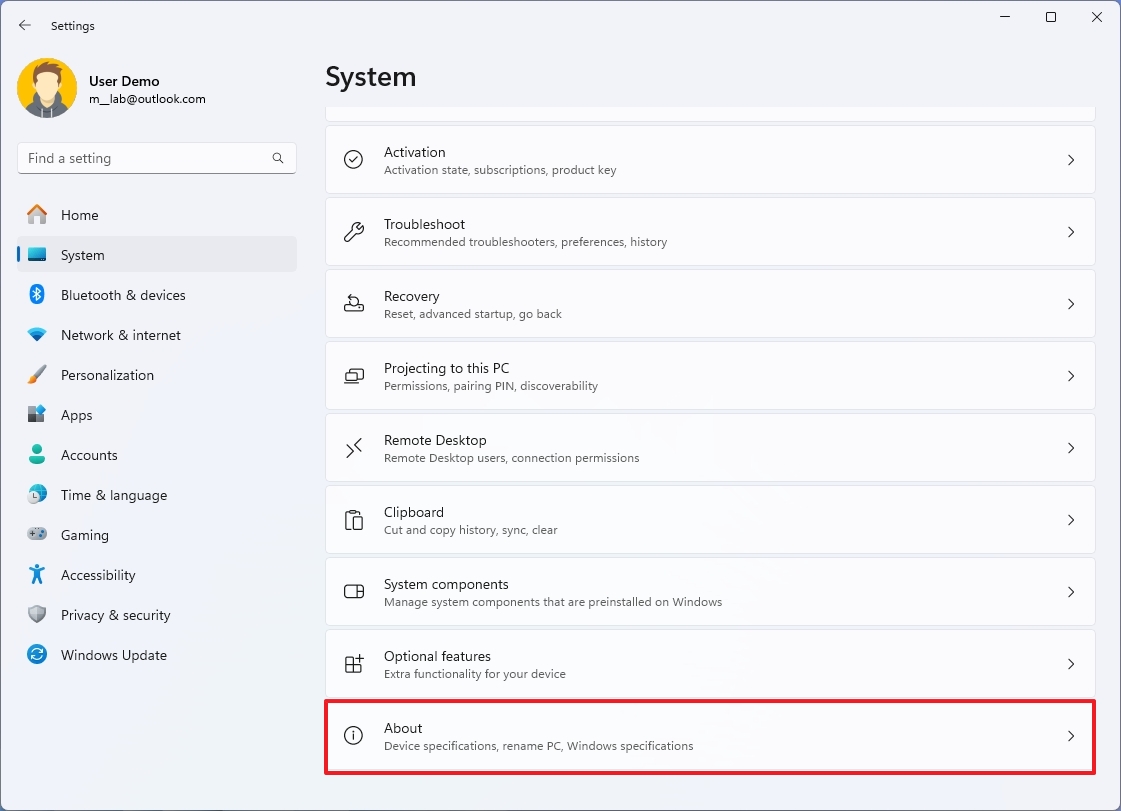
- Click on System.
- Click the About page on the right side.
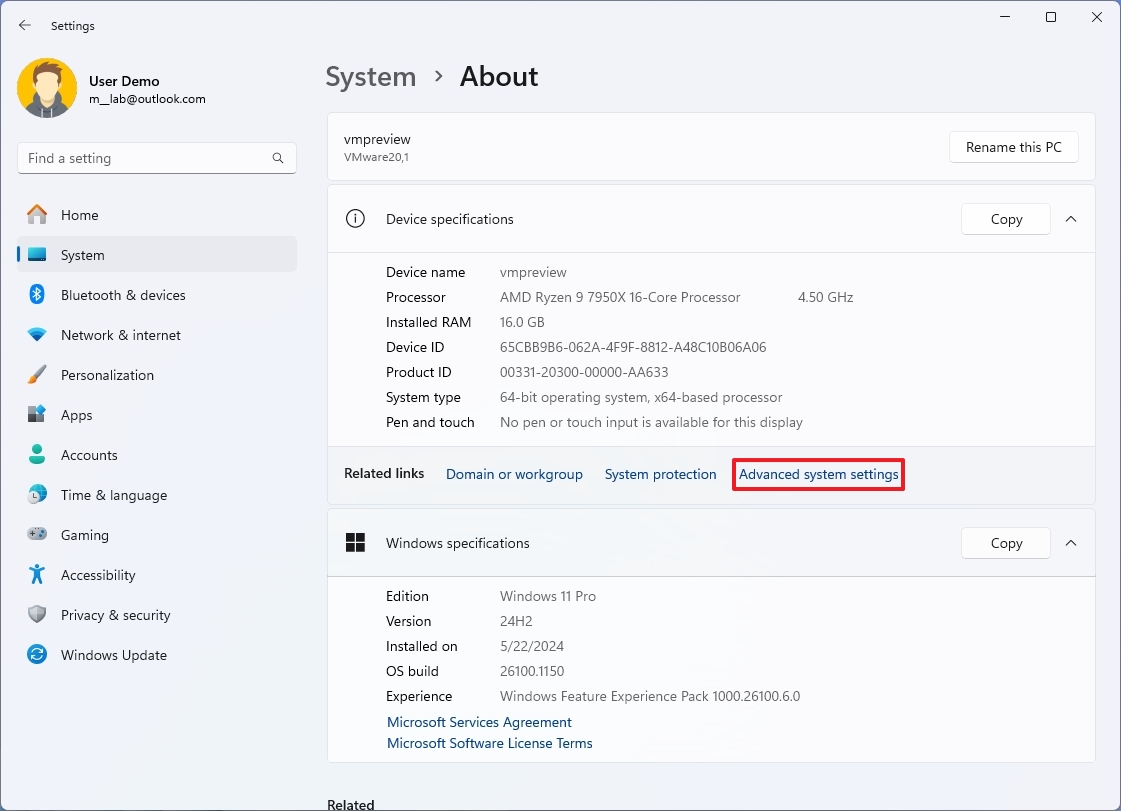
- Click the "Advanced system settings" option under the "Related links" section.
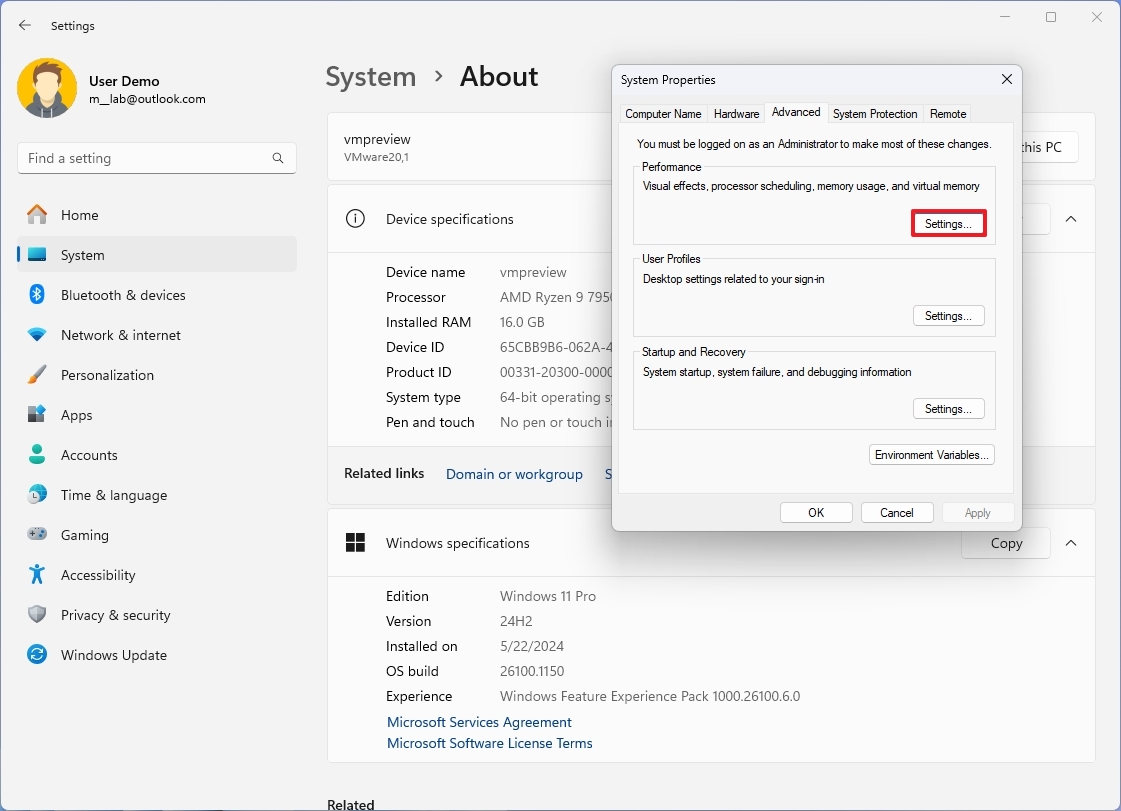
- Click the Advanced tab.
- Click the Settings button under the "Performance" section.
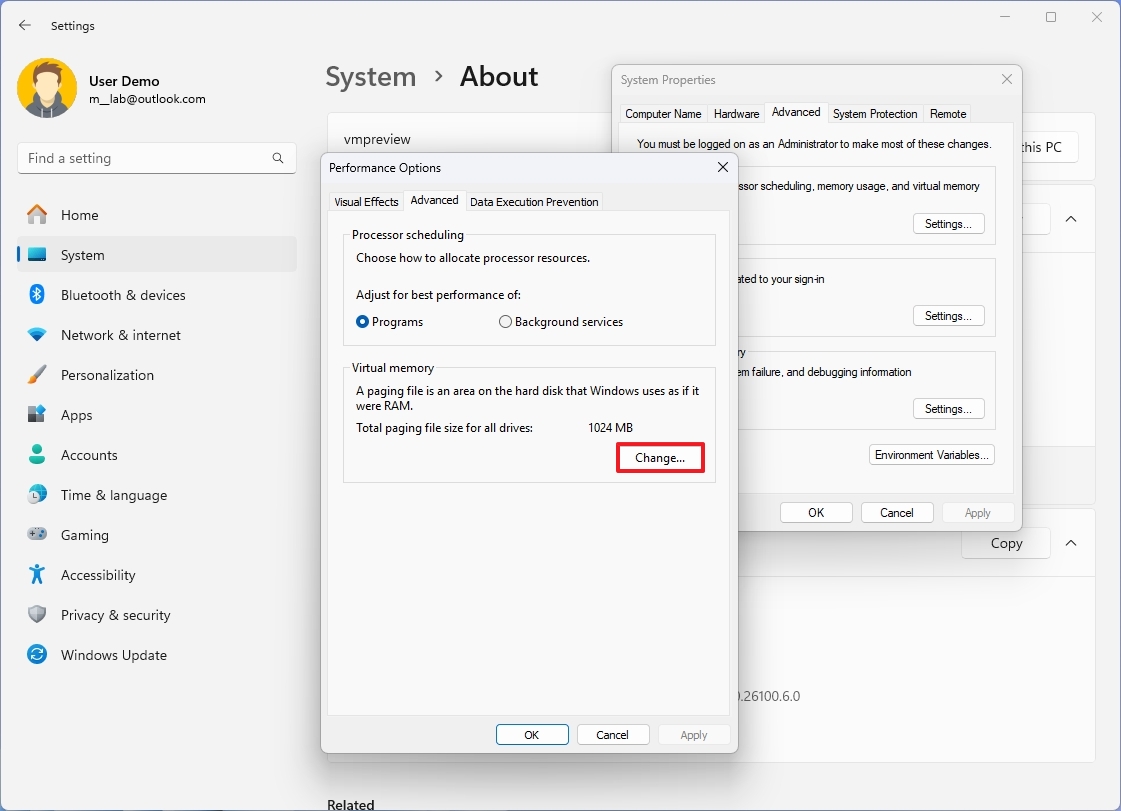
- Click the Advanced tab again.
- Click the Change button under the "Virtual memory" section.
- Clear the "Automatically manage paging files size for all drives" option.
- Select the Custom size option.
- Specify the initial and maximum size for the paging file in megabytes.
Quick tip: The virtual memory size will not be the same for every situation. However, you should usually use a number that's one and a half times the total available memory for the "Initial size" and three times the available memory for the "Maximum size." Also, remember that the computer must have enough available space to set the new parameter since the virtual memory will be stored on the main hard drive.
- Click the Set button.
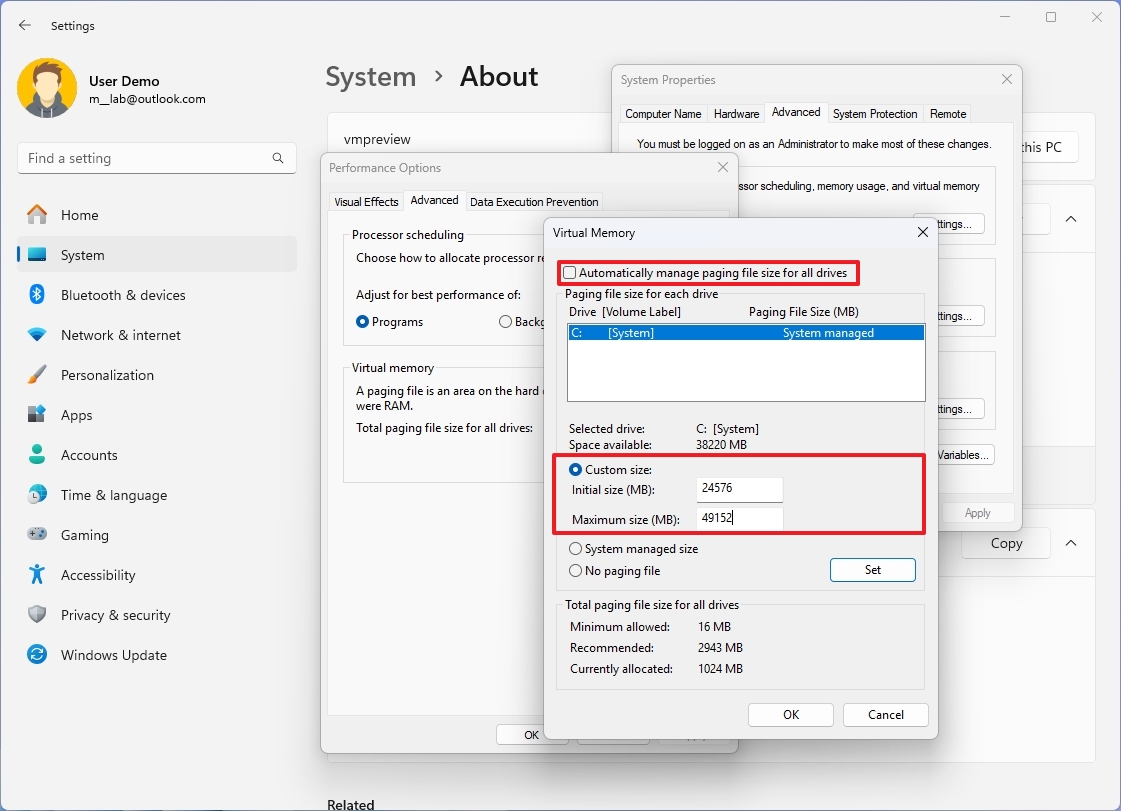
- Click the OK button.
- Click the OK button again.
- Restart your device.
Once you complete the steps, the overall system performance should increase while navigating the desktop and running apps.
All the latest news, reviews, and guides for Windows and Xbox diehards.
If you change your mind, you can undo the changes with the same instructions, but on step 9, check the "Automatically manage paging size for all drives" option and restart the computer.
How to increase virtual memory through Command Prompt
To change the paging file size with commands on Windows 11, use these steps:
- Open Start.
- Search for Command Prompt, right-click the top result, and select the Run as administrator option.
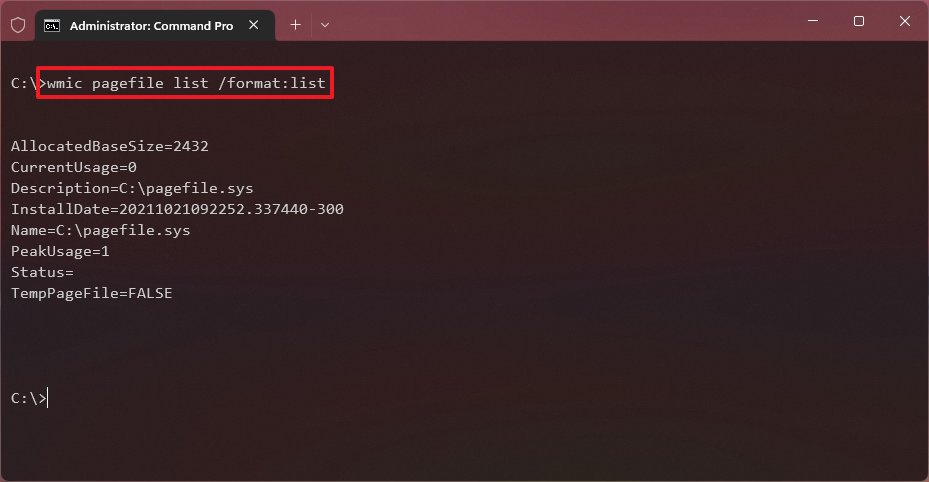
- Type the following command to understand the current paging file and press Enter: wmic pagefile list /format:list
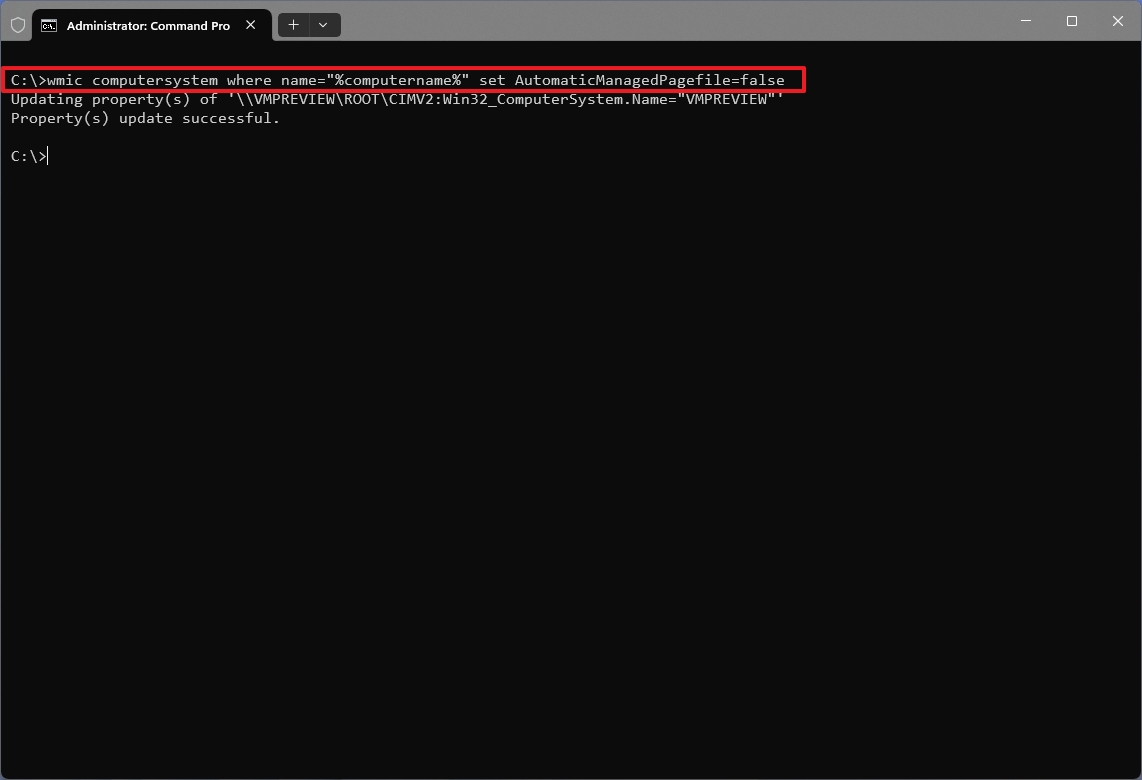
- Type the following command to switch from system managed to custom virtual memory on Windows 11 and press Enter: wmic computersystem where name="%computername%" set AutomaticManagedPagefile=false
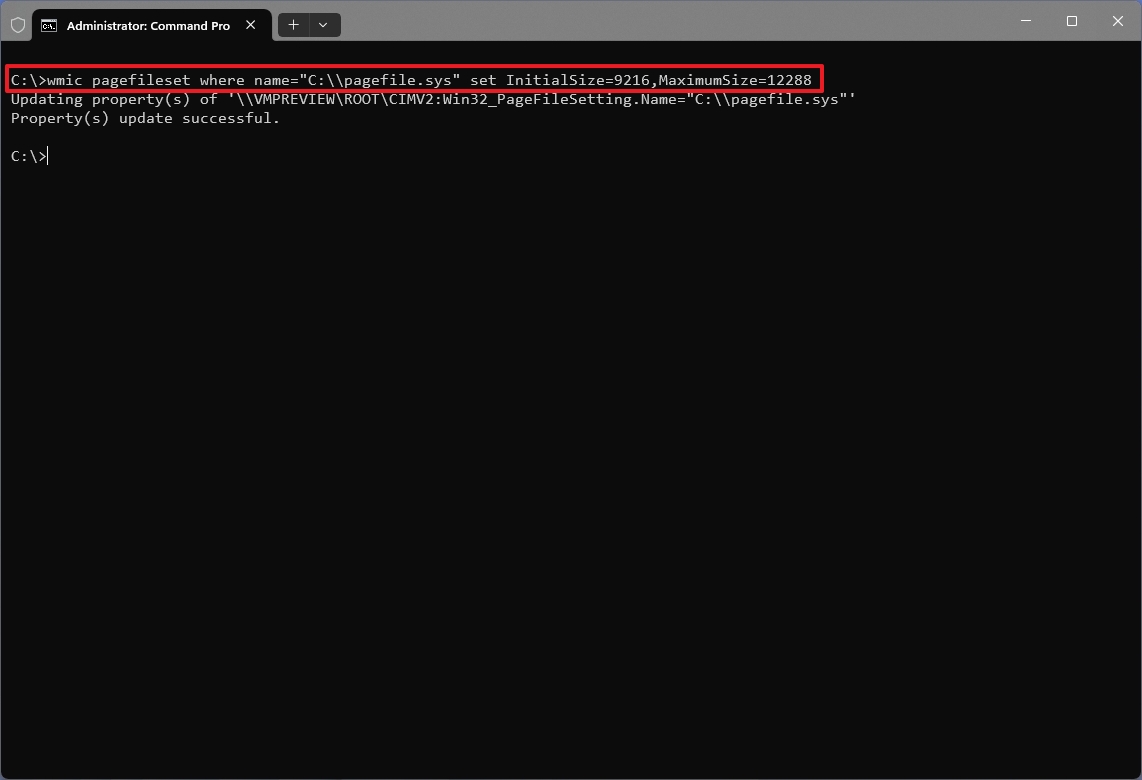
- Type the following command to configure the initial and maximum virtual memory size and press Enter: wmic pagefileset where name="C:\\pagefile.sys" set InitialSize=YOUR-INIT-SIZE,MaximumSize=YOUR-MAX-SIZE
This example sets the paging file to "9216" and "12288" megabytes for the initial and maximum size: wmic pagefileset where name="C:\\pagefile.sys" set InitialSize=9216,MaximumSize=12288
- Type the following command to restart the device and press Enter: shutdown -r -t 00
After you complete the steps, the computer should start showing a boost in performance.
When you no longer need this configuration, you can run the wmic computersystem where name="%computername%" set AutomaticManagedPagefile=true command to revert the changes and restart the computer.
Although there are some recommendations to configure the virtual memory manually, you should always take the time to test the configurations and modify the values if the system starts having stability problems.
If you think that the device doesn't need virtual memory only because you have a large amount of physical memory, you shouldn't disable the feature. The reason is that the system needs the paging file. Otherwise, you may experience problems running applications and using many Windows 11 features.
More resources
For more helpful articles, coverage, and answers to common questions about Windows 10 and Windows 11, visit the following resources:
- Windows 11 on Windows Central — All you need to know
- Windows 10 on Windows Central — All you need to know

Mauro Huculak has been a Windows How-To Expert contributor for WindowsCentral.com for nearly a decade and has over 22 years of combined experience in IT and technical writing. He holds various professional certifications from Microsoft, Cisco, VMware, and CompTIA and has been recognized as a Microsoft MVP for many years.
