


When you come across a black screen, this could be one of the most annoying problems on Windows 11 because you are not given an error code or anything that can help you know what's happening.
Also, you can come across different black screen issues. For example, the computer may get stuck with the loading animation with a black background during startup or while updating. You may come across a black screen, but you can still use the mouse cursor, or the display may appear to be turned on, but you won't be able to do anything on the screen.
While many things can cause black screen problems on Windows 11, it's usually a compatibility issue with a system or driver update or a hardware problem with the graphics card, monitor, or physical connection.

If your computer is experiencing problems on Windows 11, you have several ways to troubleshoot the issue, whether the black screen appears during an update, before signing into your account, or randomly when working with applications.
This guide will walk you through the different ways you can troubleshoot and resolve black screen problems on Windows 11.
How to fix black screen connection problems on Windows 11
In front of a black screen error, the device could be facing a hardware or software problem. This section will show you the basic steps to troubleshoot the most common issues to resolve the problem.
Confirm connection
When you come across a black screen before you are on the desktop, the problem is probably a connection malfunction between the display and the computer.
In this situation, you first want to ensure that that monitor receives power and turns on. Second, you want to check the video cable is connected correctly on both ends. You can also try disconnecting and reconnecting the cable to reset the physical connection.
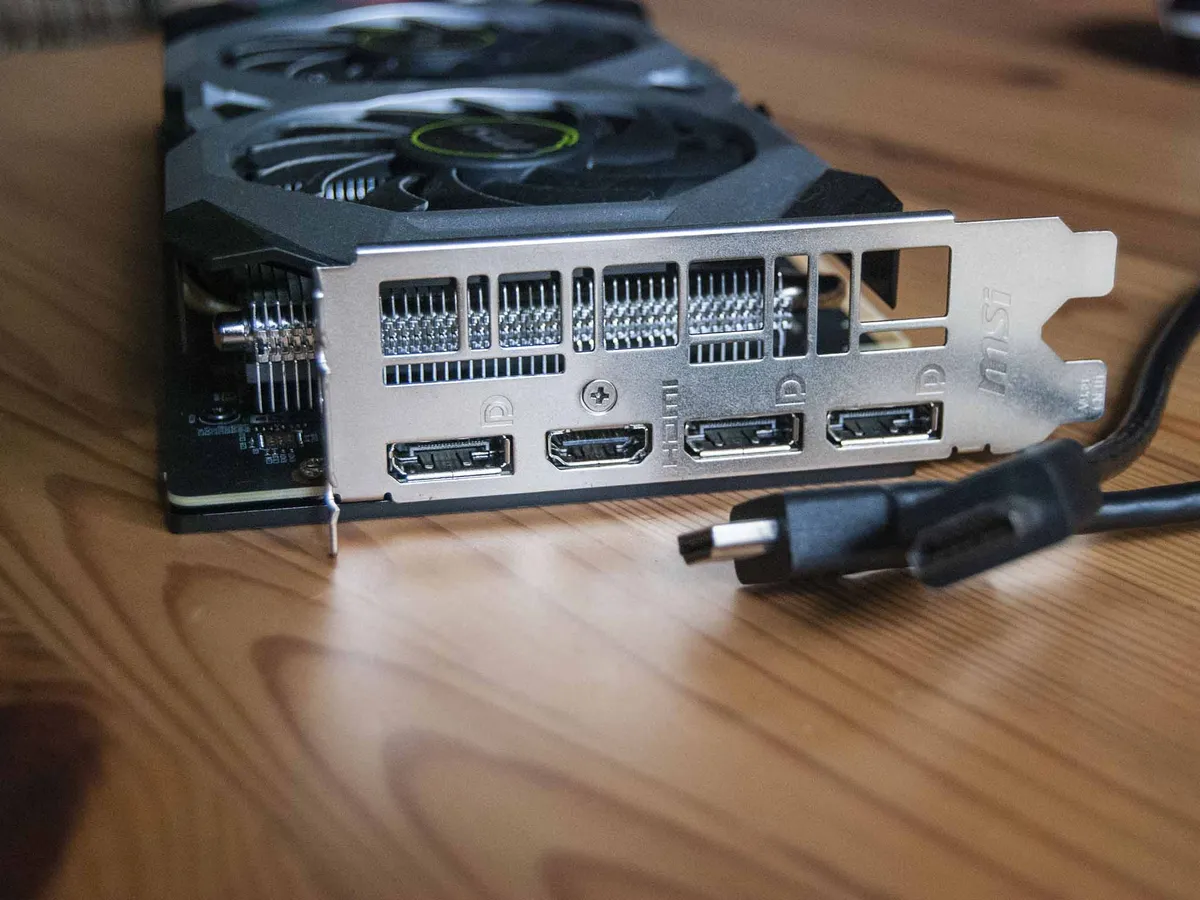
If the graphics card has more than one output, connect the display to another port and move the mouse or press any key to send a wake-up signal. Sometimes, a driver update could make unwanted changes, such as changing the signal to a different output port (DisplayPort, HDMI, DVI, Thunderbolt, VGA).
In case the system features an integrated graphics card on the motherboard and an add-in discrete card, you may want to switch the video to the embedded graphics to confirm if the problem lies in the discrete card. If you recently updated the UEFI (Unified Extensible Firmware Interface), this action can sometimes disable the discrete graphics card, which you can only re-enable from the motherboard firmware.
If you have a traditional desktop computer with a discrete video card, the hardware may not be fully making contact with the motherboard's slot. If you suspect this could be the case, open the computer case, remove the card from the motherboard, and reinstall it again. (You may need to check your hardware manufacturer's website for details on how to proceed.)
In case this is an external monitor, open the display's control panel and adjust the brightness level to fix the black screen problem. Also, confirm that monitor has the correct input selected.
Furthermore, you can try connecting the display to a different system or using a different video cable to determine whether you are dealing with a broken monitor, graphics card, or damaged cable.
If you have a laptop, use the designated function keyboard shortcut to increase the brightness to see whether that's causing the problem. Usually, you have to press the Function (FN) key and one of the functions keys like "F8" or "F10."
Detect displays
Windows 11 can also lose its connection with the display out of the blue. When this happens, you can use the "Windows key + Ctrl + Shift + B" keyboard shortcut to restart the video driver and refresh the connection with the monitor.
In some devices, such as Surface tablets, you can wake up the screen by pressing the volume up and volume down buttons at the same time three times (quickly).
The wake action will produce a beep and activity on the screen, indicating that the system is responding to the command.
Furthermore, you can also use the "Windows key + P" keyboard shortcut to open the "Project" flyout. Then hit the "P" key again, and press the Enter key to switch between the different display modes. (You will need to repeat the steps four times to allow cycling through all the possible modes.)

Restart the computer
If, after these troubleshooting steps, you're still seeing a black screen during boot or while working with an application. You may need to cold-reboot the system by pressing and holding the power button for about 10 seconds to shut down the system completely. Then press the power button again to turn on the device. (If you had some files open on the desktop, you might lose the unsaved work as a result of this action.)
Disconnect peripherals
It could also be the case of a hardware conflict causing the black screen or black screen with a circle animation during boot.
Usually, when the computer starts up and hangs with cycle animation, it could indicate an update is currently being installed on the computer. In this case, you will need to wait a few minutes to get to the sign-in screen. However, if the device is taking a very long time, you could be in front of a compatibility problem.
If you suspect hardware is causing a conflict, disconnect all the peripherals, including printers, cameras, removable drives, dock station, Bluetooth, and other USB devices, and then restart the computer. If the problem seems to be resolved, it's likely one of the peripherals. You can determine which component is causing the issue by reconnecting them one at a time until you come across the problem.
How to fix black screen from desktop on Windows 11
If you are on the Windows 11 desktop and can move the mouse around, the black screen problem could be related to Windows Explorer.
Reset Windows Explorer process
To fix the Windows Explorer service causing a black screen on Windows 11, use these steps:
- Use the "Ctrl + Shift + Esc" keyboard shortcut to open Task Manager.
- Quick tip: You can also use the "Ctrl + Alt + Del" keyboard shortcut and click the Task Manager button.
- Click the More details button (if in compact mode).
- Click the Processes tab.
- Select the Windows Explorer service.
- Click the Restart button from the bottom-right corner.

After you complete the steps, the black screen problem should be resolved.
Restart explorer.exe
Alternatively, if the above instructions did not work, use these steps:
- Use the "Ctrl + Alt + Delete" keyboard shortcut to open Task Manager.
- Click the More details button (if in compact mode).
- Right-click the Windows Explorer service and select the End task option (if available).
- Click the File menu.
- Select the Run new task option.
- Type the following command and click the OK button: explorer.exe

Once you complete the steps, you should have access to the desktop and apps.
Application conflict
Applications may also have compatibility issues that can cause a black screen. If this is the case, you can update or remove the application from the current setup.
Update Microsoft Store apps
To update an app on Windows 11, use these steps:
- Open Microsoft Store.
- Click on Library from the bottom-left navigation pane.
- Click the Get updates button.

After you complete the steps, the Microsoft Store will download and install the available updates automatically.
Update non-Microsoft Store apps
If the problem is happening with a non-Microsoft Store app, the steps to update will be slightly different, depending on the application. However, applications usually have a help menu with an option to update. For example, to update Microsoft Edge, you would use these steps:
- Open the app.
- Open the Help menu.
- Select the About, Check for Updates, Software Update, or similar option (as applicable).
- Continue with the on-screen directions to complete the update (if applicable).

If you are still seeing the same problem, you may need to contact the developer for more specific details.
Uninstall problematic app
In the case that a specific app has a compatibility issue, you may want to consider removing it to fix the black screen. Here's how:
- Open Settings.
- Click on Apps.
- Click the Apps & features page on the right side.
- Under the "App list' section, click the menu (three-dotted) button on the right of the app and select the Uninstall option.
- Click the Uninstall button again.
- Continue with the on-screen directions (if applicable).

Once you complete the steps, restart the computer, and confirm the problem has been resolved.
Perform clean boot
Windows 11 starts all the necessary services, drivers, and certain apps during startup. If any of these components are not working, the computer could end up with a black screen.
A clean boot allows the system to start with minimal components, which can help you determine why you are seeing a black screen.
To perform a clean boot of Windows 11, use these steps:
- Open Start.
- Search for msconfig and click the top result to open the System Configuration app.
- Click the Services tab.
- Check the "Hide all Microsoft services" option.
- Click the Disable all button.

- Click the Apply button.
- Click the Startup tab.
- Click the Open Task Manager option.
- Click the Startup tab.
- Select each application, and click the Disable button in the bottom-right corner.

- Close Task Manager.
- Click the OK button.
- Restart the computer.
If the black screen problem disappears, you will know that the issue lies in one of the services, drivers, or apps that load at startup.
Troubleshoot black screen from clean boot
To fix the black screen issue on Windows 11, re-enable the items one at a time and restart the computer to see which one is causing the problem:
- Open Start.
- Search for msconfig and click the top result to open the System Configuration app.
- Click the Services tab.
- Check the "Hide all Microsoft services" option.
- Check one of the services.

- Click the Apply button.
- Click the OK button.
- Restart the device.
After you complete the steps, repeat the instructions for each service until you come across the one causing the issue.
Re-enable startup items
If none of the services seems to be the issue, use these steps to re-enable the startup items:
- Open Start.
- Search for Task Manager and click the top result to open the app.
- Click the Startup tab.
- Select an app and click the Enable button in the bottom-right corner.

Once you complete the steps, you may need to repeat the instructions for every item until you determine the app causing the black screen.
How to fix black screen from safe mode on Windows 11
If the computer doesn't start correctly, you may need to use the Windows Recovery Environment (WinRE) to access safe mode to troubleshoot the problem.
Open WinRE using the three-fail boot method
To access the recovery environment, use these steps:
- Start the computer.
- As soon as the Windows logo appears on the screen, press the power button to interrupt the boot sequence.
- Repeat steps 1 and 2 two more times.

After the second interruption, Windows 11 will start WinRE, where you will find the option to access Advanced startup, and then you can continue with the steps to boot in safe mode.
Open WinRE using bootable media method
Alternatively, you can use a bootable USB flash drive to access the recovery environment settings using these steps:
- Start PC from USB flash drive.
- Quick tip: If the computer doesn't start from USB, you may have to change the motherboard's firmware settings. You can usually access the UEFI firmware by powering up the device and pressing one of the functions, the Delete or Esc keys. However, check your manufacturer's support website for more specific details.
- Click the Next button.
- Click the Repair your computer link in the bottom-left corner.

Once you complete the steps, continue with the instructions to start Windows 11 in safe mode.
Open safe mode on Windows 11
After starting in the recovery environment, use these steps:
- Click on Advanced options.
- Click the Troubleshoot option.
- Click the Advanced options button.
- Click the Startup Settings option.

- Click the Restart button.
- On the "Startup Settings" page, press the 5 or F5 key to select the "Enable Safe Mode with Networking" option.

While in safe mode, you have many ways to fix the black screen problem. For instance, you can reinstall the graphics driver, remove buggy updates, change system settings, and more (see instructions below).
Resolve graphics card driver problems
If the problem is the graphics card driver, this could happen after updating the driver manually or automatically through Windows Update. Also, it could be that the driver got corrupted for any reason. If this is the case, you can reinstall or roll back the driver to the previous version.
Reinstall graphics driver
To reinstall the graphics driver while in safe mode on Windows 11, use these steps:
- Open Start.
- Search for Device Manager and click the top result to open the app.
- Expand the Display Adapters branch.
- Right-click the video adapter and select the Uninstall device option.

- (Optional) Check the delete driver option.
- Click the OK button.
- Restart the device.
Once you complete the steps, Windows 11 will reinstall the graphics driver automatically, resolving the black screen issue.
Roll back graphics driver
If the system was recently updated, rolling back the driver to the previous version may fix the problem on Windows 11.
To roll back a previous version of a driver on Windows 11, use these steps:
- Open Start.
- Search for Device Manager and click the top result to open the app.
- Expand the Display Adapters branch.
- Right-click the video card and select the Properties option.

- Click the Driver tab.
- Click the Roll Back Driver button.

- Select a reason to enable the option to roll back.
- Click the Yes button.
- Restart the computer.
After completing the steps, the system will restore the previous driver version, fixing the black screen problem.
If the "Roll Back Driver" option is grayed out, Windows 11 does not have a previous version. If an earlier version of the driver was working, you might be able to download it from your manufacturer's support website.
Disable Fast Startup
Sometimes, the fast startup feature may be why the device ends up with a black screen. On Windows 10, fast startup is a feature available in specific hardware configurations to speed up the boot process. If it's causing a black screen, you can disable it to mitigate the issue.
To disable fast startup on Windows 10, use these steps:
- Open Control Panel.
- Quick note: If you can't find a way to open Control Panel, use the Windows key + R keyboard shortcut and type the Control command and click the OK button.
- Click on Hardware and Sound.
- Click on Power Options.
- Select the "Choose what the power button does" option on the left pane.

- Click the Change settings that are currently unavailable option.
- Clear the Turn on fast startup (recommended) option.

- Click the Save changes button.
- Restart the computer.
After restarting the device, you should no longer experience the black screen problem on Windows 11.
Uninstall buggy updates
If you recently installed a system update, the update may have a compatibility problem with the video driver or another component that causes the screen to go black.
To uninstall a buggy update in safe mode, use these steps:
- Open Start.
- Search for Command Prompt, right-click the top result, and select the Run as administrator option.
- Quick note: If search doesn't work to open Command Prompt, use the Windows key + R keyboard shortcut and type the CMD command and click the OK button.
- Type the following command to view the recently installed updates and press Enter: wmic qfe get hotfixid, installedon
- Type the following command to remove the update and press Enter: wusa /uninstall /kb:5015732

- Click the Yes button.
- Click the Restart button to reboot.
Once you complete the steps, the update will be removed from the device, fixing the black screen issue.
Uninstall security software
Also, security applications like third-party antivirus can be the reason for a black screen on Windows 11.
If the device has a third-party security application, you can temporarily remove them to confirm if the app is the reason for the black screen.
To uninstall a security app while in safe mode on Windows 11, use these steps:
- Open Start.
- Click the All apps button in the top-right corner.
- Right the antivirus and select the Uninstall button.
- Continue with the on-screen directions (if applicable).

In the scenario, we use the Start menu option to remove the app because the Settings app may or may not work in safe mode. Alternatively, you can find the uninstaller in the application installation folder in "C:\Program Files."
If removing the app resolves the problem, check the developer support website for an updated version of the app or more specific steps on how to mitigate the issue.
Create new user account
A damaged account could also be the reason you see a black screen on Windows 11. You can create a new account in safe mode to confirm if this is causing the problem. If the black screen goes away with the new account, you should consider transferring your files and settings to the other account.
To create a new account in safe mode on Windows 11, use these steps:
- Open Start.
- Search for Command Prompt, right-click the top result, and select the Run as administrator option.
- Type the following command to create a new account and press Enter: net user ACCOUNT-NAME /add
In the command, make sure to change "ACCOUNT-NAME" for the name of the account you want to create. For example, this command creates an account named tempuser: net user tempuser /add.
- Type the following command to change the account type to "Administrator" and press Enter: net localgroup administrators tempuser /add

- Restart the computer.
- Sign in with the new user account.
If the problem is resolved, it would indicate that the issue could be something in the old account.
How to fix black screen from System Restore on Windows 11
If System Restore is enabled on your computer, you can use a restore point to undo system changes (such as recent apps, configurations, and updates), which may be causing the black screen on Windows 11.
The feature shouldn't delete any files, but it'll remove some settings, apps, and updates that were applied after the last restore point.
Since the desktop won't be available to use System Restore, you will need to access the feature from the Windows Recovery Environment.
Open WinRE using the three-fail boot method
To access the recovery environment, use these steps:
- Start the computer.
- As soon as the Windows logo appears on the screen, press the power button to interrupt the boot sequence.
- Repeat steps 1 and 2 two more times.
After the second interruption, Windows 11 will start the recovery experience. Continue with the restore point instructions below.
Open WinRE using bootable media method
Alternatively, you can use a bootable USB flash drive to access the recovery environment settings using these steps:
- Start PC from USB flash drive.
- Click the Next button.
- Click the Repair your computer link in the bottom-left corner.
Once you complete the steps, continue with the instructions below.
Undo system changes
To restore a device to an earlier point in time, use these steps:
- Click on Advanced options.
- Click the Troubleshoot option.
- Click the Advanced options button.
- Click the System Restore option.

- Click the Next button.
- Select the most recent restore point likely to resolve the issue.

- (Optional) Click the "Scan for affected programs" button to determine the apps that will be affected after the restore point is created.
- Click the Close button.
- Click the Next button.
- Click the Finish button.
After you complete the steps, the feature will apply the restore point that will bring the system back to the time when everything was working without a black screen.
How to fix black screen uninstall feature update on Windows 11
If the computer is getting a black screen after upgrading to a newer version, rolling back to the previous version of the operating system can be a solution until an update is released with a permanent fix.
Open WinRE using the three-fail boot method
To access the recovery environment, use these steps:
- Start the computer.
- As soon as the Windows logo appears on the screen, press the power button to interrupt the boot sequence.
- Repeat steps 1 and 2 two more times.
After the second interruption, Windows 11 will start the recovery experience. Continue with the instructions below.
Open WinRE using bootable media method
Alternatively, you can use a bootable USB flash drive to access the recovery environment settings using these steps:
- Start PC from USB flash drive.
- Click the Next button.
- Click the Repair your computer link in the bottom-left corner.
Once you complete the steps, continue with the instructions below.
Roll back to previous OS version
To roll back to the previous version of Windows 11, use these steps:
- Click on Advanced options.
- Click the Troubleshoot option.
- Click the Advanced options button.
- Click the Uninstall Updates option.

- Select the "Uninstall latest feature update" option.

- Sign in with your account credentials.
- Click the "Uninstall feature update" button.

If rolling back to a previous version of Windows 11 or 10 resolves the issue, you shouldn't upgrade until you know there's an update that permanently fixes the problem.
The option to reset the system to the previous version is only available during the first 10 days after an upgrade.
How to fix black screen using recovery feature on Windows 11
If nothing seems to resolve the issue, as a last resort, you can reset your computer to the factory default settings to fix the black screen issue.
You won't lose your files using this feature, but this process will delete your apps and settings.
To reset a Windows 11 laptop or desktop to its factory default settings without losing your files, use these steps:
- Open Settings.
- Click on System.
- Click the Recovery page on the right side.

- Under the "Recovery options" section, click the Reset PC button for the "Reset this PC" feature.

- Click the Keep my files option.

- Select the Local reinstall option.

- Review the apps to reinstall after the reset to factory settings.
- Click the Next button.
- Click the Reset button.

Once you complete the steps, the computer will reset to the factory settings preserving your files. You can learn more about the "Reset this PC" recovery feature in this guide.
Reset computer from recovery settings
If you don't have access to the desktop, you can reset your computer from the recovery environment.
Open WinRE using the three-fail boot method
To access the recovery environment, use these steps:
- Start the computer.
- As soon as the Windows logo appears on the screen, press the power button to interrupt the boot sequence.
- Repeat steps 1 and 2 two more times.
After the second interruption, Windows 11 will start the recovery experience. Continue with the instructions below.
Open WinRE using bootable media method
Alternatively, you can use a bootable USB flash drive to access the recovery environment settings using these steps:
- Start PC from USB flash drive.
- Click the Next button.
- Click the Repair your computer link in the bottom-left corner.
Once you complete the steps, continue with the instructions below.
Reset system to factory settings
To roll back to the previous version of Windows 11, use these steps:
- Click on Advanced options.
- Click the Troubleshoot option.
- Click on Reset this PC option.

- Click the Keep my files option.

- Select the Local reinstall option.

- Click the Reset button.
After you complete the steps, the wizard will take over and reinstall Windows 11, hopefully fixing the black screen issue.
How to fix black screen during installation on Windows 11
In case the black screen occurs during the upgrade process to a new release of the operating system, the setup may be taking its time processing the installation. Sometimes, the upgrade process could take several hours, but it'll finish successfully.
If it's been more than six hours, you can try powering off the computer by pressing the power button for about 10 seconds.
After the device is powered down, disconnect the non-essential peripherals (such as removable storage, printer, network cable, dock station, and secondary displays). Only connect essential devices like the mouse, keyboard, and primary monitor.
If the problem wasn't critical, the installation might resume and complete automatically. After the installation, remember to reconnect the remaining peripherals.
However, in case it was a fatal error, the setup will try to roll back to the previous version. You may try the upgrade one more time, but this time, you should use the Windows 11 bootable media to proceed with the installation.
More resources
For more helpful articles, coverage, and answers to common questions about Windows 10 and Windows 11, visit the following resources:

