How to use tags for pictures in OneDrive
Here are the easy steps to manage tagging for images in OneDrive.
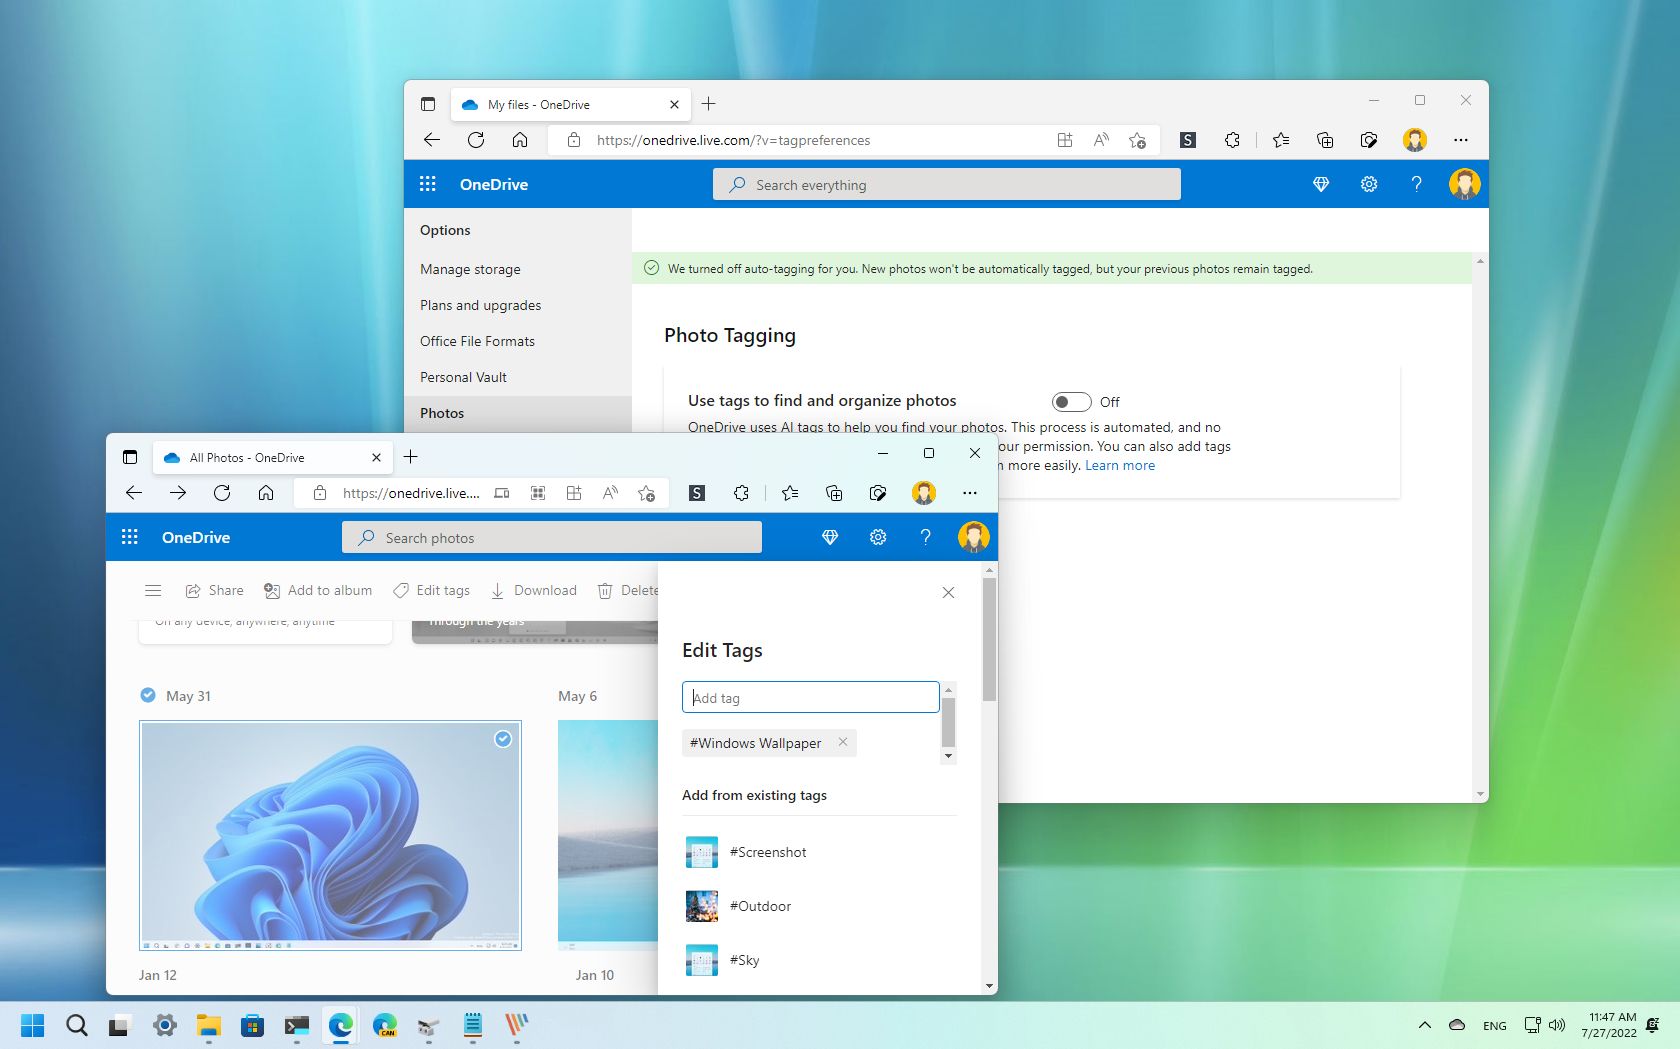
OneDrive includes support for tags to make it easier to search and find your pictures faster with keywords and key phrases (tags) embedded in the file, and in this guide, we'll teach you how to use them.
If you use OneDrive on Windows 11, macOS, iOS, Android, or any other supported platform, the cloud storage service automatically scans and assigns tags based on the contents of the images without any additional action on your part. However, since this process happens automatically, and sometimes files can end up with wrong or not enough tags, you can add or remove tags manually or disable the feature if you're concerned about security.
This guide will walk you through the steps to manage tags for images in OneDrive.
How to add tags on photos in OneDrive
To add tags to a picture stored in OneDrive, use these steps:
- Open OneDrive (web).
- Click on Photos from the left pane.
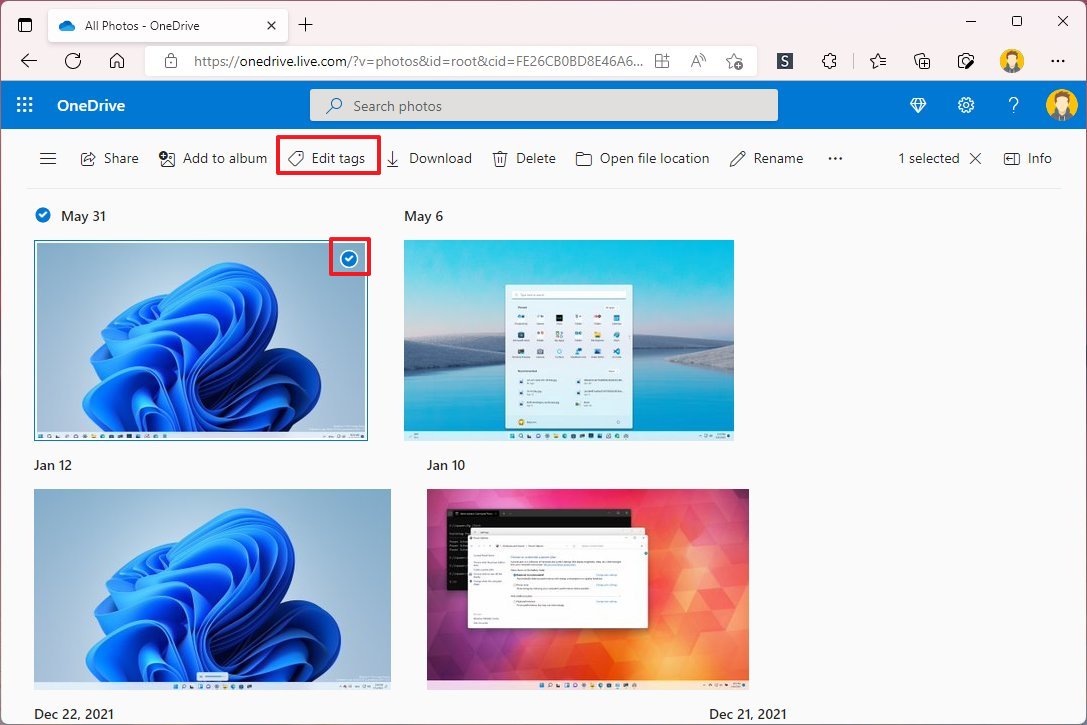
- Check the image to edit its tags. (Or click it to open the file.)
- Click the Edit tags option from the command bar.
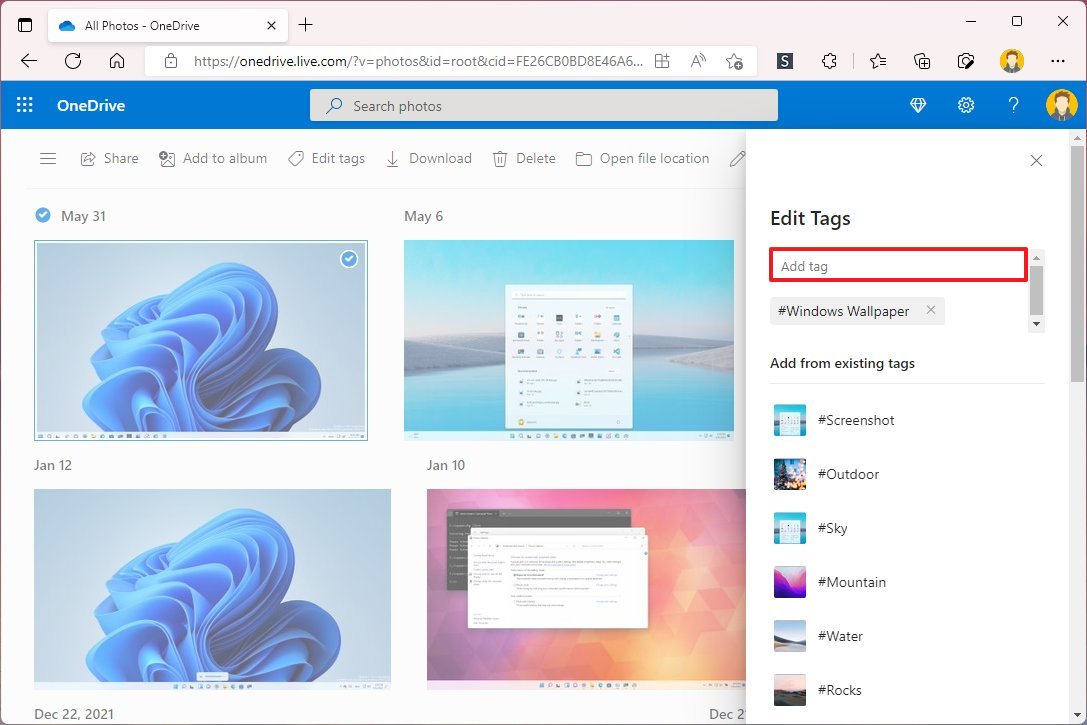
- Confirm the new tag in the "Add tag" box and press Enter.
- (Optional) Select from one of the automatically generated tags.
Once you complete the steps, the photo will be searchable with the newly assigned tags.
You can also select a group of photos and click the "Edit tags" option from the command bar to add specific tags that will help you find a collection of pictures.
How to remove tags on photos in OneDrive
To remove tags from a photo in OneDrive, use these steps:
All the latest news, reviews, and guides for Windows and Xbox diehards.
- Open OneDrive (web).
- Click on Photos from the left pane.
- Check the image to edit its tags. (Or click it to open the file.)
- Click the Edit tags option from the command bar.
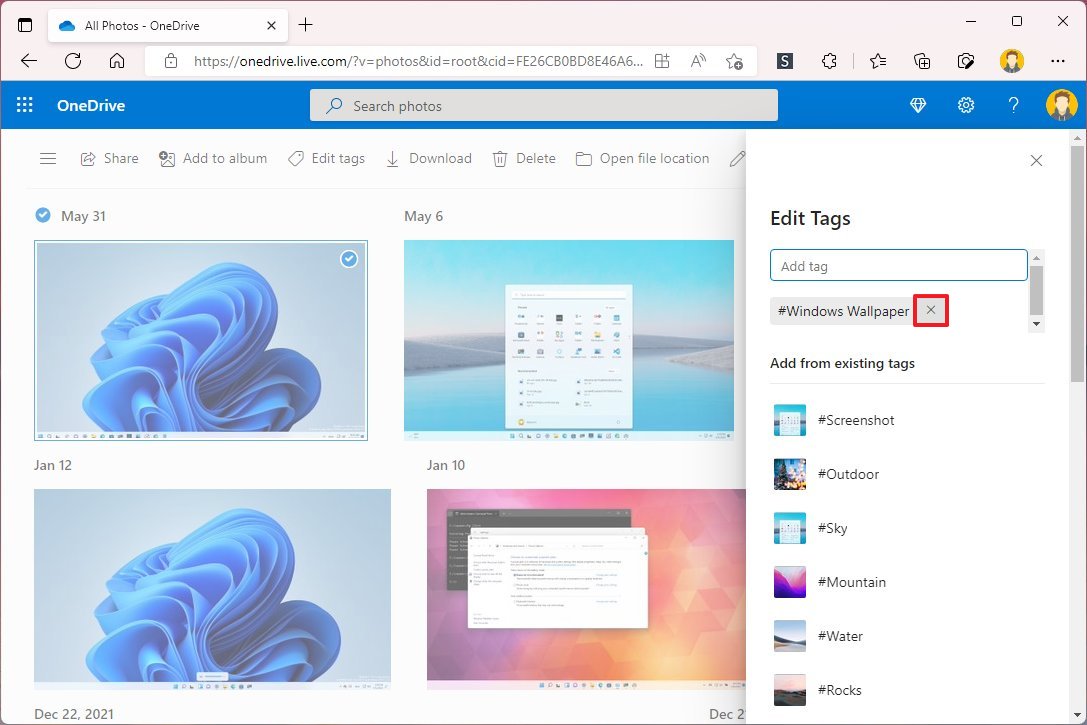
- Click the Remove (X) option in the tag.
- Repeat the previous steps to remove other tags.
After completing the steps, the tags will no longer be available on the image. You will still be able to find the image by file name, date, meta information, or any other tags (if applicable). However, the image won't be searchable with the removed tags.
How to disable automatic tags on photos in OneDrive
To disable auto-tagging for photos in OneDrive, use these steps:
- Open OneDrive (web).
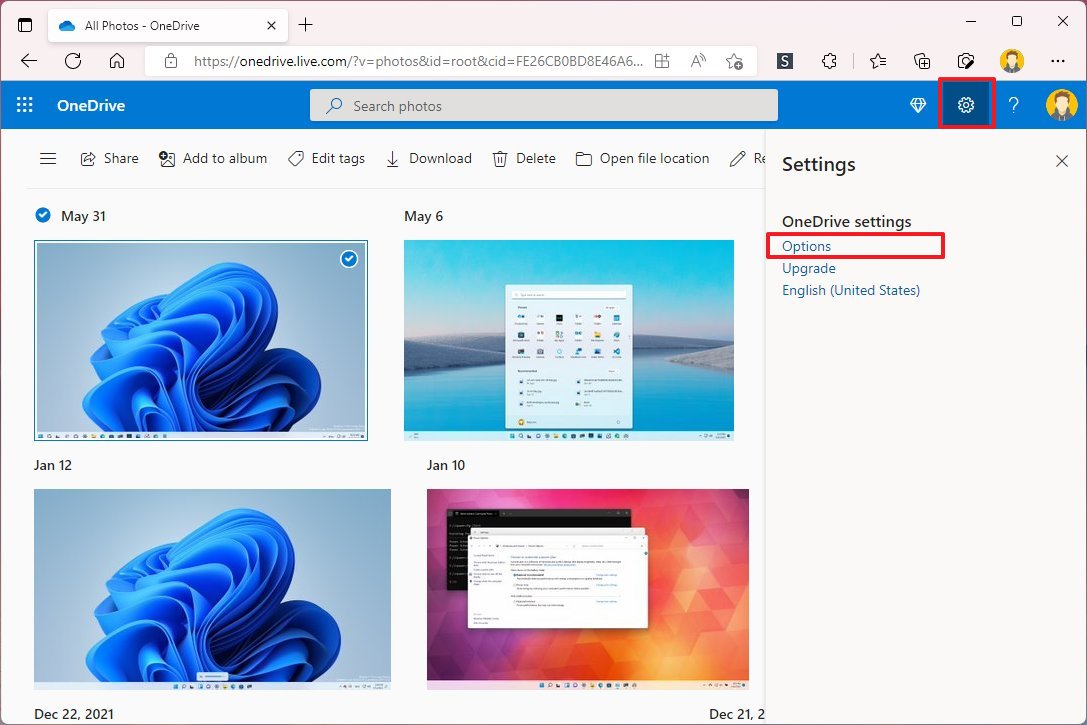
- Click the Settings (gear) menu button.
- Click on Options.
- Click on Photos from the left side.
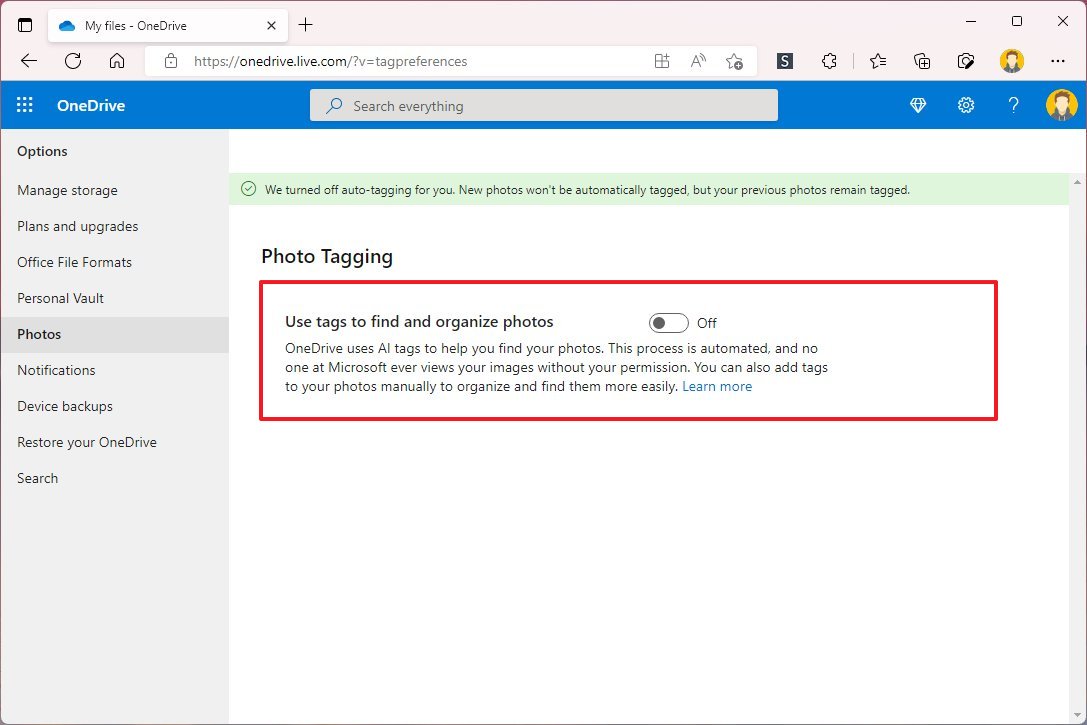
- Turn off the "Use tags to find and organize photos" toggle switch to disable auto-tagging.
- (Optional) Turn on the "Use tags to find and organize photos" toggle switch to enable auto-tagging.
Once you complete the steps, the feature automatically stops tagging your photos stored in your OneDrive account. However, tags already in the images won't be removed. If you want to remove the tags for existing files, you will need to perform this task manually.
More resources
For more helpful articles, coverage, and answers to common questions about Windows 10 and Windows 11, visit the following resources:

Mauro Huculak has been a Windows How-To Expert contributor for WindowsCentral.com for nearly a decade and has over 22 years of combined experience in IT and technical writing. He holds various professional certifications from Microsoft, Cisco, VMware, and CompTIA and has been recognized as a Microsoft MVP for many years.
