How to play Minecraft on Steam Deck: Prism Launcher guide for Java v1.19
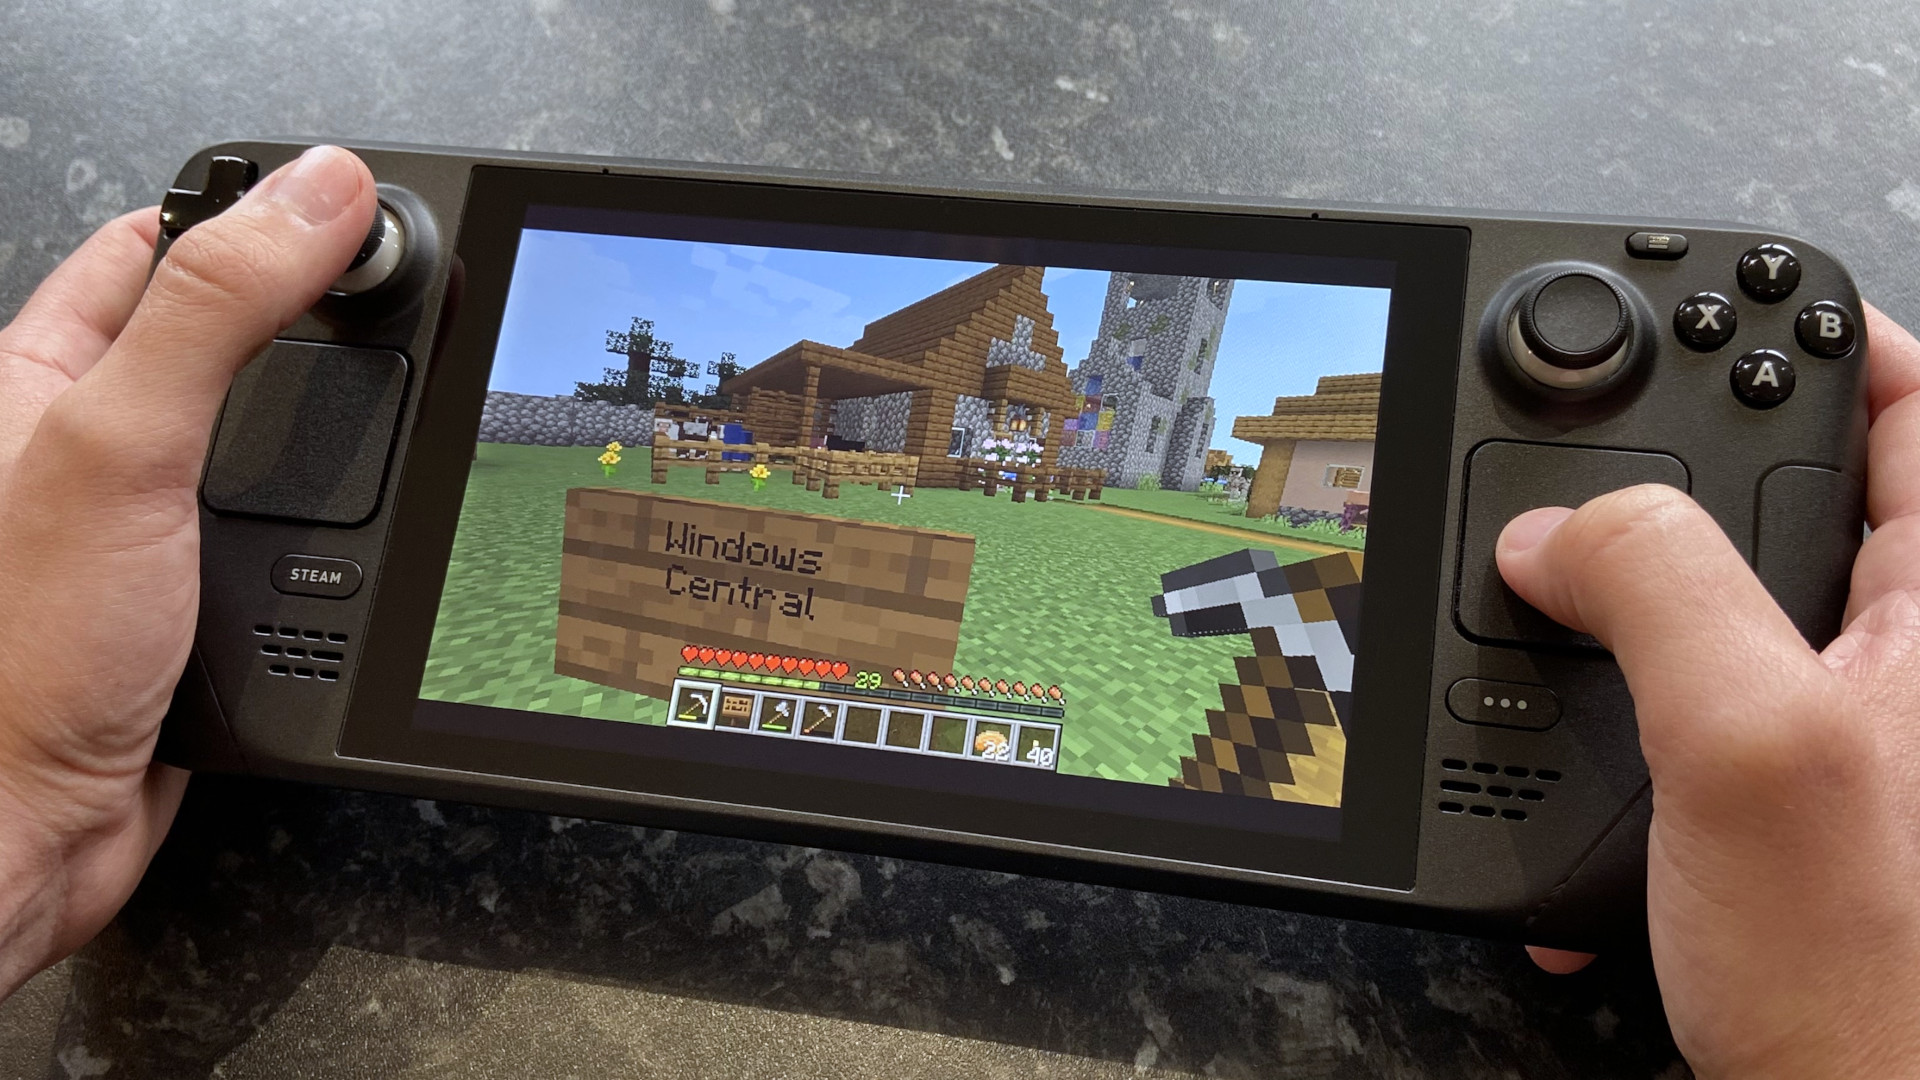
It's super easy to get Minecraft Java running on Steam Deck.
All the latest news, reviews, and guides for Windows and Xbox diehards.
You are now subscribed
Your newsletter sign-up was successful
Minecraft is one of the most popular video games of all time, and Microsoft acquired the brand in 2014. Since then, the game has spawned multiple ports, including the Bedrock Edition for Xbox consoles. However, the original Java Edition remains a favorite, partly thanks to its open nature towards the modding community and the rise of self-hosted servers.
It never made its way to the official Steam store, but that doesn't mean you can't play Minecraft on your Steam Deck. It's super simple and doesn't take long to set up the official launcher, but you'll be logged out of the game every time you close it. Boo. Not to worry; I've compiled this step-by-step guide on playing Minecraft with the community-led Prism Launcher, with helpful images and straightforward instructions.
How to install Minecraft with Prism Launcher
- Hit the left-side STEAM button to open the quick menu.
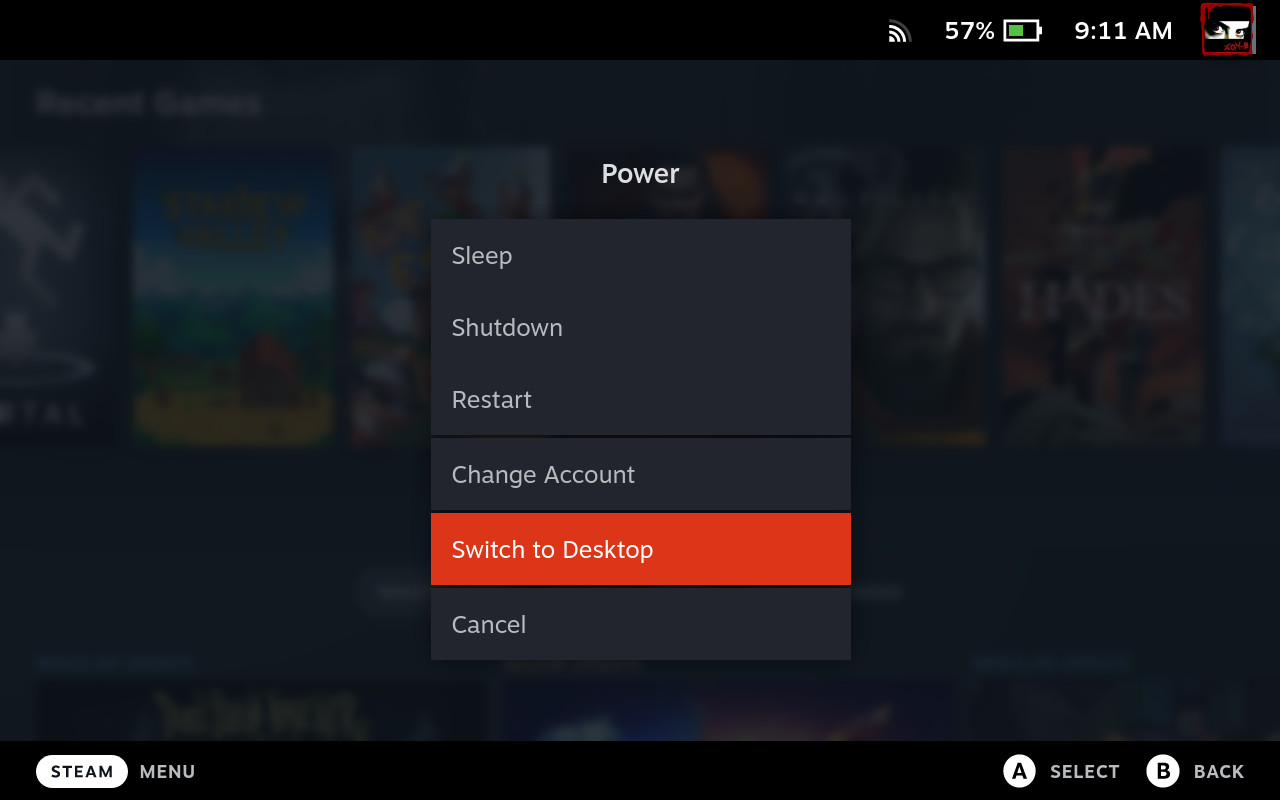
- Navigate down the list to highlight and select Power.
- On the power menu, navigate to and select Switch to Desktop.
Alternatively, you can briefly hold down the power button to access the power menu a little faster. A Switching to Desktop ... notification will appear whichever method you choose. After a short wait, the Steam Deck will boot into its Linux desktop environment, just like you would expect on any regular PC.
- Locate and open the Discover app, which is usually pinned to your taskbar with an icon resembling a blue shopping bag. Otherwise, you can find it in the System tab of the applications menu.
- Using the search function in the top-left of Discover, look for Prism Launcher.
- Find Prism Launcher in the list of results and hit Install.
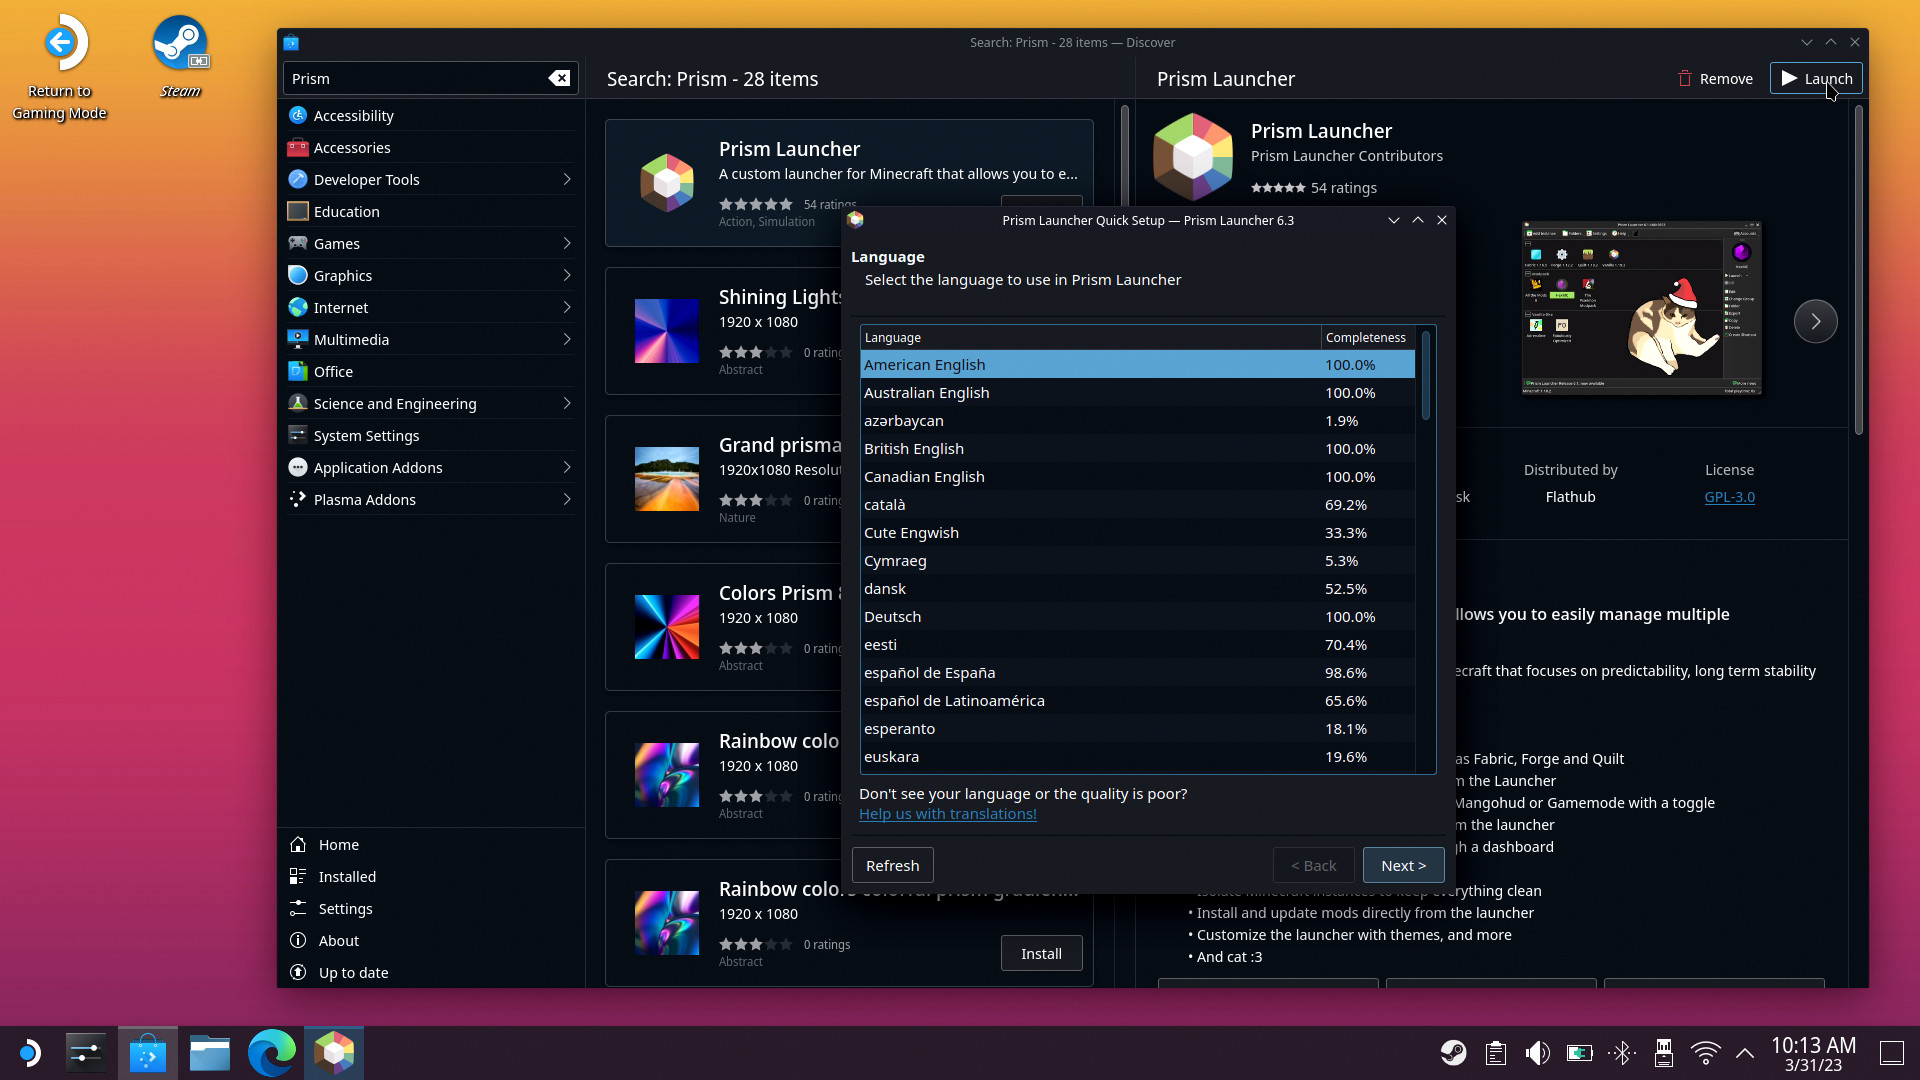
- From the Prism Launcher page, click Launch in the top right of the Discover app or find it in your app drawer.
- Select the appropriate language for your location, and click Next.
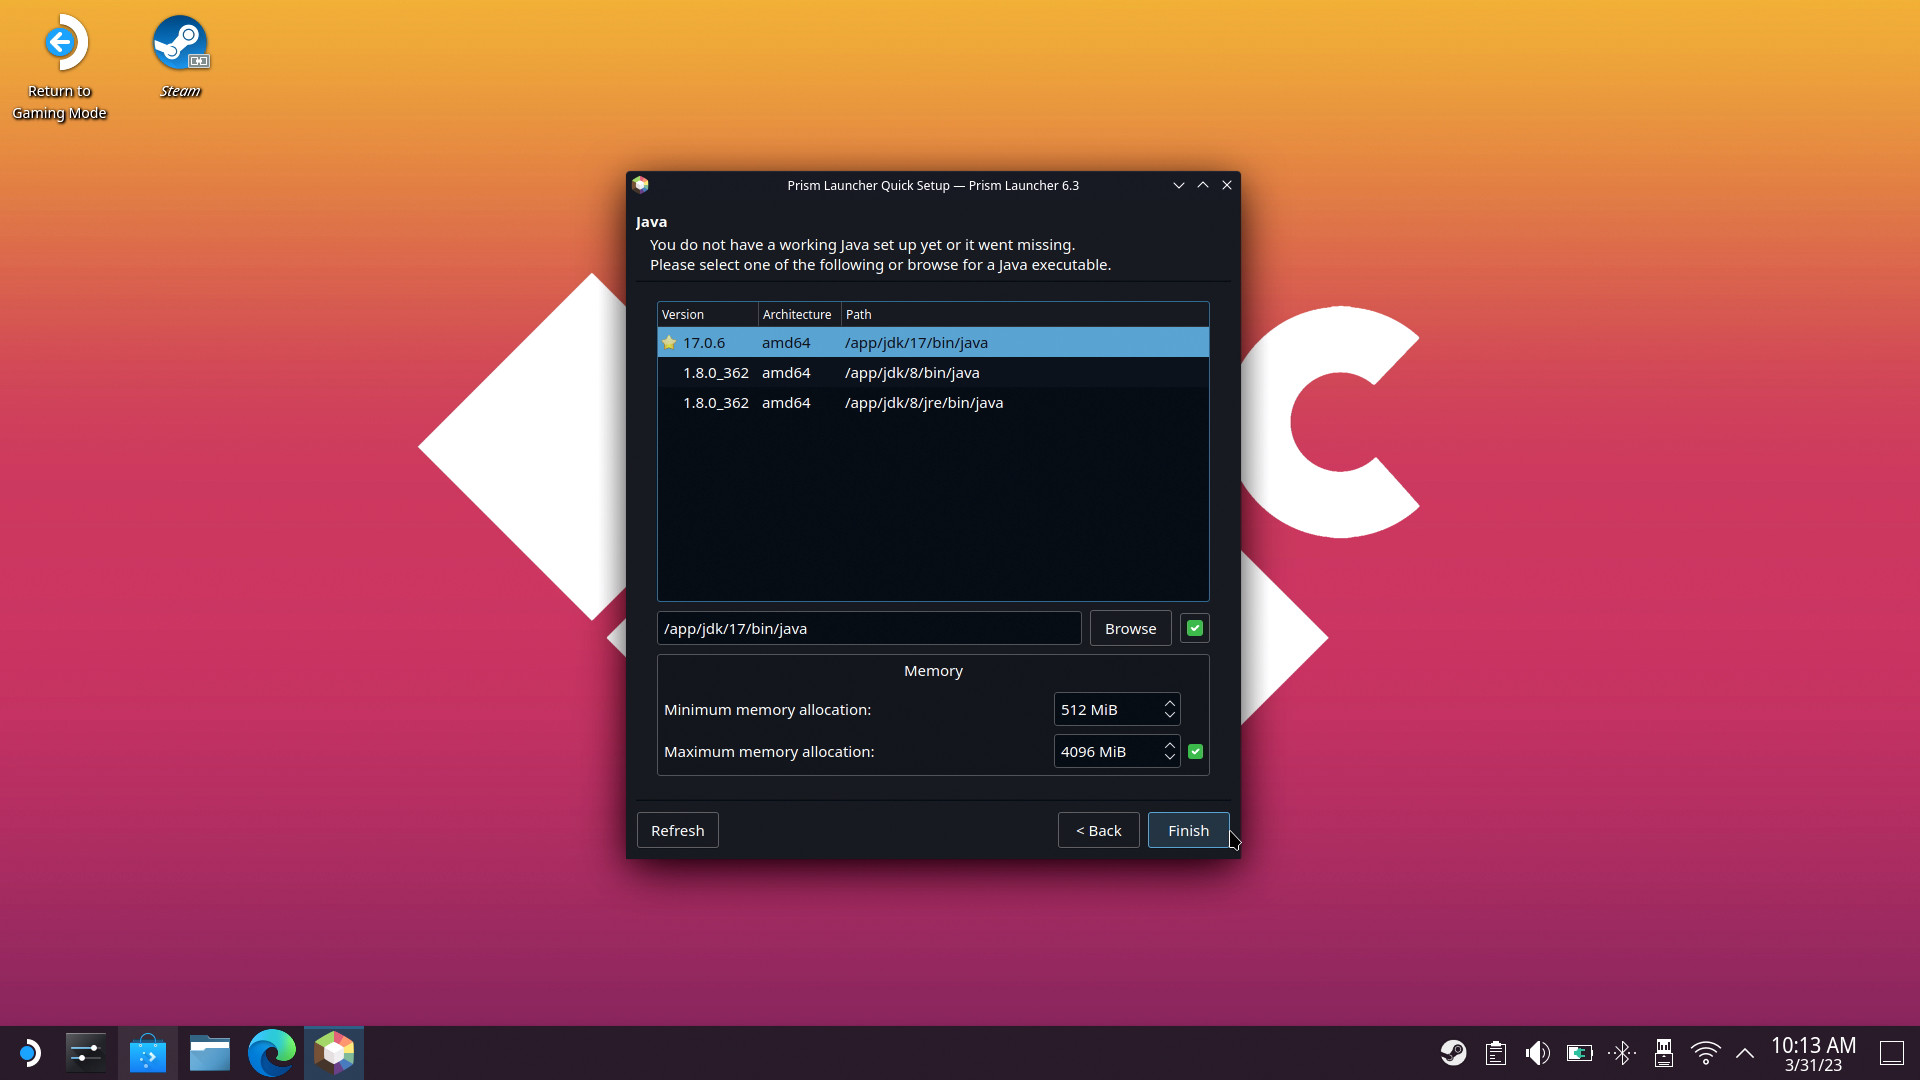
- If you don't have Java installed, select the recommended (⭐) version and click Finish.
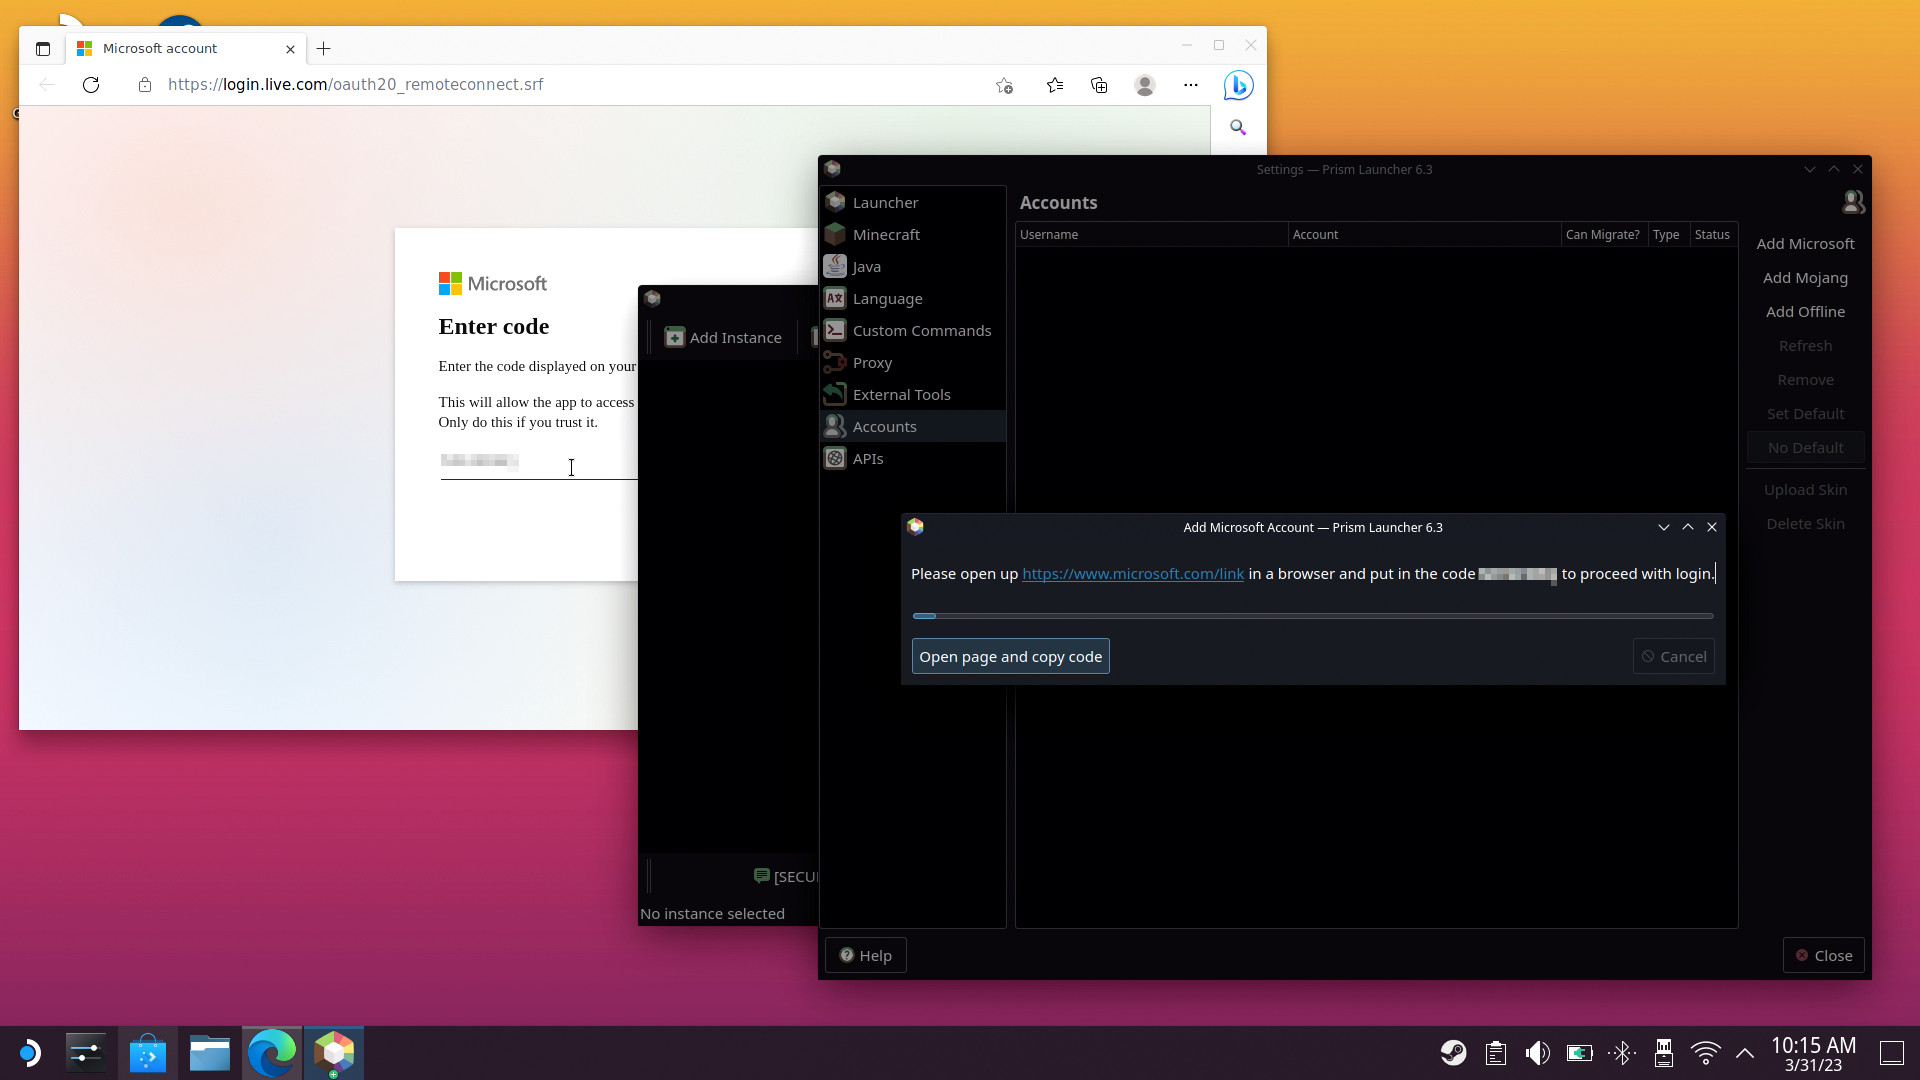
- Inside Prism Launcher, click Accounts in the top right and select Manage Accounts...
- Select Add Microsoft (for modern accounts) and click the login link to open your browser.
- Copy and paste the provided code into your browser and complete the login process.
Your Microsoft account should now appear in the list with the 'Ready' status. If it doesn't, follow the steps above again to ensure your credentials are correct and you have a valid Minecraft purchase tied to that account. Don't close the Prism Launcher settings page yet; one extra step will make launching the game on your Steam Deck even easier.
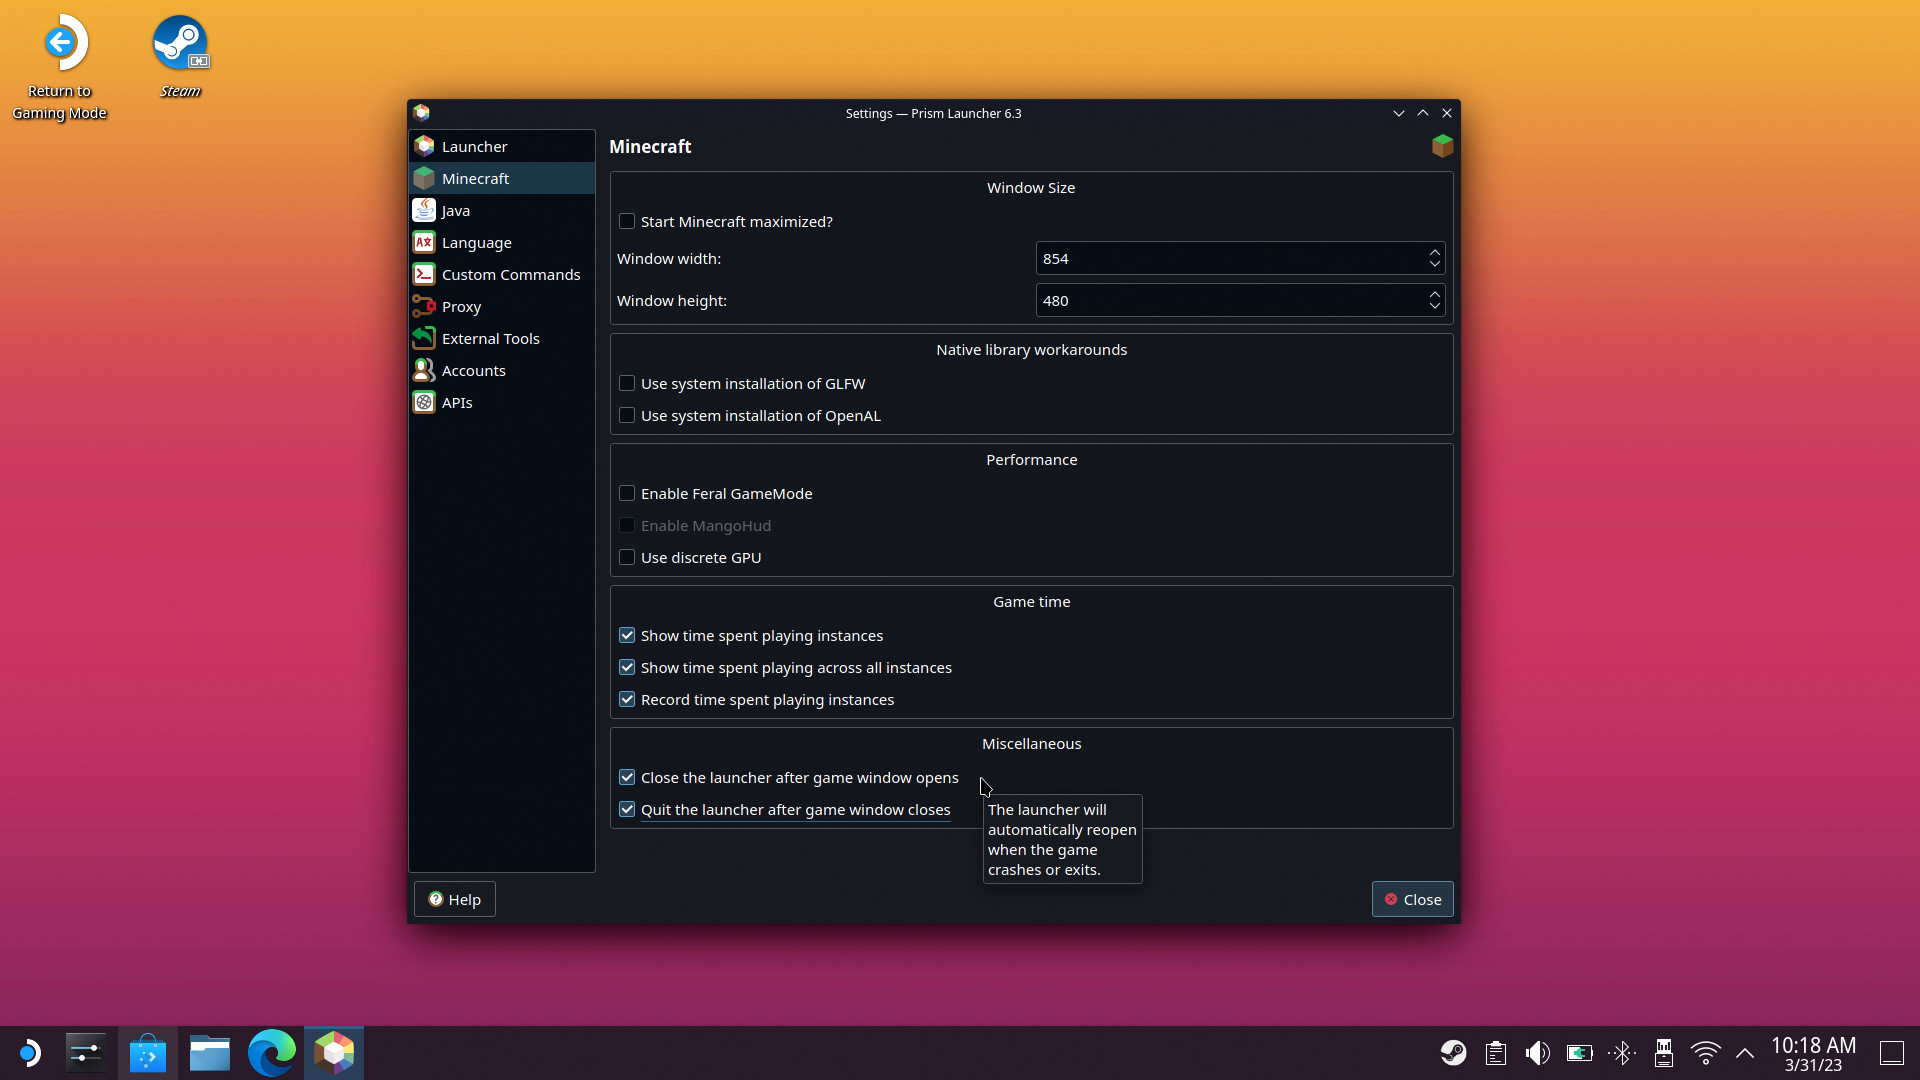
- Click Minecraft on the left-side settings panel to access game-specific tweaks.
- At the bottom, under Miscellaneous, check both boxes related to closing the launcher.
- Click Close in the bottom right to exit the Settings menu.
- In Prism Launcher, click Add Instance in the top left of the main window.
- Select your desired Minecraft version, or stick with the recommended (⭐.)
- With a version selected, click OK at the bottom of the New Instance window.
Your chosen Minecraft version should now appear in the Prism Launcher, ready to play. If you'd like to test if the game works, click Launch on the right side of the main window with an instance selected. This will launch the game inside Desktop Mode, usually needing a mouse and keyboard.
Instead, let's add it to the Steam Deck games library to play it in Gaming Mode and use the console's buttons, touchpads, and analog sticks. Close any Minecraft and Prism Launcher windows and open the desktop Steam app instead.
How to add Minecraft as a non-Steam game
You technically could stop here, but switching to Desktop Mode every time you want to play Minecraft is less than ideal. Plus, if you want more straightforward access to Steam Deck's controller support, it only takes a few extra steps to add Minecraft to the SteamOS games library and unlock community-made controller profiles.
All the latest news, reviews, and guides for Windows and Xbox diehards.
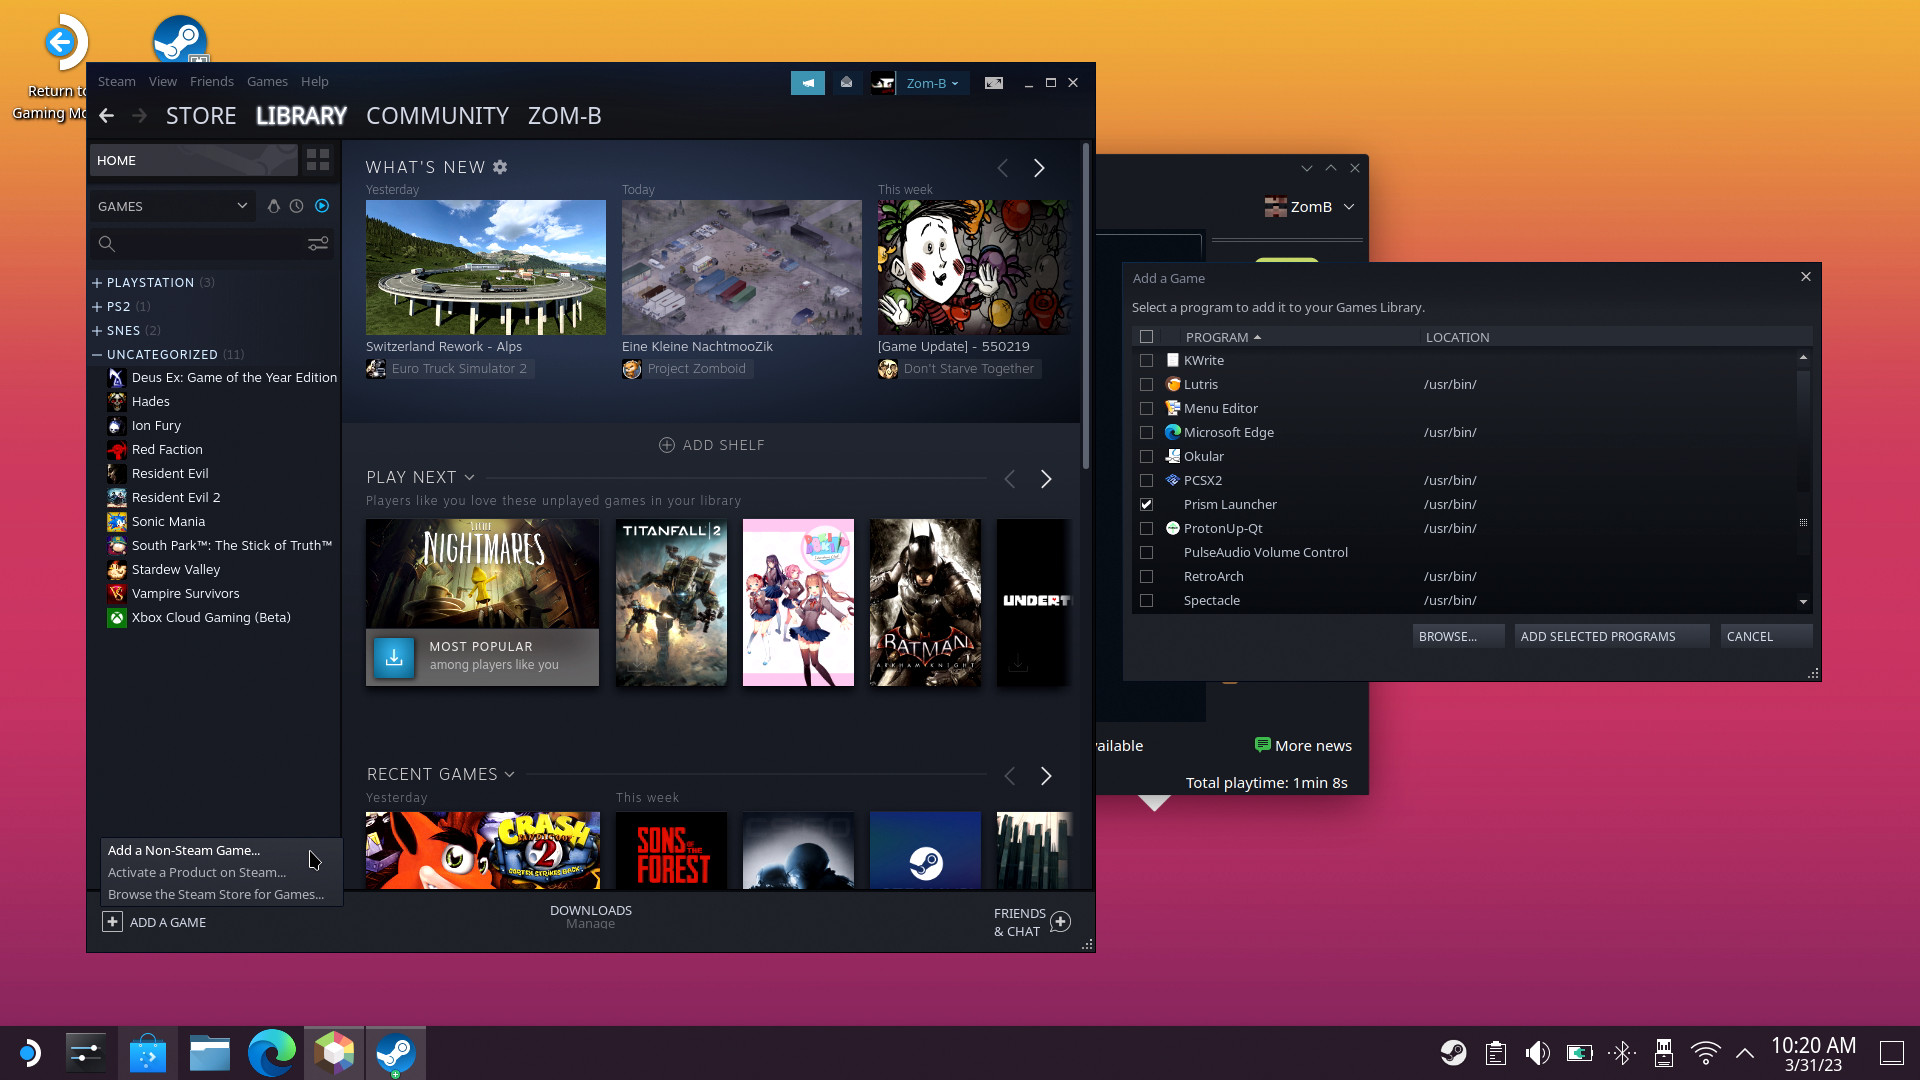
- From the desktop Steam app, click Add a Game in the bottom left.
- Select Add a Non-Steam Game... from the drop-down menu.
- In the Add a Game window, find and select Prism Launcher.
- Click Add Selected Programs.
To make it easier to launch directly into Minecraft, instead of first opening the Prism Launcher, we can choose to add an argument to the launch options. This tiny bit of code allows us to boot straight into our preferred game version, which is helpful if you don't use multiple instances.
In this guide, we're playing Java version 1.19.4, but your instance might differ, so use the appropriate number.
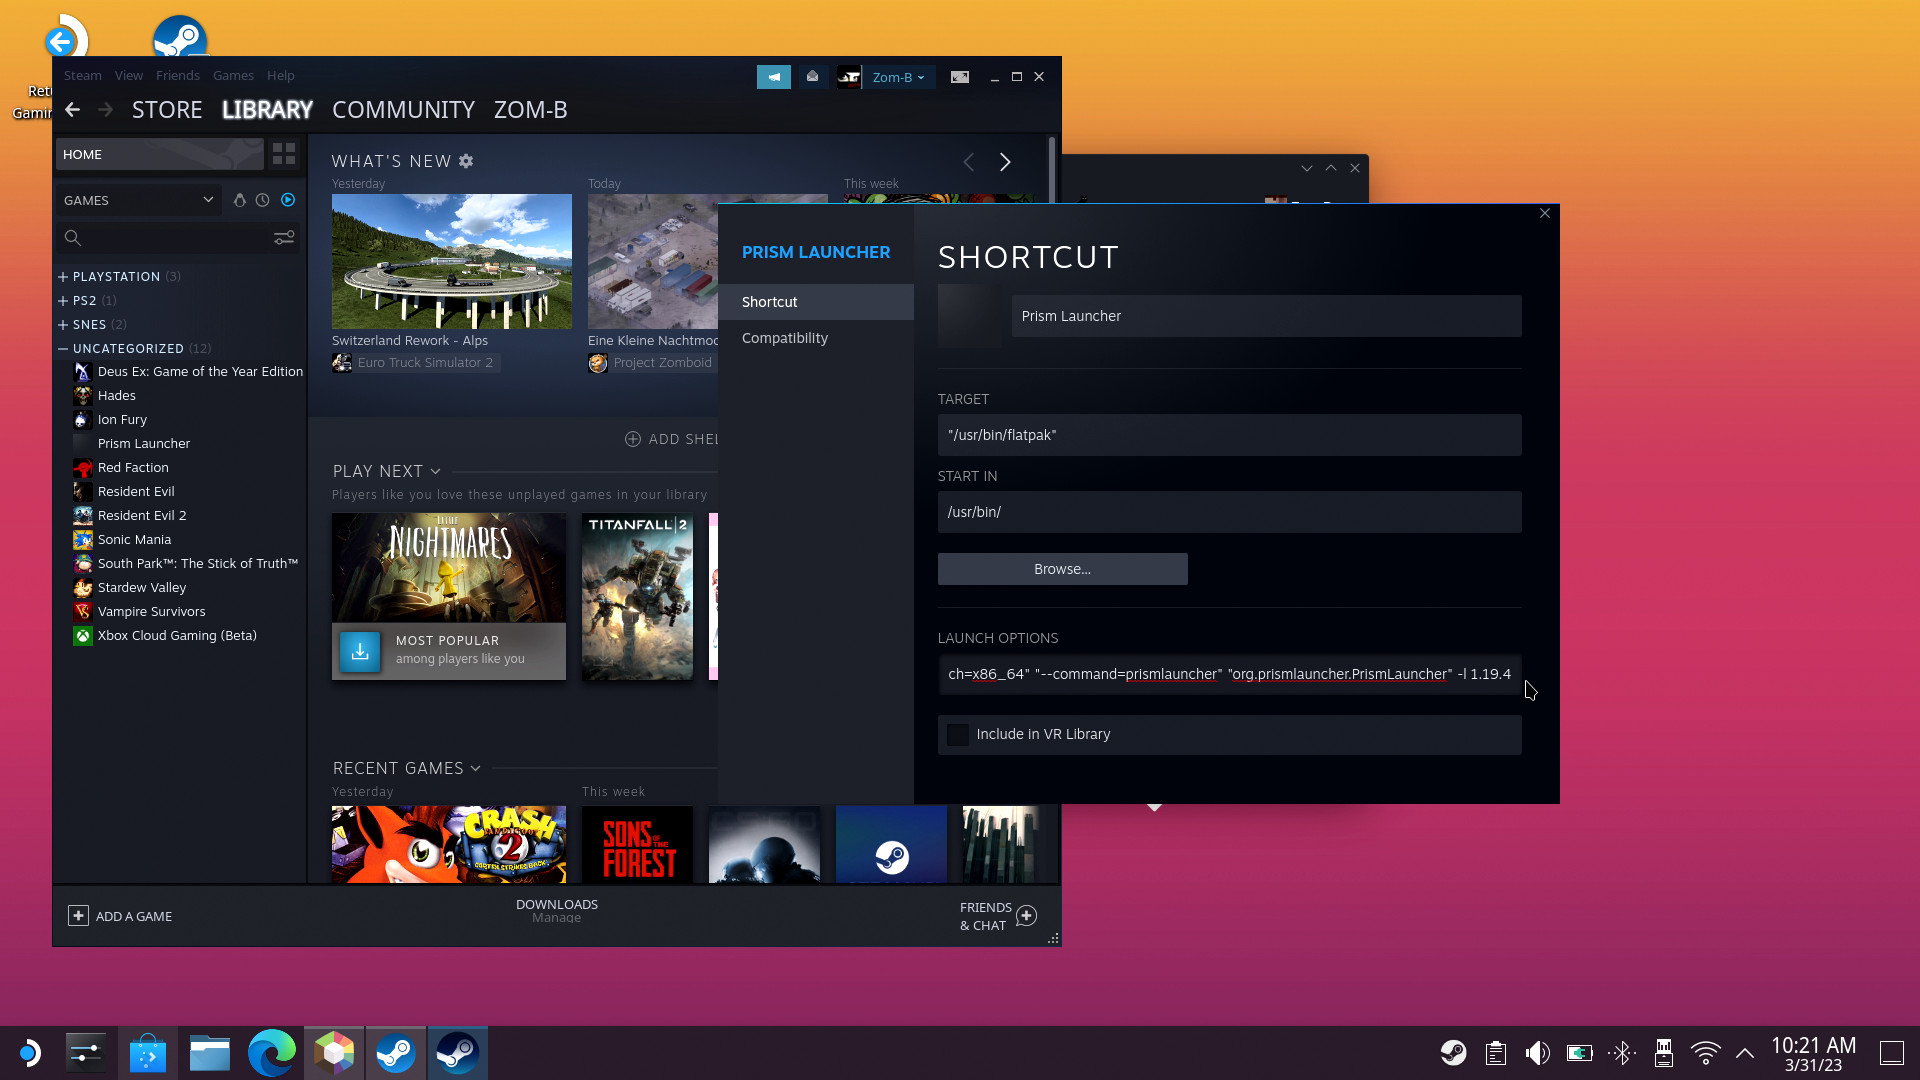
- Right-click on Prism Launcher in your library and left-click on Properties.
- In the Launch Options box, scroll to the far end of the text and add this code:
-l 1.19.4If you did it correctly, it should look something like this:
"run" "--branch=stable" "--arch=x86_64" "--command=prismlauncher" "org.prismlauncher.PrismLauncher" -l 1.19.4Again, if your Minecraft version number differed from the guide when you selected Add Instance earlier, it must also be manually changed in the Launch Options. If you've made other customizations to your Steam Deck operating system, your complete launch option command might look slightly different, but the -l (lowercase L) and version number are essential.
Back in the SteamOS Deck UI, you can find Prism Launcher in the non-Steam game category and use it to play Minecraft from your account as usual. The downside to using Prism is you won't have any information on compatibility, such as the list of Steam Deck verified games, so be prepared to troubleshoot any problems yourself. It's undoubtedly the easiest way to access Minecraft on Steam Deck until a possible official release on the Steam store.
How to set up Steam Deck controls for Minecraft
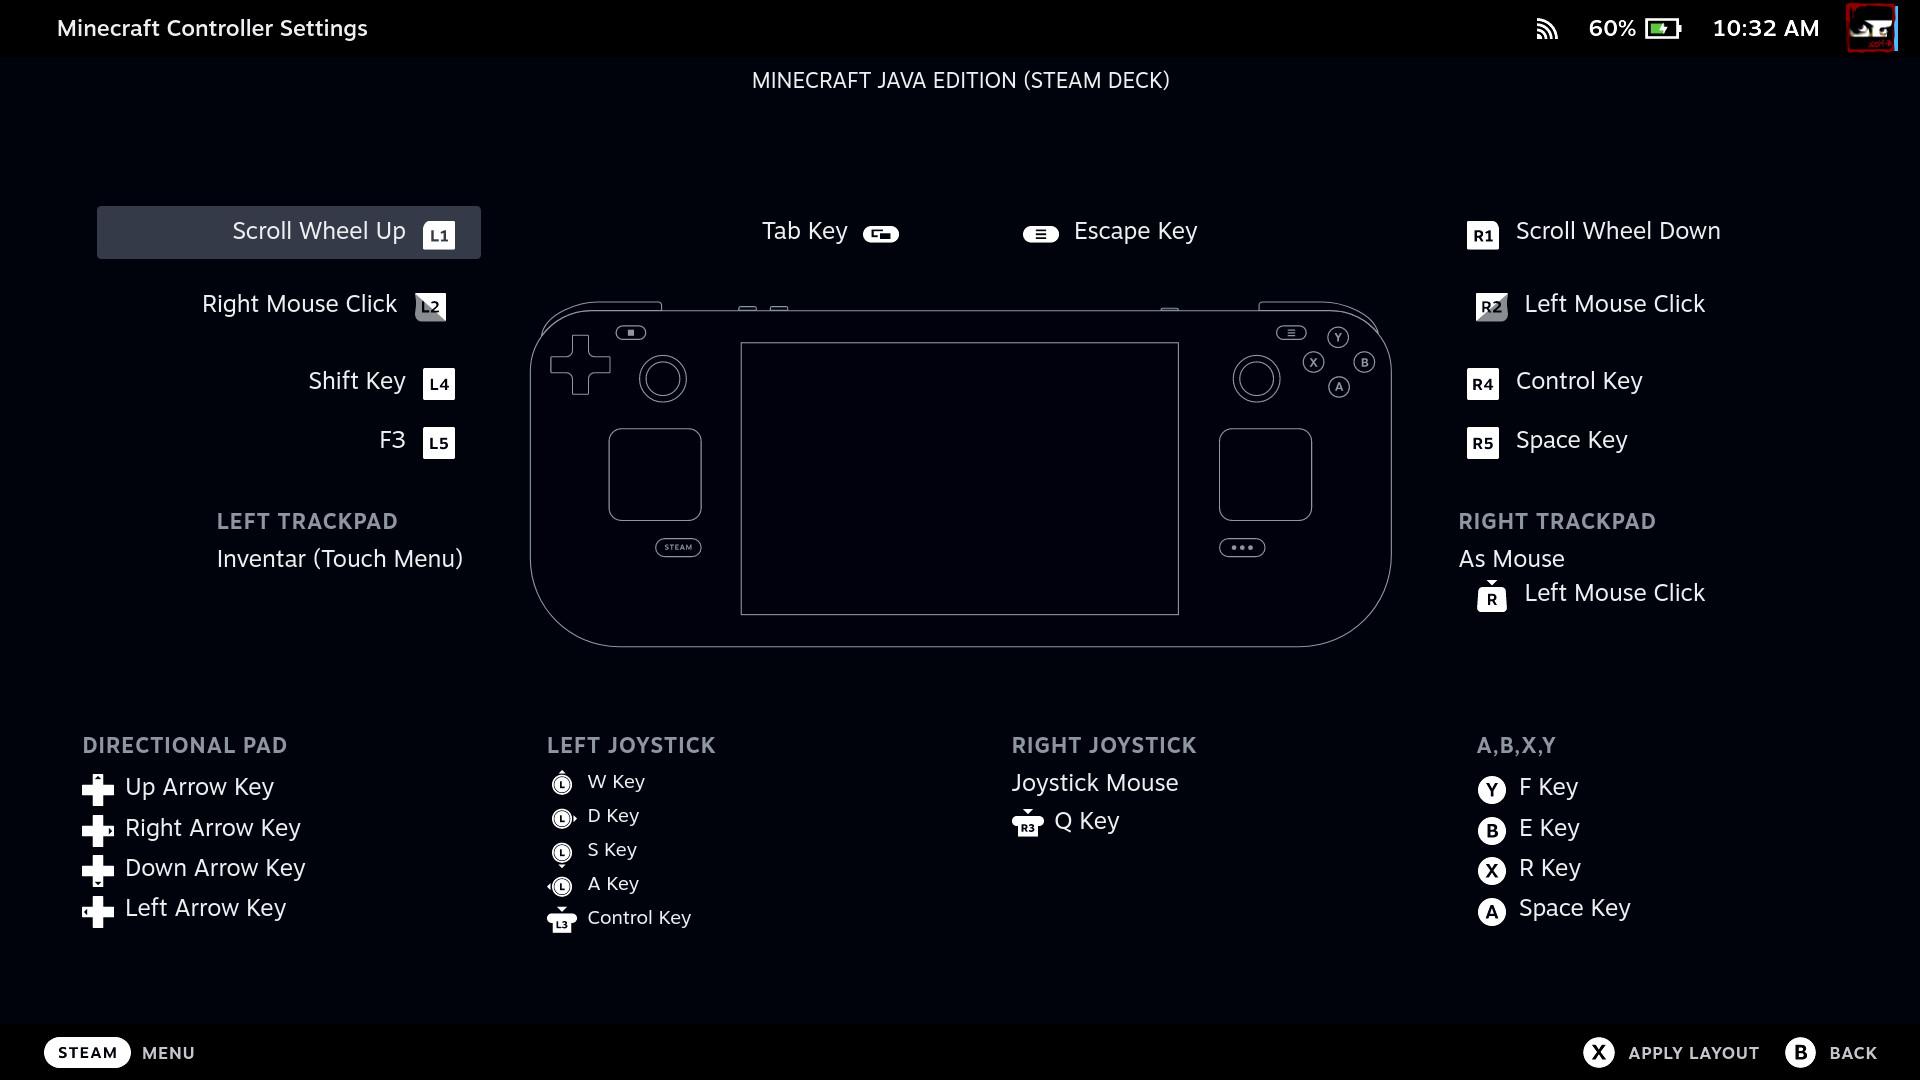
As with any game installed on Steam Deck, you can create a custom set of inputs for games initially designed for a mouse and keyboard. Alternatively, you can select a profile created by the community and get straight into the game. Here's how to do it.
- In the SteamOS UI, select Prism Launcher and navigate to Controller Settings on the right.
- Click Current Layout to see a list of generic Templates created by Valve.
- Press the right bumper (R1) to select Community Layouts.
- Select a community-made controller profile from the list and press A to select it.
- If you're happy with the controls, press X to Apply Layout.
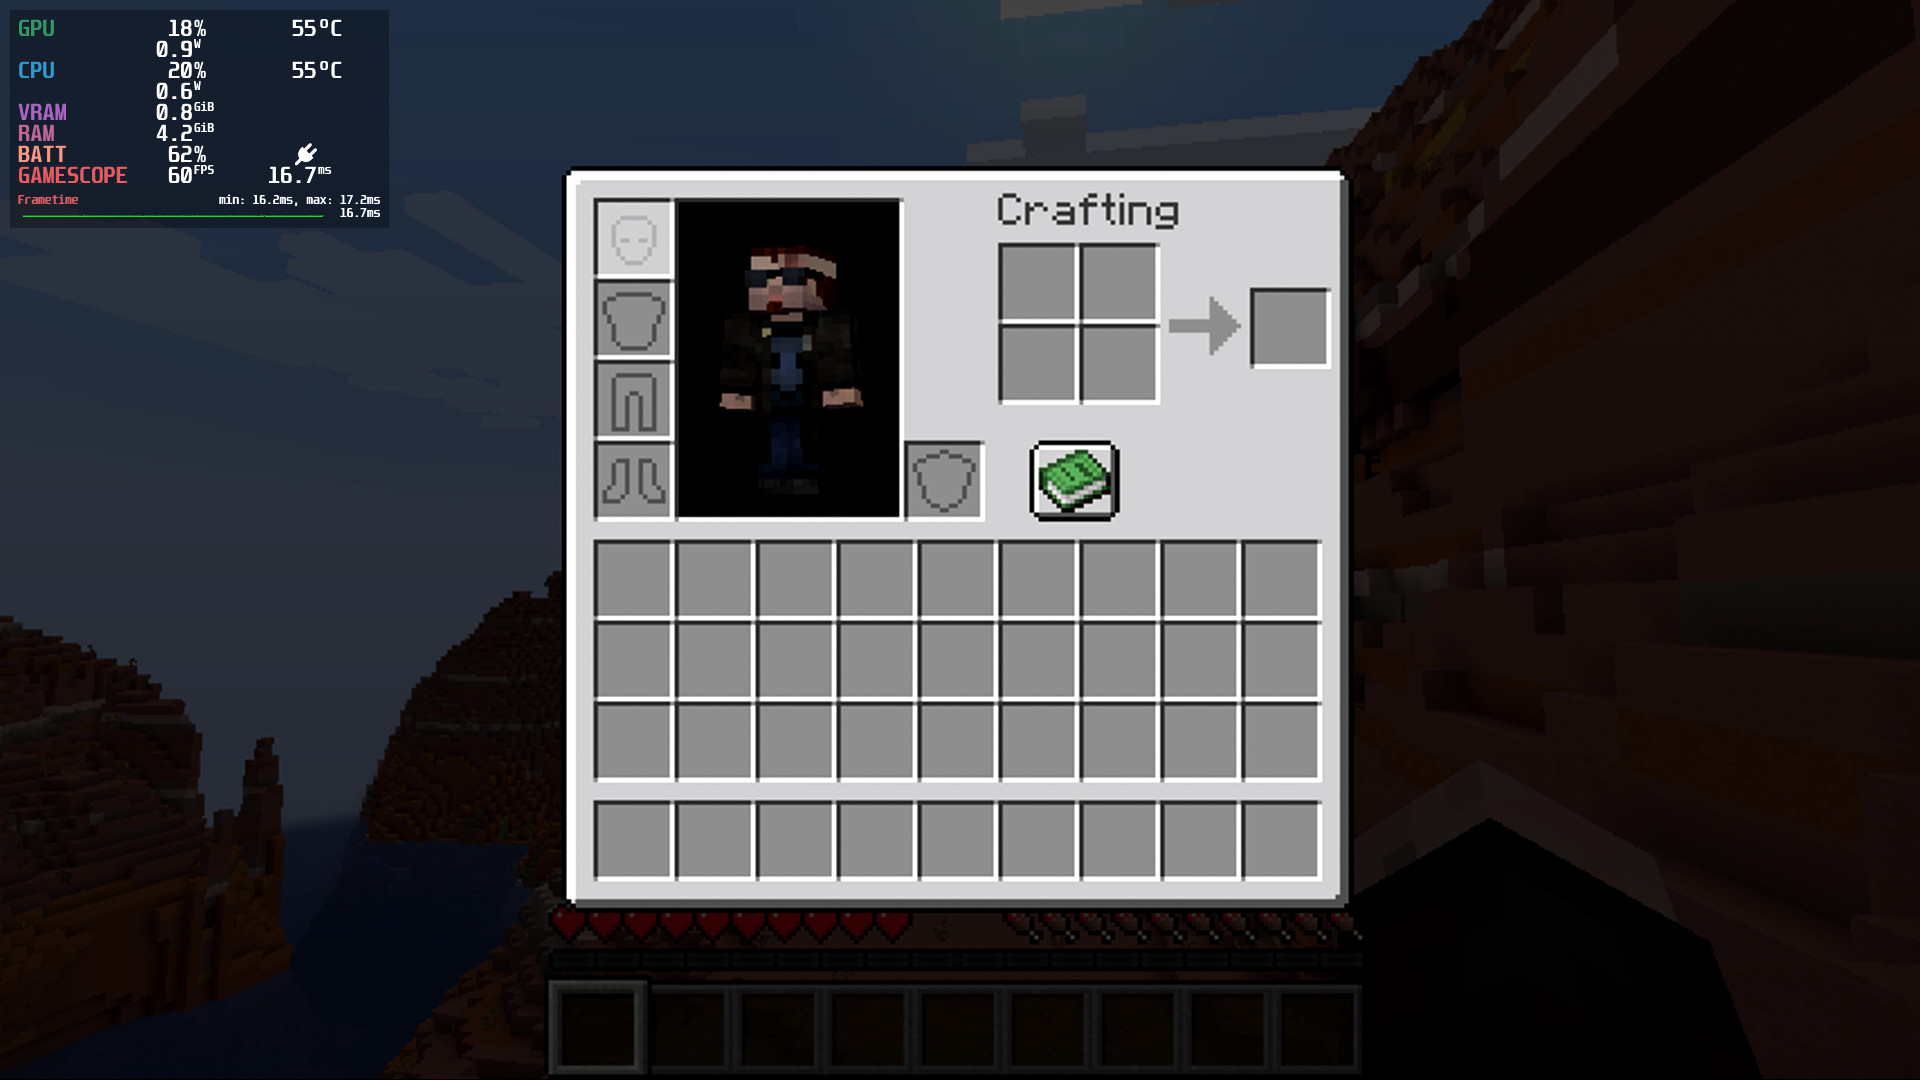
- Launch Minecraft to test out the inputs, using Edit Layout to make any changes.
How to set custom library artwork for Minecraft
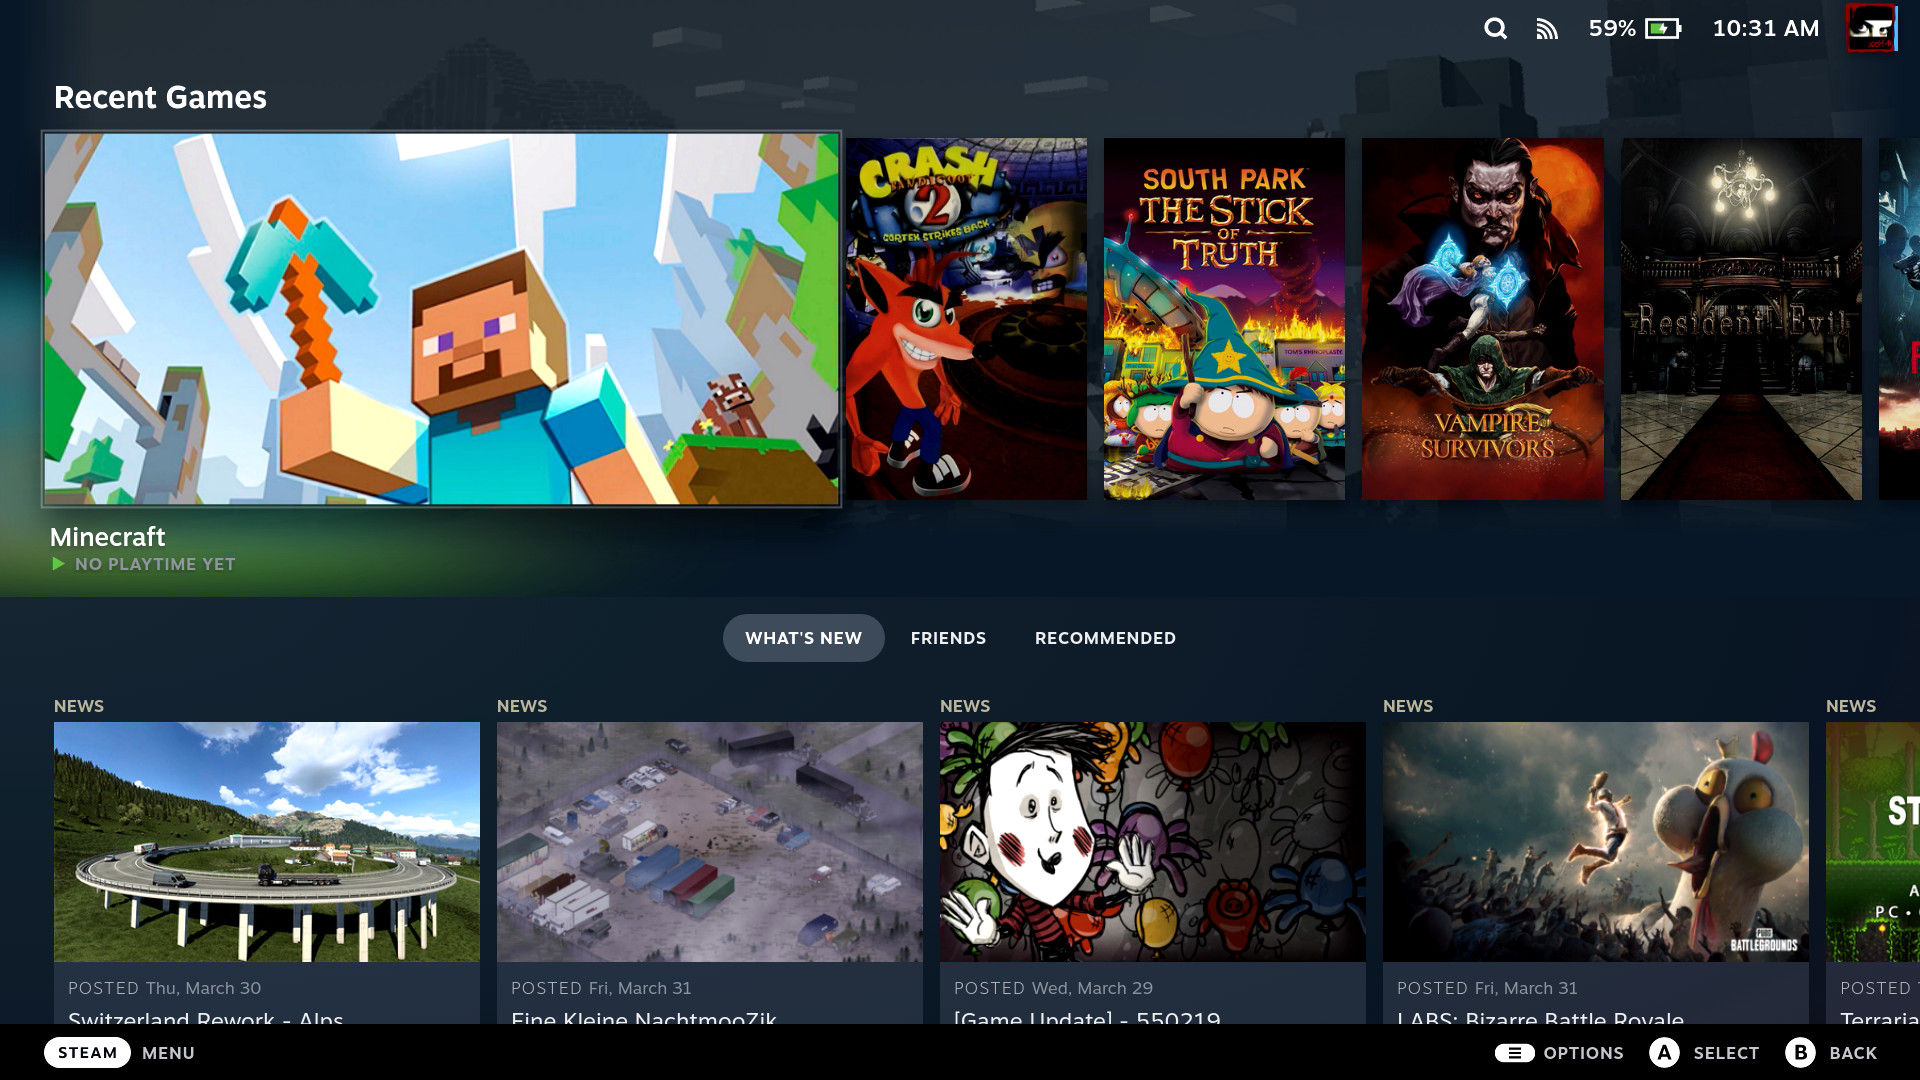
Using Prism Launcher to jump straight into Minecraft on your Steam Deck is great, but it looks a little ugly on the SteamOS UI without some artwork and a name change. Here's how to set custom library artwork and fix the text.
- Hit the left-side STEAM button to open the quick menu.
- Navigate down the list to highlight and select Power.
- On the power menu, navigate to and select Switch to Desktop.
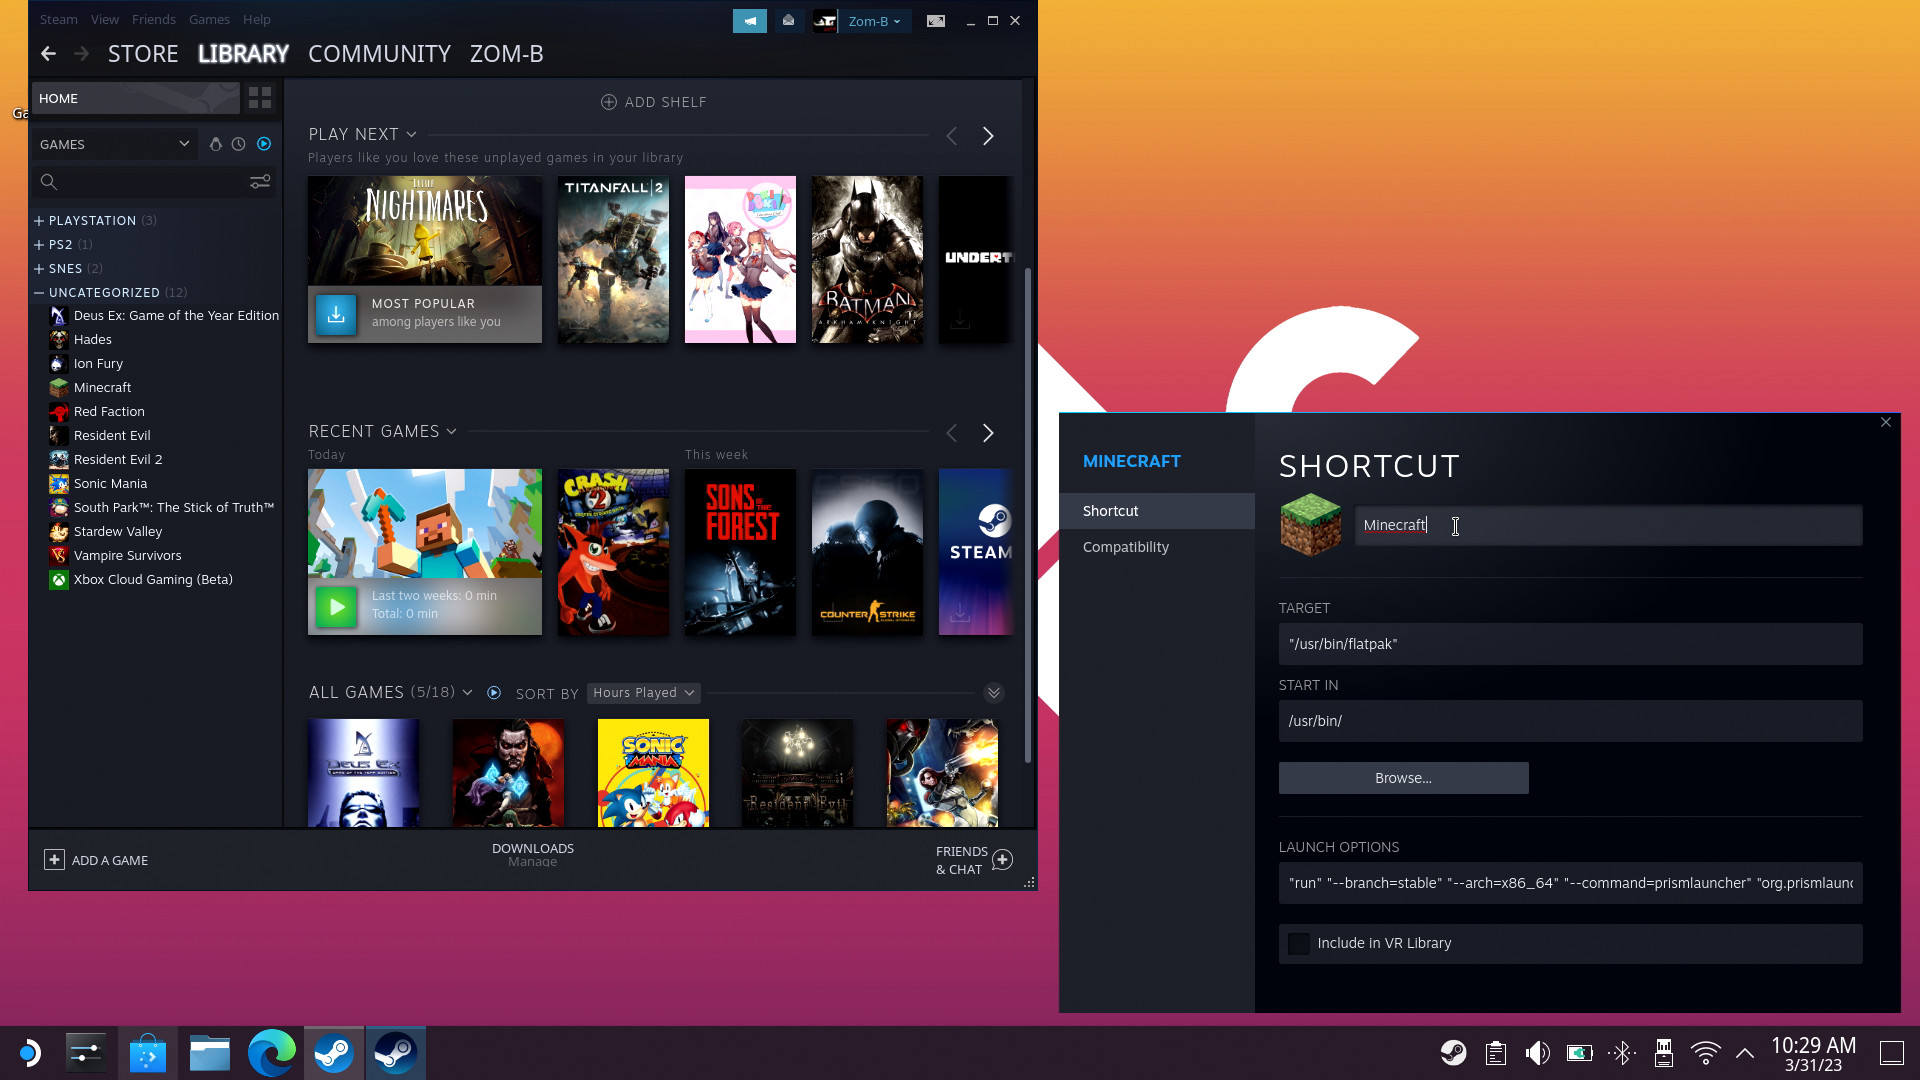
- Open the Steam desktop app and right-click Prism Launcher, then click Properties.
- In the top field, rename the shortcut from Prism Launcher to Minecraft.
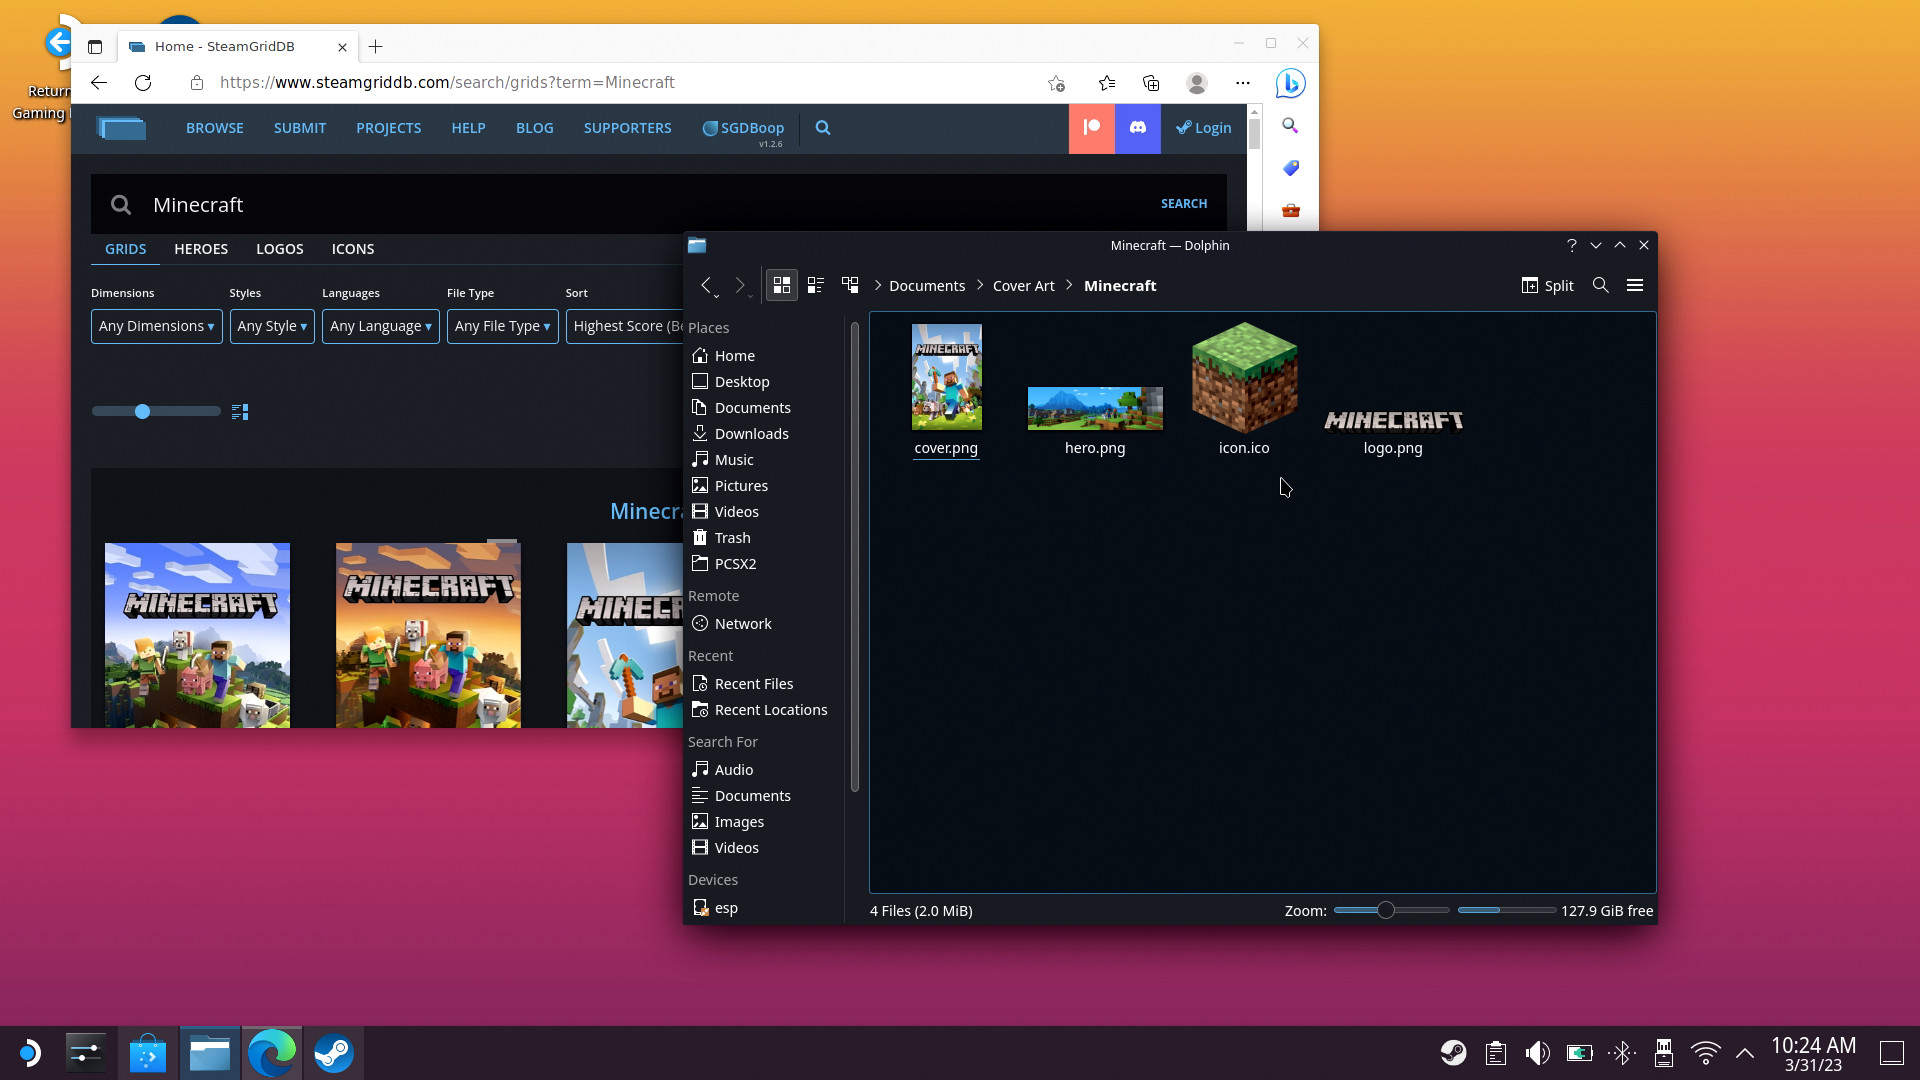
For artwork, you can provide your own or save time by visiting SteamGridDB and downloading community-provided images. Choose your favorite variants from the categories of grids, heroes, logos, and icons, saving the images to your Steam Deck. Remember where these files are; you'll need them shortly.
Navigate back to the Steam desktop app and select Minecraft in your library. Now you can right-click in the space where game artwork usually shows and select custom art from your directory. Icons are set via the game properties window, the same place you renamed the shortcut, by clicking the grey square in the top left.
If your icon doesn't appear in the folder, click the File type drop-down menu and select All Files (*.*) instead of *.tga, *.png. Many icons from SteamGribDB will be in the .ico format, so they'll be invisible without making this change.
For the portrait-oriented artwork, you'll need to launch a different game before Minecraft appears second on your list of recently played games. Once there, you can set the portrait artwork in Desktop Mode. Otherwise, only the landscape artwork will appear. If you notice Minecraft has lost its art when browsing your library, this missing piece is usually why.
Congratulations, you can now play Minecraft on your Steam Deck using the built-in controls! Part of the appeal of Valve's handheld is allowing users to tinker behind the scenes and install non-Steam games. If you're running out of space on your console, consider picking up one of the best SD cards for Steam Deck and expanding your storage for more Minecraft instances and worlds.
Minecraft: Java & Bedrock Edition for PC
Minecraft: Java & Bedrock Edition is one bundle, one launcher, two games for Windows. Switch between the two editions seamlessly and enjoy the best of both worlds.

Ben is a Senior Editor at Windows Central, covering everything related to technology hardware and software. He regularly goes hands-on with the latest Windows laptops, components inside custom gaming desktops, and any accessory compatible with PC and Xbox. His lifelong obsession with dismantling gadgets to see how they work led him to pursue a career in tech-centric journalism after a decade of experience in electronics retail and tech support.
