Full Xbox capture storage: How to delete and manage game clips
Dealing with full capture storage? Here's how you can quickly and easily deal with it.
All the latest news, reviews, and guides for Windows and Xbox diehards.
You are now subscribed
Your newsletter sign-up was successful
Ever been slapped with the message that your Xbox game capture storage is nearly full? Yes, we have too. If you're wondering how to deal with it, we've got you covered.
By default, Xbox uploads any screenshots or game clips you create using the console's screen capture features to the cloud. This cloud storage allocation is relatively generous, but can fill up quite quickly if you're capturing clips and screenshots in 4K resolution from all those juicy games on Xbox Game Pass.
There's a variety of ways you can manage your Xbox Game DVR clips and screenshots, from using external HDD devices, to backing up clips on OneDrive, or just deleting those captures that weren't as good as you originally perhaps thought they were. Here's a quick guide to all the ways you can manage storage for Xbox game clips on Xbox Series X, Xbox Series S, and Xbox One.
How to manage clips on your Xbox console
Managing clips on an Xbox console is relatively straightforward, but the option to do so isn't particularly easy to find first time at least. Here's a quick run-through of the steps to find the capture management area, and how to clean up and back up your existing Game DVR clips and screenshots.
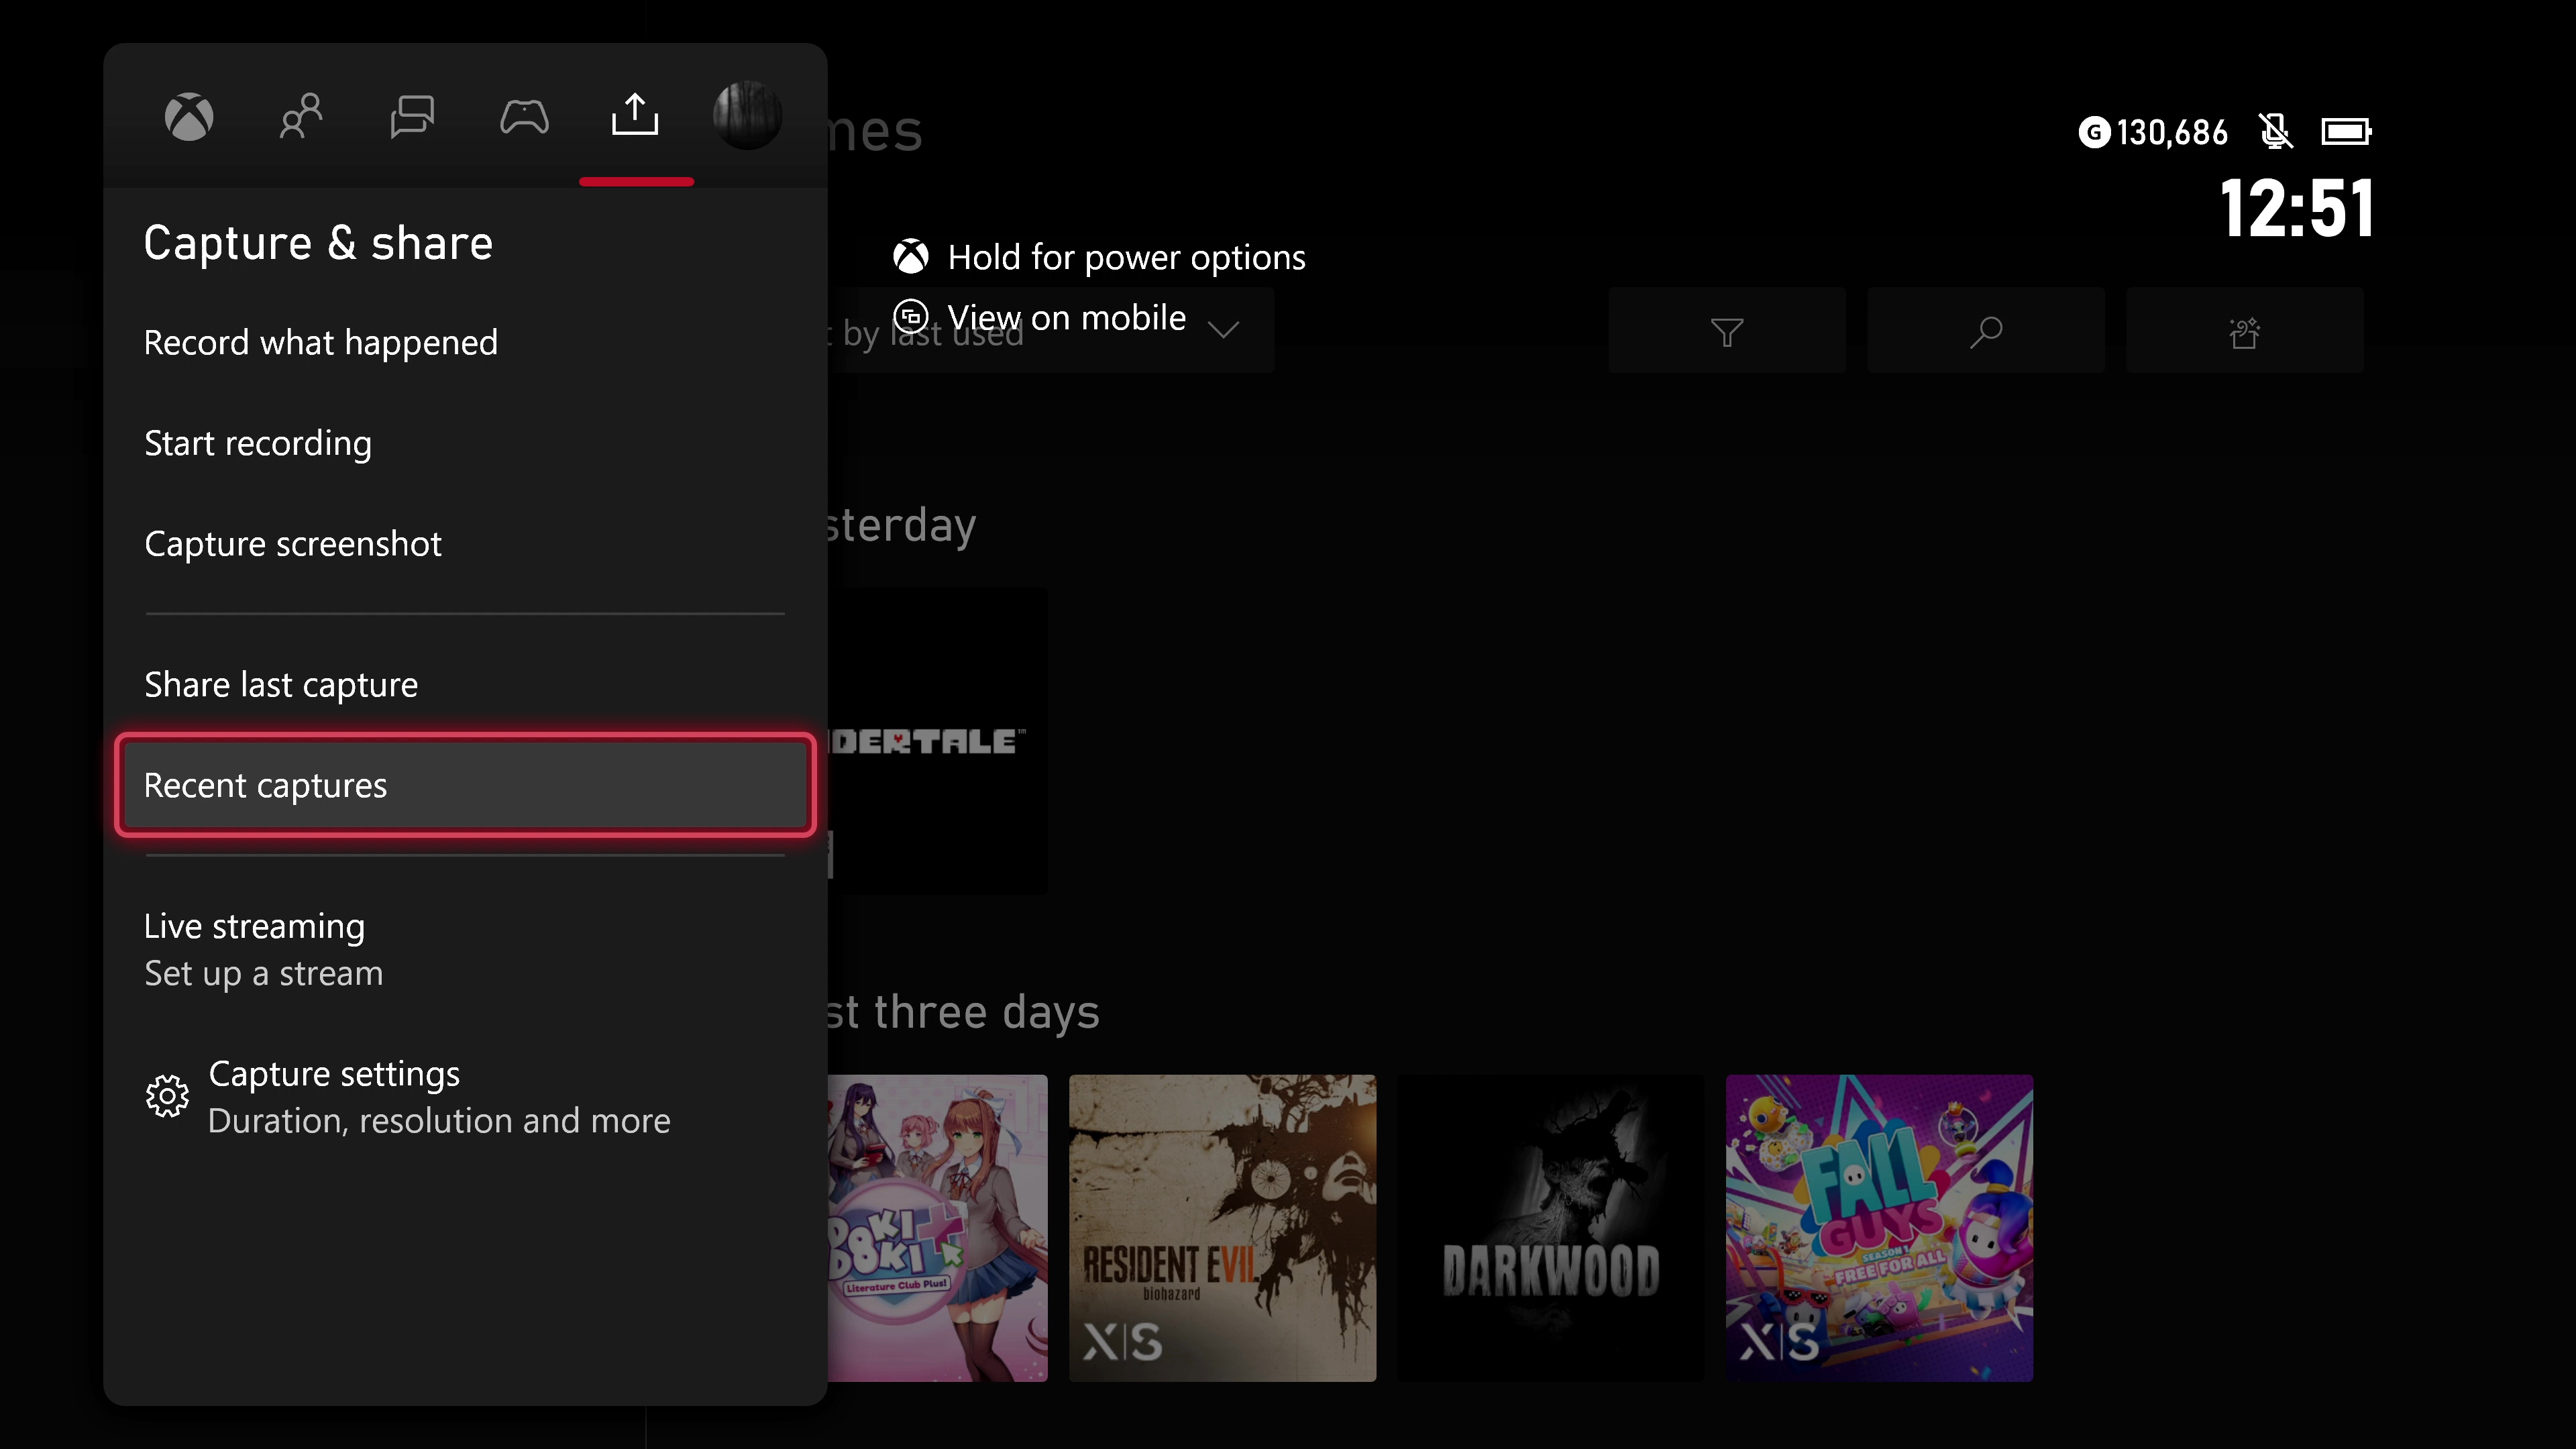
1. Open the Guide by pressing the Xbox button on your controller.
2. Navigate right to the Capture & share menu, as shown here.
3. Select Recent captures.
4. Navigate to the bottom of the list and select show all to open the captures menu.
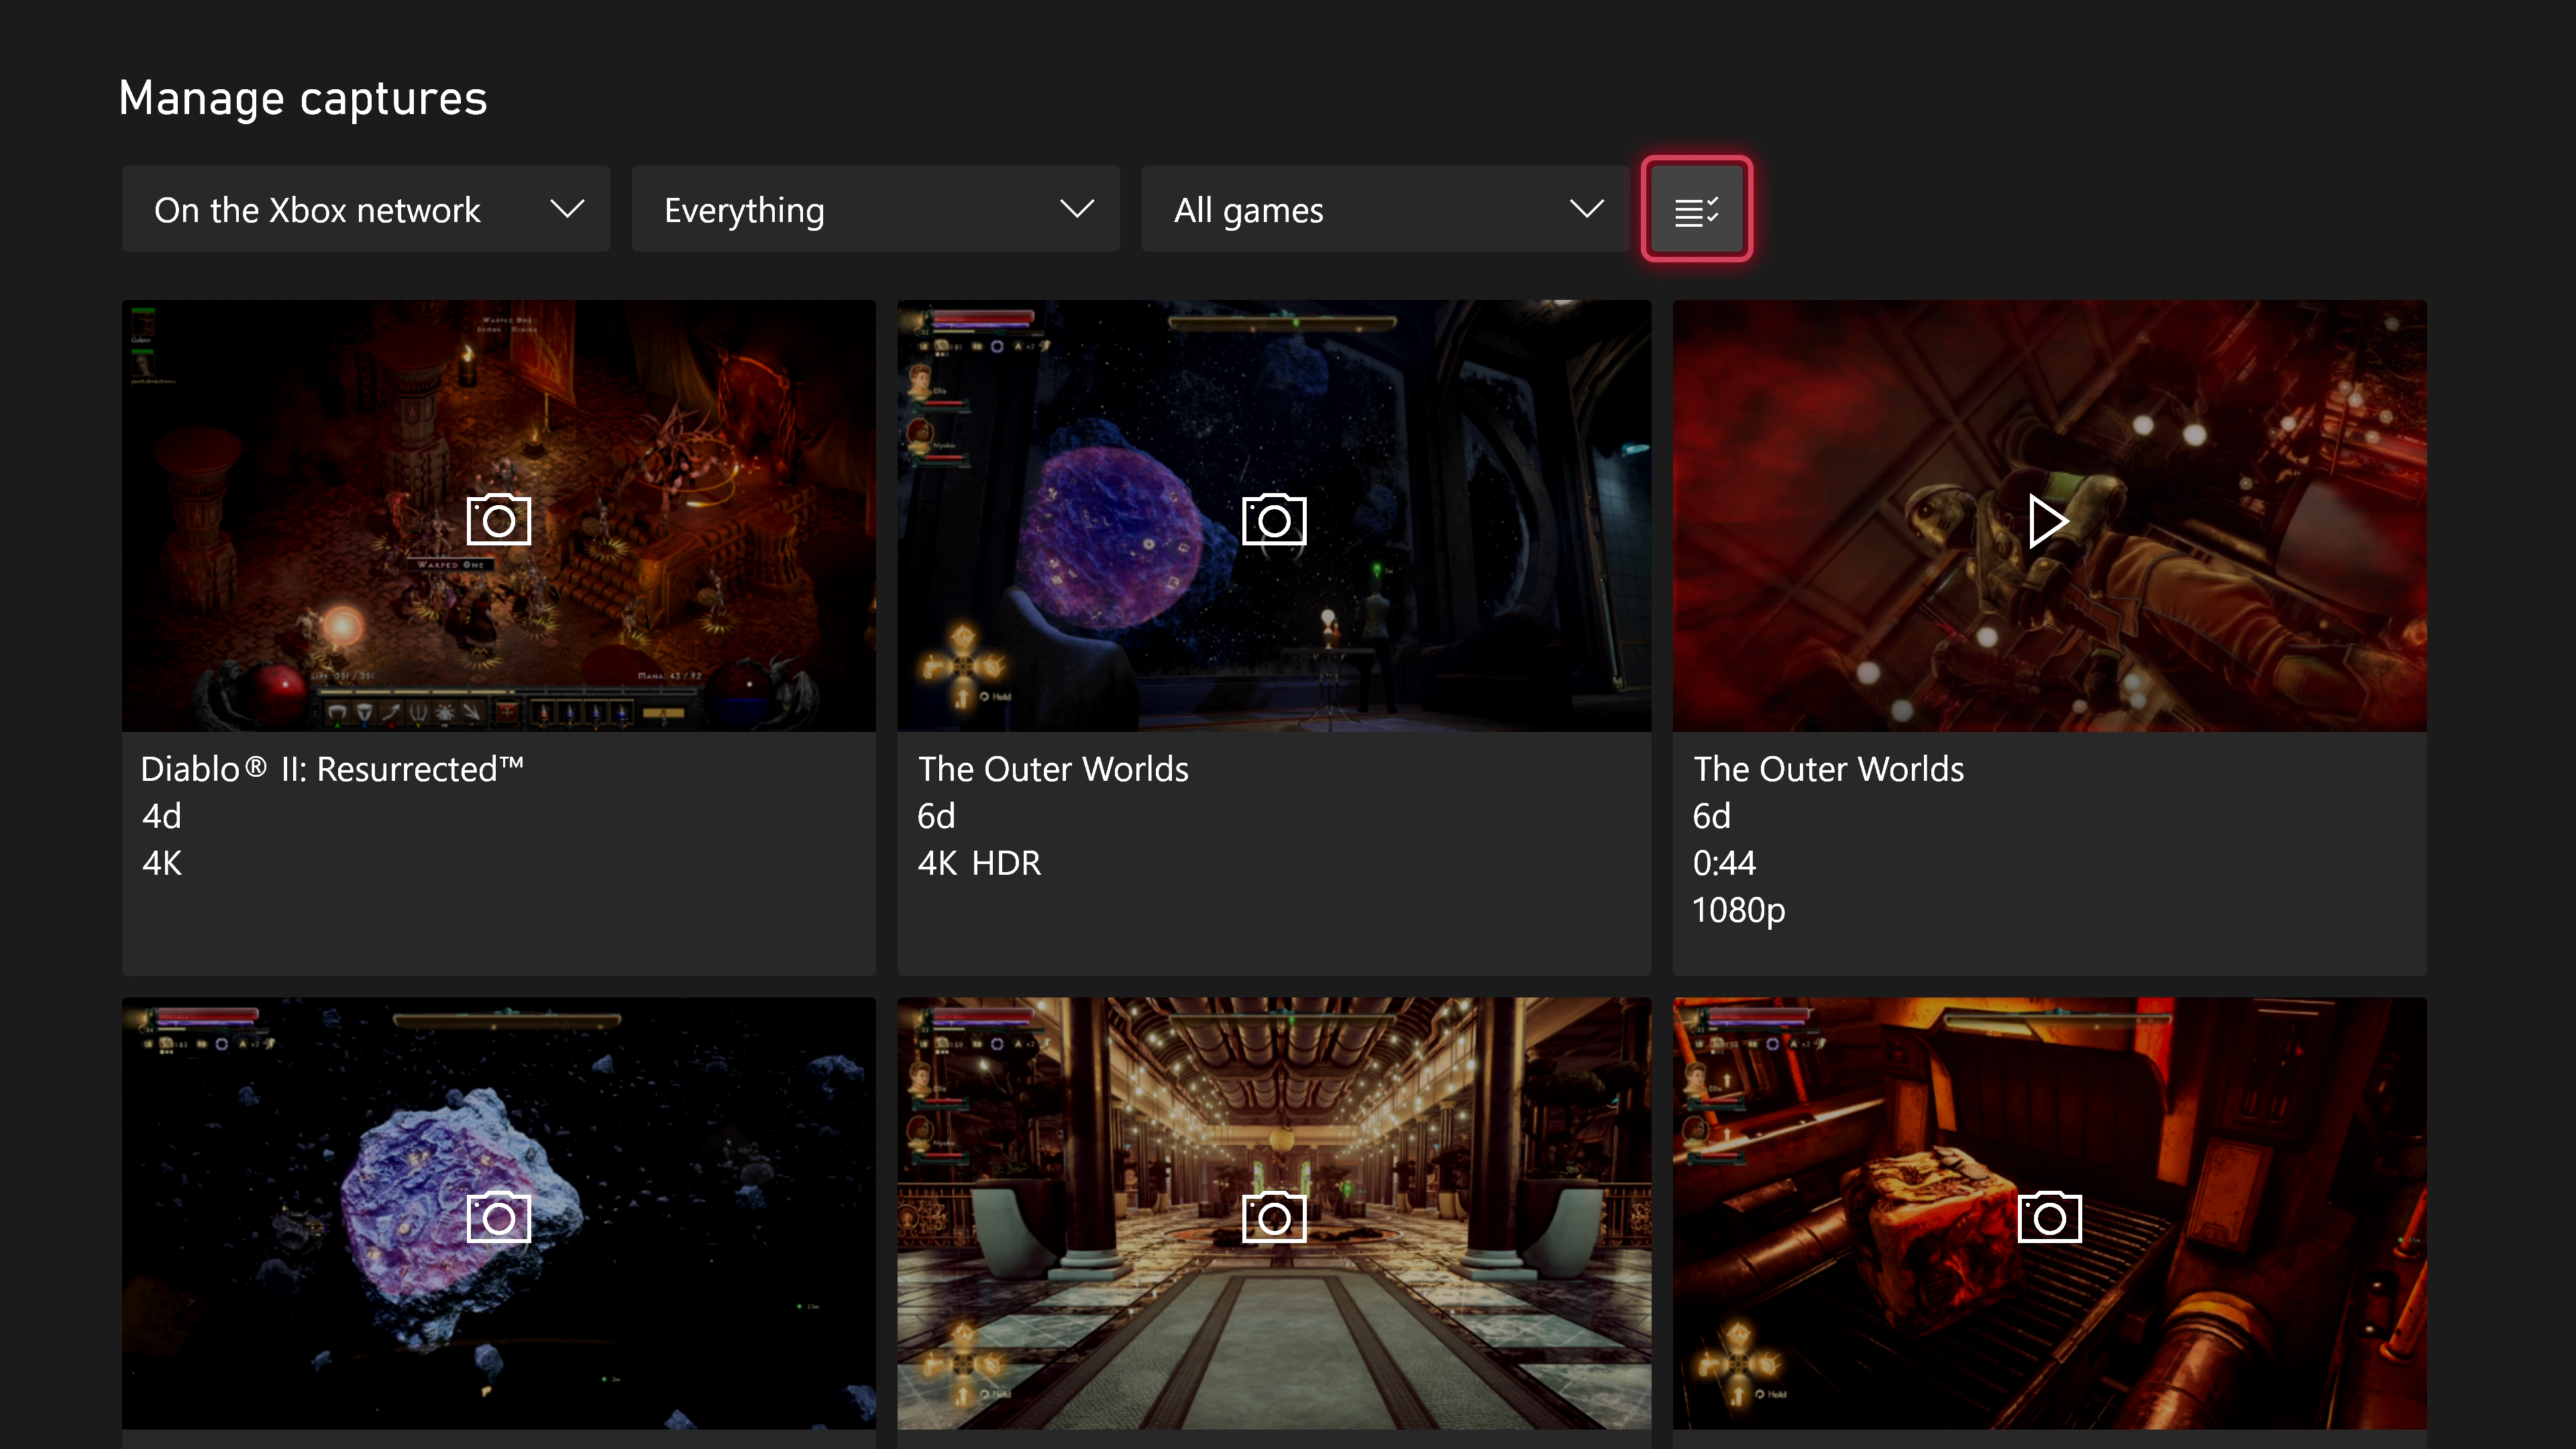
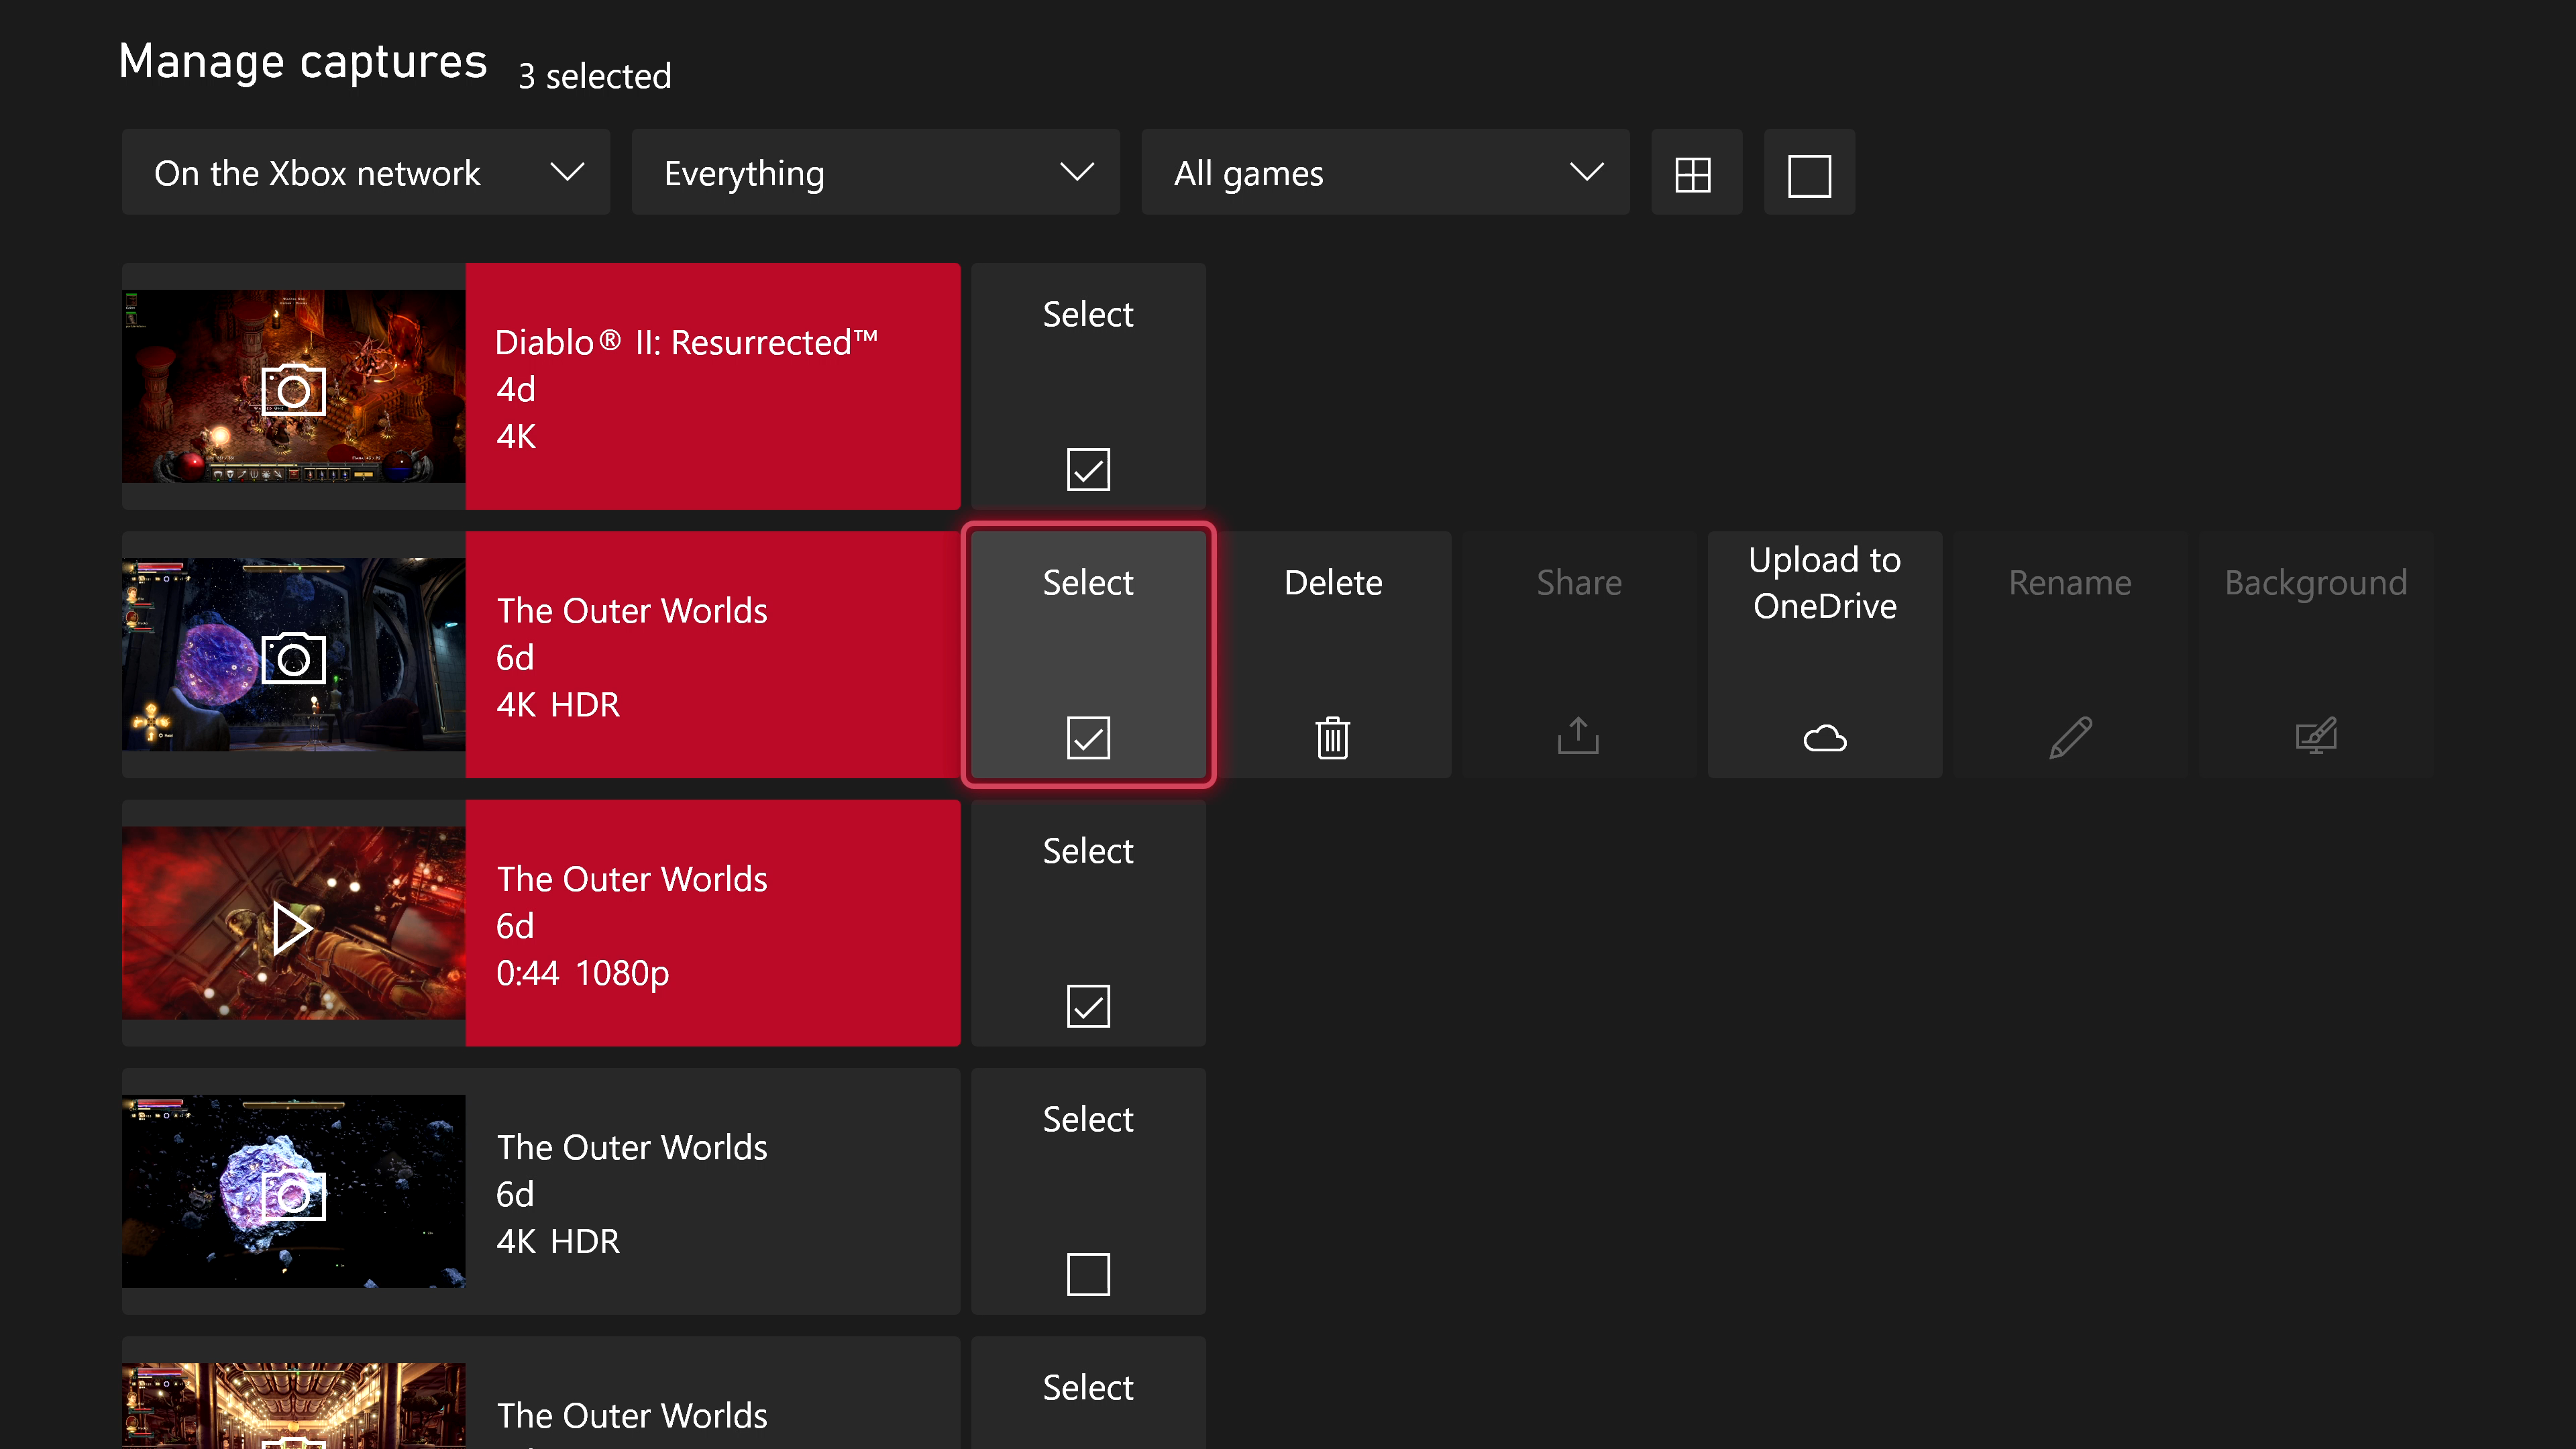
5. In the Manage Captures section, you can easily filter and view all of the captures you have available. By default, On the Xbox network is the selected filter; this shows captures that are uploaded to the Xbox cloud.
6. If you navigate to the top right, you can select list view. This lets you easily select multiple clips for management.
7. Put a tick in the select box to highlight clips you want to manage.
All the latest news, reviews, and guides for Windows and Xbox diehards.
8. Once you've selected the clips you want to manage, you can either move right to delete them, or you can Upload to OneDrive to back them up to your personal cloud storage.
Note: You can access OneDrive on the website OneDrive.com using your Xbox login (Microsoft Account). We also have a guide all about OneDrive cloud storage here.
How to manage Xbox clips on your phone
Another way to manage Xbox clips uploaded to the cloud storage area is via the Xbox app on Google Play and iOS. The Xbox app is available for free and once you've signed in using your Microsoft Account, you can manage your Friends List, view game content, use voice comms, and even stream your console to a remote device. It also makes managing clips in your cloud storage easy and straightforward.
1. Download the Xbox app from either Google Play or Apple's app store.
2. Sign in using the same Microsoft Account that you use on your Xbox.
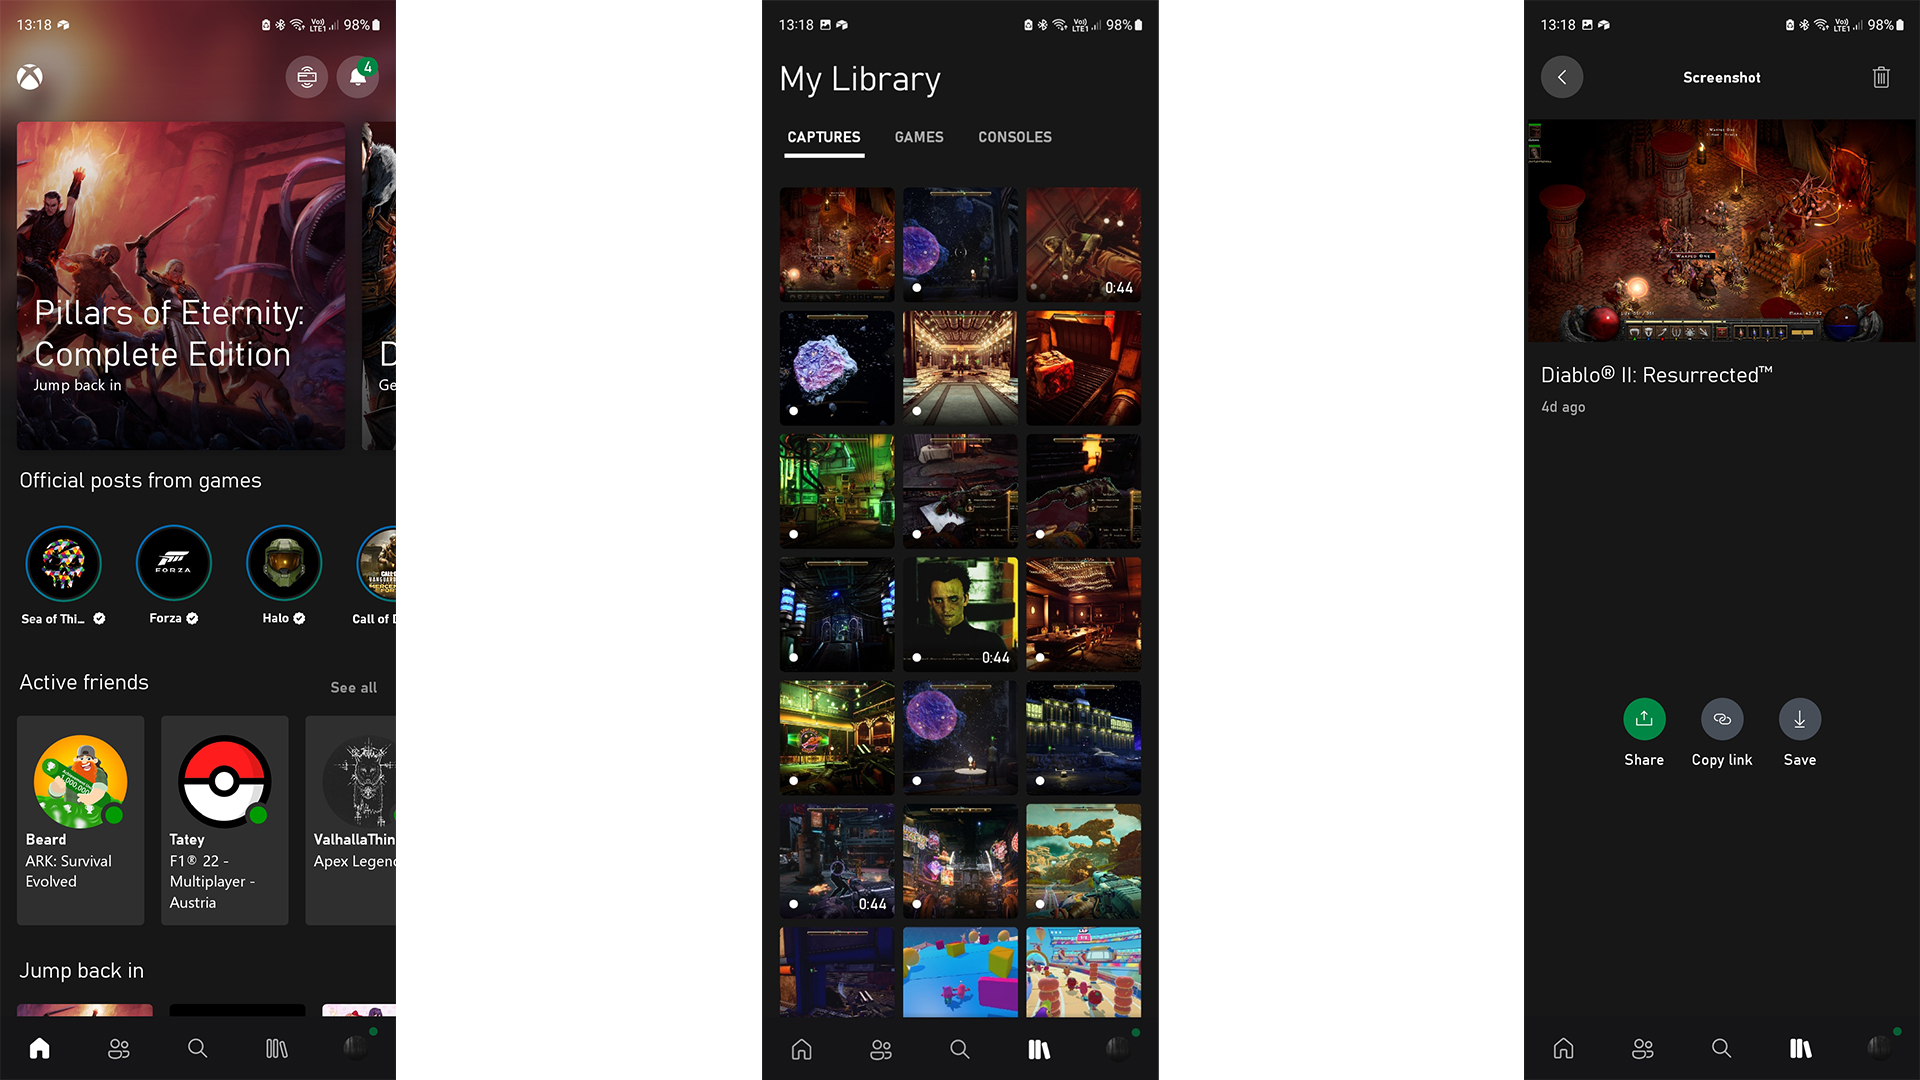
3. Tap on the Library icon at the bottom, which looks like a stack of books.
4. From here, you can see your Xbox clips and screenshots, depicted above. Select a clip you want to manage.
5. From inside the clip, you can either delete it by clicking the trash icon, or download it by hitting save. Removing it will free up storage on your cloud allocation.
Expand your game clip storage on your Xbox
While you can't expand your cloud allocation direct on the Xbox (besides using OneDrive as a backup option), you can instead connect a USB HDD to your Xbox console and use that instead for creating longer captures and backing up files. This is also makes it easy to move content between your Xbox and another device simply by taking the device and plugging it into a PC.
1. Grab a USB storage device. Some of the best Xbox external HDDs can be found here.
2. Connect the storage device to your Xbox console.
3. Open the Xbox guide using the Xbox button on your controller.
4. Navigate to the Captures & share menu by moving right.
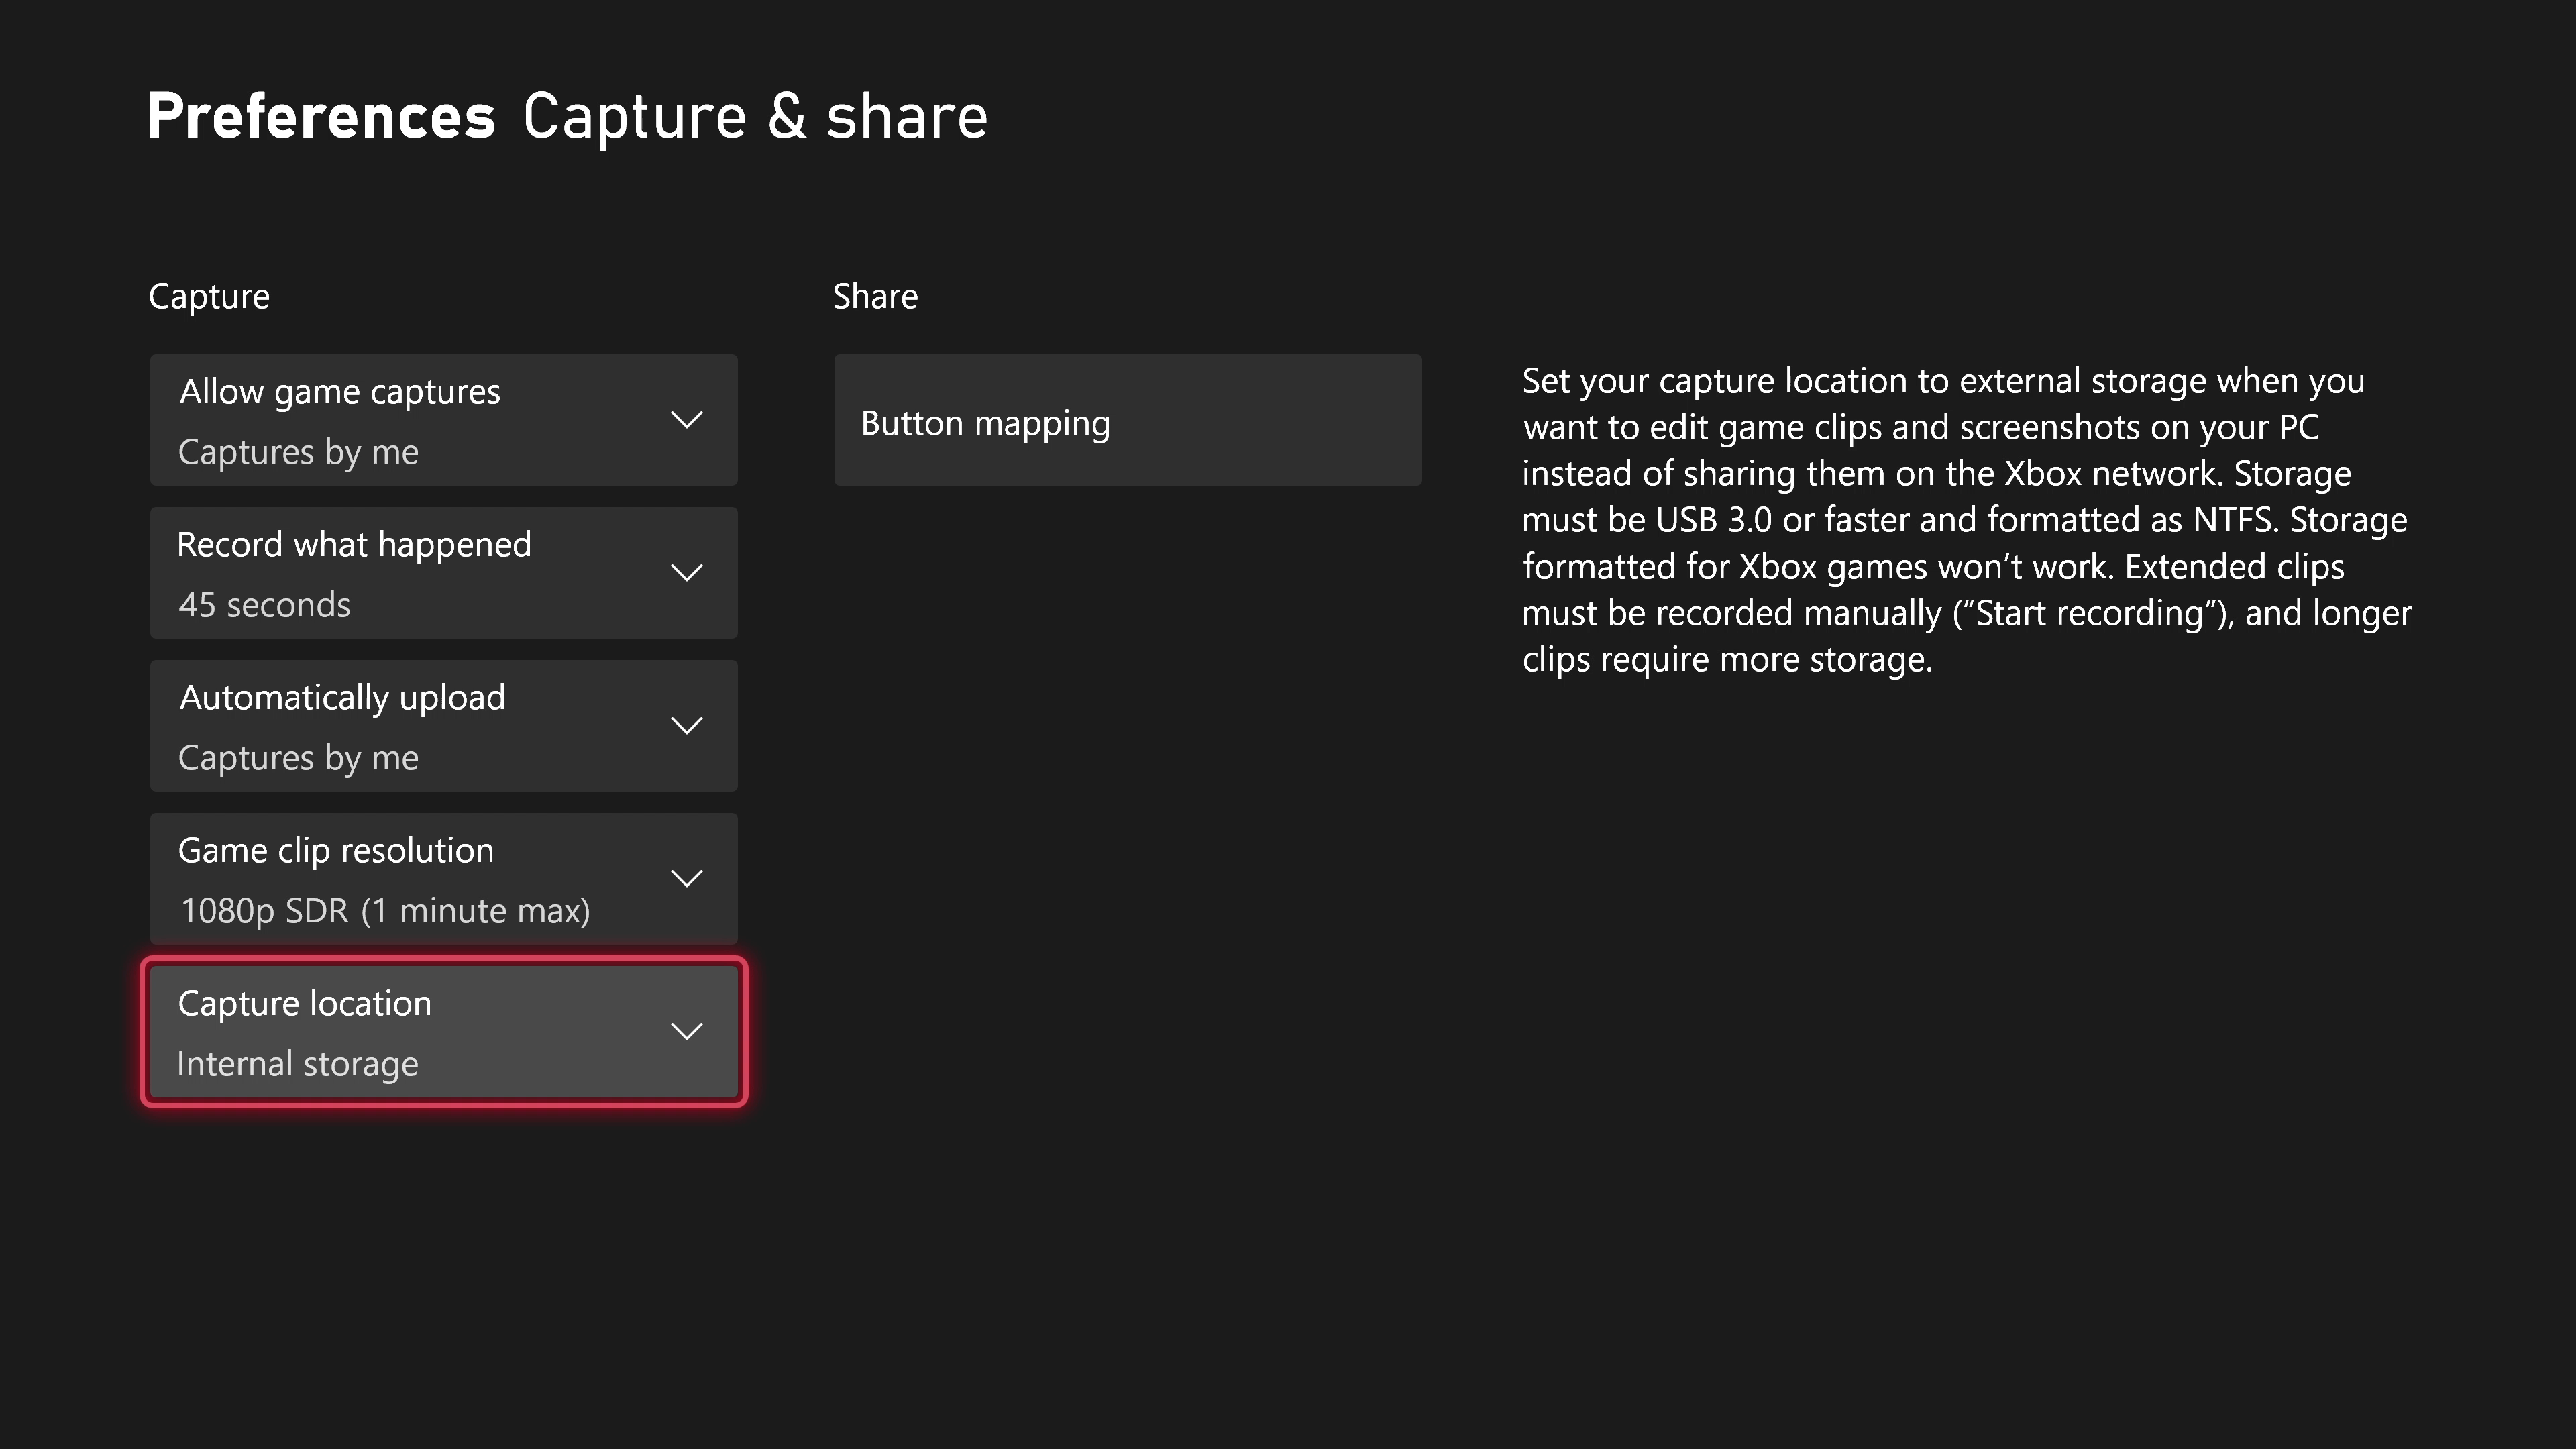
5. Select Capture settings at the bottom of this menu.
6. Under the left column, navigate to Capture location and select your new external storage device.
7. Note that you may be prompted to reformat your USB storage device if it has been previously formatted as Xbox game storage. You can also use this menu to configure game capture defaults, such as clip resolution and so on.

Jez Corden is the Executive Editor at Windows Central, focusing primarily on all things Xbox and gaming. Jez is known for breaking exclusive news and analysis as relates to the Microsoft ecosystem — while being powered by tea. Follow on X.com/JezCorden and tune in to the XB2 Podcast, all about, you guessed it, Xbox!
