How to back up Windows 10 to a Synology NAS
Here's how you can back up Windows 10 with a NAS device and keep everything safe.
All the latest news, reviews, and guides for Windows and Xbox diehards.
You are now subscribed
Your newsletter sign-up was successful
Backing up your Windows 10 installation regularly is a good practice. Here's how to do it with a Synology Network Attached Storage (NAS) device. We've covered backing up Windows 10 in the past, using discs and other removable media, but being able to do it automatically across the network to a NAS unit makes the whole process much more convenient.
To use a Synology NAS as a viable location to save system images, you first need to ensure you have it all connected correctly. In our comprehensive guide to configuring a Synology NAS with Windows, it takes but a few seconds to add the NAS as a virtual drive within File Explorer (look at "Mapping in Windows"). Once that's done, just follow these steps.
File History
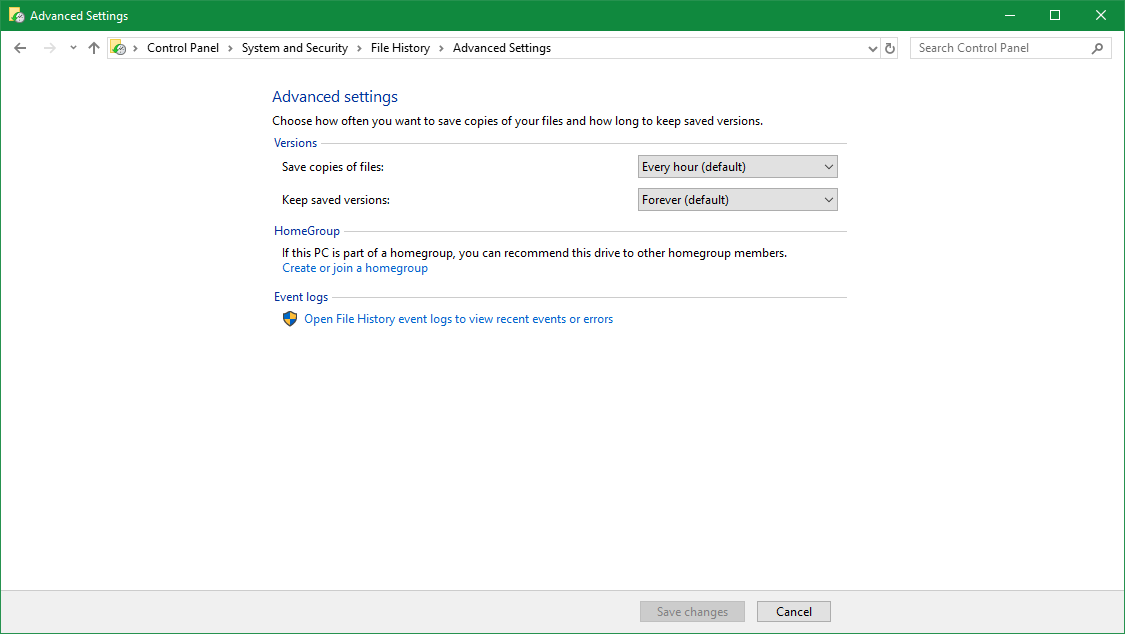
File History is a new tool in Windows 10 that doesn't necessarily back up everything, but instead it copies files and saves them to an external location. This way, should your main drives fail, Windows 10 self-destruct, or you happen to accidentally delete a file, you have access to versions. Here's how to use it:
- Hit Windows Key + Q to bring up the search.
- Type in "backup".
- Choose Backup settings.
- Select More options.
- Choose See advanced settings.
- Select Add network location.
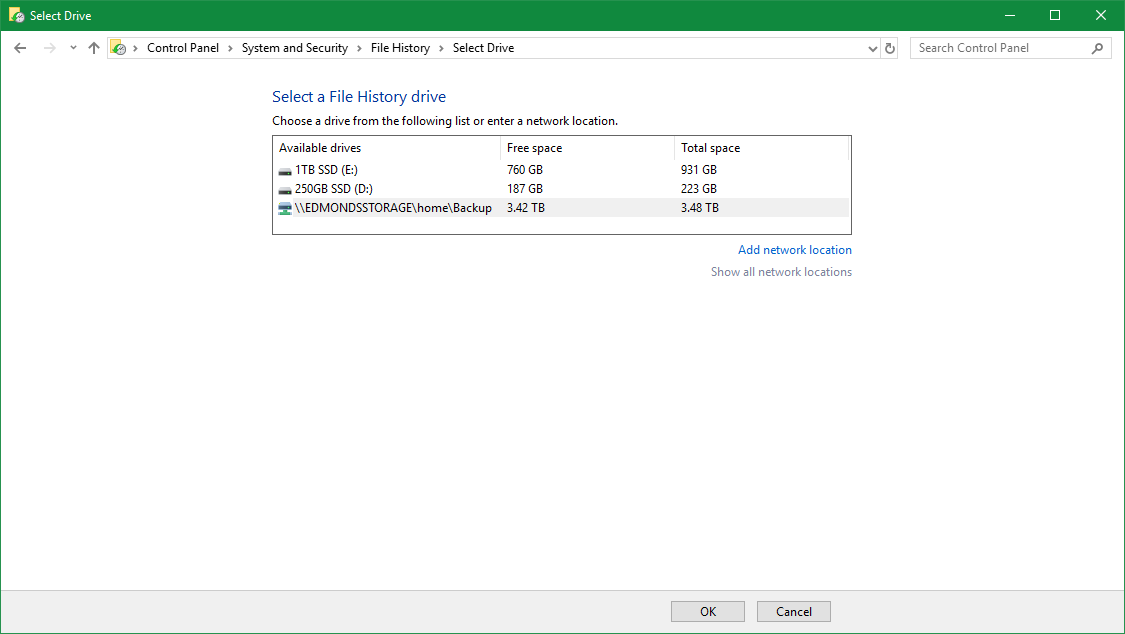
- Choose a folder on the network drive. (It's a good idea to add a dedicated folder.)
- Choose Select folder.
- Hit OK.
You can now configure the File History feature by excluding specific folders and choosing how often files are copied across. This neat tool will allow you to access a full history of all files saved to protect against system failure. In order to access saved files, use Windows search and type in "File History."
Backup and Restore
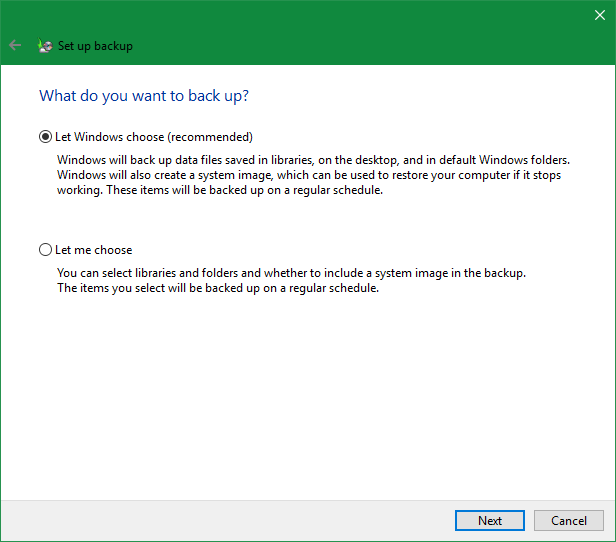
File History may be enough for some, but doing this alone may not safeguard against other issues, which is where the traditional Backup and Restore tool comes into play. Here's how to use it:
- In the window for File History, select System image backup in the lower left.
- Choose set up back-up.
- Select Save on network.
- Hit Browse and choose a location on the NAS.
- Enter your username and password.
- Hit Next
- Choose whether or not you want Windows to handle everything.
- Hit Next.
- Confirm everything and choose Save settings and run backup.
Windows 10 should now start backing up to the Synology NAS. This area is where you can also apply backups to restore previous system states. If you'd rather use a third-party tool to handle backups, many have support for Synology NAS and other units. Regardless, it's best to back up everything on your PC.
Related resources
- What you need to know when selecting a Synology NAS
- 3 hard drives that pair perfectly with any NAS
- How to get started with the Synology DS218+
- How to make a full backup of your Windows 10 PC
- How to backup your PC automatically on Windows 10
All the latest news, reviews, and guides for Windows and Xbox diehards.

Rich Edmonds was formerly a Senior Editor of PC hardware at Windows Central, covering everything related to PC components and NAS. He's been involved in technology for more than a decade and knows a thing or two about the magic inside a PC chassis. You can follow him on Twitter at @RichEdmonds.
