How to reclaim space after upgrading to Windows 10 April 2018 Update
Did the available space shrink on your hard drive after installing the Windows 10 April 2018 Update? Here's how to get the storage back.
All the latest news, reviews, and guides for Windows and Xbox diehards.
You are now subscribed
Your newsletter sign-up was successful
As part of the April 2018 Update (version 1803) install process, Windows 10 saves a copy of the previous installation files in case the system needs to revert to its original settings due to an error during the upgrade, or you need to rollback because of a problem after the upgrade.
While it's a useful safeguard feature, the files (stored in the Windows.old folder) can take up a fair amount of disk space. Deleting these files can get you back anywhere between 10GB to 20G of storage space, which may not mean a lot for users with terabytes to spare, but it's a significant amount of space for laptops and tablets with limited storage.
If you're running low on space or the upgrade is working correctly and you don't have the need to keep these files, you can use the Settings app or Disk Cleanup tool to reclaim disk space.
In this Windows 10 guide, we'll walk you through the different ways you can safely delete the previous installation files saved on your device after upgrading to the April 2018 Update to reclaim storage space.
- How to free up space after upgrade using Storage sense
- How to free up space after upgrade using Temporary files
- How to free up space after upgrade using Disk Cleanup
How to free up space after upgrade using Storage sense
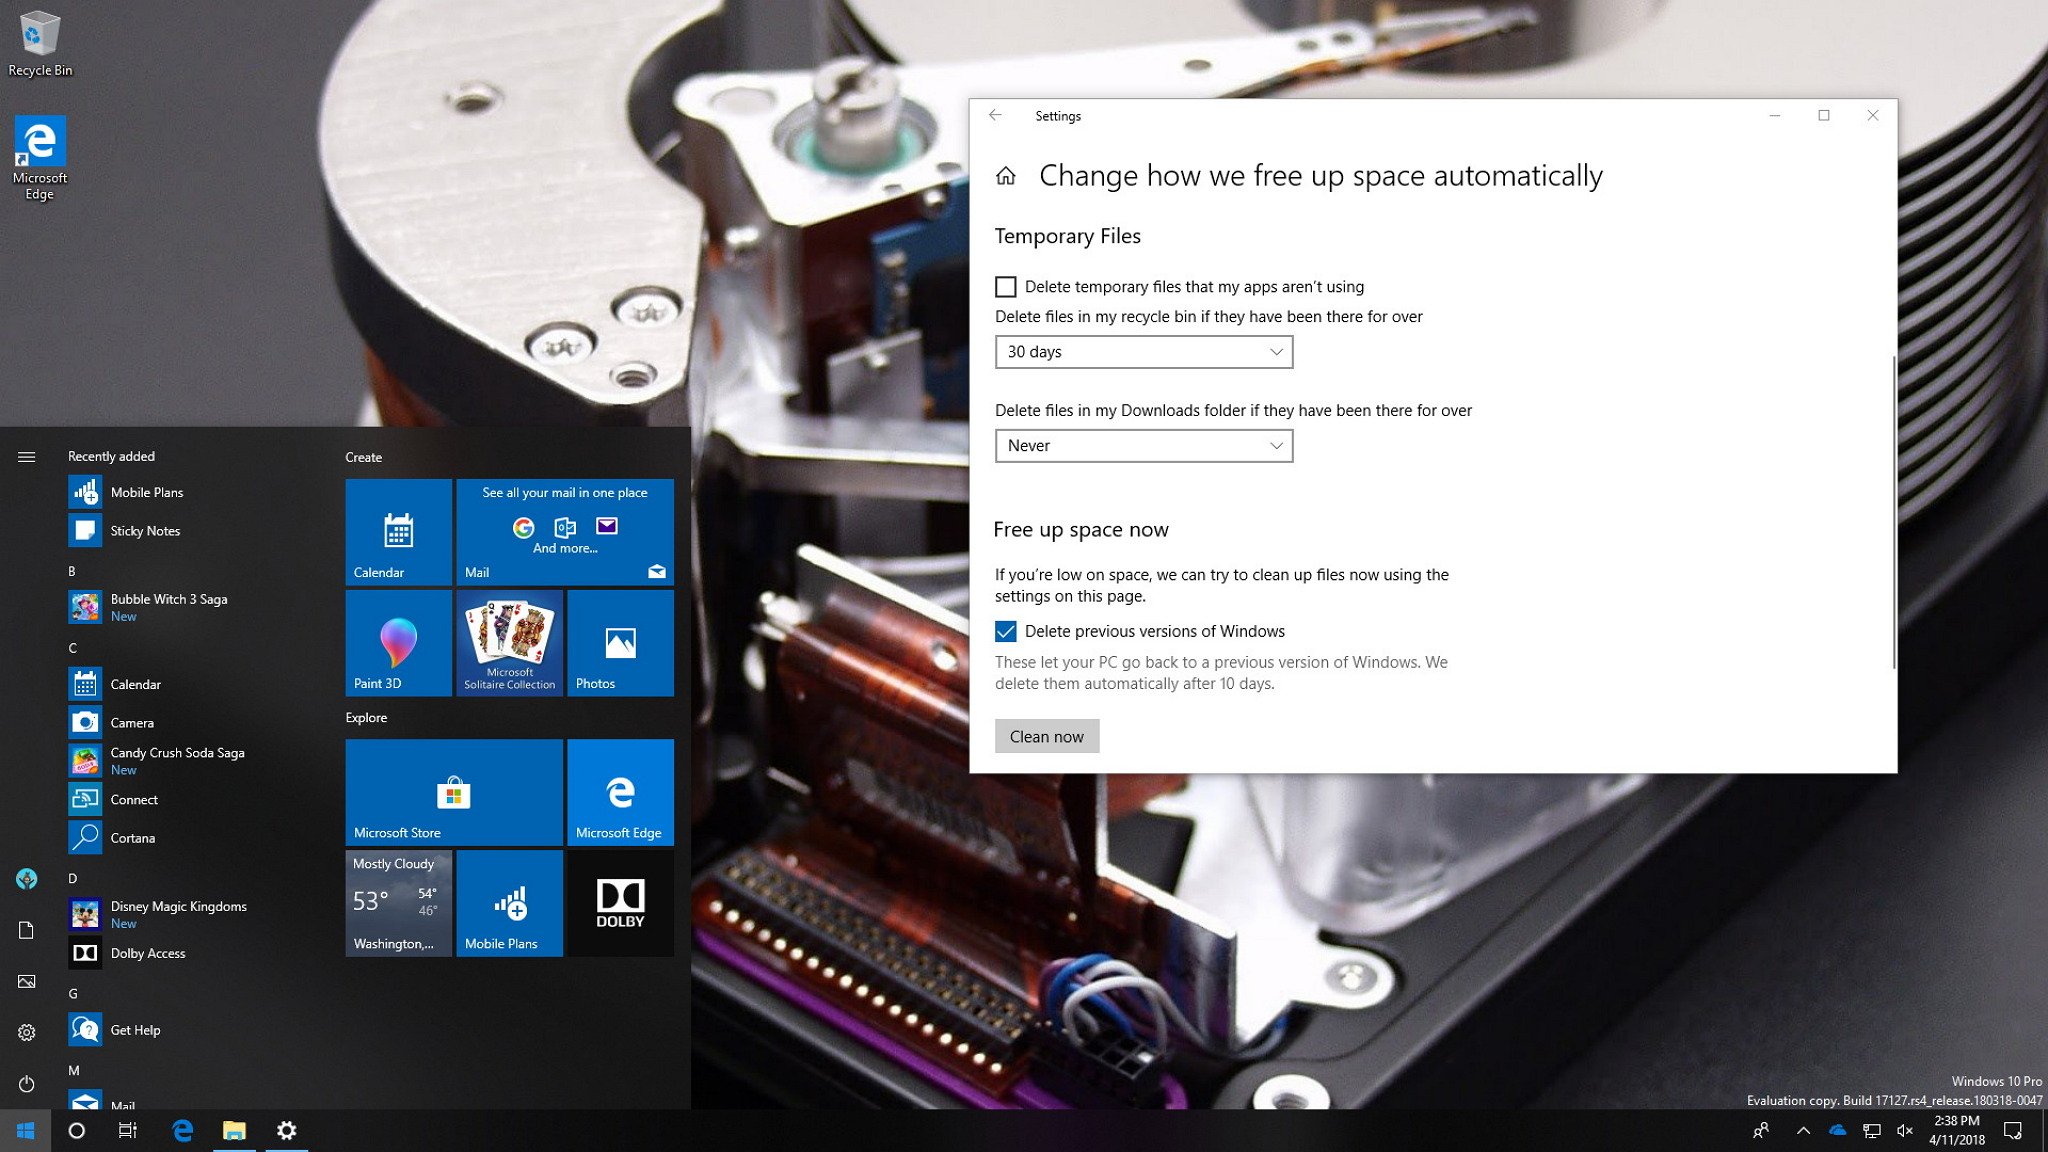
After installing the April 2018 Update, the best way to remove the previous installation files from your device is to use Storage sense with these steps:
- Open Settings.
- Click on System.
- Click on Storage.
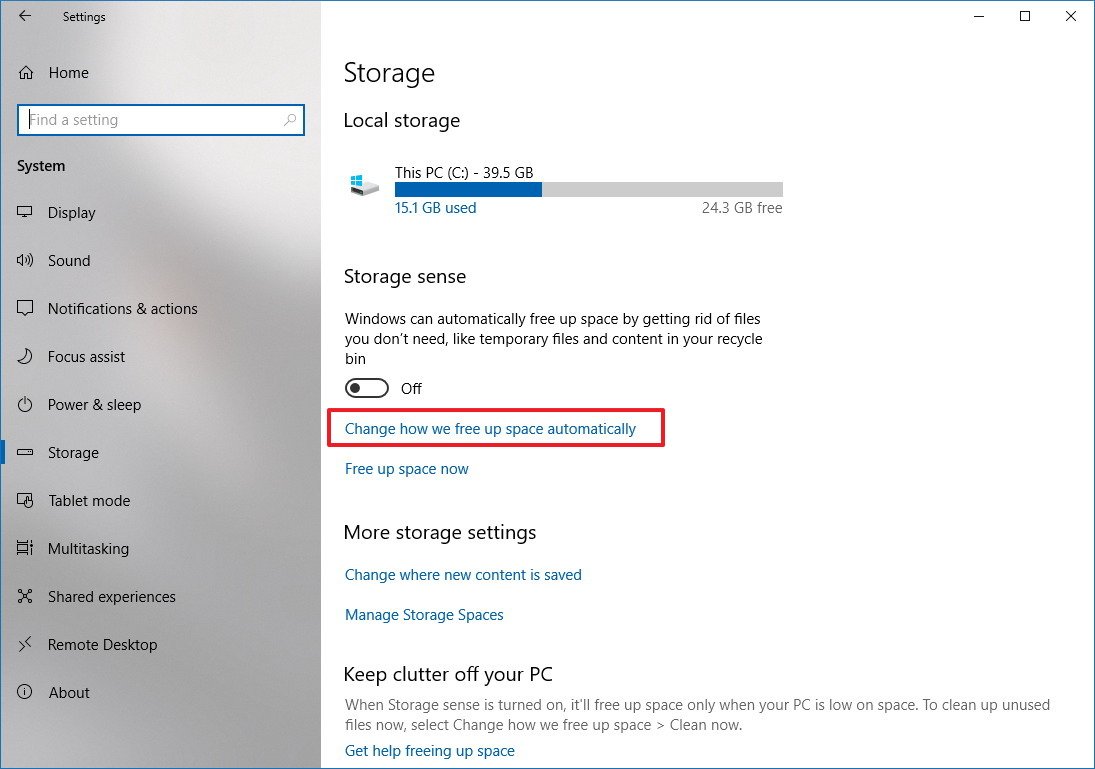
- Under "Storage sense," click the Change how we free up space link.
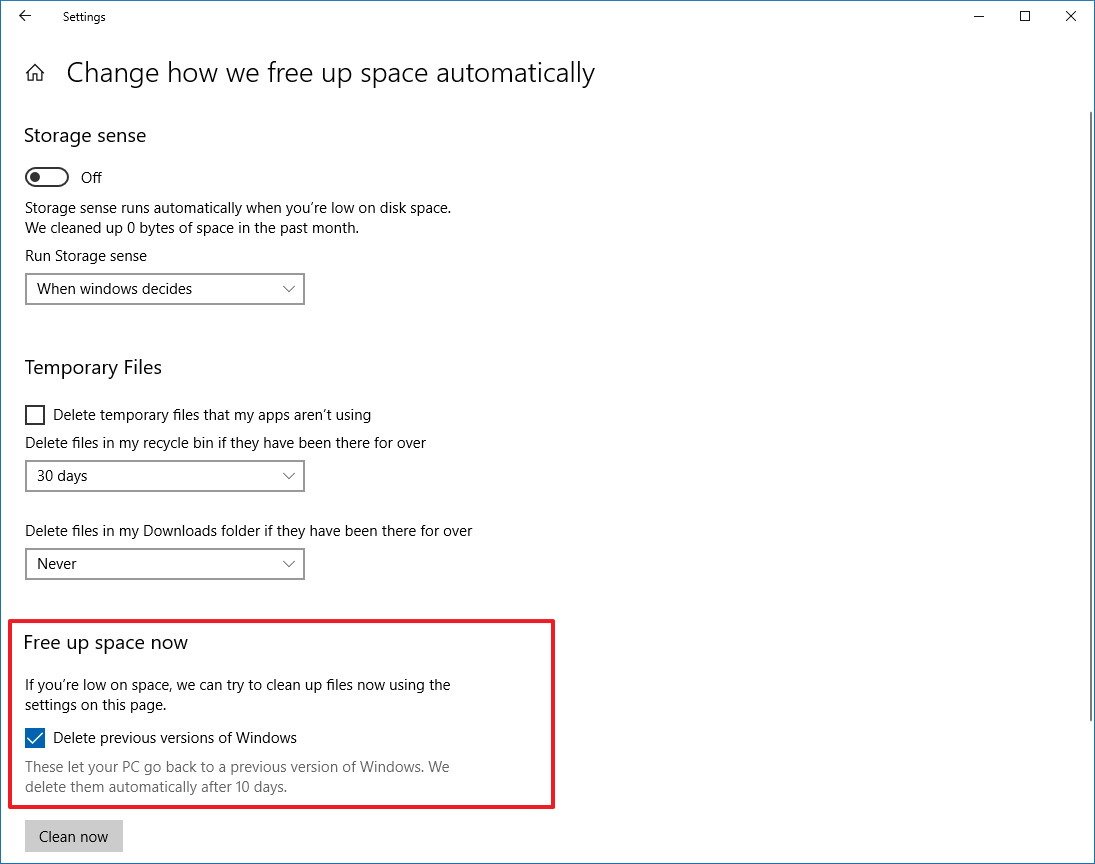
- Under "Free up space now," check the Delete previous version of Windows option.
- Click the Clean now button.
Once you've completed the steps, the backup files that enable Windows 10 to rollback to the previous version will be erased from your computer, as well as any other files that you may have checked to delete using the process under "Temporary Files."
How to free up space after upgrade using Temporary files
You can also use the Temporary files settings page to reclaim space after upgrading to the new version of Windows 10 using these steps:
All the latest news, reviews, and guides for Windows and Xbox diehards.
- Open Settings.
- Click on System.
- Click on Storage.
- Under "Storage sense," click the Free up space now link.
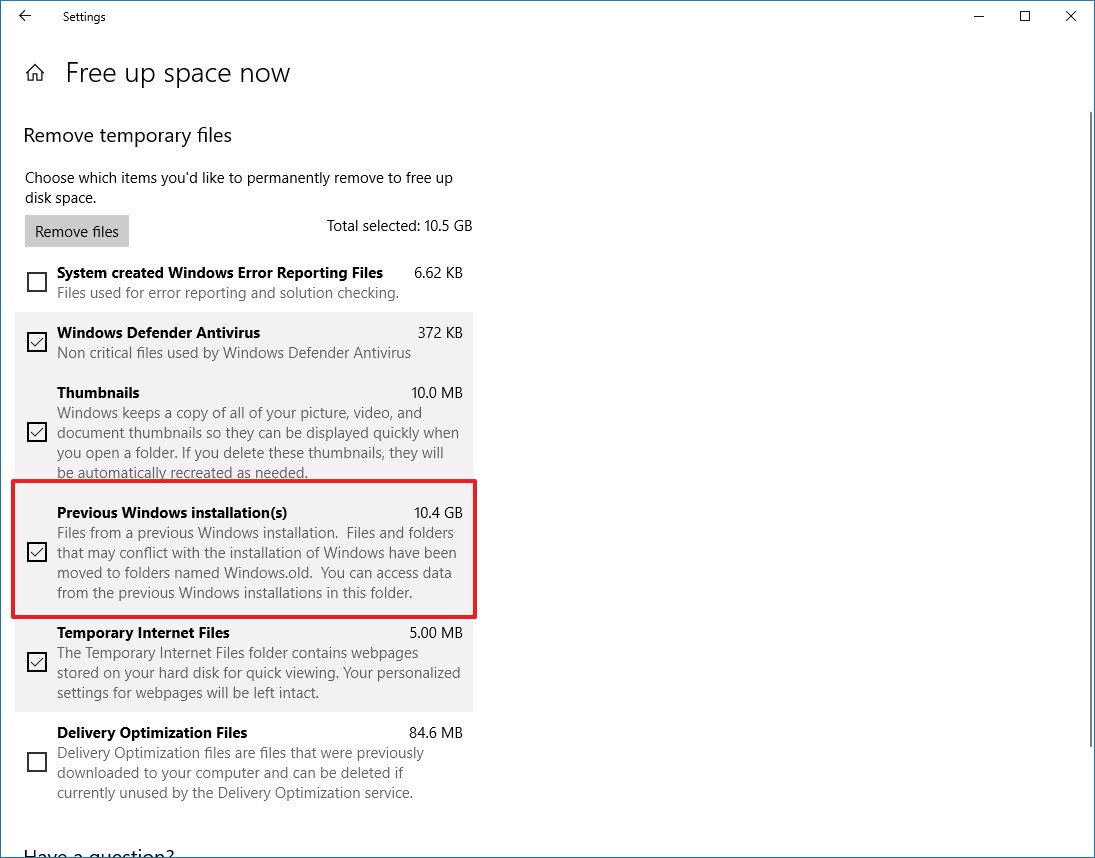
- Under "Remove temporary files," check the Previous Windows installation(s) option from the list.
- Click the Remove files button.
After completing the steps, Windows 10 will remove the "Windows.old" folder that contains the previous installation files freeing up space to store more valuable data.
Starting with Windows 10 version 1803, this page is also getting updated to give you the ability to delete even more junk files, removing the need to use the old Disk Cleanup tool.
How to free up space after upgrade using Disk Cleanup
Although it's now recommended to use the Settings up to free up space on Windows 10, you can still use the Disk Cleanup tool to delete the previous installation after an upgrade using these steps:
- Open File Explorer.
- Click on This PC from the left pane.
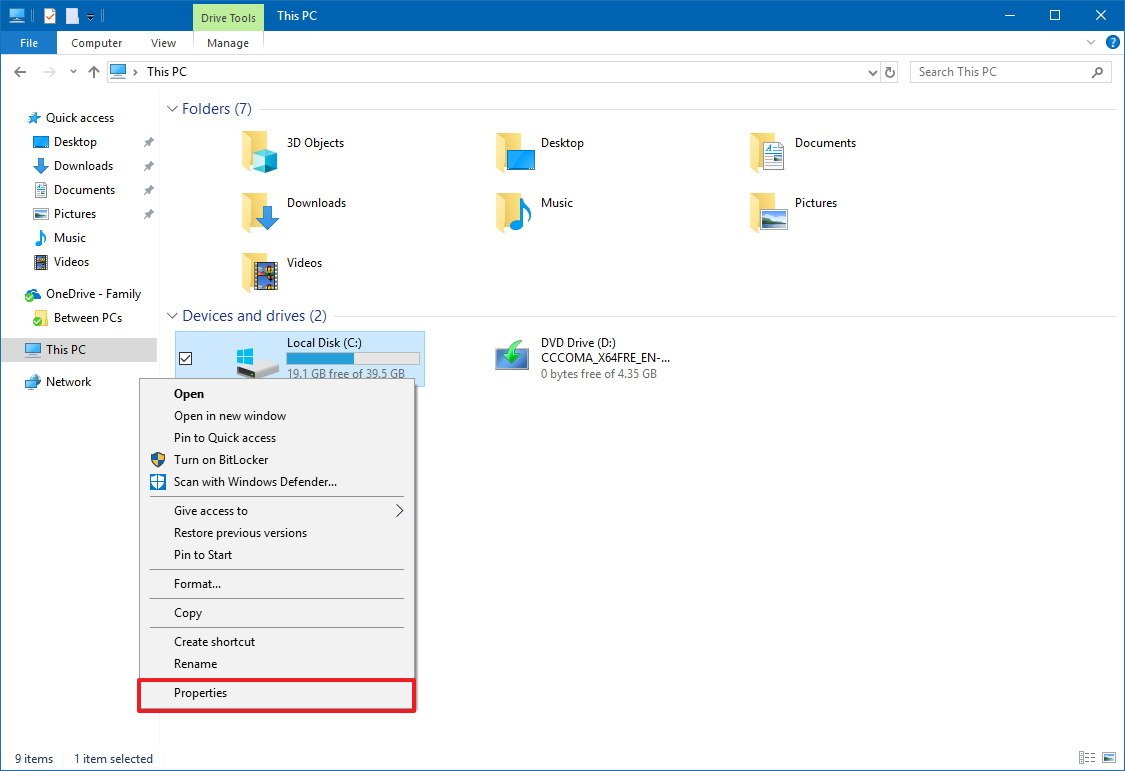
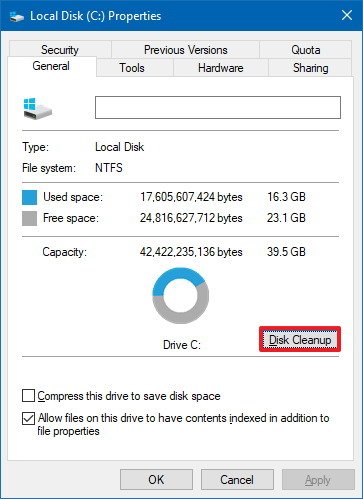
- Right-click the Local Disk (C:) drive, and select Properties.
- Click the Disk Cleanup button.
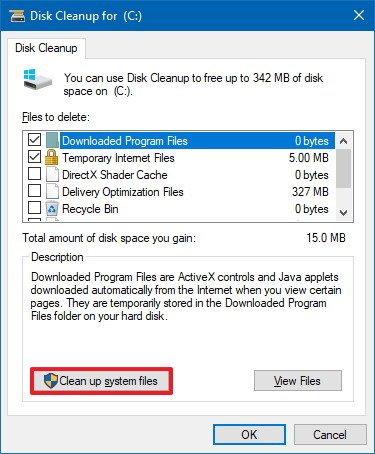
- Click the Clean up system files button.
- Check the Previous Windows installation(s) option.
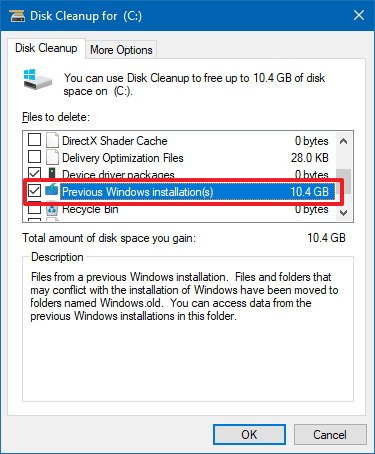
- Click OK.
Once you've completed the steps, the previous installation will be removed from your device.
If it's been a while since you've run a disk maintenance, it's now an excellent opportunity to use Disk Cleanup to delete other junk files from your computer to free up more space. Using this tool, you can also delete files like Windows Defender Antivirus, upgrade logs, temporary program and internet files, and error reporting logs among other files.
Wrapping things up
Although using any of these methods will help you reclaim several gigabytes of space after upgrading to Windows 10 version 1803, it's important to note that these leftover files are necessary to go back to your previous installation if you're experiencing problems. You should only use these steps after noticing that the update and device drivers are working as expected.
In the case you remove the previous installation backup files, the option to rollback will disappear from the Settings app, and then the only way to go back is doing a clean installation of Windows 10. However, you can't keep these files forever either, because the system will remove these files after ten days automatically.
More Windows 10 resources
For more helpful articles, coverage, and answers to common questions about Windows 10, visit the following resources:
- Windows 10 on Windows Central – All you need to know
- Windows 10 help, tips, and tricks
- Windows 10 forums on Windows Central

Mauro Huculak has been a Windows How-To Expert contributor for WindowsCentral.com for nearly a decade and has over 22 years of combined experience in IT and technical writing. He holds various professional certifications from Microsoft, Cisco, VMware, and CompTIA and has been recognized as a Microsoft MVP for many years.
