How to schedule a Windows Defender Antivirus scan on Windows 10
You can run Windows Defender Antivirus scans on your schedule, and in this guide, we'll show you the steps to get it done.
All the latest news, reviews, and guides for Windows and Xbox diehards.
You are now subscribed
Your newsletter sign-up was successful
Windows Defender Antivirus is the security solution available on every installation of Windows 10 to protect your device and files from unwanted viruses, spyware, ransomware, and other types of malware and online threats.
The antimalware offers real-time protection functionality to detect and remove malware proactively, and you even get the option to start a scan manually. You can also schedule a Windows Defender Antivirus scan at your preferred day of the month and time to create an extra layer of security. However, it's not an option that you can enable through the Windows Security app. Instead, it's something that you have to configure manually using the Task Scheduler.
In this Windows 10 guide, we'll walk you through the steps to schedule a manual scan of Windows Defender Antivirus on your computer.
- How to schedule a Windows Defender Antivirus scan using Task Scheduler
- How to schedule a Windows Defender Antivirus custom scan using Task Scheduler
How to schedule a Windows Defender Antivirus scan using Task Scheduler
To schedule a Windows Defender Antivirus scan manually on your device, use these steps:
- Open Start.
- Search for Task Scheduler, and click the top result to open the app.
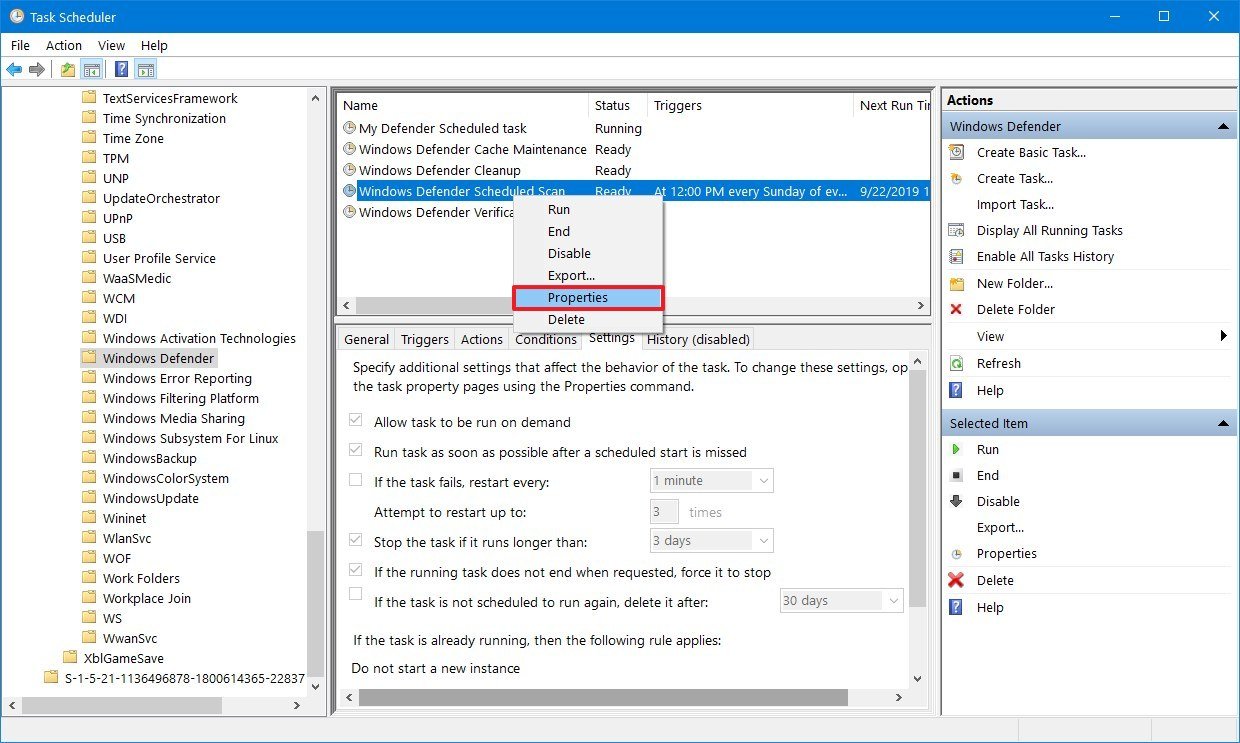
- Browse the following path:
Task Scheduler Library > Microsoft > Windows > Windows Defender - Right-click the "Windows Defender Scheduled Scan" task, and select the Properties option.
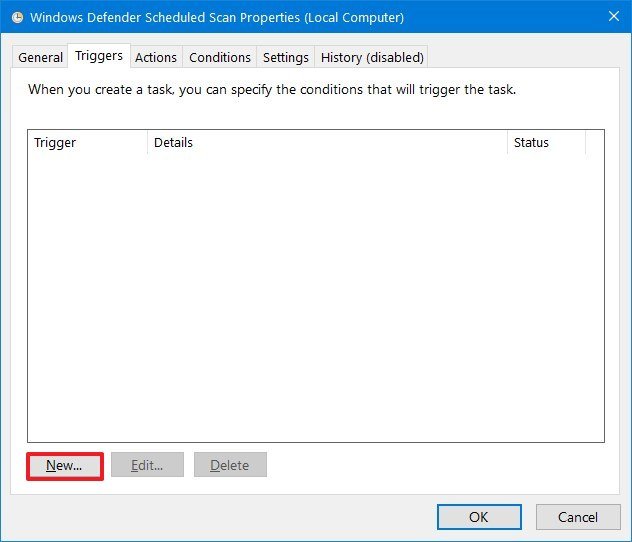
- Click the Triggers tab.
- Click the New button.
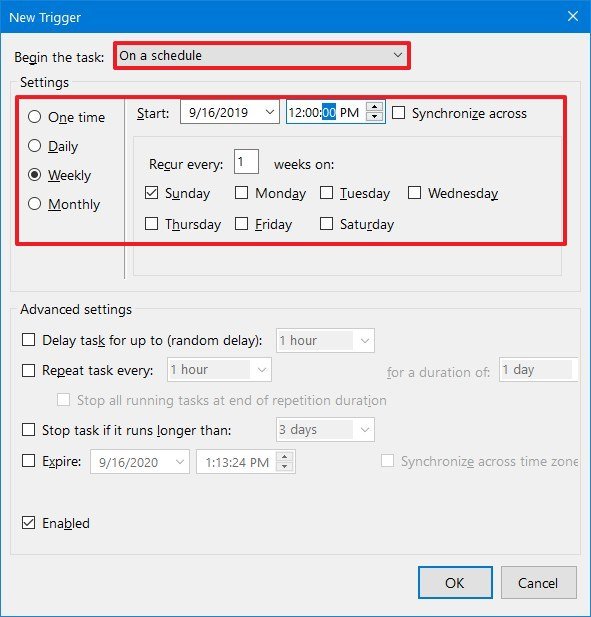
- Use the "Begin the task" drop-down menu to select one of the many triggers, including "On a schedule," "At startup," "On workstation unlock," and many others. For this guide, select the On a schedule option.
- Select the Weekly option from the left side (or the option that best suits your situation).
- Using the "Start" settings, specify when the task should start running and the time (very important).
- Specify the number of weeks when to recur the task.
- Check the day of the week that you want the scan to take place.
- Click the OK button.
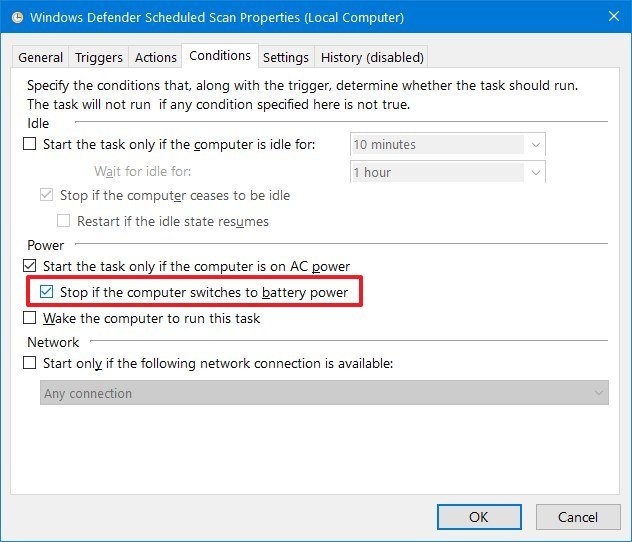
- (Optional) Click the Conditions tab.
- Under the "Power" section, check the Stop if the computer switches to battery power option to prevent affecting the battery life on your laptop.
- Click the OK button.
Once you complete the steps, the built-in antivirus will run automatically using the schedule that you specified.
How to schedule a Windows Defender Antivirus custom scan using Task Scheduler
If using the built-in task doesn't work, or you see the error 0x2, under the "Last Run Result" column, you can set up a custom schedule using a new task.
To create a custom malware scan using Task Scheduler, use these steps:
All the latest news, reviews, and guides for Windows and Xbox diehards.
- Open Start.
- Search for Task Scheduler, click the top result to open the app.
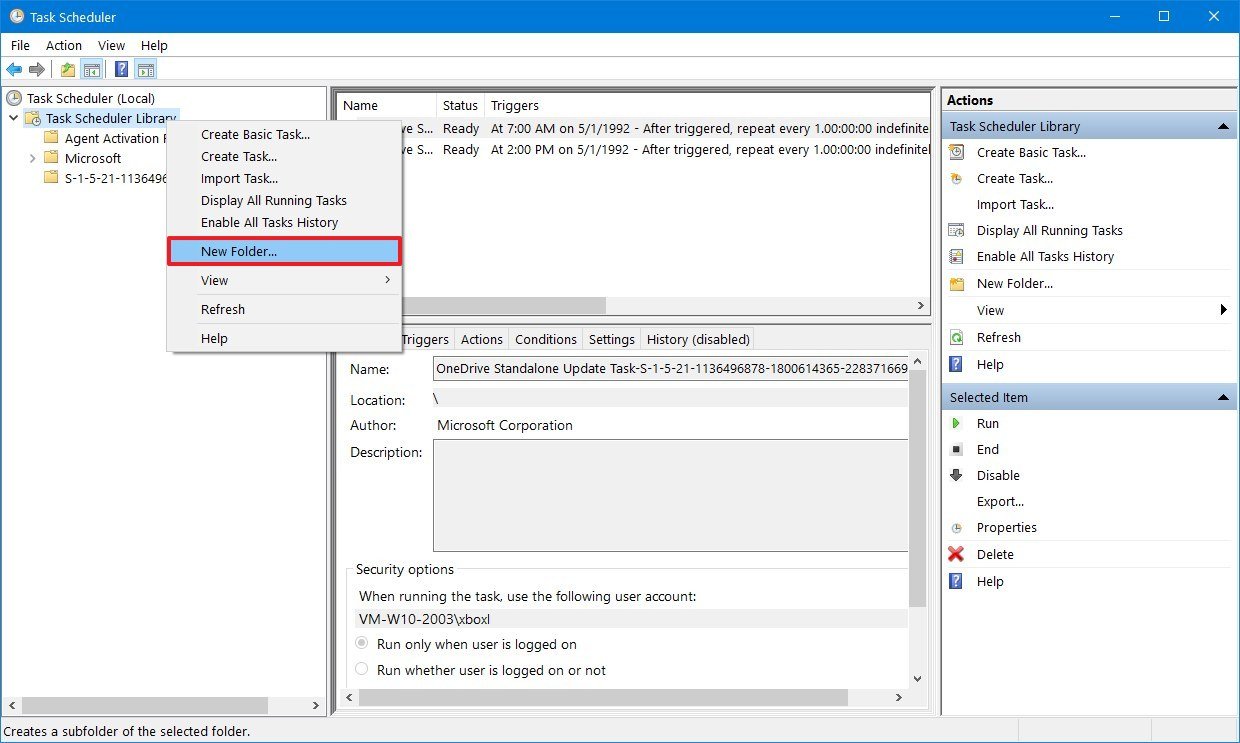
- Right-click the "Task Scheduler Library" branch, and select the New Folder option.
- Type a name for the folder. For example, MyTasks. (This step isn't a requirement, but it's a recommended step to keep your tasks separate from the system tasks.)
- Click the OK button.
- Expand the "Task Scheduler Library" branch, and select the MyTasks folder.
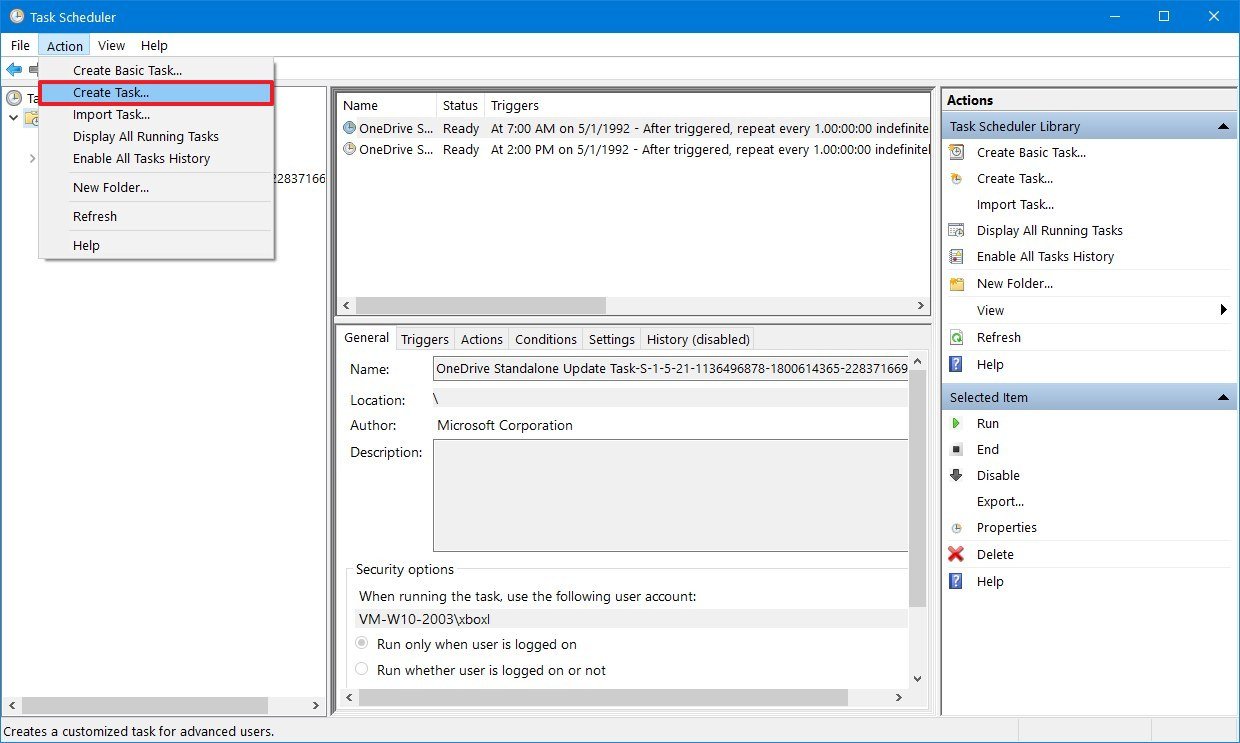
- Click the Action menu.
- Select the Create Task option.
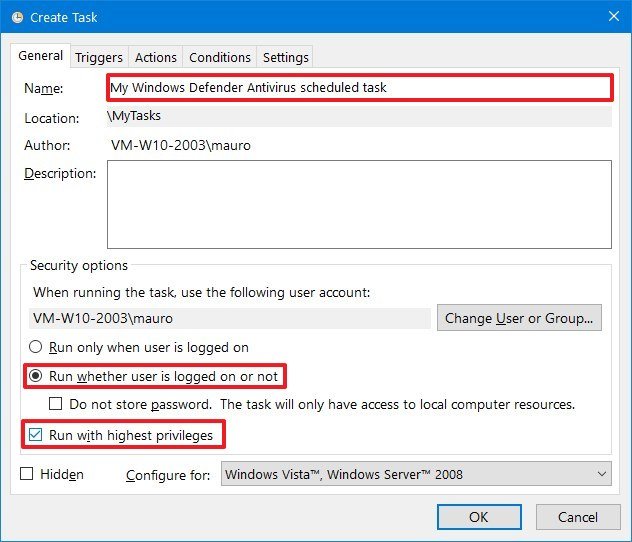
- In the "Name" field, type a descriptive name for the task. For example, My Windows Defender Antivirus scheduled task.
- In the "Security options" section, you can configure which administrator account can run the task.Quick tip: If you're using an account with administrative privileges, the default user should be fine.
- Check the Run with highest privileges option.
- Click the Triggers tab.
- Click the New button.
- Use the "Begin the task" drop-down menu to select one of the many triggers, including "On a schedule," "At startup," "On workstation unlock," and many others. For this guide, select the On a schedule option.
- Select the Weekly option from the left side (or the option that best suits your situation).
- Using the "Start" settings, specify when the task should start running and the time (very important).
- Specify the number of weeks when to recur the task.
- Check the day of the week that you want the scan to take place.
- (Optional) In the "Advanced settings" section, you can select options to delay, repeat, stop, and expire a task. Also, leave the Enabled option checked.
- Click the OK button.
- Click the Action tab
- Click the New button.
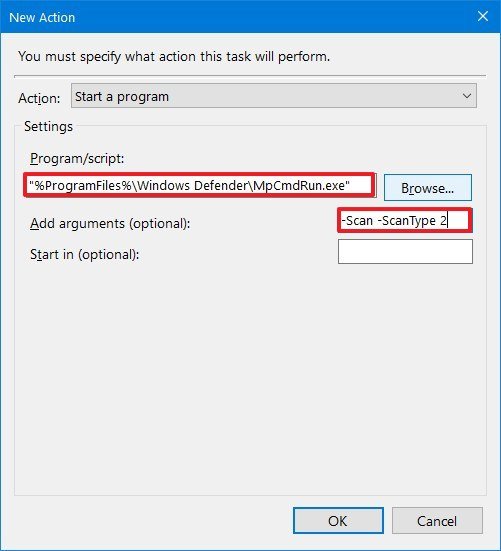
- Use the "Action" drop-down menu and select the Start a program option.
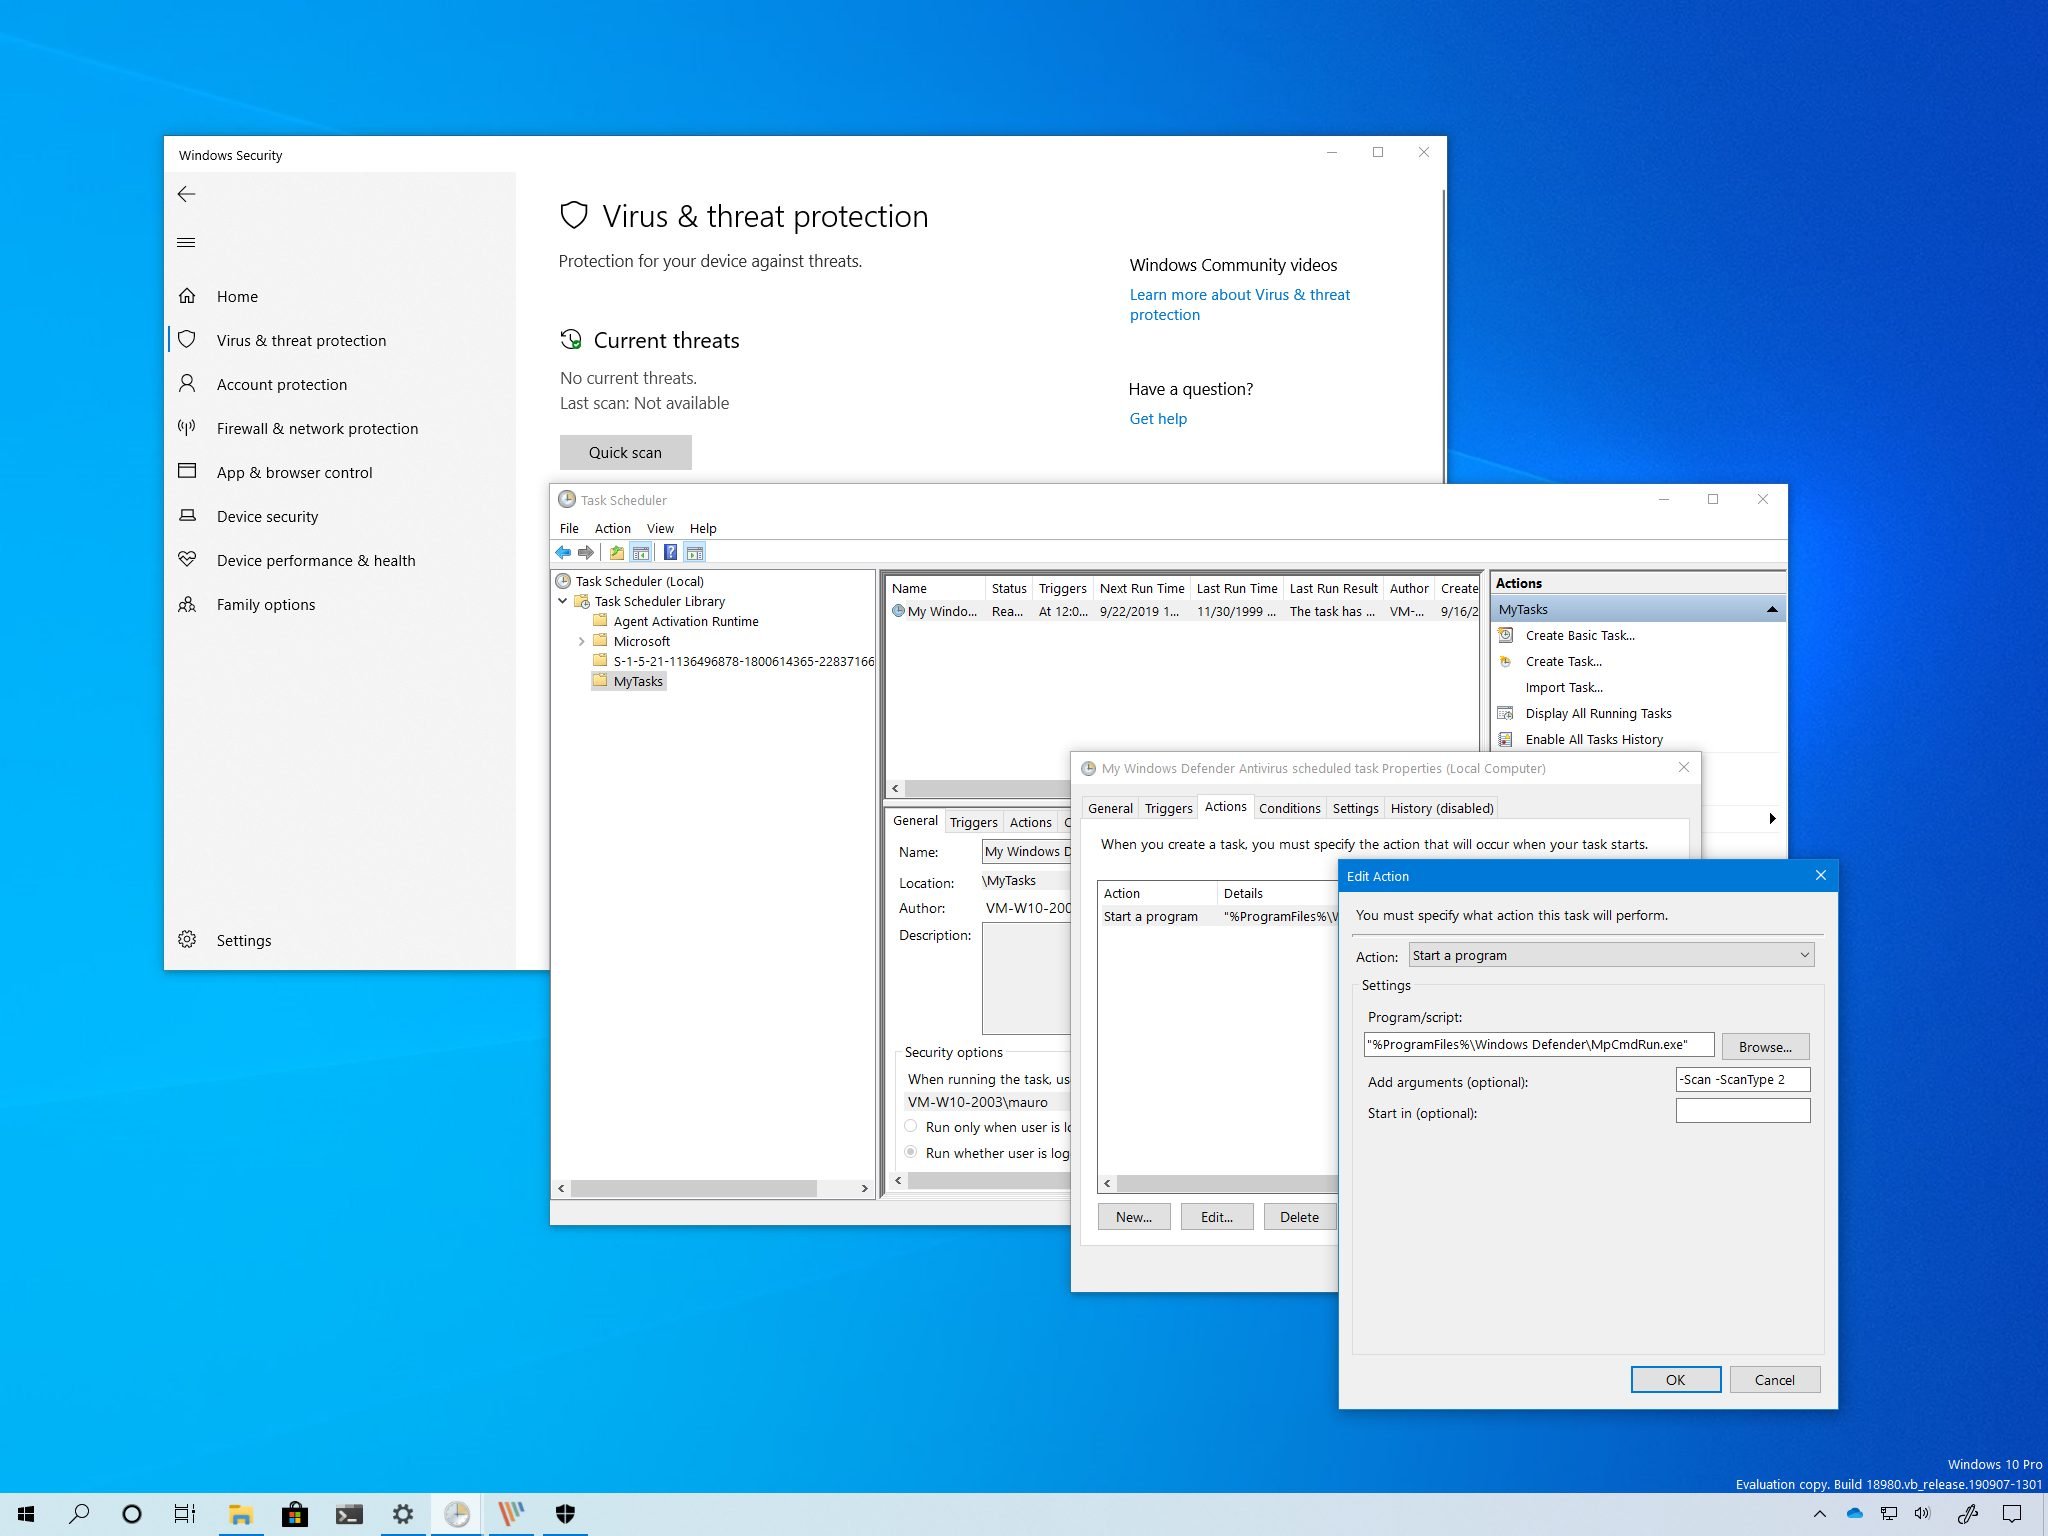
- Under the "Settings" section, in the "Program/script" field, specify the path for the Windows Defender Antivirus program:
"%ProgramFiles%\Windows Defender\MpCmdRun.exe"
- In the "Add arguments" field, specify the type of scan you want to run:
-Scan -ScanType 2The above argument performs a full malware scan, but you can use the-Scan -ScanType 1argument to specify a quick scan, or you can use the-Scan -ScanType 3 -File PATH/TO/FILE/OR/FOLDERto scan a particular location or file. - Click the OK button.
- (Optional) Click the Conditions tab.
- Under the "Power" section, check the Stop if the computer switches to battery power option to prevent affecting the battery life on your laptop.
- Click the OK button.
After you complete the steps, authenticate with your account credentials, and then the Windows Defender Antivirus will run automatically on schedule.

Mauro Huculak has been a Windows How-To Expert contributor for WindowsCentral.com for nearly a decade and has over 22 years of combined experience in IT and technical writing. He holds various professional certifications from Microsoft, Cisco, VMware, and CompTIA and has been recognized as a Microsoft MVP for many years.
