How to set up a home file server using FreeNAS
Setting up FreeNAS, a popular open-source network attached storage (NAS) solution, is not a difficult task. Here's how to get started and configure a working home server.
FreeNAS offers a stable platform for home and office use. From a simple file server to a connected media hub, it's possible to configure FreeNAS to perform a variety of tasks on behalf of other PCs on the same network. Thankfully, to install the OS, it doesn't require much time or knowledge.
What is FreeNAS and why should you use it?
What you need to get up and running with FreeNAS
Before you begin, you need to ensure that you have everything you need. This includes the following:
- A device that meets minimum requirements (see the link above).
- 8GB USB drive (for OS).
- 1GB USB drive or DVD (for OS install).
- FreeNAS .iso file.
In order to install FreeNAS on a free PC, you need to make sure the USB drive is bootable and has all the necessary files. Because disks are fading out in favor of removable media, here's how you can get a USB drive ready to go:
- Download FreeNAS.
- Insert your USB drive.
- Download Rufus (a program to create bootable USB drives).
- Run Rufus, and select the USB.
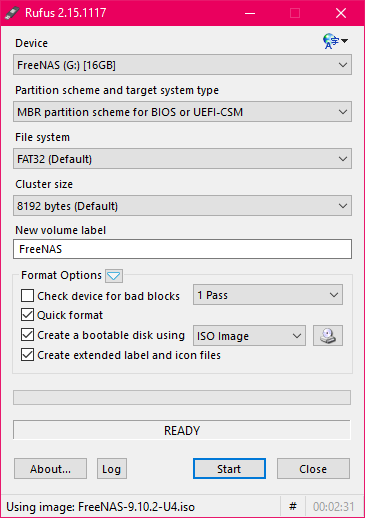
- Click the disk image next to Create a bootable disk using.
- Navigate to the downloaded FreeNAS .iso file.
- Select the .iso file.
- Click Start.
The USB drive is now ready to be inserted into the FreeNAS PC to install the OS.
Installing FreeNAS OS
When firing up your FreeNAS PC, you should see a boot screen that displays FreeNAS as an option. You'll want to select this to continue. If nothing appears, you may need to hit the boot menu shortcut for your motherboard (ours is F11) during startup or make sure the USB drive has been successfully set up. Then do the following:
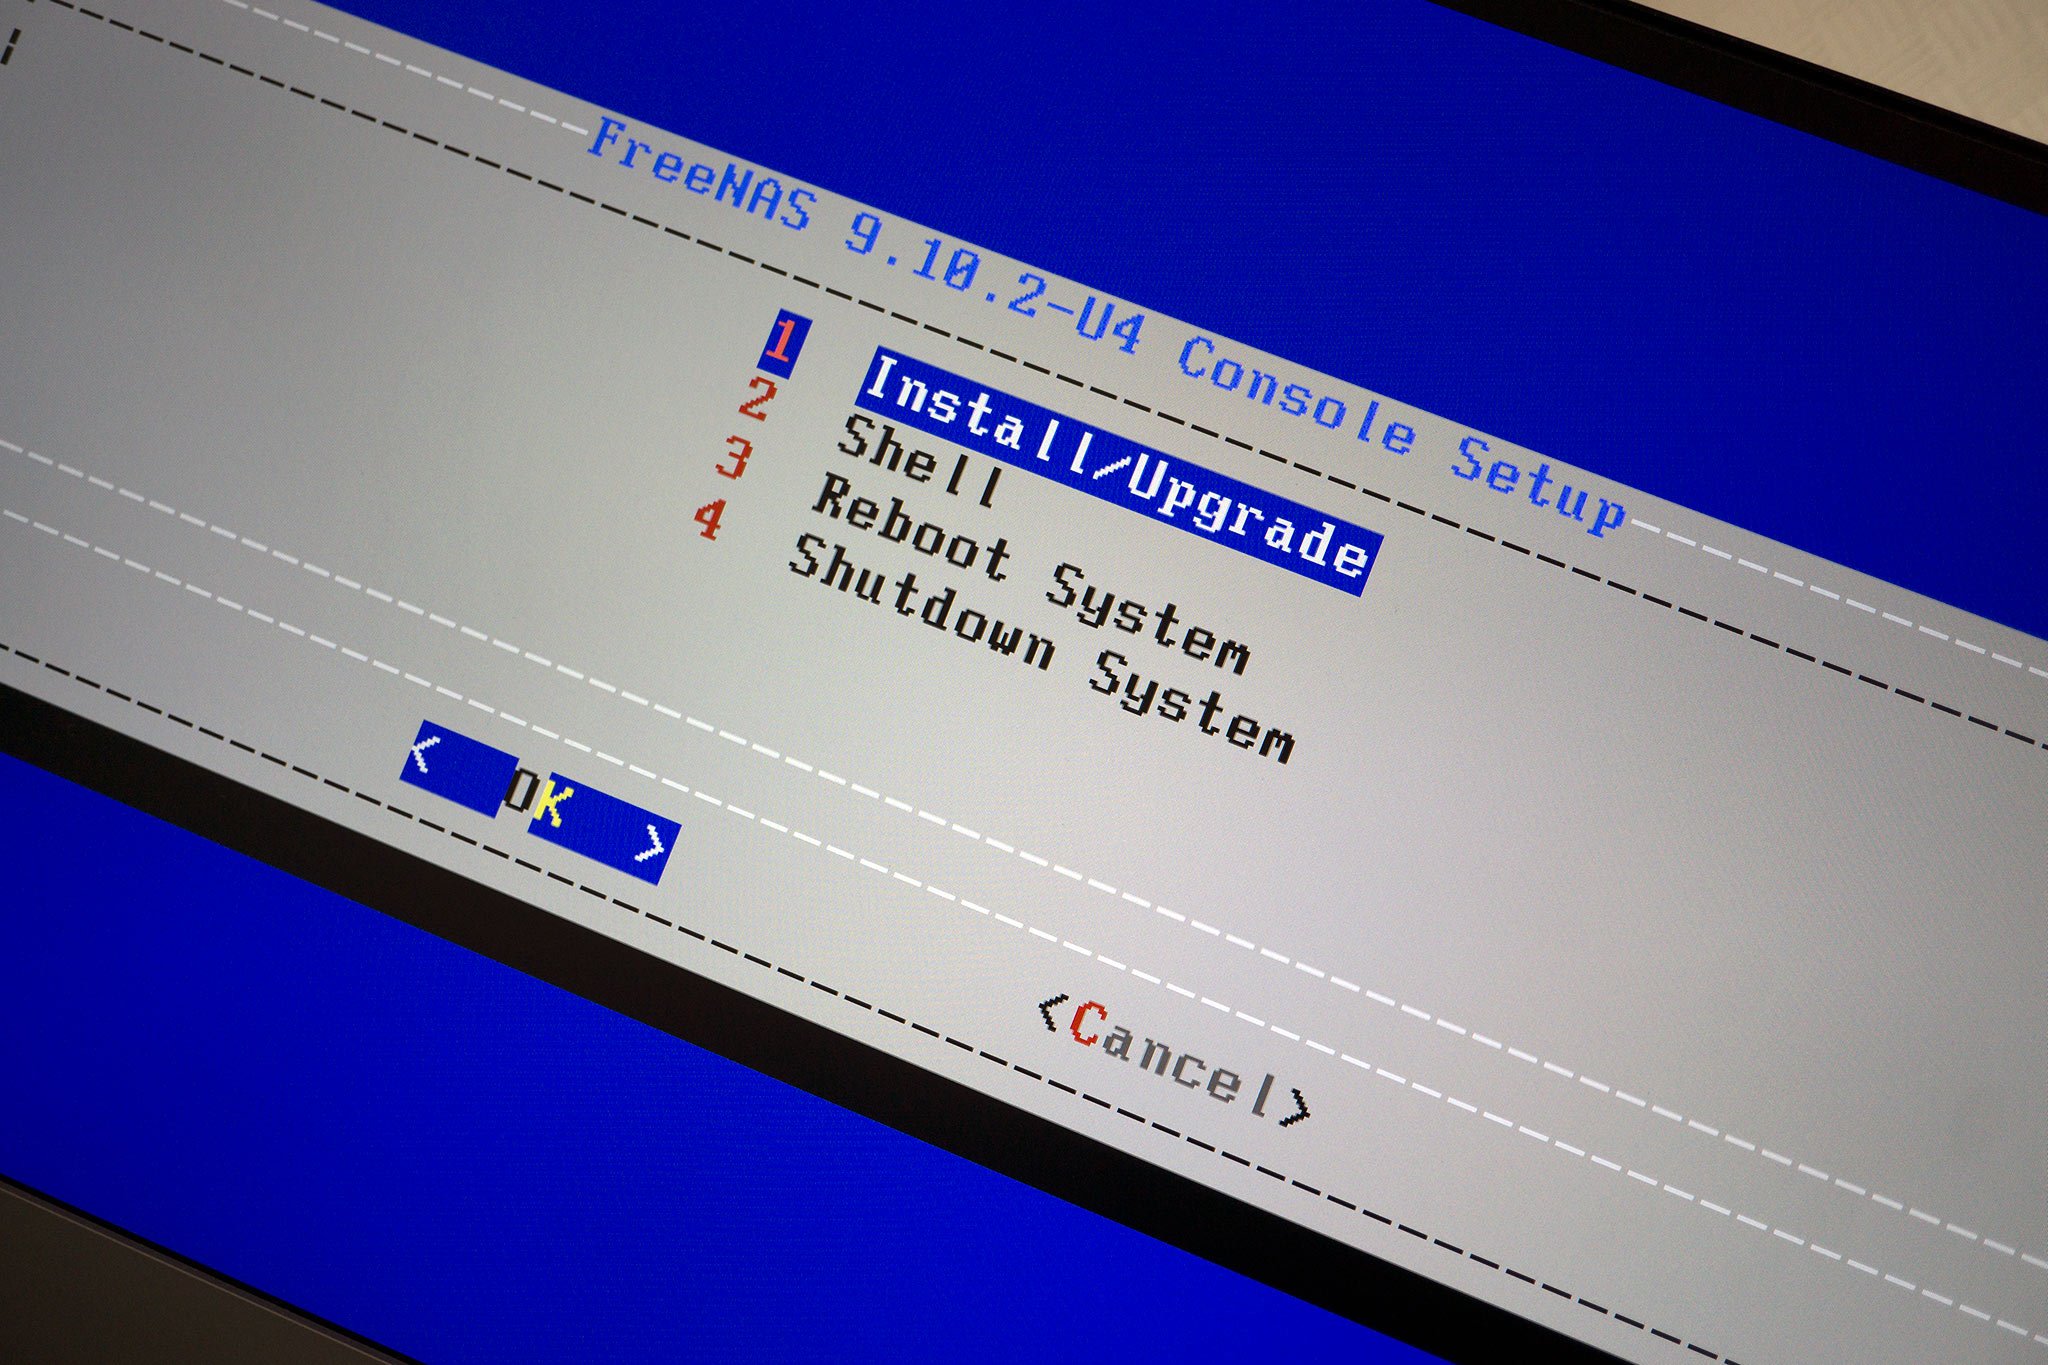
- Select Install/Upgrade.
- Select the spare USB drive (FreeNAS will not install on the one containing the OS so fear not if you select the wrong one) with the spacebar.
- Hit Ok.
- Enter a root password.
- Hit Ok.
- Wait for the OS to install.
- Reboot the PC.
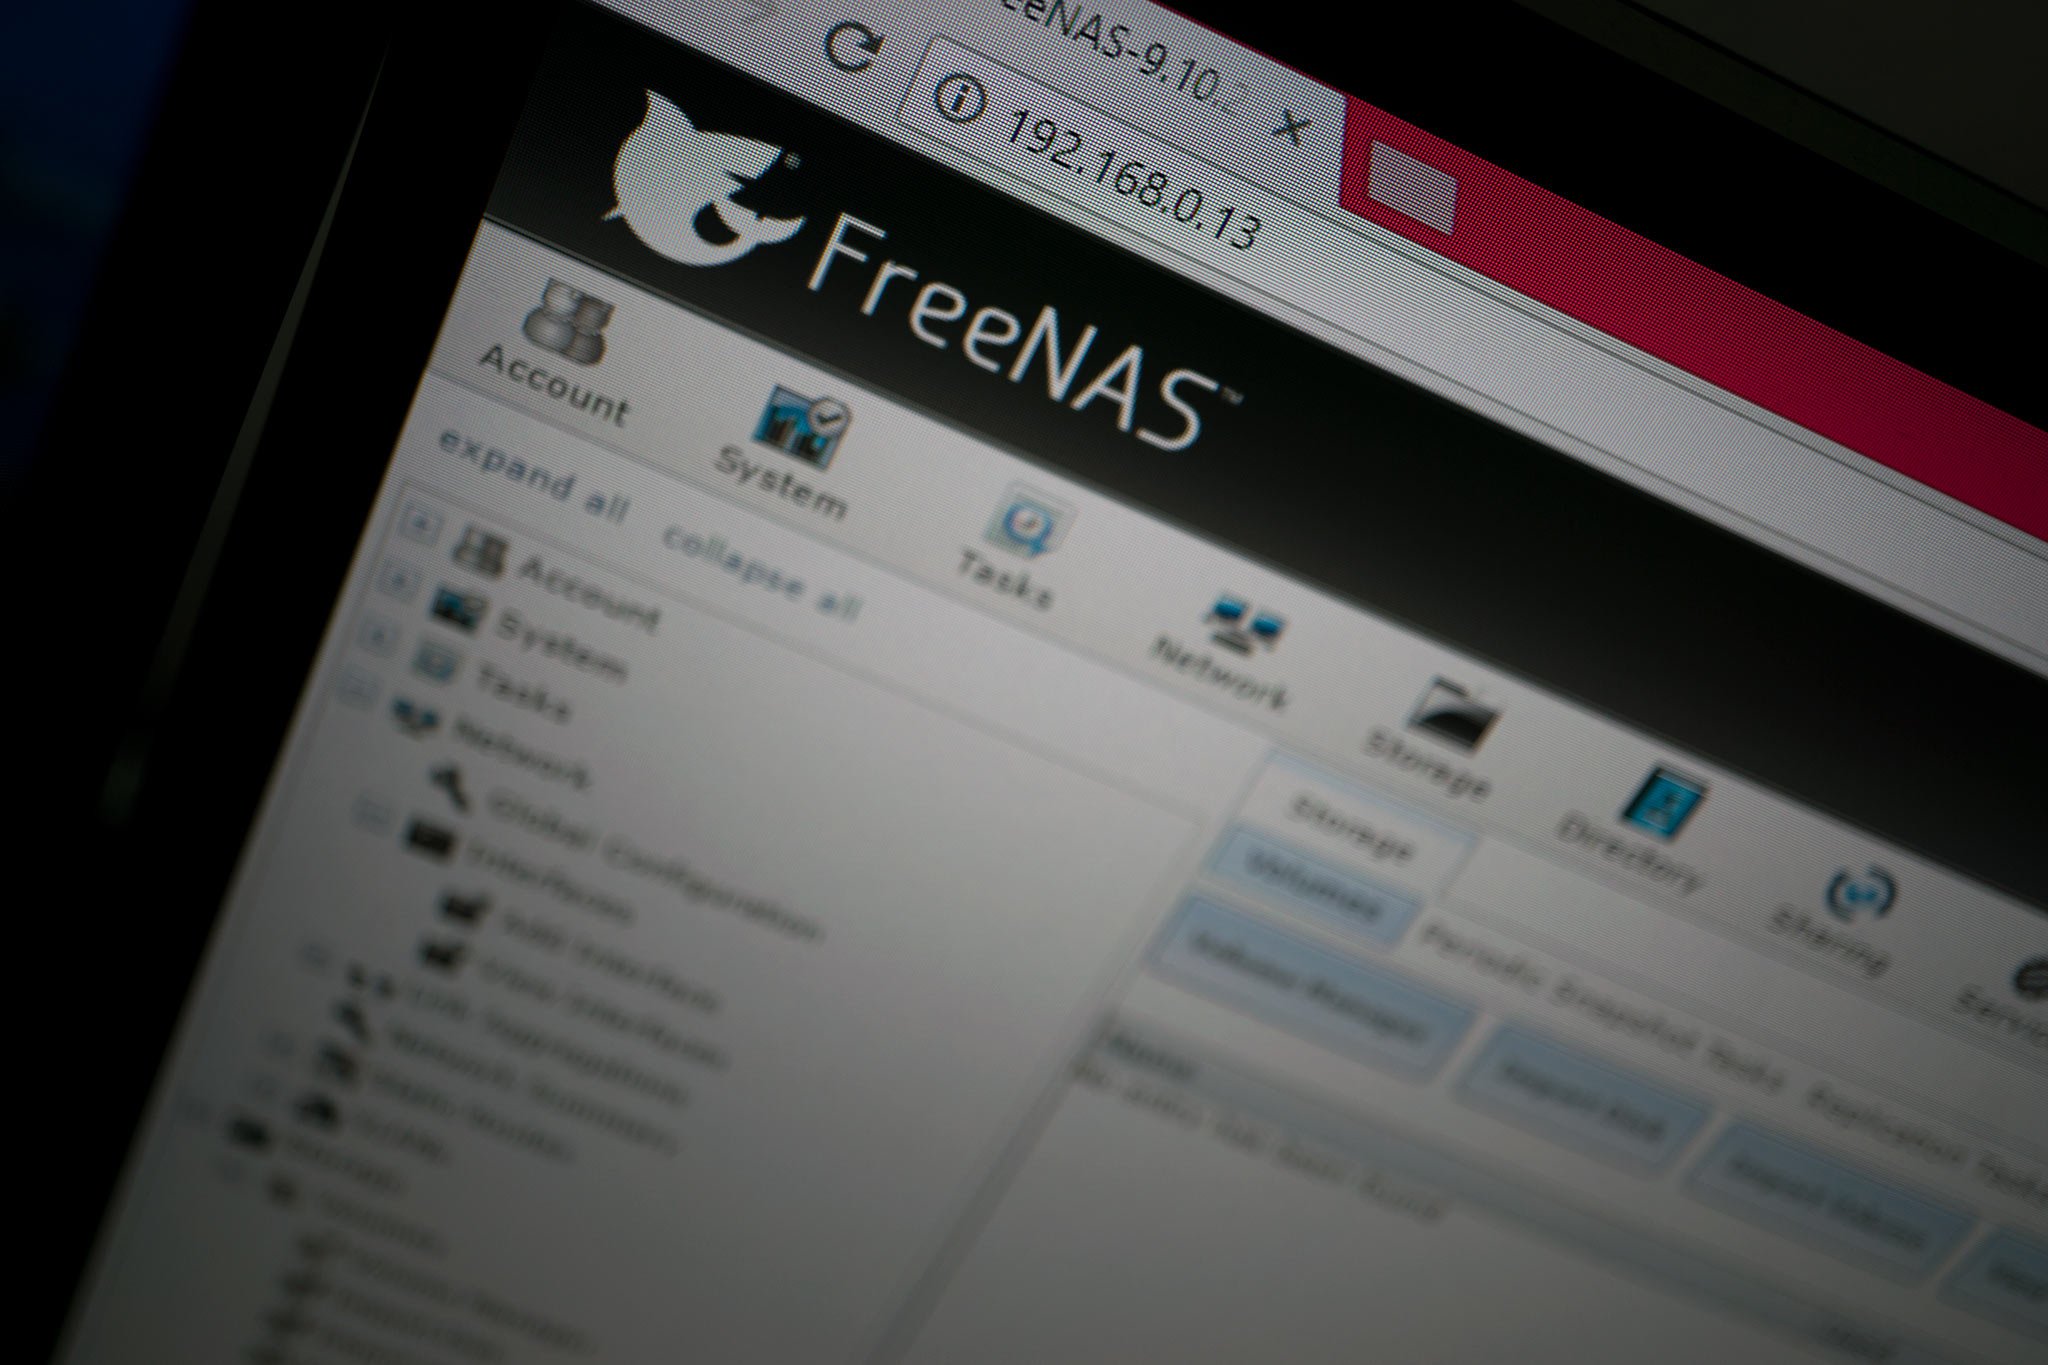
Once FreeNAS has loaded, it's possible to select from various entries on the main menu, or detach the PC from a monitor and log in to the web interface from another PC on the same network. The FreeNAS machine should provide a URL, which is essentially the IP that has been assigned to that particular machine by the network. For example, we access our FreeNAS test machine using 192.168.0.13 in the web browser.
Initial FreeNAS setup
After successfully connecting to the machine from another PC, the web interface will walk you through configuring various settings, including language, keyboard layout, and more. It's possible to exit this wizard and do everything manually. We'll run through the Wizard in our setup process to keep everything simple.
- Enter a pool name (can be unique or simply "storage").
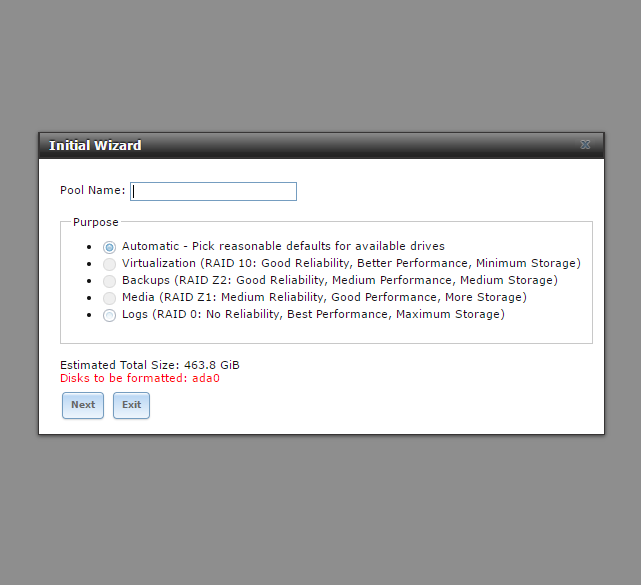
- Click Next.
- Choose RAID setup (can be left on "automatic").
- Click Next.
- Select desired Directory Service (can be left on Active).
- Click Next.
- Enter share name.
- Select Windows (SMB).
- Hit Ownership.
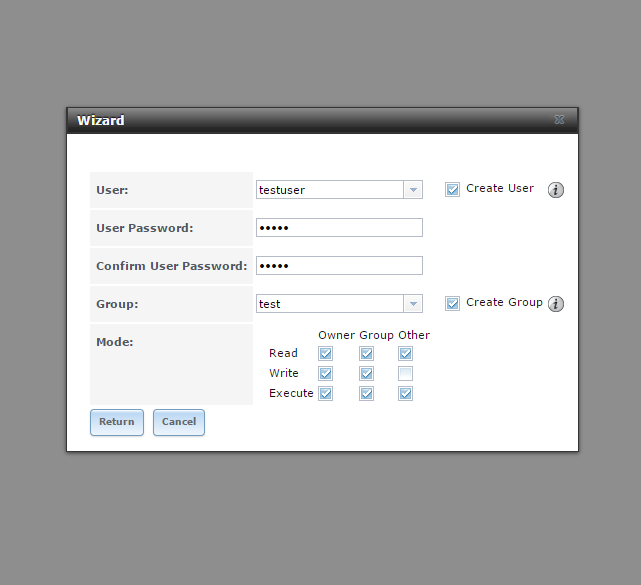
- Enter a username and select Create User.
- Enter a password.
- Create a new group and select Create Group.
- Alter permission boxes to reflect what we have.
- Hit Return.
- Hit Add.
- Click Confirm.
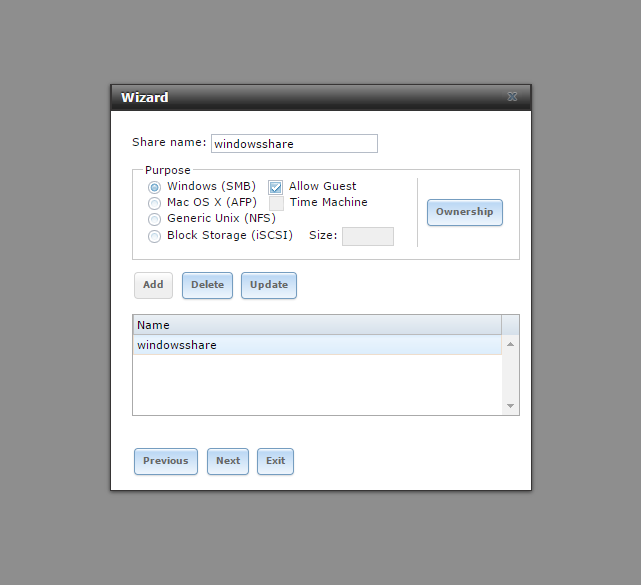
- Click Next.
- Only configure this window if you wish to set up email on the server.
- Click Next.
The web interface will now run through the configuration and apply all changes you made. This may take some time.
Setting up volumes
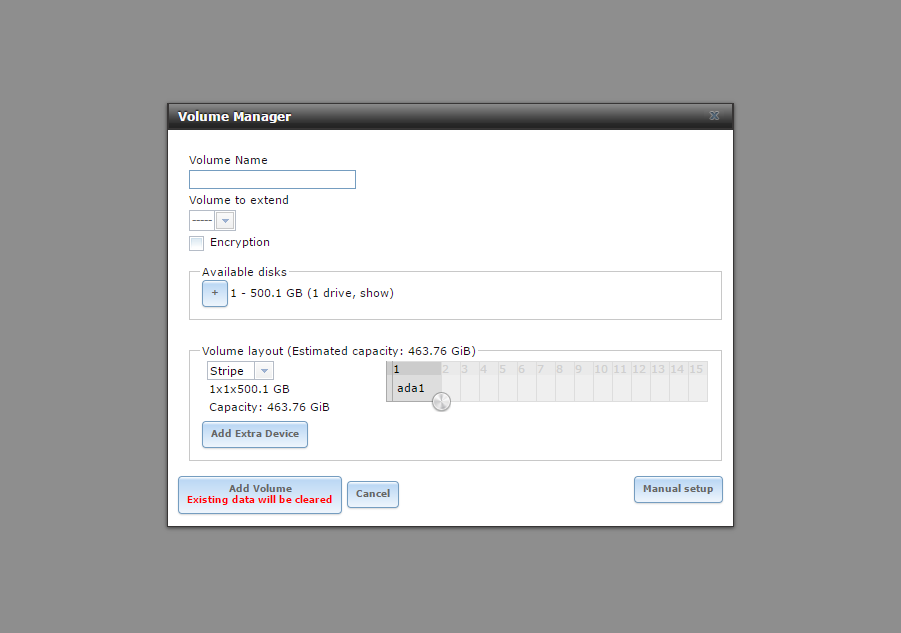
Here's how to set up a new volume:
- Go to Storage > Volumes > Volume Manager.
- Enter a name for the volume.
- Add an available disk.
- Configure the volume layout.
- Click Add volume.
Now you'll need to configure services for sharing and access.
- Click on Services at the top.
- Enable SMB.
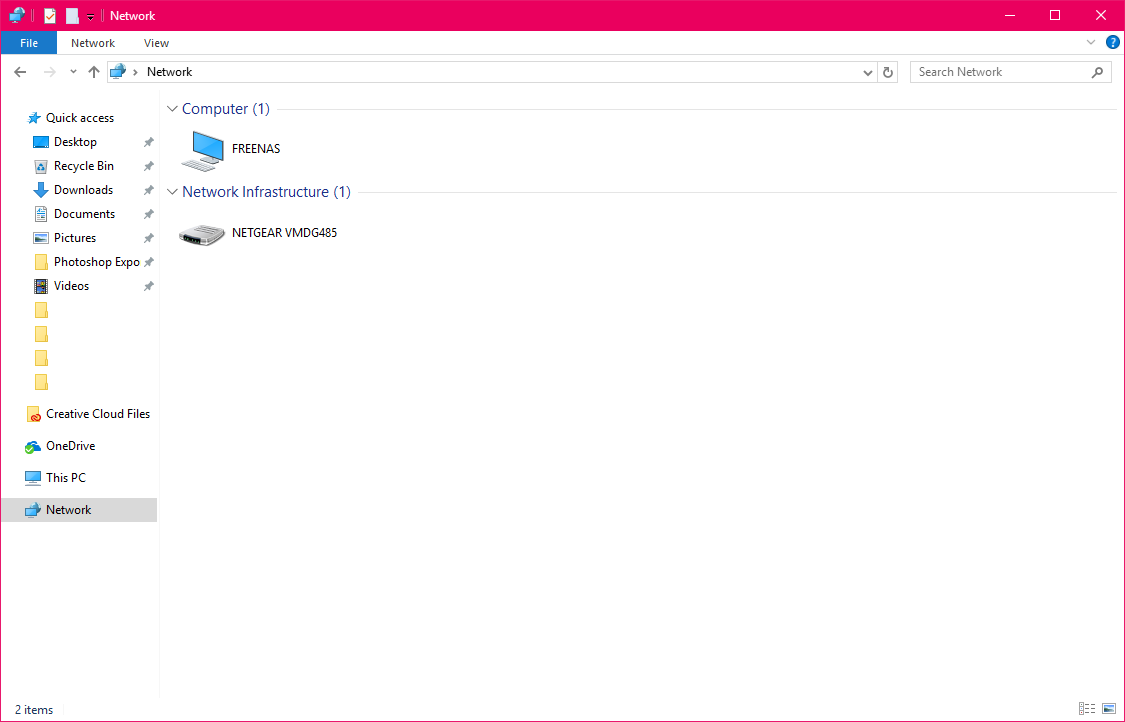
That's it. This is a basic setup using FreeNAS that will now allow for connections to be made via OS file viewer programs (Explorer on Windows and Finder on macOS, for example). Simply connect through the respective GUI options or directly by using the same IP address that is used for the web interface. A credentials window will pop up asking for login information. Enter the same user account and password you created back in the wizard.
Mapping Windows
In Windows, you can map the FreeNAS location to a specific drive letter so it appears in Windows Explorer as an internal hard drive. Here's how:
- Open Explorer.
- Right-click on This PC.
- Click on Map network drive....
- Choose a drive letter.
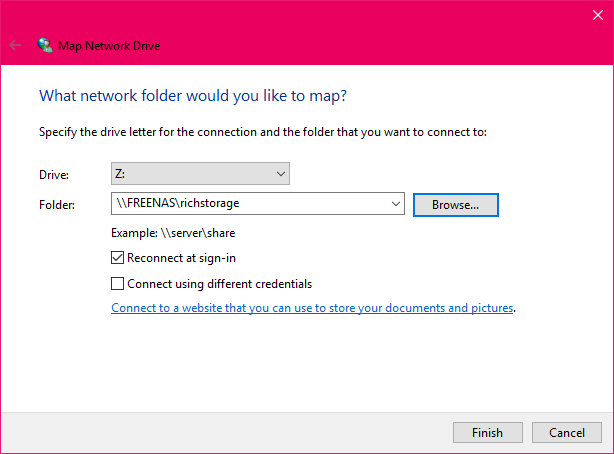
- Hit Browse.
- Browse to the network location.
- Click Ok.
- Click Finish.
Now a virtual drive will appear in Explorer, allowing for more convenient access.
Your turn to play around
Now's the time to play around with FreeNAS, exploring different aspects of the OS through the web admin interface. You can activate various services that you may desire to use, remembering that this is quite the capable platform that can be deployed as a media center with full support for popular media services, such as Plex. The best part about learning through trial and error is that it doesn't take long to reinstall the OS if you happen to really mess everything up.
Got FreeNAS up and running? Let us know in the comments what you're using it for.
Updated August 15, 2018: We updated this guide to include the latest info on installing FreeNAS.
Get the Windows Central Newsletter
All the latest news, reviews, and guides for Windows and Xbox diehards.
Rich Edmonds was formerly a Senior Editor of PC hardware at Windows Central, covering everything related to PC components and NAS. He's been involved in technology for more than a decade and knows a thing or two about the magic inside a PC chassis. You can follow him on Twitter at @RichEdmonds.
-
C:\
-
This is a great way to recycle older PC's. A few things you'll want to consider. If you intend on leaving it without a monitor, set the bios to restart on power loss, disable DHCP, set a static IP to make sure you can always find the NAS and if you're not in the habit of maintaining things, there are just as many security advisories for Linux so consider disabling the gateway and if your router has proxy arp, disable that too. Connect remotely as often as possible to re-enable the gateway, preform updates then disable gateway.
-
Using older PC hardware for FreeNAS is generally a bad idea. It's also not based on Linux.
-
Your right, it's based on BSD (not linux) and I meant to say Samba. As for the old hardware, I would still use an i3 (which is old) and a minimum 4GB of ram for 2TB of storage for a personal NAS. Significantly more of everything for a small office.
-
Personal NAS and FreeNAS are not necessarily synonymous. 4GB of RAM is too little for FreeNAS, for example, and it's highly recommended (though not required) that you use a platform that supports ECC RAM. I've been using FreeNAS for years. I love it, but it's not really designed or intended as an ad-hoc, "build as you go with old crap" NAS system. You have to be a little more intentional with it (ZFS doesn't grow easily, unlike something like UnRaid, for example), and for the best experience you need to really think about your hardware choices and how they're supported in the underlying FreeBSD version.
-
I agree on every single point. Sure 32GB ECC, multiple gigabit Ethernet NIC's, WD Red Pro's, redundant PSU, hot-swappable drive bays would be nice. But I feel the articles intended audience is geared towards those with spare hardware kicking around and an afternoon getting their hands dirty. If they do enjoy what they've accomplished, they can always upgrade and the seed has been planted.
-
The problem with this kind of article is that FreeNAS does not work reliably well under those conditions. There are better alternatives (like previously mentioned UnRaid, or even just Windows 10 and Storage Spaces) if you aren't going to dedicate specific hardware and intentionally build for FreeNAS. Doing otherwise leads to weird and unexpected errors, many of which you can see on the official forums.
-
Sadly, you get posts like that everywhere and what I can't understand, is how people in retail do it all day. Rich, toddos raises a lot of good points and more articles like this would be great. True story BTW. Last year while I was out of town, my 10 year old son decided to use my Raspberry PI's to make Minecraft servers. He was one of those people posting to forums and while they didn't run worth a crap, he did get them going and something I'll always be proud of.
-
I'm all for hacking on a shoestring if you're doing it intentionally. I take issue with writing an article suggesting anybody/everybody should do it. The truth of the matter is that most people would be served perfectly well by something as simple as a WD Cloud Mirror or similar, and if they really needed more then a Synology or Drobo (or whatever the cool new thing is in that space -- I've been DIY for so long, I don't even know). An article like this a) doesn't belong on WindowsCentral in the first place, and b) if it is going to be posted, needs a "DIY", "Do at your own risk", "This is not the right way to do it" series of tags and disclaimers.
-
Beware: The ZFS file system used by FreeNAS is designed for robustness and is periodically verifying file integrity. This can cause smaller USB flash drives to overheat, resulting in loss of the OS (but not your data; though getting that back on-line is going to take work). Also flash drives may not have the best longevity and not all brands are equal. A good recommendation I saw and use is to mirror the OS on at least two flash drives so that if one fails, you're safe. Doing that has already saved me from one failed flash drive. At less than $20 (I use 16 GB drives), it's cheap insurance for my time trying to recover. Also, before using FreeNAS in any real use case, I highly recommend more research than this very basic article. There are many configuration options and other issues like that highlighted above that you should consider if you value your data and/or time.
-
Probably the greatest tip is adding more than one flash drive.
-
How is this any different from seting up a HomeGroup in Windwos 10? I aleady share all my files btw all my PCs without FreeNAS.
-
NAS - Network-attached storage is popular in the Enterprise environment where data center handles a large amount of data from multiple users. NAS has built-in features to prevent data loss from losing physical HDDs. Many vendors do sell NAS unit to enterprise and home users. Popular brands such as Western Digital does provide NAS models for home use. The key here is data protection from hardware failure. For example, my ZFS pool consist of six 4Tb HDD is configured as RAID Z2, this configuration allows 2 of my HDD to fail without me losing any data. I can just buy 2 new 4 Tb HDD popped it in and issue a rebuild command and no data is lost. FreeNAS is just an open source software for people that want to build their own NAS with available PC components. Bear in mind, FreeNAS is still a relatively complex software that requires an understanding of Unix or Linux operating system especially if things starts to go wrong, nevertheless a good challenge for people that are up to the task.
-
I think Homegroup has been deprecated.
-
Windows 10 file sharing FTW!! I don't wanna learn some third party OS.
-
Thanks for the article. Will have a tinker with this.
-
Back in 2012 I tried to build a FreeNAS system to become my media store, unfortunately I had a SATA RAID card. They had drivers, but it was terribly unstable, so I junked it and put Windows on the system and decided to see how it went. Today, that NAS is just about to have it's sixth birthday, it's currently supporting 36TB (12x3TB) with scope to go to 16x4GB at some point (it also survived several house moves including a transatlantic one). It's been upgraded from Win 7 all the way to the latest Win 10 release and has run pretty much 24x7 throughout those 6 years. Cost of parts (including the OS, but the not the drives) was competitive with a 4-bay NAS at the time, but I had 16 hot plug bays, a Gbit interface, 8GB of cache and a processor that was fast enough for Plex transcoding. If you want something simple that integrates perfectly with a network of PCs at home, using Windows has a lot to be said for it.
-
I don't think ECC memory is needed, I do think that the dual USB or mini sata flash card on board is with usb backup. And if you encrypt knowing where the key is. I use FreeNas personally, for clients rock solid and If you plan you can grow just find. For performance I would separate my pools anyway in addition to having 1GB of ram per TB. Just my opinion though I would suggest it for a lab not a home media use.