How to force a Blue Screen of Death (BSoD) on Windows 11
You can force a blue screen error for testing purposes, and here's how on Windows 11.
All the latest news, reviews, and guides for Windows and Xbox diehards.
You are now subscribed
Your newsletter sign-up was successful
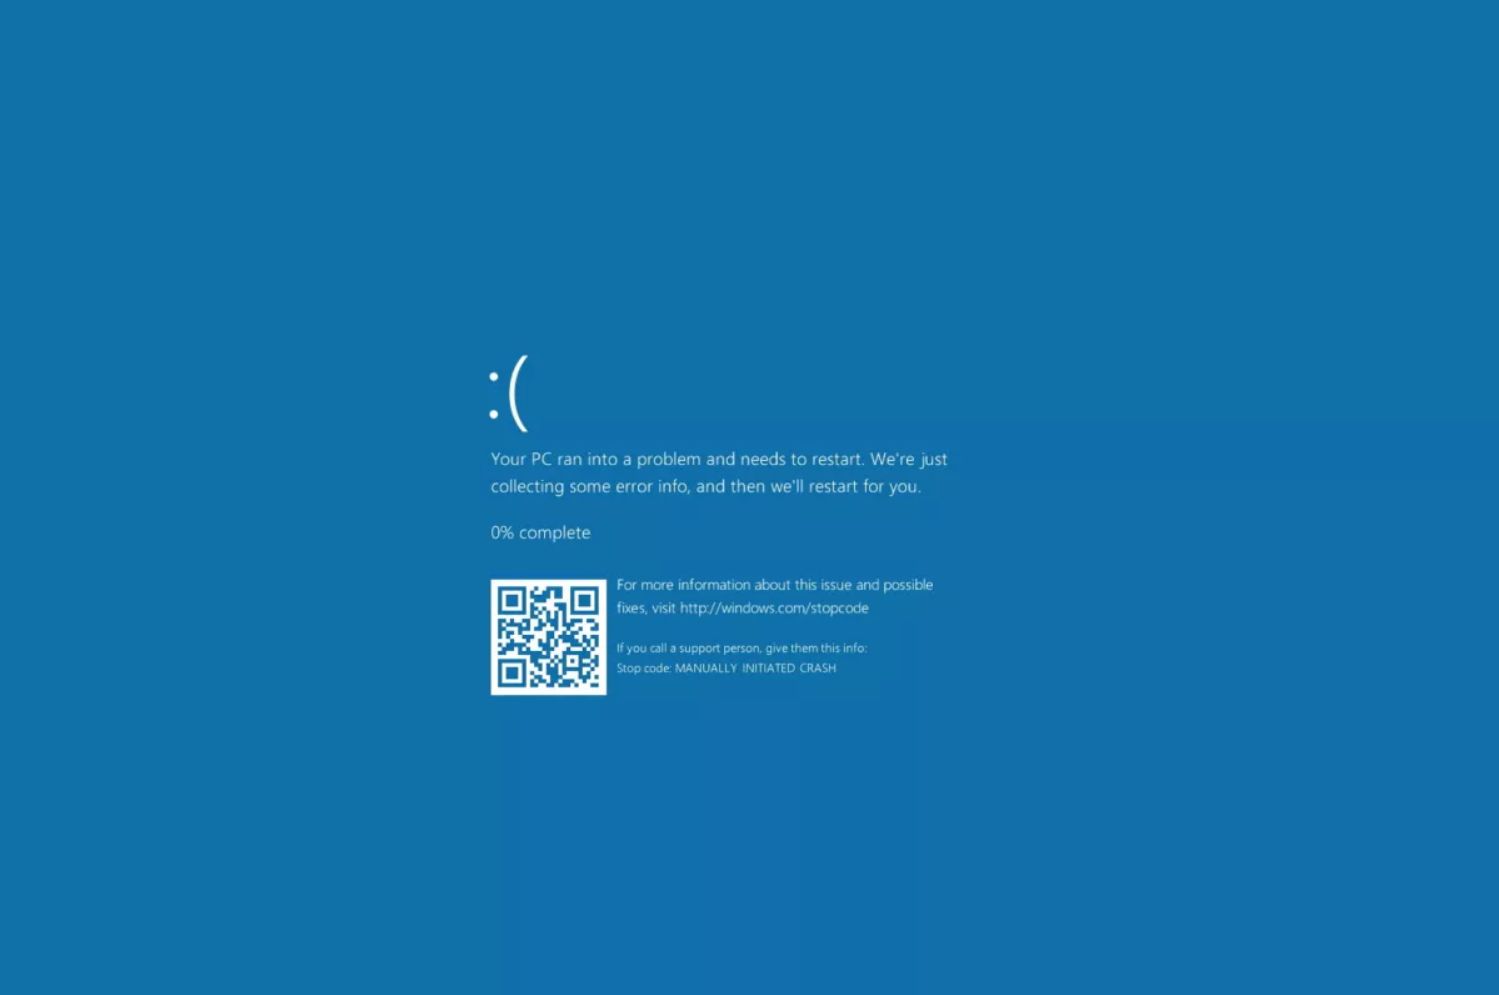
On Windows 11, a Blue Screen of Death (BSoD) – also referred to as a "stop error" and "bug check"– is an error that the system triggers during a critical problem. Although you never want to stumble upon this error, sometimes, you may need to force a bug check for different reasons, including testing the system or a program you're developing or playing a prank on someone.
Regardless of the reason, Windows 11 includes an option you must enable through the Registry that allows you to invoke a key combo to force a Blue Screen of Death.
This guide will walk you through the steps to configure Windows 11 to force a Blue Screen of Death error.
Warning: This is a friendly reminder that editing the Registry is risky and can cause irreversible damage to your installation if you don't do it correctly. Before proceeding, it's recommended to create a backup of your computer.
How to force BSoD error on Windows 11
To intentionally generate a Blue Screen of Death on Windows 11, use these steps:
- Open Start.
- Search for regedit and click the top result to open the Registry.
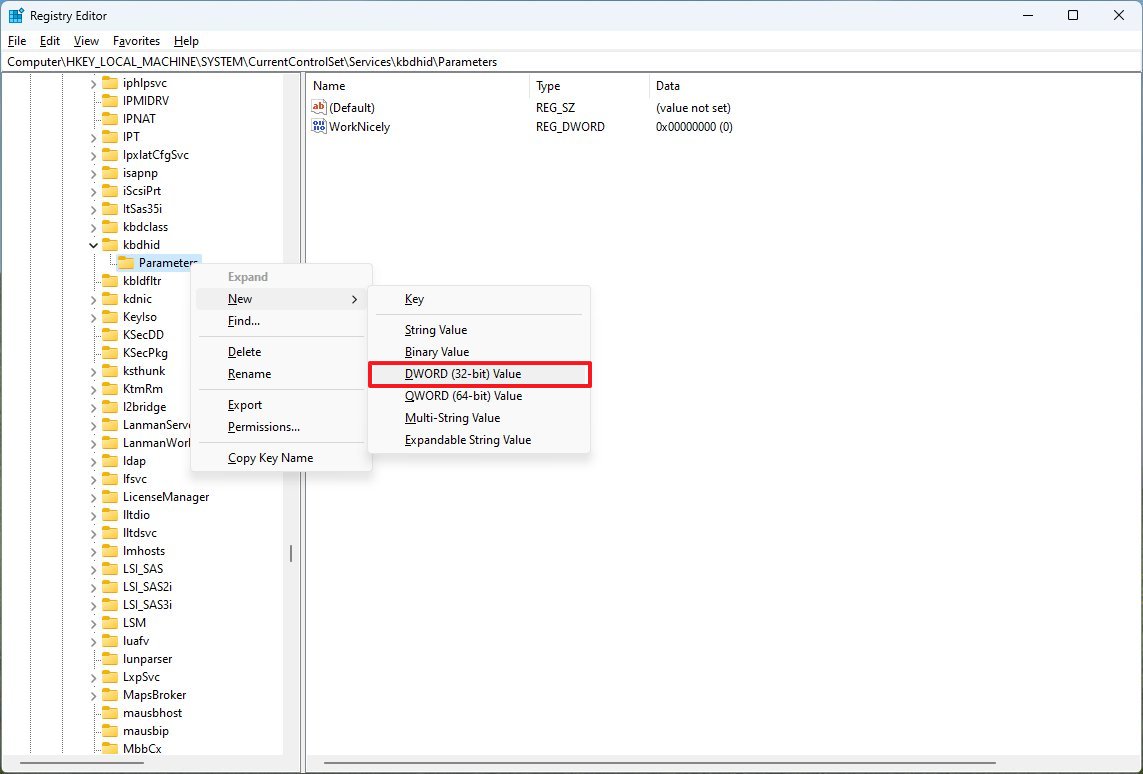
- If you plan to use a USB keyboard, browse the following path: HKEY_LOCAL_MACHINE\SYSTEM\CurrentControlSet\Services\kbdhid\Parameters
- Right-click the Parameters key, select New, and then click on DWORD (32-bit) Value.
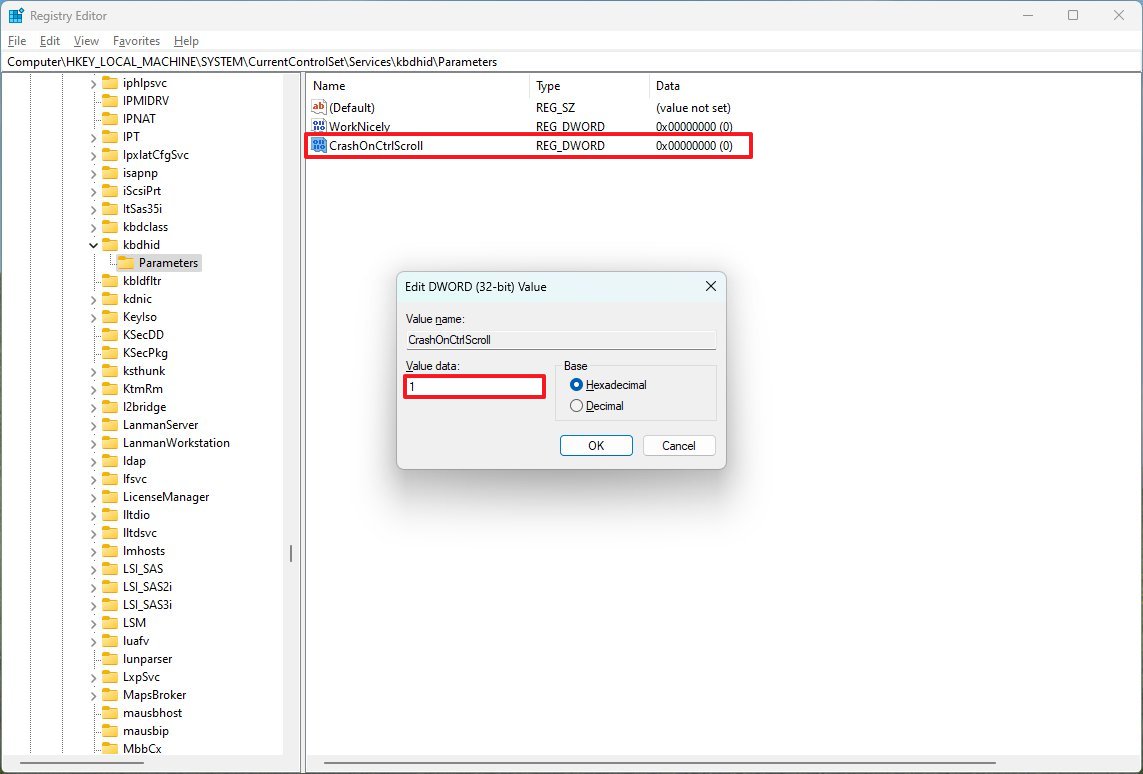
- Name the new DWORD CrashOnCtrlScroll and press Enter.
- Double-click the newly created DWORD and change its value from 0 to 1.
- Click the OK button.
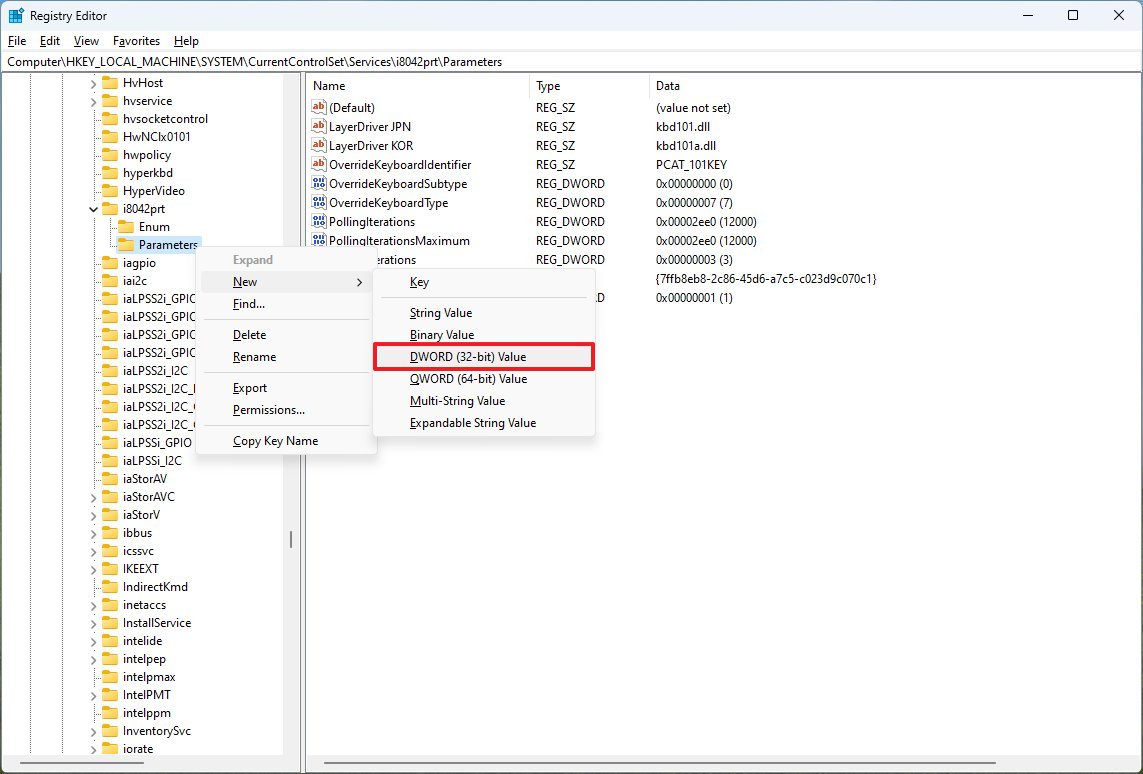
- (Optional) If you plan to use a legacy PS/2 keyboard, browse the following path: HKEY_LOCAL_MACHINE\SYSTEM\CurrentControlSet\Services\i8042prt\Parameters
- Right-click on the right side, select New and then click on DWORD (32-bit) Value.
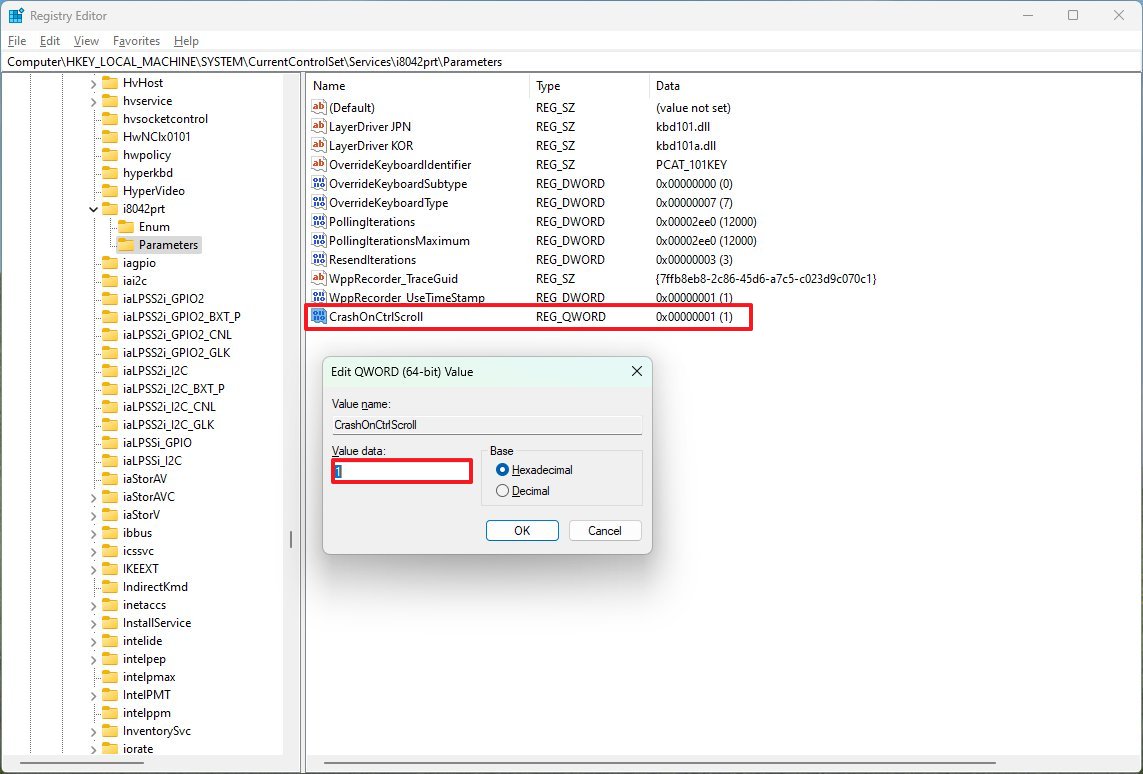
- Name the new DWORD CrashOnCtrlScroll and press Enter.
- Double-click the newly created DWORD and change its value from 0 to 1.
- Click the OK button.
- (Optional) If you plan to use the Hyper-V keyboard on a virtual machine, browse the following path: HKEY_LOCAL_MACHINE\System\CurrentControlSet\Services\hyperkbd\Parameter
- Quick note: The key is only available on devices with Hyper-V already enabled.
- Right-click on the right side, select New and then click on DWORD (32-bit) Value.
- Name the new DWORD CrashOnCtrlScroll and press Enter.
- Double-click the newly created DWORD and change its value from 0 to 1.
- Click the OK button.
- Restart the computer to apply the settings.
Once you complete these steps, hold down the (right) "Ctrl" key and press the "Scroll Lock" twice to cause a Blue Screen of Death intentionally.
As you action the shortcut, the system will trigger a KeBugCheck and generate a 0xE2 error displaying a bugcheck with a "MANUALLY_INITIATED_CRASH" message. In addition, Windows 11 will also save a dump file for further debugging.
All the latest news, reviews, and guides for Windows and Xbox diehards.
If you have to undo the changes, you can use the same steps, but on steps 3, 8, or 13, depending on the setting you enabled, right-click and delete the CrashOnCtrlScroll DWORD.
More resources
For more helpful articles, coverage, and answers to common questions about Windows 10 and Windows 11, visit the following resources:

Mauro Huculak has been a Windows How-To Expert contributor for WindowsCentral.com for nearly a decade and has over 22 years of combined experience in IT and technical writing. He holds various professional certifications from Microsoft, Cisco, VMware, and CompTIA and has been recognized as a Microsoft MVP for many years.
