How to get started with Side Panel on Google Chrome
Check out all you can do with the Side Panel on Chrome on your Windows PC.
All the latest news, reviews, and guides for Windows and Xbox diehards.
You are now subscribed
Your newsletter sign-up was successful
On Windows 11 (or 10), if you use Chrome, you probably still haven't noticed the "Side Panel," which gives you access to various features.
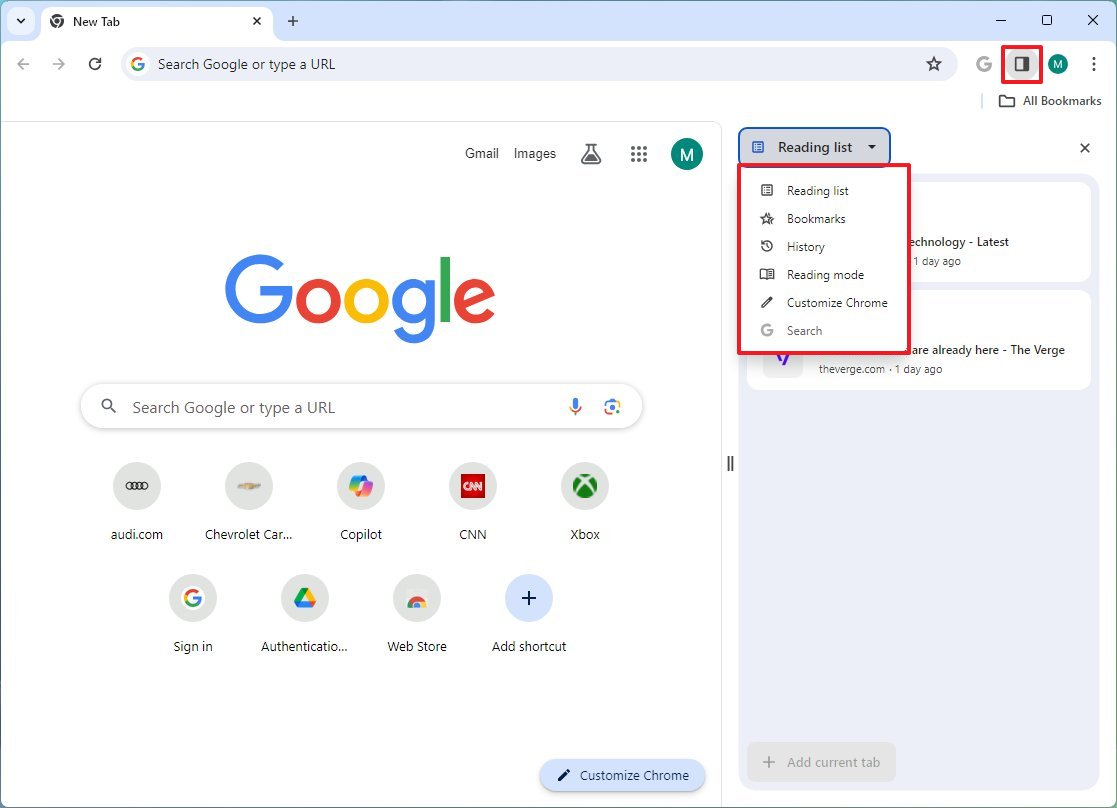
The Side Panel is accessible from any website and serves as a handy tool that provides quick access to several features, some of which you're probably not using, including Reading List, Bookmarks, History, Reading mode, Customize Chrome, and Search.
In this how-to guide, I will walk you through the features available through the Side Panel on Google Chrome.
How to access and use the Chrome Side Panel
To access the Side Panel, use these steps.
- Open Chrome.
- Open any website.
- Click the Side Panel button from the top-right corner.
- Select the feature to use in the browser.
- (Optional) Click and drag the left side to make the Side Panel bigger.
Once you complete the steps, you will have access to the available functionalities.
Reading list
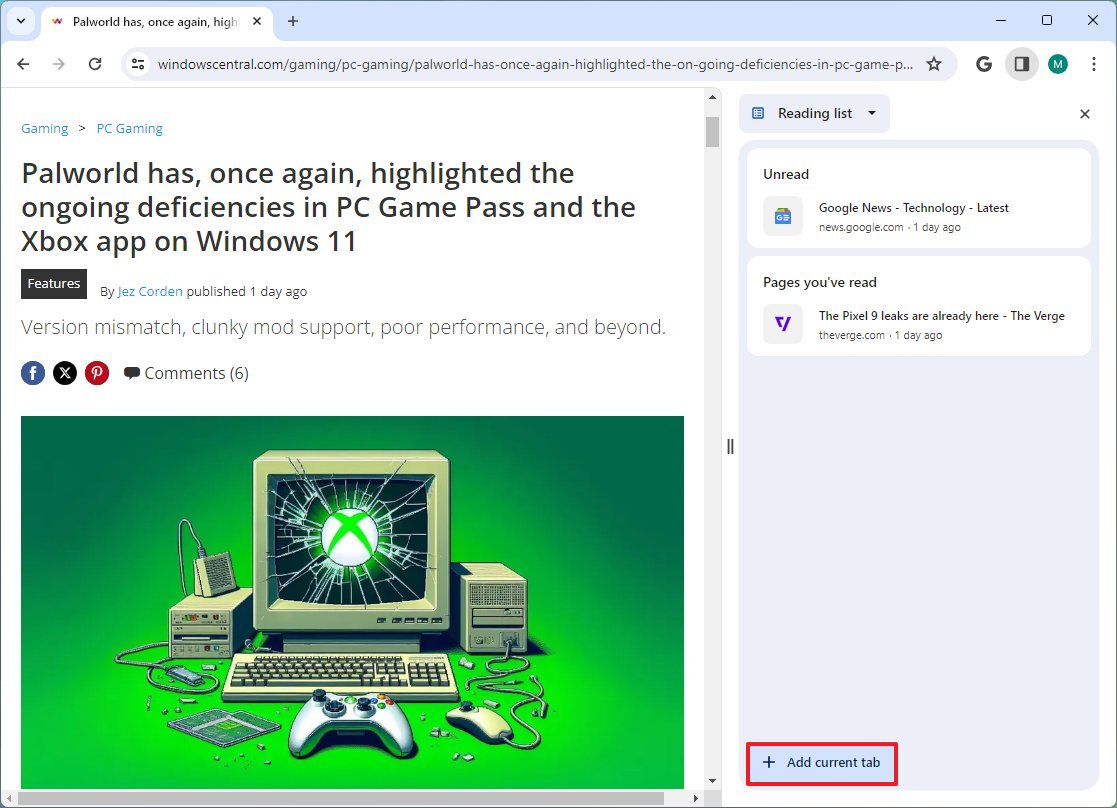
"Reading list" is a feature that allows you to bookmark pages temporarily. The feature is helpful when you find the content you want to read later and don't want to save in the bookmarks, since you won't return to that page once read.
To use Reading list on Chrome, use these steps:
All the latest news, reviews, and guides for Windows and Xbox diehards.
- Open Side Panel.
- Choose the Reading list option from the drop-down menu.
- Open a web page with content.
- Click the "Add current tab" button.
- Repeat steps 3 and 4 to add more pages.
Once you complete the steps, you can always open the panel, and as you go through each page, you can click the "Mark as read" button on the link or the "Mark current tab as read" button at the bottom of the panel. Or click the "Delete" (X) button to remove the link from the panel.
Bookmarks
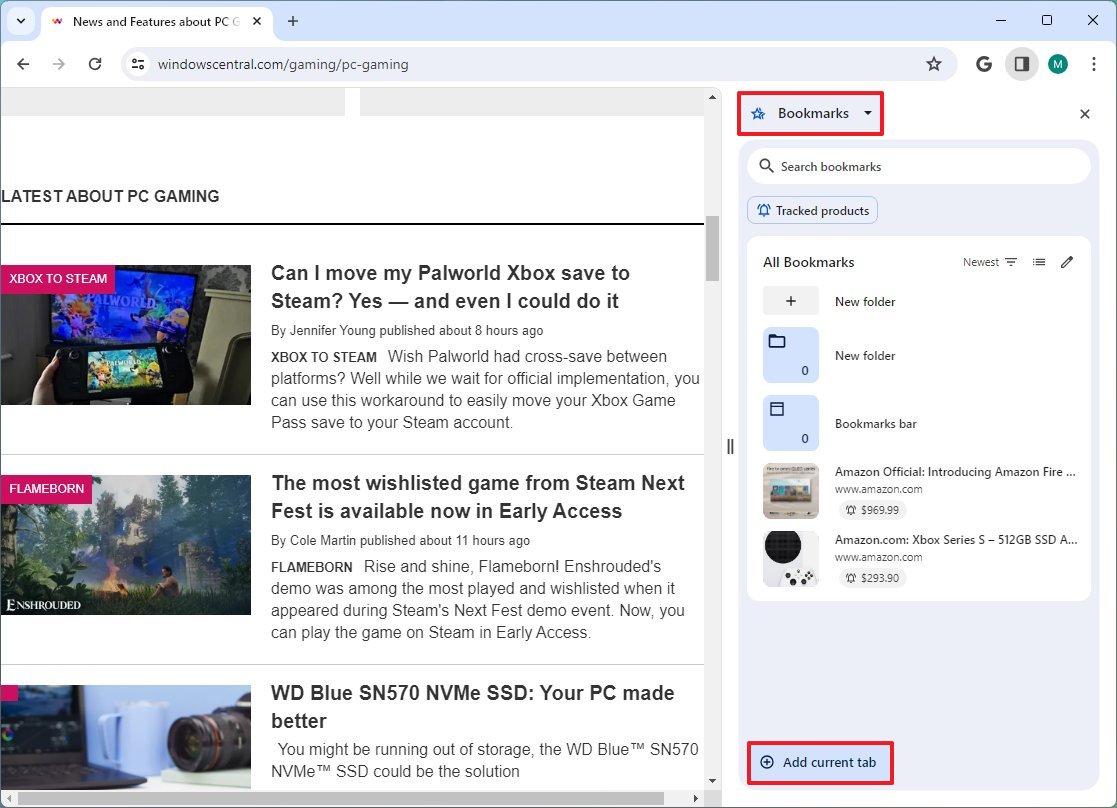
"Bookmarks" is the same feature that has been around for a long time, but the experience from the "Side Panel" is new. The most significant difference is that the new interface manages your favorite links and tracks products with the Google pricing tracking feature.
To use Bookmarks from the Side panel, use these steps:
- Open Side Panel.
- Choose the Bookmarks option from the drop-down menu.
- Open a web page with content.
- Click the "Add current tab" button.
- Repeat steps 3 and 4 to add more pages.
- Quick tip: Of course, you can always save pages through the "Star" button in the Omnibar.
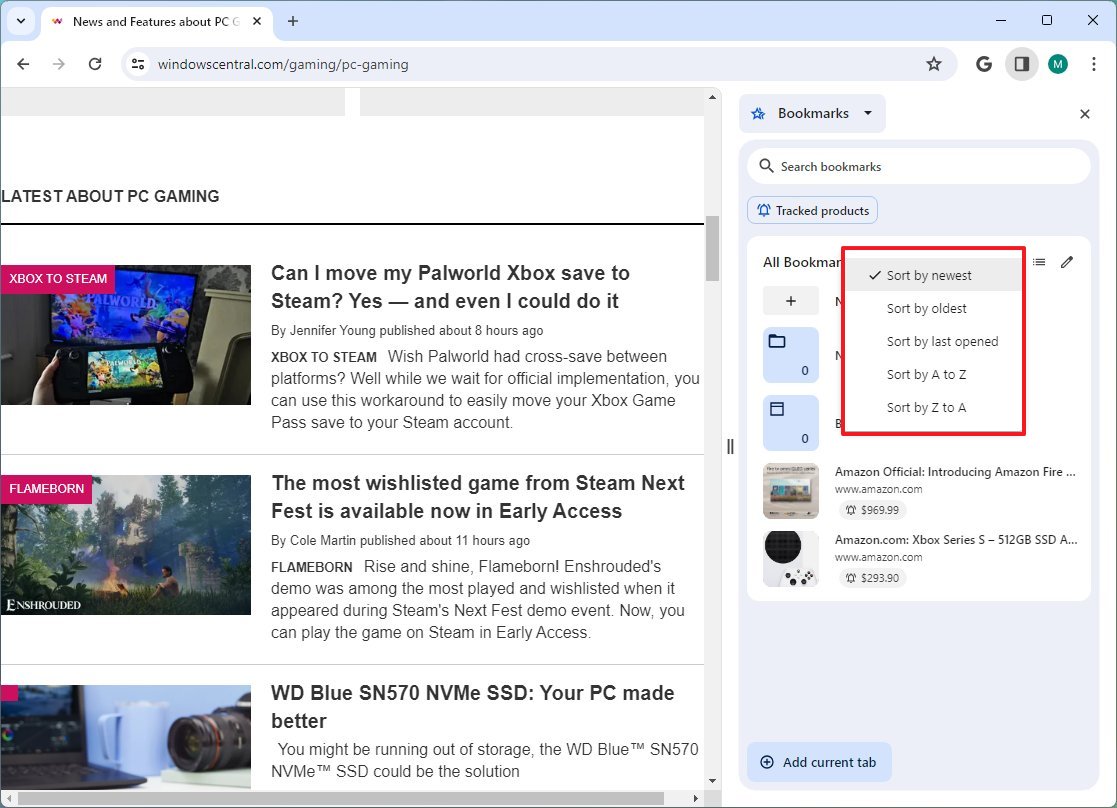
- (Optional) Open the sort menu from the top-right and choose from one of the available options, including newest, oldest, last opened, and alphabetical.
- (Optional) Click the "Visual view" button to change the layout.
- Quick note: Although you can change the view, consider that the default layout shows bigger thumbnails, making it easier to identify the page.
You can also use the search box at the top to quickly look for any bookmark. If you want to organize your saved links further, you can right-click a link to access the available options. Also, the "Edit" button in the top-right allows you to select multiple bookmarks that you can then delete, move, or open in a different tab or window with the options available at the bottom of the page.
The interface even includes an option to create new folders, making this experience much better than the legacy "Bookmarks Manager."
If you want to see the products you're tracking with Google, click the "Tracked bookmarks" button at the top of the page.
History
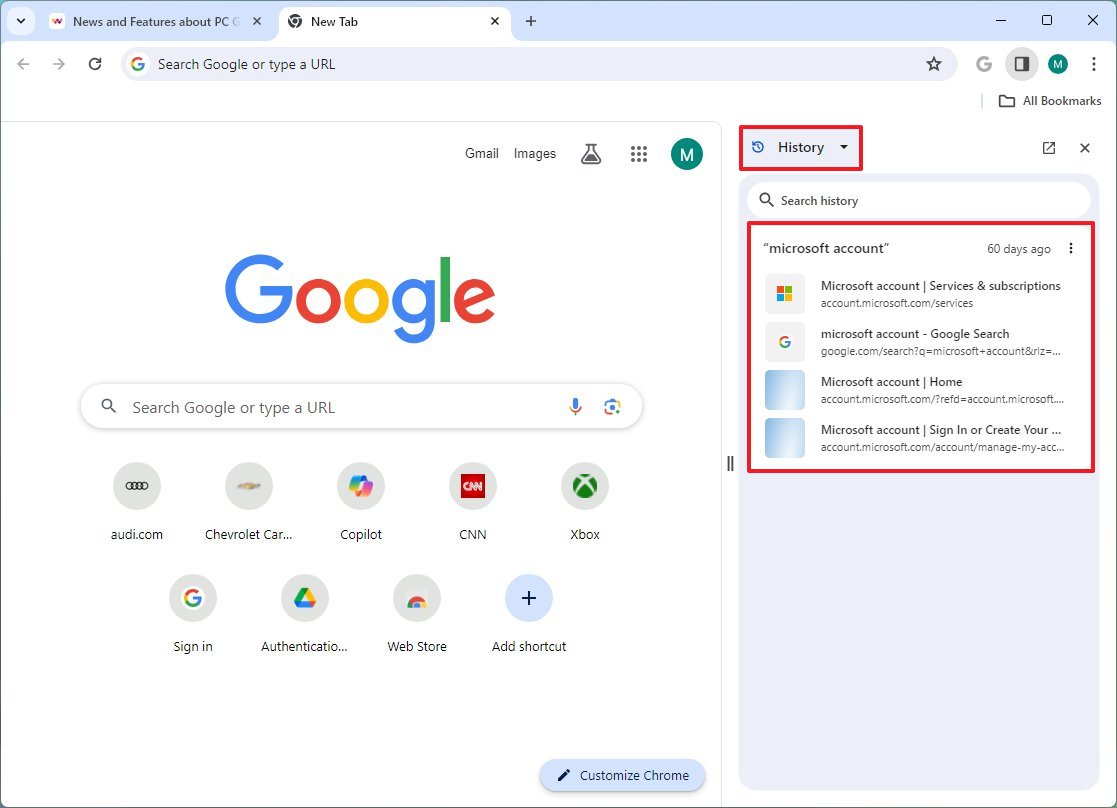
The "History" feature shows the pages you have visited in the past. However, they are sorted by search terms, meaning you will only find the history of pages you visited using a Google search. If you want to view all your activities, you will have to open the legacy history feature.
To use History, use these steps:
- Open Side Panel.
- Choose the History option from the drop-down menu.
- Review your page history in Google search.
Each group is labeled using the search term, and you can use the context menu on the right to take different actions, including opening all pages in a tab group, hiding the items, or removing them from history.
Reading mode
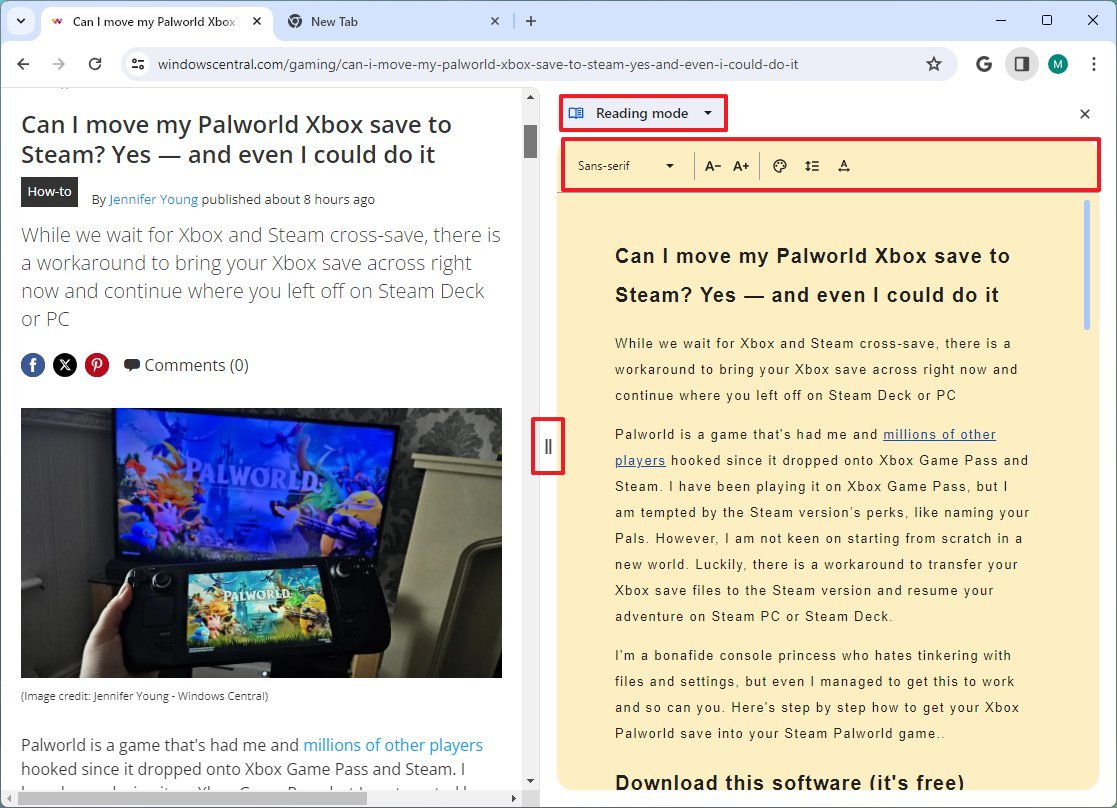
The "Reading mode" feature converts the page into a clean document without clutter, but without closing the original page on the left.
To use Reading mode, use these steps:
- Open Side Panel.
- Open the page you want to use with this mode.
- Choose the Reading mode option from the drop-down menu.
- Quick tip: Click and drag the side of the panel to improve the reading experience.
Optionally, you can customize the font size and family, background, line height, and spacing between the words and letters to improve the reading experience.
Customize Chrome
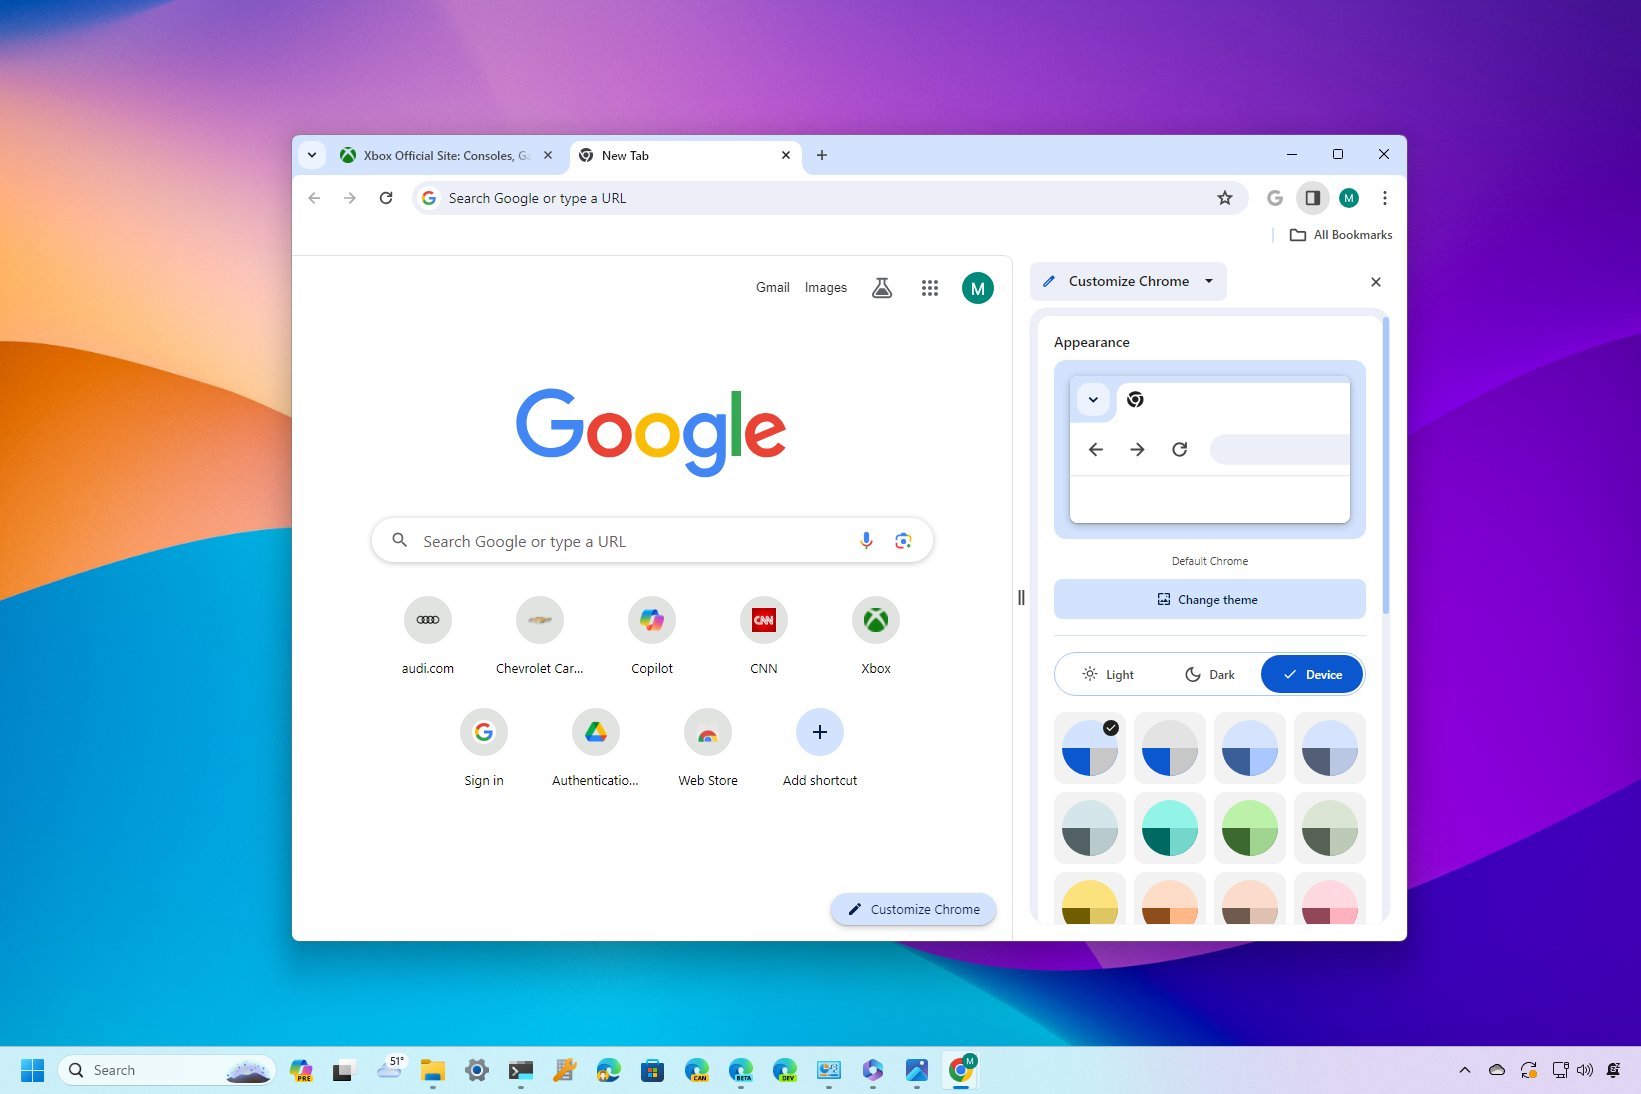
The "Customize Chrome" feature is usually available from the new tab page, not a web page. The feature allows you to customize various browser aspects, including themes, shortcuts, and cards.
Change colors
To customize the appearance of Chrome, use these steps:
- Open Side Panel.
- Open a new tab page.
- Choose the Customize Chrome option from the drop-down menu. Or click the button from the bottom-right corner of the new tab page.
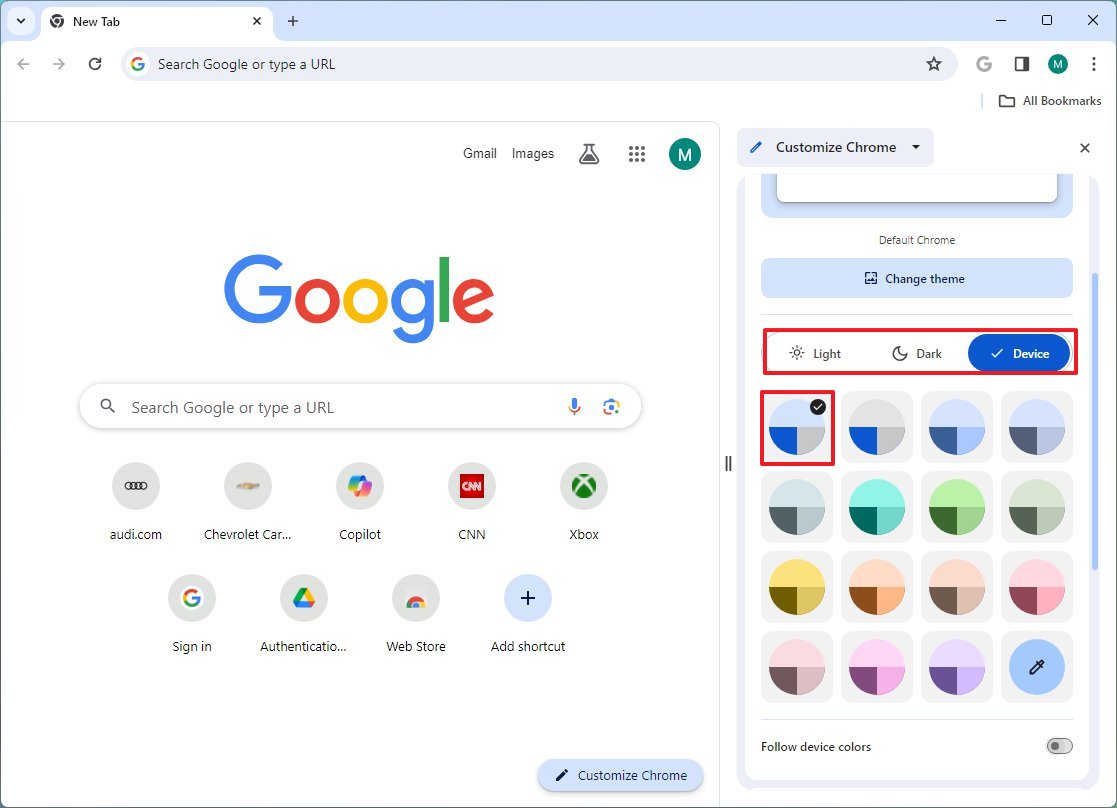
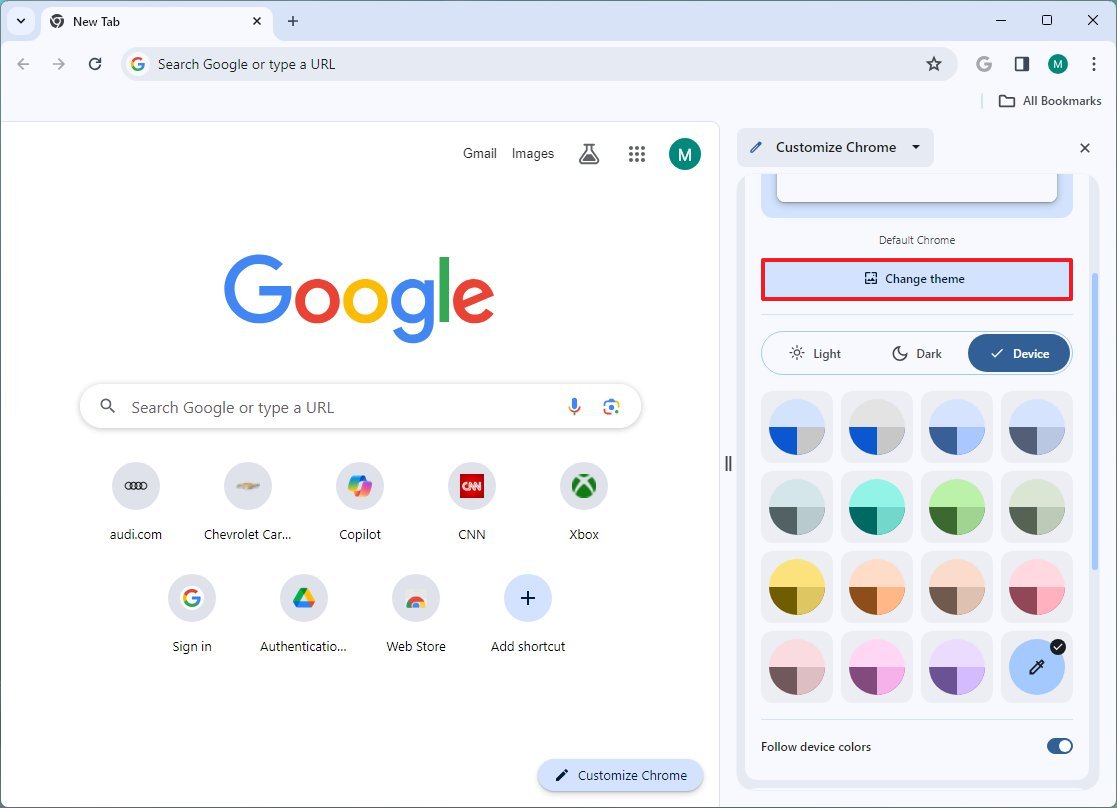
- Choose the color mode of the browser, including "Light," "Dark," or the "Device" option will match the operating system mode.
- Select one of the available color schemes.
- Quick tip: The "Custom color" option allows you to create your very own color scheme for Chrome.
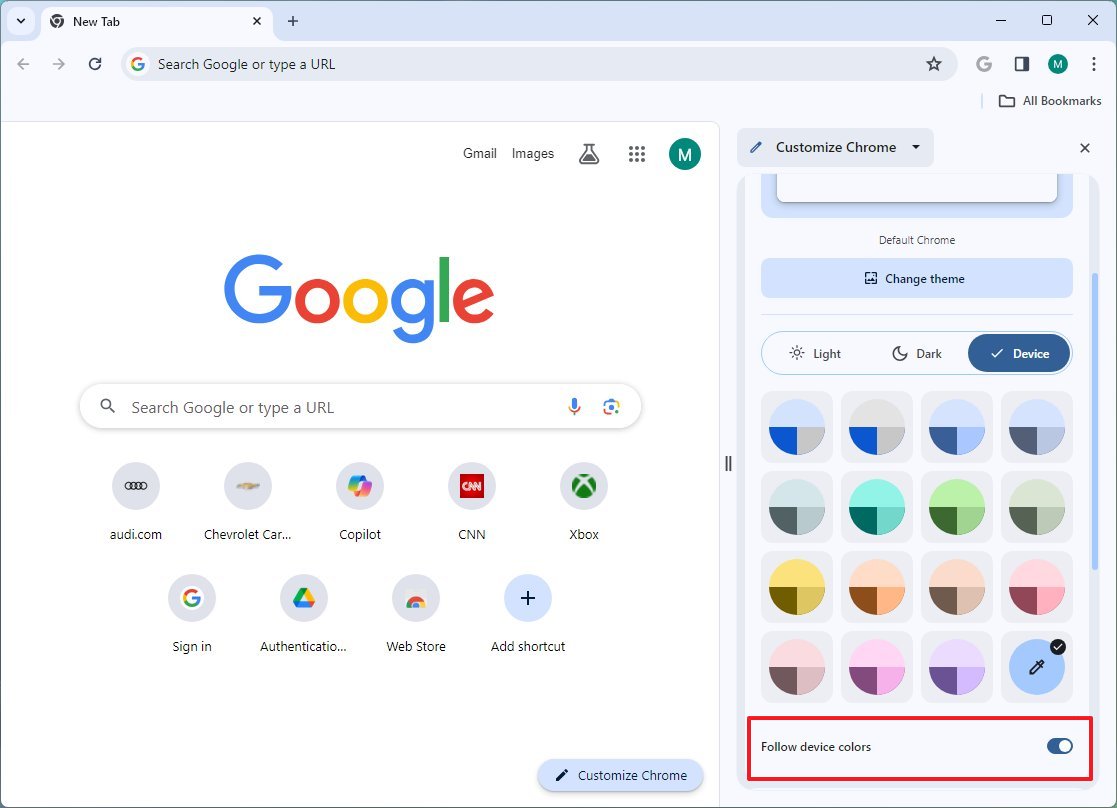
- (Optional) Turn on the "Follow device colors" toggle switch to allow Chrome to match the operating system color scheme.
After you complete the steps, the new color will apply to the browser.
Change themes
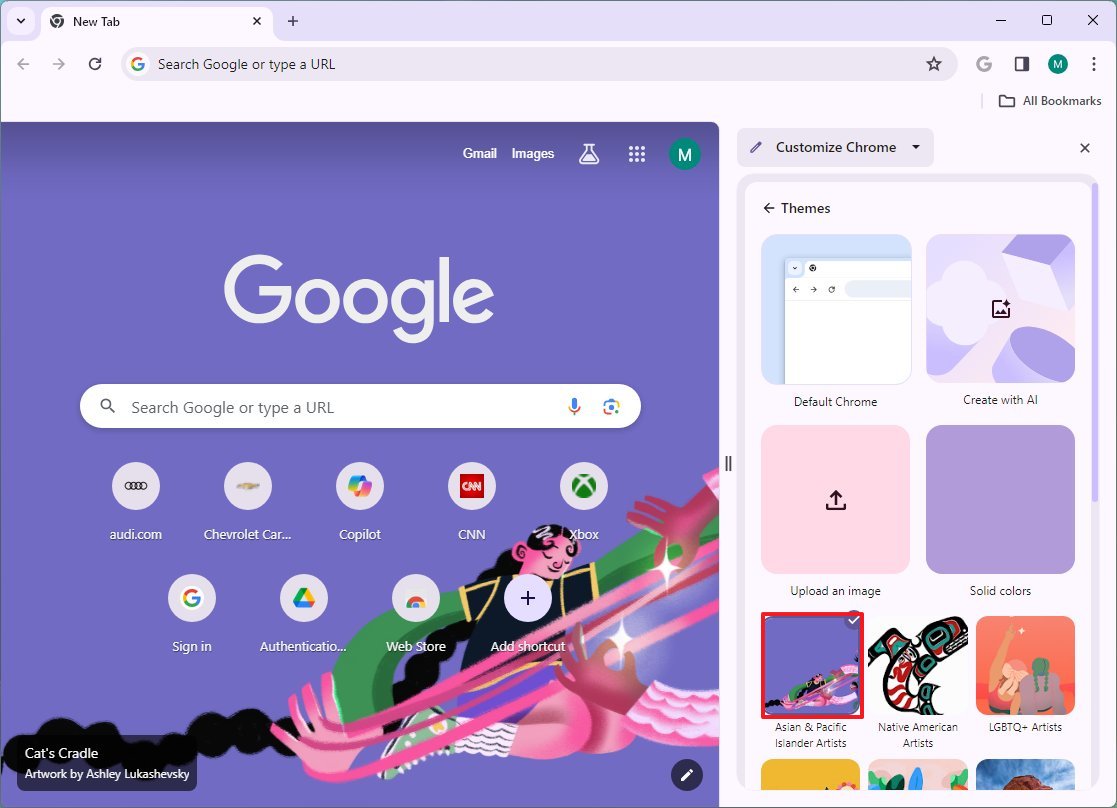
On Chrome, themes allow you to use background images and colors to change the look and feel.
The browser comes with various themes, and you can download more from the Chrome Web Store, but starting with version 121, you can now use AI to create custom themes for Google's browser.
To change themes, use these steps:
- Open Side Panel.
- Open a new tab page.
- Choose the Customize Chrome option from the drop-down menu.
- Click the Change theme button.
- Choose one of the available themes.
- Quick tip: You can also upload your own image and choose a custom color for the theme.
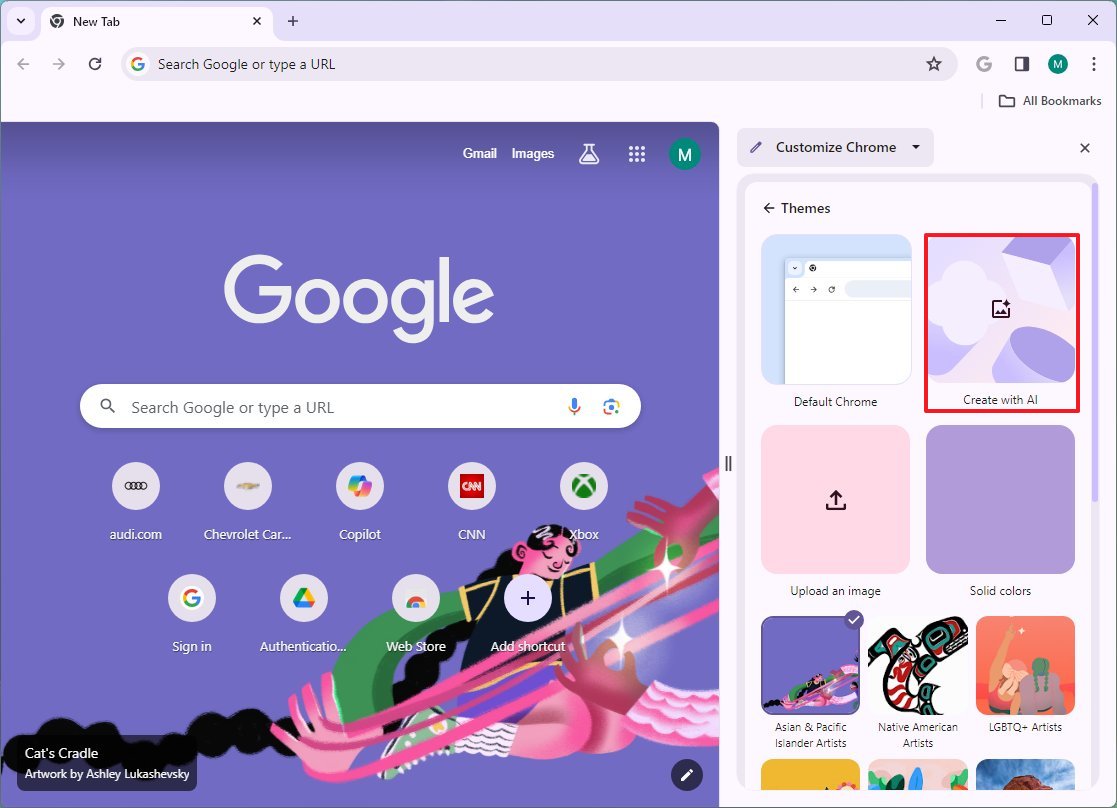
- (Optional) Click the "Create with AI" option.
- Quick note: This feature is currently only available for users in the United States.
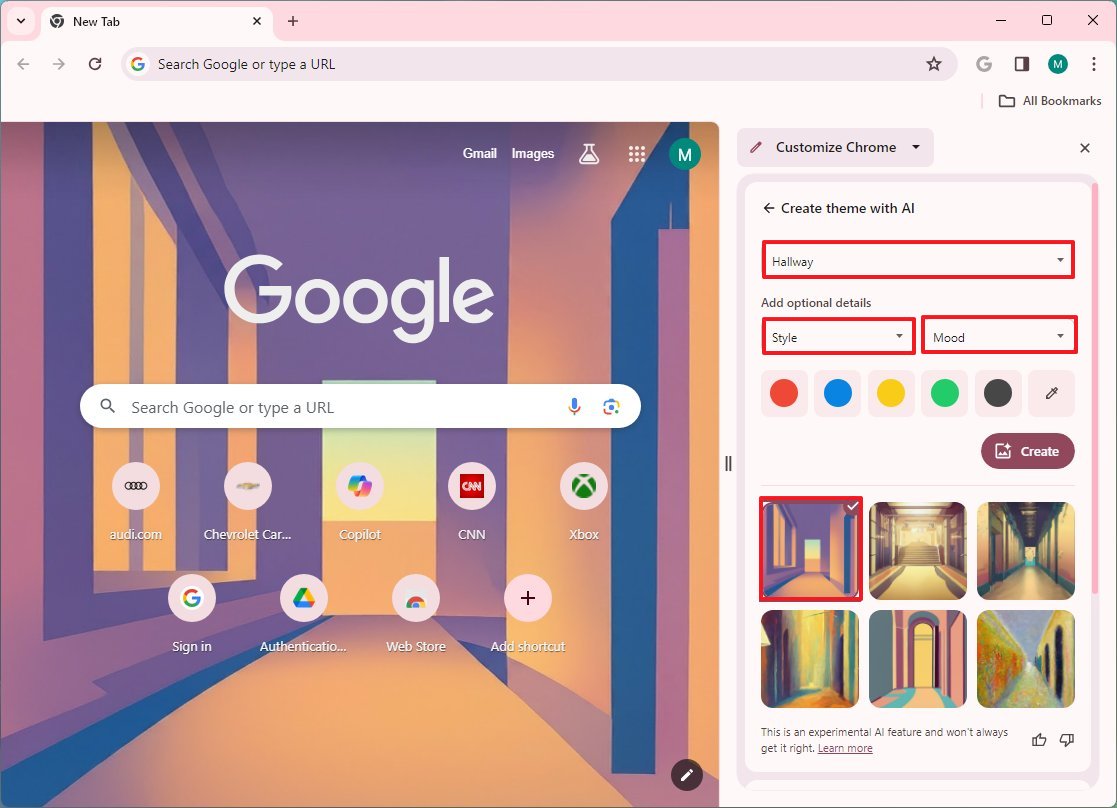
- Select the topic of the theme to create with the "Subject" setting.
- Choose one of the 16 styles (Animated, Dream, Fantasy, etc).
- Choose one of the 12 moods (Dark, Serene, Snowy, etc).
- Select the primary color for the theme.
- Click the Create button.
- Select the theme created with AI to apply it.
Once you complete the steps, the new theme with the custom background for the new tab page will apply to the browser.
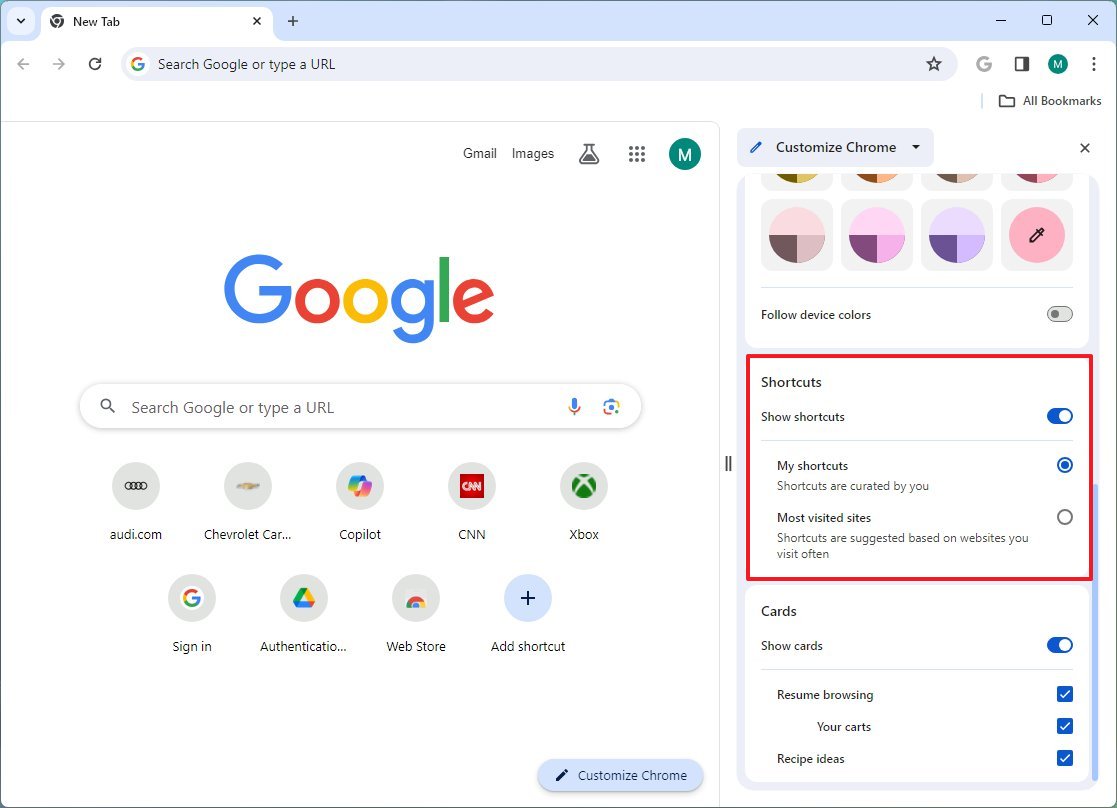
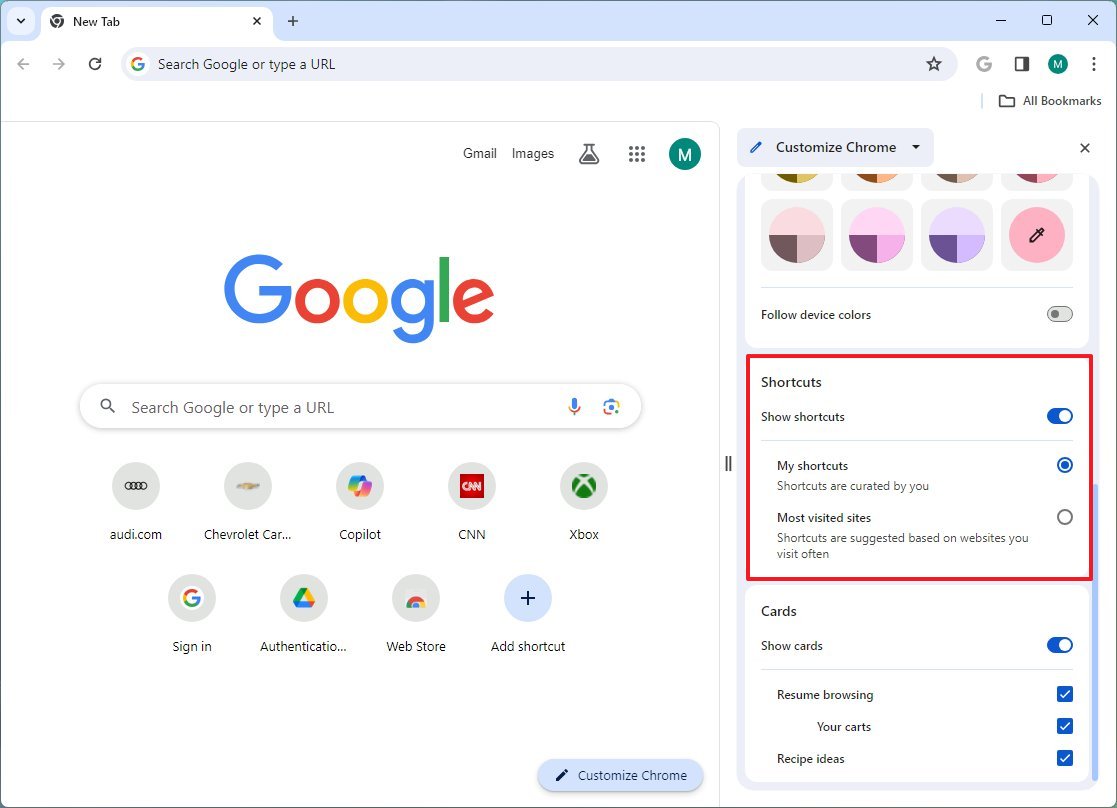
Manage shortcuts
In the new tab page, Chrome can show shortcuts to specific websites you created manually, or set it to show the most visited sites.
To manage Chrome shortcuts, use these steps:
- Open Side Panel.
- Open a new tab page.
- Choose the Customize Chrome option from the drop-down menu.
- Turn on the "Shortcuts" toggle switch. (If you don't like this feature, you can turn it off.)
- Choose the "My shortcuts" option to display only your shortcuts, or the "Most visited sites" to show the most frequent pages.
- Quick tip: If you use the shortcuts option in the new tab page, use the "Add shortcut" option to create the items you want to see on this page.
After you complete the steps, the shortcuts will appear on the new tab page of Chrome.
Manage cards
In the new tab page, the browser can also show cards to help you resume previous searches and continue shopping, and you can either turn this feature on or off.
To turn cards on or off, use these steps:
- Open Side Panel.
- Open a new tab page.
- Choose the Customize Chrome option from the drop-down menu.
- Turn the "Cards" toggle switch on or off to manage the feature.
Once you complete the steps, the cards will appear on the new tab page, according to your configuration.
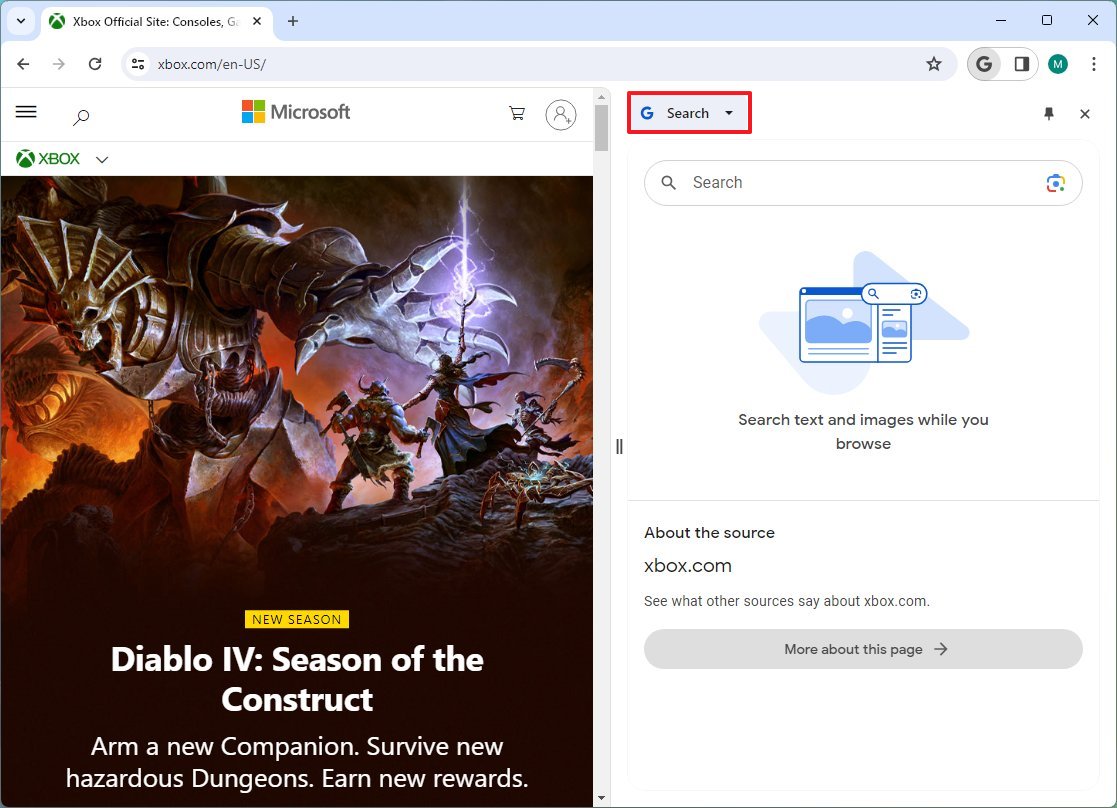
Search
The "Search" feature allows you to research the website or the content in the tab. Although you can access the feature from the Side Panel, Chrome also has a dedicated option in the toolbar next to Omnibar.
To get started with the Search feature on Chrome, use these steps:
- Open Side Panel.
- Open a web page with content.
- Choose the Search option from the drop-down menu.
- Quick tip: You can also click the Search (Google) button in the toolbar. If the option is grayed out, it's because you're viewing a page with content.
In the experience, you can learn to click the "More about this page" to access the available details. Or you can use the search box to perform other related searches without leaving the tab. (This feature works more like a split screen feature.)
More resources
For more helpful articles, coverage, and answers to common questions about Windows 10 and Windows 11, visit the following resources:
- Windows 11 on Windows Central — All you need to know
- Windows 10 on Windows Central — All you need to know

Mauro Huculak has been a Windows How-To Expert contributor for WindowsCentral.com for nearly a decade and has over 22 years of combined experience in IT and technical writing. He holds various professional certifications from Microsoft, Cisco, VMware, and CompTIA and has been recognized as a Microsoft MVP for many years.
