How to hide (or unhide) files on Windows 11
Yes, you can hide virtually any file you want, and here's how on Windows 11.
All the latest news, reviews, and guides for Windows and Xbox diehards.
You are now subscribed
Your newsletter sign-up was successful
On Windows 11, even though you always lock access to your desktop and files behind your account name and password, you can always find reasons to hide files and folders. For instance, you created a program, and you want to protect the files by making them invisible to prevent users from accidentally deleting some of the files. Or you have specific documents or videos you want to make a little more private.
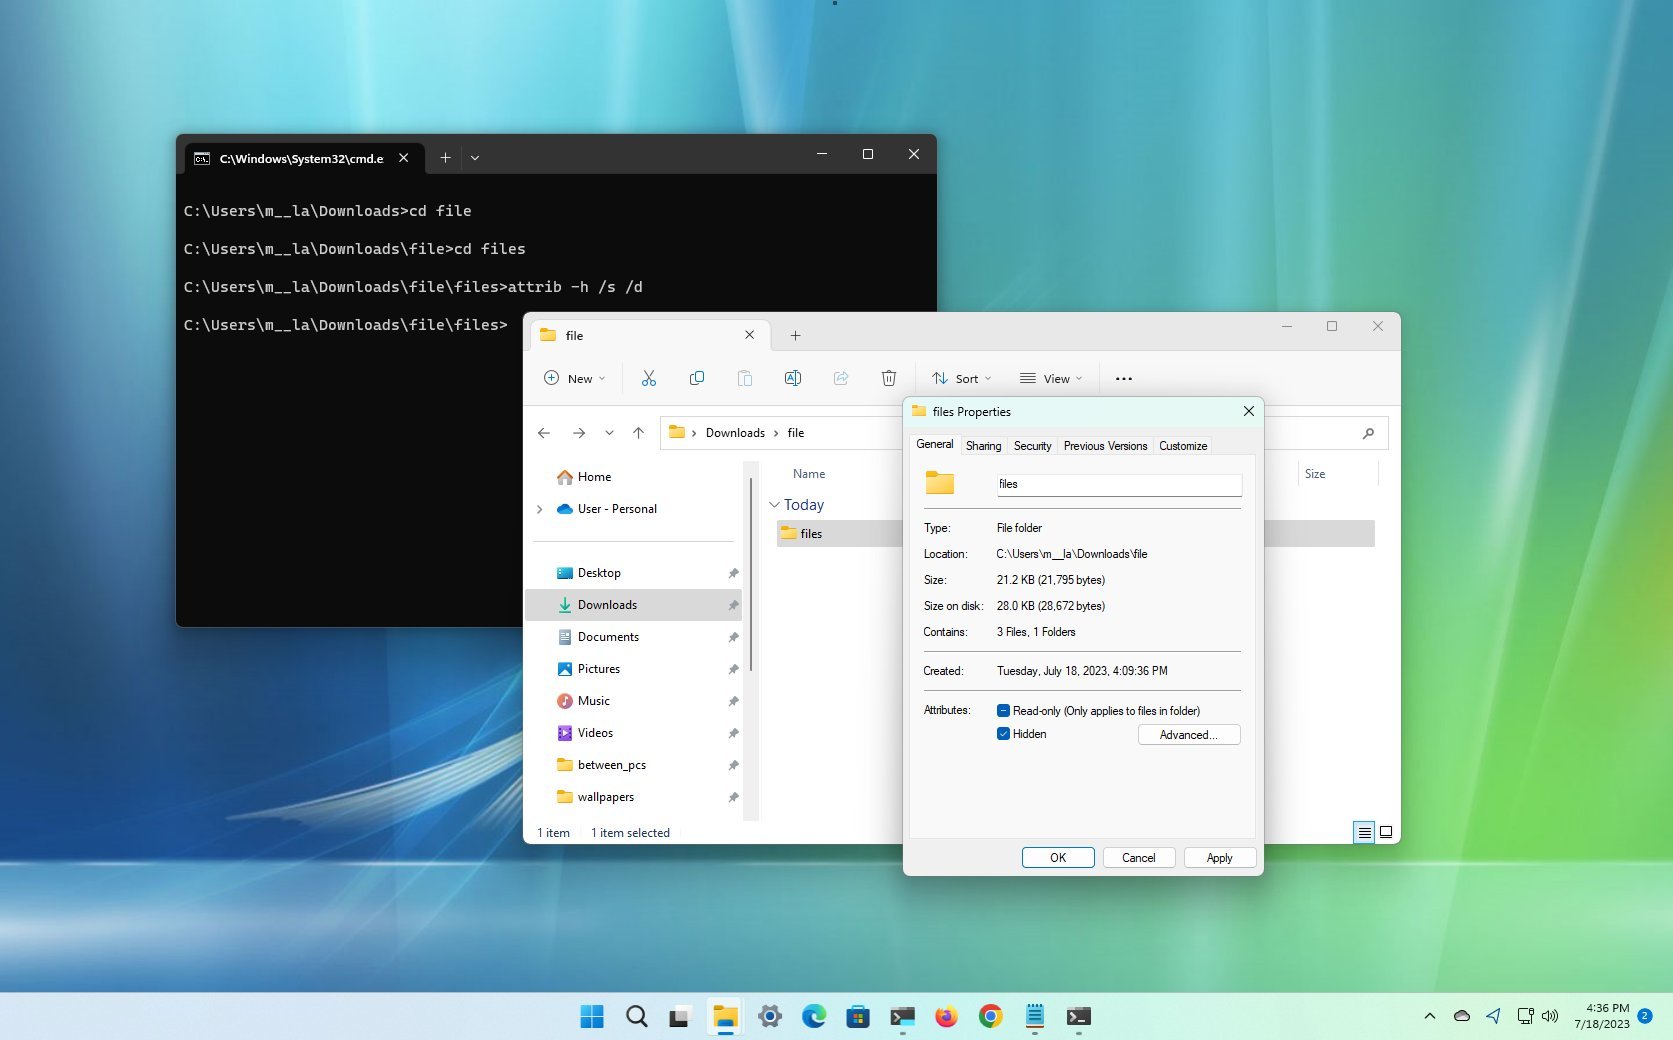
Regardless of the situation, Windows 11 includes multiple ways to hide one or multiple files and folders using File Explorer or commands with PowerShell or Command Prompt.
This how-to guide will walk you through the steps to hide (and unhide) specific files and folders on Windows 11.
How to hide files and folders from File Explorer on Windows 11
To hide files and folders on File Explorer, use these steps:
- Open File Explorer.
- Open the location with the content to hide.
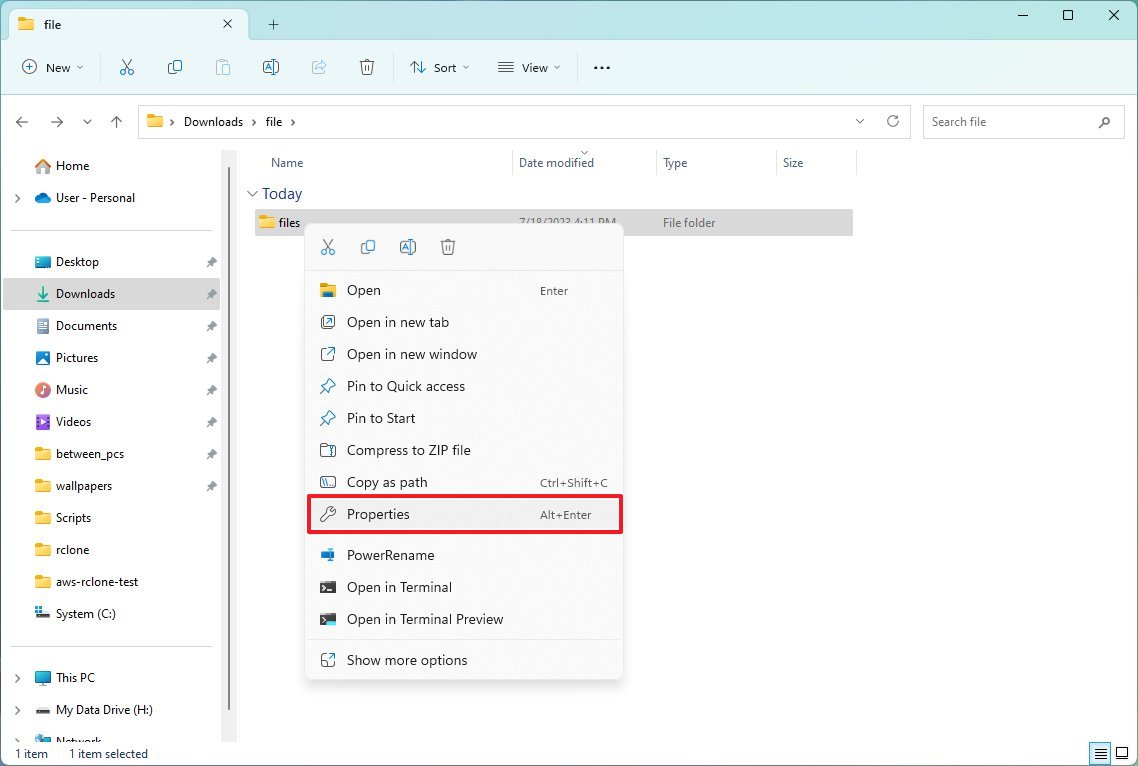
- Right-click the item and select the Properties option.
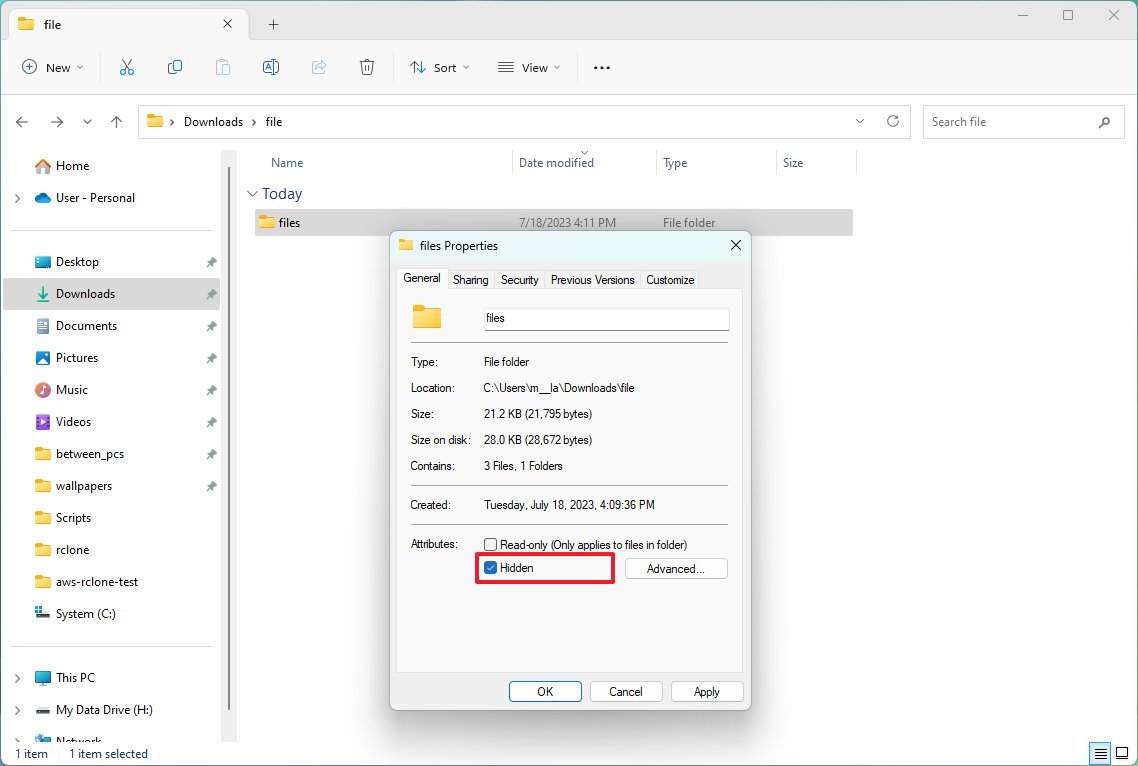
- Check the Hidden option.
- Click the Apply button.
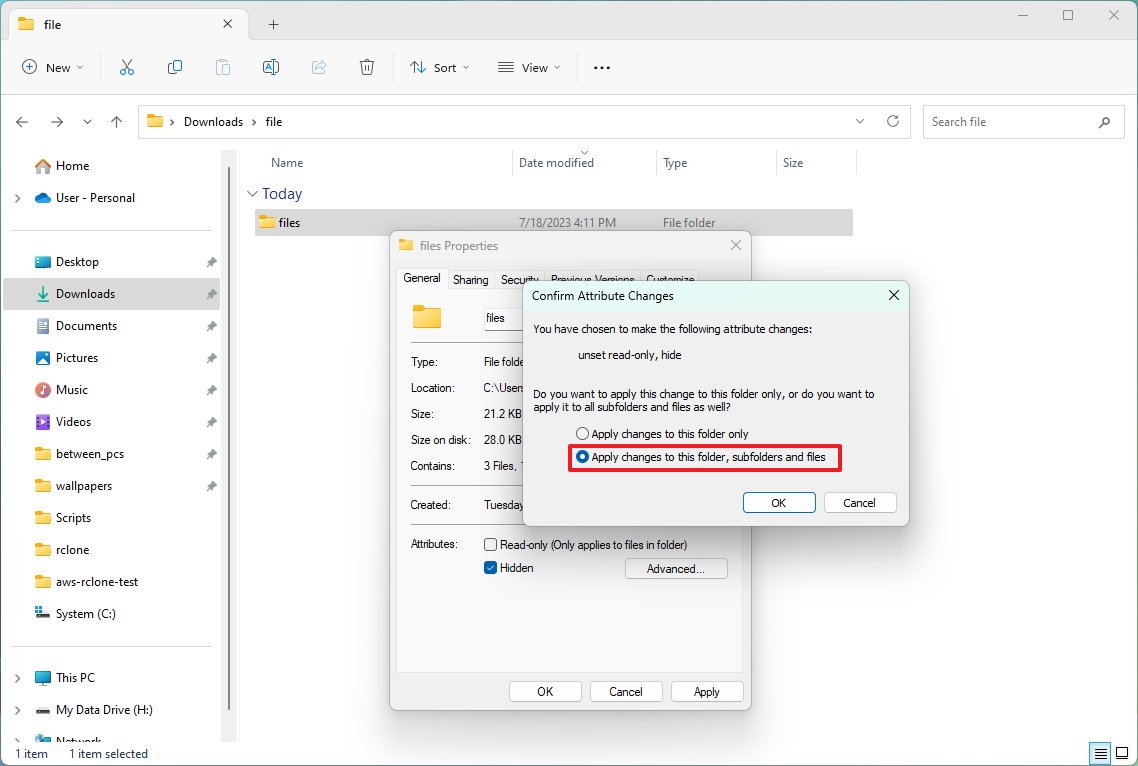
- Choose the "Apply changes to this folder, subfolders, and files" option to hide a folder with files and subfolders (if applicable).
- Click the OK button.
- Click the OK button again.
Once you complete the steps, the contents will remain hidden as long as you don't enable the show hidden option on File Explorer.
You can always access the hidden contents using the full path to the folder or file. Alternatively, on File Explorer, open the "View" menu, select the "Show" submenu, and check the "Hidden items" option.
Show files and folders
All the latest news, reviews, and guides for Windows and Xbox diehards.
To revert the change and show files and folders again, use these steps:
- Open File Explorer.
- Open the location with the contents to show.
- Right-click the item and select the Properties option.
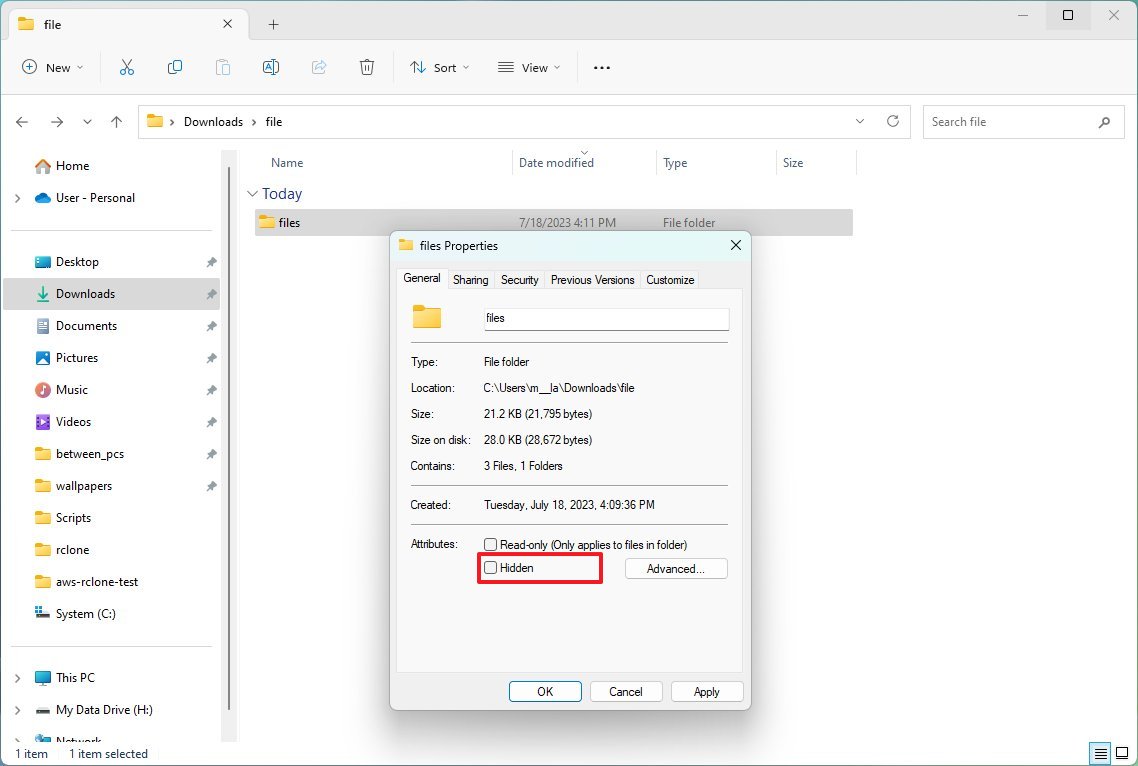
- Clear the Hidden option.
- Click the Apply button.
- Choose the "Apply changes to this folder, subfolders, and files" option to hide a folder with files and subfolders (if applicable).
- Click the OK button.
- Click the OK button again.
After you complete the steps, the system will remove the hidden attribute from the files and folders, making them visible again.
How to hide files and folders from Command Prompt on Windows 11
To hide files and folders with Command Prompt or PowerShell, use these steps:
- Open Start.
- Search for Command Prompt (or PowerShell) and click the top result to open the app.
- Type the following command to navigate to the items you want to hide, and press Enter: cd c:/SECRET-FILES-LOCATION
In the command, update the path with the location to your files.
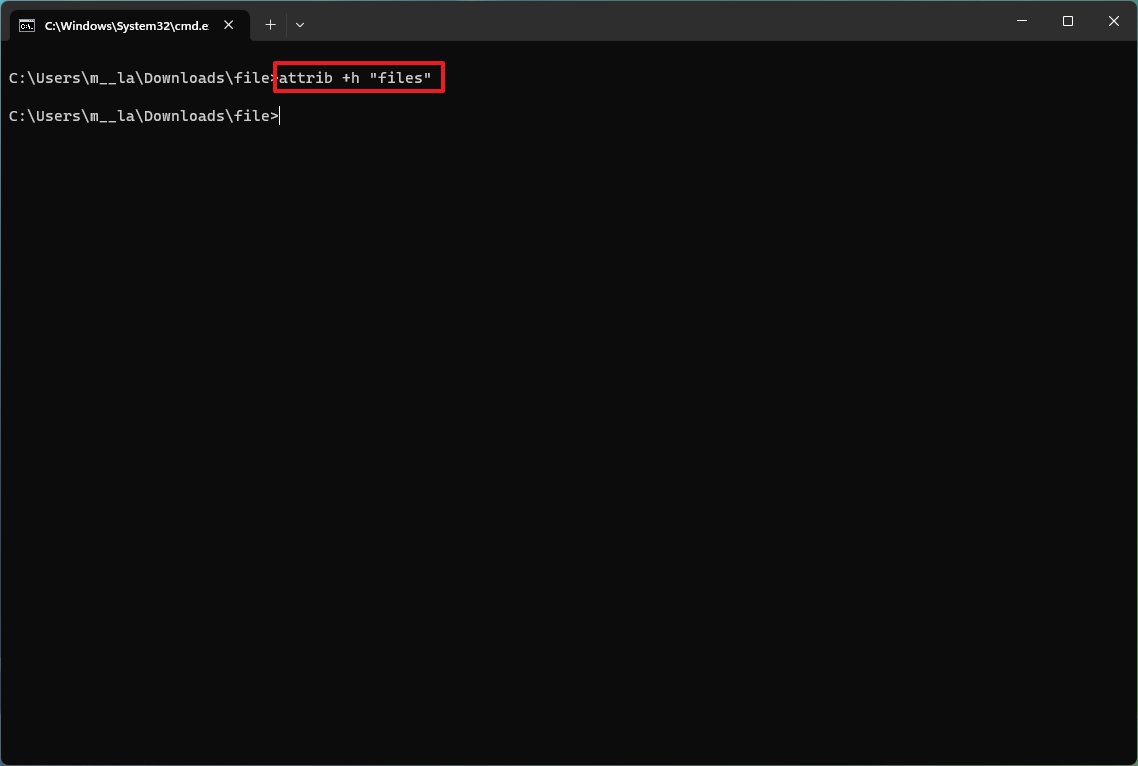
- Type the following command to hide a folder or file on Windows 11 and press Enter: attrib +h "SECRET-FILES"
In the command, replace "SECRET-FILES" with the name of your folder or file. Quotation marks are only necessary when there are spaces in the name.
Once you complete the steps, the hidden attribute will only apply to the folder. However, the files and subfolders inside the folder will still be visible to anyone who knows the path.
Hide subfolders
To hide a folder with files and subfolders, use these steps:
- Open Start.
- Search for Command Prompt (or PowerShell) and click the top result to open the app.
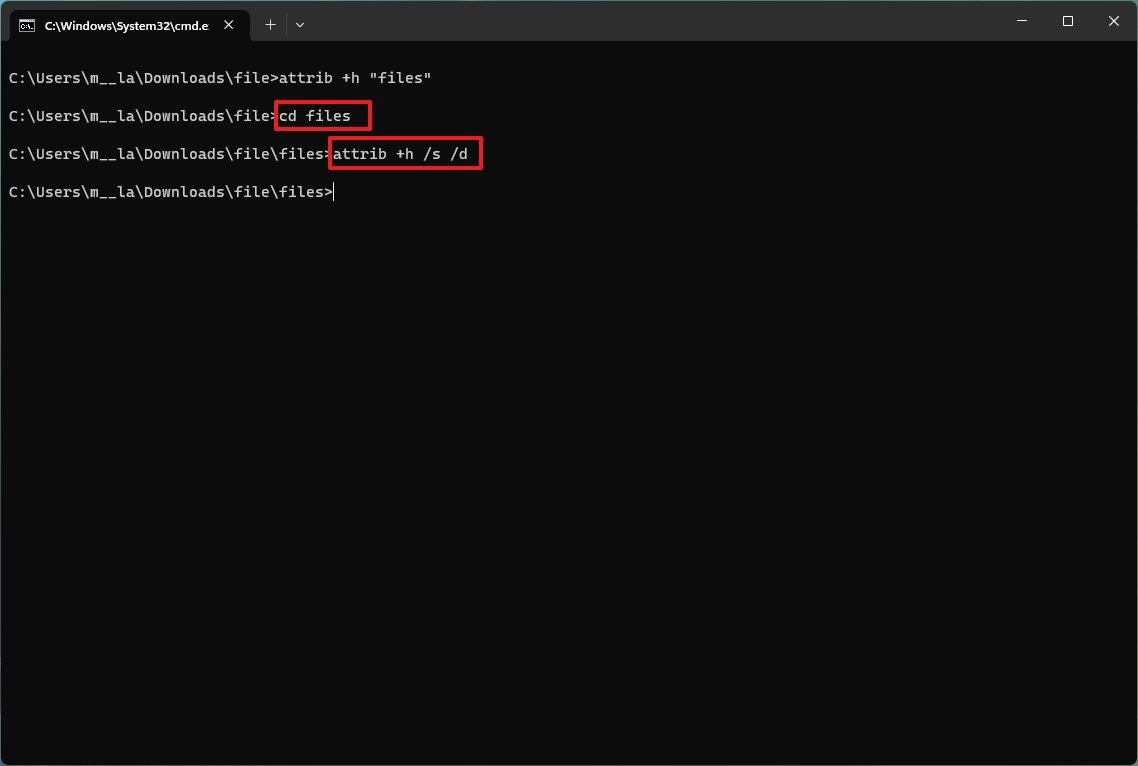
- Type the following command to navigate inside the hidden folder and press Enter: cd "SECRET-FILES-LOCATION"
In the command, replace "SECRET-FILES-LOCATION" with the name of your hidden folder.
- Type the following command to hide all files and folders inside the hidden folder and press Enter: attrib +h /s /d
After you complete the steps, the command will apply the settings to the items, making them hidden.
Show files and folders
To show files and folders with Command Prompt or PowerShell, use these steps:
- Open Start.
- Search for Command Prompt (or PowerShell) and click the top result to open the app.
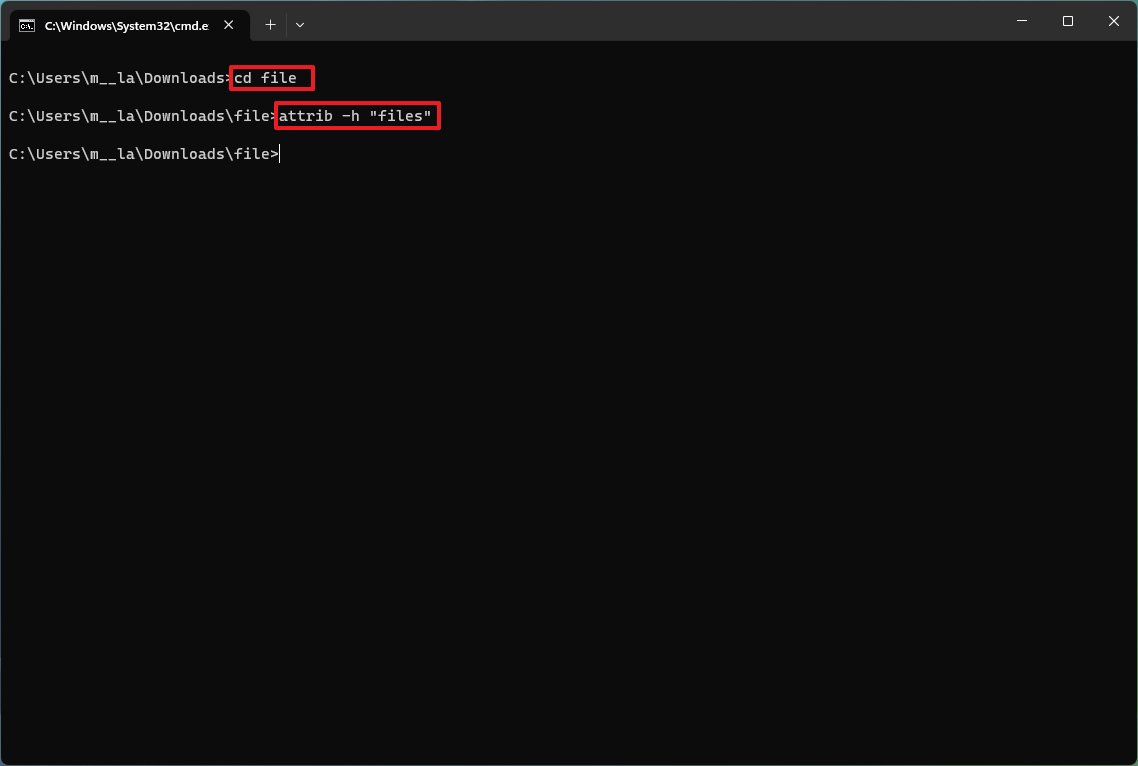
- Type the following command to navigate to the hidden items location and press Enter: cd "SECRET-FILES-LOCATION"
In the command, update the path with the location of your files.
- Type the following command to make the items visible again and press Enter: attrib -h "SECRET-FILES"
In the command, replace "SECRET-FILES" with the name of your folder or file. Quotation marks are only necessary when there are spaces in the name.
Once you complete the steps, the command will remove the hidden attributes, making them visible again on Windows 11.
Remove hidden attribute
To remove the hidden attribute for files and subfolders inside of a folder with commands on Windows 11, use these steps:
- Open Start.
- Search for Command Prompt (or PowerShell) and click the top result to open the app.
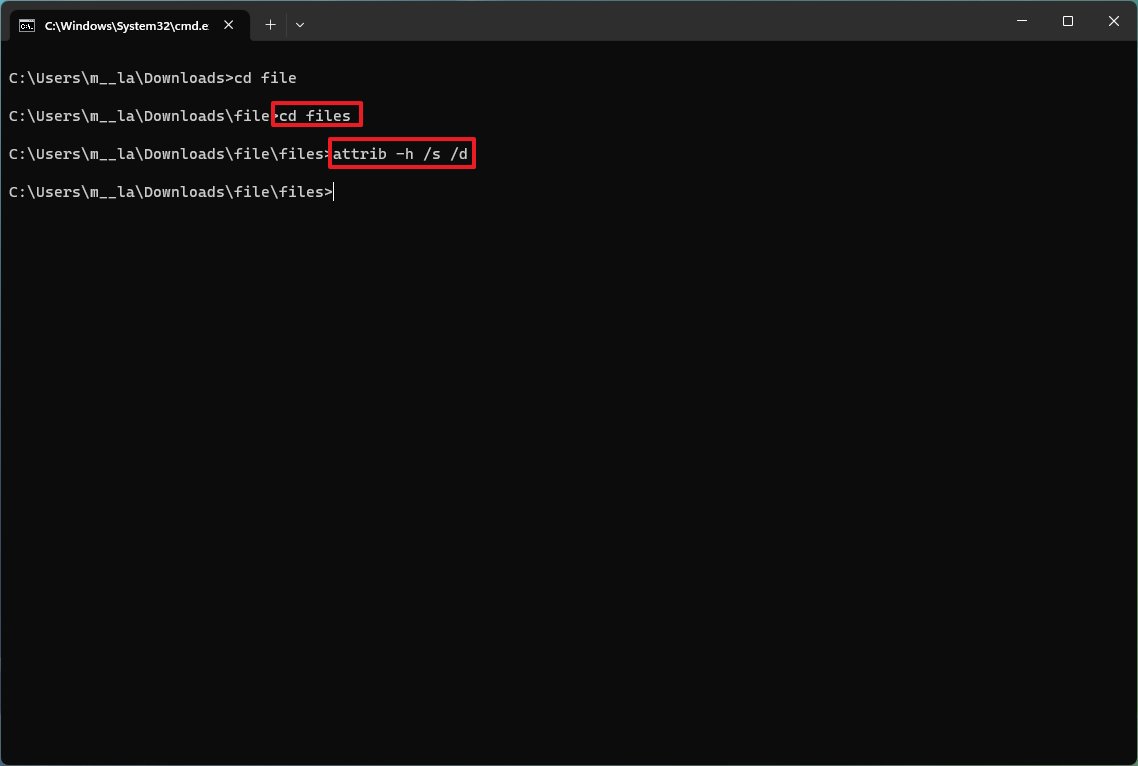
- Type the following command to navigate inside the hidden folder and press Enter: cd "SECRET-FILES"
In the command, replace "SECRET-FILES" with the name of your hidden folder.
- Type the following command to remove the hidden attribute from all files and folders inside the folder and press Enter: attrib -h /s /d
After you complete the steps, the command will remove the attribute from the files and subfolders in the path.
More resources
For more helpful articles, coverage, and answers to common questions about Windows 10 and Windows 11, visit the following resources:
- Windows 11 on Windows Central — All you need to know
- Windows 10 on Windows Central — All you need to know

Mauro Huculak has been a Windows How-To Expert contributor for WindowsCentral.com for nearly a decade and has over 22 years of combined experience in IT and technical writing. He holds various professional certifications from Microsoft, Cisco, VMware, and CompTIA and has been recognized as a Microsoft MVP for many years.
