


Although Windows 10 is a fast operating system, the performance will start degrading at some point due to many factors, including compatibility issues and bugs, viruses or other types of malware, hardware problems, and more.
If your computer is getting slower, it does not necessarily mean you have to replace it with a new system. Simple software and hardware tweaks can significantly speed up the Windows 10 experience.
This guide will walk you through a long list of ways to speed up, optimize, and improve the performance of your computer — whether it has an older or modern hardware configuration.
1. Restart computer
Shutting down and restarting your computer is perhaps one of the first things you can do to speed up the system. (It might be obvious, but it's not the first thing that usually comes to mind.)
When the device restarts, the computer usually terminates the applications and processes. The data loaded into memory also gets cleared, which helps to resolve everyday performance and stability issues due to keeping the operating system running for a long time.
To shut down and restart your computer to speed up Windows 10, use these steps:
- Open Start.
- Click the Power button.
- Select the Shut down option.
- Quick tip: The "Sleep" or "Hibernate" options do not reset the system or clear the data in memory.

- Press the power button to turn on the computer.
After you complete the steps, Windows 10 will restart, and this time the performance should be noticeably improved.
2. Disable startup apps
On Windows 10, many apps can register themselves to start automatically during startup and continue to run in the background, wasting system resources that can slow down the experience.
When you try to speed up Windows 10, it's recommended to disable all the apps running at startup, or at least those you do not use regularly.
To disable apps at startup on Windows 10 to speed up the system, use these steps:
- Open Settings.
- Click on Apps.
- Click on Startup.
- Click the Sort by menu and select the Startup impact option.
- Turn off the toggle switch for any unnecessary app (especially those marked as "High impact" by the system).

- Restart your computer.
Once you complete the steps, the computer should start faster than before. Of course, the improvement gain will vary depending on the apps you disabled and hardware configuration.
3. Disable apps relaunch on startup
Windows 10 has a feature that restarts the apps from your last session after a reboot, even before you sign in. Although this is a convenience feature that can speed up the process of quickly resuming where you left off, it can also impact system performance.
If the feature to restart apps at startup is enabled, you can disable it with these steps:
- Open Settings.
- Click on Accounts.
- Click on Sign-in options.
- Under the "Restart apps" section, turn off the toggle switch.

After you complete the steps, the apps running on the desktop won't reopen during the next restart, speeding up the overall system performance.
4. Disable background apps
On Windows 10, some apps can continue to run tasks in the background even when you're not using them. If you want to speed up your computer as much as possible, you can decide which apps can operate in the background or disable the feature to block all apps.
To stop apps from running in the background to speed up Windows 10, use these steps:
- Open Settings.
- Click on Privacy.
- Click on Background apps.
- Turn off the toggle switch for the apps you want to stop running in the background.

- (Optional) Turn off the "Let apps run in the background" toggle switch to disable the feature for all modern apps (excluding win32 apps).
Once you complete the steps, apps will not waste any more resources when you do not actively use them to increase system performance.
5. Uninstall non-essential apps
Typically, new devices come with applications you do not need, including the usual bloatware and system tools you will never use, which will only waste space on the drive and resources. When trying to increase the system performance, you should always remove those non-essential applications.
To uninstall non-essential apps on Windows 10, use these steps:
- Open Settings.
- Click on Apps.
- Click on Apps & features.
- Select the app to remove.
- Click the Uninstall button.

- Click the Uninstall button again. Or continue with the on-screen directions to finish removing the app.
After you complete the steps, you may need to repeat the instructions to uninstall other non-essential apps from the device.
6. Install quality apps only
Old and poorly designed apps and apps that load unnecessary features can negatively affect the performance of your computer. Also, just because an app comes from a company you trust does not mean it's a good app.
Only install good apps if you want to keep your device healthy and snappy. Typically, you want to install apps available from the Microsoft Store because they've been reviewed for security and performance. If the app is not in the store, only download apps from trusted sources and confirm they work on Windows 10.
If you are unsure, you can research online to get more information about the app. For example, you can check the software vendor's forums to check whether users are experiencing issues or post a question in the forums to find out more details.
To install apps from the Microsoft Store on Windows 10, use these steps:
- Open Microsoft Store.
- Use the search box to find an app.
- Select the app from the result.

- Click the Install button.
Once you complete the steps, the app will install on your device. If the app is not in the Microsoft Store, download the installer from the trusted source, and follow the vendor support website steps to install and configure the program.
7. Clean up hard drive space
Whether you have a traditional Disk Hard Drive (HDD) or Solid-State Drive (SSD), it's never wise to run Windows with a full hard drive because it will affect performance.
If the device has relatively new hardware and you notice apps, managing files, and other tasks are struggling to complete, it is likely because the drive is running out of space. Usually, this becomes more evident after the drive is filled with around 70 percent of the total capacity.
One way to prevent the storage from impacting performance is to use the Storage settings to delete temporary and unnecessary files to reclaim space.
To free up space with to speed up Windows 10, use these steps:
- Open Settings.
- Click on System.
- Click on Storage.
- Under the "Local Disk" section, click the Temporary files option. (If you do not see the option, click the "Show more categories" option to view the remaining items in the list.)

- Check the files you want to delete to reclaim space and improve system performance.
- Quick tip: When selecting the temporary files, remember that checking the Downloads option will delete everything inside the "Downloads" folder. If you want to keep these files, do not check this option. Also, you can select to delete the "Previous Windows Installation(s)" item (if applicable).
- Click the Remove files button.

Once you complete the steps, the device's performance should be noticeably improved if the system can reclaim enough space.
In addition to using the Storage settings, you can also use the OneDrive Files On-demand feature to free up space. You can use these instructions to set up Files On-demand on your device.
If you cannot reclaim enough space, use this guide to find more ways to optimize the storage on your computer.
8. Use drive defragmentation
Organizing the data can increase responsiveness if you have a computer with older hardware and a traditional rotating platters hard drive.
To run the defragmentation tool to speed up the system drive, use these steps:
- Open Settings.
- Click on System.
- Click on Storage.
- Under the "More storage settings" section, click the Optimize Drives option.

- Select the drive that needs defragmentation.
- Click the Optimize button.

After you complete the steps, the tool will rearrange the files to make them accessible more quickly the next time they are needed, translating into noticeable performance improvement. The only caveat is that the process can take a long time, depending on the data stored on the drive. (If you have an older system, it is best to leave the process running overnight.)
If you have a computer with an SSD, using the defragmentation tool will run the trim command to inform the storage device of the blocks with data that can be safely erased. This process can significantly improve performance because the drive won't have to erase the blocks during the writing data process.
9. Configure ReadyBoost
In addition, to use the defragmentation tool on computers with older hardware, you can also use the ReadyBoost feature to boost performance.
ReadyBoost is not new to Windows 10. It's been around for years as a feature that uses a flash drive or SD card to cache files to boost the overall system performance. (If the device has an SSD, this feature won't be available since it won't offer additional benefits.)
To enable ReadyBoost to speed up your computer, connect a USB flash drive and use these steps:
- Open File Explorer.
- Click on "This PC" from the left pane.
- Under the "Devices and drives" section, right-click the USB flash drive and select the Properties option.

- Click on the ReadyBoost tab.
- Select the "Dedicate this device to ReadyBoost" option.

- Click the Apply button.
- Click the OK button.
Once you complete the steps, the removable drive should help boost the computer's performance.
We recommend the SanDisk Extreme Go if you need a USB flash drive to use with ReadyBoost because of its storage capacity, reliability, and price.

Reliable storage
The SanDisk Extreme Go (CZ800) is an excellent choice to use with the ReadyBoost feature. The USB drive offers up to 128GB of storage with fast transfer speeds of up to 200MB/s, it's backed by a strong brand, and it is affordable.
10. Perform malware scan
When a device starts to run very slowly, this could indicate a malware infection. Typically, viruses, spyware, and other malware types are known to take up many system resources making a device unusable.
Although Windows 10 comes with the Microsoft Defender Antivirus, it does not guarantee that malware will make its way into the system. If you suspect the device has been infected, you should try running a full virus scan.
To run a full virus scan on Windows 10, use these steps:
- Open Start.
- Search for Windows Security and click the top result to open the app.
- Click on Virus & threat protection.
- Under the "Virus & threat protection updates" section, click the "Check for updates" option.

- Click the Check for updates button.

- Click on Virus & threat protection from the left pane.
- Under the "Current threats" section, click the Scan options option.
- Select the Full scan option.

- Click the Scan now button.
After you complete the steps, Microsoft Defender Antivirus should detect and remove any malware impacting performance.
Microsoft Defender Offline scan
If you cannot use the default antivirus because it's not running, updates don't work, or scanning problems, the device probably has one of those tricky malware that cannot be removed while the system is running. If this is the case, the antivirus can perform an offline scan.
To complete a Microsoft Defender Antivirus offline scan, use these steps:
- Open Start.
- Search for Windows Security and click the top result to open the app.
- Click on Virus & threat protection.
- Under the "Current threats" section, click the Scan options option.

- Select the "Microsoft Defender Offline scan" option.

- Click the Scan now button.
Once you complete the steps, the system will automatically restart into the offline experience of Microsoft Defender, and it will perform a scan to detect and remove any threats that could not be removed while Windows 10 was running.
If you use other anti-malware solutions like Malwarebytes, Bitdefender, Trend Micro, or Norton, check their support documentation to remove viruses and other malicious programs.
11. Install latest update
Microsoft proactively releases updates to address problems, add new features, and patch security vulnerabilities. While sometimes updates are the reason for things not working correctly, maintaining the update can speed up your computer.
Install cumulative updates
On Windows 10, updates happen automatically, but depending on the update or the device's configuration, they don't always download and install as soon as they become available. If your computer is running slower than usual, it could be possible that an update is available to improve performance.
To install updates manually on Windows 10, use these steps:
- Open Settings.
- Click on Update & Security.
- Click on Windows Update.
- Click the Check for updates button.

- (Optional) Under the "Optional updates available" section, click the "Download and install now" option if there's a cumulative update available.
- Click the Restart now button.
After you complete the steps, the new update should help to improve system performance.
Upgrade to latest version
If the device has an older version of Windows 10, upgrading to the most recent version can help speed up the performance or introduce new features that could make you more productive to get work done faster.
To upgrade to the most recent version of Windows 10, use these steps:
- Open Settings.
- Click on Update & Security.
- Click on Windows Update.
- Click the Check for updates button.

- Under the "Feature Update" section, click the "Download and install" option if a new version is available. (If the option is unavailable, the computer already has the most recent version installed, or the latest version is not yet fully compatible with your hardware configuration.)
- Click the Restart now button.
Once you complete the steps, the device will restart to apply the new version, improving the overall system performance.
Update device drivers
If your computer is running slow because of a compatibility issue or a poorly designed driver, you could resolve the issue by installing the most recent or pre-release version of the driver from the manufacturer's support website manually.
Before proceeding, you need to download the latest available driver package from the manufacturer's website, uncompress the files using the self-extracting or .zip extension file, and then use these steps:
Quick note: It is recommended to use the manufacturer support website instructions to complete this task. If instructions are not available, you can refer to the steps below.
- Open Start.
- Search for Device Manager and click the top result to open the app.
- Expand the branch for the device driver causing problems. For example, Display adapters.
- Right-click the device and select the Update driver option.

- Click the "Browse my computer for driver software" option.

- Under the "Search for drivers in this location" section, click the Browse button.

- Select the folder with the device driver installation files.
- Click the OK button.
- Click the Next button.
- Click the Close button.
After you complete the steps, the new version of the driver will install to fix compatibility or any other issues affecting the system and boost performance.
On Windows 10, there are multiple ways to update device drivers. If you need additional assistance, you can use this guide outlining different methods to update a driver manually.
Update applications
Outdated apps can slow down a computer, usually due to bugs or compatibility problems with a newer version of Windows 10.
While apps from the Microsoft Store can update automatically, you have to install updates manually for many traditional desktop apps. If you have an app affecting performance, check your software support website for a newer update and the instructions to apply it.
To update Microsoft Store apps manually on Windows 10, use these steps:
- Open Microsoft Store.
- Click the Library button from the bottom-left corner.
- Click the Get updates button.

Once you complete the steps, if updates are available, they will download and install automatically.
12. Switch to high performance power plan
Windows 10 includes different plans (Balanced, Power saver, and High performance) to optimize the power usage on your computer. If you want to boost the system performance, use the "High performance" option since it allows the device to use more power to operate faster.
To select a new power plan on Windows 10, use these steps:
- Open Settings.
- Click on System.
- Click on Power & sleep.
- Under the "Related settings" section, click the "Additional power settings" option.

- Click the "Show additional plans" option (if applicable).
- Select the "High-performance power" plan.

If you don't see any plans, you may need to create a custom power plan to improve performance using the "High performance" settings.
On laptops, you can also change the mode to increase performance by tapping or clicking the battery icon in the taskbar's notification area and selecting the Best performance option using the slider.
13. Disable system visual effects
On Windows 10, you will find many visual effects, from animations to shadows to more advanced visual elements, such as blur and transparency, and part of the Fluent Design language.
Although these effects can make the experience more visually appealing, they also require resources that can slow down computers with older hardware. However, you can disable these effects to save resources and make Windows 10 feel faster.
Disable visual effects
To disable animations, shadows, smooth fonts, and other effects on Windows 10, use these steps:
- Open Settings.
- Click on System.
- Click on About.
- Under the "Related settings" section, click the "Advanced system settings" option from the right pane.

- Click the Advanced tab.
- Under the "Performance" section, click the Settings button.

- Click the Visual Effects tab.
- Select the "Adjust for best performance" option to disable all the effects and animations.
- Quick tip: Using this option will also affect the way fonts are rendered. If you want to keep fonts crisp and more readable, select the Custom option, clear all the settings, but leave the "Smooth edges of screen fonts" option checked.

- Click the Apply button.
- Click the OK button.
Once you complete the steps, the visual effects will be disabled, and interacting with elements (windows and menus) will feel more responsive.
Disable transparency effects
To speed up Windows 10 disabling transparency effects, use these steps:
- Open Settings.
- Click on Personalization.
- Click on Colors.
- Turn off the Transparency effects toggle switch.

After you complete the steps, Windows 10 will feel faster, and the device will free up some system resources for more critical tasks.
14. Disable search indexing
Although Windows 10 search is an important feature to find apps, settings, and files, the indexing process can sometimes consume resources that can negatively impact the experience – especially on low-end devices. If you want to improve the system performance as much as possible, you can exclude specific locations to prevent the indexer from using resources excessively.
To configure the indexer to improve system performance on Windows 10, use these steps:
- Open Settings.
- Click on Search.
- Click on Search Windows.
- (Optional) Turn on the "Respect Device Power Mode Settings" toggle switch.
- Quick note: When you enable this feature, the system will temporarily throttle or pause search and updates to the index database to extend battery life while on battery power.
- Under the "More Search Indexer Settings" section, click the "Advanced Search Indexer Settings" option.

- Click the Modify button.

- Click the Show all locations button.

- Under the "Change selected locations" section, clear all the selected locations.

- Click the OK button.
- Click the Close button.
Once you complete the steps, Windows Search will continue to run on your device, but Windows 10 will no longer index the specified locations, improving the overall performance.
15. Increase page file size
On Windows 10, the "page file" is a hidden file on the drive that works as memory, and it acts as an overflow of the system memory, which holds data for apps currently running on the computer.
If you increase the size of the paging file, it can help boost system performance.
To modify the page file to increase performance on Windows 10, use these steps:
- Open Settings.
- Click on System.
- Click on About.
- Under the "Related settings" section, click the "Advanced system settings" option.
- Click the Advanced tab.
- Under the "Performance" section, click the Settings button.
- Click the Advanced tab.
- Under the "Virtual memory" section, click the Change button.

- Clear the "Automatically manage paging files size for all drives" option.
- Select the Custom size option.
- Specify the initial and maximum size for the paging file in megabytes.
- Quick tip: Typically, it is recommended to use a number one and a half times the total available memory for the "Initial size" and three times of available memory for the "Maximum size" when possible. You can confirm the total amount of memory available on the About settings page.

- Click the Set button.
- Click the OK button.
- Click the OK button again.
- Restart your computer.
After you complete the steps, the device will restart, and you should notice a performance boost while using apps. The performance will be more noticeable when configuring the page file in a Solid-State Drive.
If the new settings are causing issues or performance does not improve, you can always revert the changes with the same instructions outlined above. However, on step 9, select the System managed size option and check the "Automatically manage paging files size for all drives" option.
16. Restore previous working state
Sometimes your device will slow down after installing a new system update, driver, or application. If you cannot determine why the computer is slow, you can undo any changes by restoring the previous working state using a System Restore point.
To apply a restore point to fix performance issues on Windows 10, use these steps:
- Open Start.
- Search for Create a restore point and click the top result to open the System Properties app.
- Click the System Protection tab.
- Click the System Restore button.

- Click the Next button.
- Select the most recent restore point to resolve the performance issue.

- Click the "Scan for affected programs" button to identify the apps that will be removed if they were installed after the restore point was created.
- Click the Close button.
- Click the Next button.
- Click the Finish button.
Once you complete the steps, the computer will roll back to a previous state bringing back when performance was not an issue.
System Restore is not enabled by default. This means you must set it up before you can revert system changes.
17. Repair Windows setup files
If the computer shows performance issues, it could be due to corrupted system files. If this is the case, you can use the Deployment Image Service and Management Tool (DISM) and System File Checker (SFC) command-line tools to fix the setup without reinstallation.
Fix installation files with DISM
To use DISM to repair corrupted system files to improve performance and stability on Windows 10, use these steps:
- Open Start.
- Search for Command Prompt, right-click the top result, and click the Run as Administrator option.
- Type the following command to repair the installation and press Enter: DISM /Online /Cleanup-image /Restorehealth

After completing the steps, the device should operate normally if the utility has finished successfully. You should also use the SFC command-line tool if the scan had issues. (You can always learn more about this feature in our DISM walkthrough guide.)
Fix installation files with SFC
To use SFC to repair corrupted system files on Windows 10, use these steps:
- Open Start.
- Search for Command Prompt, right-click the top result and click the Run as Administrator option.
- Type the following command to repair the installation and press Enter: sfc /scannow

Once you complete the steps, the tool should be able to fix any problem affecting performance.
You can check this guide with more details on using the System File Checker tool, including the steps to view scan details, repair individual files, and perform an offline system repair.
18. Reset device to factory defaults
Alternatively, you can reset the computer to the factory default settings to start fresh with a clean copy of Windows 10 to improve startup and shutdown, battery life, and overall system performance.
Warning: If you choose to erase your files, you should consider creating a full backup or copying your files to an external drive before proceeding.
To reset a device to its default settings on Windows 10, use these steps:
- Open Settings.
- Click on Update & Security.
- Click on Recovery.
- Under the "Reset this PC" section, click the Get started button.

- Click the Keep my files button. (You can also click the Remove everything button to erase everything and install a clean copy of Windows 10.)

- Select the Local reinstall option.
- Quick tip: If you want a clean installation of Windows 10 without the apps that came pre-installed with the device or if the Local reinstall option does not work, select the Cloud download option.

- Click the Next button.
- Click the Reset button.
After you complete the steps, Windows 10 will be reinstalled, removing previous configurations, settings, and apps to help you boost system performance. If you select the option to remove everything, remember to restore your files from a previous backup after the process.
If you want to install Windows 10 from scratch, check out our in-depth guide to do a clean installation.
19. Upgrade to faster drive
If you are not noticing performance improvements even after the reset process, it might be time to upgrade the hard drive to an SSD.
Upgrading to a Solid-State Drive is perhaps one of the best ways to increase performance on older hardware. Usually, SSDs do not have moving parts like traditional hard drives, meaning data can be read and written much faster.
When you replace an HDD with an SSD, Windows 10 will boot noticeably faster, apps will launch and run quicker, and the overall performance will be snappier and faster.
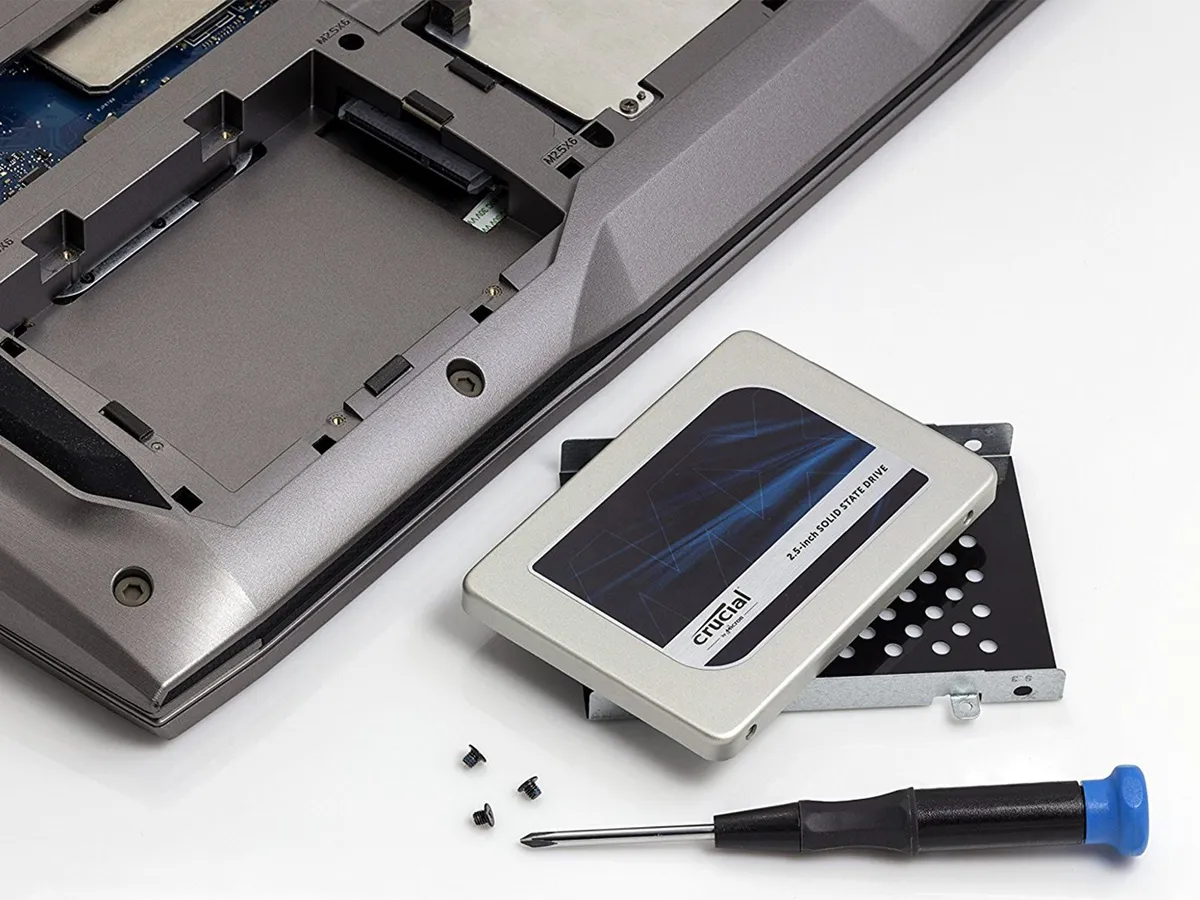
If you plan to upgrade to an SSD, we recommend the Samsung 860 EVO because of its fast performance, reliability, and five-year warranty.

Blazing speeds
The Samsung 870 EVO is one of the most popular Solid-State Drives (SSD) because of its reliability and price. It also offers excellent performance (up to 560MB/s read and 530MB/s write speeds) compared to traditional hard drives, and every drive is backed with a five-year warranty.
20. Upgrade system memory
Insufficient system memory can also be why your computer is running slow, especially if you work with multiple apps and many open tabs in the web browser.
To determine whether your computer needs more memory, you must first confirm the total amount of memory installed on the device and how the system uses it.
To view the total amount and current memory usage on Windows 10, use these steps:
- Open Start.
- Search for Task Manager, and click the top result to open the app.
- Click the Performance tab.
- Click on Memory from the left pane.
- On the right, check the total amount of RAM in the top-right corner, and in the bottom-left corner, under "In use (Compressed)," you can find the out total amount of memory currently in use.

If the total amount of "in use" memory is constantly high (around 80 percent), it's time to add memory sticks.
Although adding more memory is relatively straightforward, finding a compatible kit can be tricky. Always use Task Manager to find out the type of memory you need and whether any slots are available. It is also recommended to check your device manufacturer's website to find more specific information about the memory requirements.
More resources
For more helpful articles, coverage, and answers to common questions about Windows 10, visit the following resources:
- Windows 11 on Windows Central — All you need to know
- Windows 10 on Windows Central — All you need to know

Cutting-edge operating system
A refreshed design in Windows 11 enables you to do what you want effortlessly and safely, with biometric logins for encrypted authentication and advanced antivirus defenses.

