How to backup the Start menu settings on Windows 10
It's possible to backup and restore the Start menu settings when it's causing problems, or you want to move your settings to a new account, and here we show you how to do it.
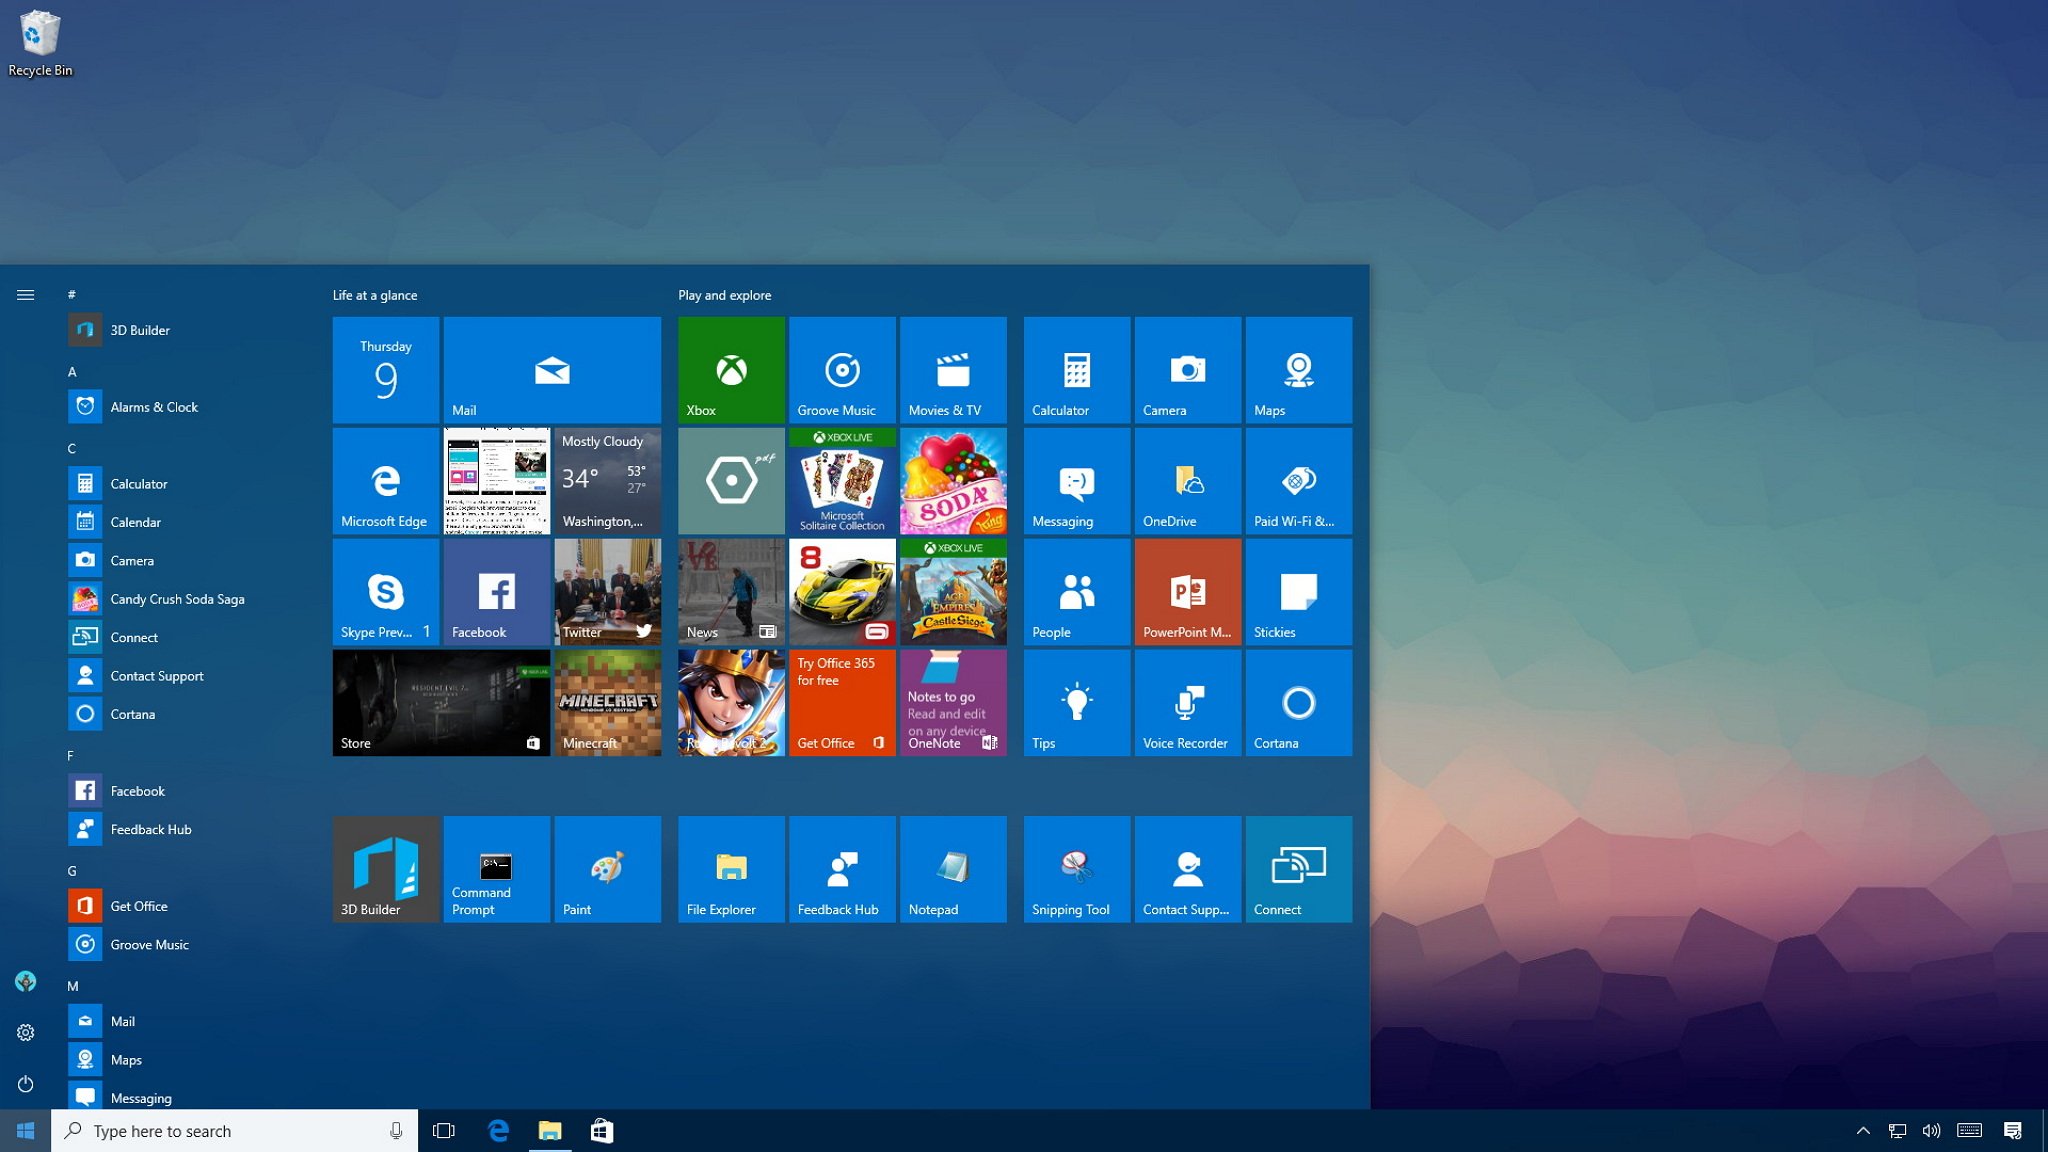
The new Start menu on Windows 10 is more useful and customizable than ever before. You have a new rail on the left to access settings and other locations. In the middle, you have a quick access to the list with all your installed apps, and on the right, you have your Live Tiles constantly showing updates to keep your informed.
Everything you see and customize in the Start menu is stored in a database inside the TileDataLayer folder. The only problem is that when you least expect it, the database can get damaged causing the menu not to work properly. To resolve any issues, or you want to move your settings to a fresh installation or new PC, it's possible to backup and restore the Start menu database with all your preferences on Windows 10.
In this Windows 10 guide, we'll walk you through the steps to create a backup of your Start menu settings, and the steps to restore it.
How to enable the built-in Administrator account
You can't properly make a backup of your Start menu settings when you're signed in to your account. This means that you'll have to use another account or temporarily enable the built-in Administrator account on Windows 10.
To enable the built-in Administrator account, do the following:
- Use the Windows key + X keyboard shortcut to open the power user menu and select Computer Management.
- Expand Local Users and Groups.
- Select Users.
- Double-click the Administrator account.
- Clear the Account is disabled option to enable the account.
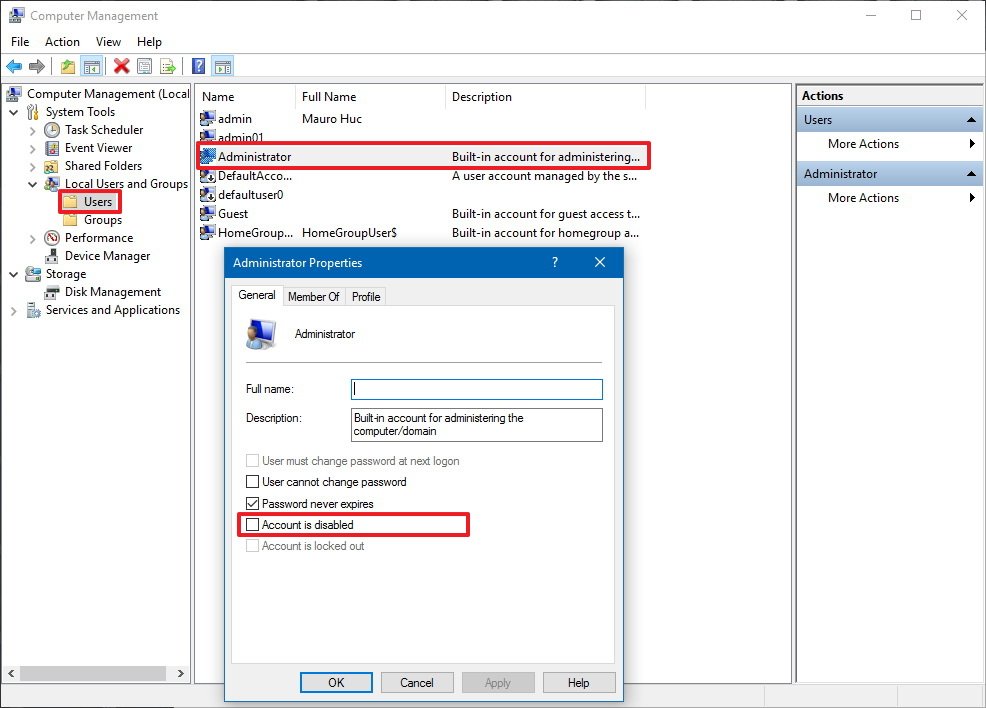
- Click Apply.
- Click OK.
You can also create a new admin account, but temporarily enabling the Administrator account is a bit quicker.
How to backup the Start menu settings
To make a backup of your current Start menu settings, do the following:
Get the Windows Central Newsletter
All the latest news, reviews, and guides for Windows and Xbox diehards.
- Sign-out of your Windows 10 account.
- Sign-in using another account or the built-in Administrator account.
- Open File Explorer.
- Click on the View tab.
- Check the Hidden items option to show hidden files.
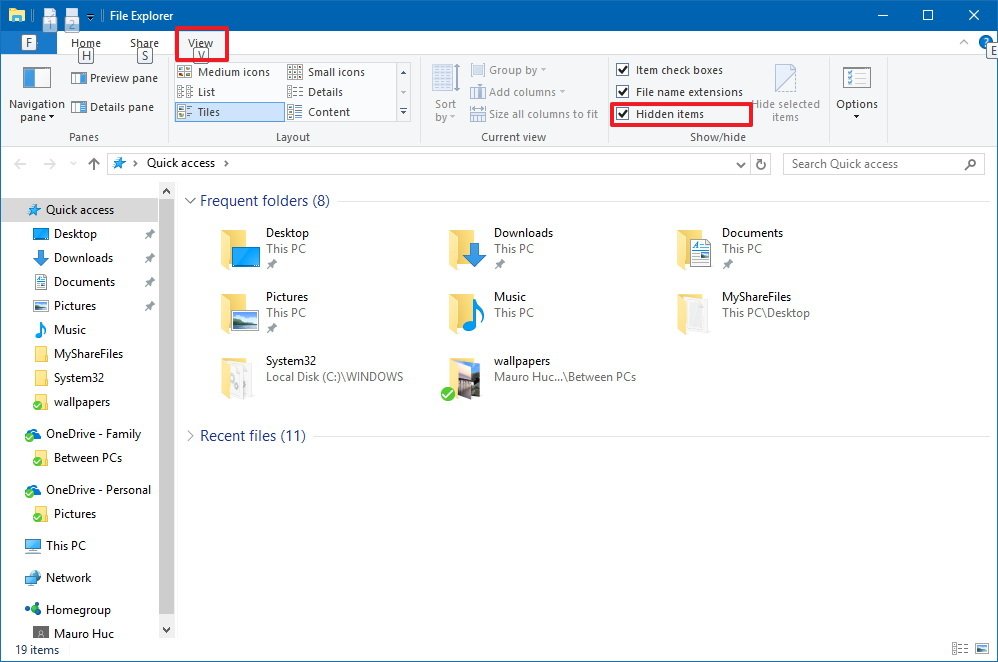
- Navigate the following path:
C:\Users\YOUR-ACCOUNT-NAME\AppData\Local\TileDataLayerIn the path, replace YOUR-ACCOUNT-NAME in the path with the name of the user account with the Start menu settings you want to backup. - Right-click the Database folder that contains all your settings and select Copy.
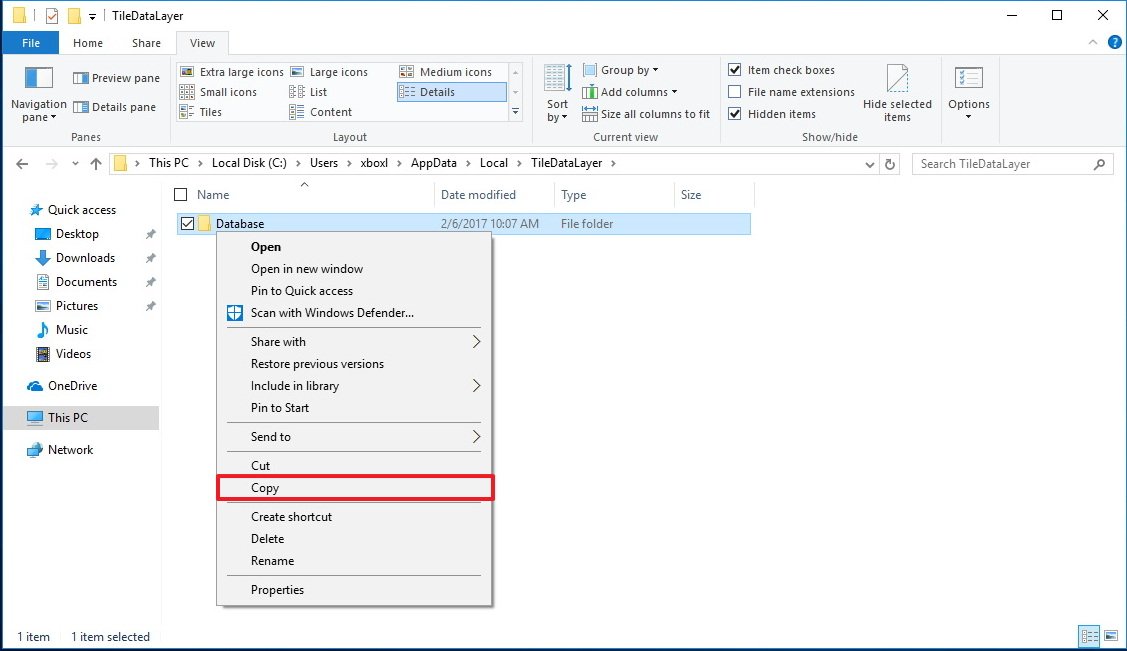
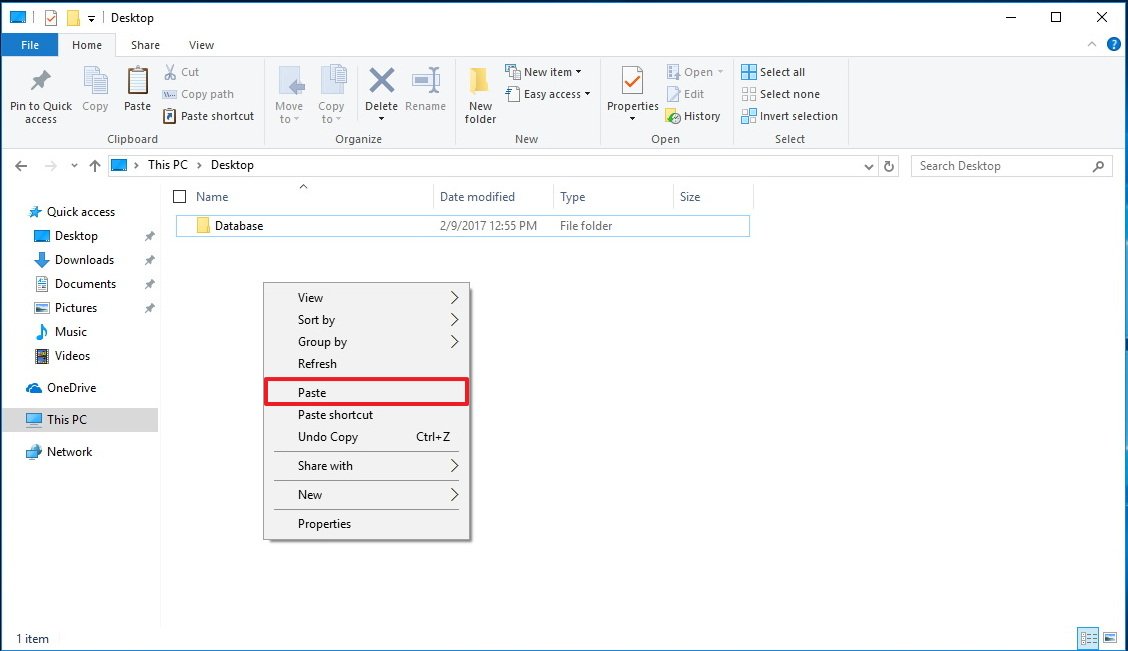
- Open the folder location you want to save the database.
- Right-click and select Paste.
How to restore the Start menu settings
If you don't have another administrator account setup on your computer, remember to use the above steps to temporarily re-enable the built-in Administrator account on Windows 10.
To restore your Start menu settings, do the following:
- Sign-out of your account.
- Sign-in using another account or the built-in Administrator account.
- Open File Explorer.
- Click on the View tab.
- Check the Hidden items option to show hidden files.

- Navigate the following path:
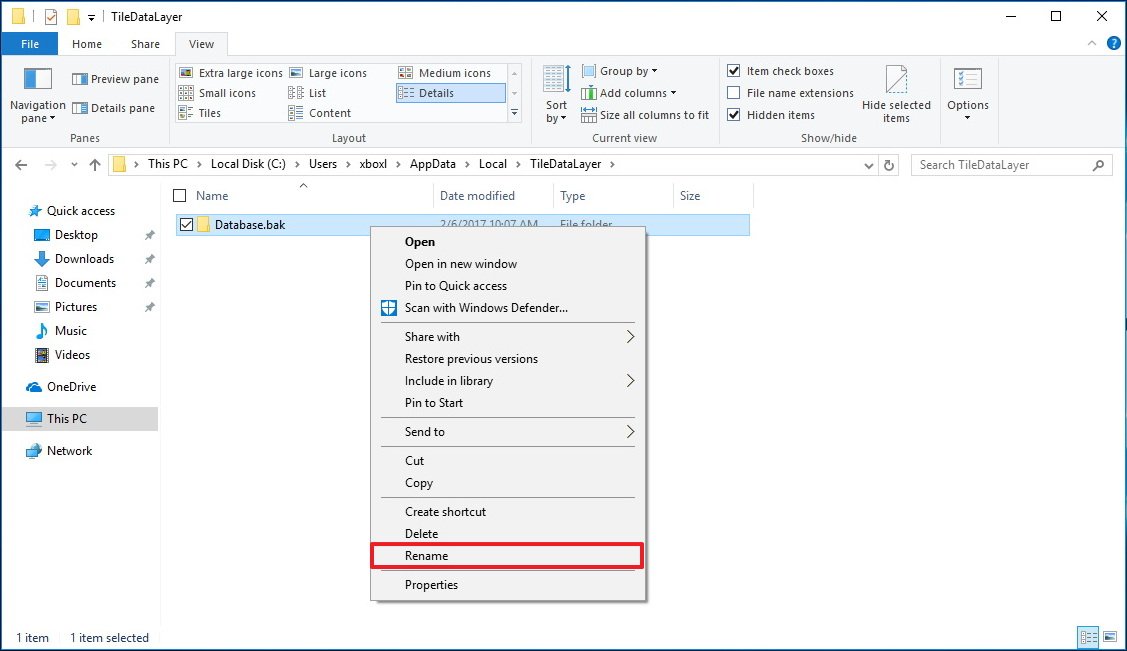
C:\Users\YOUR-ACCOUNT-NAME\AppData\Local\TileDataLayerIn the path, replace YOUR-ACCOUNT-NAME in the path with the name of the user account with the Start menu settings you want to backup. - Right-click the Database folder that contains all the Start menu settings and select Rename.
- Rename the folder Database.bak and press Enter.
- Open the folder location where you have stored the backup files.
- Right-click the Database folder and click Copy.
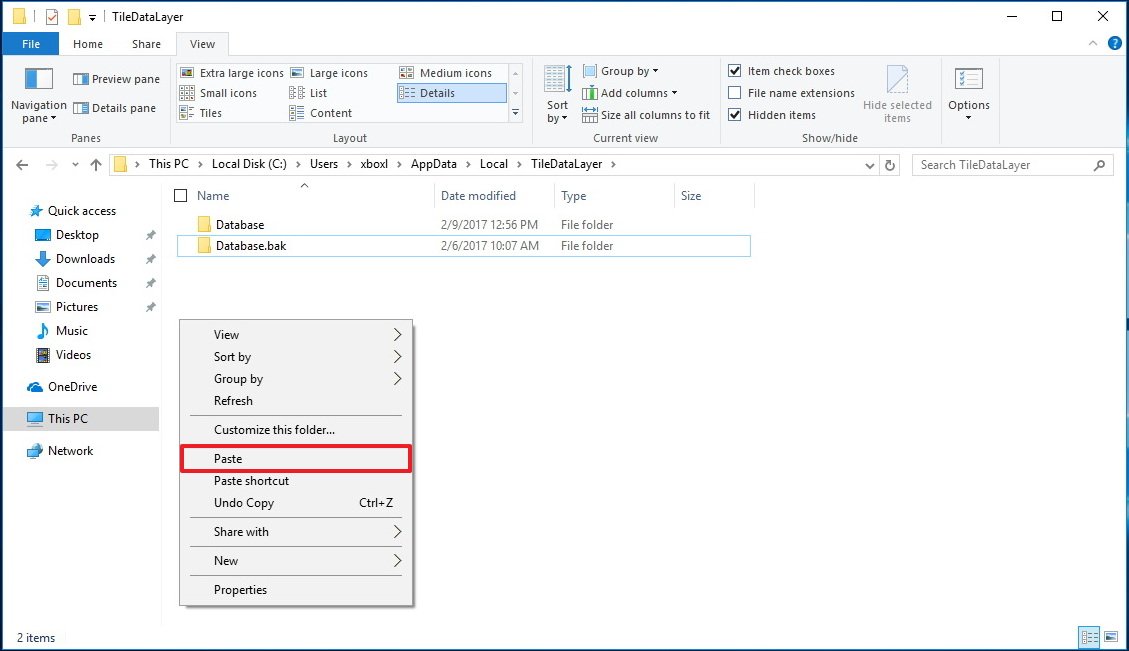
- Go back to the TileDataLayer folder for your account as noted on step 6.
- Right-click and select Paste to restore the settings.
- Sign-out of the account.
After you completed the steps, sign back into your account, and now the Start menu should be restored with all your customization preferences.
Deleting old database and disabling built-in account
The last thing left to do is to delete the Database.bak folder and disable the built-in Administrator account (if applicable).
To delete the old database, do the following:
- Use the Windows key + R keyboard shortcut to open the Run command.
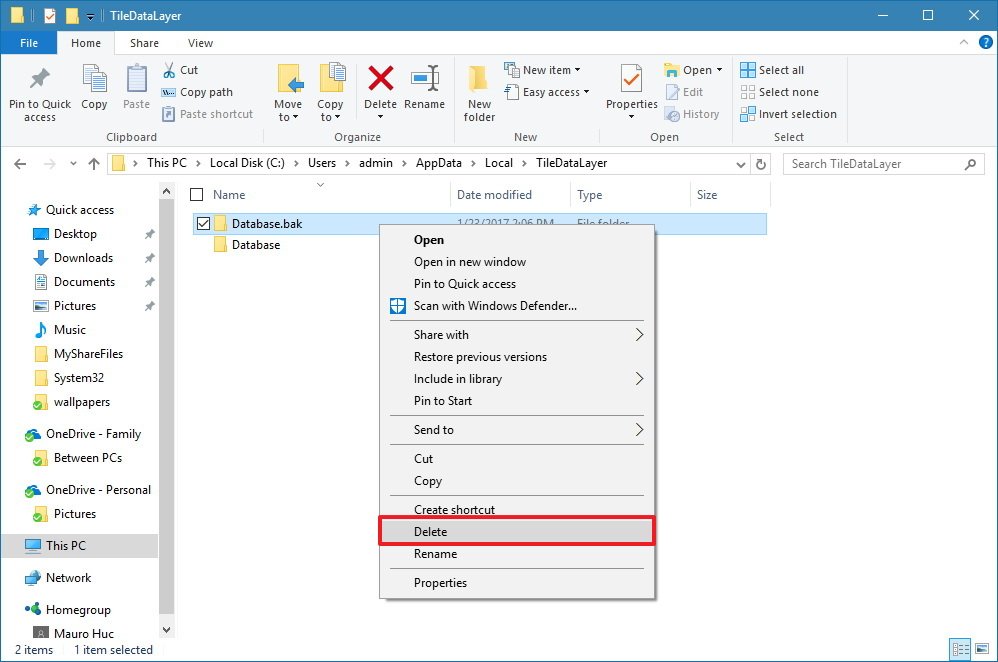
- Type the following command to open the TileDataLayer folder and press Enter:
%HOMEPATH%\AppData\Local\TileDataLayer - Right-click the Database.bak folder and select Delete.
To disable the built-in Administrator account on Windows 10, do the following:
- Use the Windows key + X to open the power user menu and select Computer Management.
- Expand Local Users and Groups.
- Select Users.
- Double-click the Administrator account.
- Check the Account is disabled option to disable the built-in account.
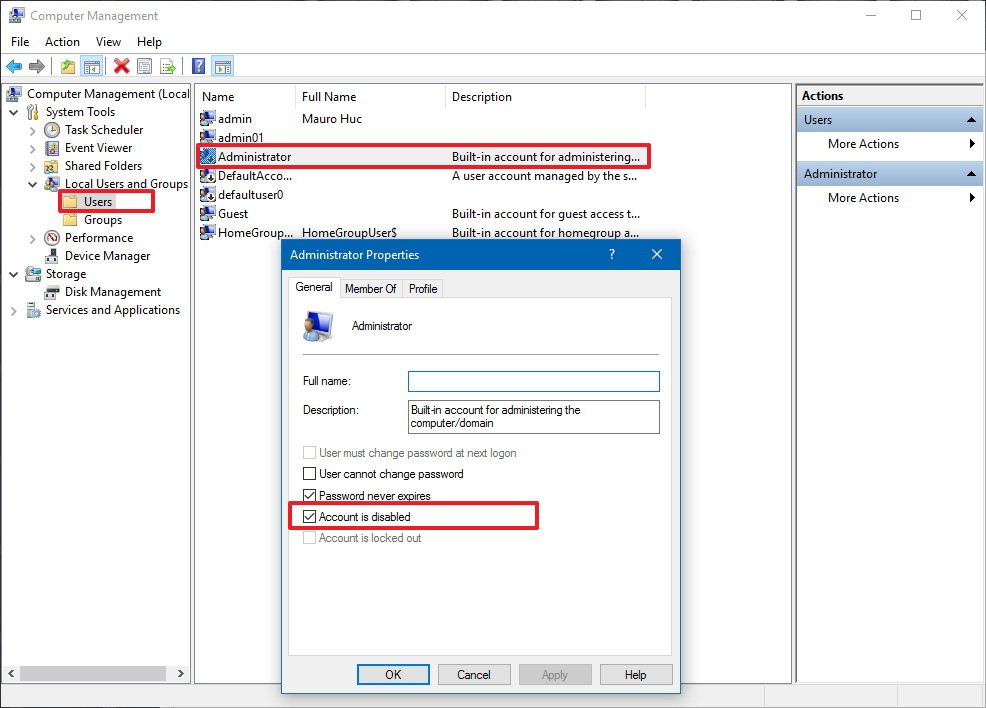
- Click Apply.
- Click OK.
Wrapping things up
While you can always reset and re-configure your Start menu, these steps give you an alternative way to keep your Start menu preferences on a new installation, new computer, or when the database gets damaged on your account.
Remember that a full backup only restores the settings until the time you created the backup. If you made any new changes, you'd need to create a fresh backup to include the new preferences.
More Windows 10 resources
For more help articles, coverage, and answers on Windows 10, you can visit the following resources:
- Windows 10 on Windows Central – All you need to know
- Windows 10 help, tips, and tricks
- Windows 10 forums on Windows Central
Mauro Huculak has been a Windows How-To Expert contributor for WindowsCentral.com for nearly a decade and has over 15 years of experience writing comprehensive guides. He also has an IT background and has achieved different professional certifications from Microsoft, Cisco, VMware, and CompTIA. He has been recognized as a Microsoft MVP for many years.

