There's a lot of excitement in the air with the new Windows Phone 8 devices that are now on the Market. Part of that excitement centers around Windows Phone photography. With it's Pureview Camera, the Nokia Lumia 920 has definitely sparked this interest.
While there is room for improvement, the Lumia 920's camera is capable of capturing quality photographs. With interest high, we'll walk you through the settings on the Lumia 920 to give you a feel for what each does. While the nomenclature will be similar for HTC Windows Phone cameras, we'll take a look at the HTC 8X and get a similar guide up shortly.

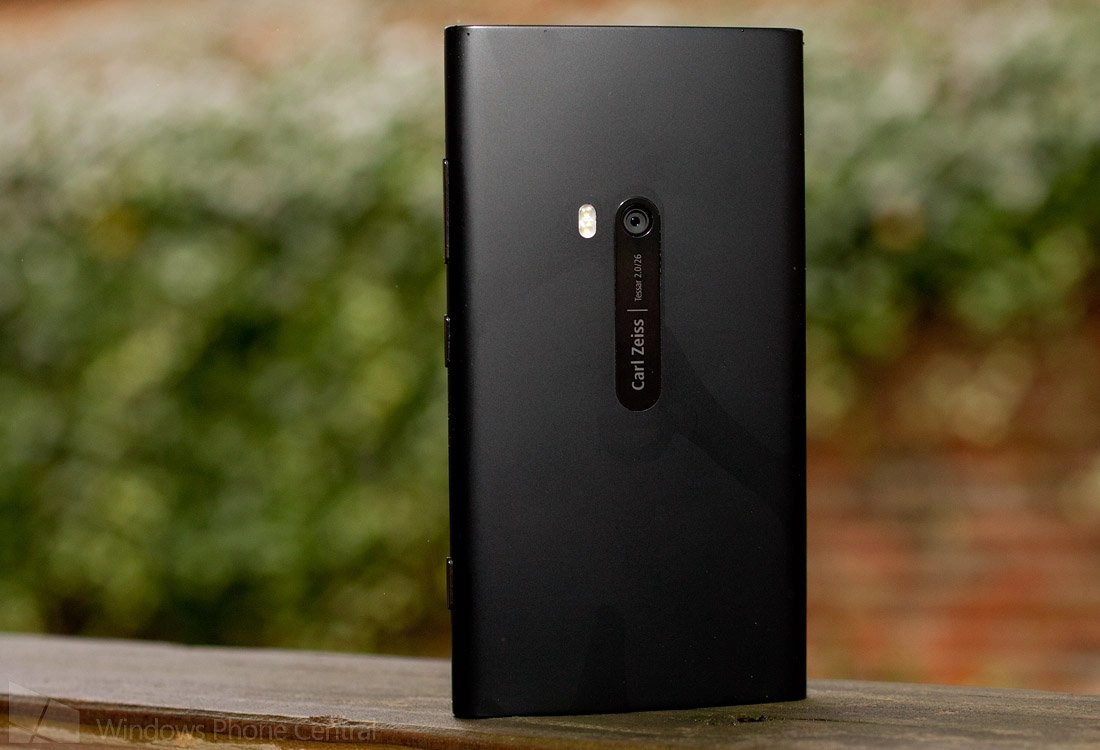
First, a quick refresher on the Lumia 920's camera.
It is fitted with a 8.7MP BSI sensor and a 26mm f2.0 camera lens. The camera housing is fitted with optical stabilization that helps keep the camera steady during slight movements. The design of the Nokia Lumia 920 camera makes it well suited for low-light photography. The BSI sensor and f2.0 lens allows more light to reach the imaging sensor and the optical stabilization allows you to use longer exposures while reducing motion blur.
The 920's camera doesn't have a shutter or aperture blades like you would find on traditional cameras. Instead it has a fixed aperture and the "shutter" function is accomplished simply by powering up the sensor. For a 1/250th shutter speed, power is supplied to the sensor for 1/250th of a second.
The fixed aperture of f2.0 helps the Lumia 920 handle low light situations better but it gives the camera somewhat shallow depth of field. Depth of field is basically how deep the camera focus reaches within the photo. Shallow depth of field has your subject in focus but what is behind them is slightly out of focus.
The Lumia 920 will focus on the center area if you press the shutter button half-way. Once you hear the beep confirming focus, press the shutter button the rest of the way to capture the photo. You can also activate the shutter by tapping on the screen. Where you tap is where the center of focus will be. Tap the screen, the Lumia 920 achieves focus and snaps the picture. Between the shallow depth of field and selective focus, you can create some nice effects with the camera. You can focus on the image in the foreground and a secondary subject in the background will be out of focus. Or you can do the opposite and have the object in the background out of focus.

Internal software processes the raw images captured by the Lumia 920's camera applying sharpness, saturation, contrast, and other photo processes. Nokia's secret formula in this regard is the Pureview algorithms that helps in low-light and other performances. While much of the image processing is done internally, the cameras settings will allow you to tweak things a bit. While the Lumia 920 doesn't offer you as much control as the Lumia 900, it does cover much of the basics.
The Menu
Scenes

The Scenes settings adjust the 920 camera's internal settings for specific situations. The default setting is on Auto which lets the camera evaluate the situation and determine the best Scene setting. However, you can override the Auto setting. On the 920 you have scene settings for:

Macro Samples
Close-up: This is your macro photo setting that allows the lens to focus at closer distances (about six inches). It is great for flowers, jewelry, coins, and other small objects. This mode does limit the overall focusing distance with the furtherest focusing distance being about a foot. If you're in Close-up Mode and want to take a picture of something far away, the 920 won't focus properly. If you are bouncing from close-up shots to distance shots a lot, it may be best to stick with the Auto Scene mode.
Night: There is little argument that the Lumia 920 captures fantastic night photos. The Night Scene setting allows for a longer shutter speed and higher ISO level to allow enough light to hit the sensor, in turn capturing a decent image.

Night Sample
Night Portrait: There's not much difference in the Night and Night Portrait Scenes. The Portrait scene seems to use a slightly faster shutter speed and is a smidgen sharper.
Sports: The Sports Scene strives to use a faster shutter speed to better keep up with the movements associated with sports or action pictures.
Backlight: If your subject has strong lighting behind it (the sun, a lamp, etc.) what's facing the camera will be in the shadows. The Backlight Scene is similar to the Night Scene in that the 920 will use a slower shutter speed and higher ISO to break through the backlighting.
ISO

We've already mentioned ISO several times with the camera scene settings. ISO is basically the light sensitivity setting for the sensor. On a bright, sunny day you won't need the sensor to be as sensitive so you would use a lower ISO setting. Darker lighting, a higher ISO would be called for.

Lumia 920 ISO Samples: ISO 100 (left) and ISO 800 (right)
The Lumia 920's default ISO setting is Auto and the camera will choose the best ISO level based on a handful of variables. However, you can override the Auto and set the ISO level manually. The ISO levels available on the 920 include 100, 200, 400, and 800. The above photo was shot at night with the image on the left being shot at ISO 100 and the image on the right at ISO 800.

ISO Noise comparison: ISO 100 (left) and ISO 800 (right)
One thing to keep in mind with using a higher ISO level you increase the digital noise or grain in the photo. Technically speaking, when we use a higher ISO, we are amplifying the signal we receive from the light photons on the sensor. As we amplify the signal, we also amplify the background electrical noise that is present in any electrical system. All of which causes the grainy appearance in some photos.
The noise is more prevalent in low light photos because the sensor struggles to capture light from the darker areas of the photo. To help combat the noise, Nokia does a really nice job of applying noise reduction to their internal image processing. The Lumia 920 does a really nice job of handling ISO 800 and keeps the noise levels manageable. While noise (the grainyness) is more noticeable in the ISO 800 sample, it's not that bad.
Exposure Value

An image's exposure is automatically set by the 920's camera by measuring the amount of light available. The 920 meters that light and determines what shutter speed is required for proper exposure. Too slow of a shutter speed and the image is overexposed and washed out. Too fast of a shutter speed and the image is underexposed and dark.

Exposure Value Comparison: Zero, +1 1/3, -1 1/3
The Exposure Value setting (otherwise known as exposure compensation) adjusts how the camera evaluates proper exposure. If images are constantly being over exposed, you can set the Exposure Value to a negative value to tell the camera to use a faster shutter speed or darken the image. If you use a positive number, the camera will use a slower shutter speed or lighten up the image.
Say you're getting a lot of glare of a subject, go into your Exposure Value and choose a negative number to darken the image a little and reduce the glare.
White Balance

White Balance is the process of removing unrealistic color casts so colors can be rendered properly in the photograph. Imbalances can be caused by different lighting that can cause warm or cooler tones or by dominant colors within the picture itself.

White Balance: Cloudy (upper left), Daylight (upper right), Florescent (lower left), Incandescent (lower right)
As with other settings on the Lumia 920, the default white balance setting is on auto where the camera chooses the best setting. But alas, you can take the helm and do things manually here as well. You can choose the following lighting conditions; Cloudy, Daylight, Fluorescent, and Incandescent lighting.

White Balance adjusted in-camera: Auto (left) vs. Florescent (right)
For the most part, the Lumia 920 does a nice job of balancing the white balance. However, we have seen it struggle indoors under artificial lighting. In those cases you can adjust the color or white balance with post-processing software like Creative Studio or tweak the settings. The above picture was first shot with white balance set to auto. The blue color cast on the wood is likely caused by a combination of the lighting and gray concrete. By switching the white balance to Florescent the blue cast is removed and the wood color is warmer, more natural.
Aspect Ratio

Aspect Ratio is the relationship the image has to the sensor size. With the Lumia 920 you have a 1/3" sensor that has a native 4:3 ratio. By default, the 920's camera aspect ratio is set to 16:9 which stretches the image full screen.

Lumia 920 Aspect Ratio: 16:9 (left) and 4:3 (right)
In the process, you get a little softness that can easily be compensated for through the internal processing software. But for whatever reason, Nokia's internal software still leaves a little softness which can easily be fixed through post-processing software like Creative Studio.
There is a slight softness in the 4:3 aspect ratio but it's not as noticeable.
Focus Assist Light

In simple terms, the focus assist light shines a little light on your subject so the camera has something to focus on. By default, this setting is on auto and in low light, if the camera can not achieve proper focus the light turns on and focus is achieved.
There is a slight risk with the focus assist light and getting proper white balance. In some low light situations, the camera will set the white balance off the light the focus assist, giving your picture a slightly warmer tone. Nothing that can't be corrected in Creative Studio and it doesn't always throw off the white balance setting. If you see this happening, go into the settings and choose daylight or incandescent to see if that is enough compensation.
Video Settings

We would be remised if we didn't touch on the Lumia 920's settings for recording video. Nokia has limited the video settings to three; white balance, continuous focus and video mode. White balance is similar to what we've already discussed on the still image side of the coin.
Continuous focus is on, by default, and allow the camera to continuously focus on subjects as they move or you move. Turned off the camera will remain focused on the original point of focus when you first press the shutter button.
Video mode is basically your resolution settings. You have Standard Quality which is 720p and High Quality which is 1080p. Standard Quality is the default setting. High Quality yields better video quality but also slightly larger video files.

The Lumia 920's camera is a very capable camera. It may not be at the same level of a DSLR or high end point and shoot but it is still capable of capturing quality images. Add editing applications such as Thumba or Creative Studio along with special effects apps such as Soviet Kam, Sketch Camera and your Windows Phone camera becomes a nice, mobile photo studio.
Knowing your camera's settings is half the battle in taking a good photo. Ansel Adams is one of my photographic inspirations from his work with black and white photography to the way he describes photography. Adams said "A good photograph is knowing where to stand." Hopefully by laying out the Lumia 920's settings will offer a little insight into taking better photos and let you concentrate on everything else, including where to stand.
Read more:

