All the latest news, reviews, and guides for Windows and Xbox diehards.
You are now subscribed
Your newsletter sign-up was successful
So your Dell XPS 13's audio is being finicky. It's a common problem, especially the 9343 model, so you're not alone. Plugging in or unplugging headphones sometimes won't register, drivers will sometimes stop working, and Windows 10 updates will sometimes decide to work against you.
There are countless forums across the internet that attempt to fix this problem, most with a different, unproven fix method. Here are some fixes that have helped other XPS 13 users and will hopefully get the audio in your Dell XPS 13 working again.
- Ensure Windows isn't still asleep
- Troubleshoot your audio settings
- Perform an ePSA test
- Uninstall and reinstall XPS 13 audio drivers
- Perform a light system restore
- Audio still not working?
Ensure Windows isn't still asleep
If you unplug headphones while your XPS 13 is asleep, Windows might think they're still plugged in when you wake up your laptop.
If your audio suddenly doesn't work upon waking your XPS 13, plug in and unplug your headphones. This could kick your XPS 13 in the butt and get the audio working again.
Troubleshoot your audio settings
Yes, this might seem obvious to some of you. Yes, you might have already tried the troubleshooter. If you haven't already tried, here's how to use Windows troubleshooter for your audio problems.
This method has reportedly solved hissing and static noises.
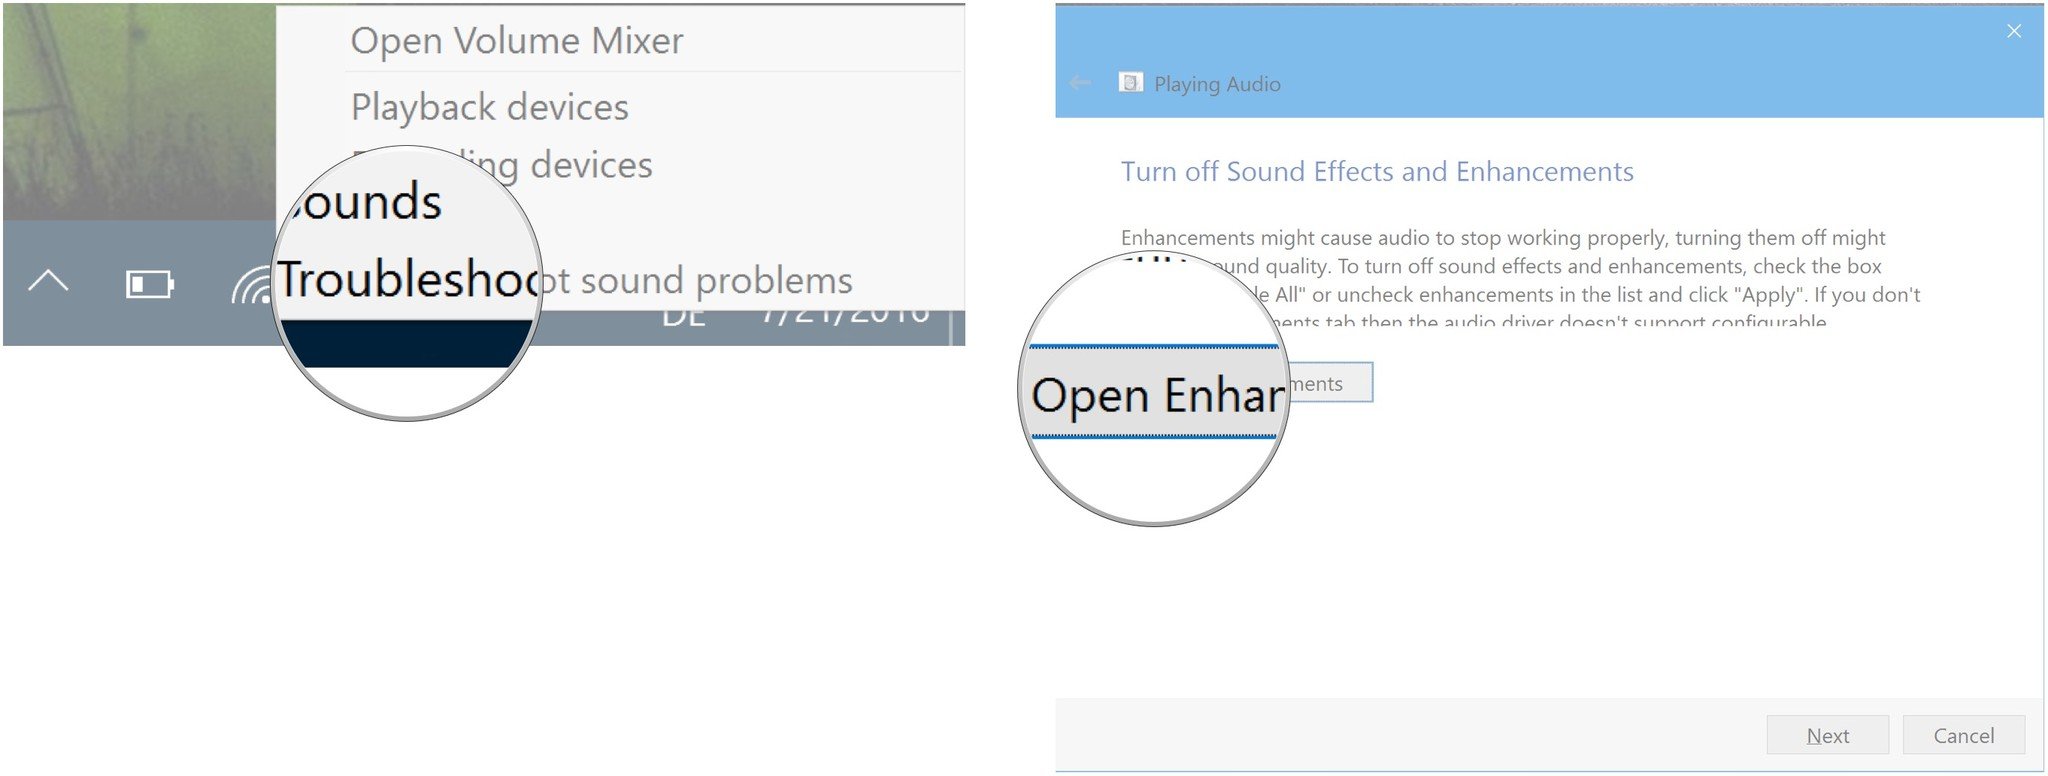
- Right-click the speaker icon in your taskbar. It's located in the bottom right corner.
- Click Troubleshoot sound problems.
- Click Open Enhancements.
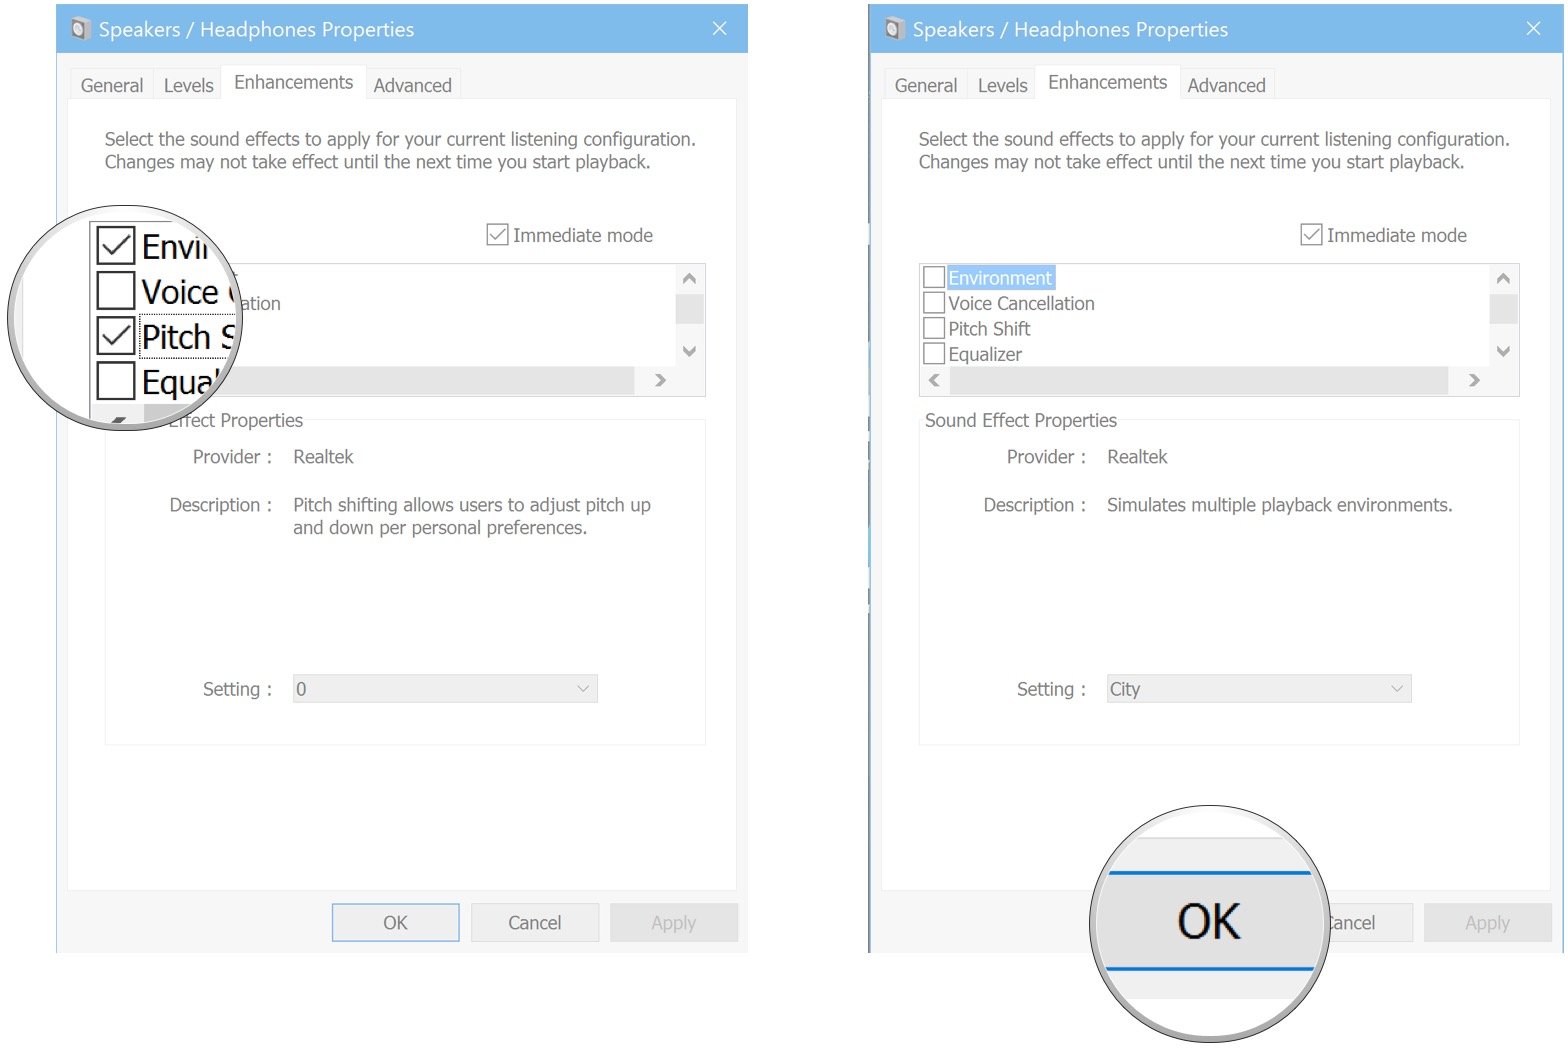
- Uncheck all boxes in the Enhancements field.
- Click OK.
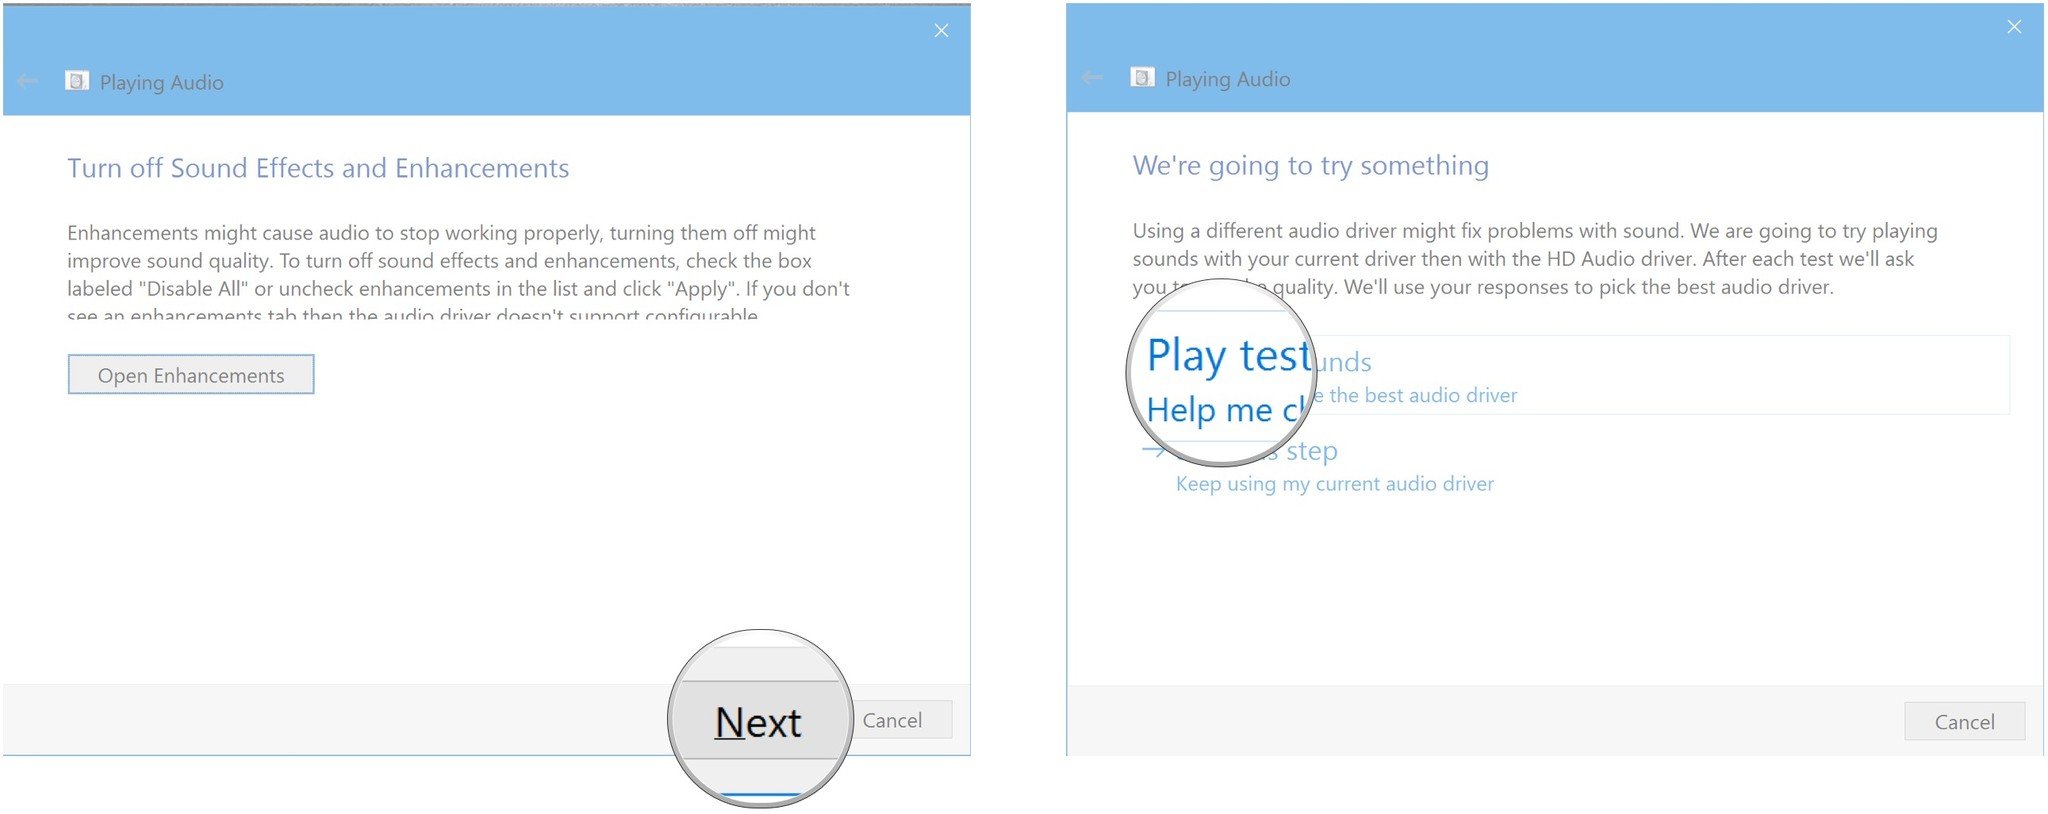
- Click Next.
- Click Play test sounds. You should hear a series of sounds.
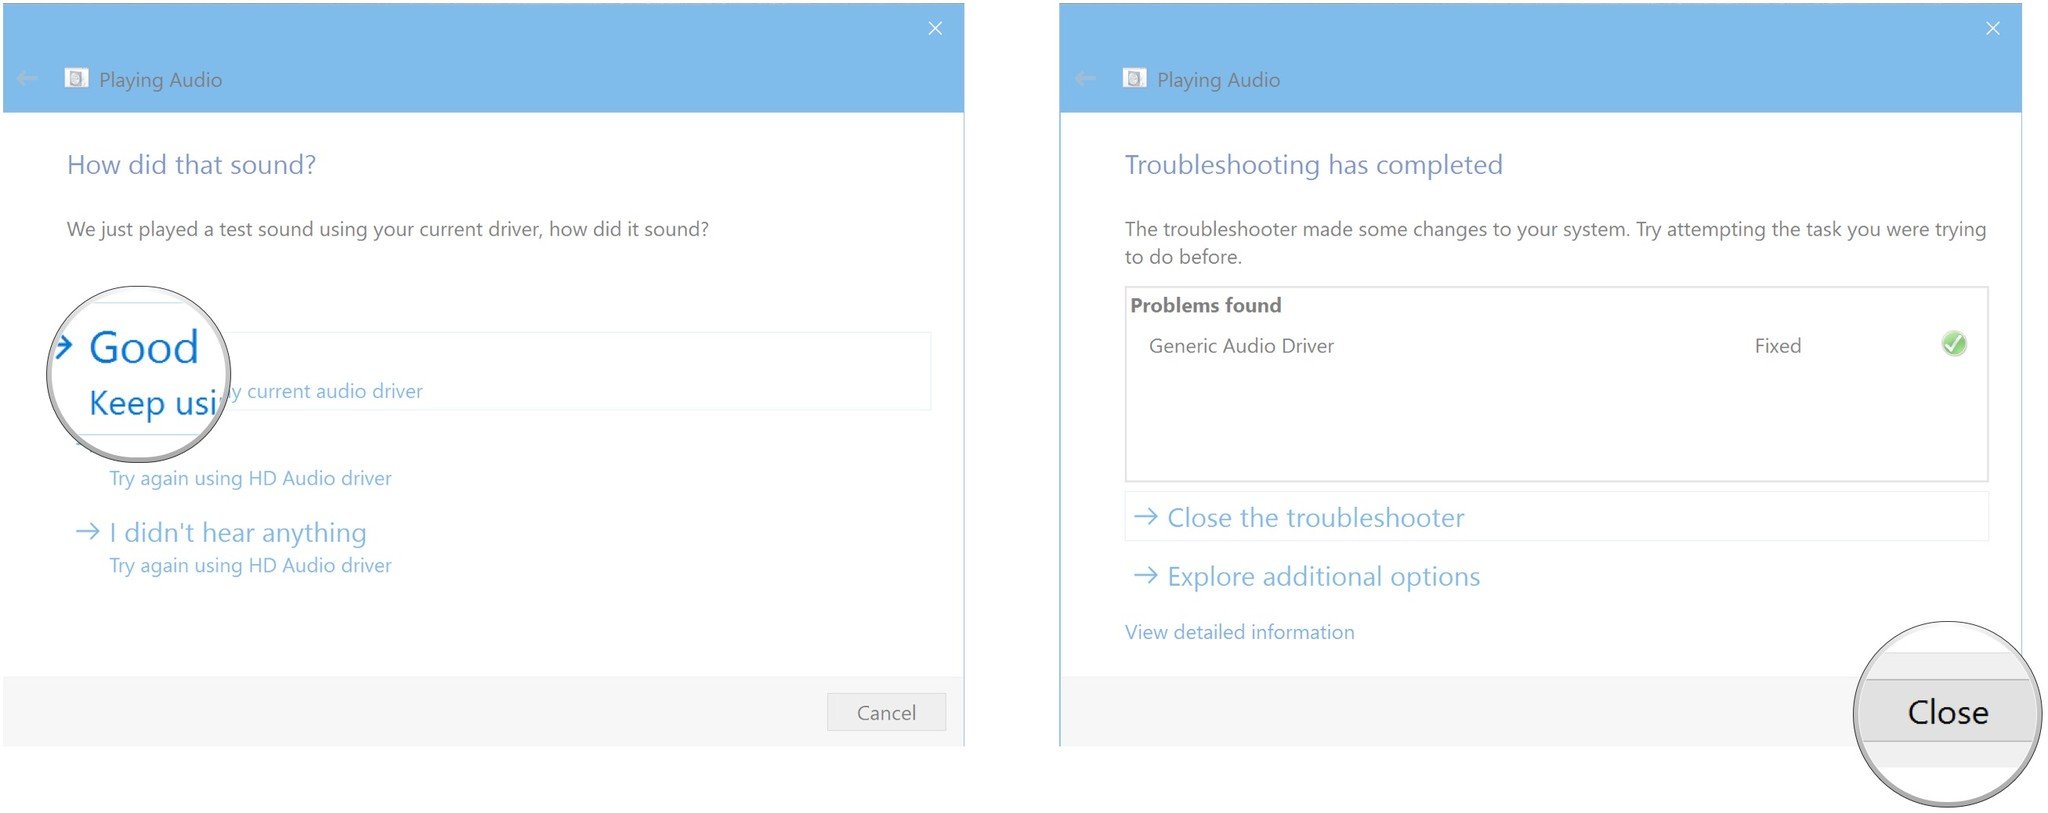
- Click the option that best suits what you heard.
- Good (Keep using my current audio driver)
- Bad (Try again using HD Audio driver)
- I didn't hear anything (Try again using HD Audio driver)
- Click Close when you're finished with the troubleshooter.
Perform an ePSA test
Restarting your computer and running a pre-boot assessment can reveal to you whether or not your speakers have failed at a hardware level.
All the latest news, reviews, and guides for Windows and Xbox diehards.
- Click the Start button.
- Click Power.
- Click Restart.
- Hit F12 on your keyboard as soon as your computer starts to boot (you will see a Dell logo on the screen).
- Select Diagnostics using the arrow keys on your keyboard.
- Hit Enter on your keyboard. An ePSA system diagnostic will start.
- Click Yes when asked if you can see the colored bars. At this point a loud beep should sound.
If you don't hear a loud beep, it likely means your speakers have failed and you should contact Dell about a hardware replacement.
If you do hear a loud beep it means your speakers are working (at least from a hardware perspective). If you're not getting any sound from them when you're not in diagnostic mode, it might mean your headphone jack sensor has failed — it thinks you still have a set of headphones in and therefore won't play any sound through your XPS 13's main speakers.
The solution to a faulty headphone jack? You're probably going to need a replacement, but there is something you can try before going that far.
Uninstall and reinstall XPS 13 audio drivers
Before going any further, you want to ensure your audio driver isn't causing the problem.
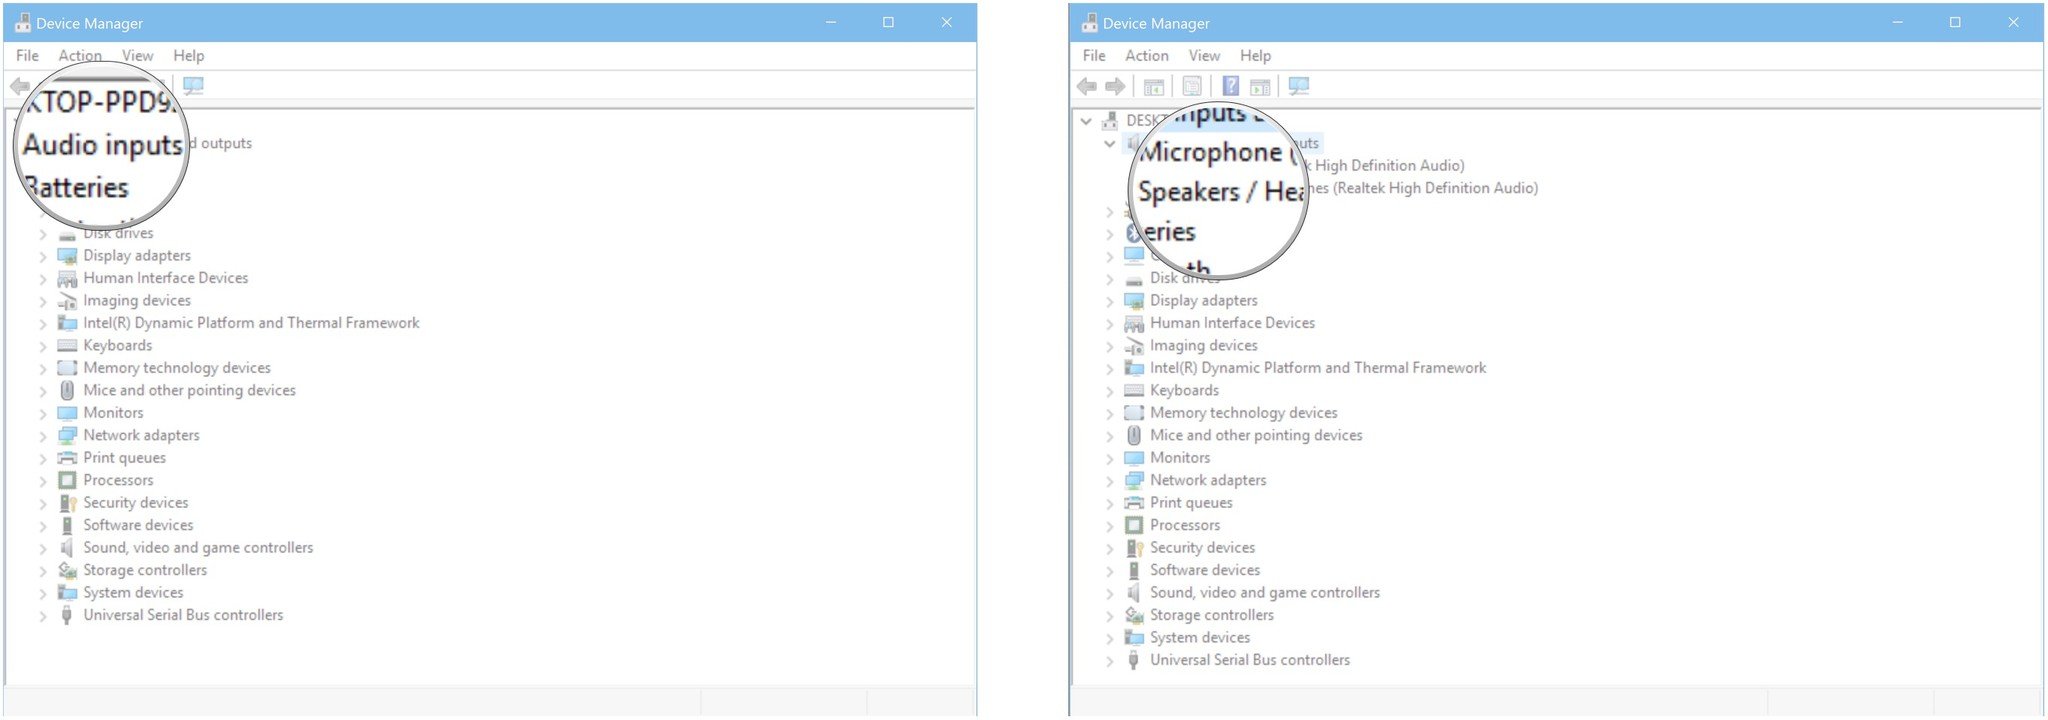
- Click the Search Windows field in your taskbar.
- Type devmgmt.msc and hit Enter on your keyboard.
- Double-click Audio inputs and outputs.
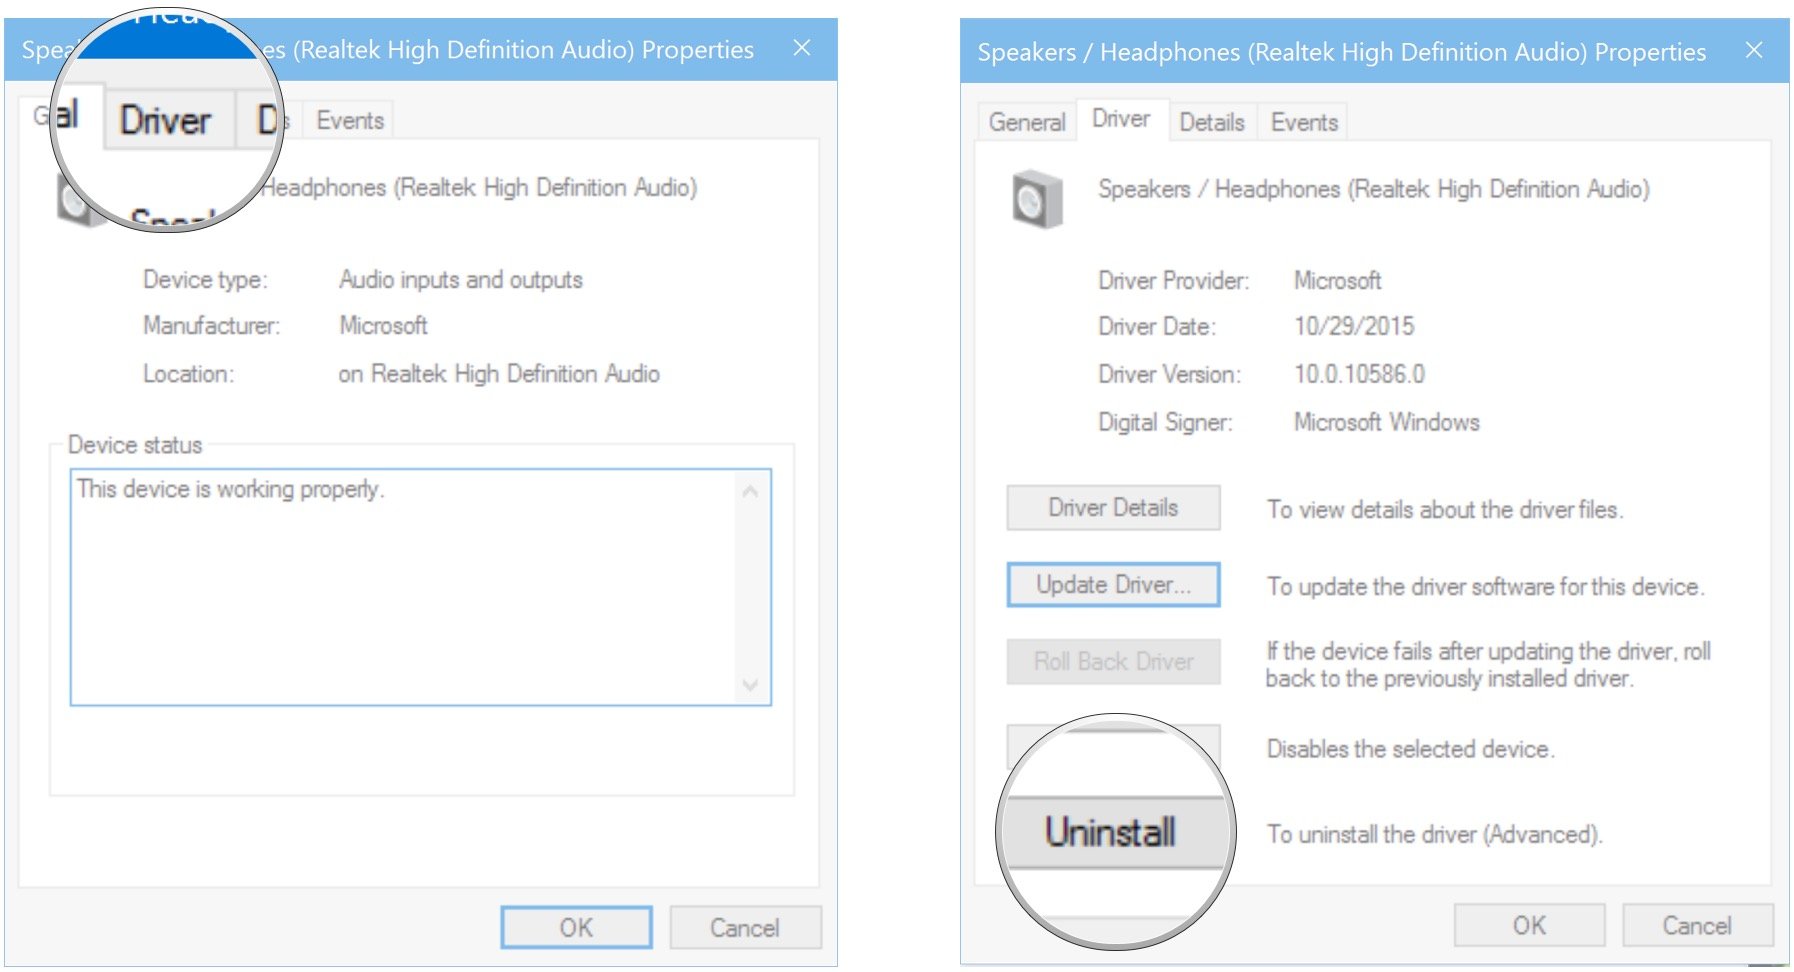
- Double-click Speakers / Headphones.
- Click Driver in the top menu.
- Click the Uninstall button.
- Click OK.
- Navigate to Dell's driver support web page using your favorite web browser.
- Click Audio. You might have to scroll down a bit.
- Click Download.
- Click Run when the download is complete.
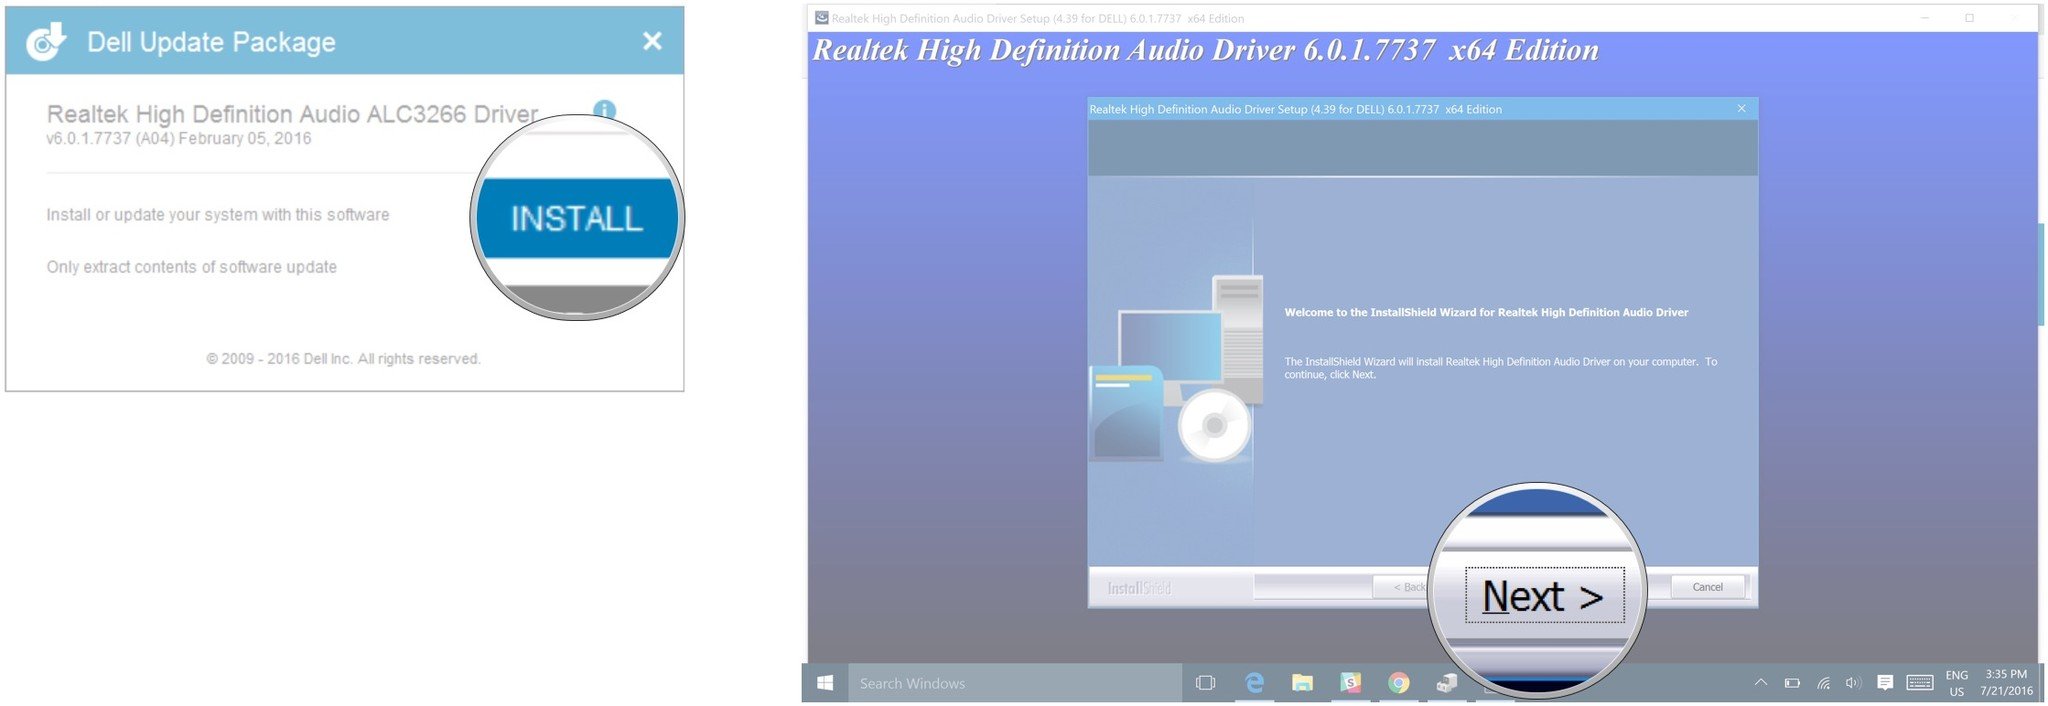
- Click INSTALL. Realtek InstallShield will open.
- Click Next >.
- Click Next > again.
- Click Finish. Your computer will restart.
Perform a light system restore
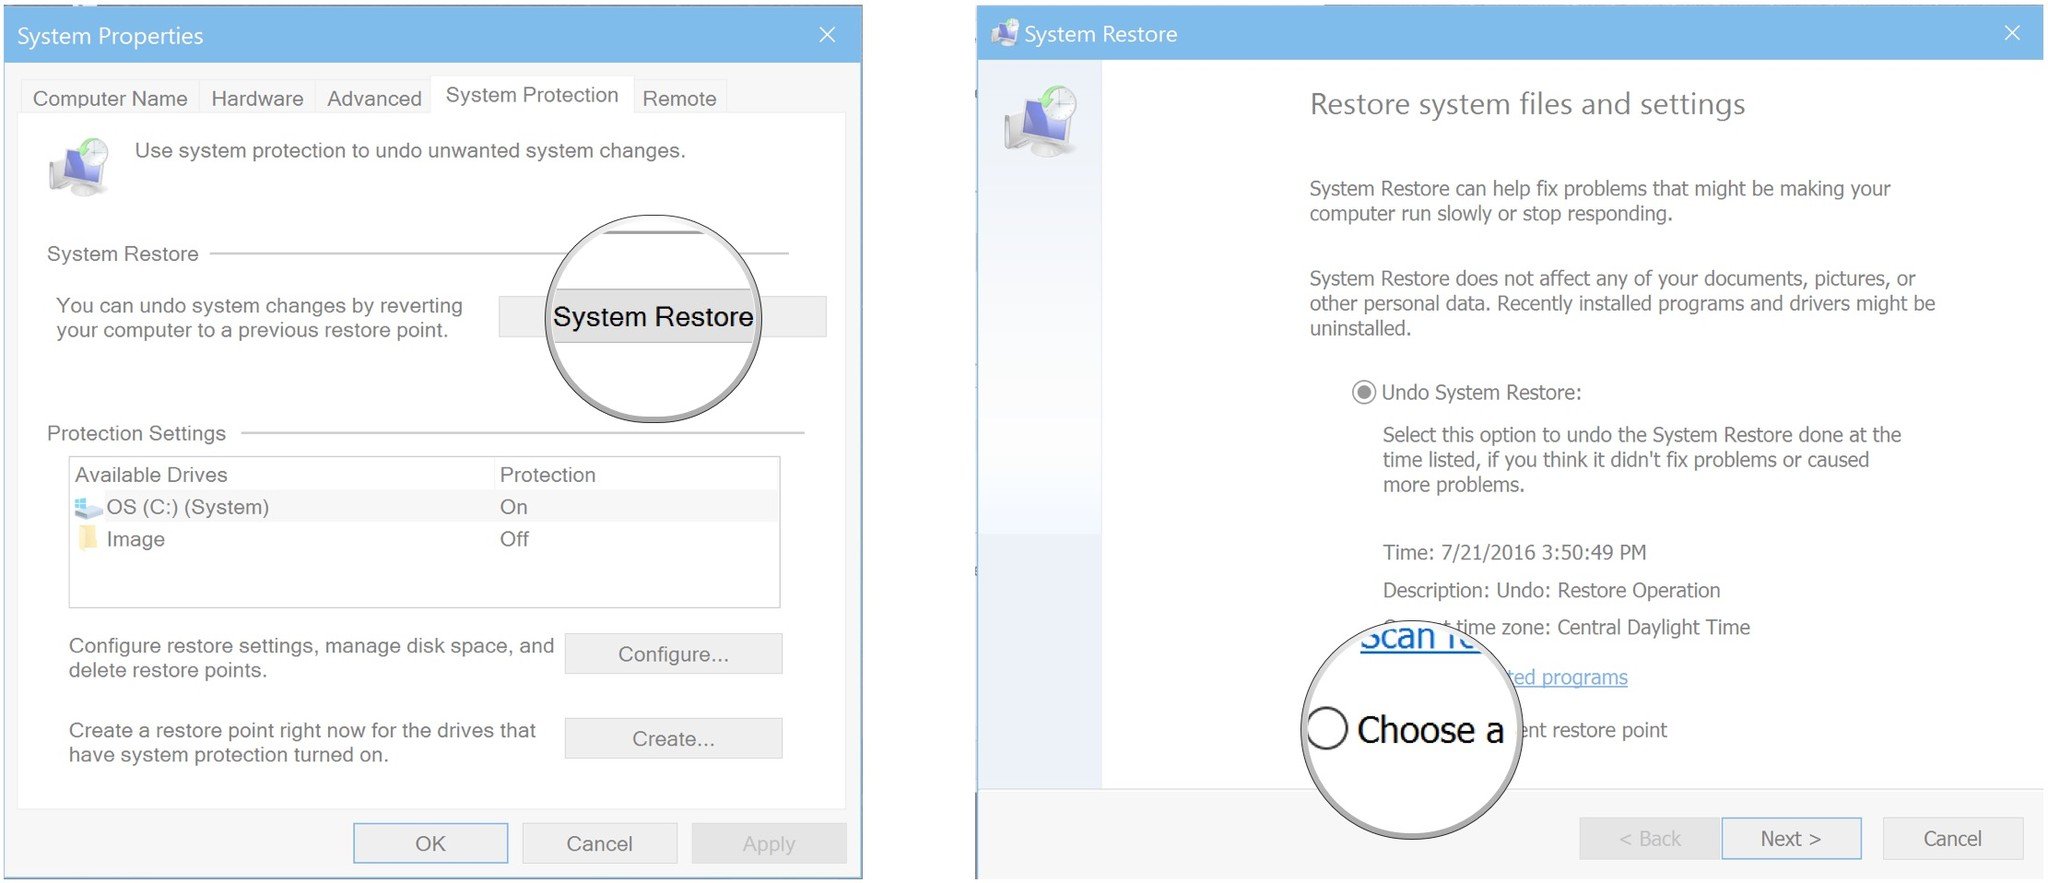
If your audio very recently crapped out (especially after a Windows update or the installation of a new app), you can set your XPS 13's settings back to a point before things went wrong.
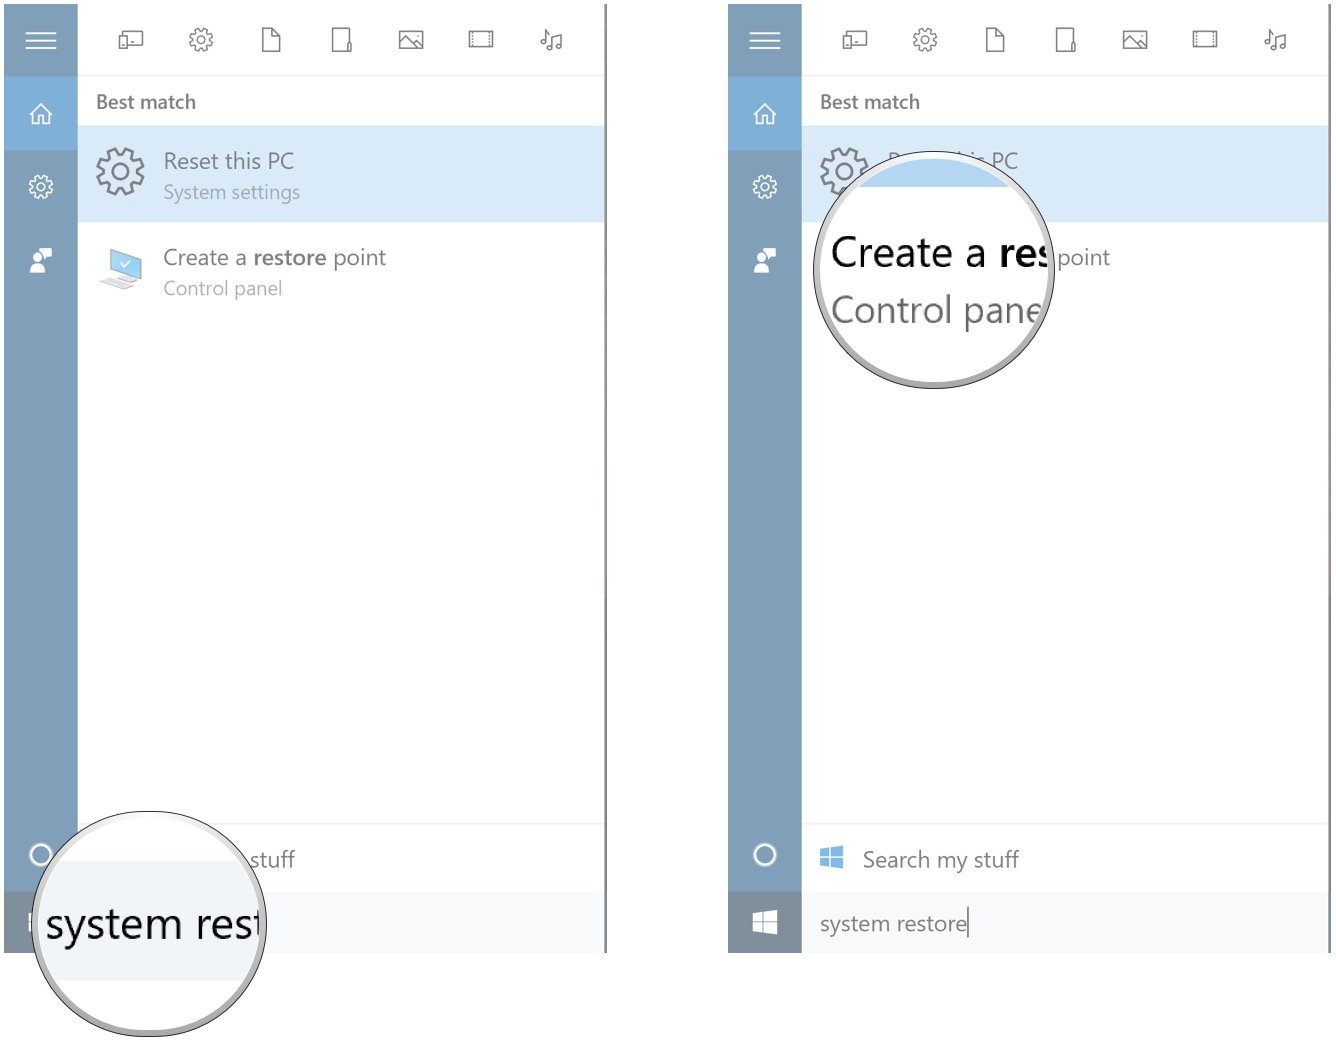
- Click the Search Windows field in your taskbar.
- Type system restore.
- Click Create a restore point.
- Click the System Restore… button.
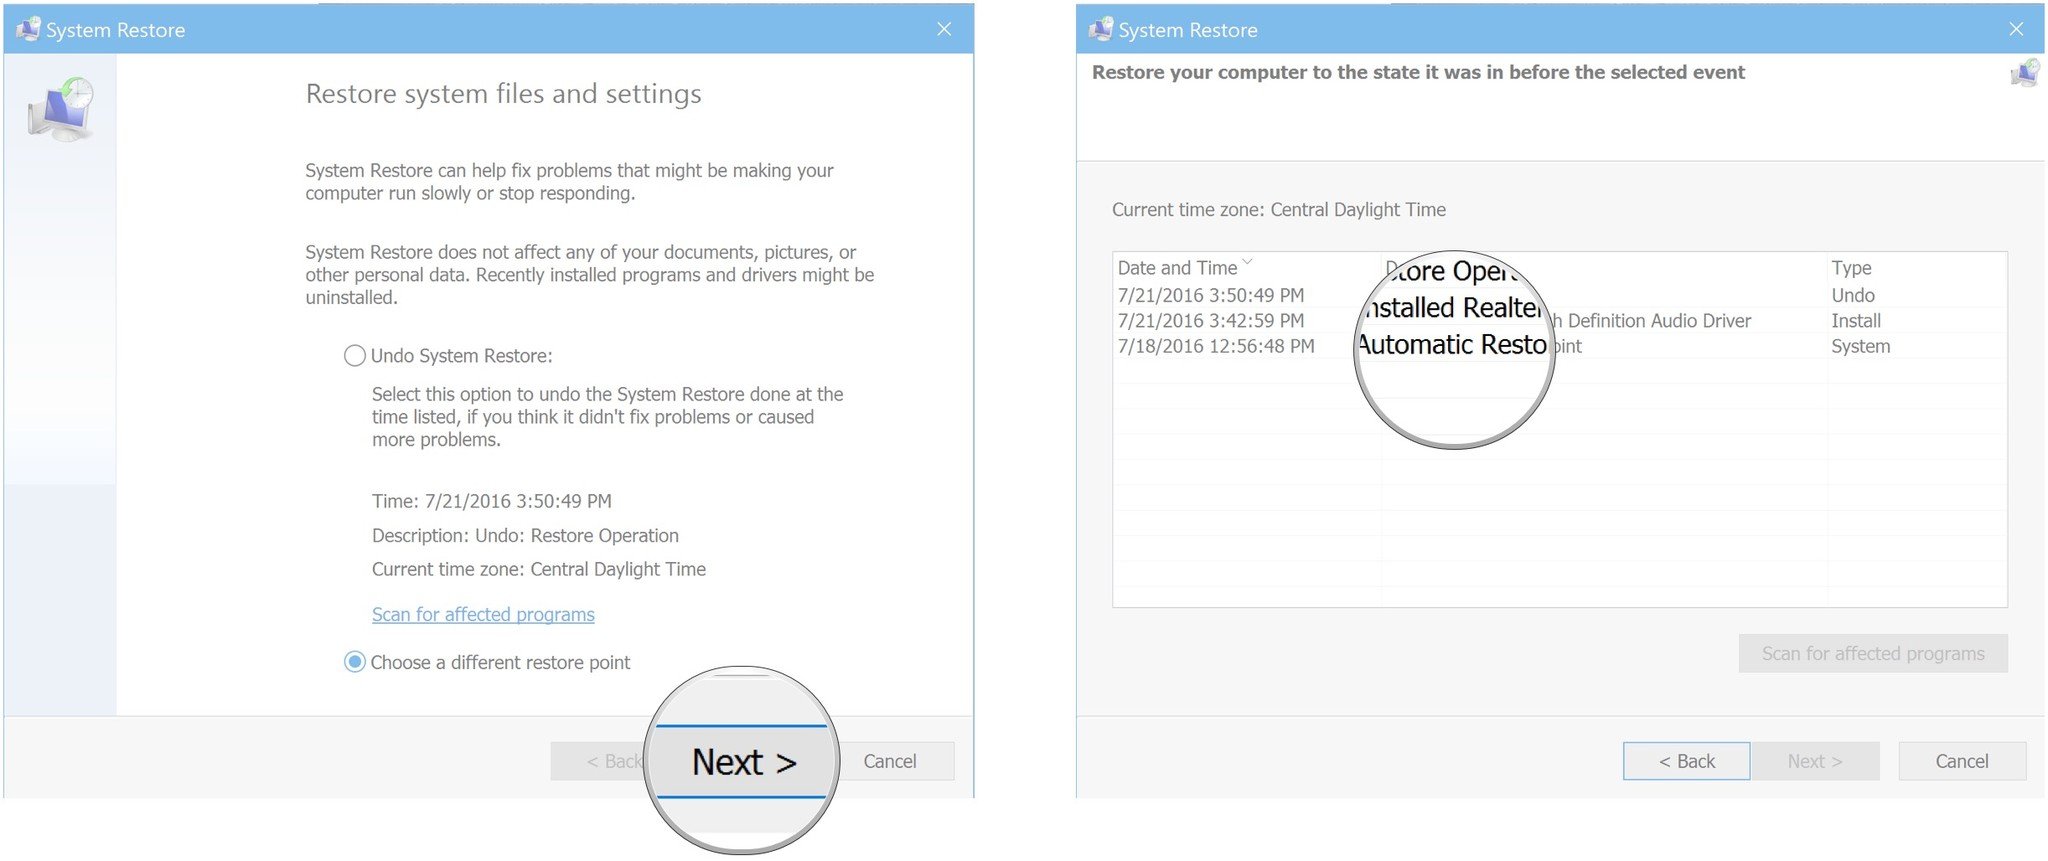
- Click Choose a different restore point.
- Click Next.
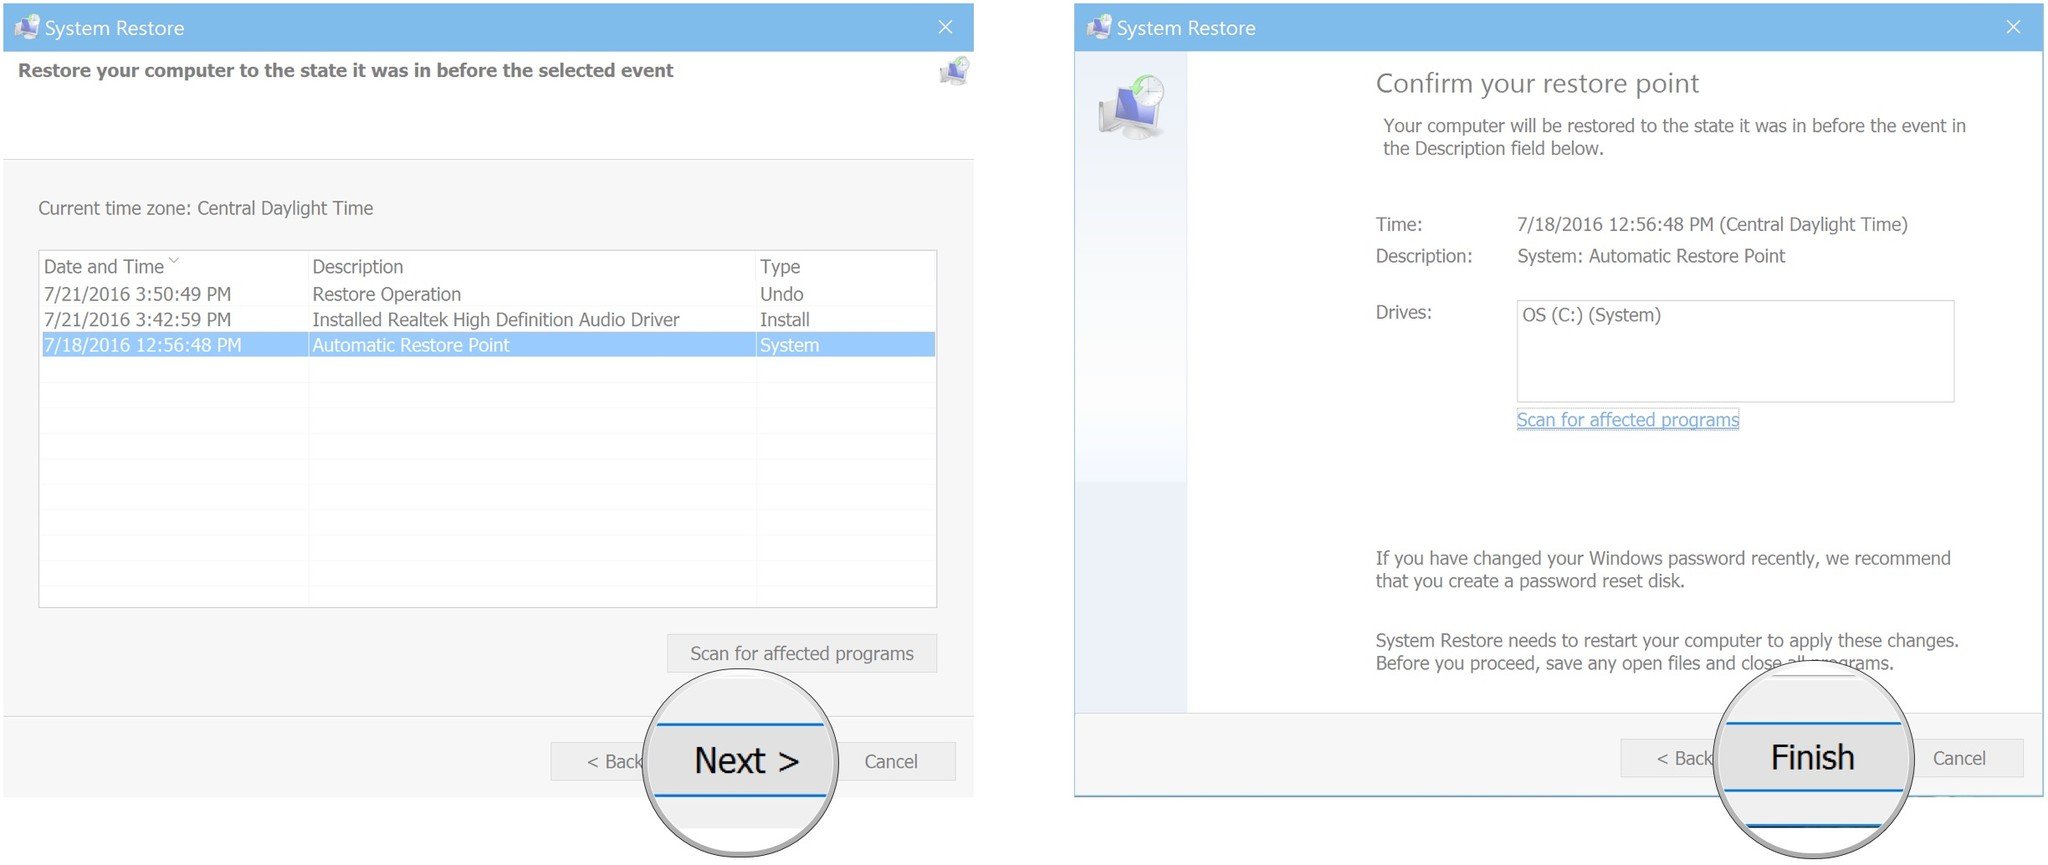
- Choose a restore point before things went wrong by clicking on it.
- Click Next.
- Click Finish. Your computer will be reset to the restore point you chose.
Audio still not working?
Dell has a fantastic customer support system in place. If you've exhausted your options and the audio still isn't working in your XPS 13, consider contacting Dell Support.
Have you had audio troubles and managed to fix them in a way not mentioned here? Let us know in the comments below!

Cale Hunt brings to Windows Central more than nine years of experience writing about laptops, PCs, accessories, games, and beyond. If it runs Windows or in some way complements the hardware, there’s a good chance he knows about it, has written about it, or is already busy testing it.
