How to customize your Fitbit using Windows 10 Mobile
Choose what info displays on your device, change which arm you wear your Fitbit on, customize the watch display and more!
All the latest news, reviews, and guides for Windows and Xbox diehards.
You are now subscribed
Your newsletter sign-up was successful
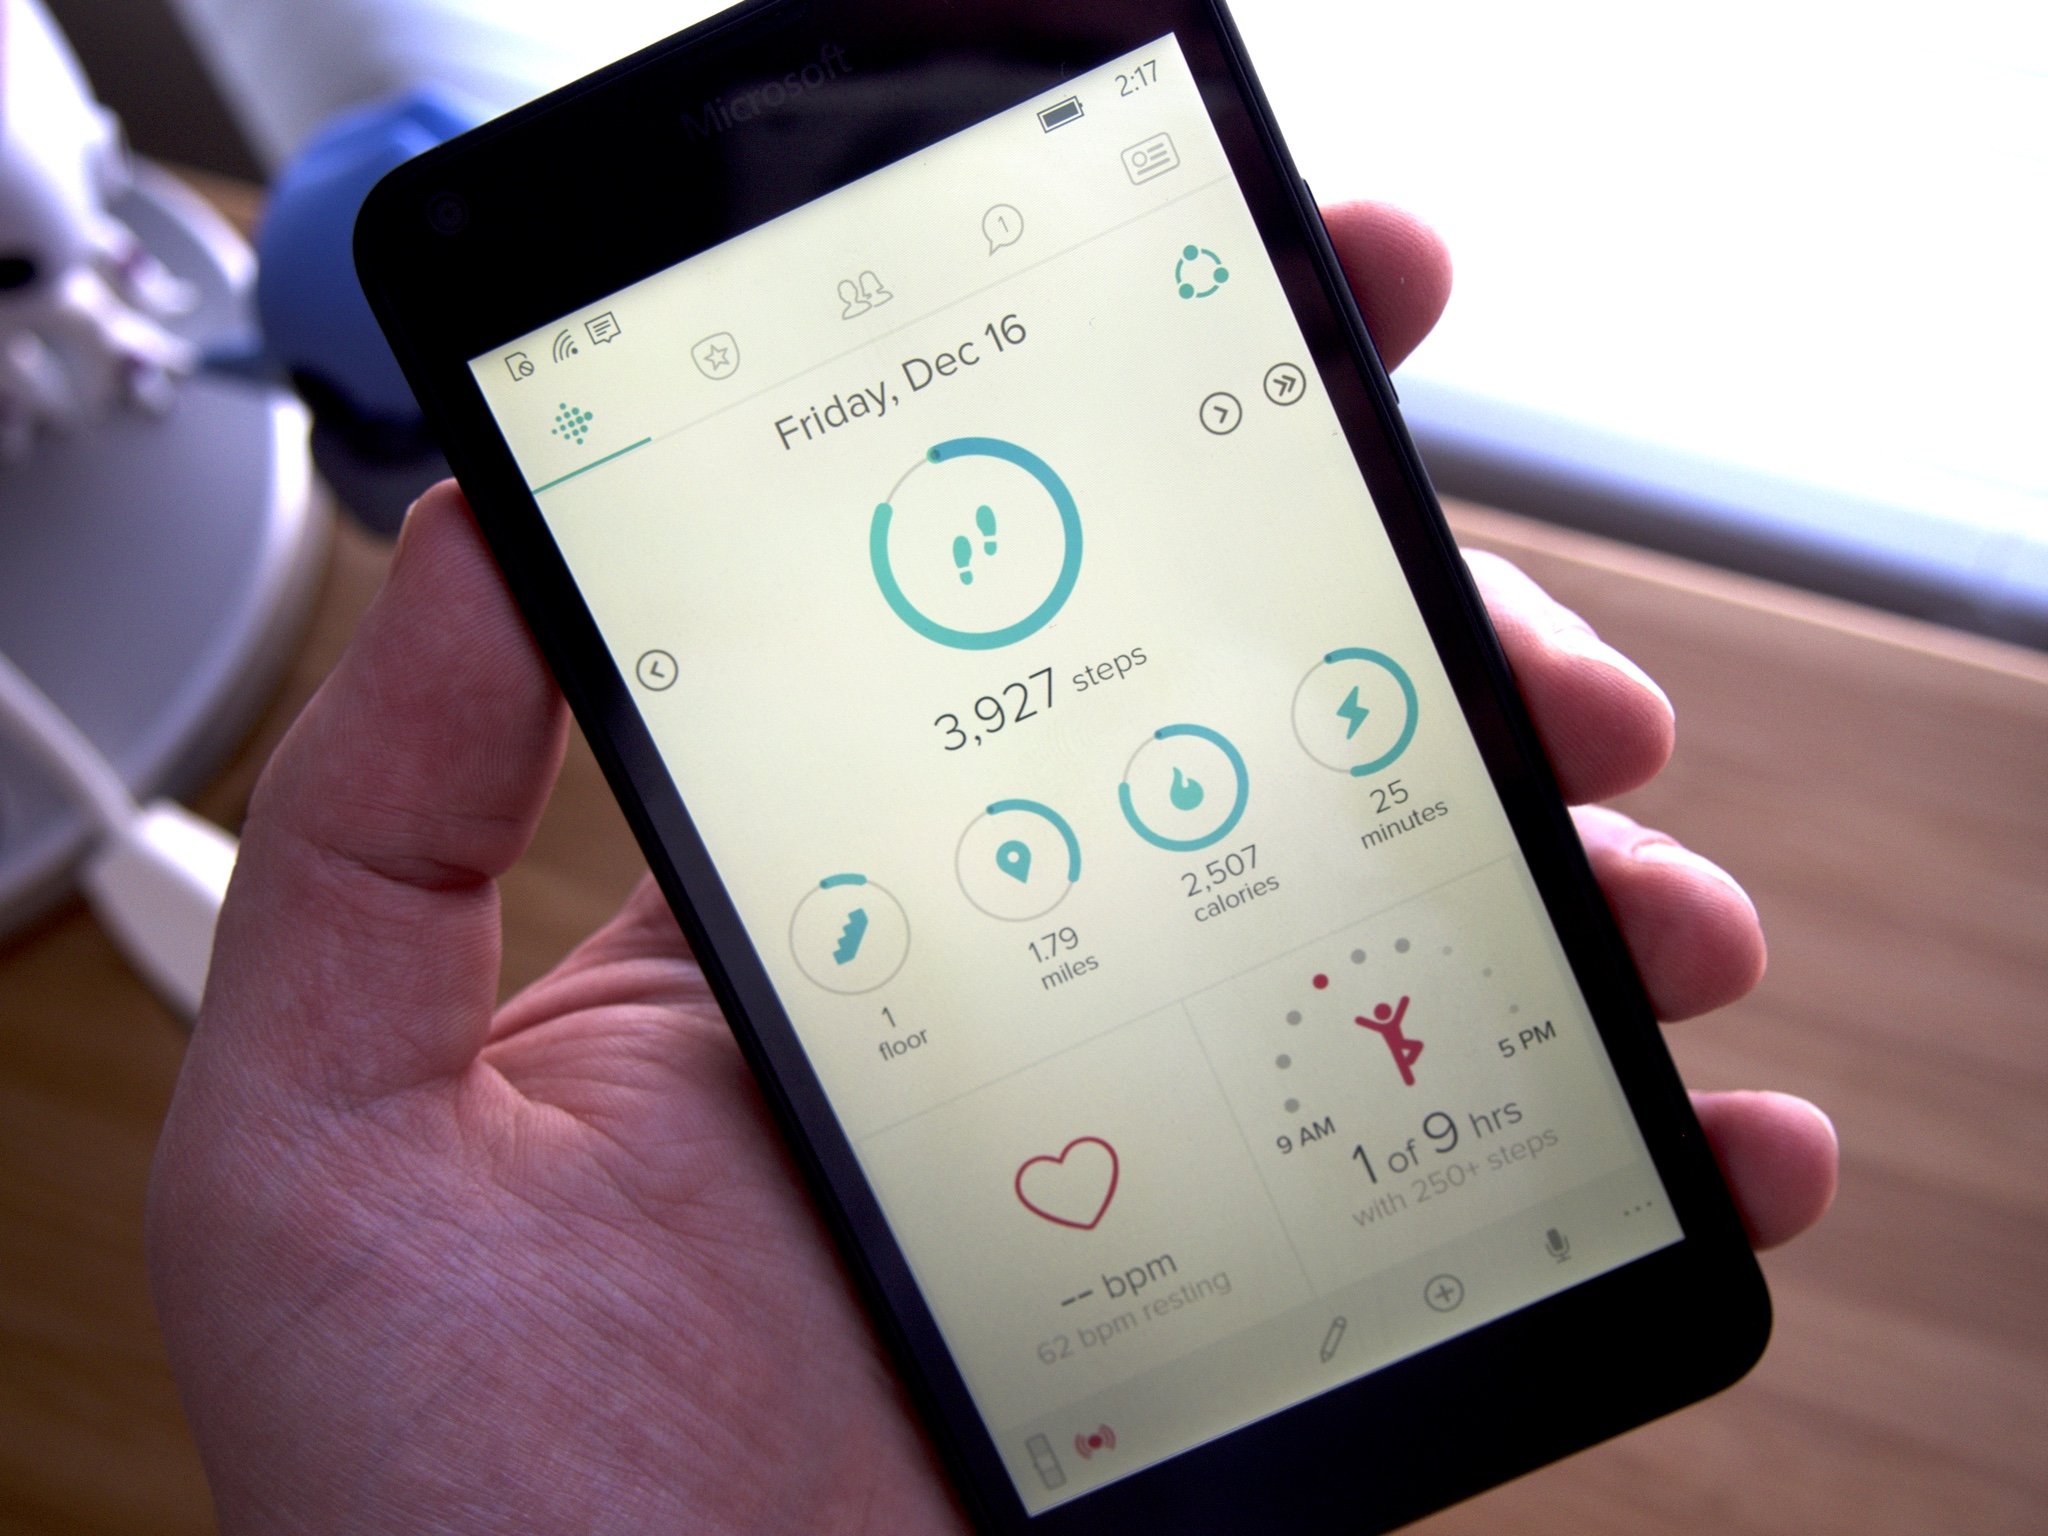
A big part of the fun of Fitbit comes as your numbers climb! When you see your step count or calories burned digits scrolling by it feels like you're cashing in on the slot machine of life!
But maybe you don't want every single activity measured and displayed on your Fitbit? No problem! With the Fitbit app Windows 10 Mobile you can customize which activities are displayed on your Fitbit.
- How to hide and show your activity categories in Fitbit on Windows 10 Mobile
- How to rearrange categories in Fitbit on Windows 10 Mobile
- How to change the Clock Face on your Fitbit on Windows 10 Mobile
- How to switch on which wrist you wear your Fitbit in Windows 10 Mobile
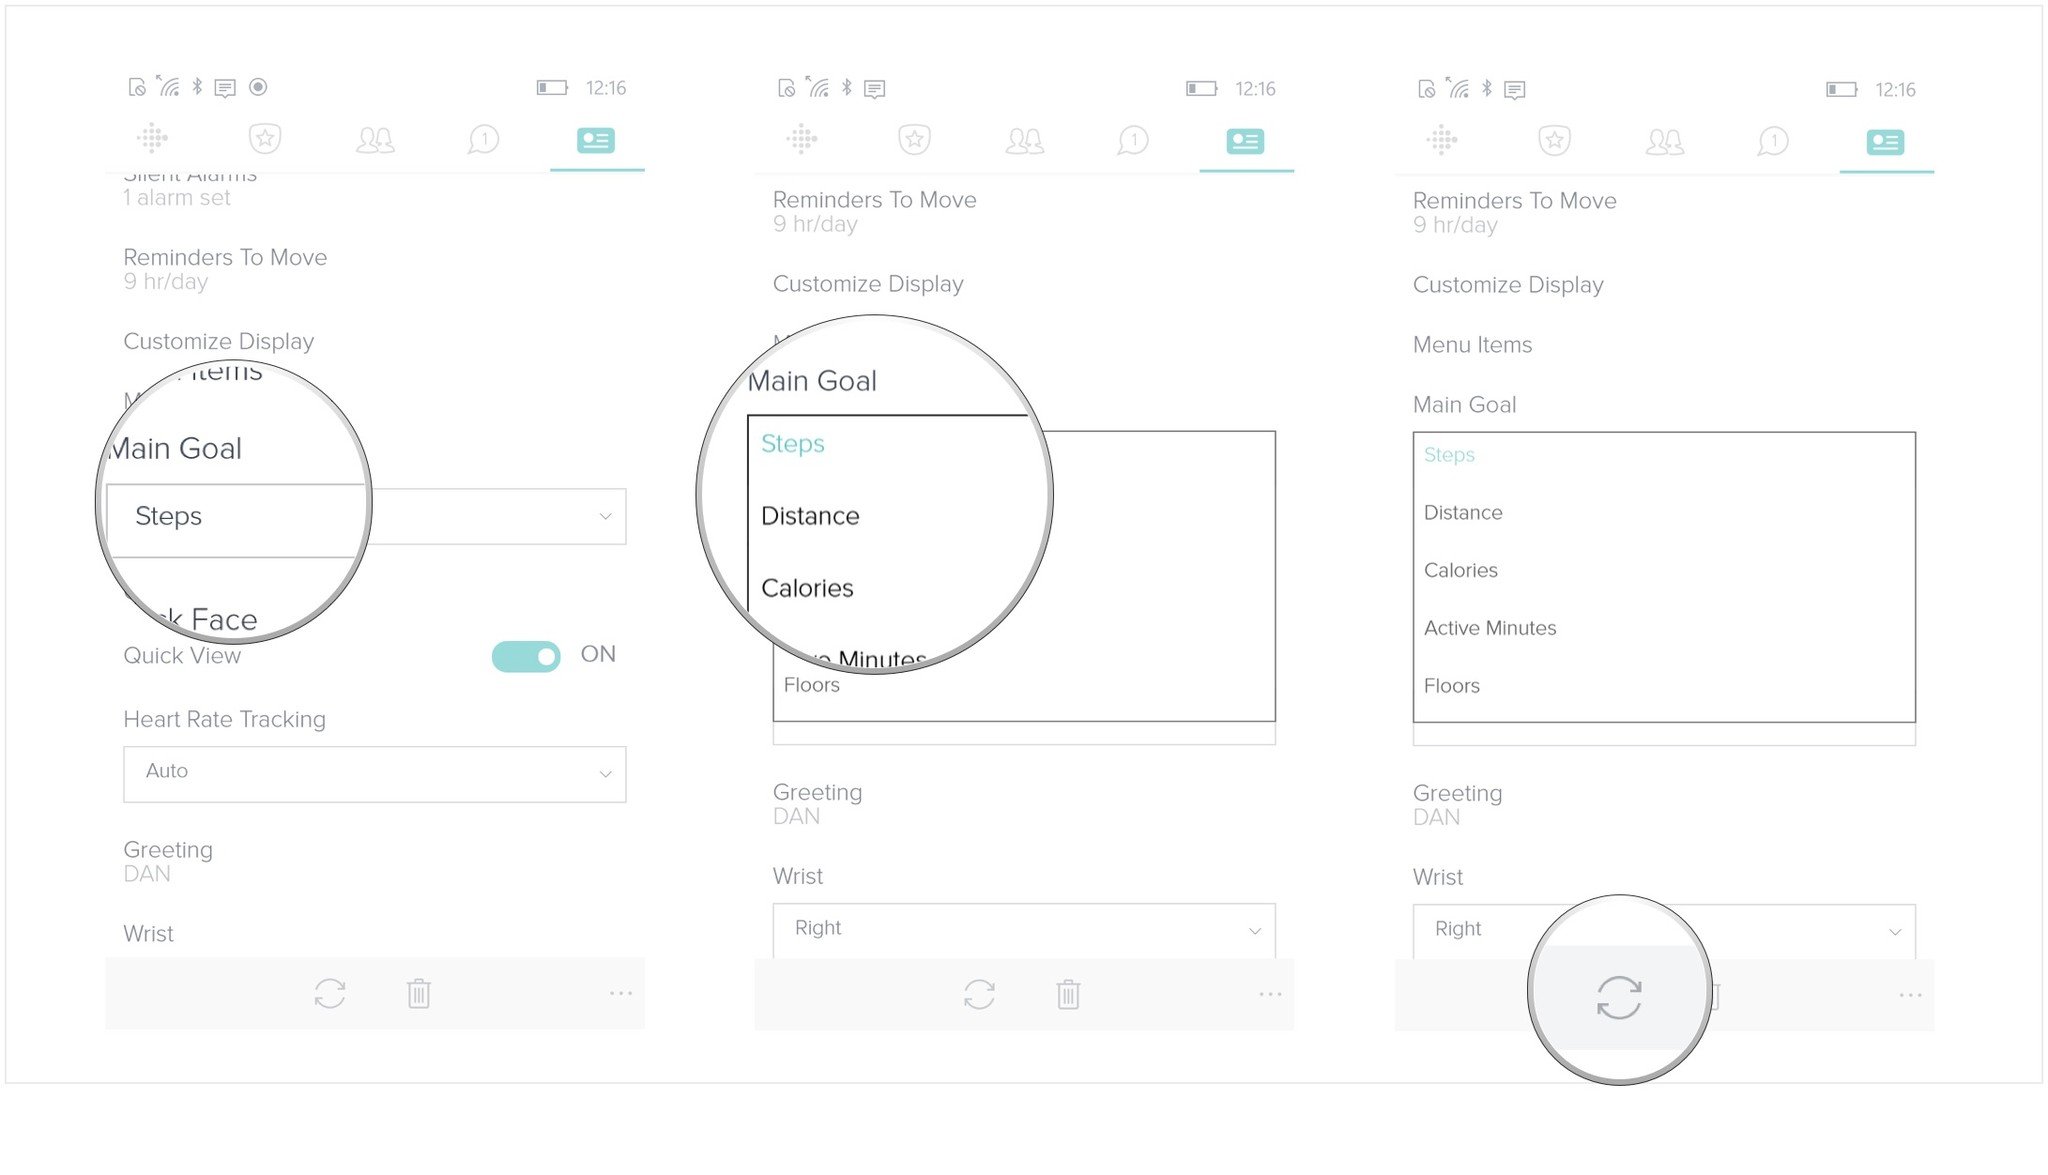
- How to change your main goal in Fitbit on Windows 10 Mobile
How to hide and show your activity categories in Fitbit on Windows 10 Mobile
If you care about your heart rate and step count, but don't care so much about knowing your calories or distance, you can customize what information is available through your Fitbit's display.
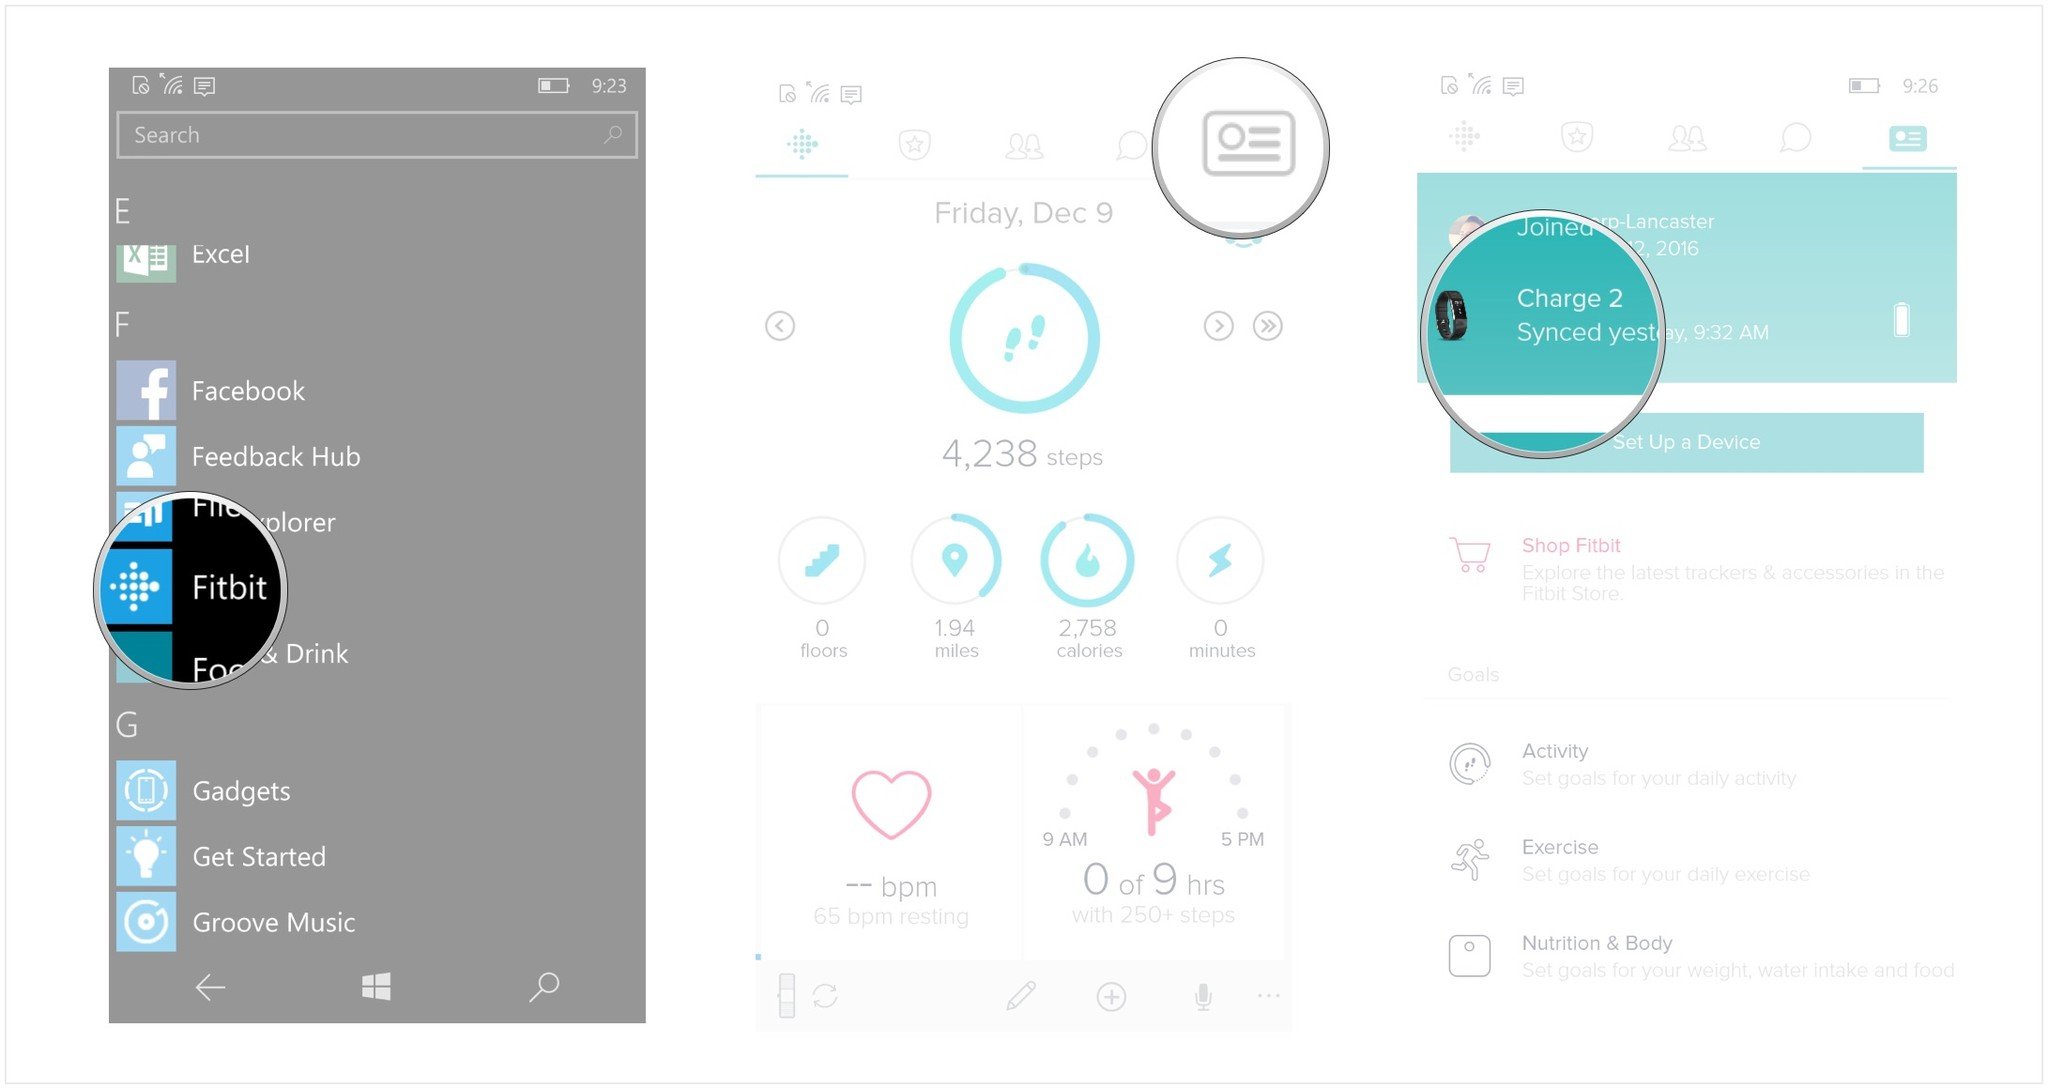
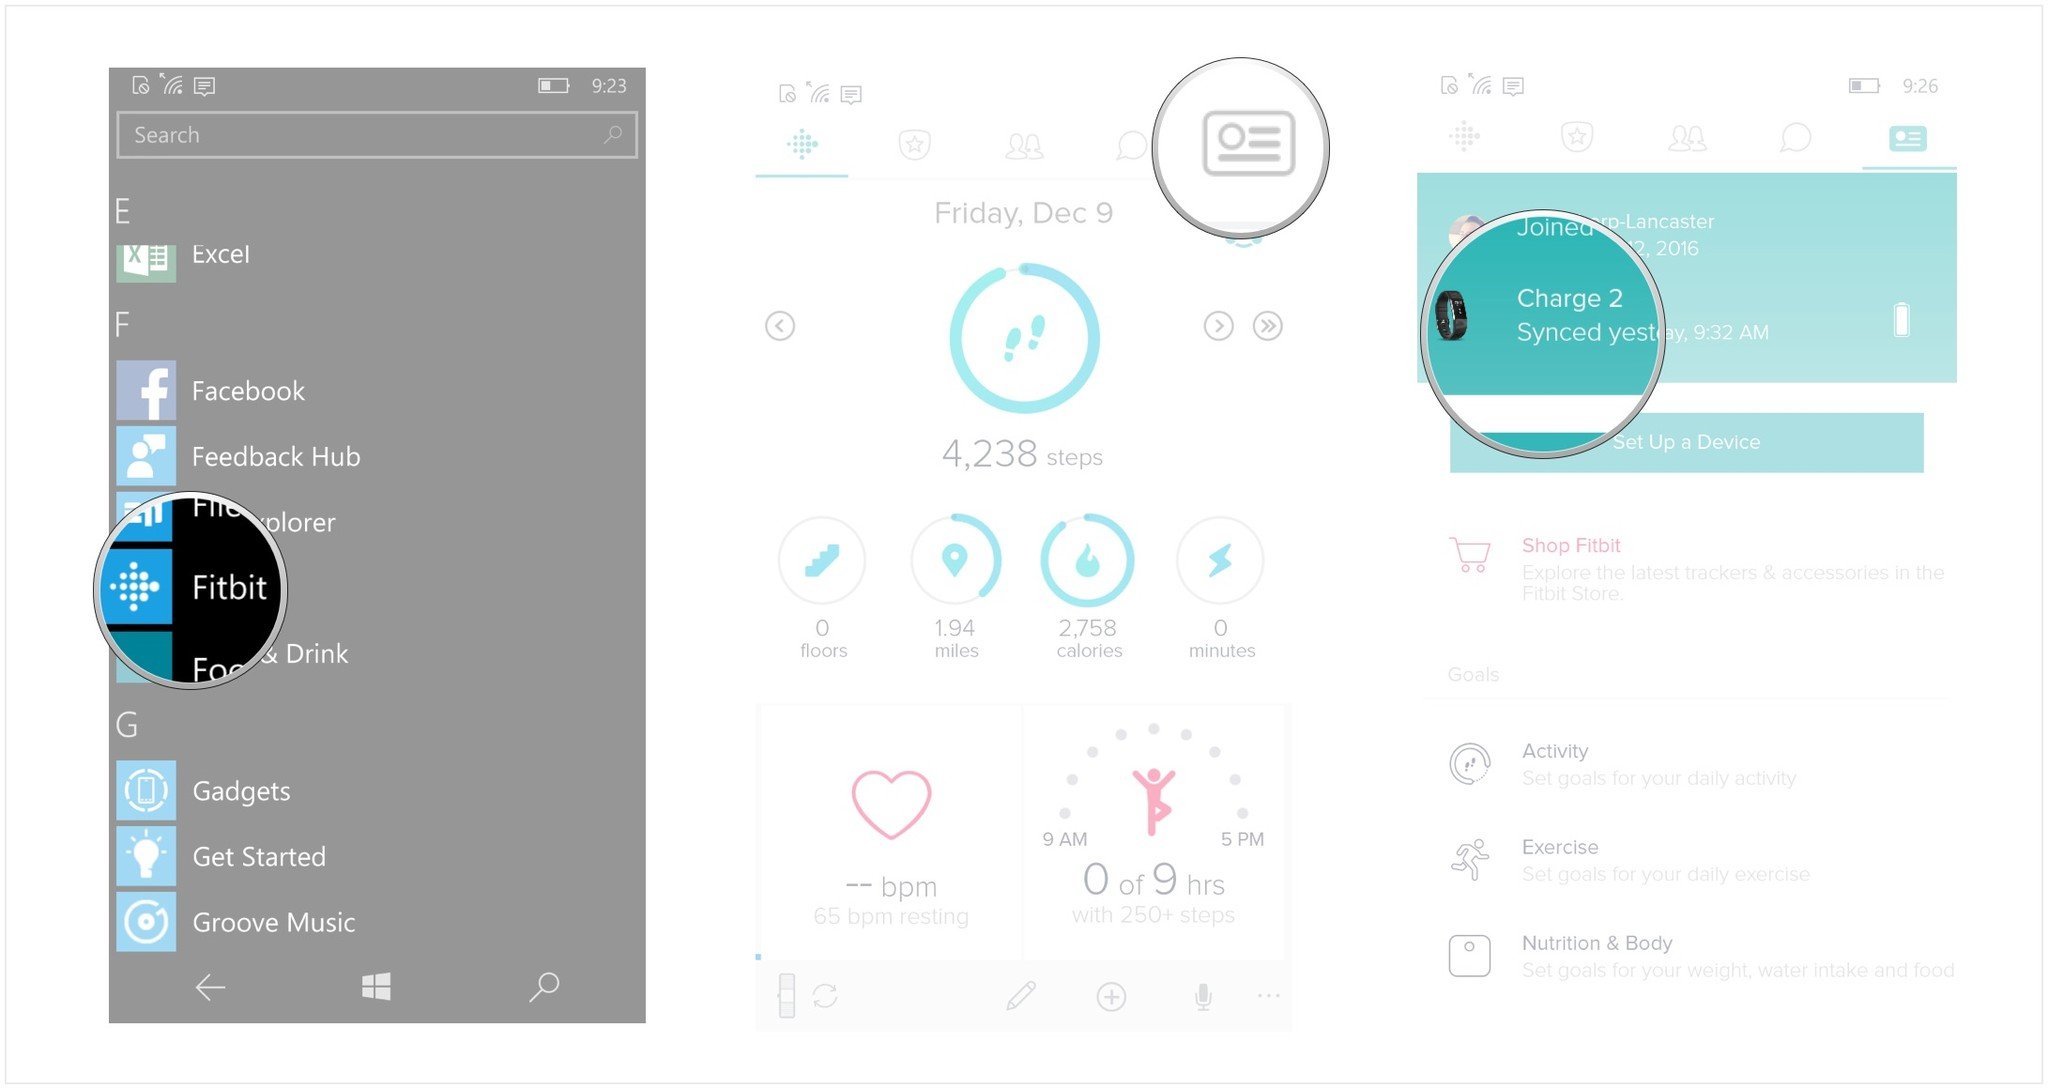
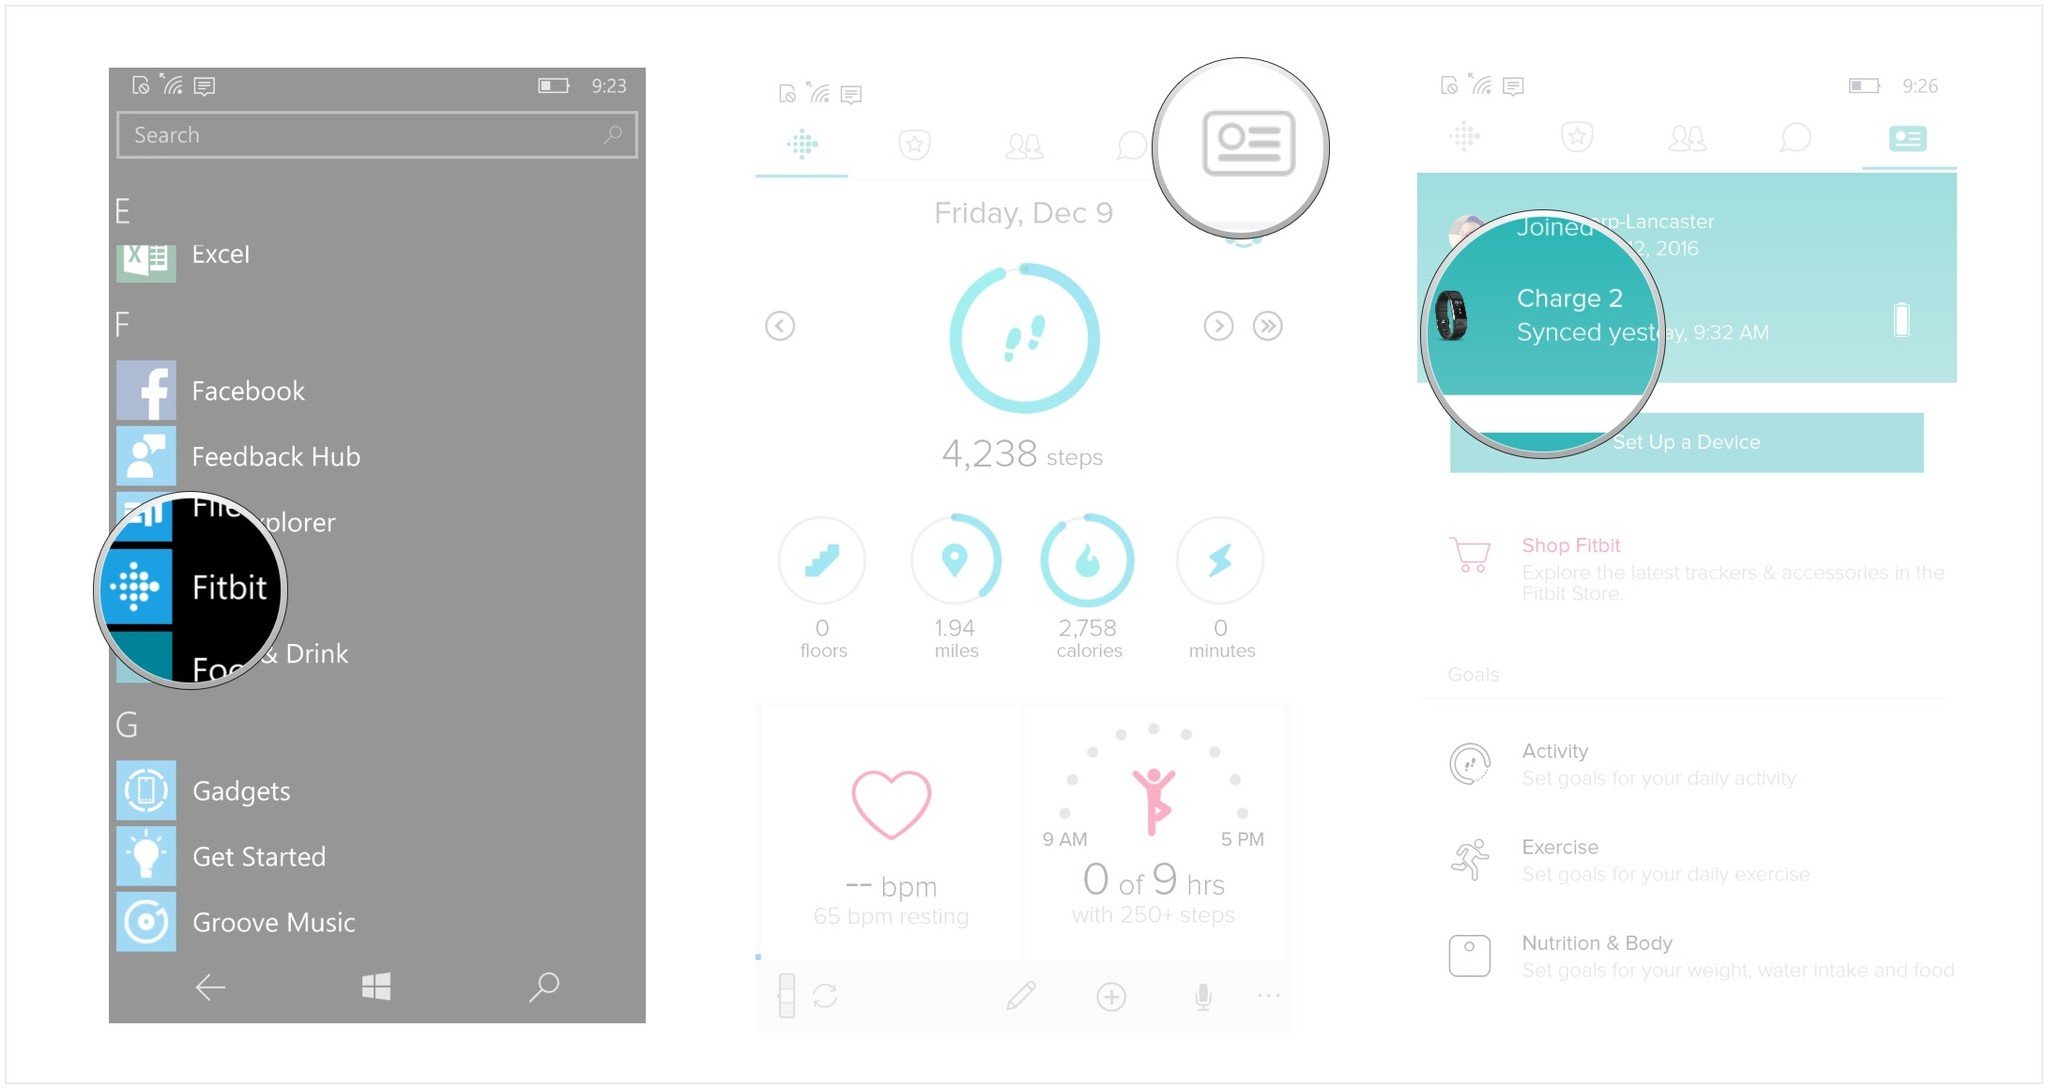
- Launch Fitbit from your Applications List (or the start screen if you have it pinned).
- Tap on the profile and settings tab on the far right at the top of the screen (it looks like a rectangle with a circle in it and three horizontal lines).
- Tap on your device. It will appear right under your profile at the top of the screen (mine is the Charge 2).
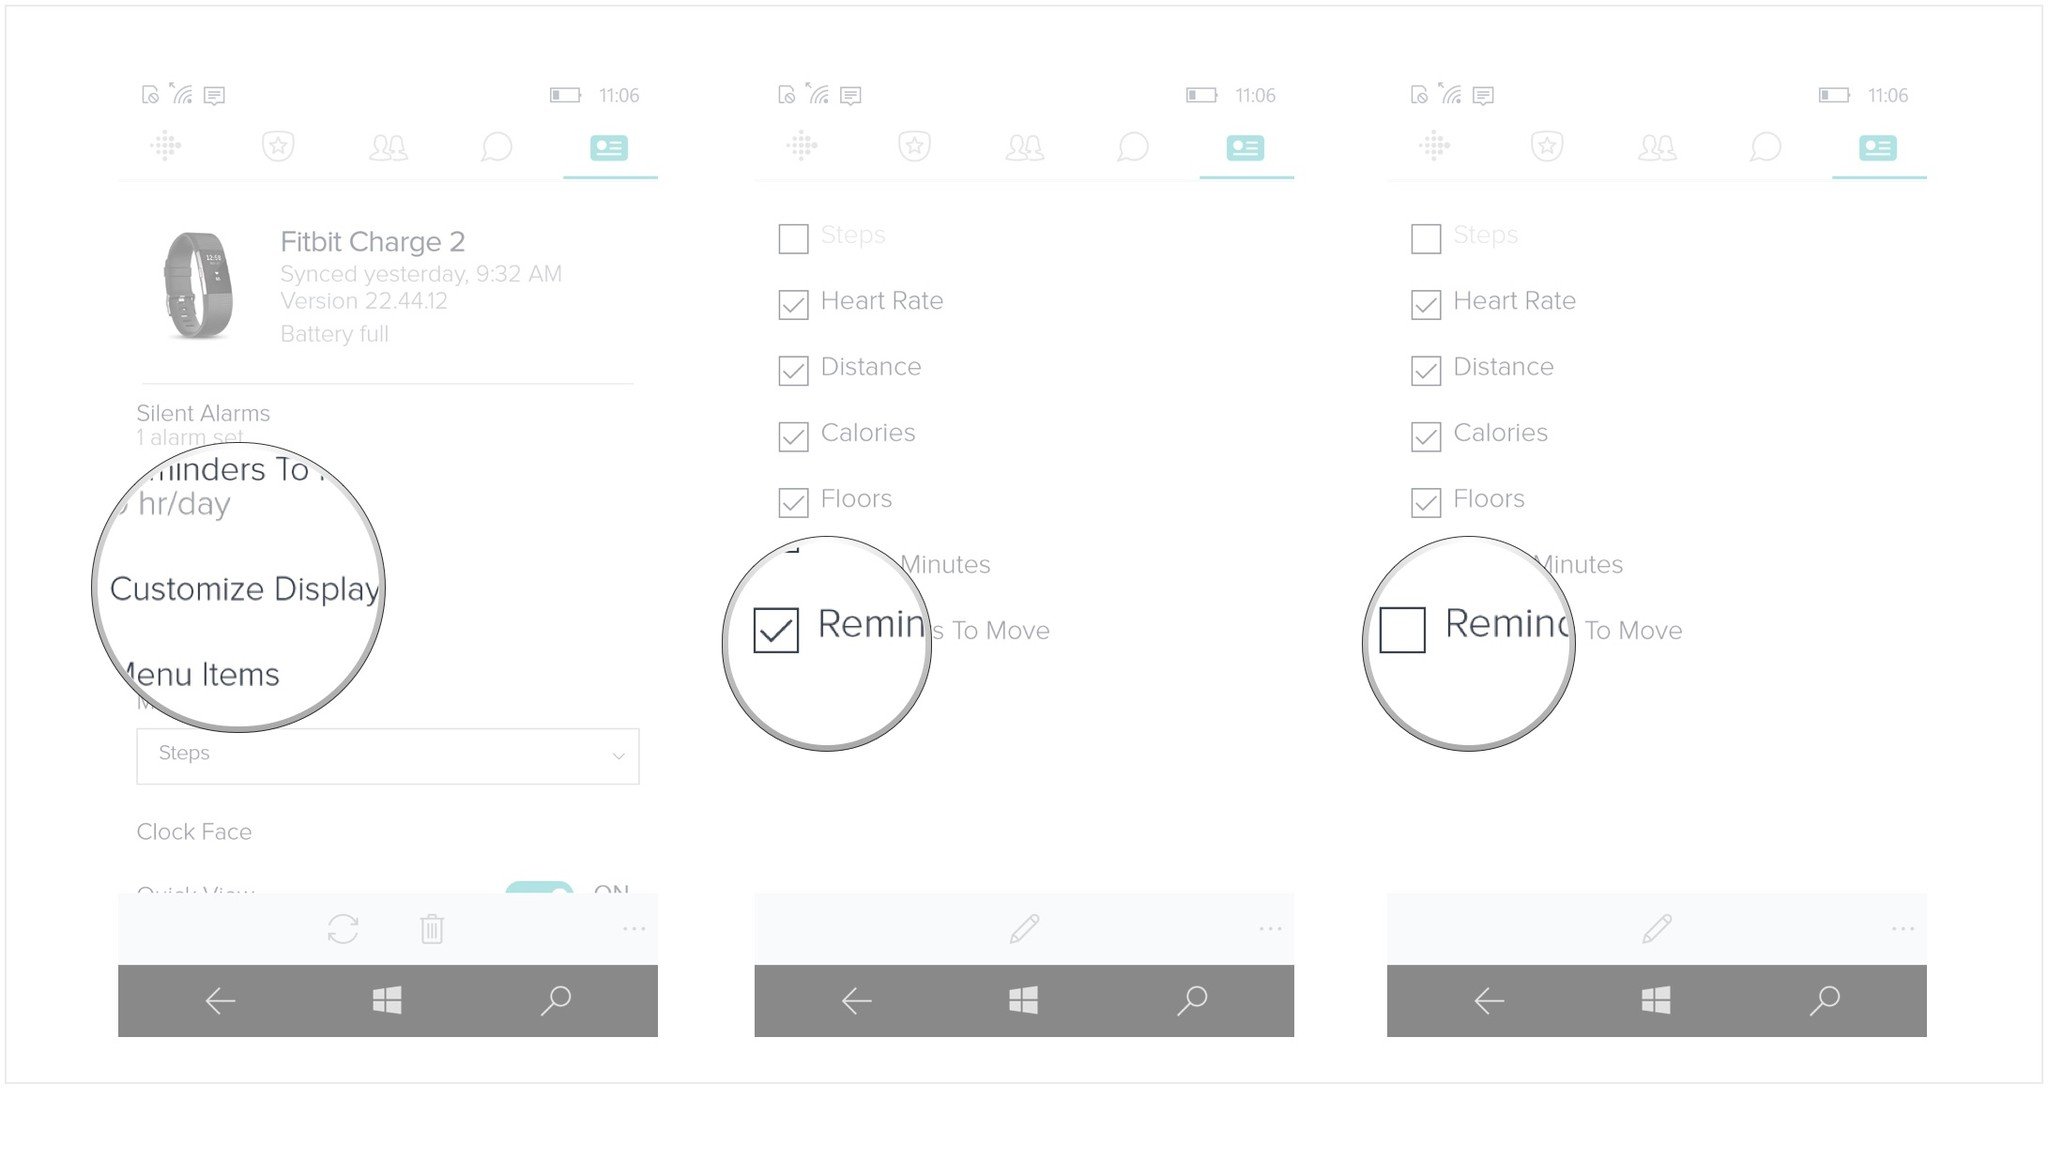
- Tap on customize display.
- Tap on a checked box to remove an item from your Fitbit display. You can toggle every option but the step count; your Fitbit will track your steps no matter what.
- Tap on an unchecked box to add an item to your Fitbit display.
Even if you remove this information from your Fitbit device, it will still be displayed on the dashboard in the Fitbit app. On Windows 10 Mobile, you can't hide an activity in the app's dashboard.
How to rearrange categories in Fitbit on Windows 10 Mobile
If you want to see your categories in a certain order when you're tapping through your categories in the Fitbit app, you can rearrange their order. Not only that, you can change that order for display on your Fitbit too.
- Launch Fitbit from your Applications List (or the start screen if you have it pinned).
- Tap on the profile and settings tab on the far right at the top of the screen (it looks like a rectangle with a circle in it and three horizontal lines).
- Tap on your device. It will appear right under your profile at the top of the screen (mine is the Charge 2).
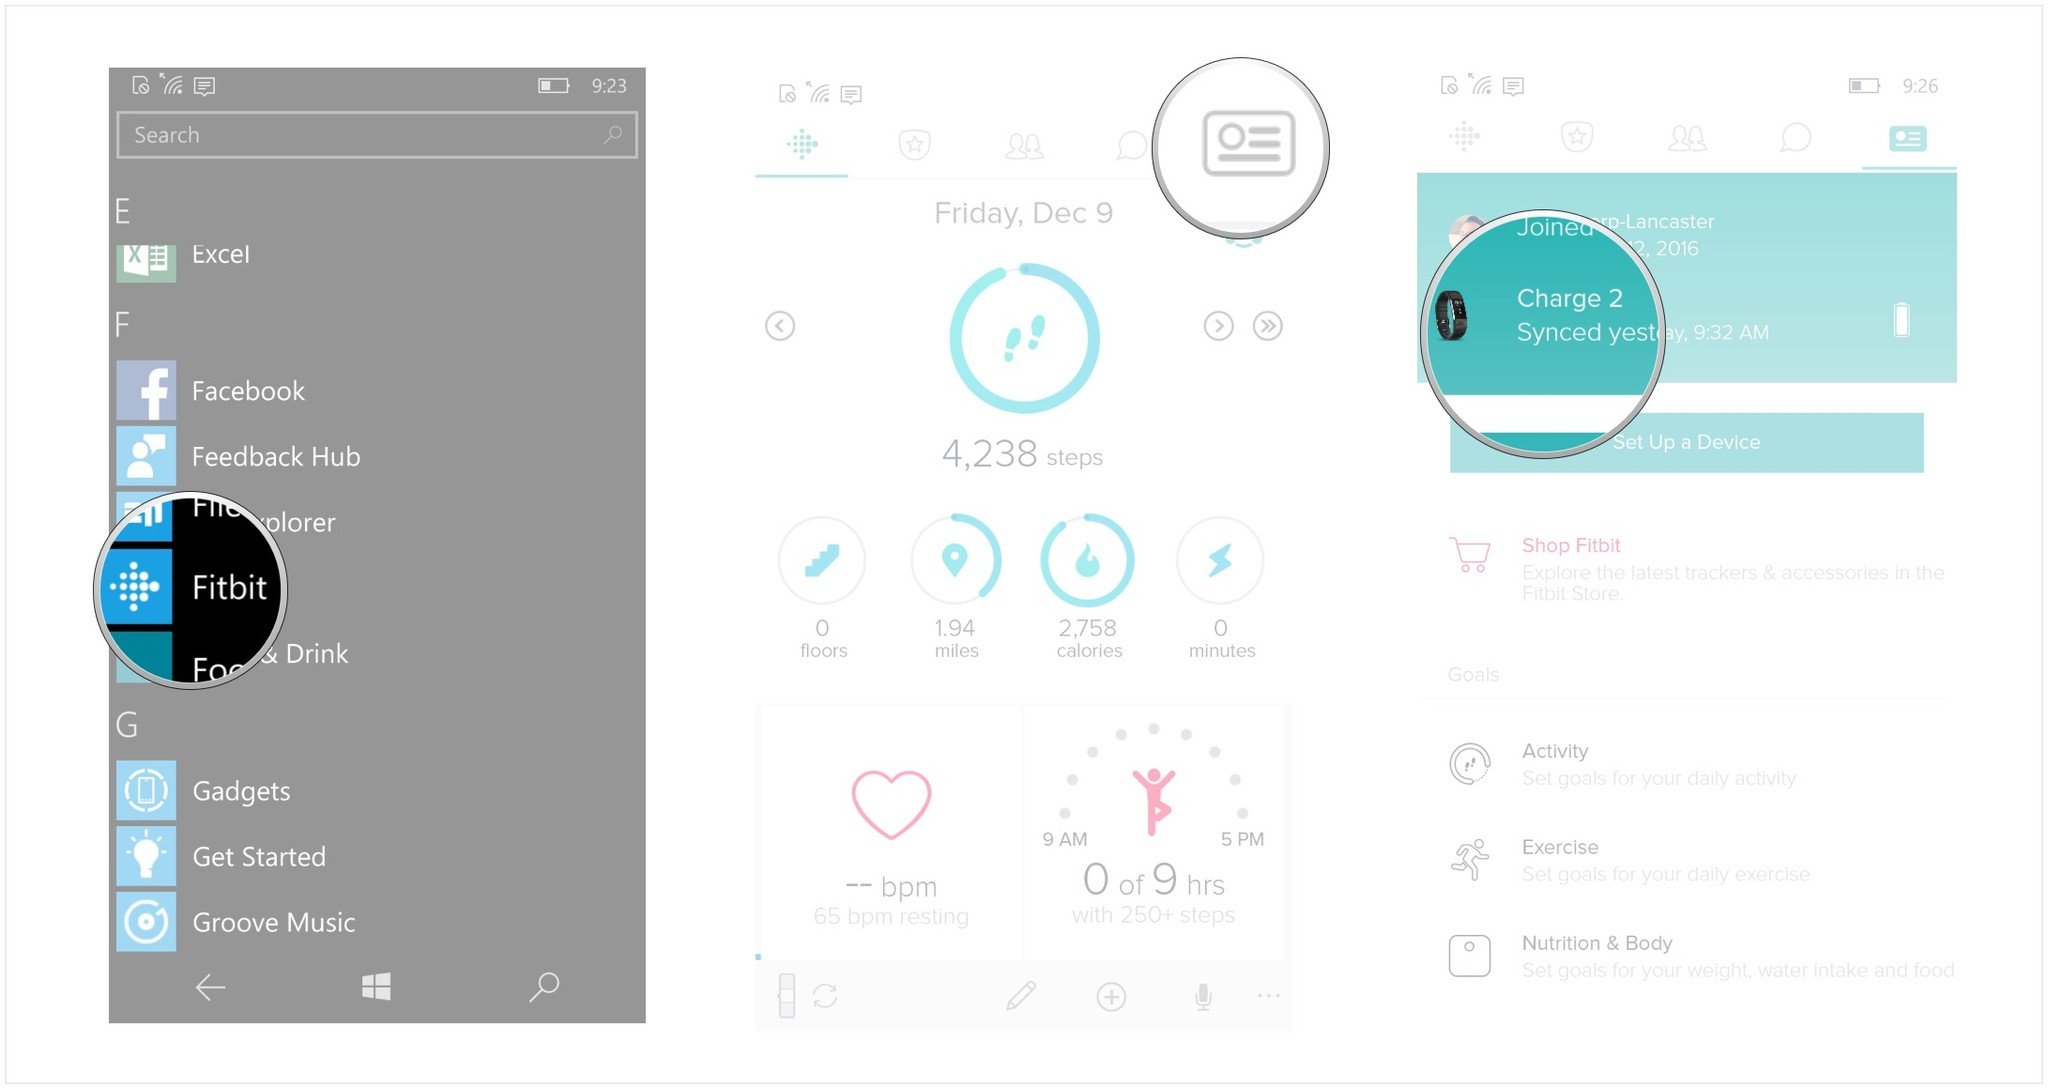
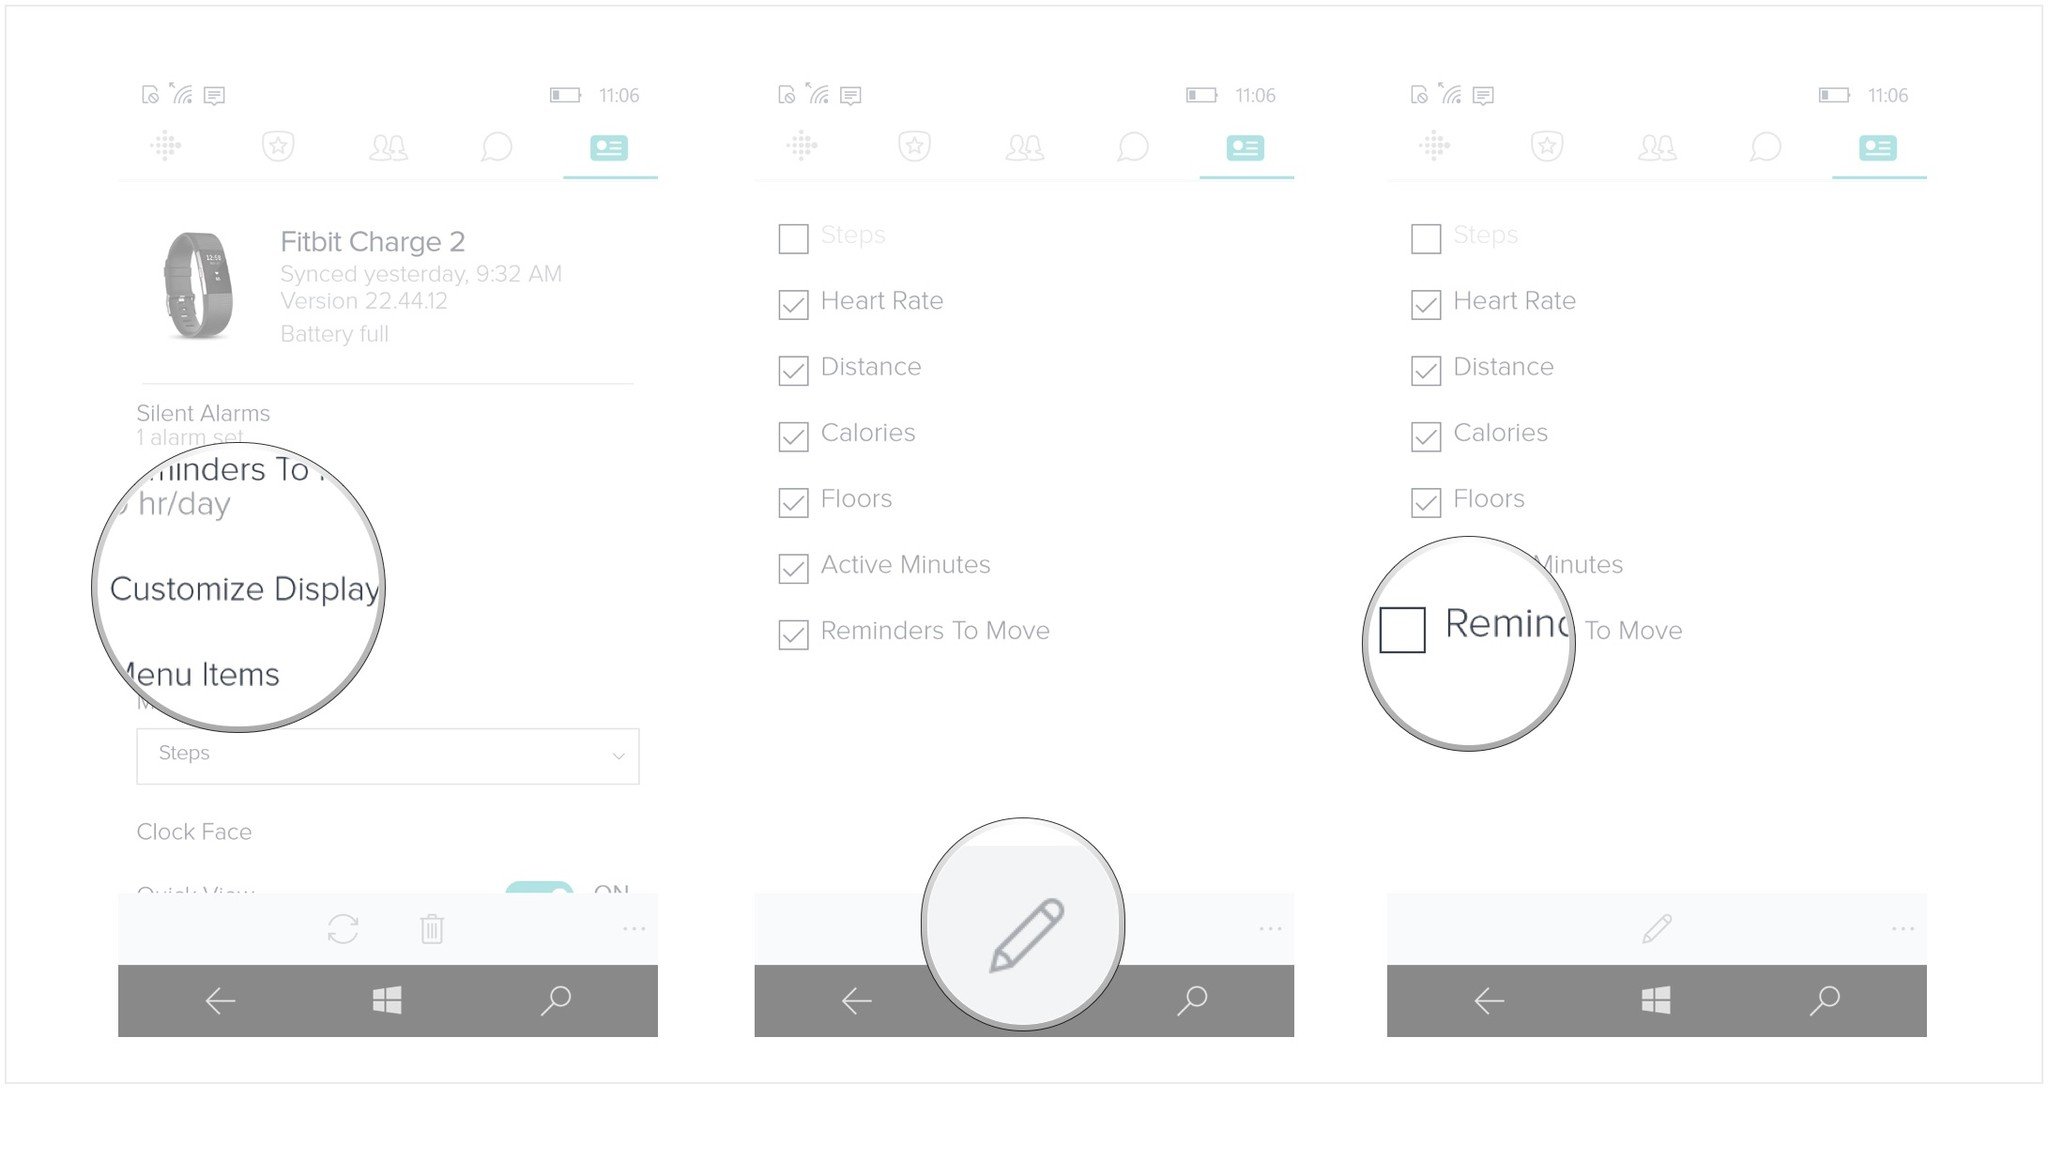
- Tap on customize display.
- Tap on the edit button at the bottom of the screen (it looks like a pencil).
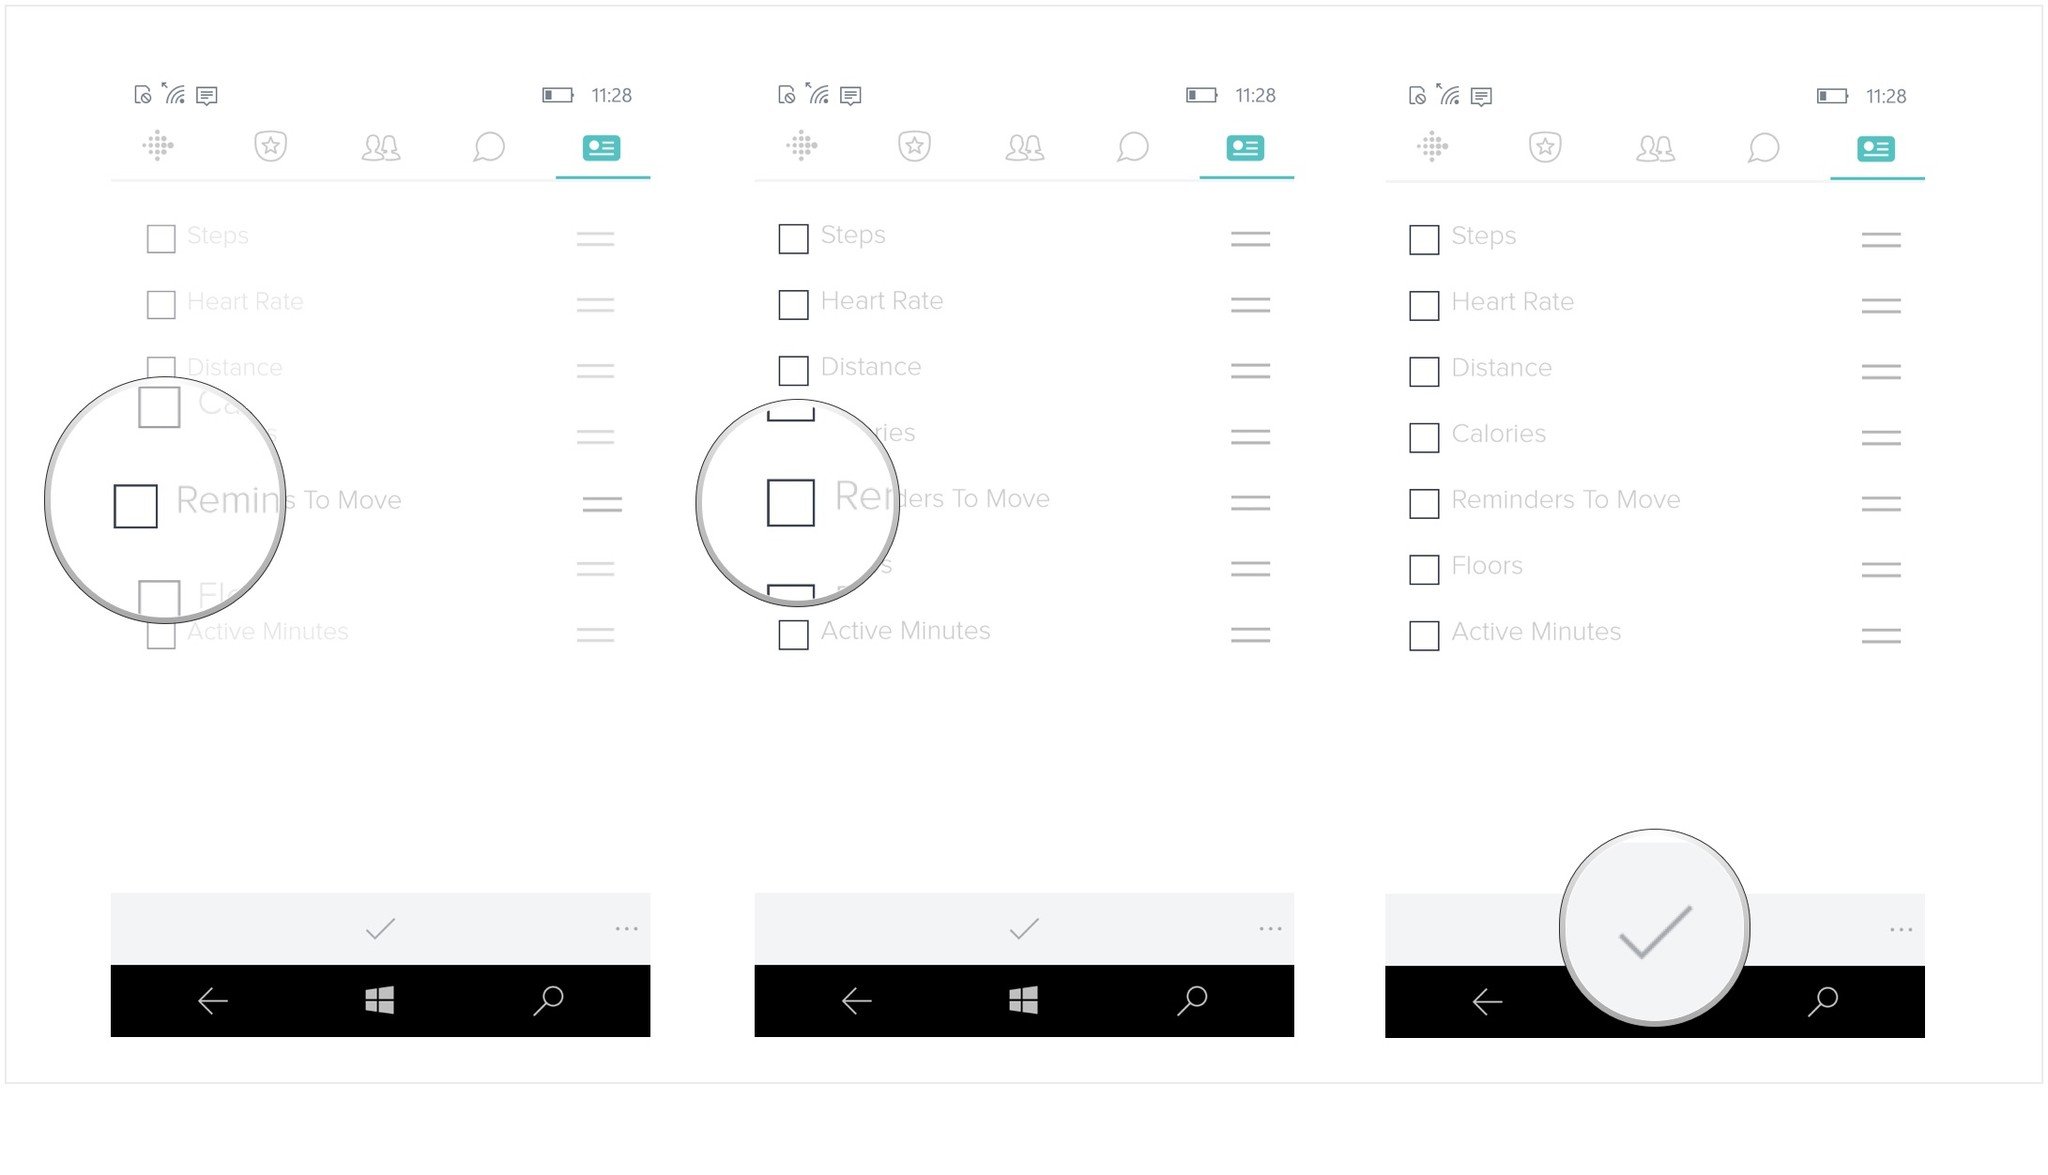
- Tap and hold a category you would like to reorder (for example: Reminders To Move).
- Drag the category higher or lower on the list until it shows up in the location you want it to be.
- Release your finger from the screen and your category will now be moved.
- Tap on the check mark at the bottom of the screen to exit edit mode.
Once you've reordered your activity categories list in the app, your activities will appear in that order when you view them on your Fitbit. If this does not happen, then you just need to sync your Fitbit.
How to change the Clock Face in Fitbit on Windows 10 Mobile
You've got a Fitbit and are wearing it all the time. You've now gotten used to the idea of checking the time on your wrist (like your grandparents and the dinosaurs did) instead of pulling your phone out of your pocket. Not happy with the default clock display on your Fitbit? No problem! Depending on your Fitbit model, you can change the clock display using the Windows 10 Mobile Fitbit app.
All the latest news, reviews, and guides for Windows and Xbox diehards.
- Launch Fitbit from your Applications List (or the start screen if you have it pinned).
- Tap on the profile and settings tab on the far right at the top of the screen (it looks like a rectangle with a circle in it and three horizontal lines).
- Tap on your device. It will appear right under your profile at the top of the screen (mine is the Charge 2).
- Tap on Clock Face.
- Select one of the four clock faces by tapping the arrows at the bottom of the screen.
That's it! Your clock face will be updated the next time your device syncs.
How to switch on which wrist you wear your Fitbit in Windows 10 Mobile
Are you concerned your step count is a little off? This may have to with which hand you're wearing your Fitbit on and whether you're right- or left-handed.
Make sure your Fitbit is set up according to which wrist you wear it on for the most accurate results.
- Launch Fitbit from your Applications List (or the start screen if you have it pinned).
- Tap on the profile and settings tab on the far right at the top of the screen (it looks like a rectangle with a circle in it and three horizontal lines).
- Tap on your device. It will appear right under your profile at the top of the screen (mine is the Charge 2).
- Scroll down to the wrist menu.
- Tap on the wrist menu to bring up two options.
- Tap on right or left depending on which wrist you wear your Fitbit on.
Change your main goal in Fitbit on Windows 10 Mobile
If you use a Fitbit that has a screen, your main goal will show a progress bar underneath the information displayed on the screen to show you how far along you are. For example, if your main goal is walking a certain number of steps in a day, when you look at the step count on your Fitbit display, you'll see a line underneath the number of steps. A short line means you've only just started making progress, while a long line shows you're nearing your goal.
You can change which activity category displays a status bar underneath it by changing your main goal in the Fitbit app settings.
- Launch Fitbit from your Applications List (or the start screen if you have it pinned).
- Tap on the profile and settings tab on the far right at the top of the screen (it looks like a rectangle with a circle in it and three horizontal lines).
- Tap on your device. It will appear right under your profile at the top of the screen (mine is the Charge 2).
- Tap on the Main Goal drop down menu.
- Tap on one of the displayed options that corresponds with what you want your main goal to be.
- Tap on the sync button (it looks like two arrows forming a circle) to immediately synchronize the change between your app and your Fitbit.

Drew is a Former Contributor for Windows Central.
