How to schedule a Skype call on Windows 10
Skype lets you schedule calls, and in this guide, we'll show you the steps to perform this task.
On Windows 10, the Skype app allows you to schedule calls, which you can use as a reminder for important calls with family or friends without the need to share a calendar or sending emails.
When you use the schedule a call option on the app for Windows 10, you'll receive a notification once the invitation is accepted or declined. If you're using the mobile app, both parties will get notifications for any updates, and you can set a reminder before each call, and the invitation will appear in the "Calls" tab.
In this Windows 10 guide, we'll walk you through the steps to schedule a call using Skype.
How to schedule calls on Skype
To schedule a Skype call on Windows 10, use these steps:
- Open Skype.
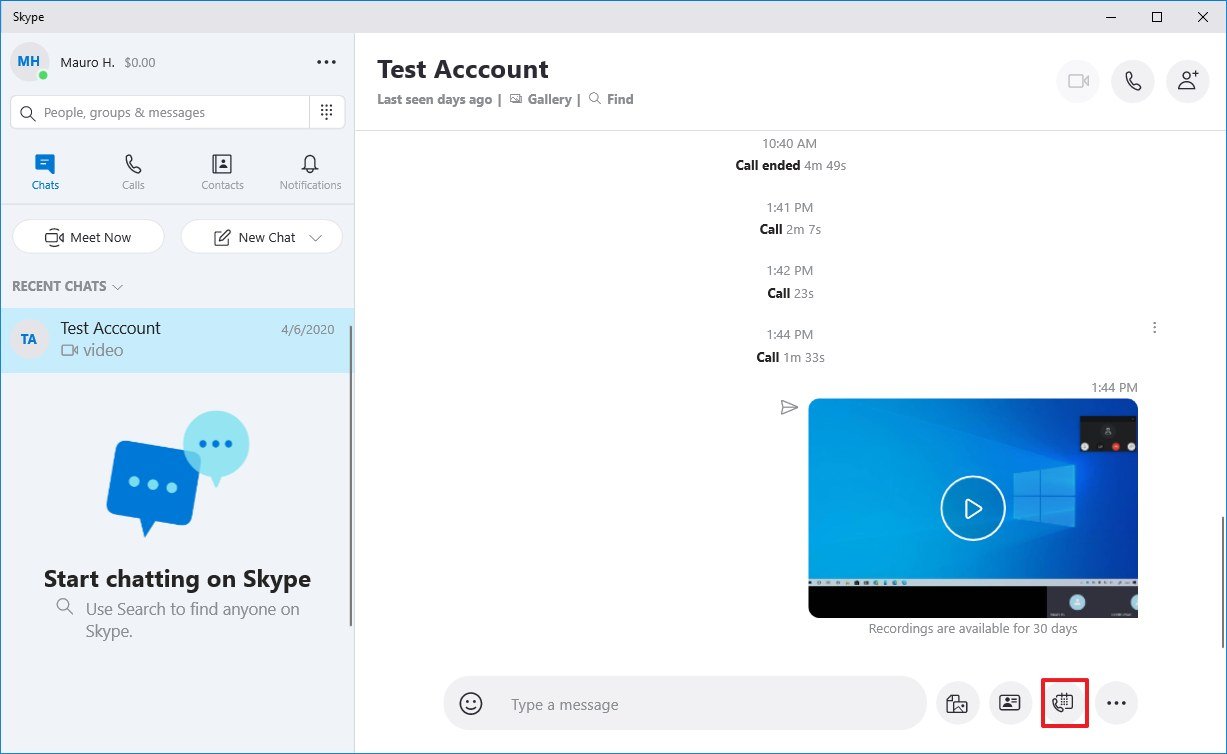
- Select a person from your contact list.
- Click the Schedule call button from the bottom-right corner.
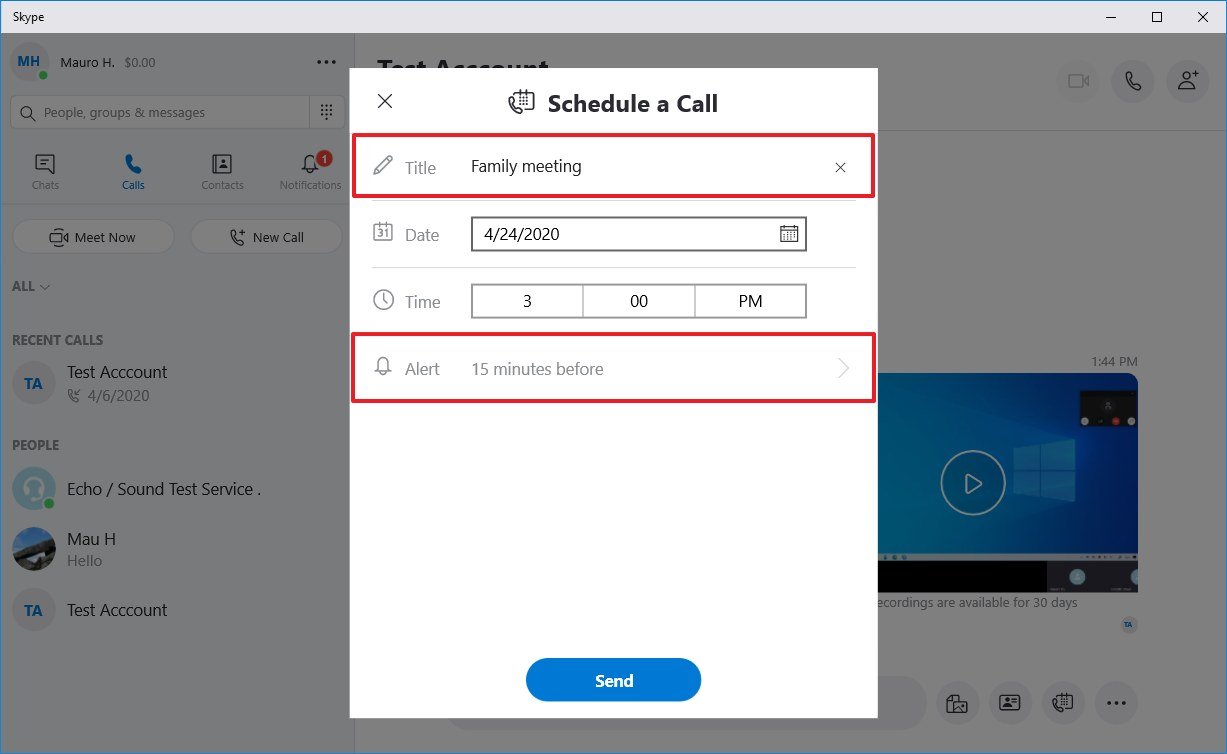
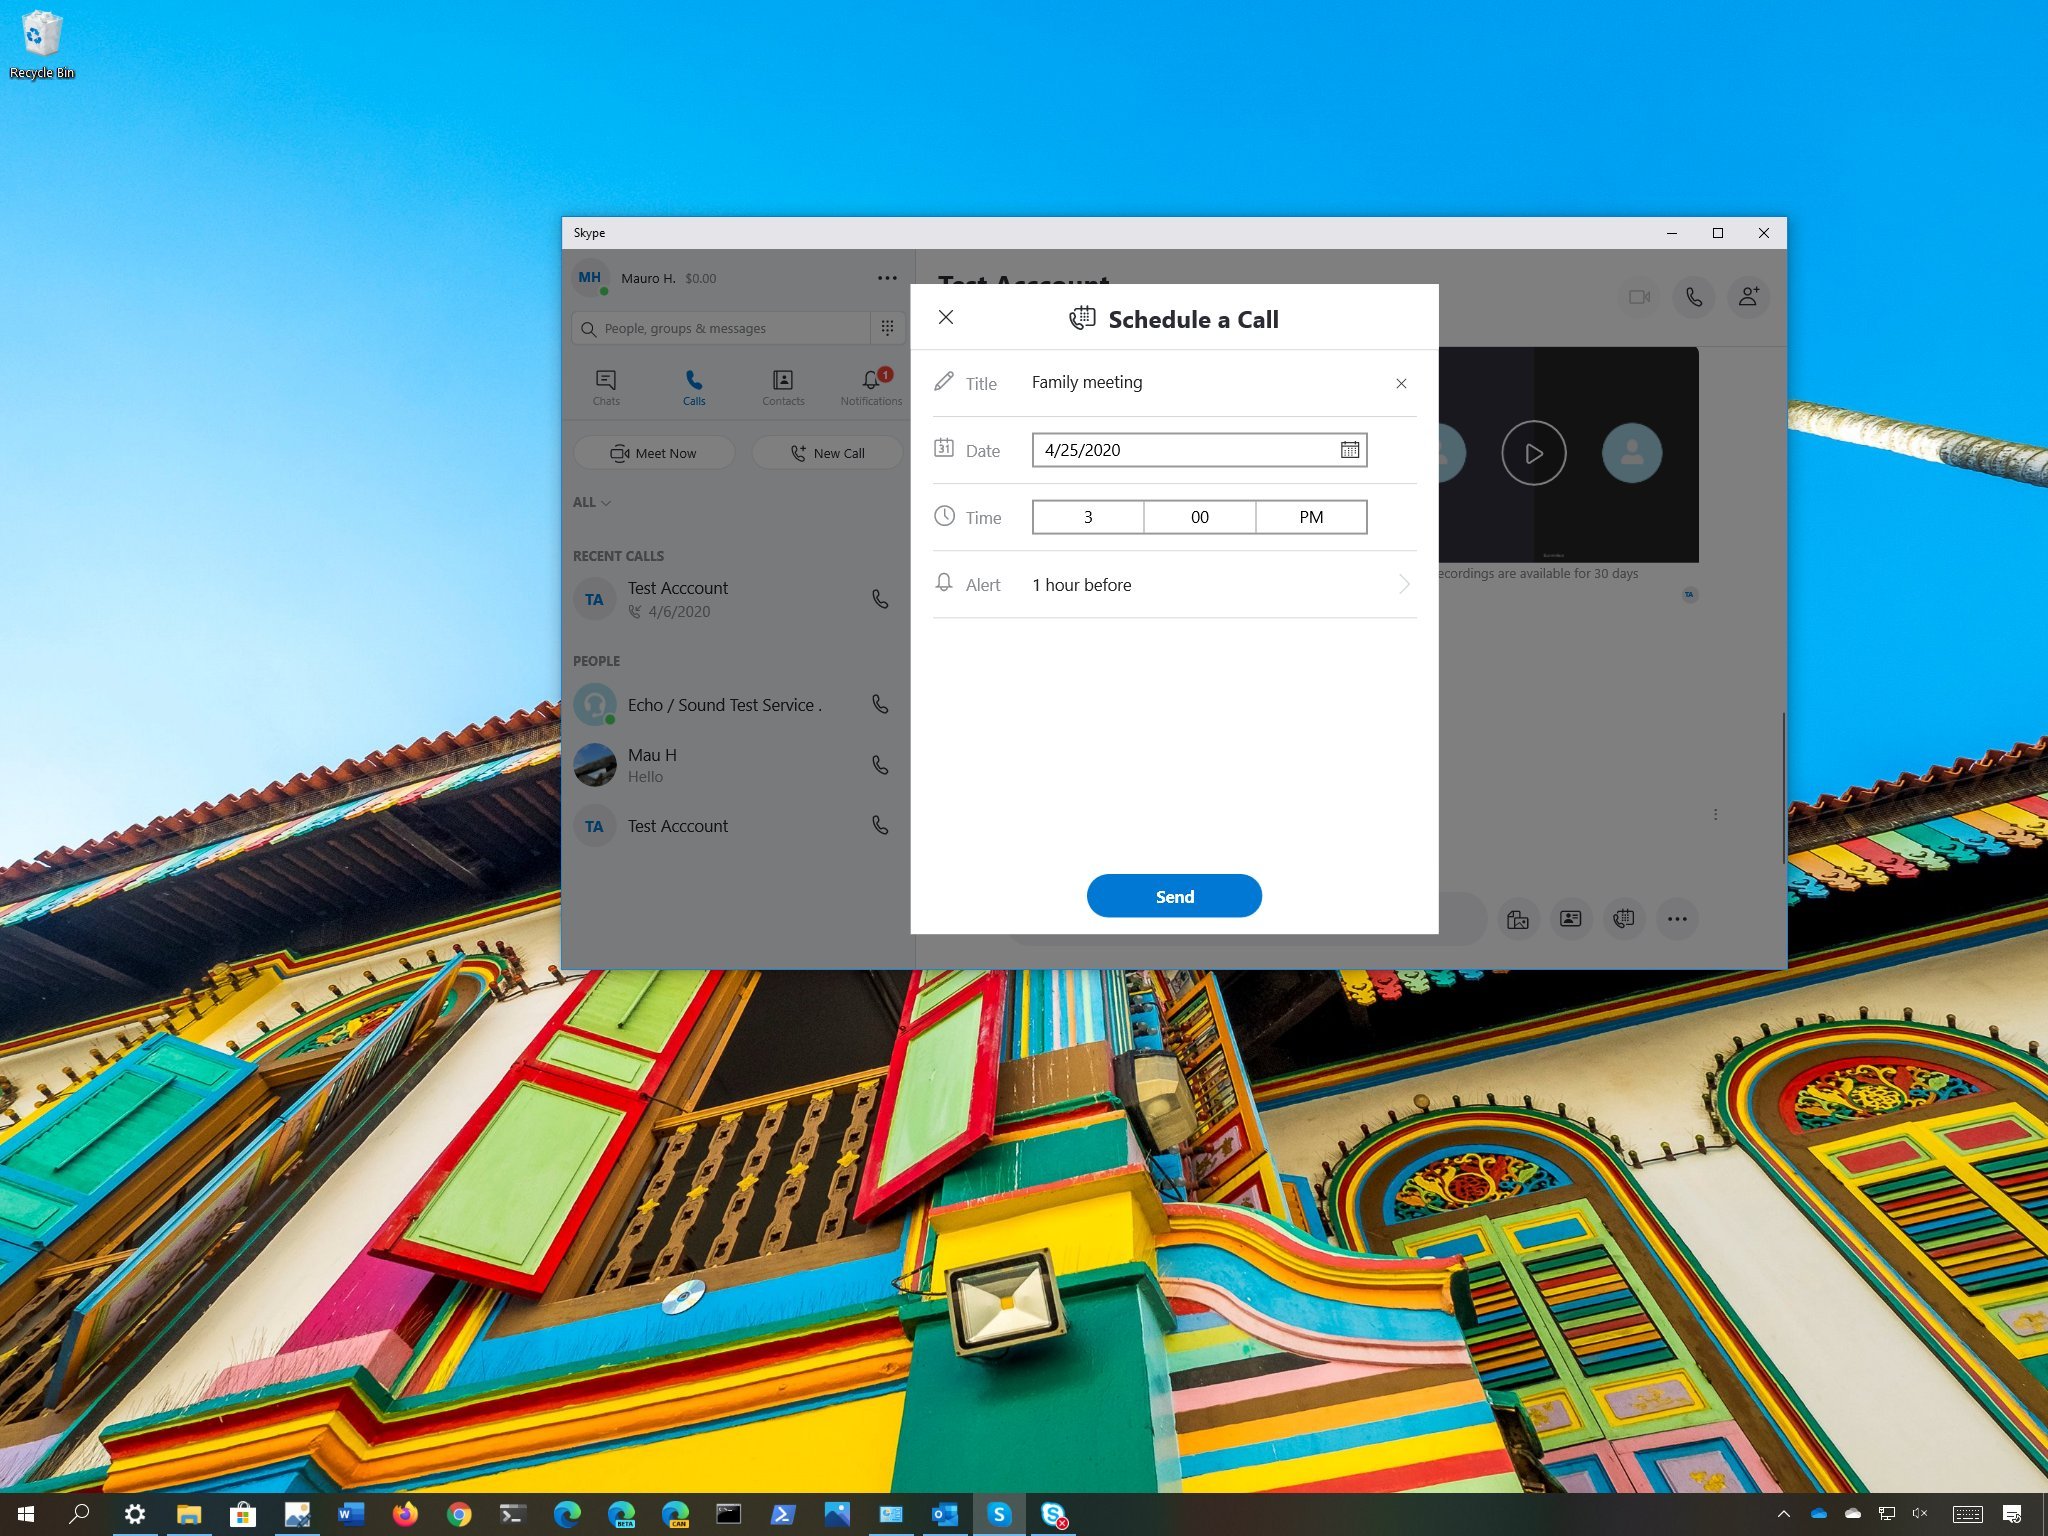
- Specify the title of the meeting. For example, "Family meeting."
- Use the Date setting to select the day of the call.
- Use the Time setting to choose the start time of the call.
- Use the Alert setting to get a notification before the call.
- Click the Send button.
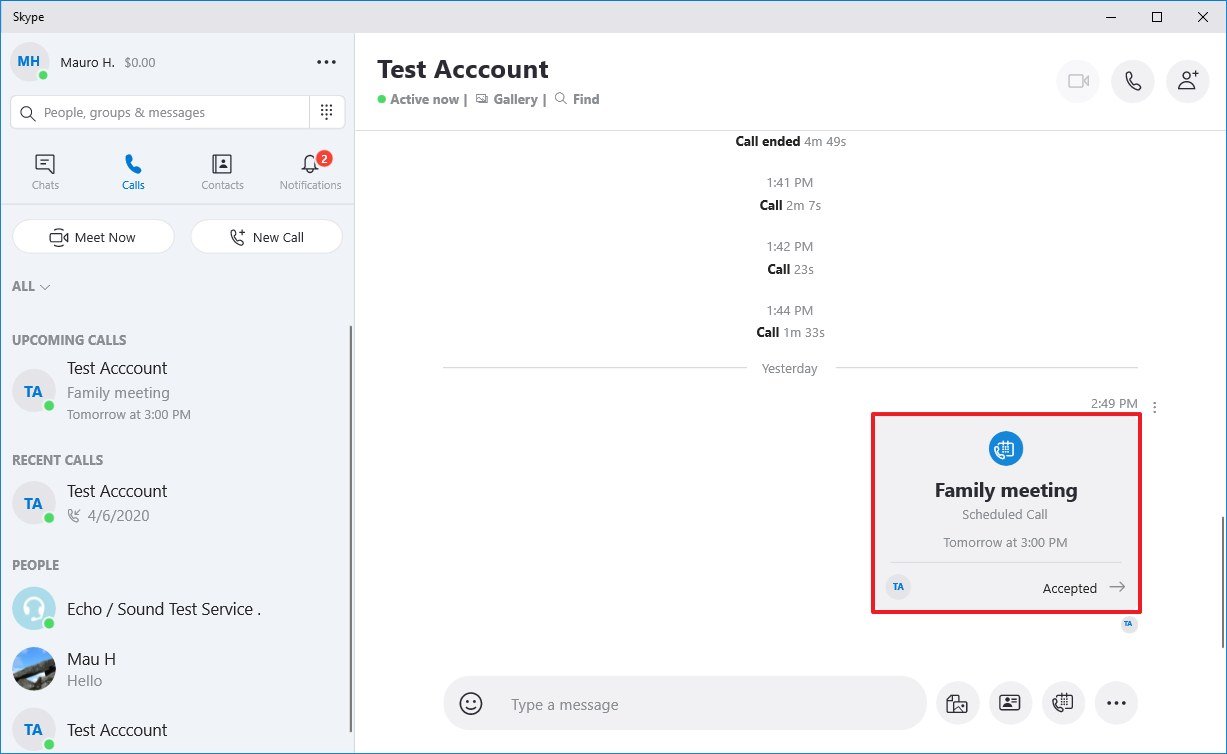
Once you complete the steps, the recipient will receive a notification about the call, which they can accept or deny from the Skype chat history.
Edit or delete Skype call schedule
If you want to modify or delete the call, use these steps:
- Open Skype.
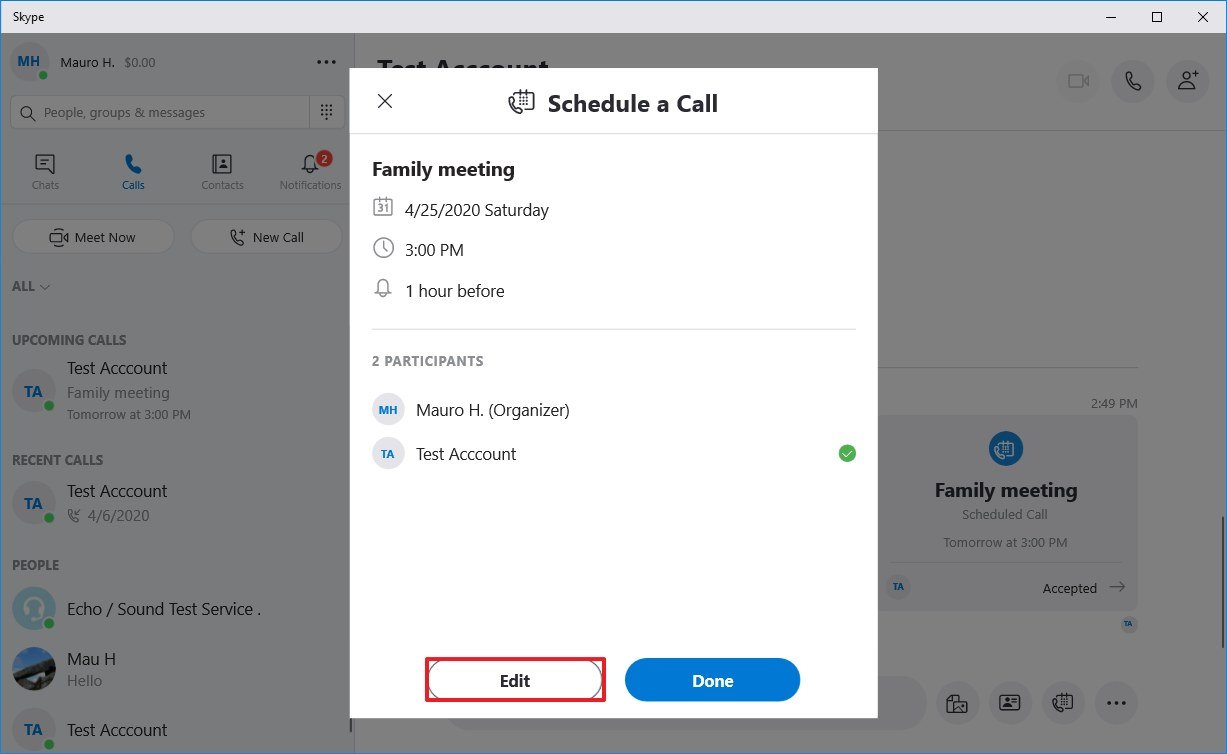
- Click the chat where you created the schedule.
- Click the Edit button.
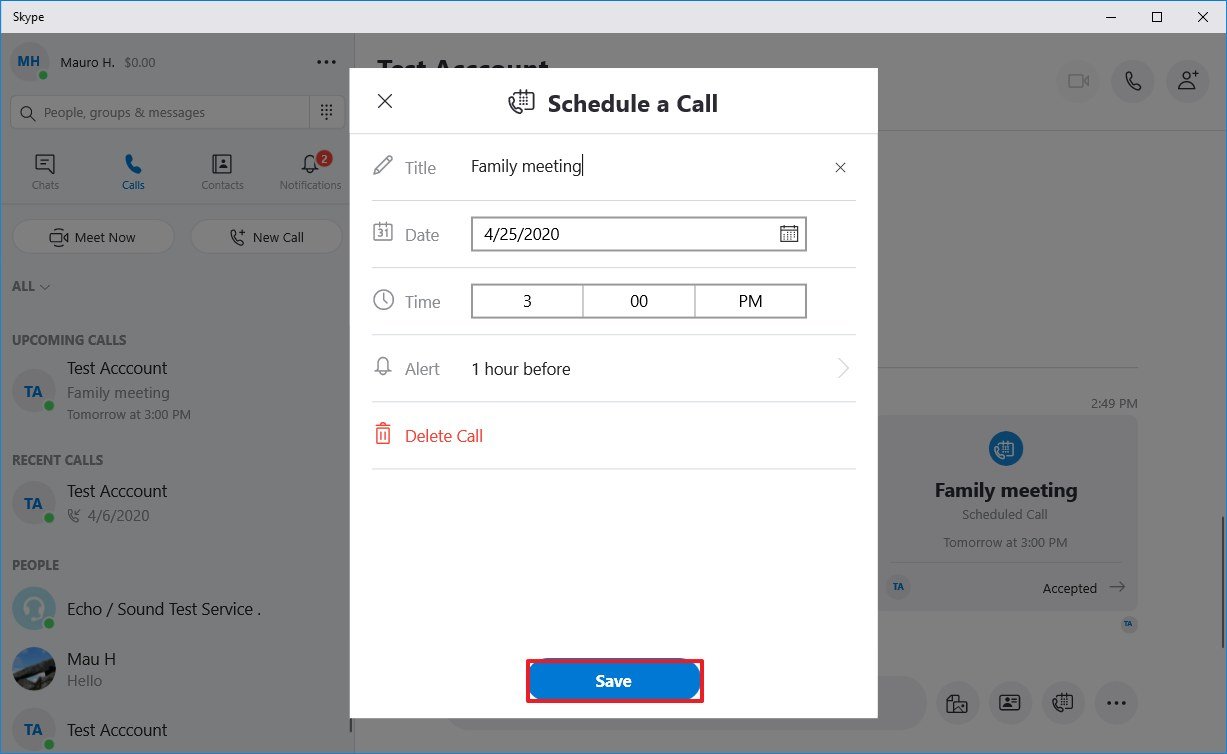
- Change the title, date, time, or alert as necessary.Quick tip: Using this page, you can also delete the call schedule.
- Click the Save button.
After you complete the steps, the Skype call will update or remove from the chat history and "Calls" tab, depending on your configuration.
All the latest news, reviews, and guides for Windows and Xbox diehards.

Mauro Huculak has been a Windows How-To Expert contributor for WindowsCentral.com for nearly a decade and has over 22 years of combined experience in IT and technical writing. He holds various professional certifications from Microsoft, Cisco, VMware, and CompTIA and has been recognized as a Microsoft MVP for many years.
