How to change default font settings in Office apps
You can change the default font settings for all your Office apps. In this guide, we show you how.
All the latest news, reviews, and guides for Windows and Xbox diehards.
You are now subscribed
Your newsletter sign-up was successful
Microsoft Office apps (such as Word, Excel, PowerPoint, and Outlook) come with a set of default settings to start working with a document immediately. This includes a default font family (Calibri), font style (regular), and font size (11-point) on the current default document template, but you can specify your preferred font settings if your requirements are different.
While adjusting the font settings in Office is easy enough, you may want a new default configuration, to save unnecessary steps every time you open an Office app. Maybe you want to start with documents using a newly installed font. Or you find yourself changing the same settings every time you create a blank document using an Office 365 subscription, the standalone version of Office 2019, Office 2016, or an older version.
In this Windows 10 guide, we walk you through the steps to change the default font settings in all your Office apps.
How to set default font settings in Word
Important: These instructions will only apply to Word. If you want to set a default font for Excel, PowerPoint, or another app, you need to use the same steps but in the individual apps that you want to customize.
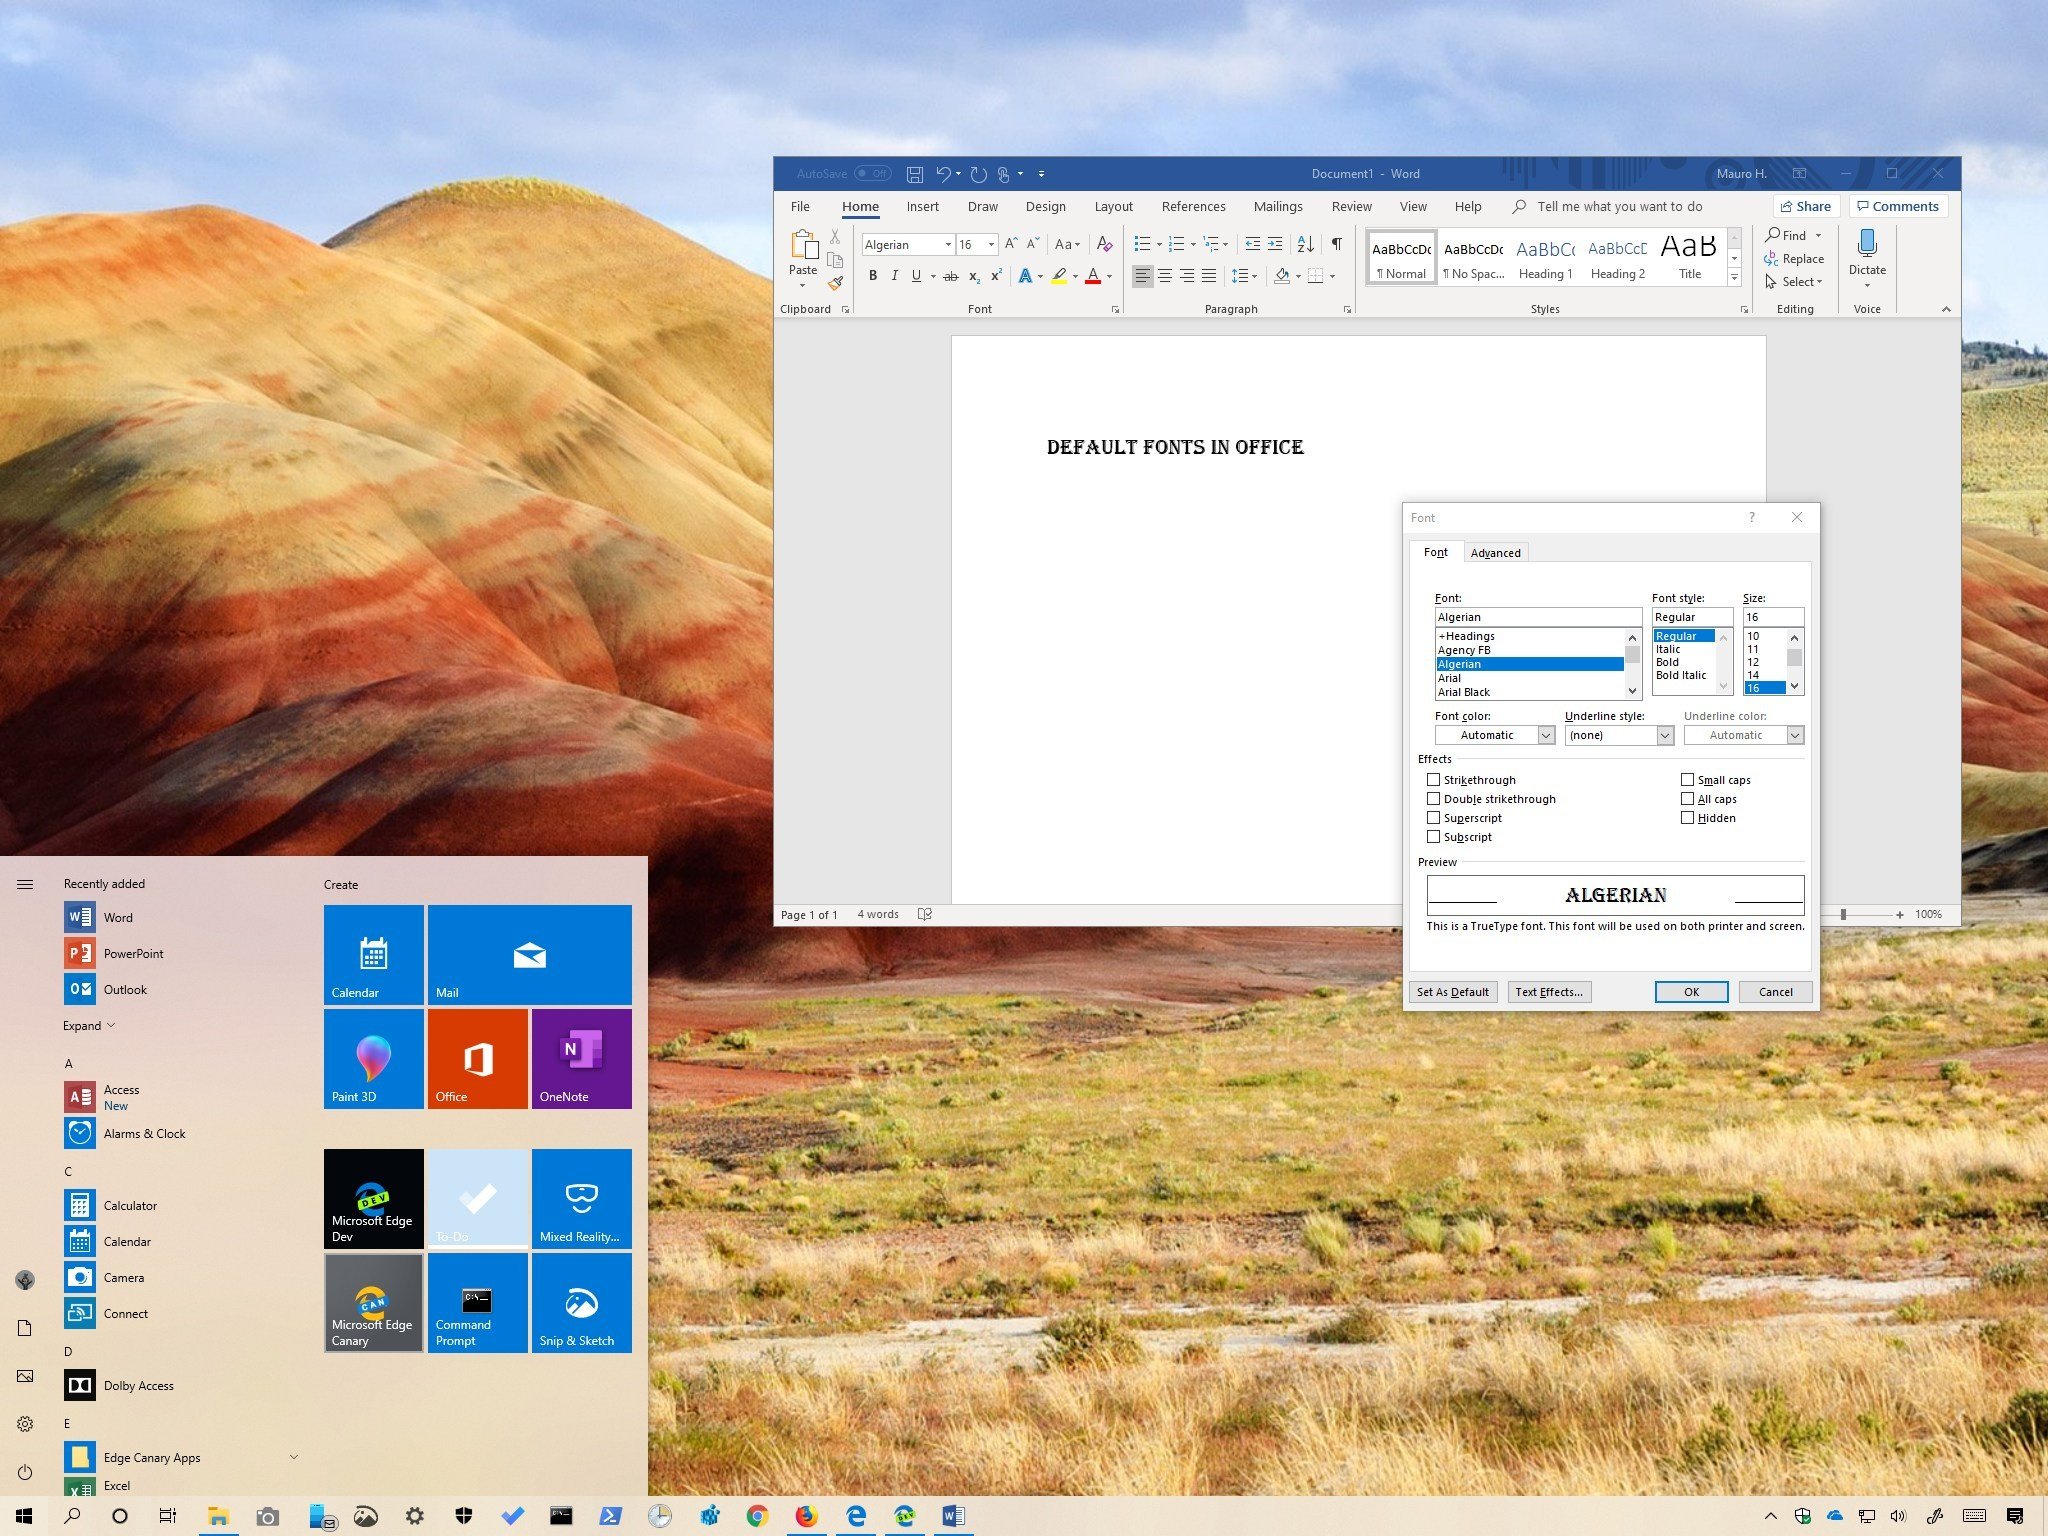
To set a new default font in Word (or other Office apps), use these steps:
- Open Word.
- Create a new blank document.
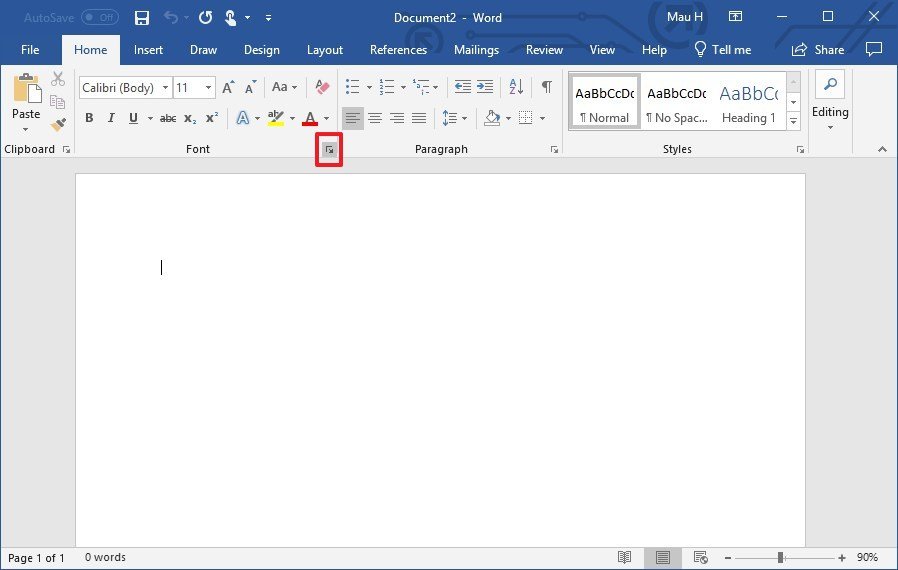
- Click the Home tab.
- Click the button in the bottom-right corner from the Font section.
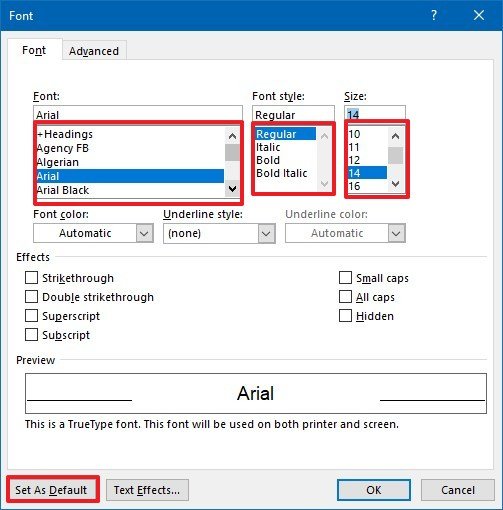
- In the "Font" section, select the new font that you want as the new default.
- (Optional) In the "Font style" section, set the preferred style (such as regular, italic, or bold).
- (Optional) In the "Size" section, select the default font size.
- Click the Set As Default button.
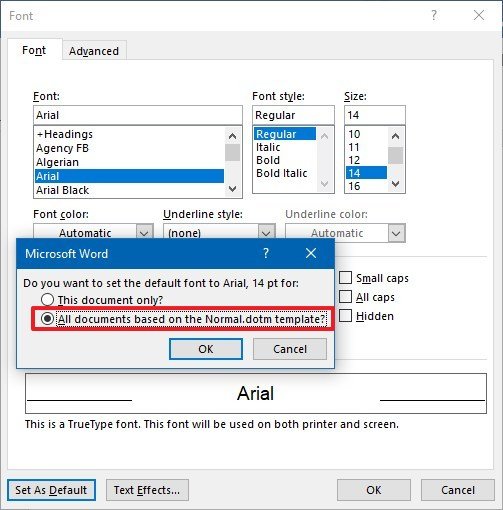
- Select the All documents based on the Normal.dotm template option.
- Click the OK button.
Once you complete these steps, every time you create a new document in Word using the default blank template, you'll be able to start typing with the new default font settings.
Although you can change the font settings in a document, this option is only available for the desktop version of the Office apps. If you try to change the settings in the online version of Word, Excel, or PowerPoint, the next time you create a new document, the font settings will reset to its original configuration.
All the latest news, reviews, and guides for Windows and Xbox diehards.
If you no longer need the new settings, you can revert the changes using the same instructions, but on step No. 8, make sure to select the +Body option in the "Font" section.
How to set default font settings in Outlook
To change the default font settings using the desktop version of Outlook, use these steps:
- Open Outlook.
- Click on File.
- Click on Options.
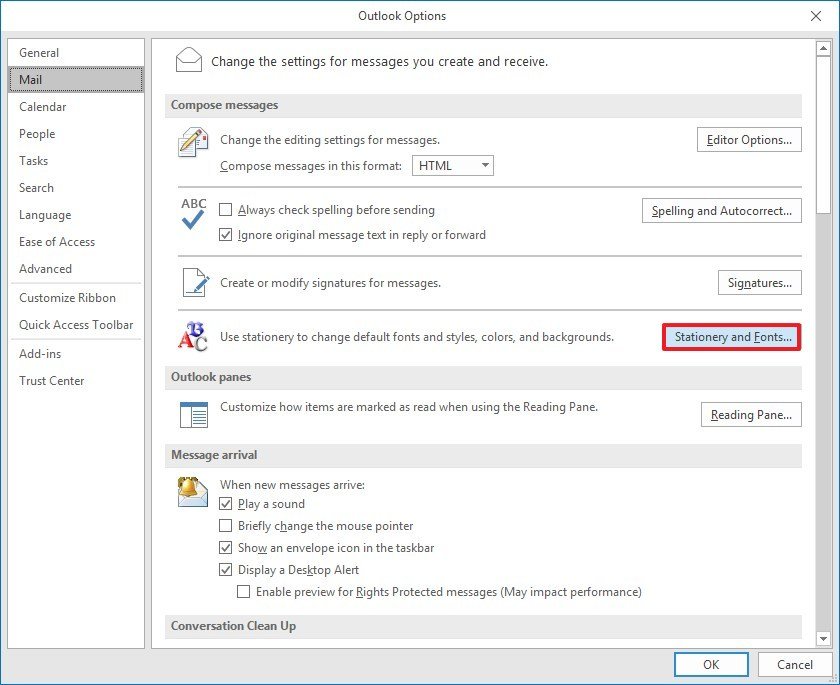
- Click on Mail.
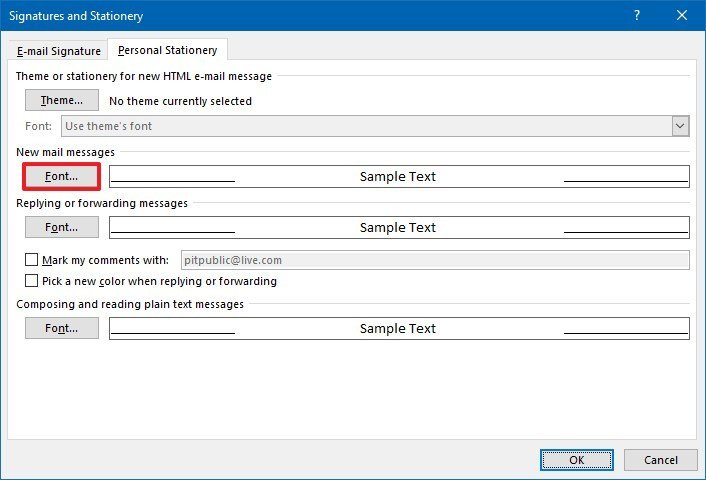
- Under the "Compose messages" section, click the Stationery and Fonts button.
- Under the "New mail messages" section, click the Font button to specify the default settings for the original message.
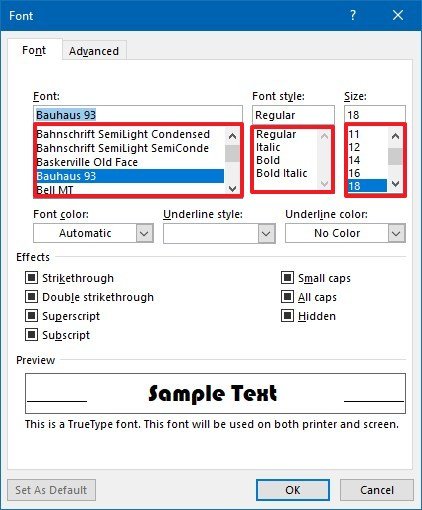
- In the "Font" section, select the new font that you want as the new default.
- (Optional) In the "Font style" section, set the preferred style (such as regular, italic, or bold).
- (Optional) In the "Size" section, select the default font size.
- Click the OK button.
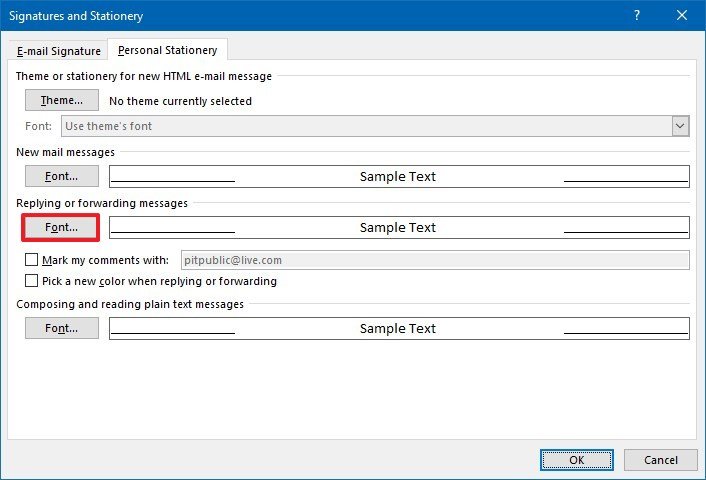
- Under the "Replying or forwarding messages" section, click the Font button to specify the default settings for forwarding or replying messages.
- In the "Font" section, select the new font that you want as the new default.
- (Optional) In the "Font style" section, set the preferred style.
- (Optional) In the "Size" section, select the default font size.
- Click the OK button.
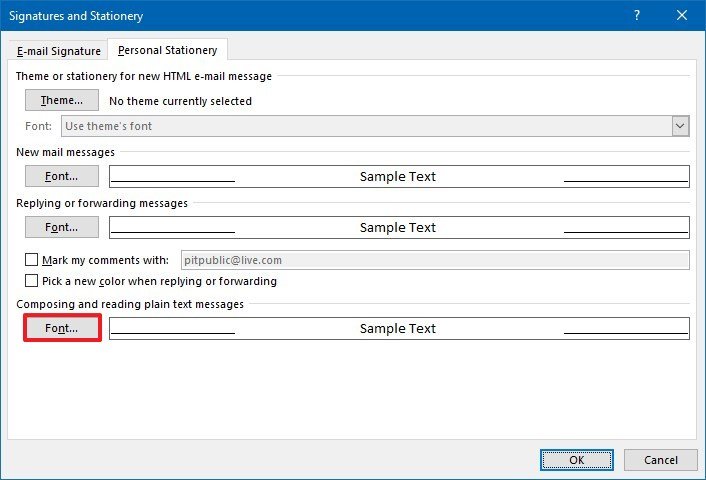
- Under the "Composing and reading plain text messages" section, click the Font button to specify the default settings for received messages using plain text. (This formatting is only visible to you.)
- In the "Font" section, select the new font that you want as the new default.
- (Optional) In the "Font style" section, set the preferred style.
- (Optional) In the "Size" section, select the default font size.
- Click the OK button.
- Click the OK button again.
- Click the OK button one more time.
After you complete the steps, depending on your new configuration, every time you compose, reply, or forward a message, you'll be able to start typing immediately with the new default font settings.
Mauro recommends all these affordable accessories
Hi, I'm Mauro Huculak, Windows Central's help and how-to guru. I wrote the post you're reading now, and I know the Windows OS inside and out. But I'm also a bit of a hardware geek. These are some of the affordable gadgets on my desk today.

Logitech MX Master Wireless Mouse ($72 at Amazon)
I know mice, and this is the one I use every day. The MX Master is a wireless high-precision mouse that's very comfortable to use and has many great features, including the ability to connect with multiple devices, an infinite scroll wheel, back and forward buttons, all of which you can customize.
Ktrio Extended Gaming Mouse Pad ($12 at Amazon)
If you spend a lot of time typing, your palms and mouse will leave tracks on your desk. My solution was to start using gaming mouse pads, which are big enough for you to use the keyboard and the mouse comfortably. This is the one I use and recommend.
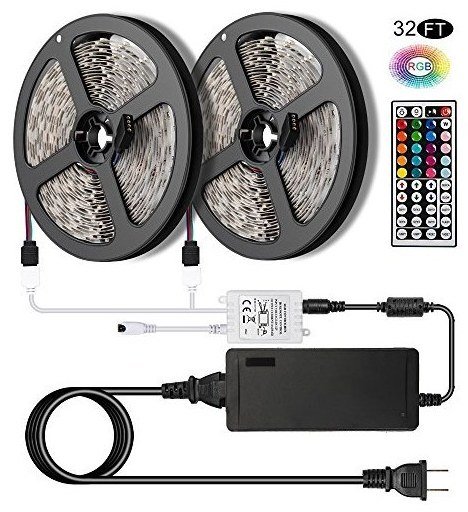
Supernight LED light strip ($20 at Amazon)
You could just use a regular light bulb in your office, but if you want to add some ambient lighting with different colors, an RGB LED strip is the way to go. This one is Mauro-approved.

Mauro Huculak has been a Windows How-To Expert contributor for WindowsCentral.com for nearly a decade and has over 22 years of combined experience in IT and technical writing. He holds various professional certifications from Microsoft, Cisco, VMware, and CompTIA and has been recognized as a Microsoft MVP for many years.
