How to use version history for documents in Office
You can go back in time to restore a previous versions of Office documents, and in this guide, we'll show you the steps to use the feature.
All the latest news, reviews, and guides for Windows and Xbox diehards.
You are now subscribed
Your newsletter sign-up was successful
Alongside the slew of the productivity features, Microsoft Office also includes the ability to keep track of the changes you make to a document and save them as versions automatically. This version history allows you to go back in time and restore a previous version of a document created using Word, Excel, or PowerPoint using the Windows 10 or web version of the app.
In addition, using version history, you can also view and compare the different versions to have a better understanding of the progress of the document.
While this is a useful feature to work without having to worry about changes that you or someone may make to a document, it's a feature limited to those files you save in OneDrive, OneDrive for Business, and SharePoint, and depending on the platform, the steps to use version history will be different.
In this Windows 10 guide, we'll walk you through the steps to use the version history feature in Office to restore previous content of documents.
How to use Office version history (app)
The ability to view and restore previous versions of Office documents is only available when files are saved to OneDrive, as such before you can start using this feature, you have to make sure that your copy of Office 365, Office 2019, or Office 2016 is connected to the cloud storage service.
Enabling version history in Office
To connect the desktop version of Office to OneDrive, use these steps:
- Open an Office app. (For example, Microsoft Word.)
- Create a blank document.Quick Tip: You can save the extra steps to create a blank document using this tip to skip the start screen in Office.
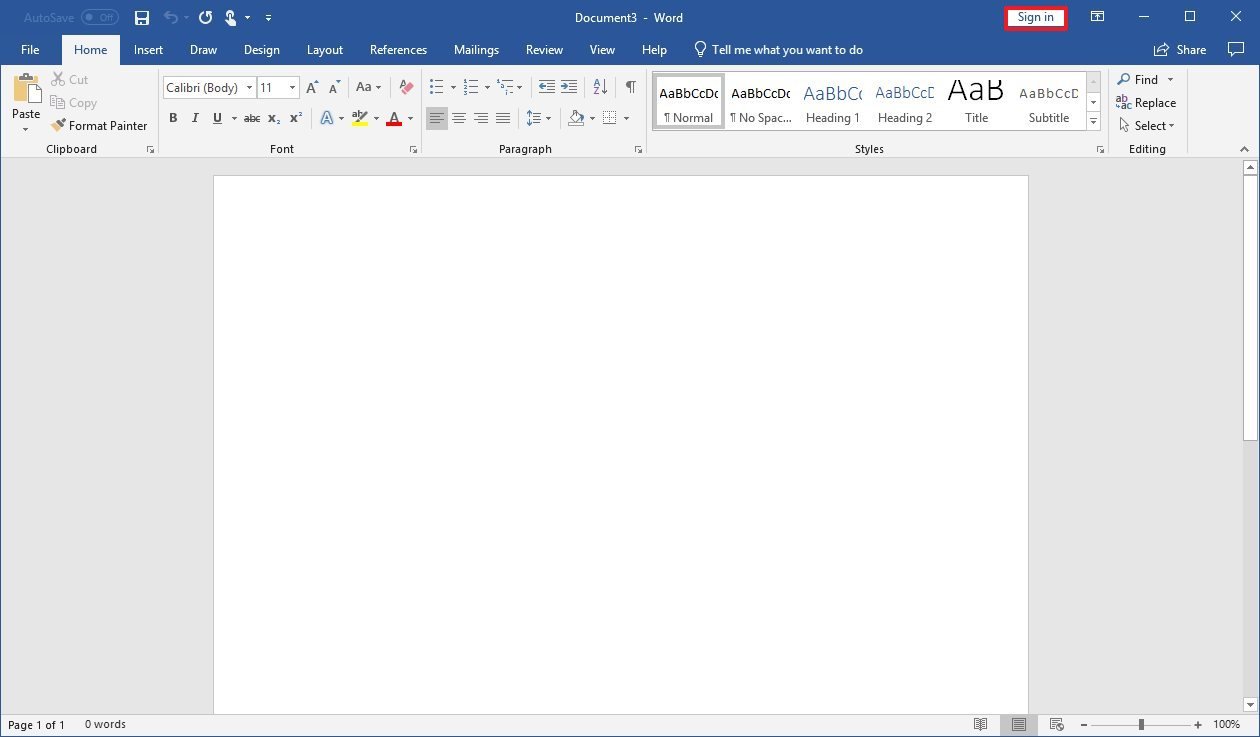
- Click the Sign in button in the top-right.
- Use your Office 365 or Microsoft account credentials to link Office with OneDrive.
After completing the steps, you can use steps below to allow Office to record multiple versions of your Word, Excel, and PowerPoint documents.
All the latest news, reviews, and guides for Windows and Xbox diehards.
Using version history in Office
To start using version history with the desktop version of the Office apps, use these steps:
- Open an Office app. (For example, Microsoft Word.)
- Create a blank document.
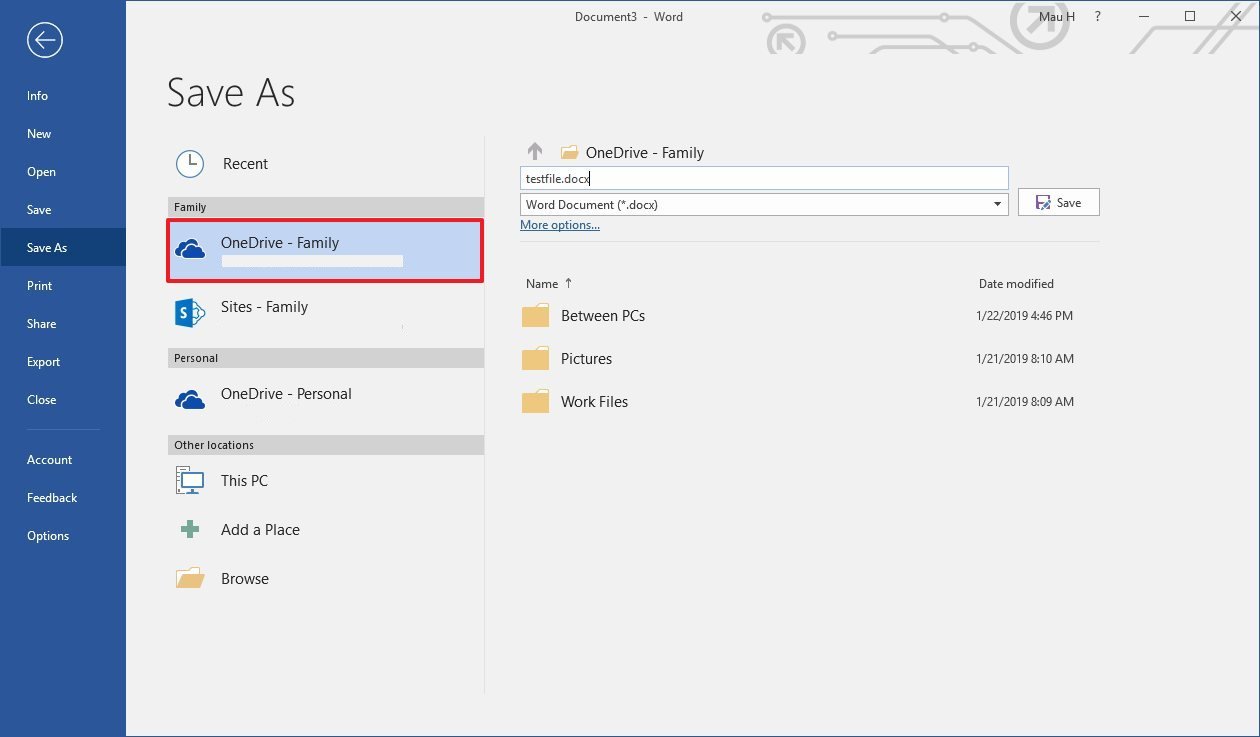
- Click on File.
- Click on Save.
- Save the file inside the OneDrive folder. (If you use a different location, version history will not work.)
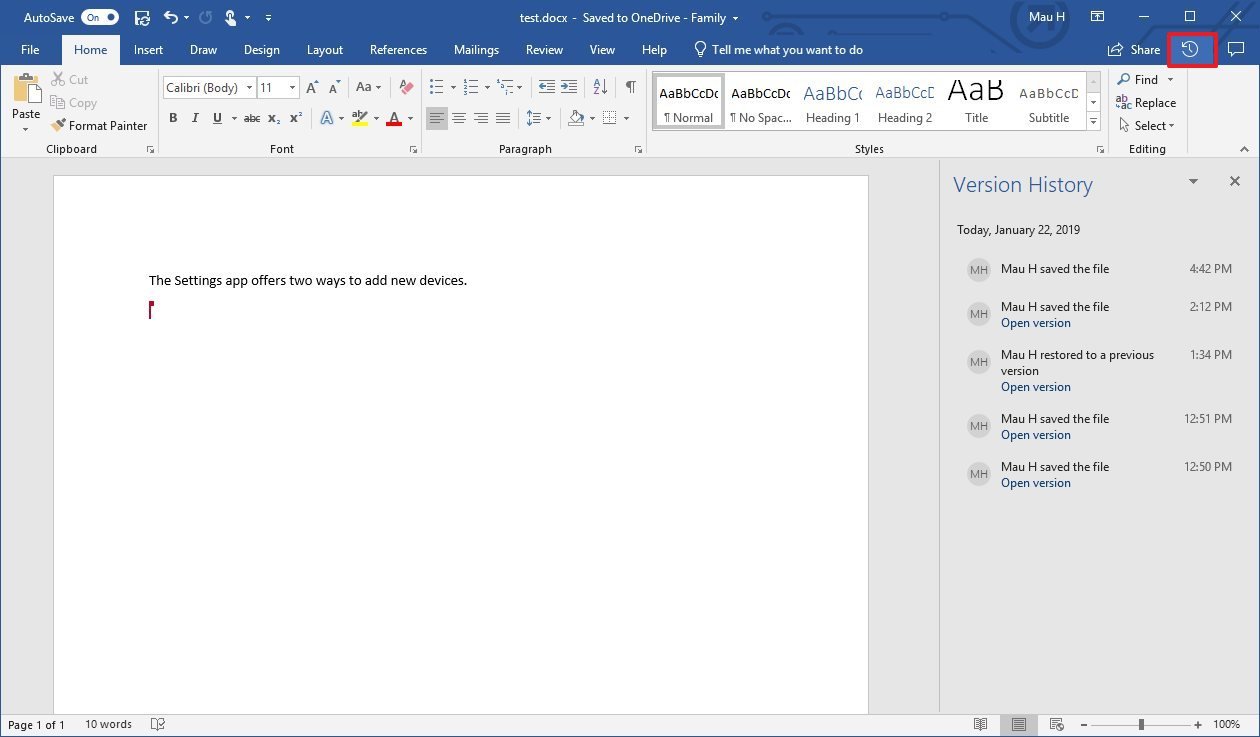
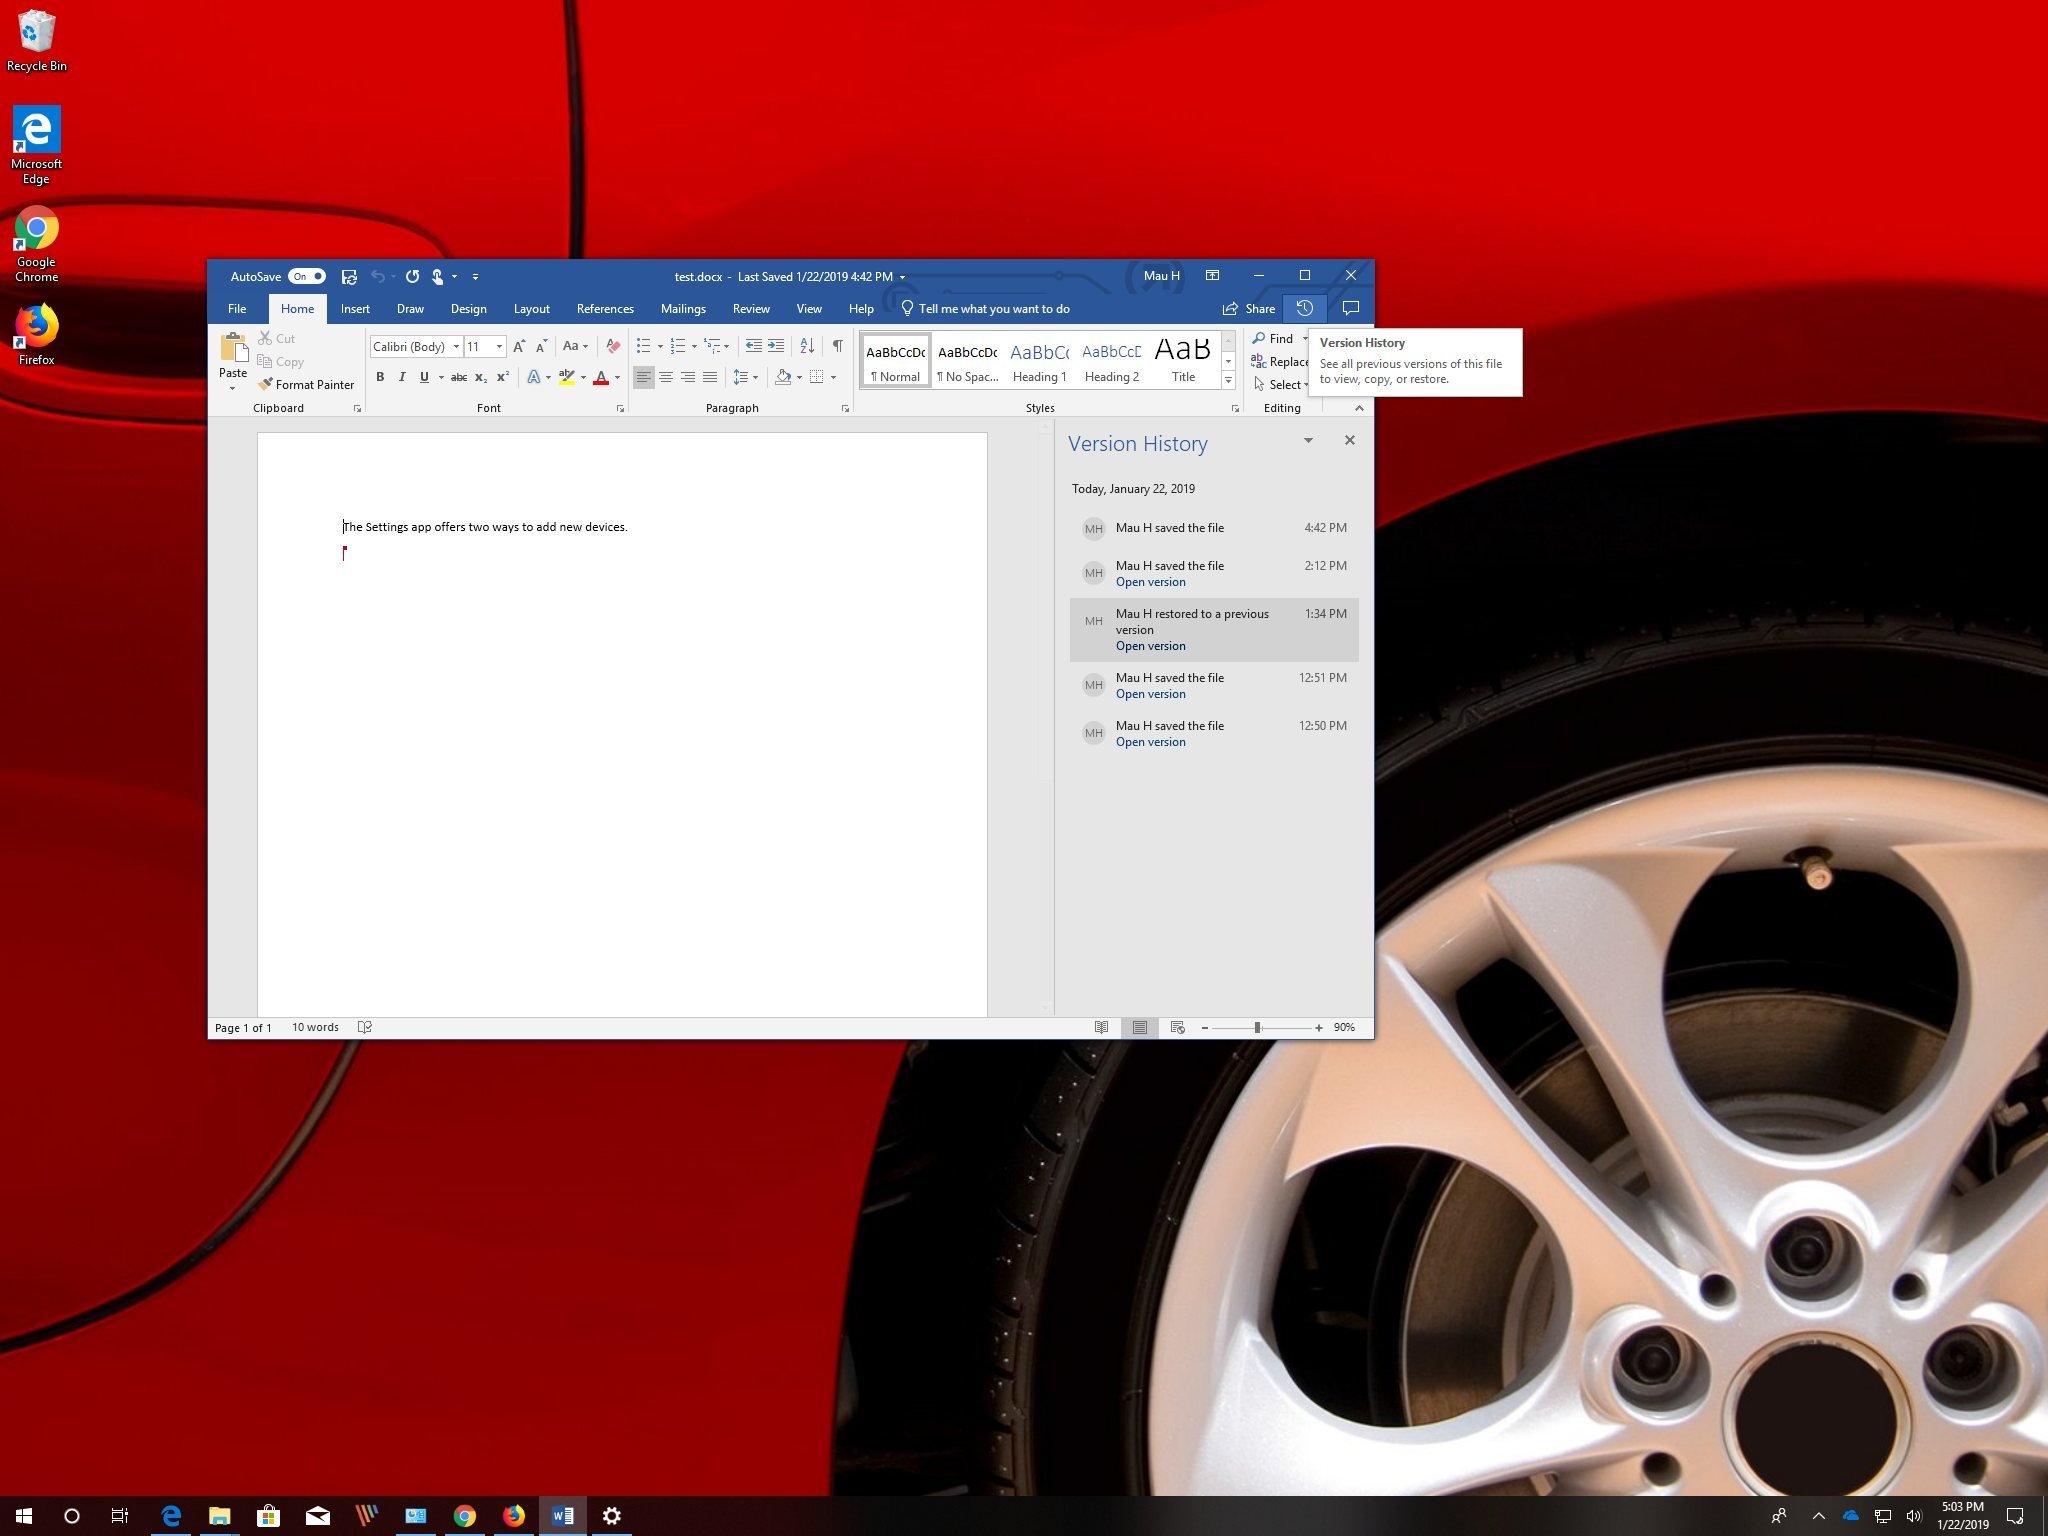
- Click the Version History button in the top-right.
- Click the version that you want to view and restore.
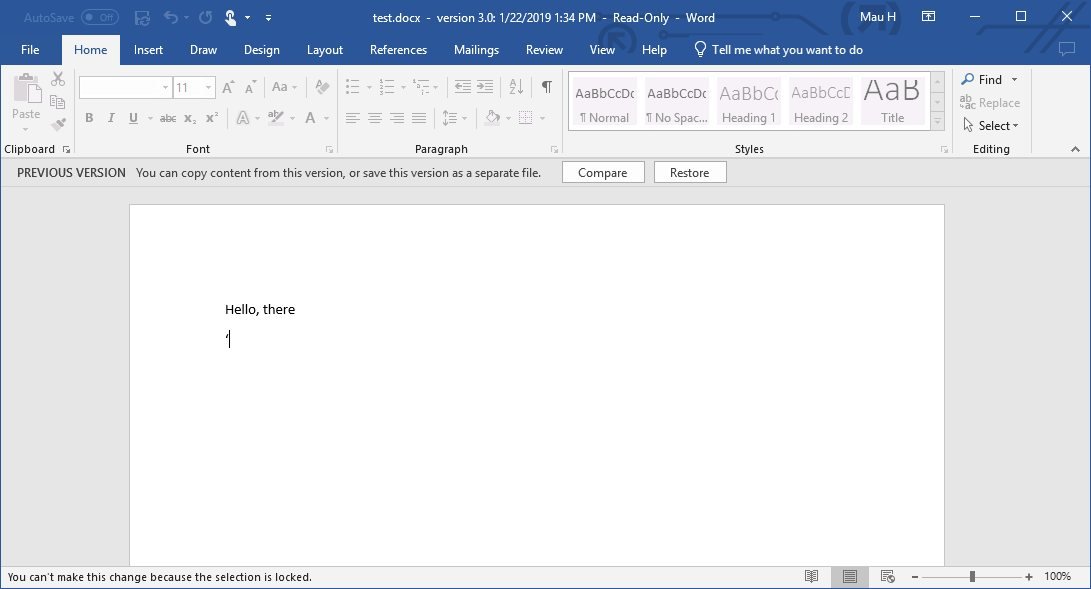
- (Optional) If you're not sure whether the version you selected has the correct changes, click the Compare button.
- Click the Restore button.
Once you've completed the steps, the version of the document will be restored with the original content.
If you restored the wrong version, Office always creates a backup of every version, which means that you can use the above instructions to restore the correct version.
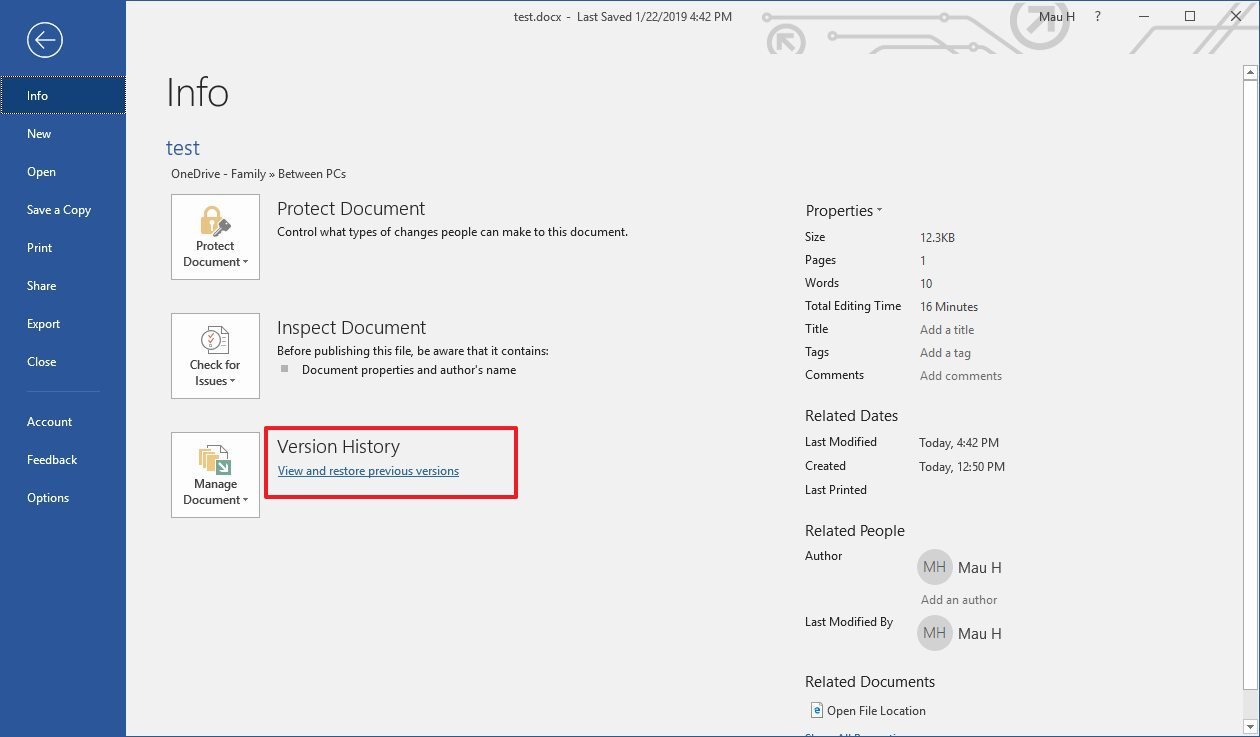
Alternatively, you can also access the "Version History" pane from File > Info, and clicking the View and restore previous version link.
How to use Office version history (online)
If you use the online version of Office, you can also view and restore the previous version of a document, but for some odd reason, the steps are different, even whether you're using OneDrive or OneDrive for Business.
Office version history with OneDrive
To view and restore a previous version of an Office document online, use these steps:
- Open OneDrive on the web.
- Browse to the location of the document that you want to see its history.
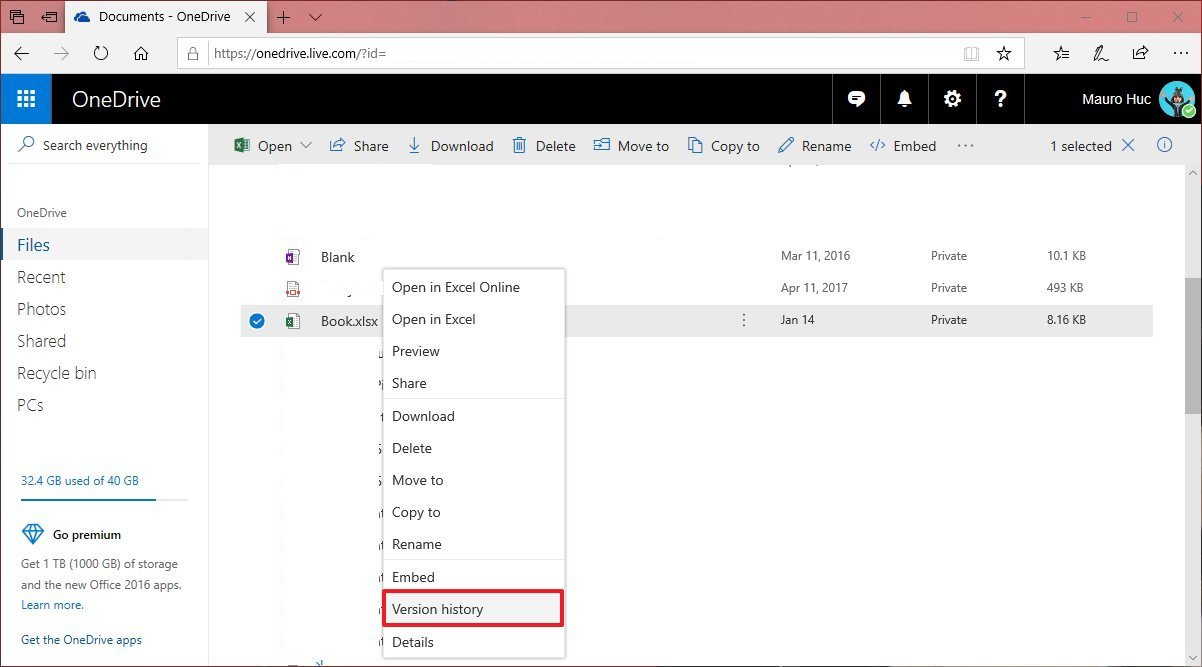
- Right-click the file and select the Version history option.
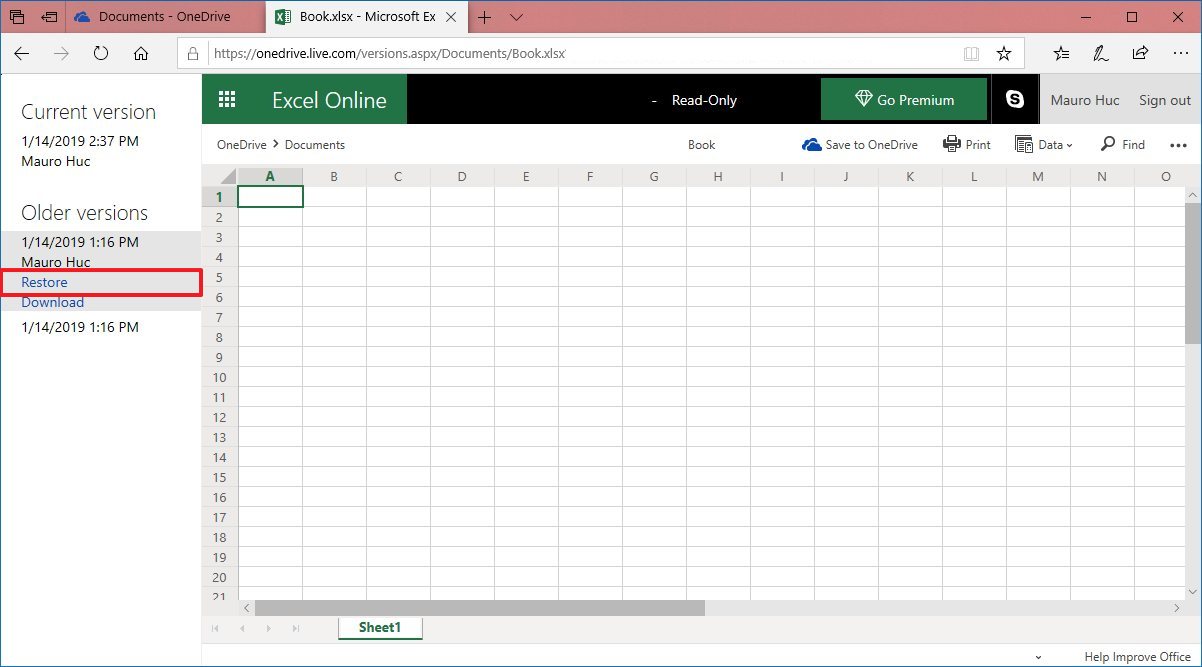
- The browser will open a new tab with a pane on the right with all the available versions for the document.
- Select and review the version.
- Click the Restore option.
After completing the steps, you can start working with the earlier version of the document.
Office version history with OneDrive for Business
If you use OneDrive for Business, the steps to use version history with Office documents is slightly different:
- Open OneDrive for Business on the web.
- Browse to the location of the document that you want to see its version history.
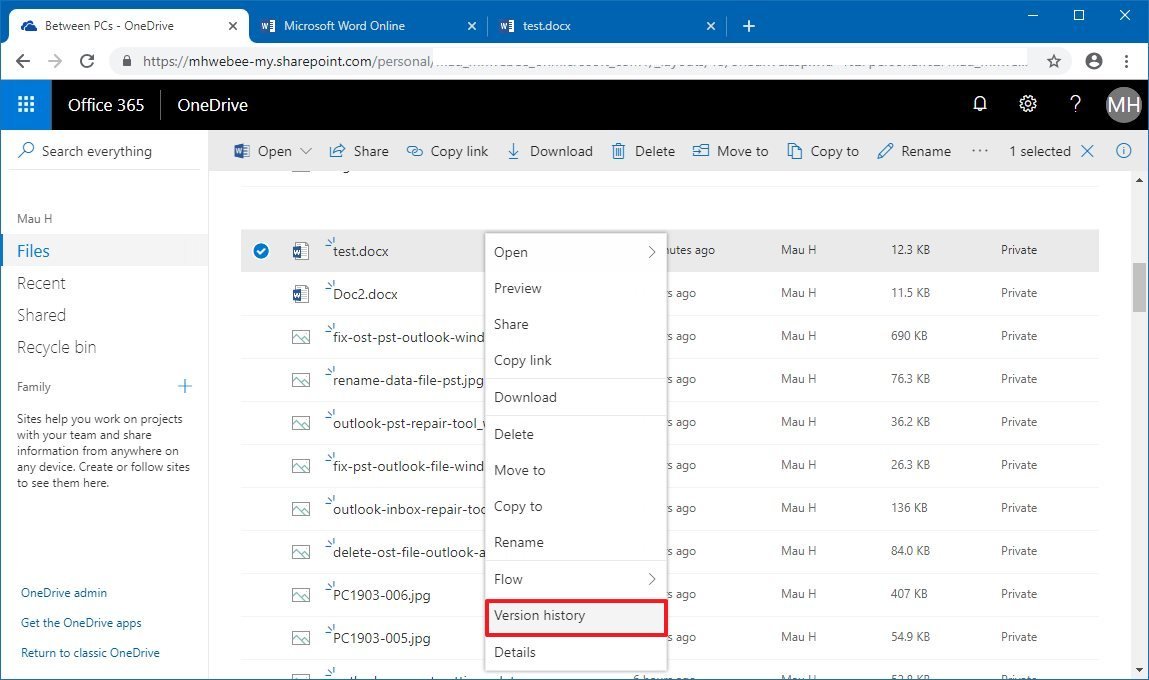
- Right-click the file and select the Version history option.
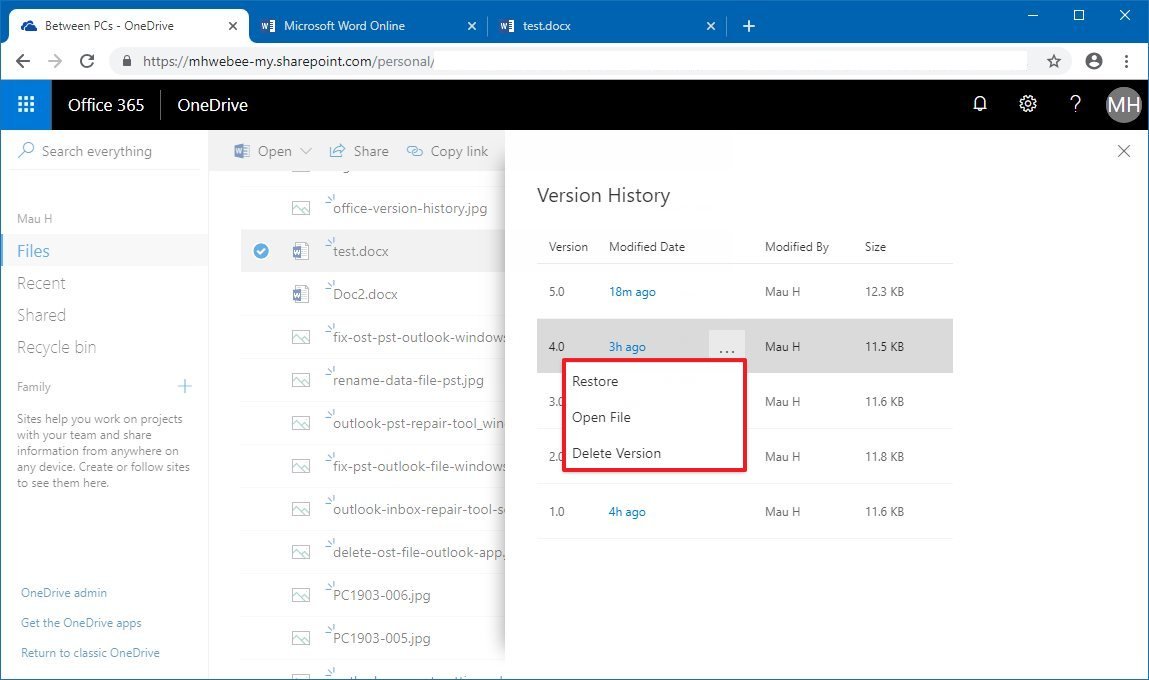
- In the right pane, click the three-dotted button for the version, and choose one of the options, including:
- Restore — restores the version of the document to its original OneDrive folder.
- Open File — launches the file with the desktop application on your computer.
- Delete version — removes the version from OneDrive.
If you use the Restore option, then you can start working with the previous version by opening the document again using the online or desktop version of the app. However, if you select the Open File option, the older file will download and open the desktop app. Then you'll need to click the Restore button to start working with the previous version.
More Windows 10 resources
For more helpful articles, coverage, and answers to common questions about Windows 10, visit the following resources:
- Windows 10 on Windows Central – All you need to know
- Windows 10 help, tips, and tricks
- Windows 10 forums on Windows Central

Mauro Huculak has been a Windows How-To Expert contributor for WindowsCentral.com for nearly a decade and has over 22 years of combined experience in IT and technical writing. He holds various professional certifications from Microsoft, Cisco, VMware, and CompTIA and has been recognized as a Microsoft MVP for many years.
