3 Google Chrome settings you must change on Windows 11
If you use Chrome, you should consider changing these settings to make your browser experience better.
All the latest news, reviews, and guides for Windows and Xbox diehards.
You are now subscribed
Your newsletter sign-up was successful
Google Chrome offers a plethora of settings and features that can significantly enhance your browsing experience. However, among the vast number of options, certain settings stand out as must change for anyone using Windows 11, 10, Linux, or macOS.
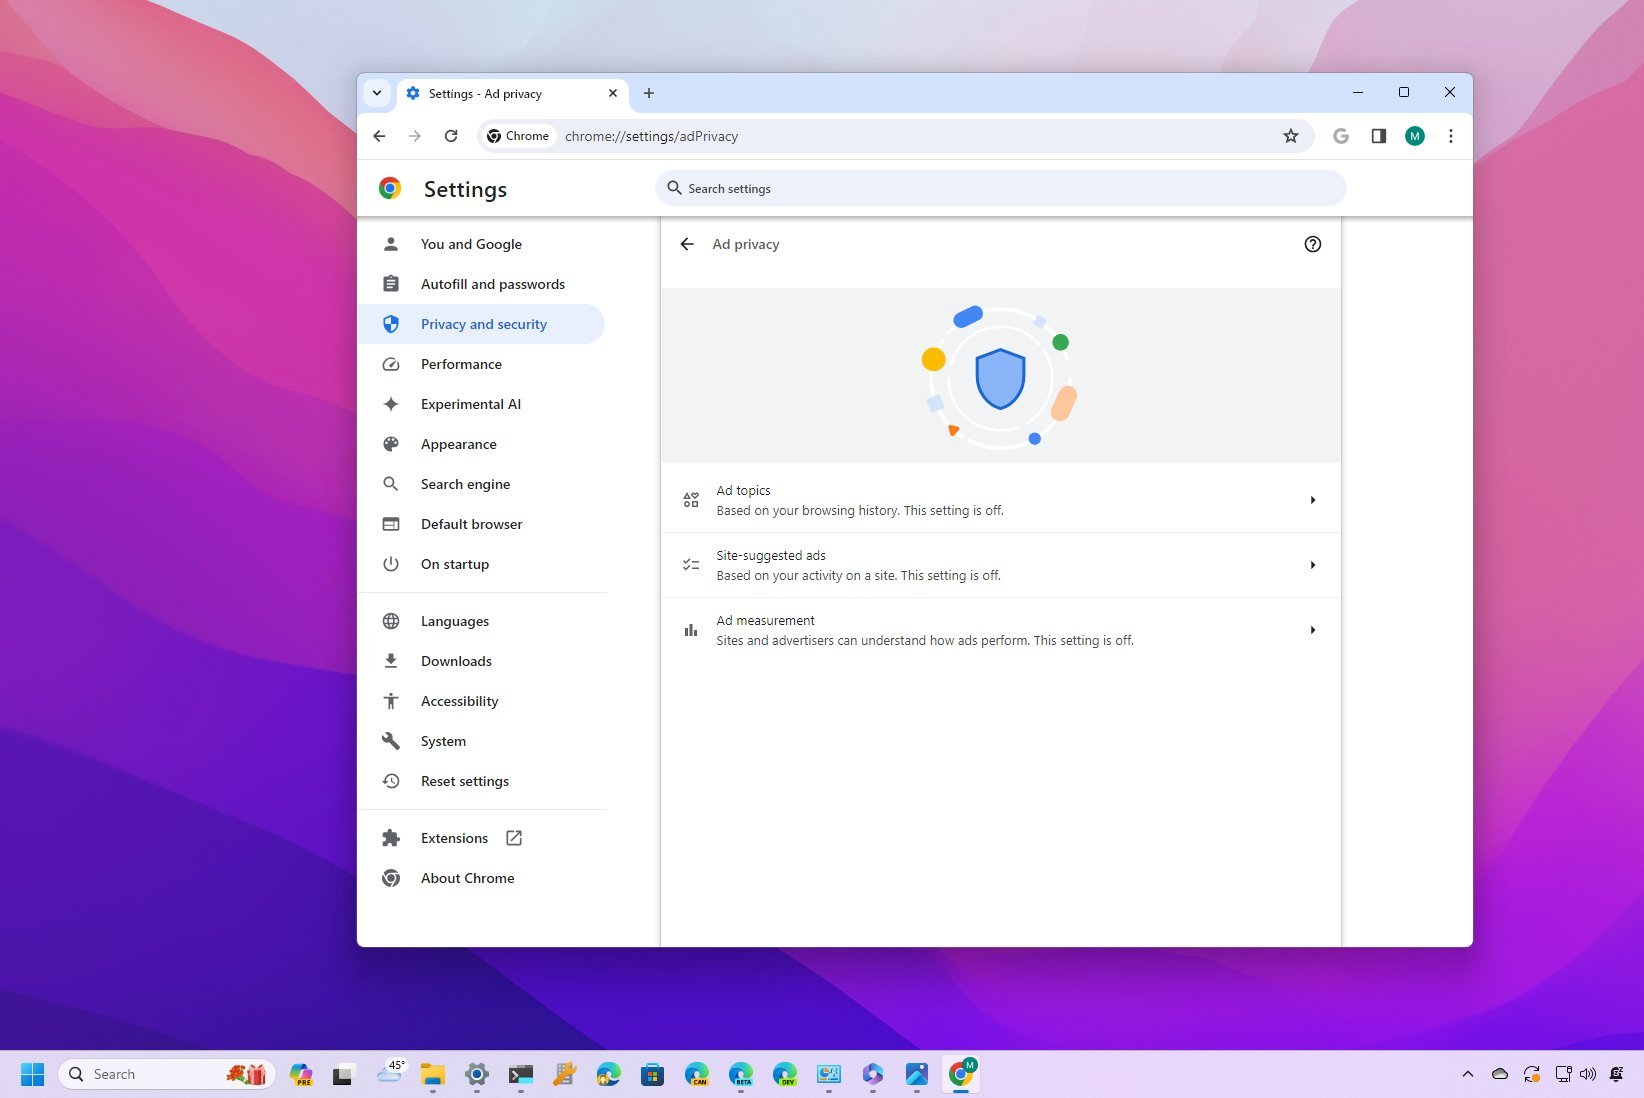
For example, by default, the browser can allow advertisers to collect specific information to target you with ads. However, you can always turn off these "Ad Privacy" settings to improve your online experience.
Chrome has always been known to consume a lot of system memory when loading a bunch of tabs. However, the "Memory Saver" option allows the browser to sleep and free up memory for inactive tabs.
Also, it's possible to customize the startup behavior to always open a new tab, pick up where you left off, or specify a page or sets of web pages that should load automatically.
In this how-to guide, I will outline several settings you should consider changing on Google Chrome, regardless of the operating system.
Settings you must change on Chrome
If you use Chrome on Windows 11 or any other desktop platform, you should consider changing the ad privacy, performance, and startup settings.
Configure ad privacy
To change the ad privacy settings on Chrome, use these steps:
All the latest news, reviews, and guides for Windows and Xbox diehards.
- Open Google Chrome.
- Click the "Customize and control Google Chrome" (three dots) button.
- Select the Settings option.
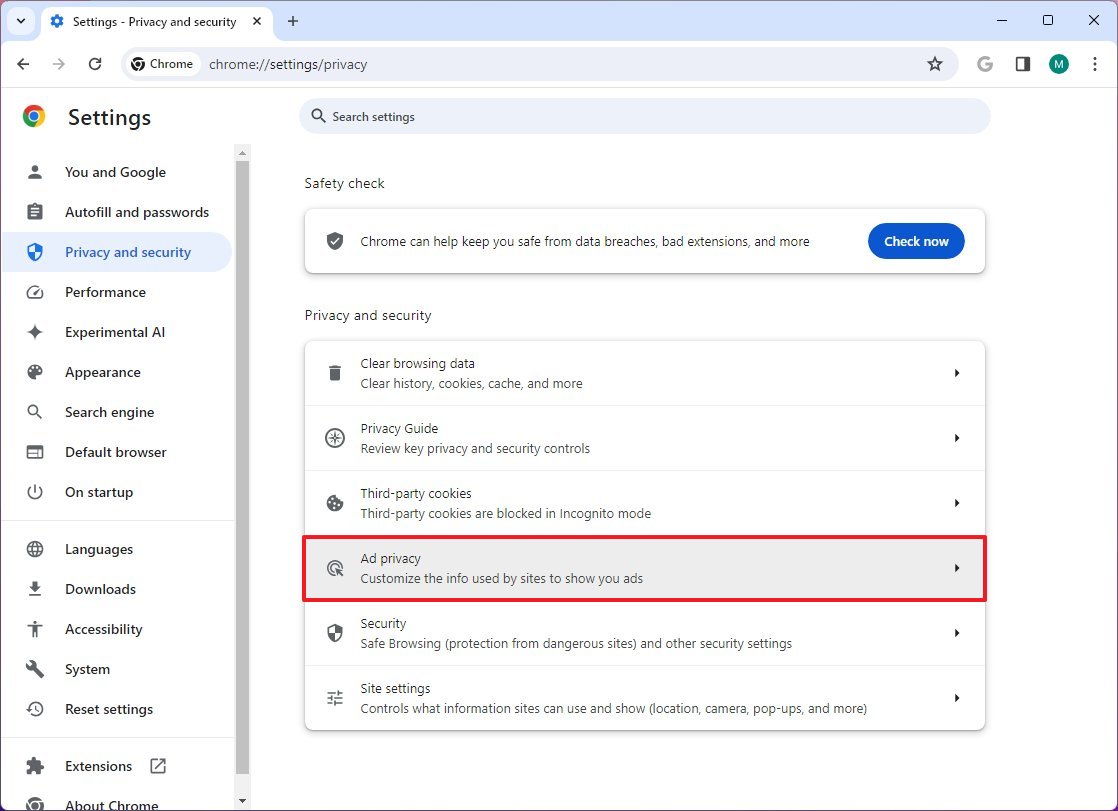
- Click on Privacy and security.
- Click the Ad Privacy page on the right side.
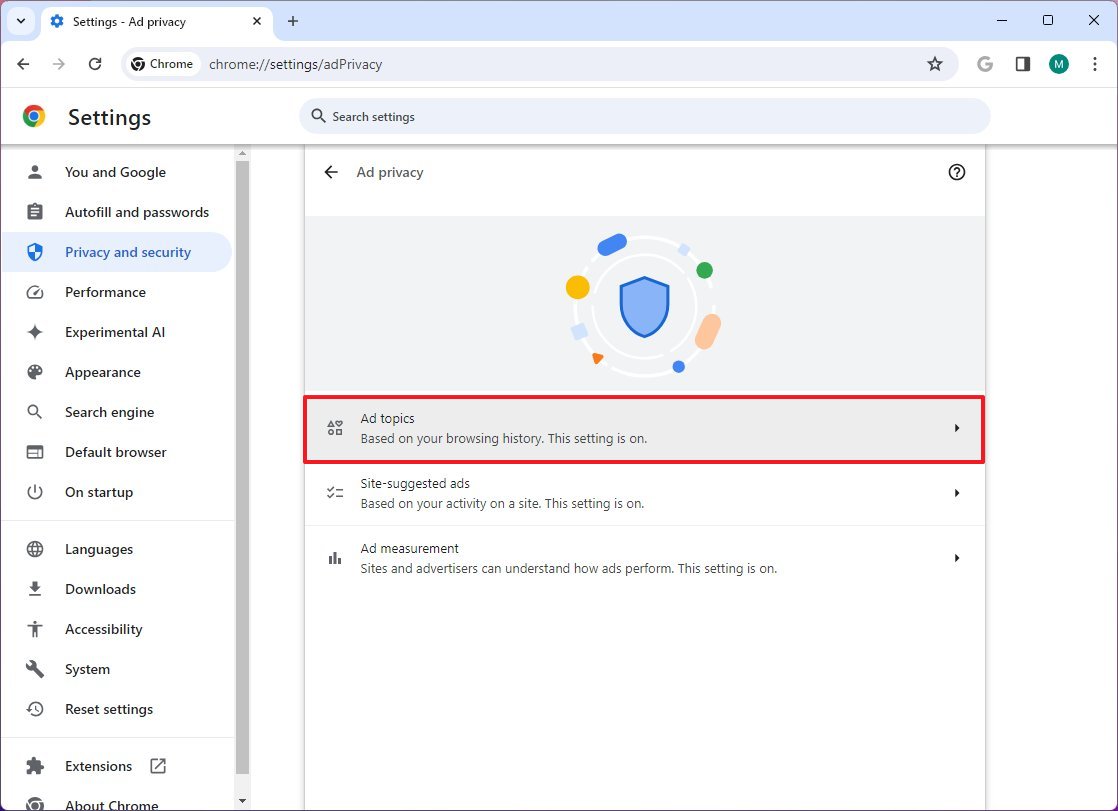
- Click the Ad topics setting.
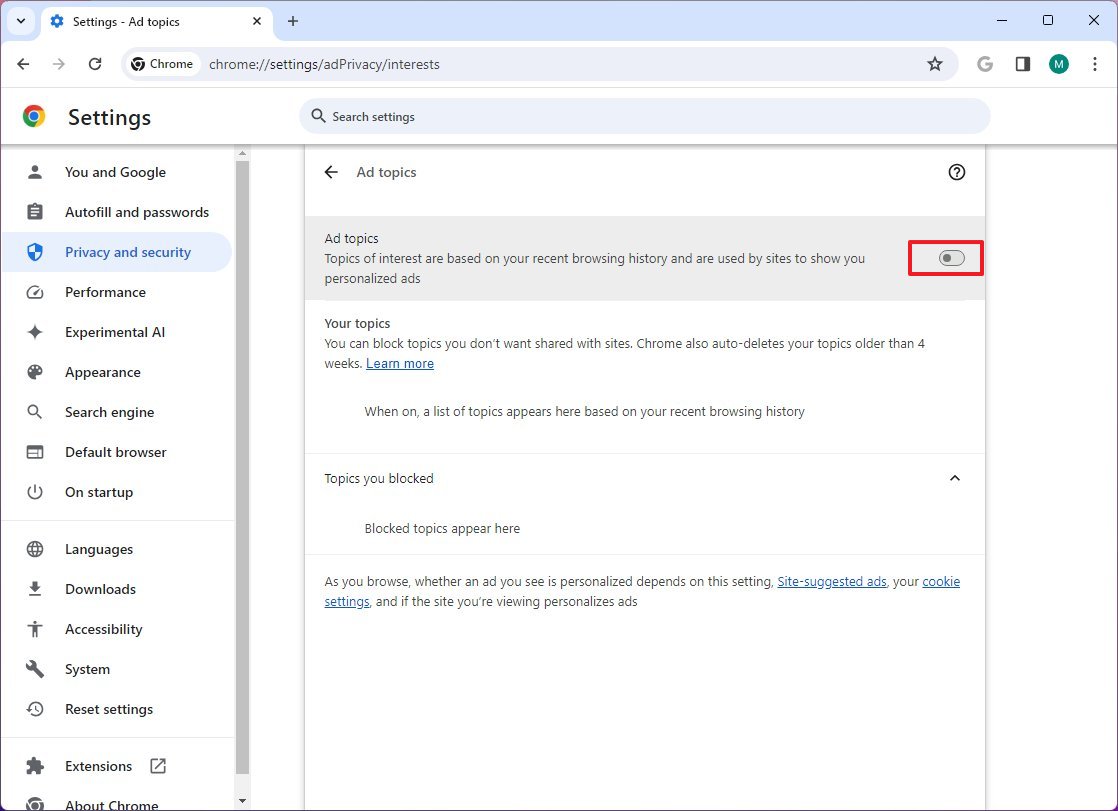
- Turn off the "Ad topics" toggle switch to prevent advertisements based on your recent browsing history.
- Click the "Site-suggested ads" setting from the "Ad Privacy" page.
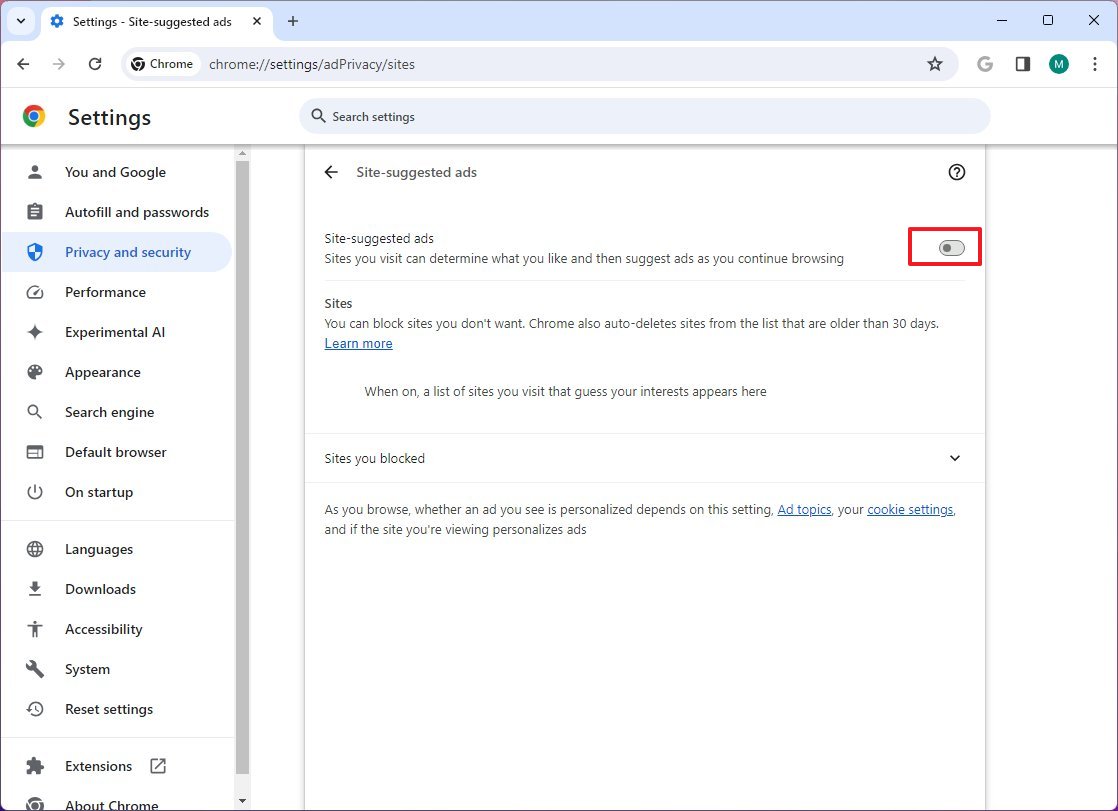
- Turn off the "Site-suggested ads" toggle switch to stop websites from determining your likes and show-related ads.
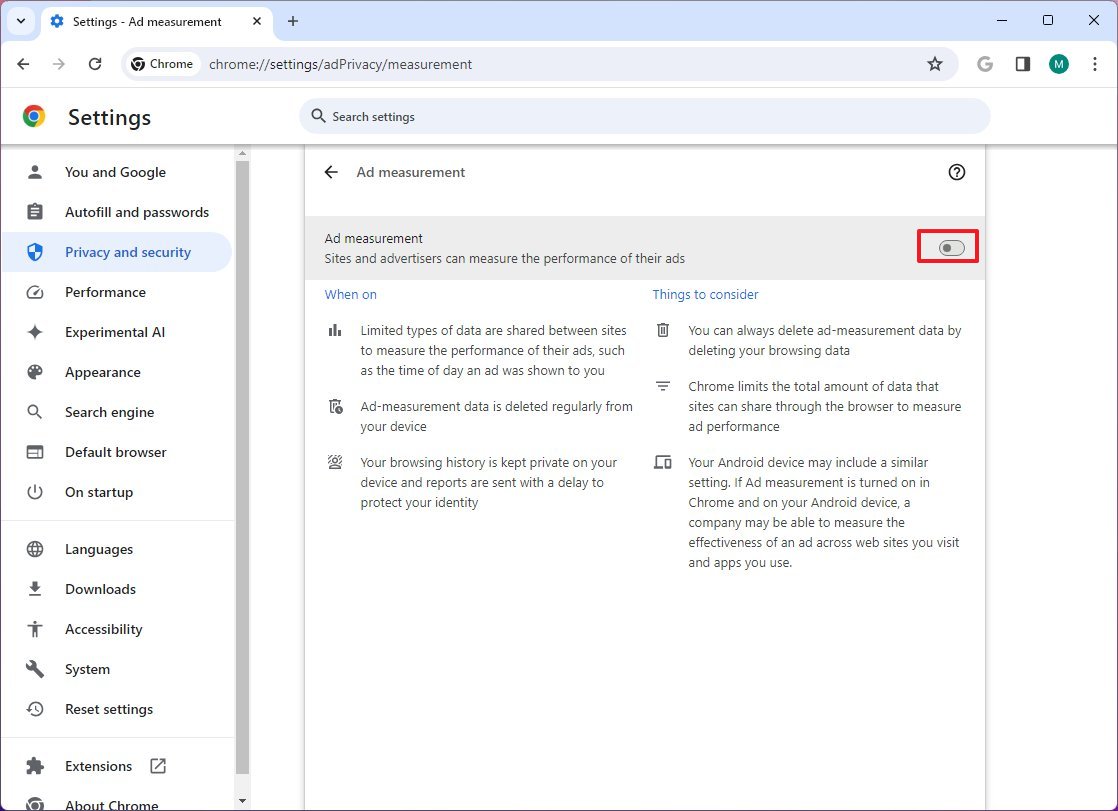
- Click the "Ad measurement" setting from the "Ad Privacy" page.
- Turn off the "Ad measurement" toggle switch to block advertisers from checking the performance of ads that are shown to you.
Once you complete the steps, you will continue to see advertisements as you browse the web, but they won't feel as targeted.
Customize performance settings
To change the Chrome settings to improve the system performance and speed up the browsing experience, use these steps:
- Open Google Chrome.
- Click the "Customize and control Google Chrome" (three dots) button.
- Select the Settings option.
- Click on Performance.
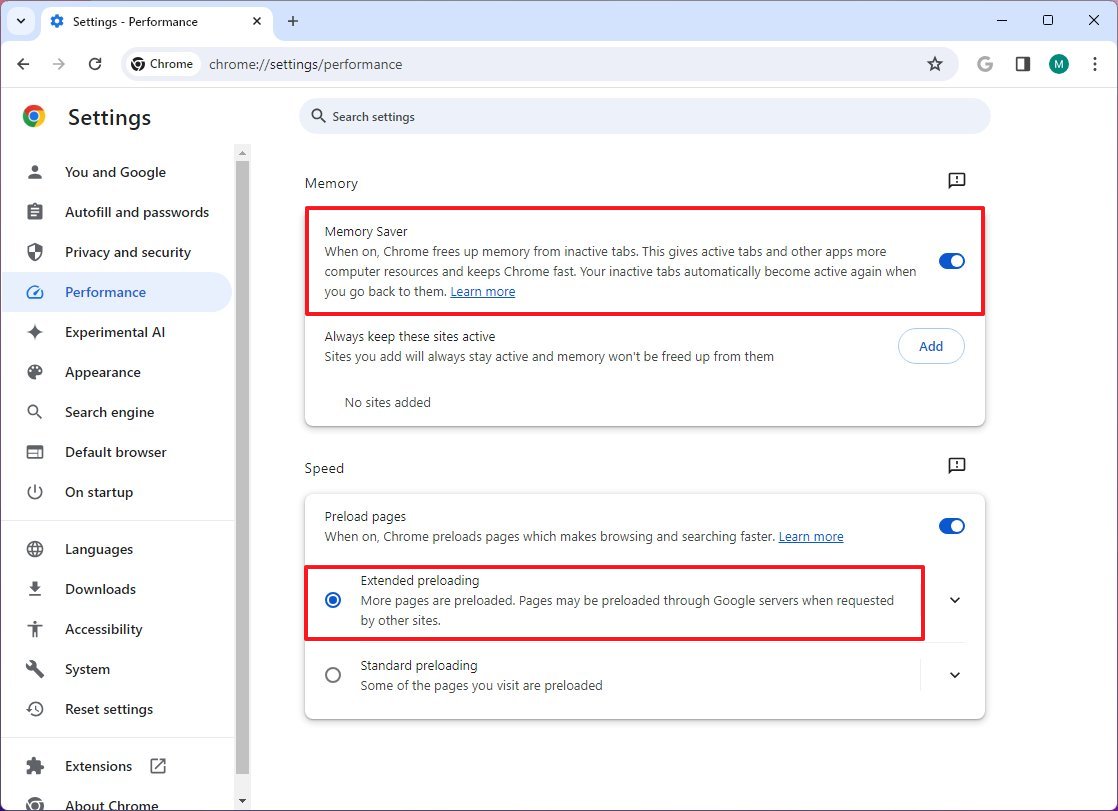
- Turn on the "Memory saver" toggle switch to allow the browser to sleep inactive tabs to minimize memory usage.
- (Optional) Click the Add button in the "Always keep these sites active" setting to prevent specific web pages from becoming inactive.
- Turn on the "Preload pages" toggle switch.
- (Optional) Choose the "Expended preloading" option to allow Chrome to predict and download more pages you're likely to visit while browsing the web for a faster loading experience. Quick note: This option will increase internet usage.
After you complete the steps, the new settings apply in the browser, and you should notice improvements on the computer and while browsing the web.
Choose startup settings
To determine how the browser starts up, use these steps:
- Open Google Chrome.
- Click the "Customize and control Google Chrome" (three dots) button.
- Select the Settings option.
- Click On startup.
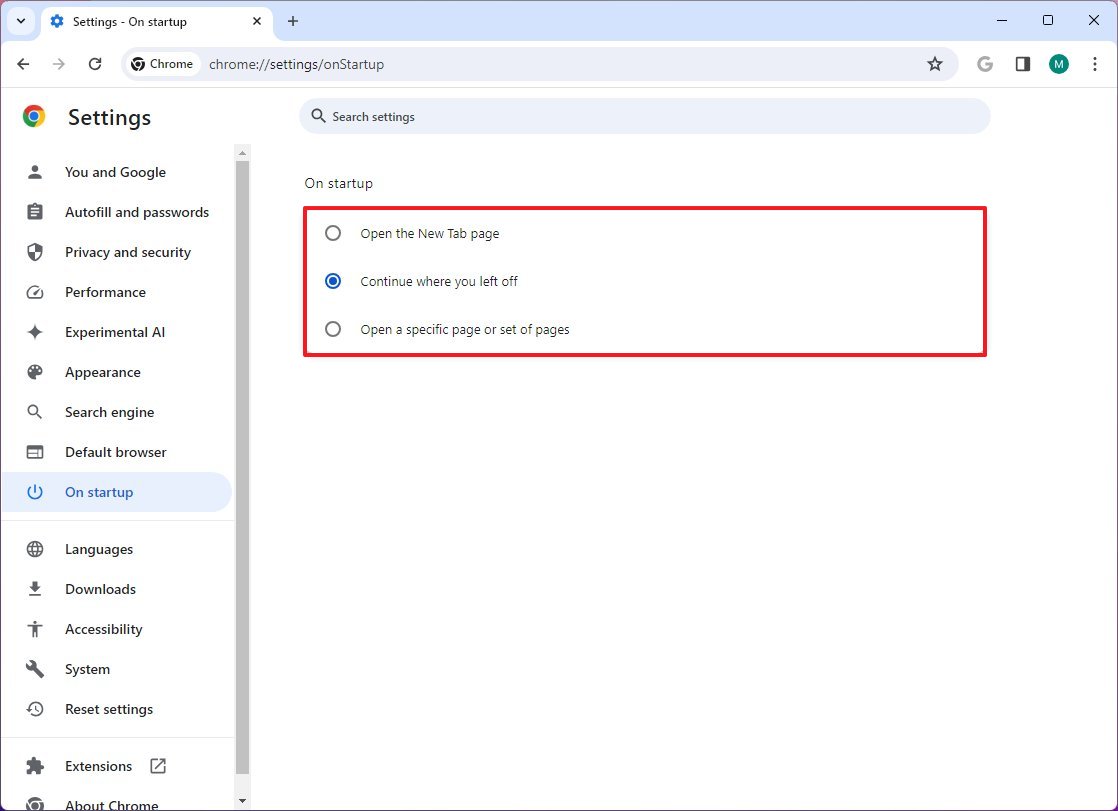
- Choose one of the options:
- Open the New Tab page.
- Continue where you left off.
- Open a specific page or set of pages.
Once you complete the steps, Chrome will launch in your selected configuration.
(Bonus) Enable experimental AI features
Similar to Microsoft Edge, Google is now integrating AI features into Chrome, but these features are still a work in progress, and you must turn them on manually.
To enable the Chrome AI features, use these steps:
- Open Google Chrome.
- Click the "Customize and control Google Chrome" (three dots) button.
- Select the Settings option.
- Click on Experimental AI.
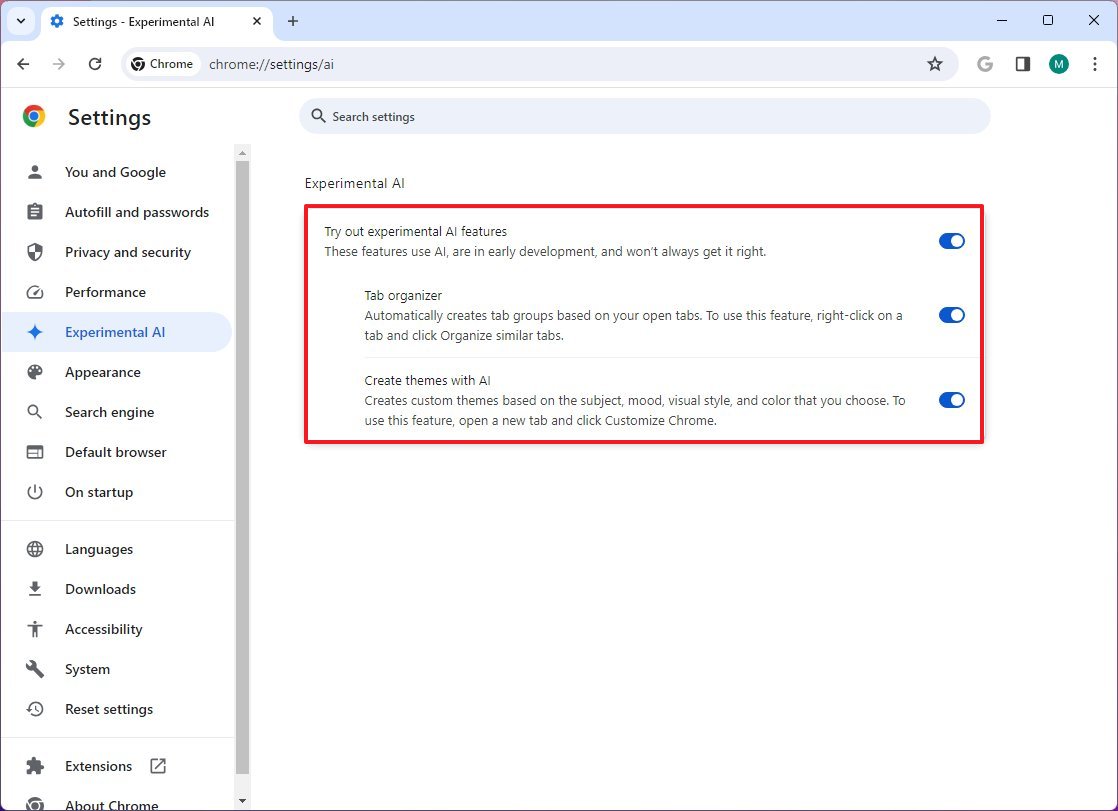
- Turn on the "Try out experimental AI features" toggle switch.
- (Optional) Turn on or off the available AI features.
- Click the Relaunch button.
After you complete the steps, you can start using the AI features on your browser.
Currently, the experimental option is available for users in the United States, and since Google is doing a controlled rollout, the features available will vary from user to user.
In the first wave of the AI features, Google is testing a new option to organize tabs using groups automatically. It's now possible to create themes with AI, and there's a new option that allows you to generate text with AI.
Also, the AI features are rolling out starting with version 121. You can always check for updates on Settings > About Chrome.
More resources
For more helpful articles, coverage, and answers to common questions about Windows 10 and Windows 11, visit the following resources:
- Windows 11 on Windows Central — All you need to know
- Windows 10 on Windows Central — All you need to know

Mauro Huculak has been a Windows How-To Expert contributor for WindowsCentral.com for nearly a decade and has over 22 years of combined experience in IT and technical writing. He holds various professional certifications from Microsoft, Cisco, VMware, and CompTIA and has been recognized as a Microsoft MVP for many years.
