How to backup and restore specific Registry keys on Windows 11
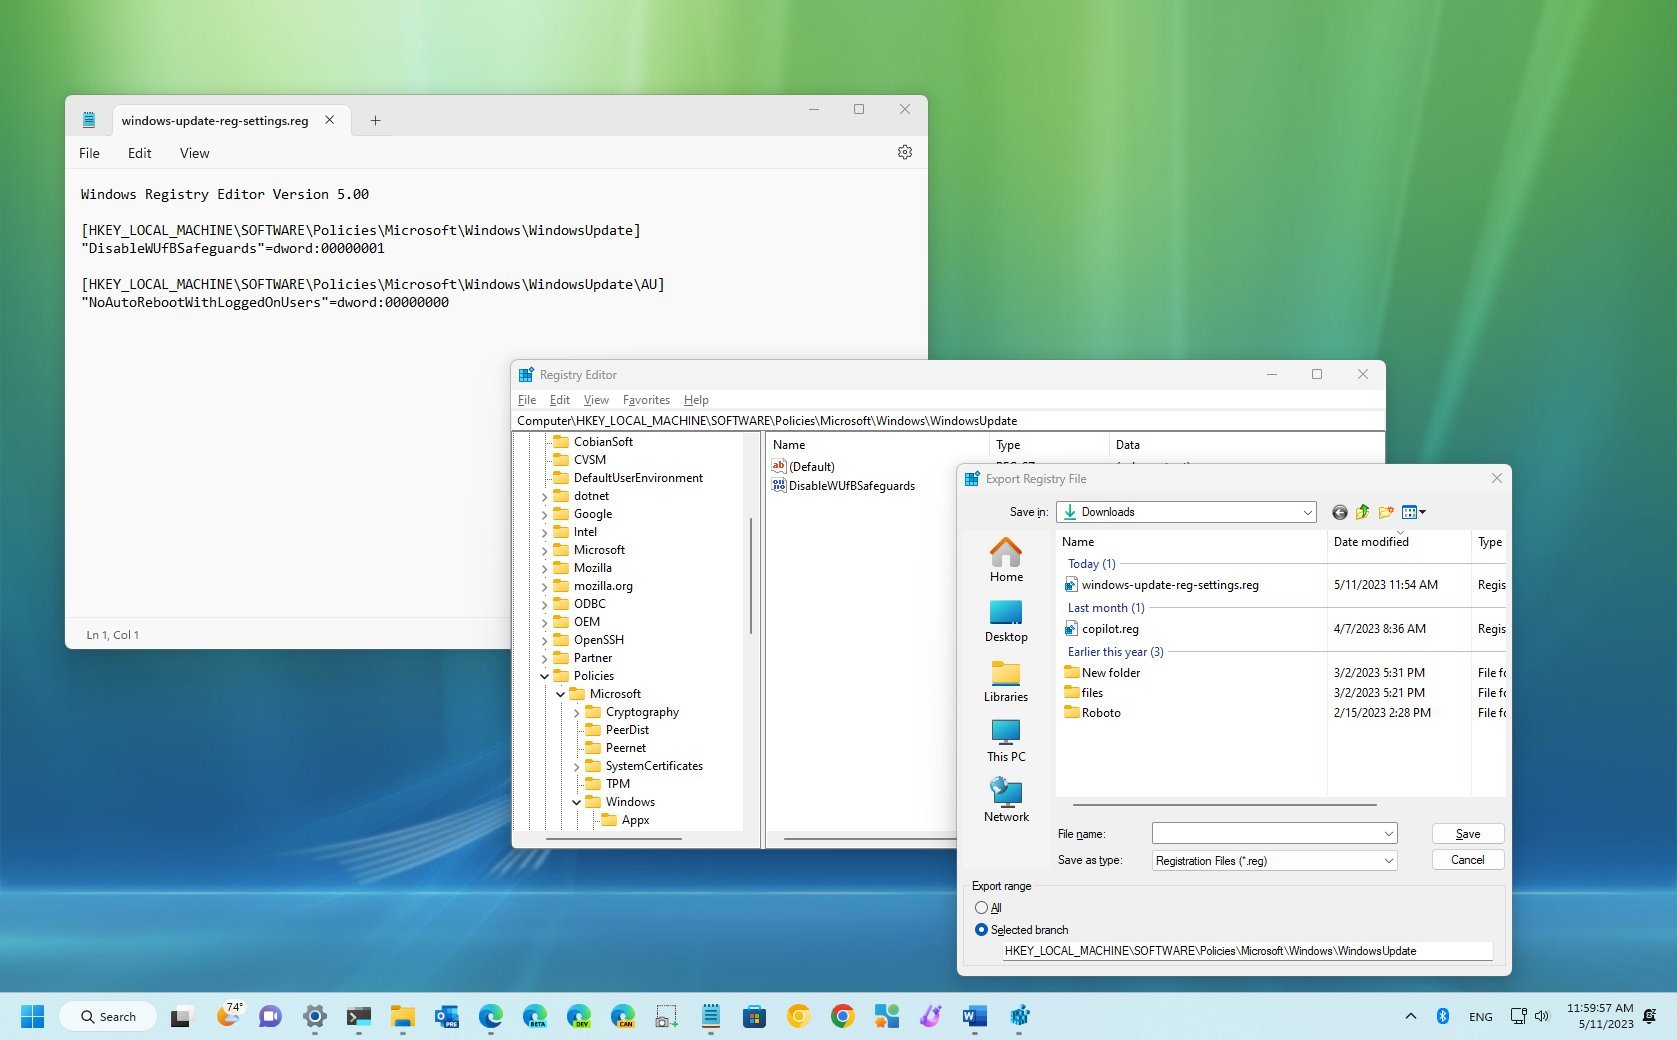
If you have to modify a specific Registry key, use these steps to back it up and restore it on Windows 11.
All the latest news, reviews, and guides for Windows and Xbox diehards.
You are now subscribed
Your newsletter sign-up was successful
The Registry is an essential database for the proper functioning of Windows 11, as it stores configuration settings and options for the system and apps. Since it contains information about hardware devices, applications, user preferences, and system settings, any misconfiguration can cause irreversible damage to the current setup. As a result, it's never a good idea to change its settings.
However, when you must modify the Registry for a particular reason, you can create a backup of the specific key (or set of keys) instead of backing up the entire database or system.
Furthermore, the ability to export and import parts of the Registry can come in handy when you have to apply the same configuration to other devices running the same version of the operating system.
This how-to guide will walk you through the steps to back up and restore Registry keys on Windows 11.
How to backup specific Registry keys on Windows 11
To export a specific Registry key on Windows 11, use these steps:
- Open Start.
- Search for Registry Editor, right-click the top result, and click the top result to open the app.
- Browse to the path where the settings are located.
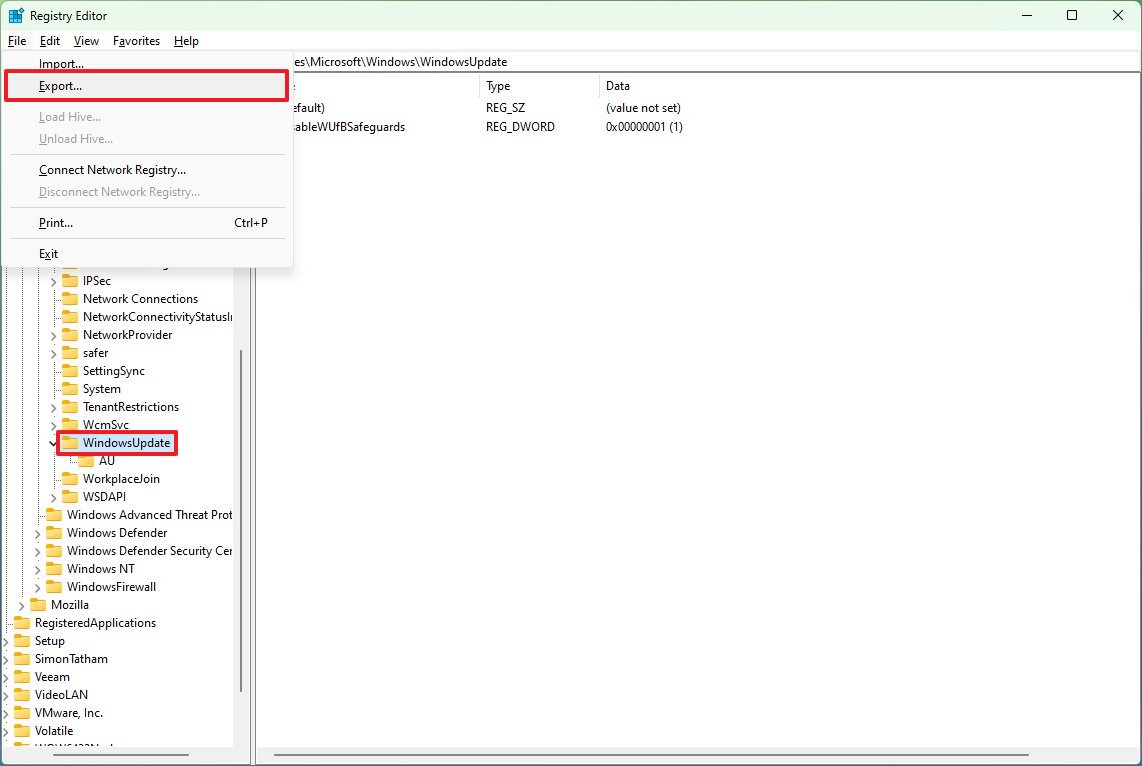
- Select the key to export as a backup.
- Click on File and choose the Export option.
- Quick note: You can export keys like folders, DWORDs, and Strings. If you choose a folder, everything within that location will be backed up.
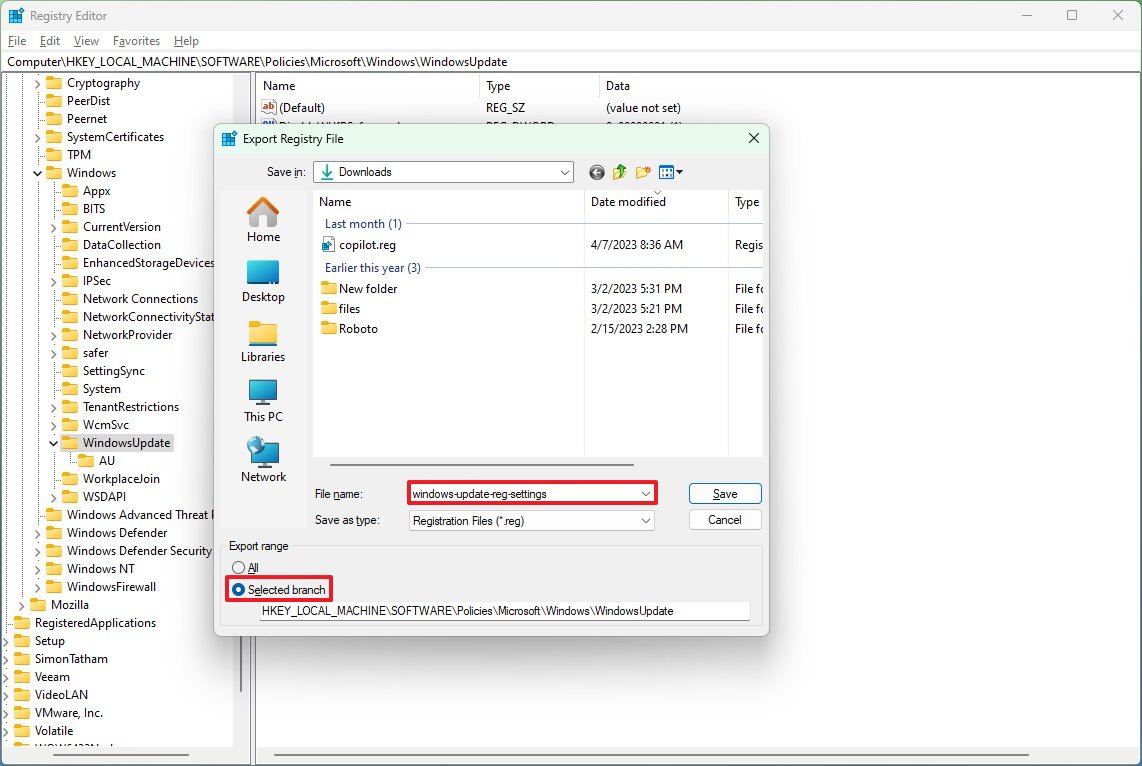
- Select the location to back up the key.
- Confirm a descriptive name for the ".reg" backup file.
- Choose the Selected branch option.
- Click the Save button.
Once you complete the steps, the settings will be exported into a ".reg" file, which you can use to undo changes or replicate the same configuration on another computer.
How to restore specific Registry keys on Windows 11
To restore Registry keys from a backup file, use these steps:
All the latest news, reviews, and guides for Windows and Xbox diehards.
- Open Start.
- Search for Registry Editor, right-click the top result, and click the top result to open the app.
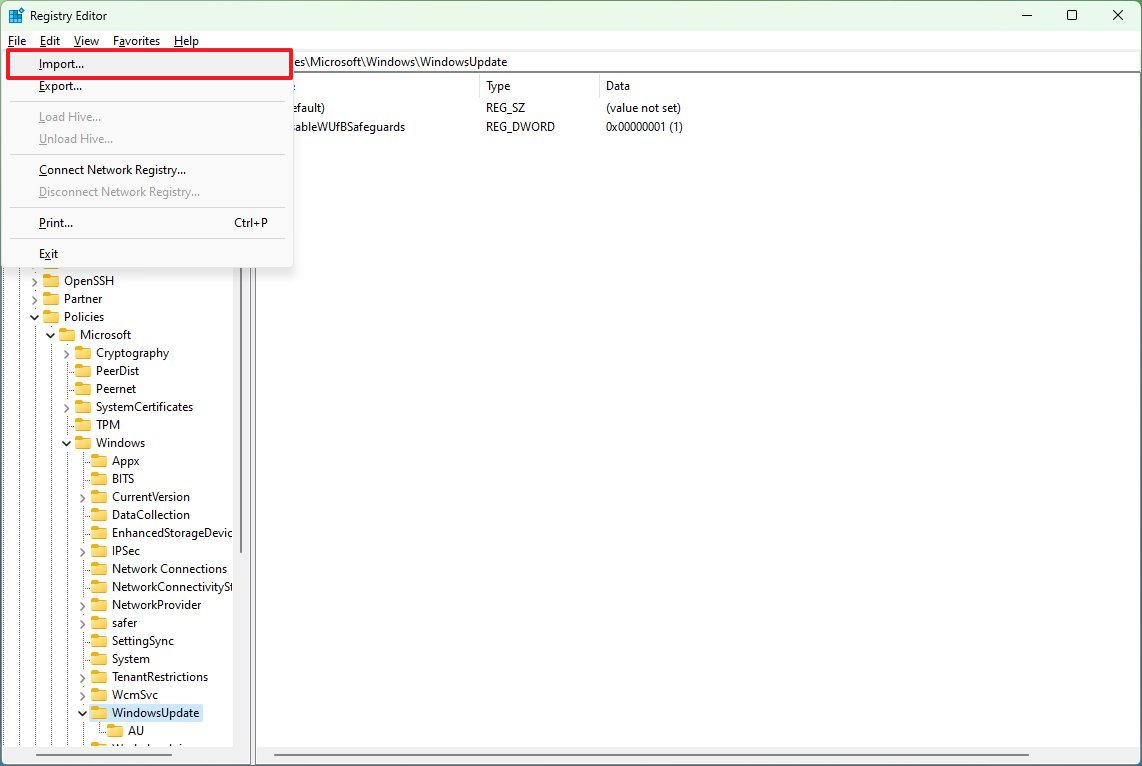
- Click the File menu and choose the Import option.
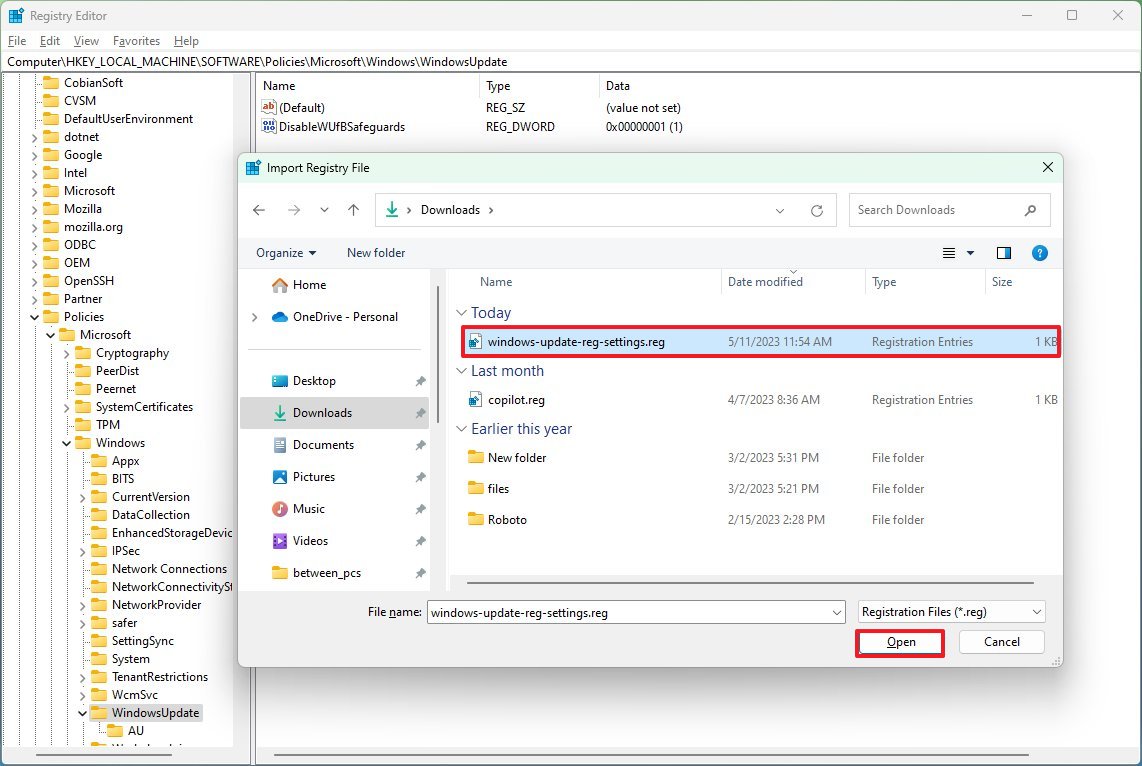
- Browse to the location where you have stored the Registry backup.
- Choose the ".reg" file.
- Click the Open button.
- Click the OK button.
After you complete the steps, the contents of the file will merge into the database. Usually, the Registry changes will apply immediately, but in some cases, you may need to restart the computer.
Although the import process can help you restore previous settings, this option won't change any additional settings you may have configured after exporting the keys into the ".reg" file.
In other words, if you created a backup of a specific DWORD key and added another DWORD or String to the Registry, the import process will only affect the settings you exported in the backup. If you also have to remove other settings, you will have to select and delete each of the keys individually.
More resources
For more helpful articles, coverage, and answers to common questions about Windows 10 and Windows 11, visit the following resources:
- Windows 11 on Windows Central — All you need to know
- Windows 10 on Windows Central — All you need to know

Mauro Huculak has been a Windows How-To Expert contributor for WindowsCentral.com for nearly a decade and has over 22 years of combined experience in IT and technical writing. He holds various professional certifications from Microsoft, Cisco, VMware, and CompTIA and has been recognized as a Microsoft MVP for many years.
