How to find computer model number on Windows 11
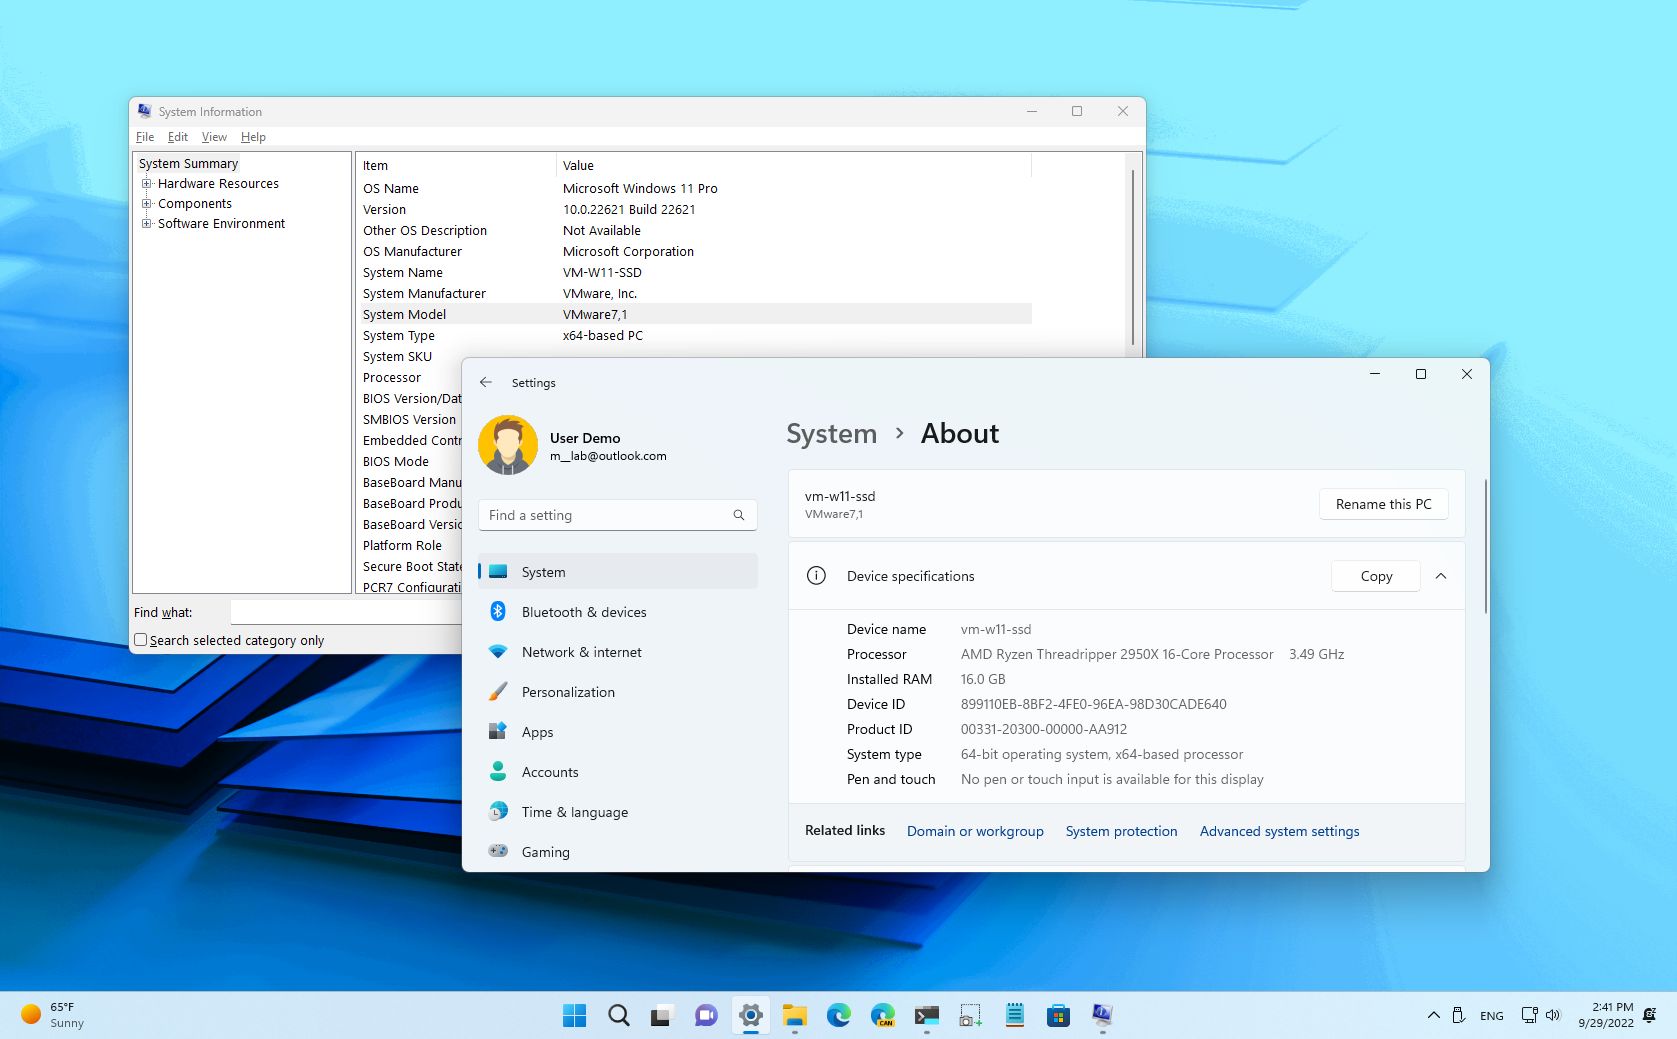
Here are four methods to determine your computer's model number on Windows 11.
All the latest news, reviews, and guides for Windows and Xbox diehards.
You are now subscribed
Your newsletter sign-up was successful
On Windows 11, the ability to determine the device model number can help you in many scenarios. For example, the information can help you find the correct drivers or parts to replace or upgrade a specific hardware component (such as display, battery, memory, hard drive, etc.). Or you may need this information when contacting technical support to troubleshoot a particular problem.
If you need to know your laptop or desktop computer model number, Windows 11 includes at least four ways to find this information with the Setting app and System Information app or using PowerShell and Command Prompt commands.
This guide will walk you through the different ways to check the model number of your computer from any manufacturer.
How to check PC model number from Settings
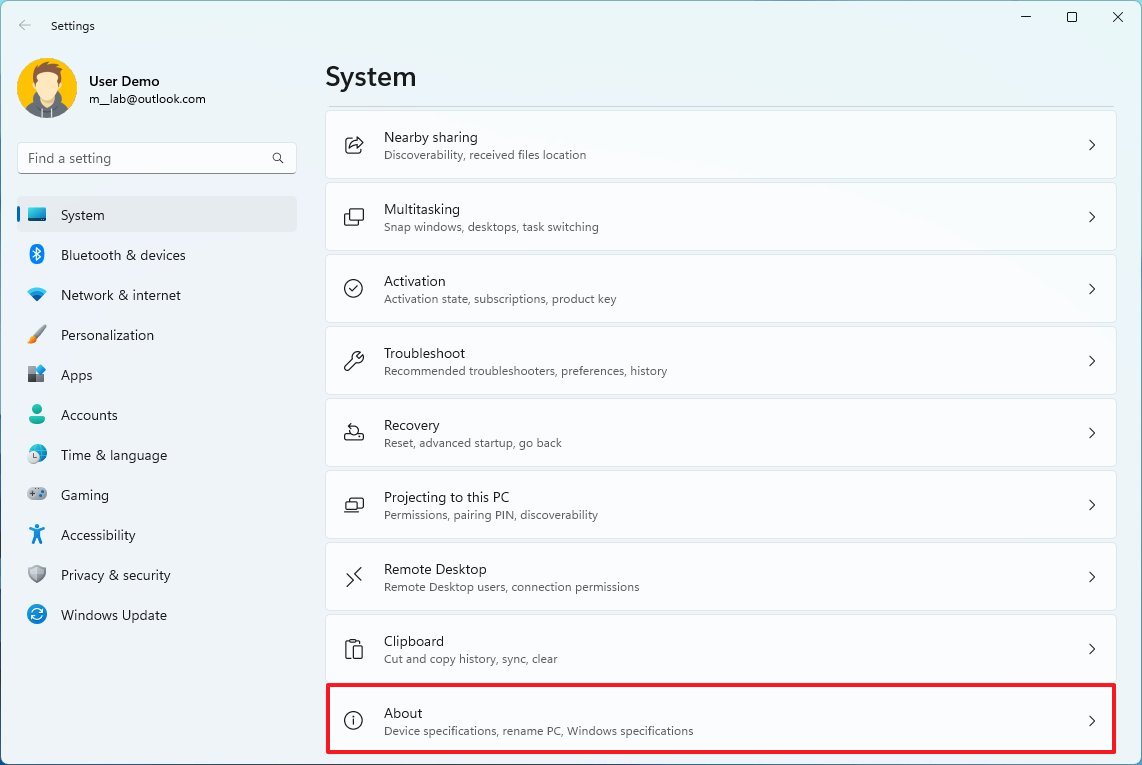
To check the model number with the Settings app, use these steps:
- Open Settings.
- Click on System.
- Click the About page on the right side.
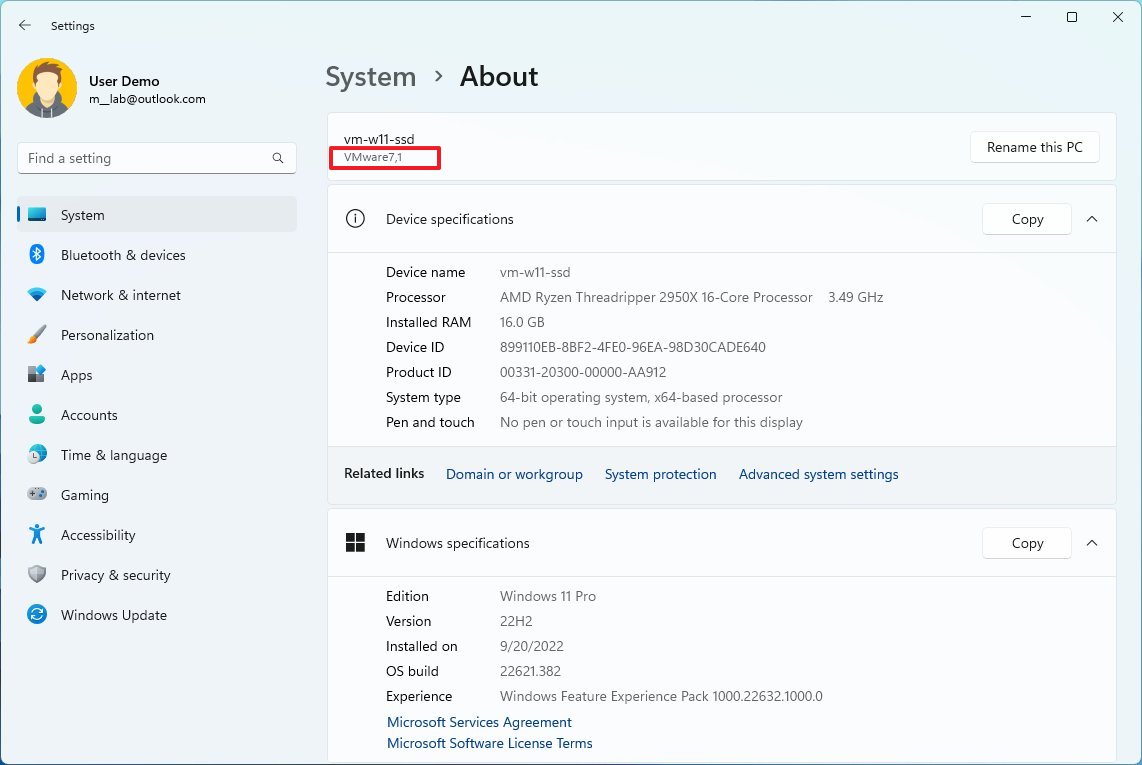
- Under the computer name, confirm the model number.
Once you complete the steps, the model number will be displayed. You can use the other methods outlined below if the information isn't available.
How to check PC model number from System Information
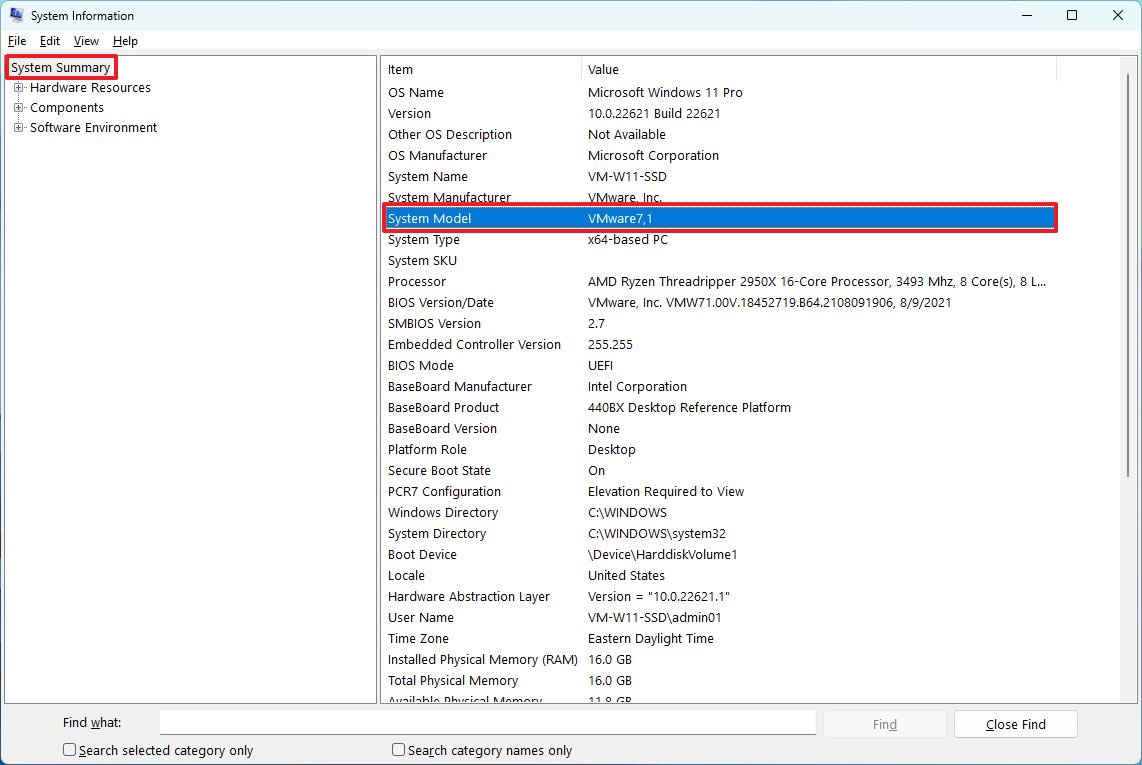
To find the computer model number with System Information on Windows 11, use these steps:
- Open Start.
- Search for System Information and click the top result to open the app.
- Click on System Summary.
- Confirm the model number of your device under the "System Model" field.
After you complete the steps, you will now have the model information of your computer.
All the latest news, reviews, and guides for Windows and Xbox diehards.
How to check PC model number from PowerShell
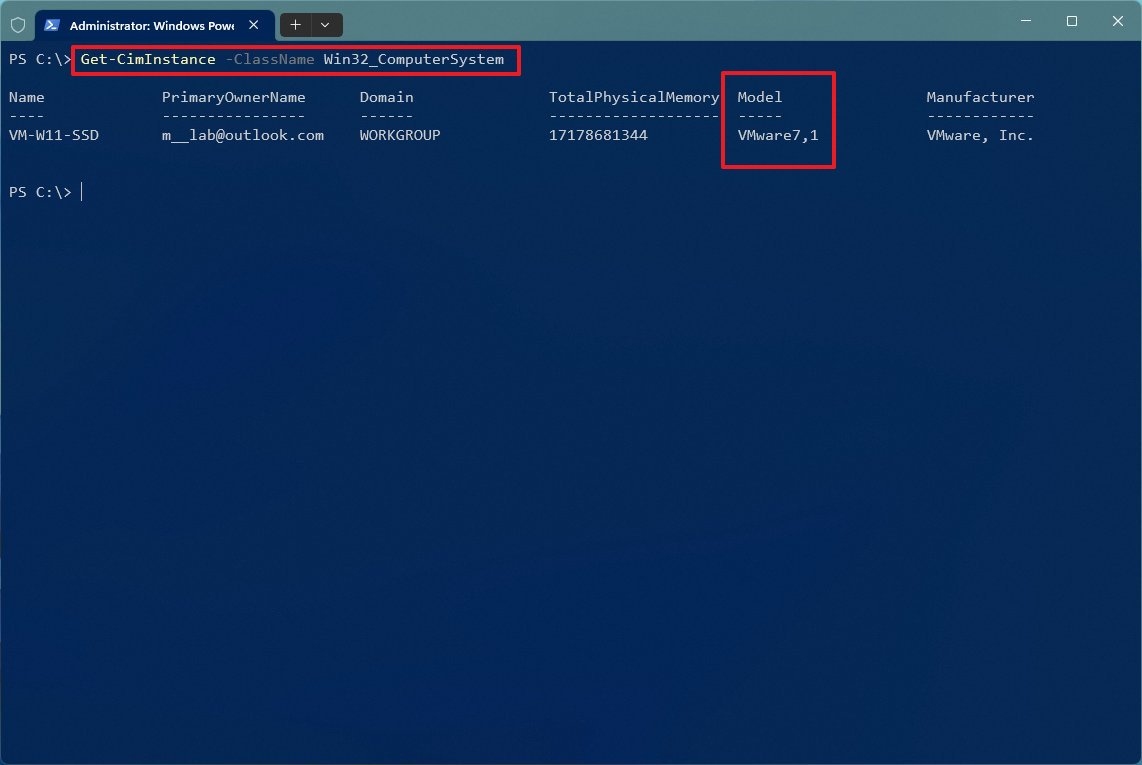
To determine your computer model number with PowerShell, use these steps:
- Open Start.
- Search for PowerShell and click the top result to open the console.
- Type the following command to check the model and the serial number of the device and press Enter: Get-CimInstance -ClassName Win32_ComputerSystem
- Confirm the computer model number.
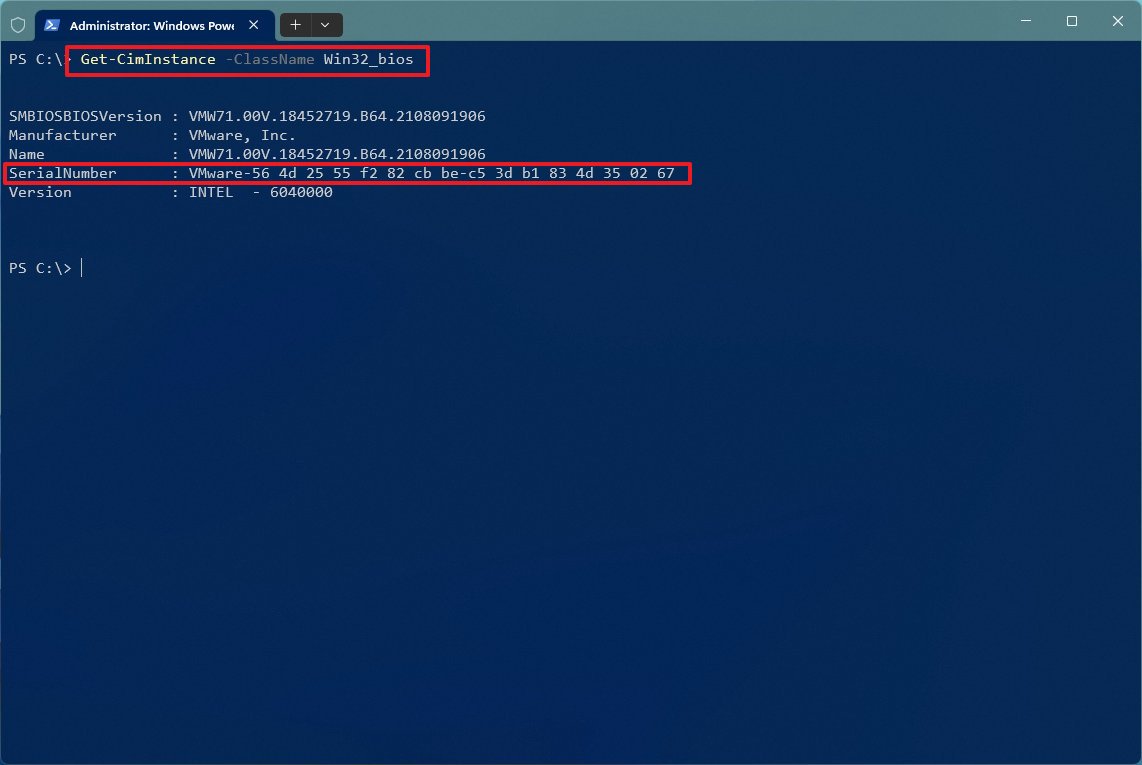
- (Optional) Type the following command to check the serial number and press Enter: Get-CimInstance -ClassName Win32_bios
- Confirm the model and the serial number of your laptop or desktop computer.
Once you complete the steps, PowerShell will return the model and the serial number for the device.
How to check PC model number from Command Prompt
To find the device model number with Command Prompt on Windows 11, use these steps:
- Open Start.
- Search for Command Prompt and click the top result to open the app.
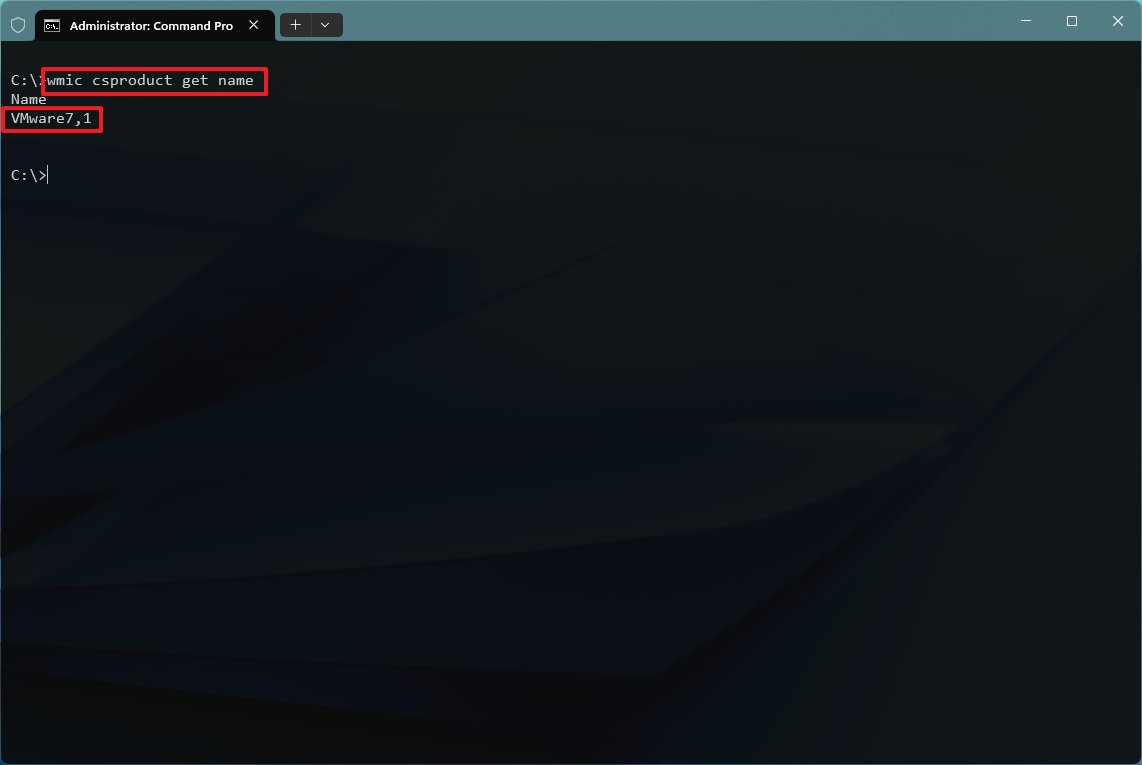
- Type the following command to find out the computer model and press Enter: wmic csproduct get name
- Confirm the device model number.
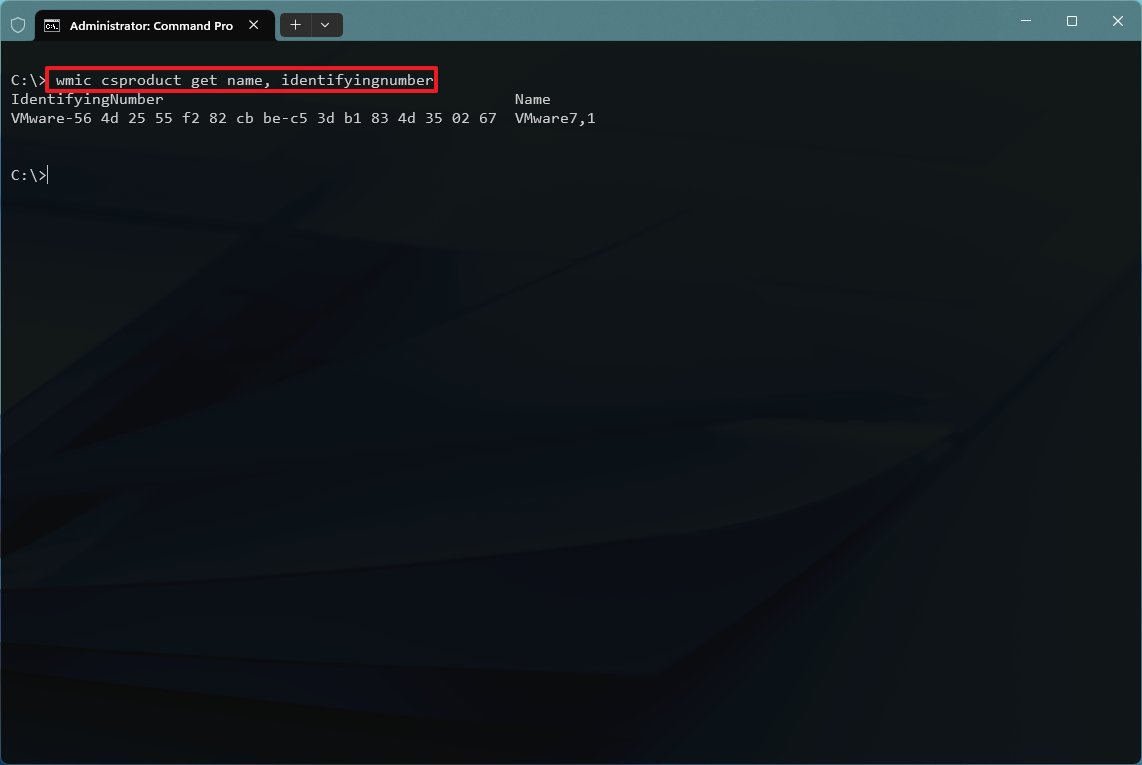
- (Optional) Type the following command to view the model and serial number and press Enter: wmic csproduct get name, identifyingnumber
- Confirm the device model and serial number.
After completing the steps, the command will display the computer's model and serial numbers.
More resources
For more helpful articles, coverage, and answers to common questions about Windows 10 and Windows 11, visit the following resources:

Mauro Huculak has been a Windows How-To Expert contributor for WindowsCentral.com for nearly a decade and has over 22 years of combined experience in IT and technical writing. He holds various professional certifications from Microsoft, Cisco, VMware, and CompTIA and has been recognized as a Microsoft MVP for many years.
