How to force quit processes consuming resources with Task Manager on Windows 11
When an app stops responding, or the computer seems slow, use the Task Manager to terminate the process.
All the latest news, reviews, and guides for Windows and Xbox diehards.
You are now subscribed
Your newsletter sign-up was successful
On Windows 11, when one or multiple processes are misbehaving and taking over the system resources making your computer sluggish, or freezing a particular app, you can use the Task Manager to terminate them and resolve the issue.
The Task Manager is an application that has been around for a long time, and it offers a number of views to monitor applications and services running on your computer. However, the "Processes" tab is the view you will use most of the time since it lets you quickly monitor the systems resources (processor, memory, drive, and network) usage for each application and service and terminate (or restart) those causing problems as necessary.
This how-to guide will walk you through the steps to find and kill high-resource utilization processes on Windows 11 using the Task Manager.
How to control processes hogging resources with Task Manager
The process of dealing with processes consumption is straightforward. You only need to know how to get to Task Manager and know the process to terminate.
Open Task Manager
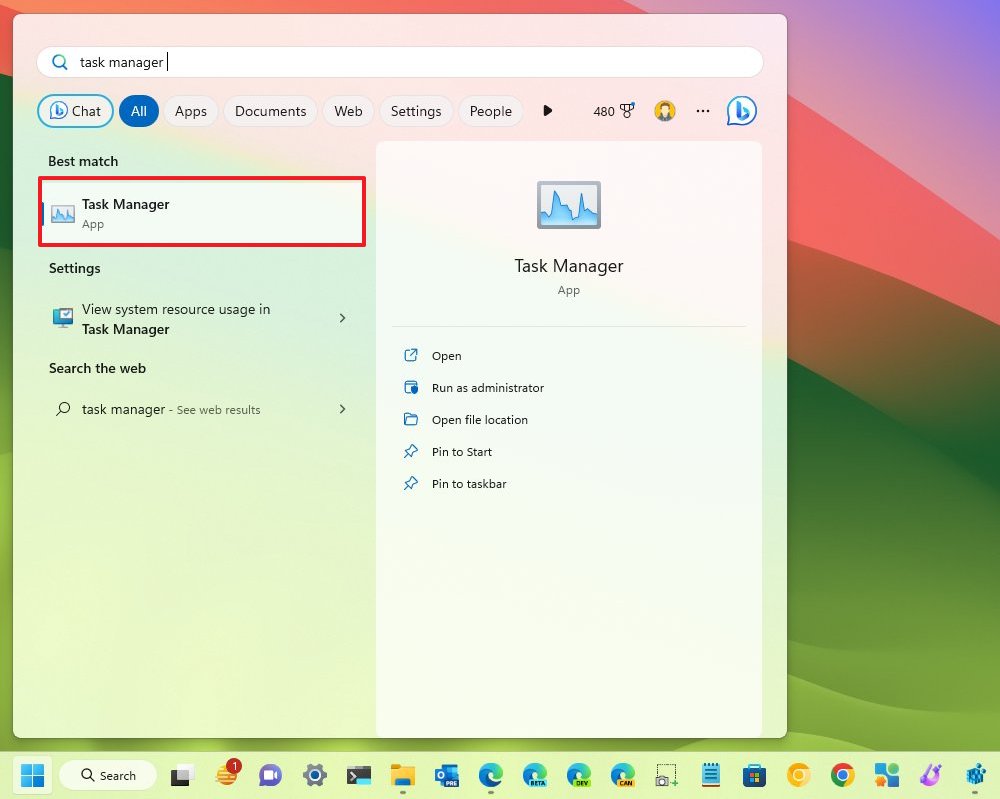
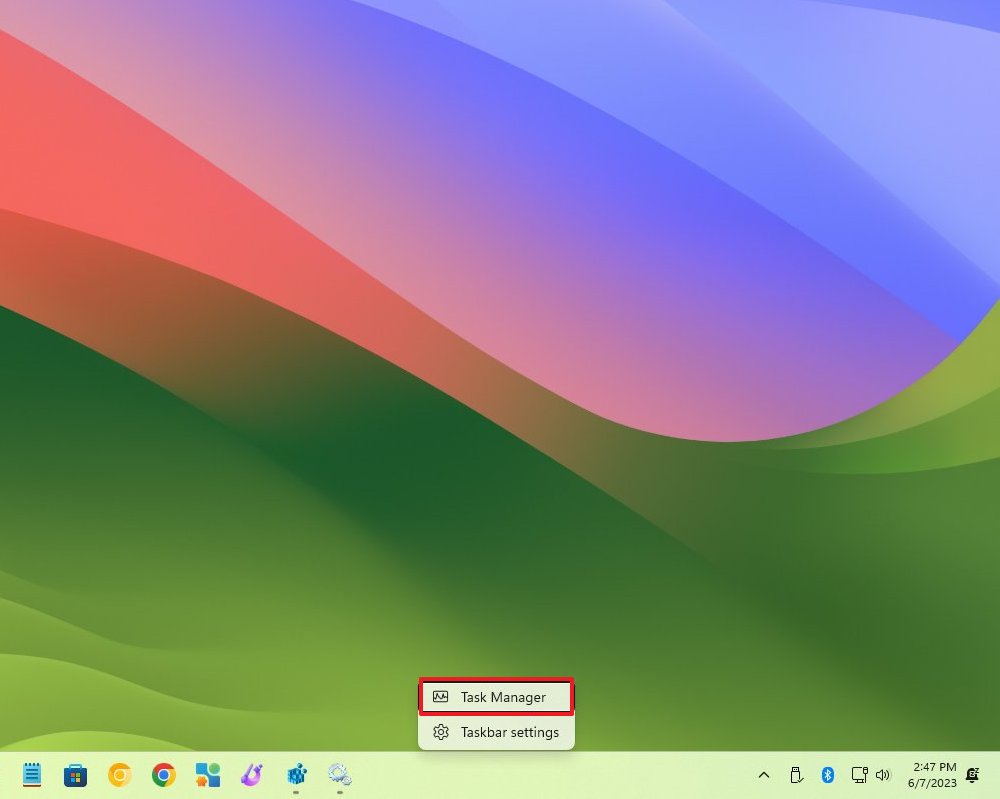
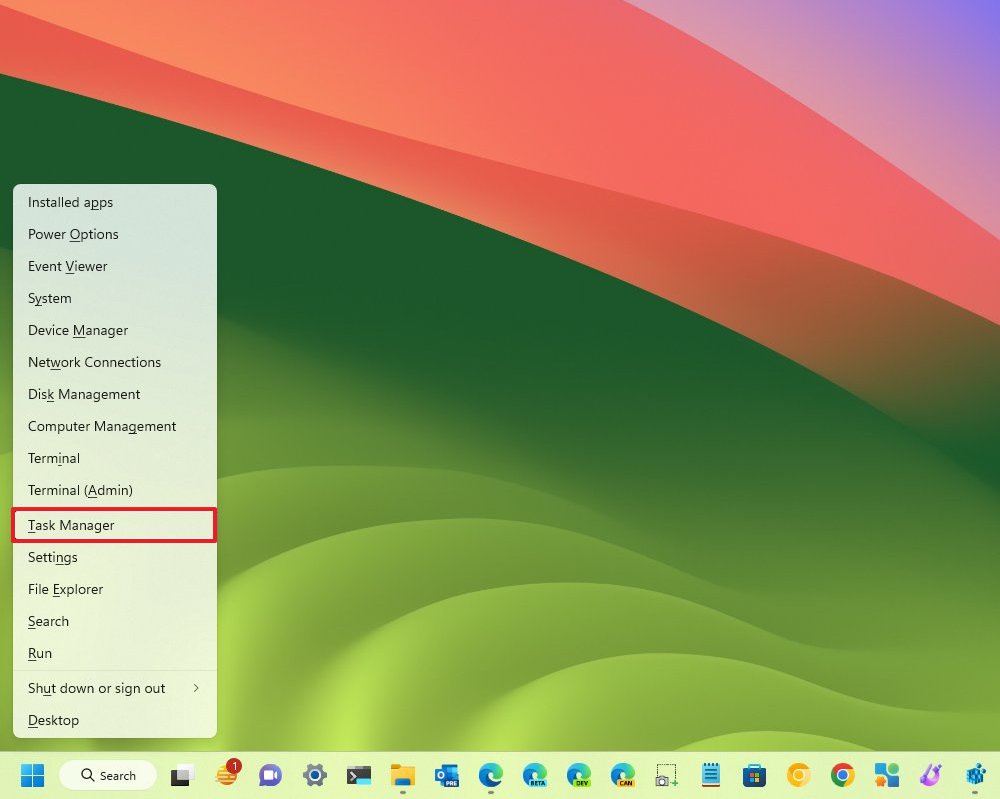
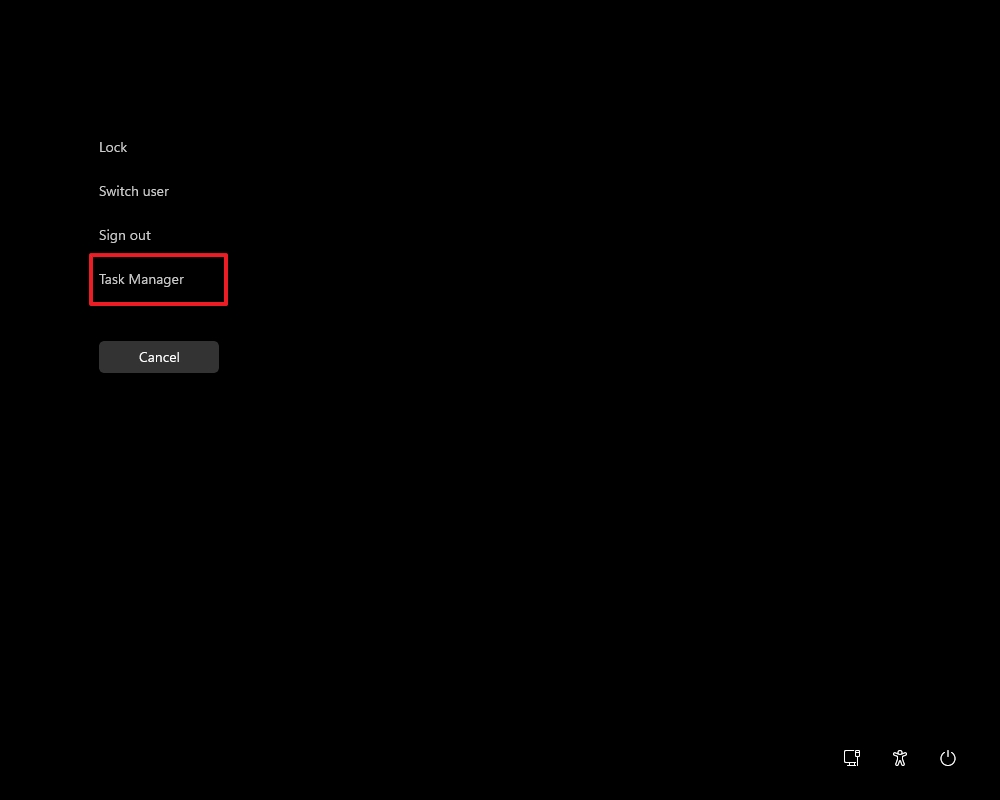
You can open the Task Manager in at least five ways:
- Open "Start," search for "Task Manager," and choose the app from the results.
- Right-click the "Taskbar" and select the "Task Manager" option from the context menu.
- Right-click the "Start" button (or use the "Windows key + X" keyboard shortcut) and choose the "Task Manager" option.
- Use the "Ctrl + Shift + Esc" keyboard shortcut.
- Use the "Ctrl + Alt + Del" keyboard shortcut and click the "Task Manager" option.
Processes tab explained
All the latest news, reviews, and guides for Windows and Xbox diehards.
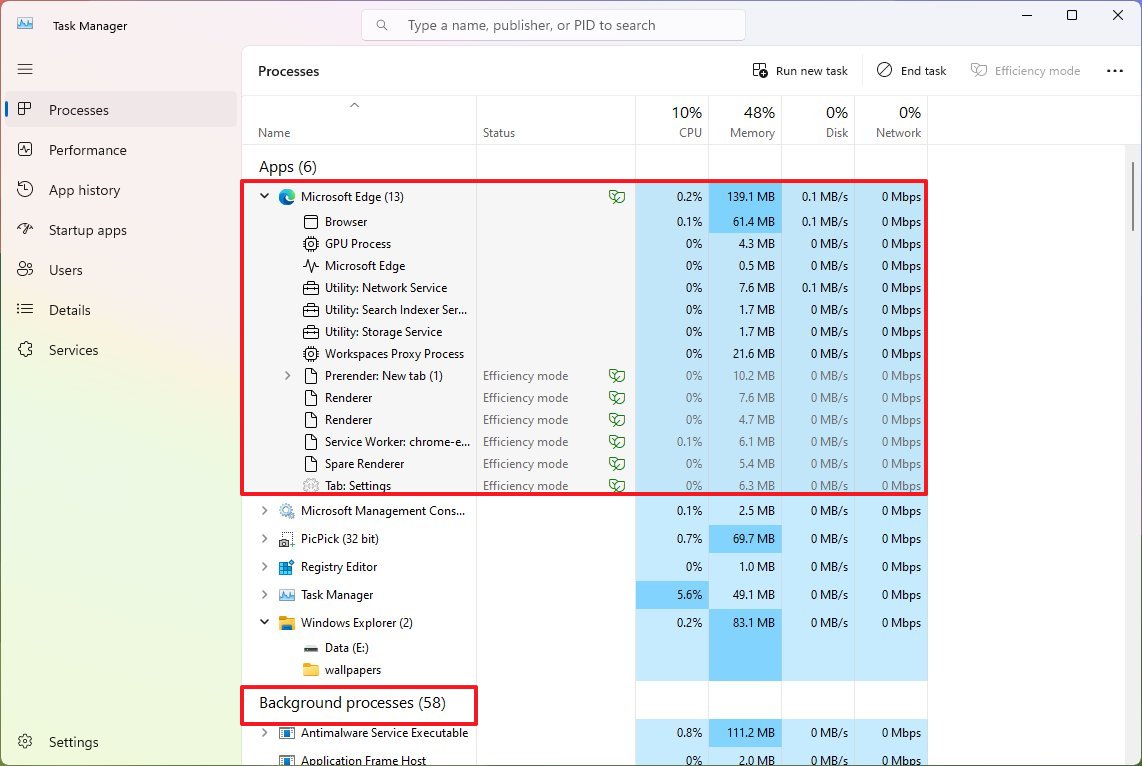
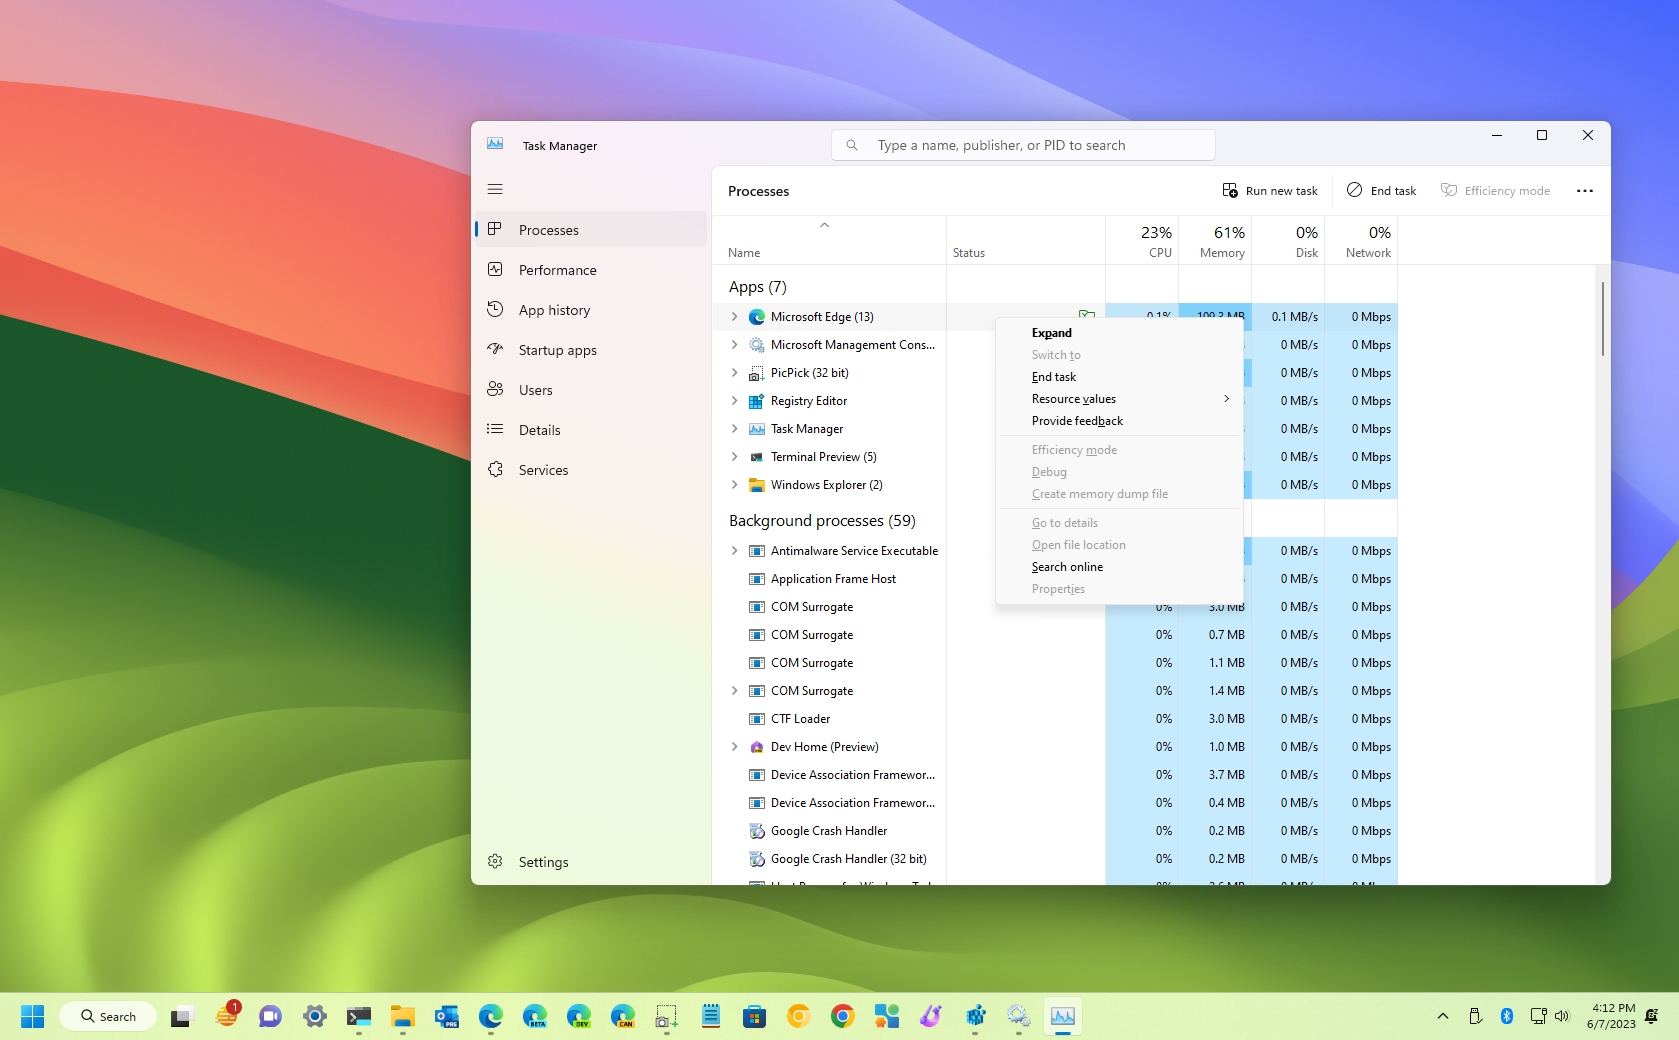
Once inside the Task Manager, you will find a navigation pane with several tabs, but the location of interest is the "Processes" tab. Usually, this is the first place to check to determine whether one or multiple processes are hogging the system resources.
In this tab, Task Manager lists all the running processes divided by apps, background processes, and Windows processes. Similar to its predecessor, on Windows 11, it's possible to find multiple instances or other processes under the same process to help you understand the organization and how they use the available resources.
You can open the process group by double-clicking, clicking the chevron-right icon, or right-clicking the group and selecting the "Expand" option. Typically, you will find multiple processes when opening multiple instances of an application (but that may not be always the case).
Find high-resources processes
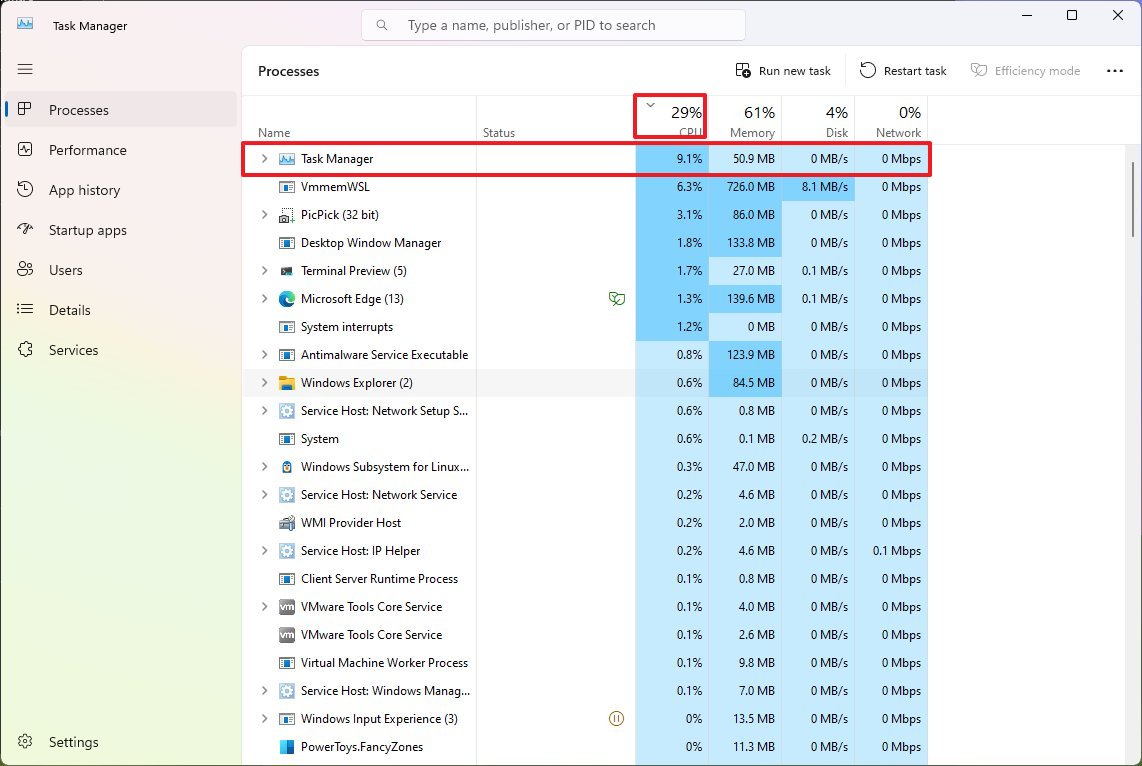
In the case that an app isn't responding, a web page isn't loading, or the system fans are ramping up, open Task Manager's Processes tab and look at the live stats usage for "CPU," "Memory," "Disk," and "Network." You can click the header of each column to identify the processes consuming the most resources. If you see a process using sixty percent or more, then that's an indication of the issue.
Task Manager, to make things even easier, uses a bolder color to highlight the process that uses the most resources.
Usually, if you're not actively using the device and the system isn't running maintenance tasks, the processor shouldn't spike over thirty percent.
Running apps (even if you're not using them) and processes will still consume some memory, and the usage will increase as you load more apps. Unless the computer runs out of memory, this won't become an issue, and even so, after the memory runs out, the system will start using its virtual memory as an overflow. It'll slow down the performance, but the system won't crash.
Depending on the system configuration, you should keep the memory usage to sixty percent. The drive usage should be around five percent unless you're doing rendering or copying tasks.
Finally, network speeds and connectivity will only slow down tasks that require a local or internet connection, but it won't affect the system's performance. If the problem is related to a streaming application, web app, or downloading a file, the activity in the "Network" column is stuck at zero percent.
Terminate processes
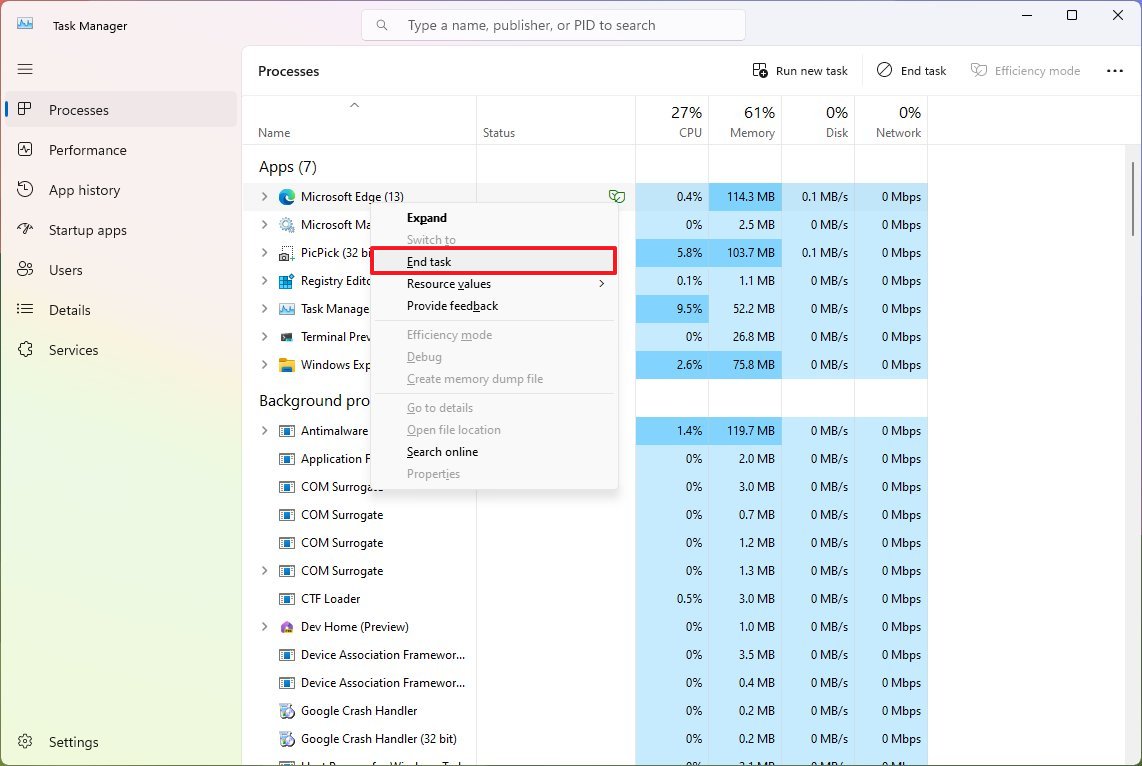
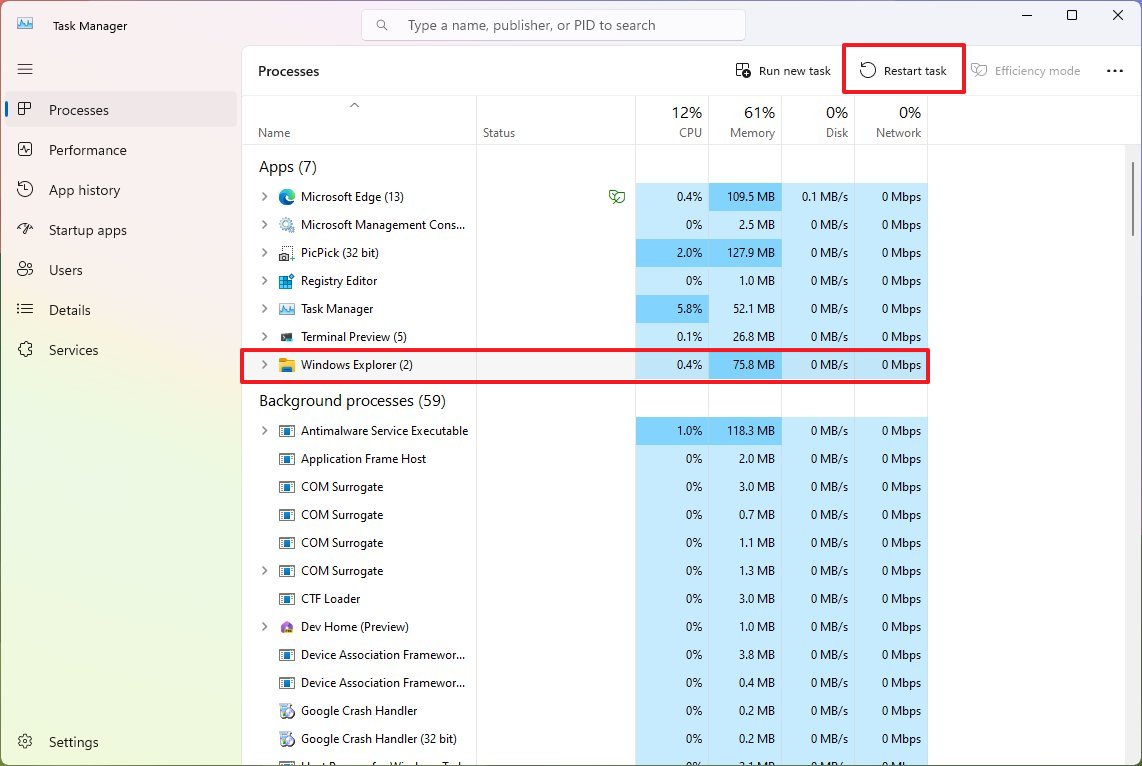
Once the issue hogging the system resources has been identified, you have multiple ways to terminate the process. You can:
Right-click the process and choose the "End task" option.
Or select the process and click the "End task" or "Restart task" button in the top-right corner.
It's important to note that terminating one or a group of processes will crash the application, and in some cases, it can also crash the system. Any unsaved work will be lost. If possible, it's always recommended to save your work before proceeding.
Once you close the processes, you can relaunch the application from the Start menu, and this action should also restart the required processes.
In some cases, you may need to restart the process manually. You can do this by clicking the "Run new task" button in Task Manager, typing the name of the service, and clicking the "OK" button.
If you are not clear on the process that you're about to terminate, right-click it and choose the "Search online" option to open the web browser with results that can help you understand the process. You can also use AI with Bing Chat or Google Bard to get more details about the process. Also, the system can inform you of certain processes essential for the operating system to run correctly.
More resources
For more helpful articles, coverage, and answers to common questions about Windows 10 and Windows 11, visit the following resources:
- Windows 11 on Windows Central — All you need to know
- Windows 10 on Windows Central — All you need to know

Mauro Huculak has been a Windows How-To Expert contributor for WindowsCentral.com for nearly a decade and has over 22 years of combined experience in IT and technical writing. He holds various professional certifications from Microsoft, Cisco, VMware, and CompTIA and has been recognized as a Microsoft MVP for many years.
