How to change sign-in account name on Windows 10
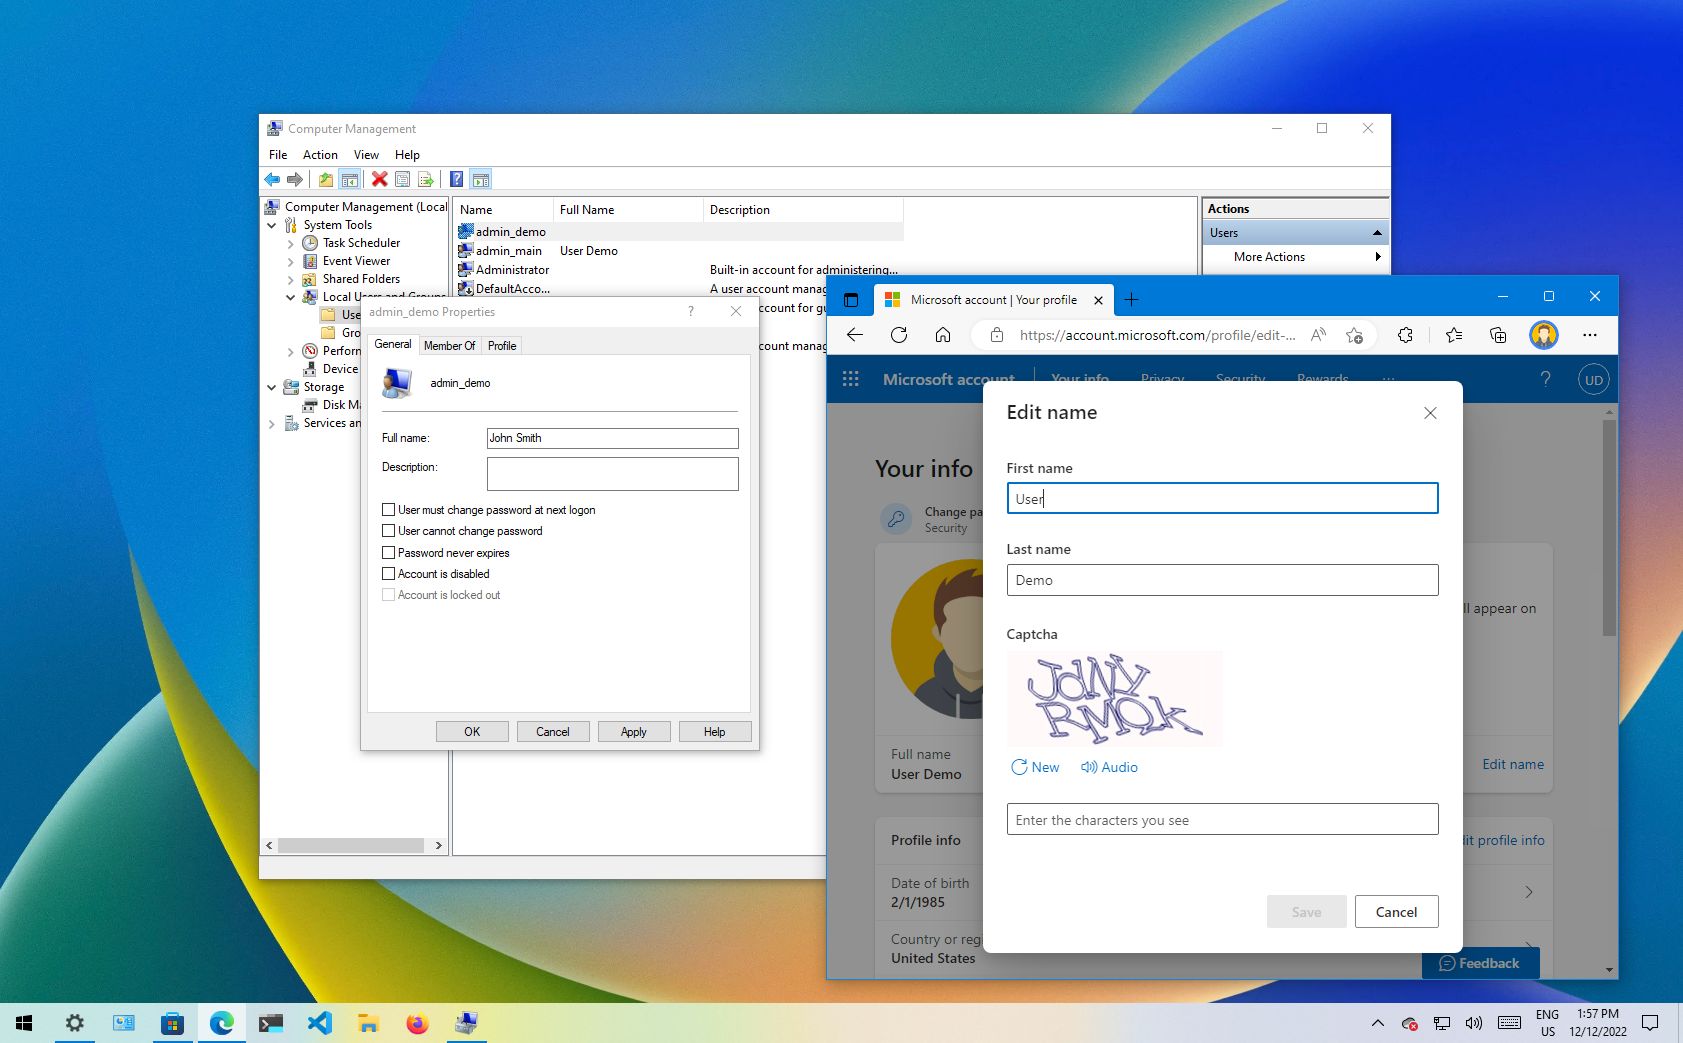
If you want to change your Windows 10 account name, we'll show you how.
All the latest news, reviews, and guides for Windows and Xbox diehards.
You are now subscribed
Your newsletter sign-up was successful
On Windows 10, you can change the account name for many reasons, including because you may need to update your personal information if you recently changed your name. The computer has a local account, and you prefer showing the actual name instead of the nickname. Or you want to update the name to make it a little more private.
Regardless of the reason, Windows 10 includes different ways to change the name on the Sign-in screen and across the desktop, but it is not a straightforward process. Depending on the account type, the instructions will be entirely different.
This guide will walk you through the steps to change the account name on the Sign-in screen for a local or Microsoft account on Windows 10.
How to change account name with Settings on Windows 10
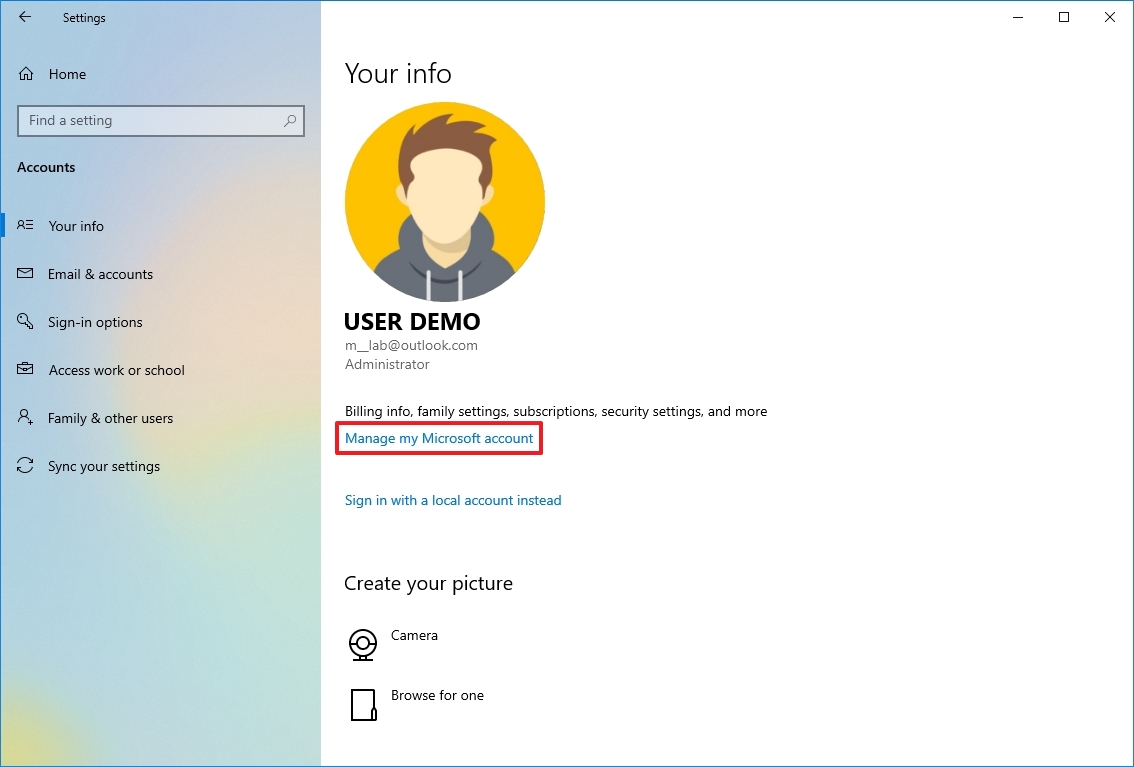
Windows 10 displays the account name from your cloud account when the computer is configured with a Microsoft account. As a result, you must change the settings online if you want to change the account name.
To change the name of the account on Windows 10, use these steps:
- Open Settings.
- Click on Accounts.
- Click on Your info.
- Click the "Manage my Microsoft account" option.
- Quick tip: You can always access your account settings online on this Microsoft page.
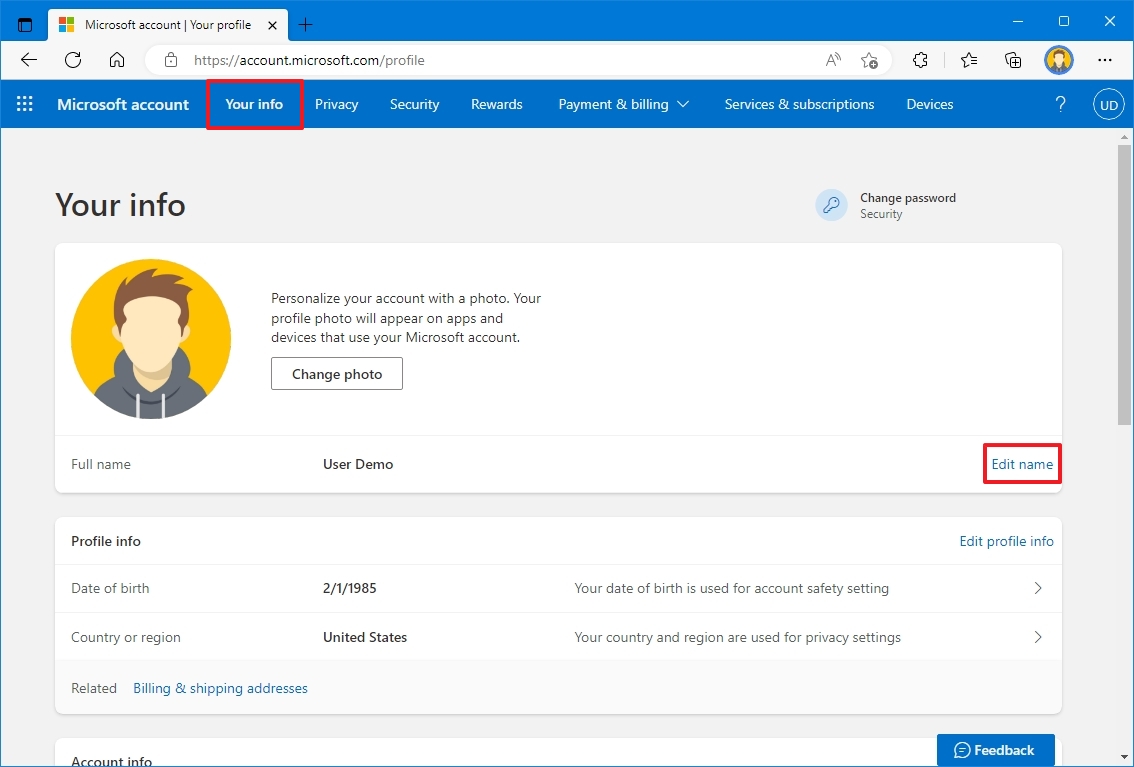
- Sign in with your credentials (if applicable).
- Click the Your Info tab.
- Under the current name of the account, click the Edit name option.
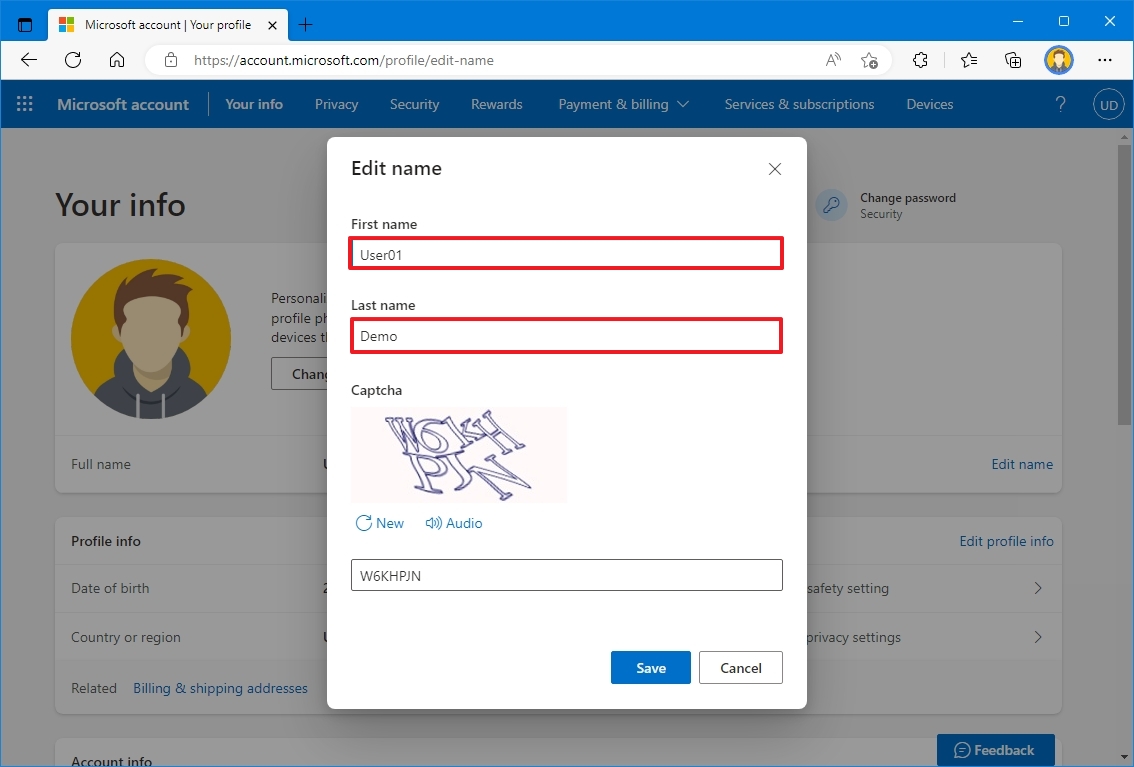
- Change the new account name as necessary.
- Quick tip: To make your information more private, you can use the first six letters of your name and the first two letters of your last name (often known as "six-by-two" by administrators).
- Confirm the challenge to verify that a robot is not making the changes in the account.
- Click the Save button.
- Restart the computer.
Once you complete the steps, the Sign-in screen will reflect the new name change but allow some time for the device to sync the latest information.
While changing the account name is a straightforward process, renaming the account online also changes the first and last name of any services connected to your account, including Xbox Live, Outlook, OneDrive, Microsoft 365, and others.
All the latest news, reviews, and guides for Windows and Xbox diehards.
How to change account name using Control Panel on Windows 10
When using a local account on Windows 10, you have several ways to modify the account's name through Control Panel.
Change account name with User Accounts
To change the account name using the User Accounts settings on Windows 10, use these steps:
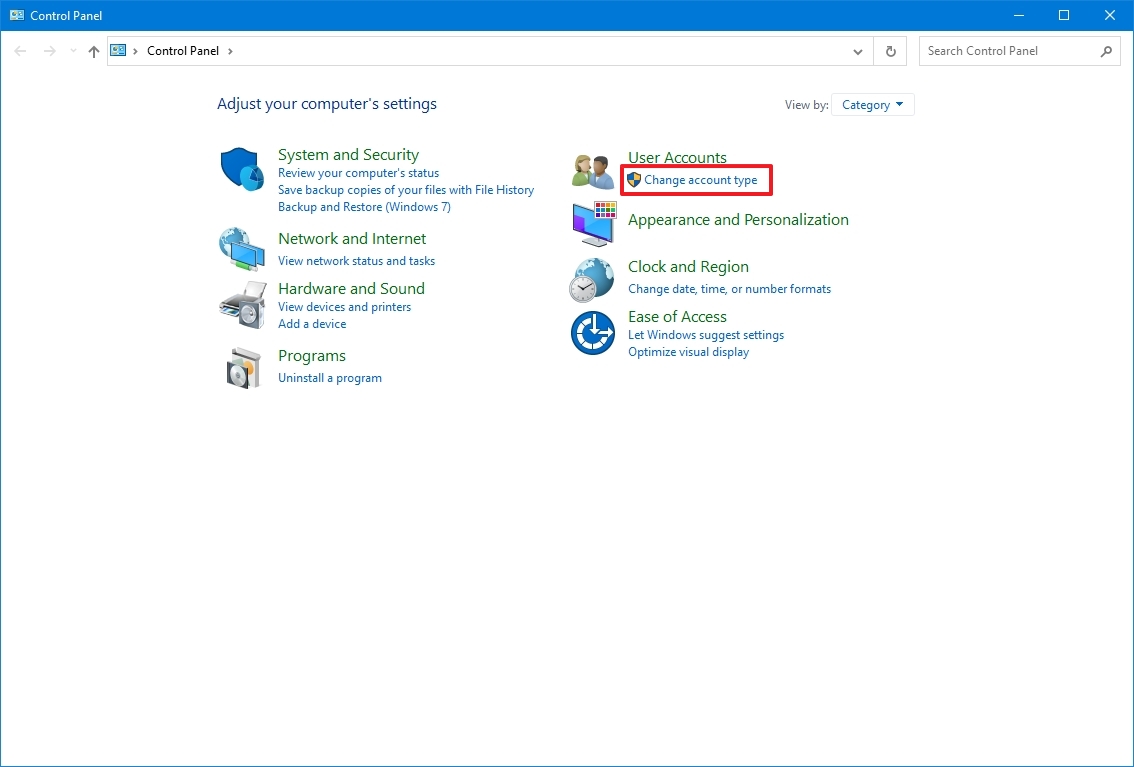
- Open Control Panel.
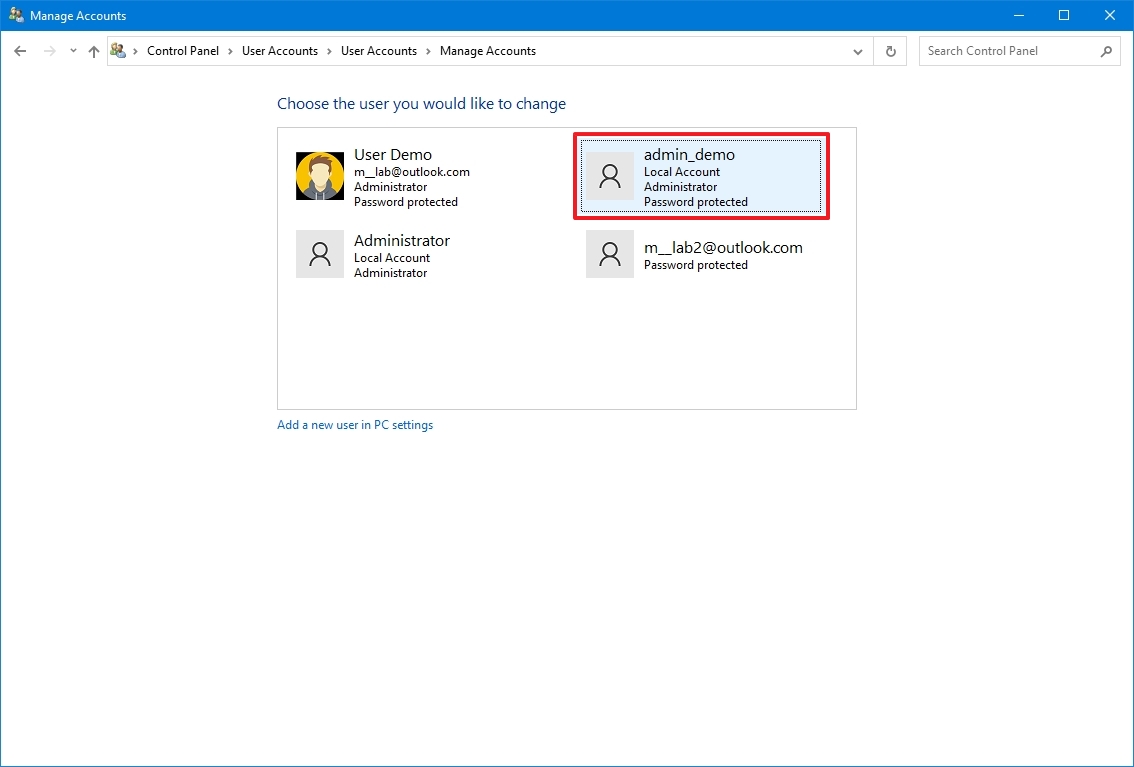
- Under the "User Accounts" section, click the "Change account type" option.
- Select the local account to change its name.
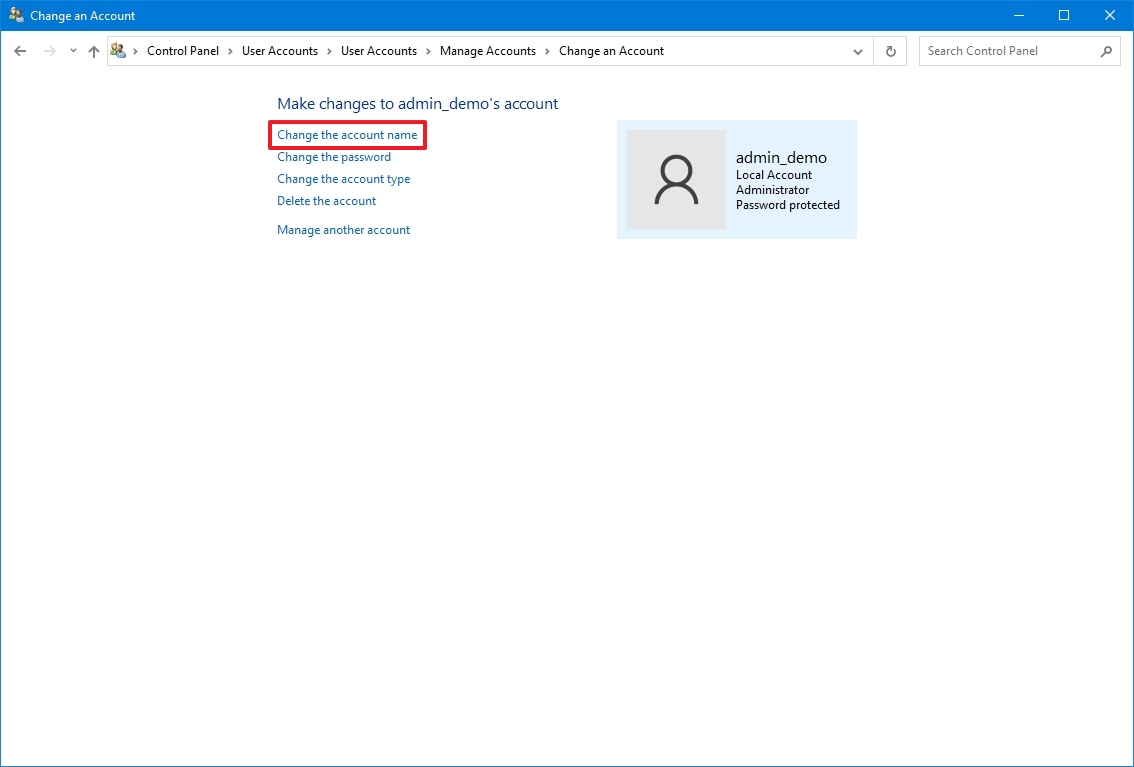
- Click the "Change the account name" option.
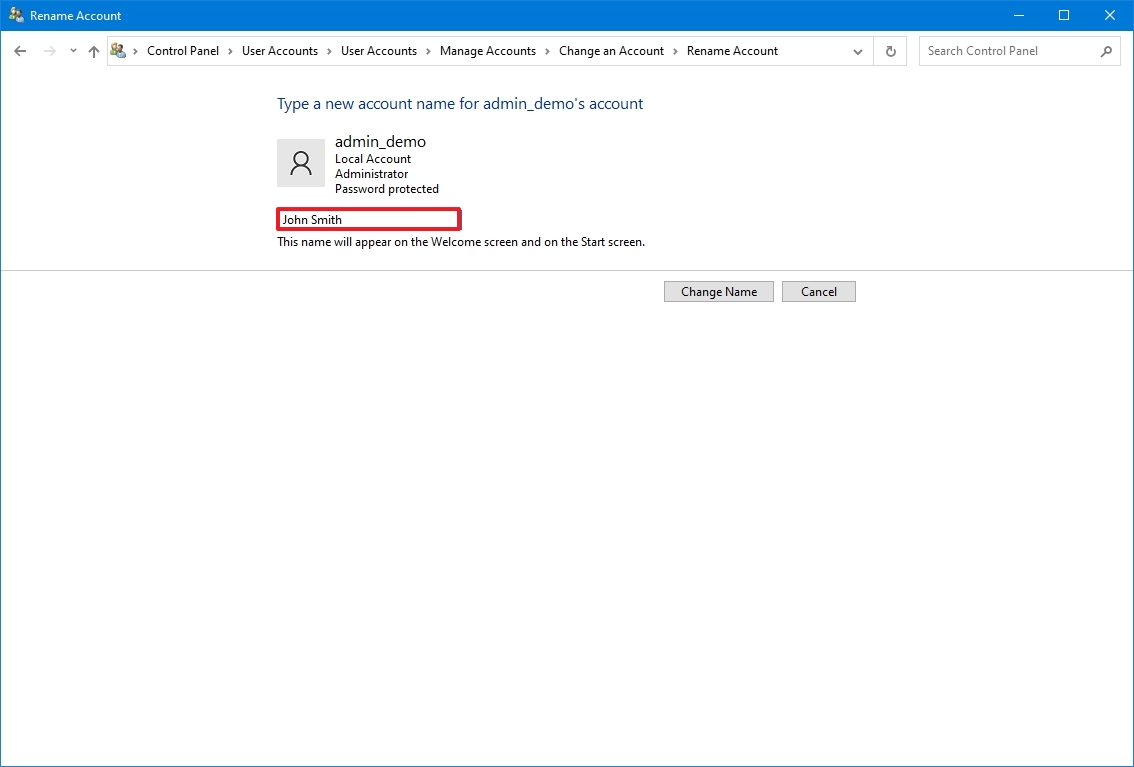
- Confirm the new account name for the Sign-in screen.
- Click the Change Name button.
After completing the steps, sign out of the current session, and the Sign-in screen should display the new name.
Change account name with netplwiz
You can also use the legacy account management tool (netplwiz) to complete the same task on your computer.
To update the account name with netplwiz, use these steps:
- Open Start.
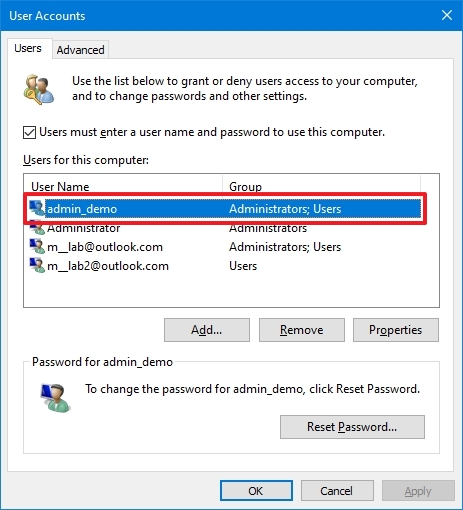
- Search for netplwiz and click the top result to open the legacy account management tool.
- Click the Users tab.
- Select the account to change its name.
- Click the Properties button.
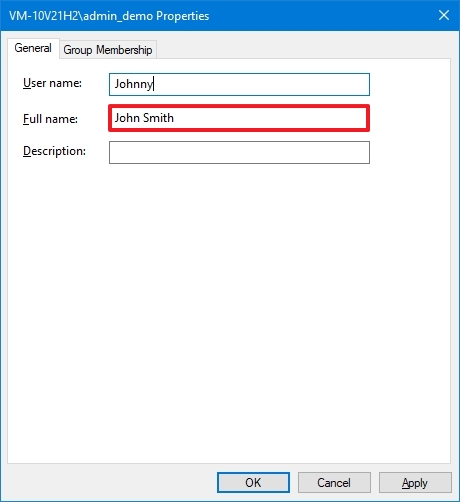
- (Optional) Update the "User name" field to change the account nickname.
- Confirm the new name in the "Full Name" field — for example, "John Smith."
- Quick tip: If you want to display a nickname instead of your real name, leave the "Full Name" field empty.
- Click the Apply button.
- Click the OK button.
- Click the OK button again.
Once you complete the steps, sign out, and the Sign-in screen will show the name in the "Full Name" field.
With the legacy tool, you can also edit the accounts linked to a Microsoft account. However, the cloud settings will overwrite the information again, thus making this option only available for local profiles.
Change account name with Computer Management
To use a different name on your Windows 10 account, use these steps:
- Open Start.
- Search for Computer Management and click the top result to open the app.
- Double-click to expand the System Tools branch.
- Double-click the Local Users and Groups branch.
- Click on Users.
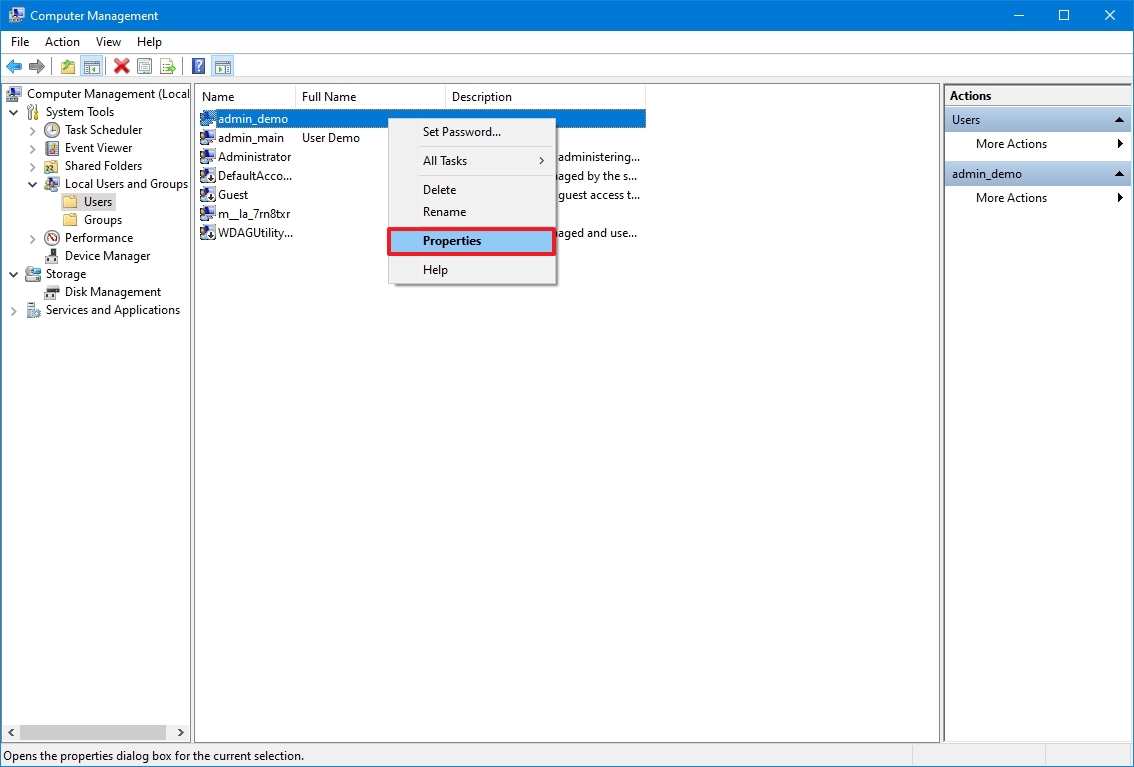
- Right-click the account to edit and select the Properties option.
- Quick tip: You can use the Rename option to change the profile nickname from the context menu.
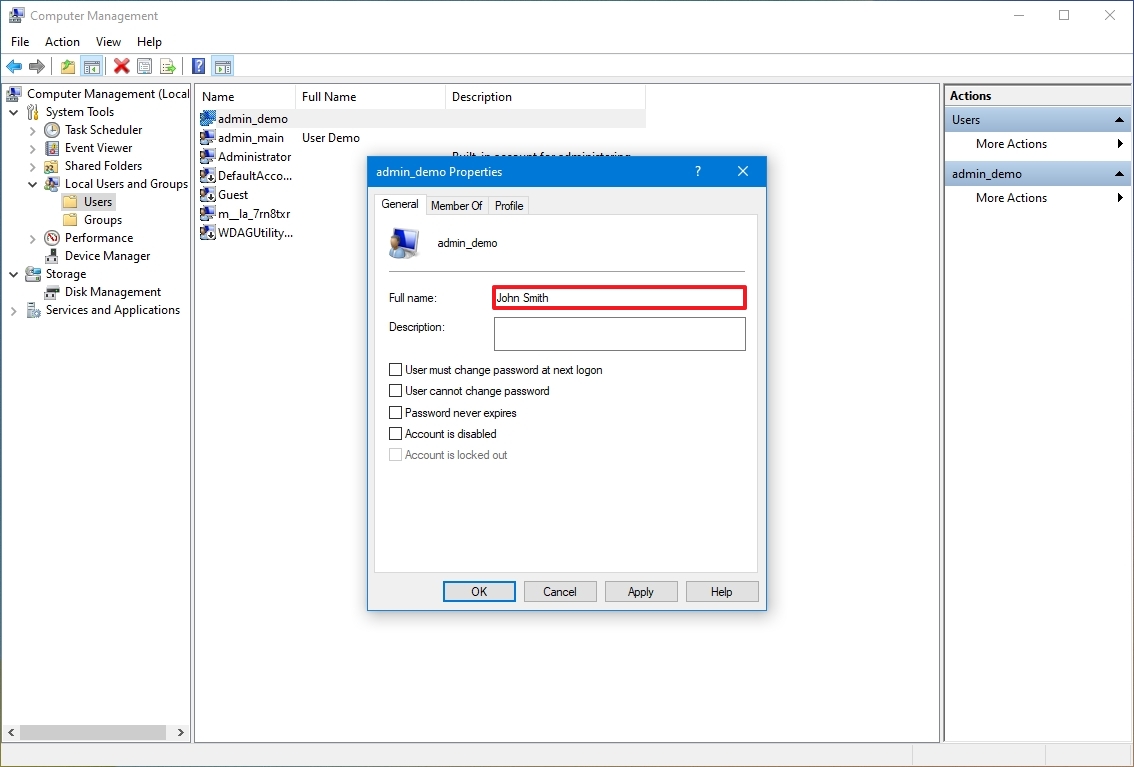
- Click the General tab.
- In the "Full name" field, confirm a new name for the account.
- Click the Apply button.
- Click the OK button.
After you complete the steps, the sign-in screen will show the local account's new name when you sign into the account.
On Windows 10, you have several methods to change the account name, but none of the available options will change the name of the profile folder in the "Users" folder. You might find some workarounds online, but it is not recommended to use those instructions, as you may create other issues.
If you want to rename the account everywhere on Windows 10, you should create a new account with the name you wish to use and then transfer all your settings and files to the newly created account.
More resources
For more helpful articles, coverage, and answers to common questions about Windows 10 and Windows 11, visit the following resources:
- Windows 11 on Windows Central — All you need to know
- Windows 10 on Windows Central — All you need to know

Mauro Huculak has been a Windows How-To Expert contributor for WindowsCentral.com for nearly a decade and has over 22 years of combined experience in IT and technical writing. He holds various professional certifications from Microsoft, Cisco, VMware, and CompTIA and has been recognized as a Microsoft MVP for many years.
