How to track internet data usage on Windows 11
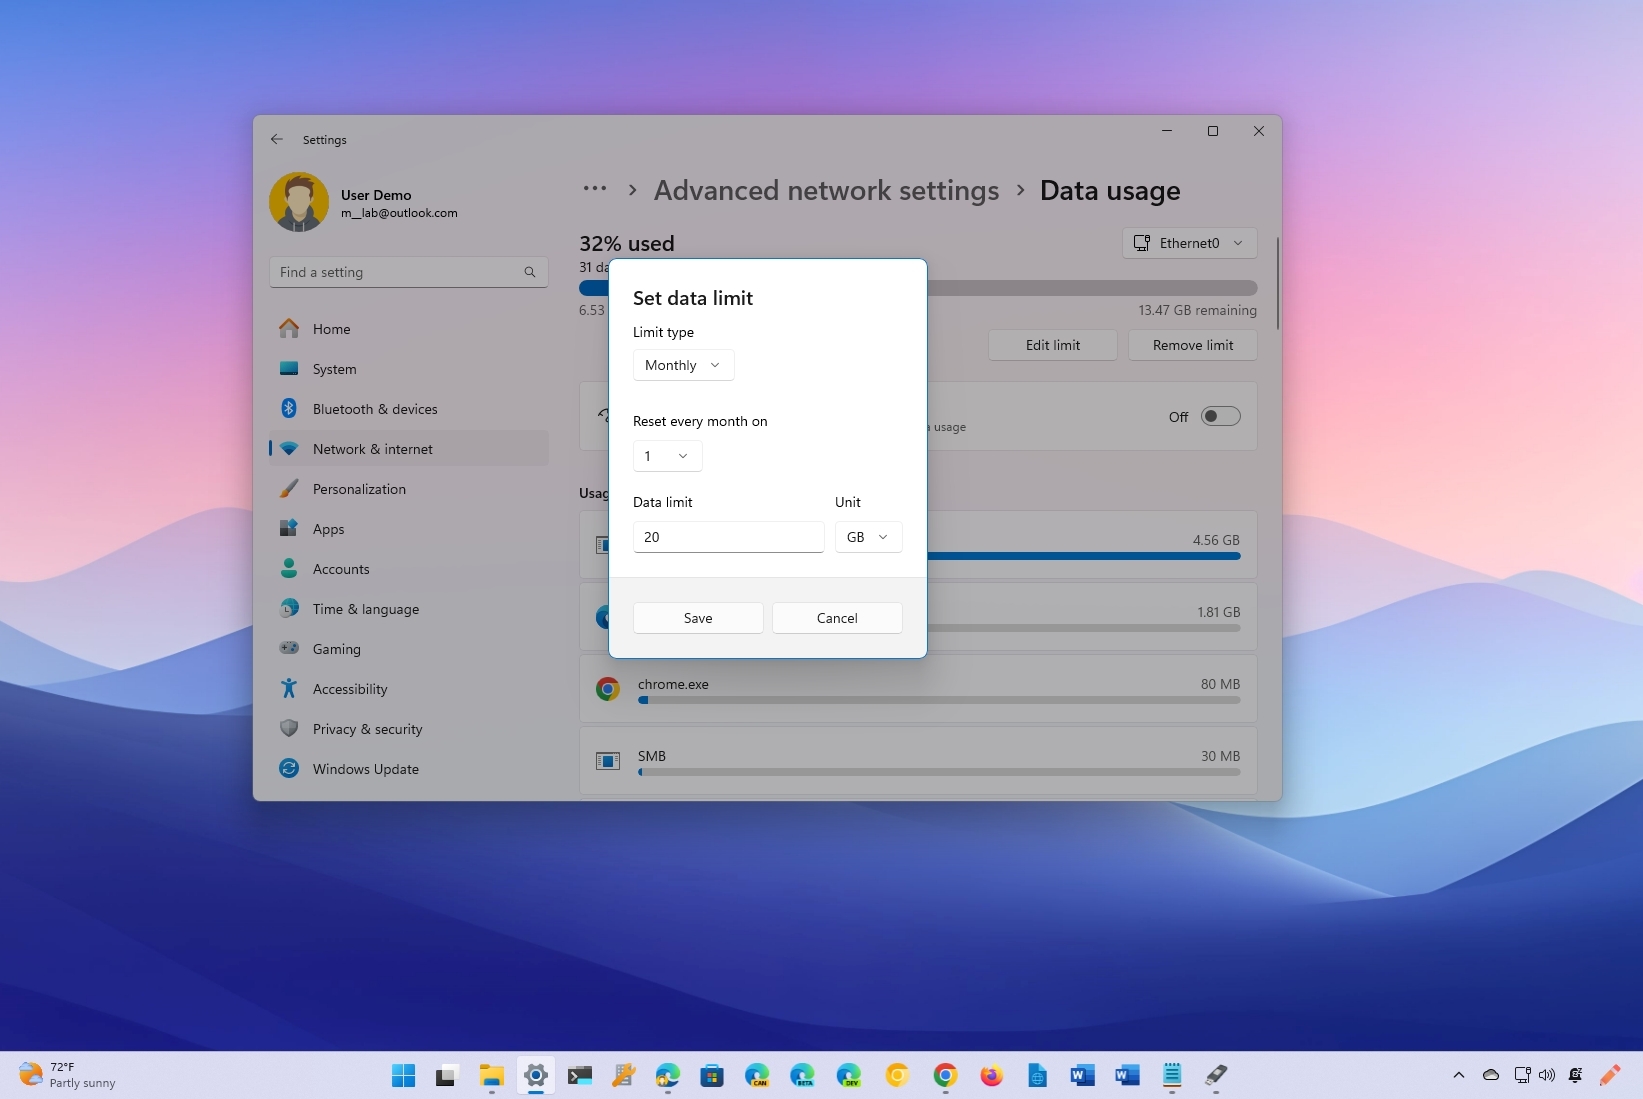
If you use a capped internet plan, use these steps to monitor your usage and receive warnings before exceeding the limits on Windows 11.
All the latest news, reviews, and guides for Windows and Xbox diehards.
You are now subscribed
Your newsletter sign-up was successful
Although most Internet Service Providers (ISPs) give you unlimited access to the Internet (as long as you don't overuse it), you may still encounter services that offer a limited amount of data each month, such as companies that provide mobile hotspots.
If you happen to use a capped data plan, you should use Windows 11's "Data Usage" feature, which has been designed to monitor the network connection data usage during a specified cycle. It also includes an option to configure limits to get warnings to ensure you do not exceed the data allowance.
In this how-to guide, I will walk you through the steps to configure and use the Data Usage feature on Windows 11 to control your internet data usage and avoid extra charges.
How to view data usage on Windows 11
To see the data usage of the network adapters configured on Windows 11, use these steps:
- Open Settings.
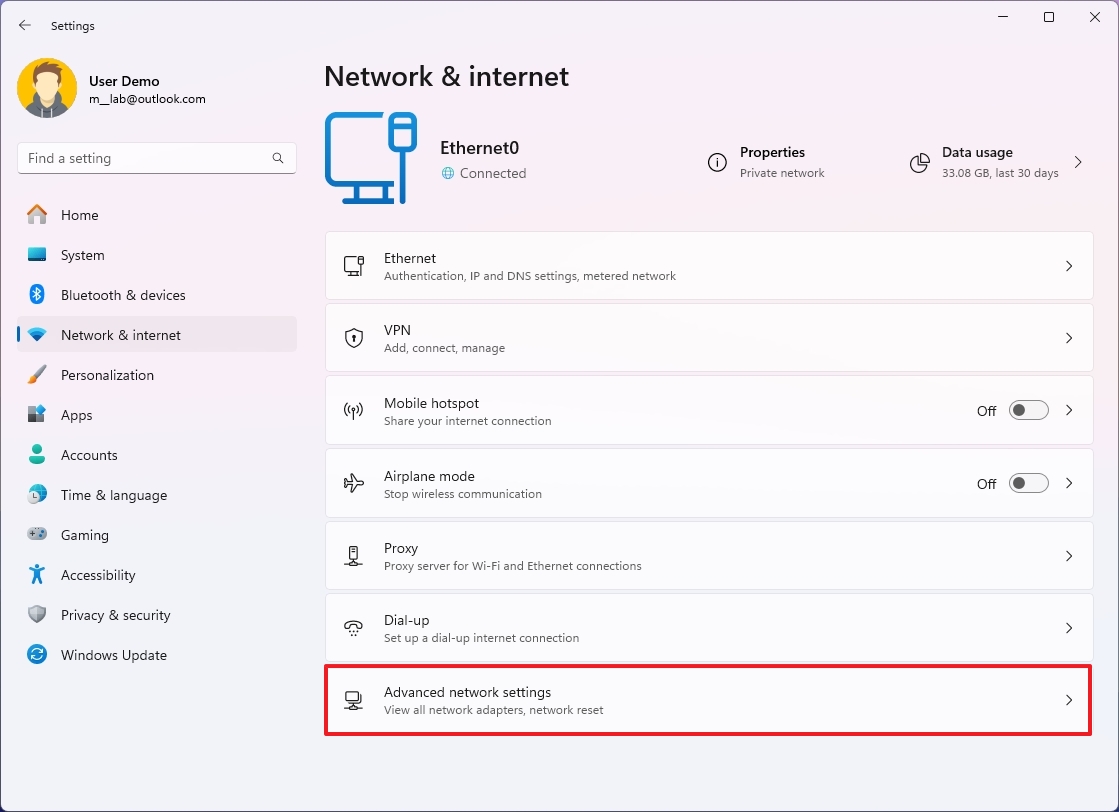
- Click on Network & internet.
- Click the "Advanced network settings" page on the right side.
- Quick tip: Alternatively, you can access the settings page by clicking the "Data usage" button on the right side of the network adapter, which summarizes the last 30 days of usage for that particular adapter.
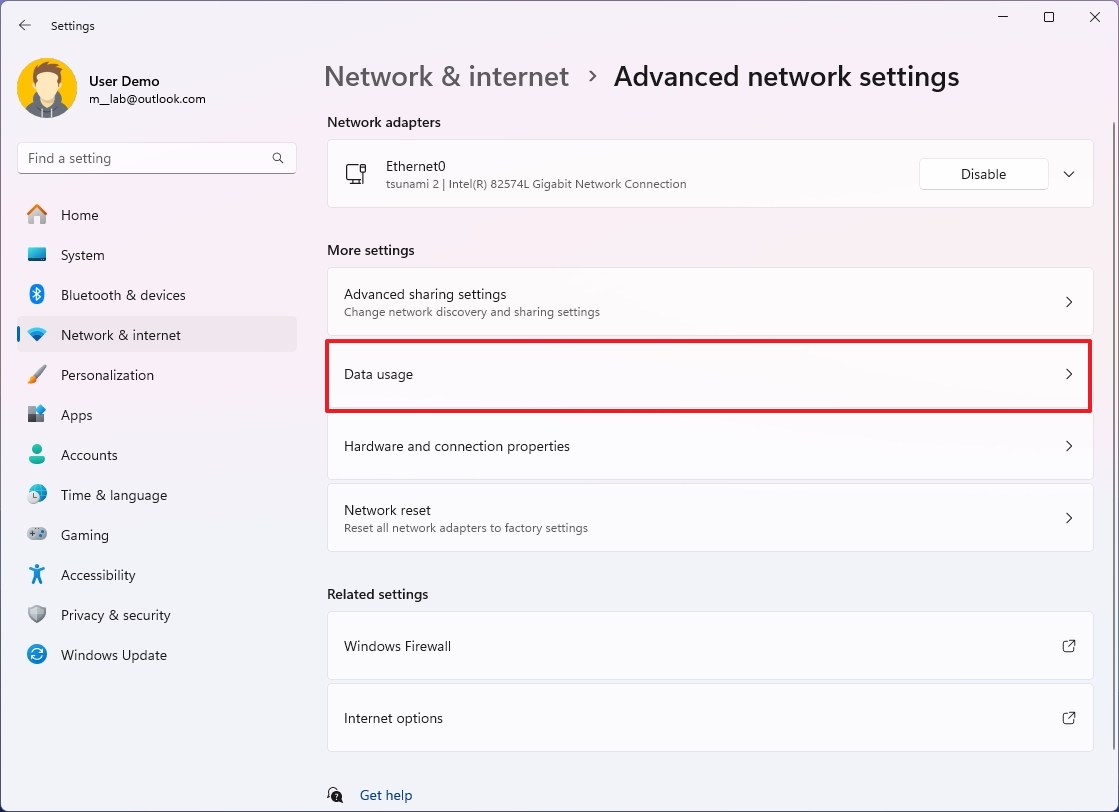
- Click the Data usage setting under the "More settings" section.
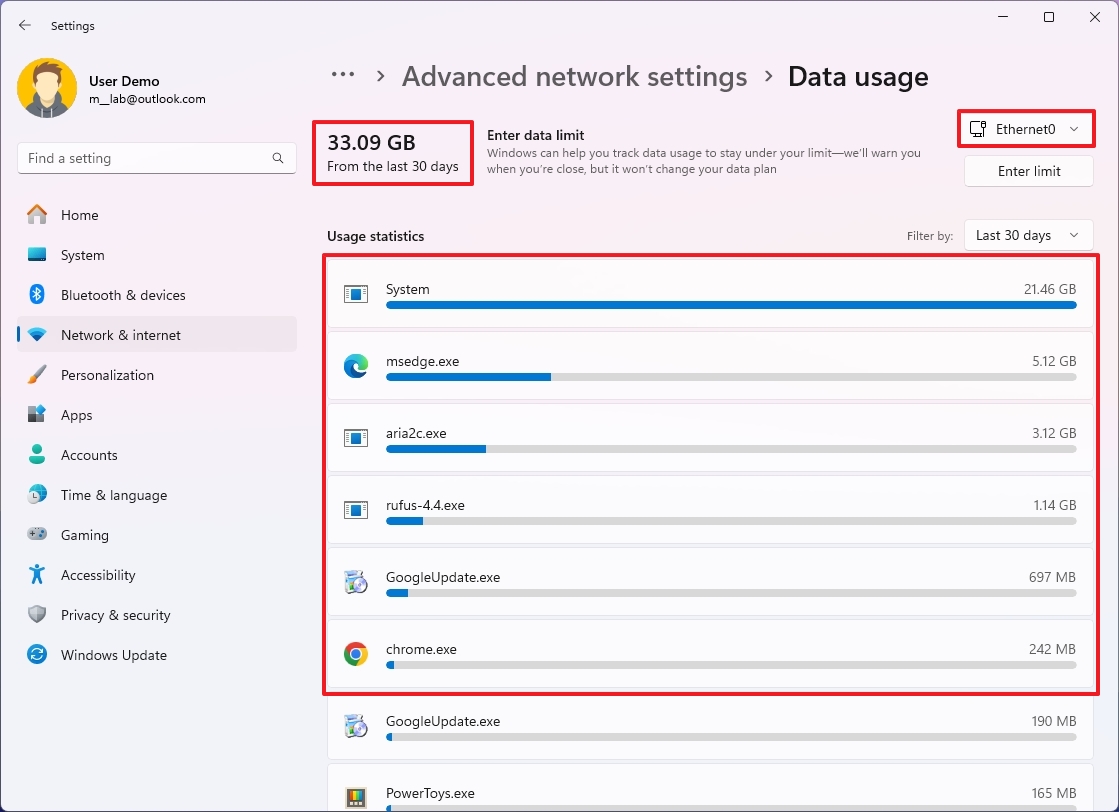
- (Optional) Select the network adapter using the settings on the top-right side, such as Ethernet0.
- Confirm the total data usage in the top-left corner for the last 30 days.
- Quick tip: You can also use the filter setting on the top-right to change the range to the last 7 days or 24 hours.
- Review the usage statistics for each application.
Once you complete the steps, you will have access to usage statistics, allowing you to find out the total data usage per network adapter and which applications use the most data.
How to reset data usage on Windows 11
Since data usage is enabled by default, you must reset the usage history if you want to start a new data usage counter.
To reset the data history, use these steps:
All the latest news, reviews, and guides for Windows and Xbox diehards.
- Open Settings.
- Click on Network & internet.
- Click the "Advanced network settings" page on the right side.
- Click the Data usage setting under the "More settings" section.
- (Optional) Select the network adapter using the setting on the top-right side.
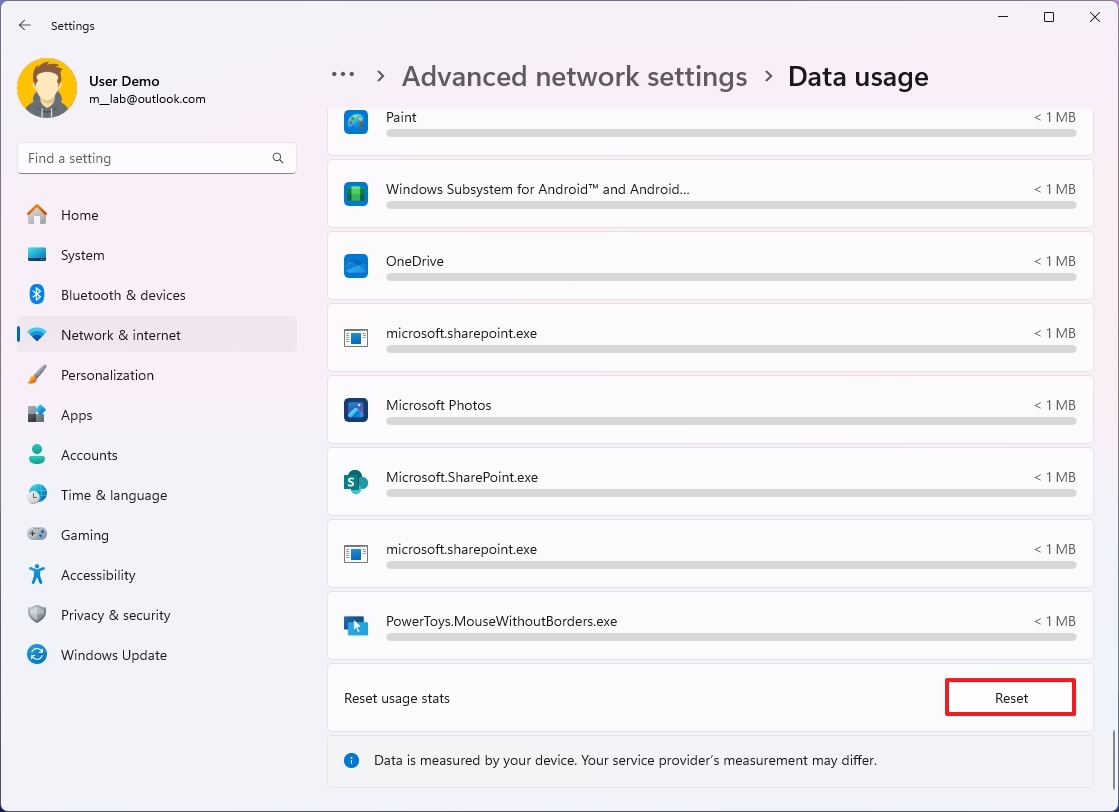
- Click the Reset button at the bottom of the page.
After you complete the steps, the history information will reset on the device, starting a new count.
How to configure data usage limit on Windows 11
Windows 11 allows you to configure data usage limits and receive alerts as you approach the limit for a limited internet plan. After setting up the feature, you can review the remaining data, modify the configuration, or remove the limit.
To configure a data usage limit on your Windows 11 laptop or desktop computer, use these steps:
- Open Settings.
- Click on Network & internet.
- Click the "Advanced network settings" page on the right side.
- Click the Data usage setting under the "More settings" section.
- (Optional) Select the network adapter using the setting on the top-right side.
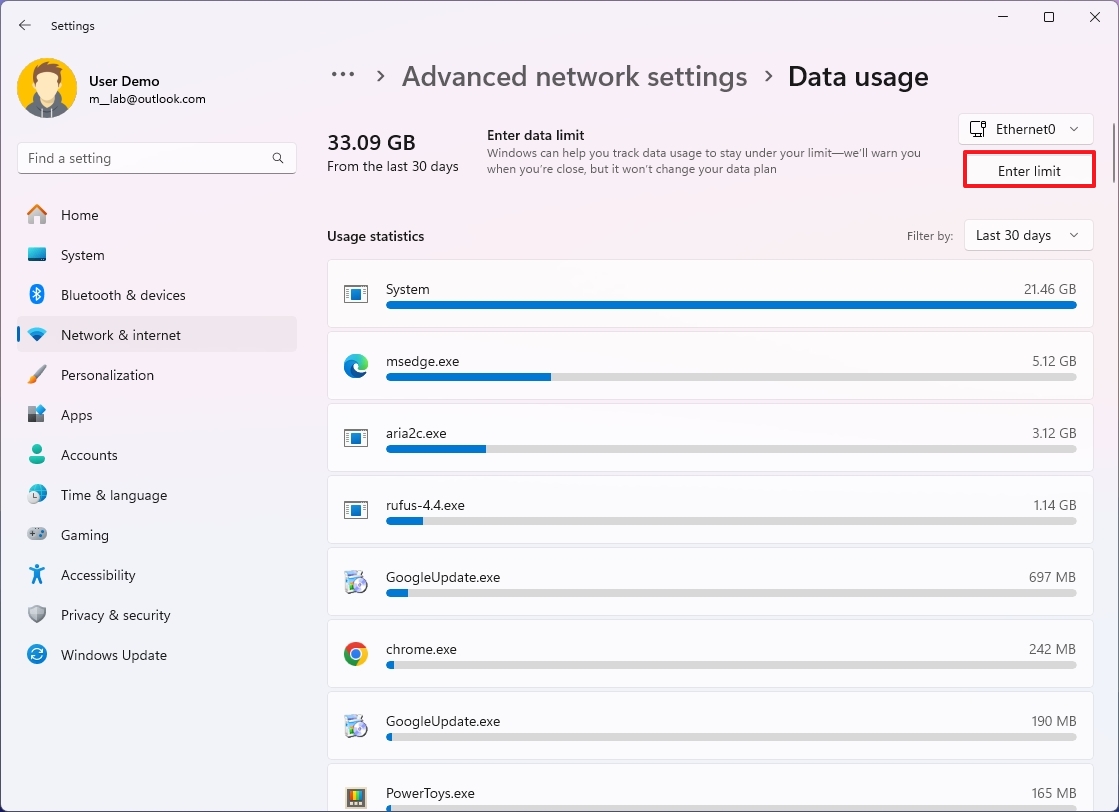
- Click the Enter limit button.
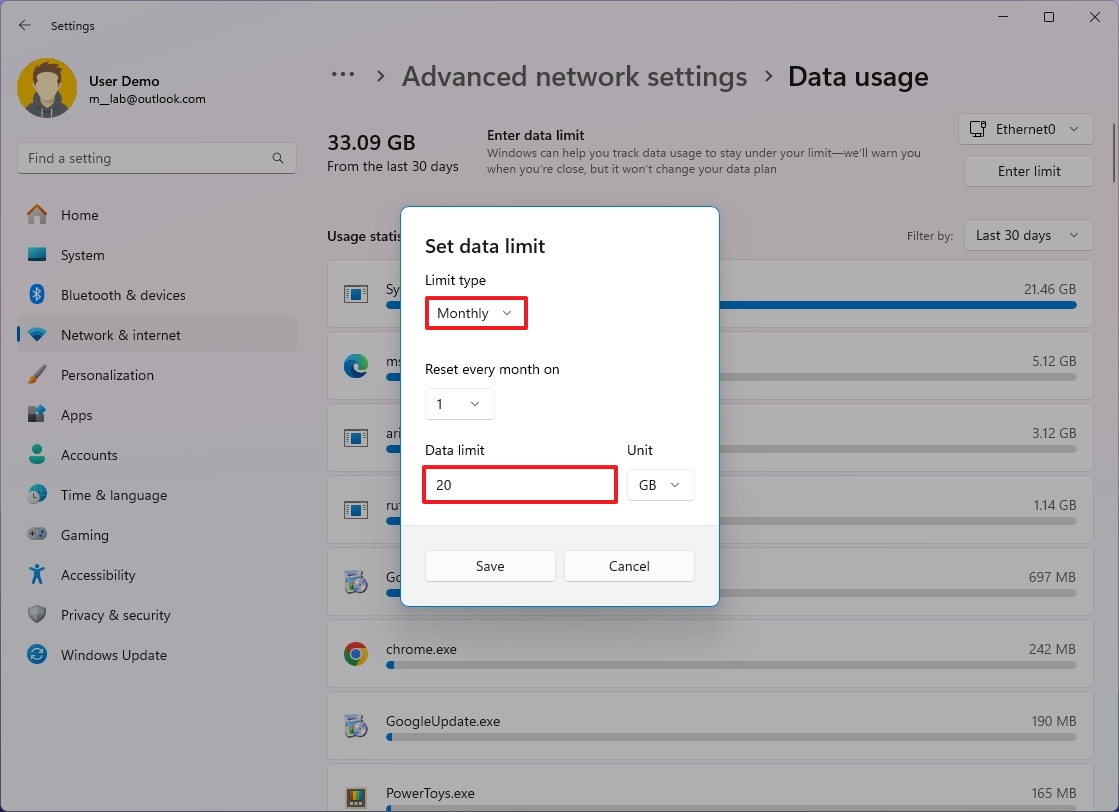
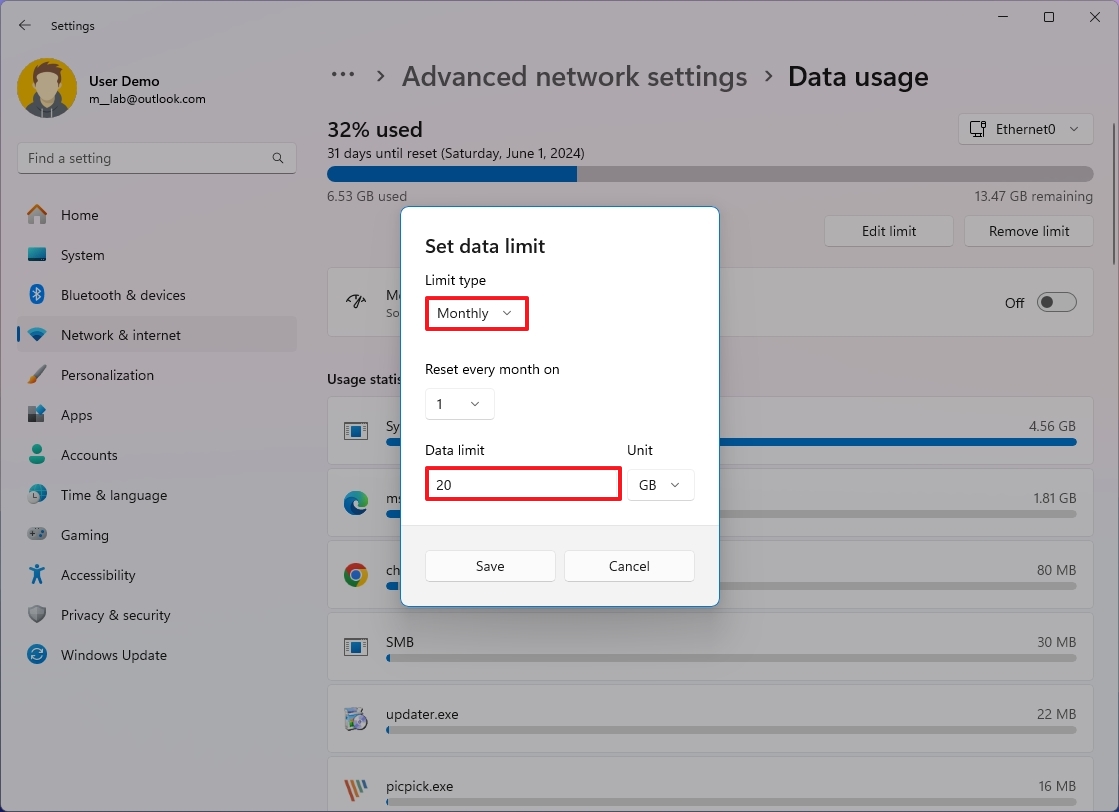
- Choose the limit type — for example, Monthly. Other options include "Daily," "Weekly," "One time," and "Unlimited."
- Click the Save button.
Once you complete the steps, the system will continue to monitor the data usage and send you a warning as you begin to reach the limit so you can take action accordingly.
It's important to note that service providers may count data differently. As such, it is a good practice to set a limit that is less than the actual quota from the service. For example, if you have 20GB of data, you can set the limit to 18 or 19GB to ensure you don't exceed the cap.
Review remaining data
To review the remaining data for the cycle you configured, use these steps:
- Open Settings.
- Click on Network & internet.
- Click the "Advanced network settings" page on the right side.
- Click the Data usage setting under the "More settings" section.
- (Optional) Select the network adapter using the setting on the top-right side.
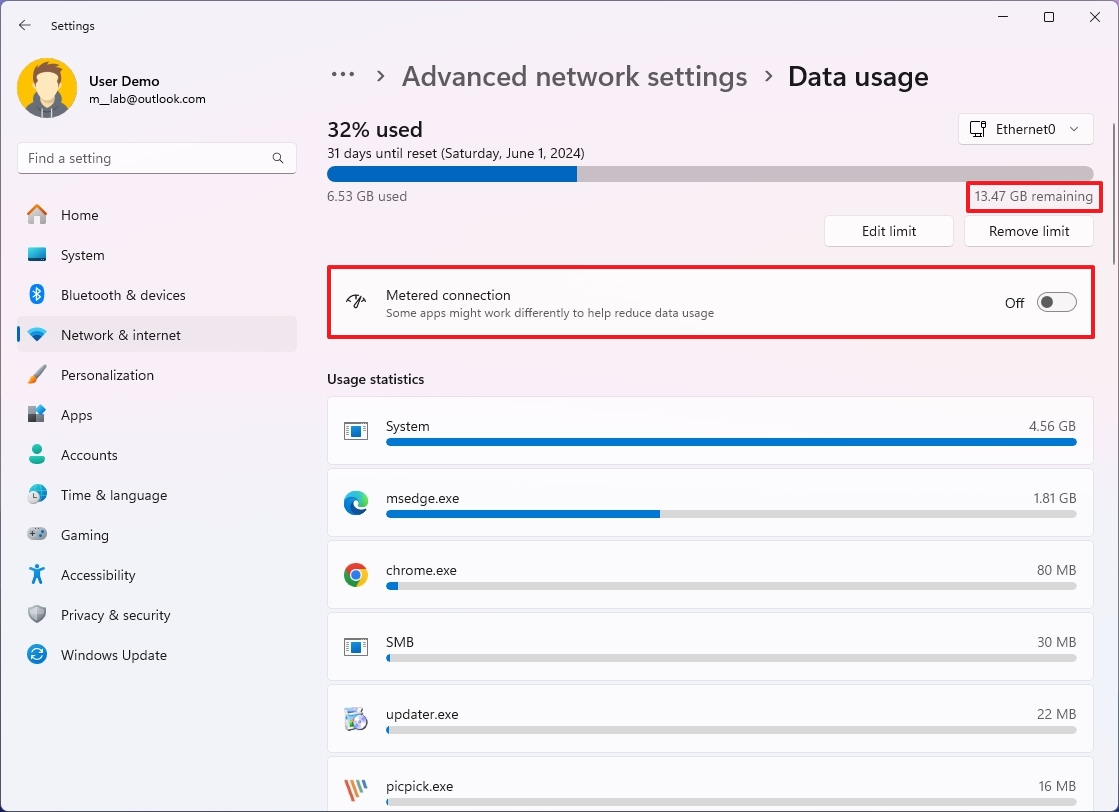
- Confirm the remaining data and current usage.
- (Optional) Turn on the Metered connection toggle switch if you are running out of data and need to optimize the remaining allowance.
After you complete the steps, you will know the remaining data allowance. Also, if you turn on the metered connection feature, the system and certain apps will adjust their settings to save data. For example, Windows 11 will no longer download and install maintenance and feature updates, and the Microsoft Store will pause app updates. In addition, if you use OneDrive, the client will stop syncing your files until you turn off the metered connection.
Modify data limit
To edit the data limit configuration, use these steps:
- Open Settings.
- Click on Network & internet.
- Click the "Advanced network settings" page on the right side.
- Click the Data usage setting under the "More settings" section.
- (Optional) Select the network adapter using the setting on the top-right side.
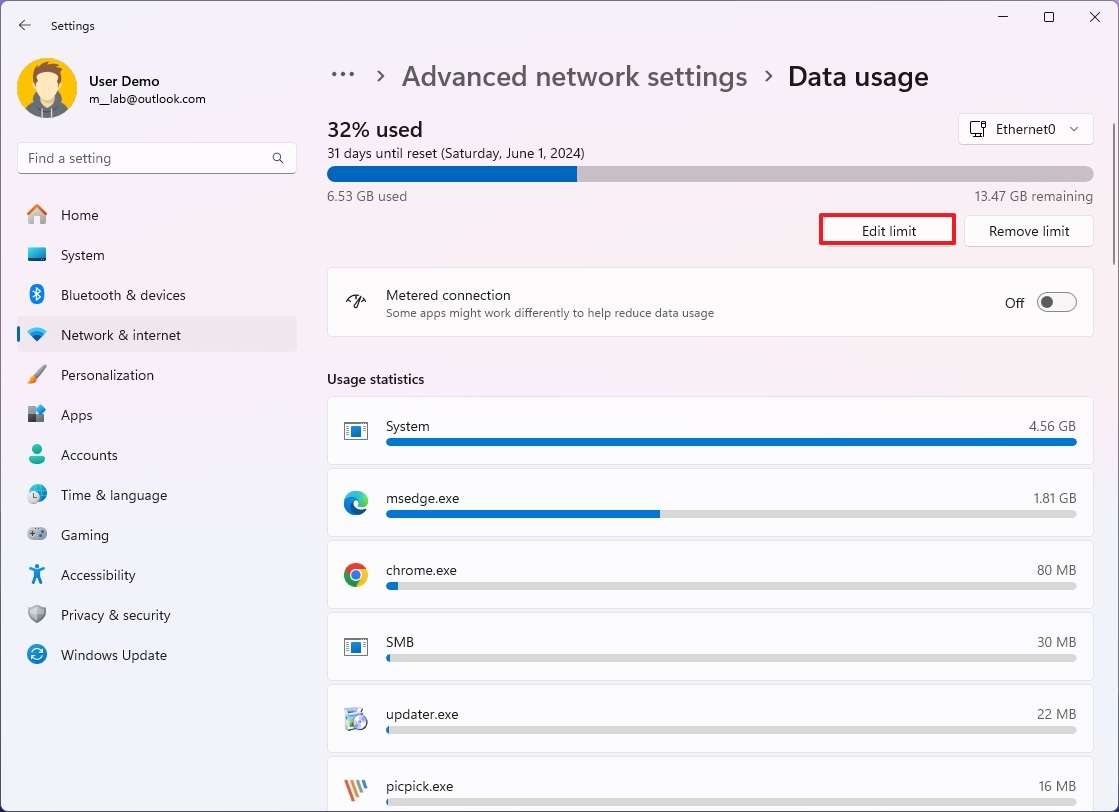
- Click the Edit limit button.
- Confirm the new settings for the limit.
- Click the Save button.
Once you complete the steps, the feature will continue monitoring the usage with the new configuration.
Remove data limit
To remove a data limit configuration on Windows 11, use these steps:
- Open Settings.
- Click on Network & internet.
- Click the "Advanced network settings" page on the right side.
- Click the Data usage setting under the "More settings" section.
- (Optional) Select the network adapter using the setting on the top-right side.
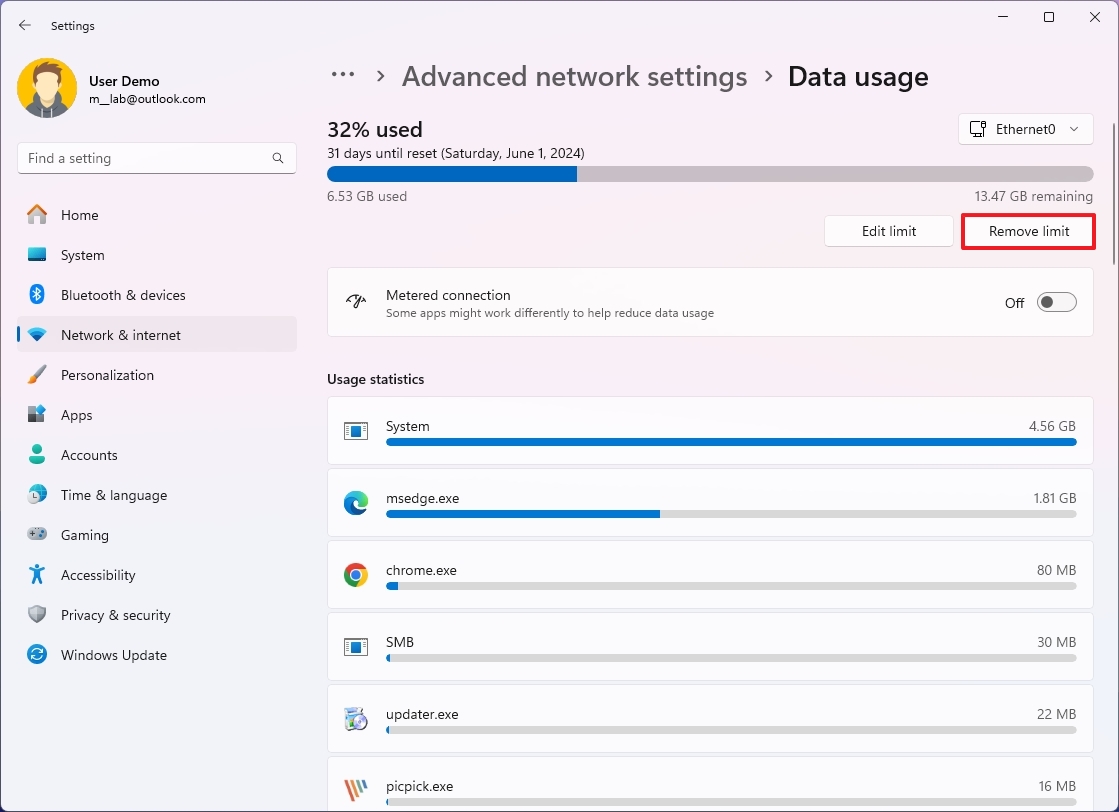
- Click the Remove limit button.
- Click the Remove button.
After you complete the steps, you will no longer receive warnings, but the feature will continue to monitor the data usage.
More resources
For more helpful articles, coverage, and answers to common questions about Windows 10 and Windows 11, visit the following resources:
- Windows 11 on Windows Central — All you need to know
- Windows 10 on Windows Central — All you need to know

Mauro Huculak has been a Windows How-To Expert contributor for WindowsCentral.com for nearly a decade and has over 22 years of combined experience in IT and technical writing. He holds various professional certifications from Microsoft, Cisco, VMware, and CompTIA and has been recognized as a Microsoft MVP for many years.
