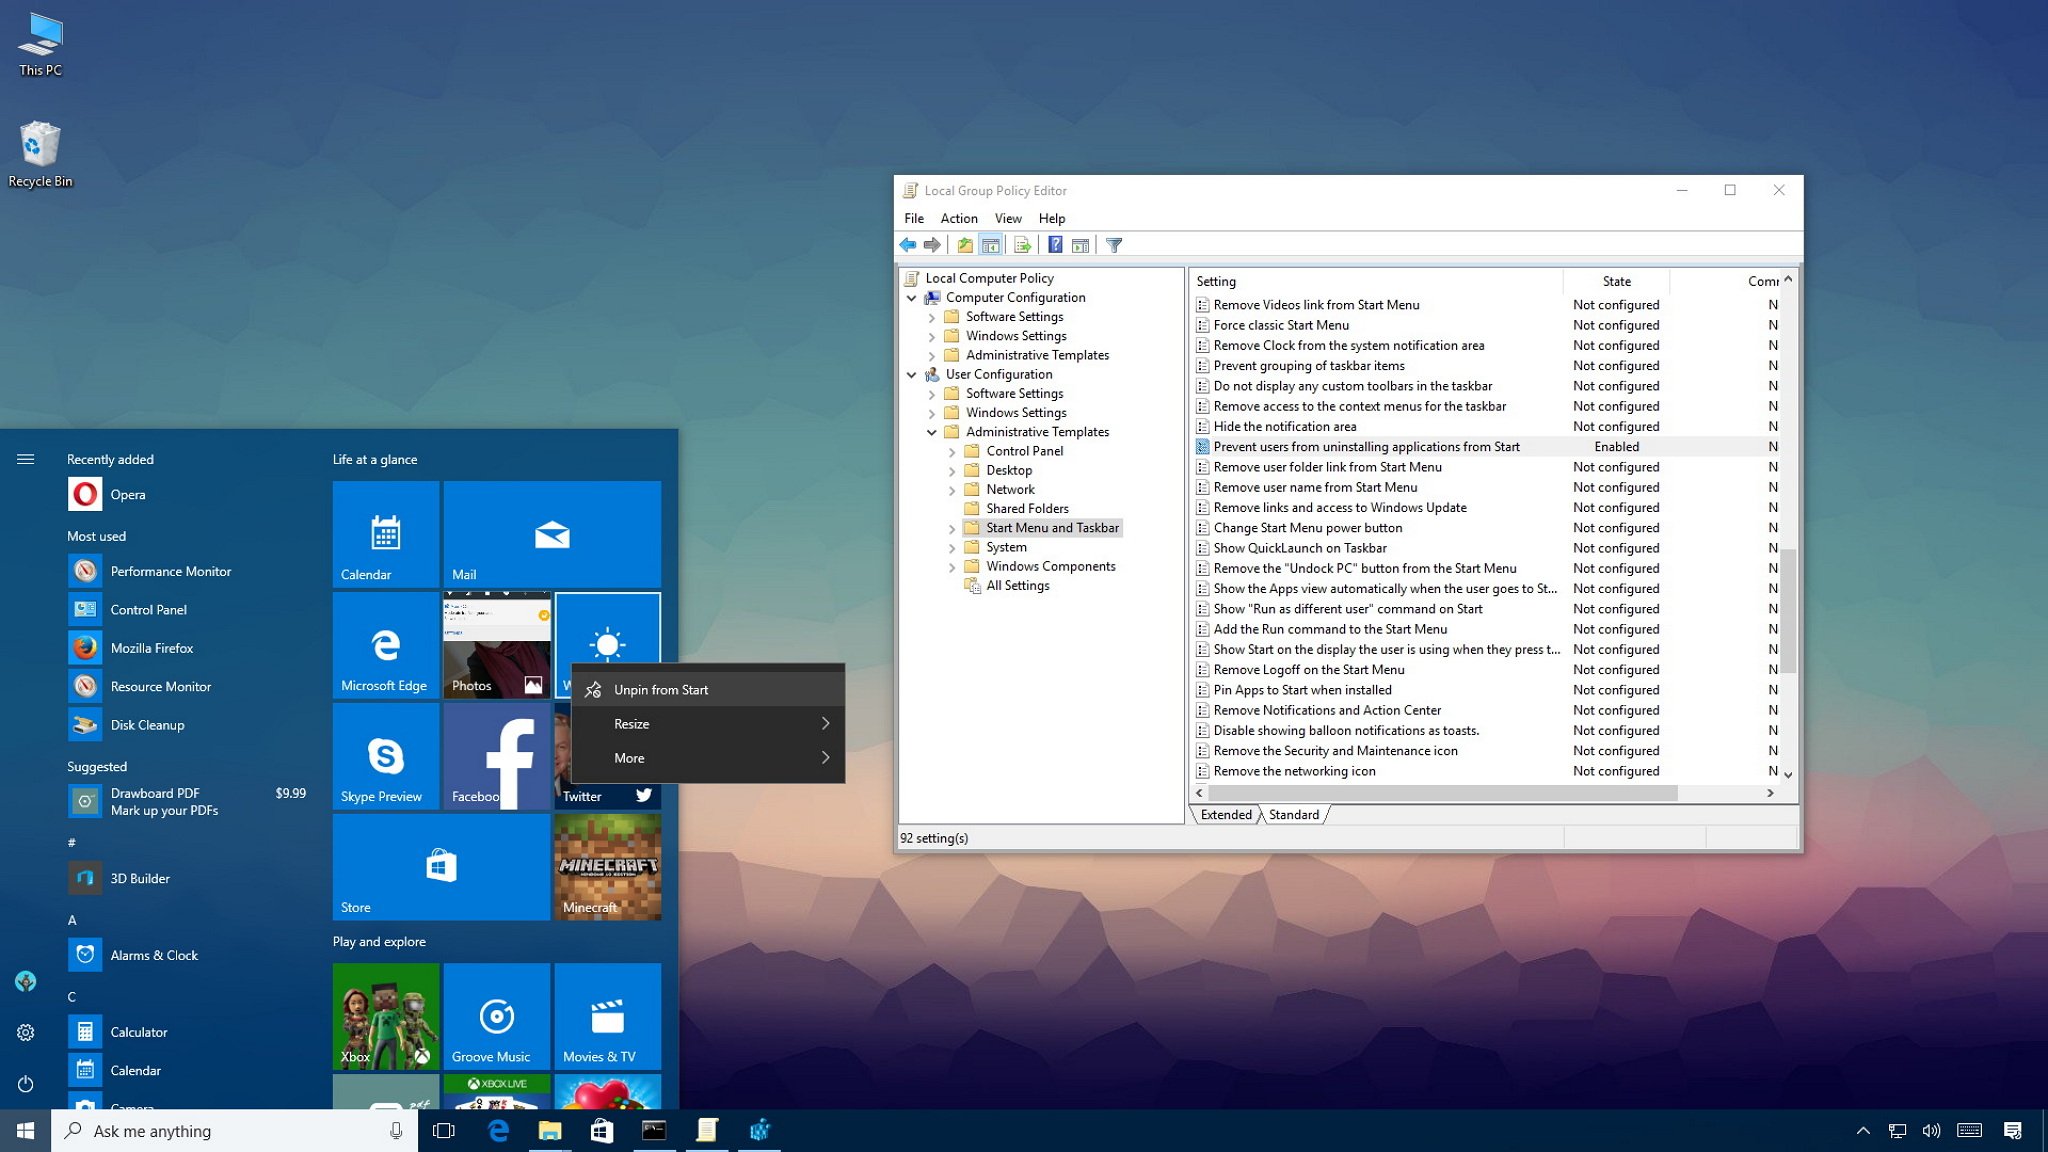
How to stop users from uninstalling apps from Windows 10's Start menu
Windows 10 lets you block users from uninstalling apps from the Start menu. Here's how.
All the latest news, reviews, and guides for Windows and Xbox diehards.
You are now subscribed
Your newsletter sign-up was successful
Windows 10 includes an improved Start menu that combines the best of the classic menu on Windows 7 with elements of the Start screen from Windows 8.1. In addition, it features a new number of improvements, including the ability to uninstall apps without the need to open Settings.
Although removing apps with a simple right-click can be convenient, if you're sharing your computer with other people, using your own or guest account, you may not want others to easily or accidentally uninstall apps from the Start menu. In those cases, you can use the Local Group Policy Editor or Registry to prevent this from happening on Windows 10.
In this Windows 10 guide, we'll walk you through the steps to prevent users from uninstalling apps from the Start menu.
- How to prevent users from uninstalling apps from Start using Group Policy
- How to prevent users from uninstalling apps from Start using Registry
How to prevent users from uninstalling apps from Start using Group Policy
If you're running Windows 10 Pro, Enterprise, or Education, you can use the Local Group Policy to block users from removing apps from the Start menu.
- Use the Windows key + R keyboard shortcut to open the Run command.
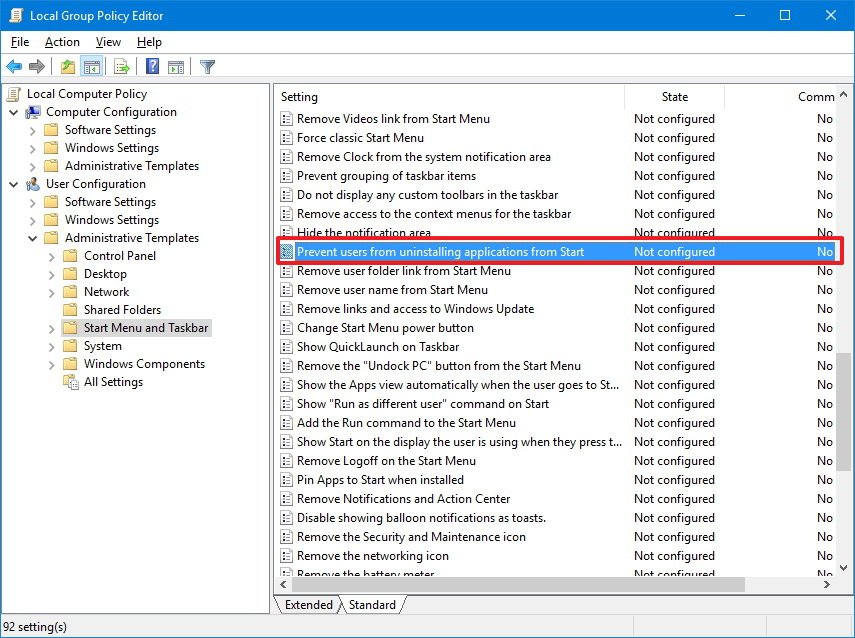
- Type gpedit.msc and click OK to open the Local Group Policy Editor.
- Browse the following path:
User Configuration > Administrative Template > Start Menu and Taskbar - Double-click the Prevent users from uninstalling applications from Start policy.
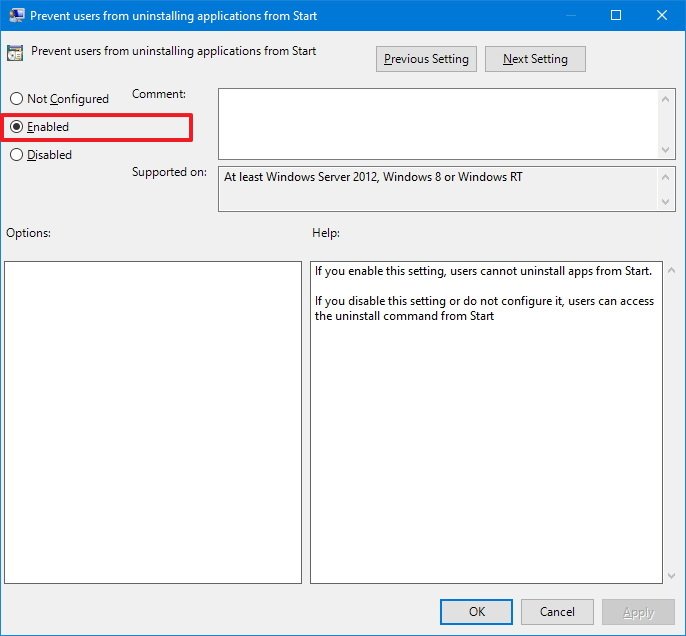
- Select the Enabled option.
- Click Apply.
- Click OK.
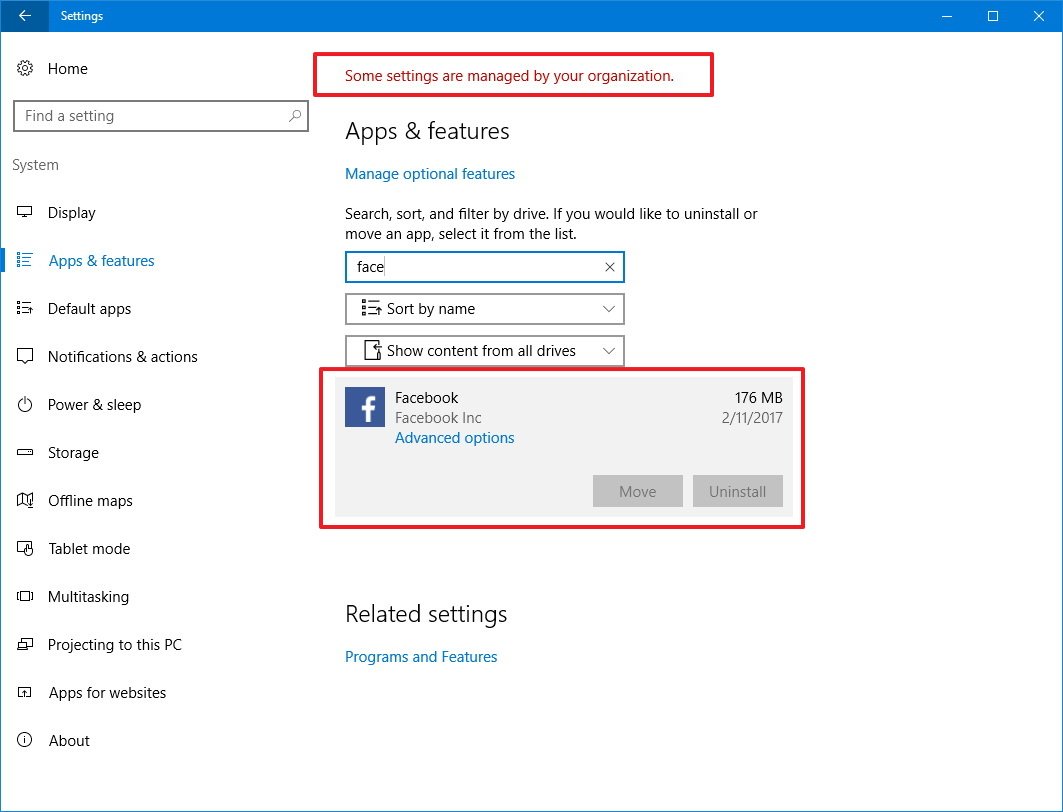
Once you complete the steps, if users right-click an app on the Start menu the "uninstall" option will not be available.
This will also prevent you from uninstalling apps from Settings, as you can see in the screenshot after enabling this option a "Some settings are managed by you organization" message will appear, and selecting an app the "Uninstall" option will be unavailable.
If you change your mind, at any time, you can use the same steps to revert the changes, but on step No. 5 make sure to select the Not Configured option.
All the latest news, reviews, and guides for Windows and Xbox diehards.
How to prevent users from uninstalling apps from Start using Registry
If you're running Windows 10 Home, you won't have access to the Local Group Policy Editor, but you can still enforce this option by modifying the Registry.
Important: This is a friendly reminder to let you know that editing the registry is risky, and it can cause irreversible damage to your installation if you don't do it correctly. It's recommended to make a full backup of your computer before proceeding.
- Use the Windows key + R keyboard shortcut to open the Run command.
- Type regedit, and click OK to open the registry.
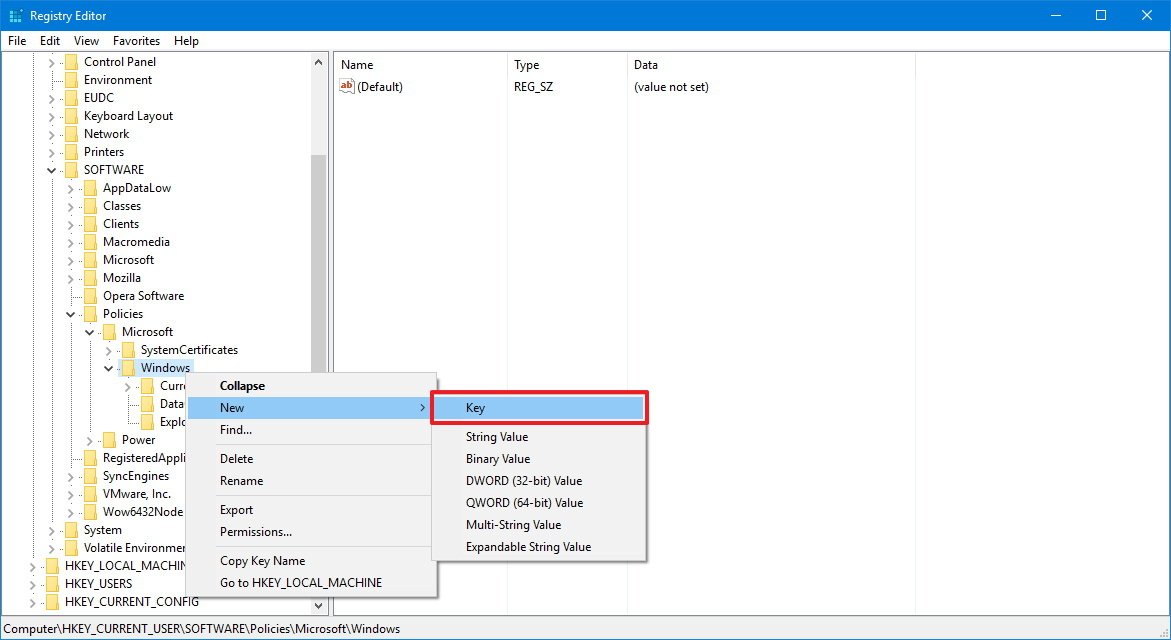
- Browse the following path:
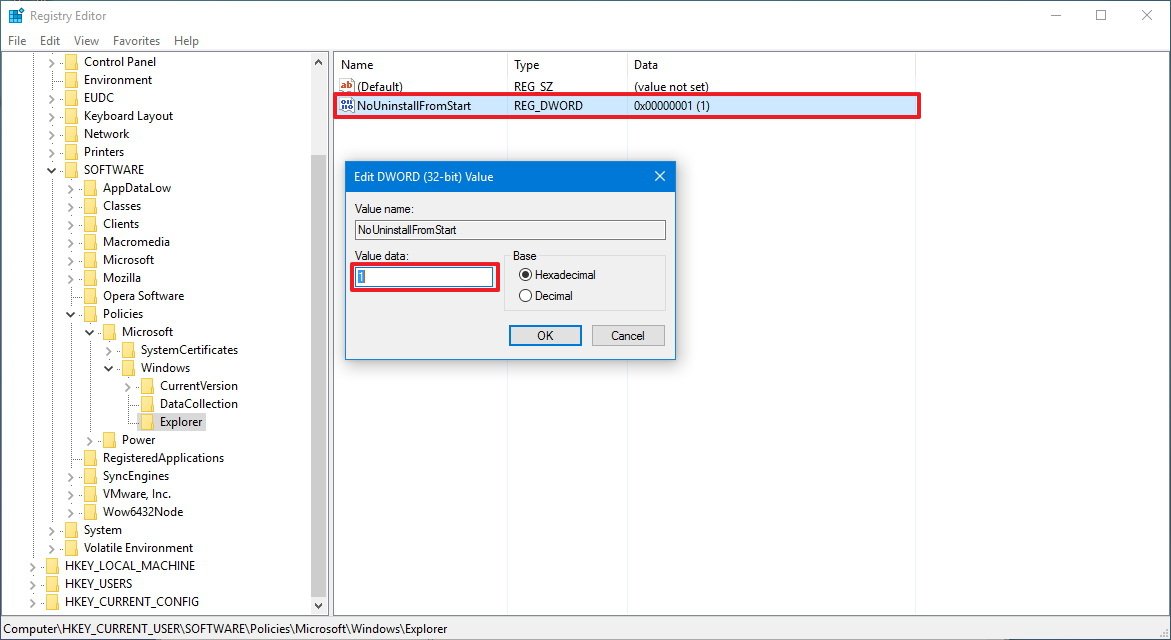
HKEY_CURRENT_USER\Software\Policies\Microsoft\Windows - Right-click the Windows (folder) key, select New, and click on Key.
- Name the key Explorer and press Enter.
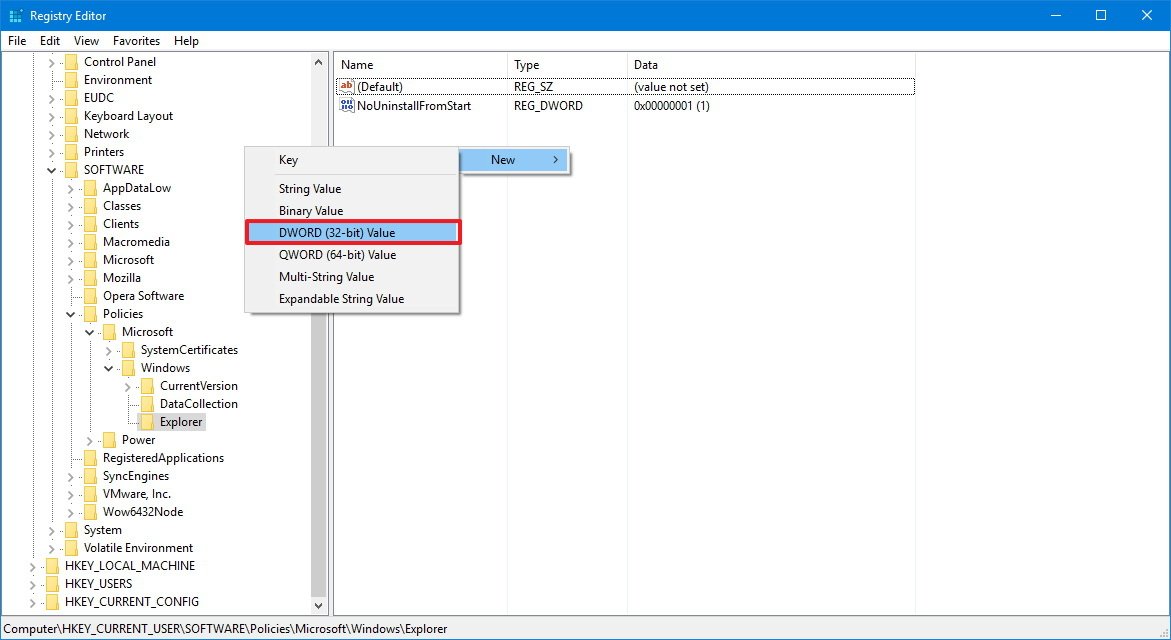
- Inside the newly created key, right-click and select New, and click on DWORD (32-bit) Value.
- Name the key NoUninstallFromStart and press Enter.
- Double-click the newly created DWORD key and make sure to change its value from 0 to 1.
- Click OK.
After completing the steps, simply close the Registry, and you should no longer see the "uninstall" option in the context menu when right-clicking an app from the Start menu.
In the case you want to remove an app, you'l you'll need to revert the changes, using the steps mentioned above, but on step No. 8 make sure to change the DWORD value from 1 to 0.
More Windows 10 resources
For more help articles, coverage, and answers to common questions about Windows 10, visit the following resources:
- Windows 10 on Windows Central – All you need to know
- Windows 10 help, tips, and tricks
- Windows 10 forums on Windows Central

Mauro Huculak has been a Windows How-To Expert contributor for WindowsCentral.com for nearly a decade and has over 22 years of combined experience in IT and technical writing. He holds various professional certifications from Microsoft, Cisco, VMware, and CompTIA and has been recognized as a Microsoft MVP for many years.
