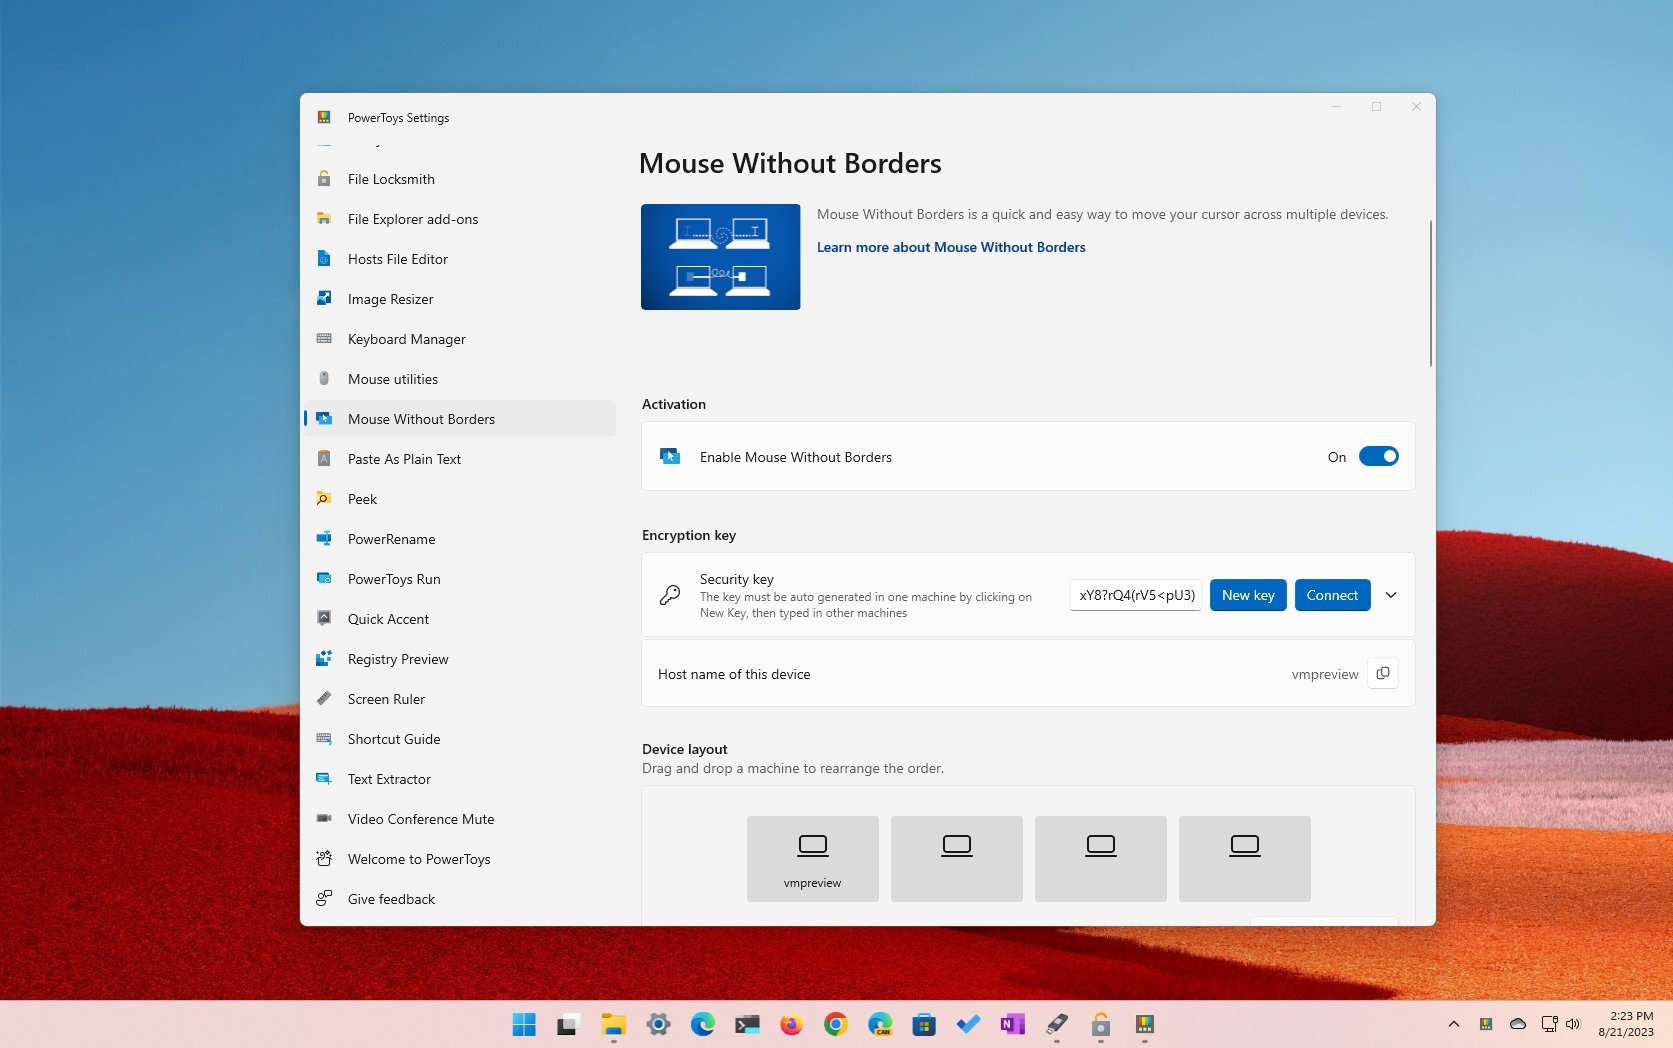
Five lesser-known PowerToys features you should be using on Windows 11
If you have PowerToys installed on your computer, you probably didn't notice these features.
All the latest news, reviews, and guides for Windows and Xbox diehards.
You are now subscribed
Your newsletter sign-up was successful
PowerToys is considered the "Swiss army knife" of Windows 11 (and 10) since it features a set of utilities designed to improve productivity and customization options.
For example, some of the most popular features include "FancyZones" to manage windows on the screen, "PowerRename" for bulk rename files, and "Keyboard Manager" for remapping keys. However, PowerToys includes many other tools, some of which you probably didn't notice, such as "Peek" to preview files, "Text Extractor" to extract text from images, "Registry Review" to view and edit ".reg" files, "File Locksmith" to determine the processes accessing a file, and "Mouse Without Borders" to share the mouse keyboard with other devices.
This how-to guide will walk you through five PowerToys features you should be using on Windows 11.
PowerToys features you should enable on Windows 11
These are five lesser tools from PowerToys that you should try to improve your experience on Windows 11.
Peek
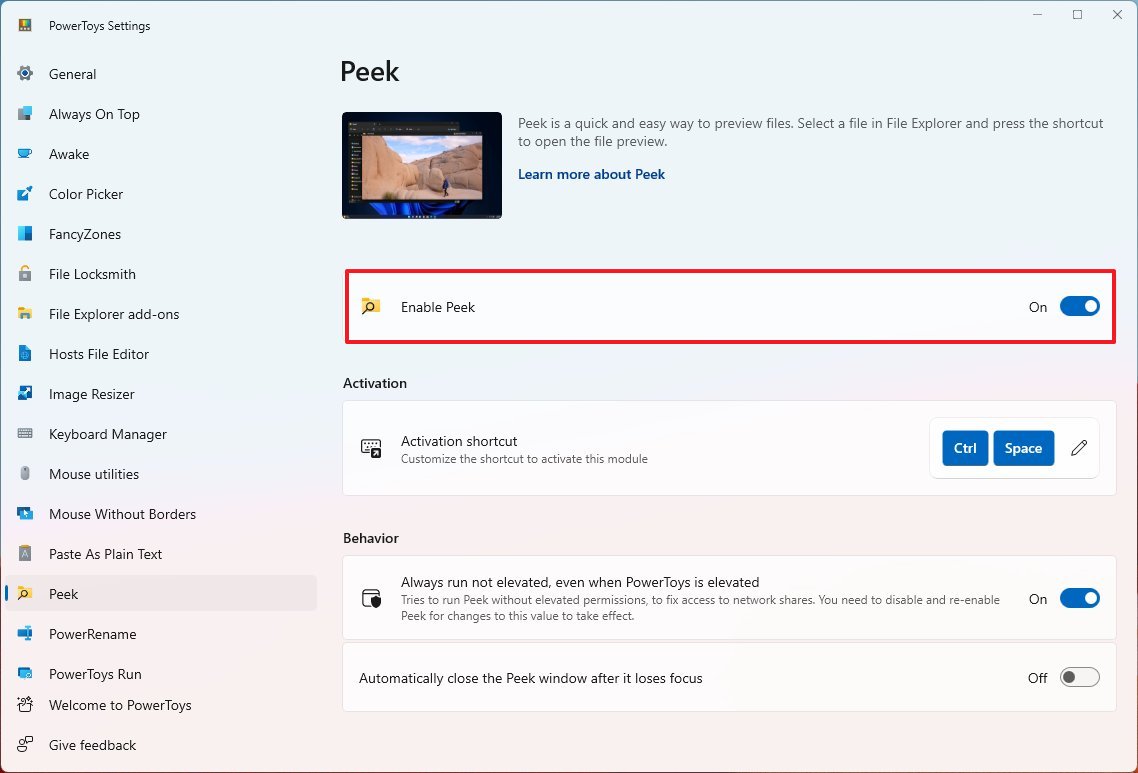
On PowerToys, Peek is a feature that allows you to preview files (such as pictures and documents) without opening them using the "Ctrl + Space" keyboard shortcut on File Explorer.
To enable Peek on PowerToys, use these steps:
- Open PowerToys.
- Click on Peek.
- Turn on the Enable Peek toggle switch.
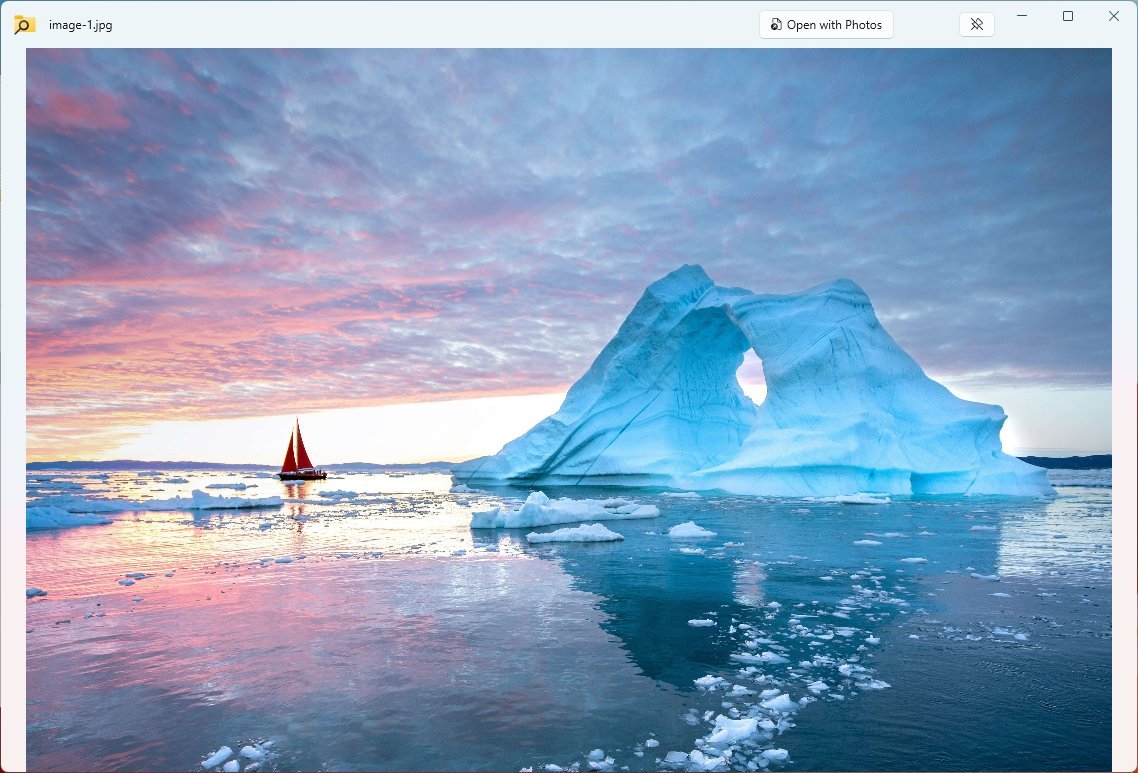
Once you complete the steps, on File Explorer, select a file and use the "Ctrl + Space" keyboard shortcut.
All the latest news, reviews, and guides for Windows and Xbox diehards.
While in the preview, you have the option to open the file using a supported application, and a pin button allows you to save the size and location of the window on the screen.
Text Extractor
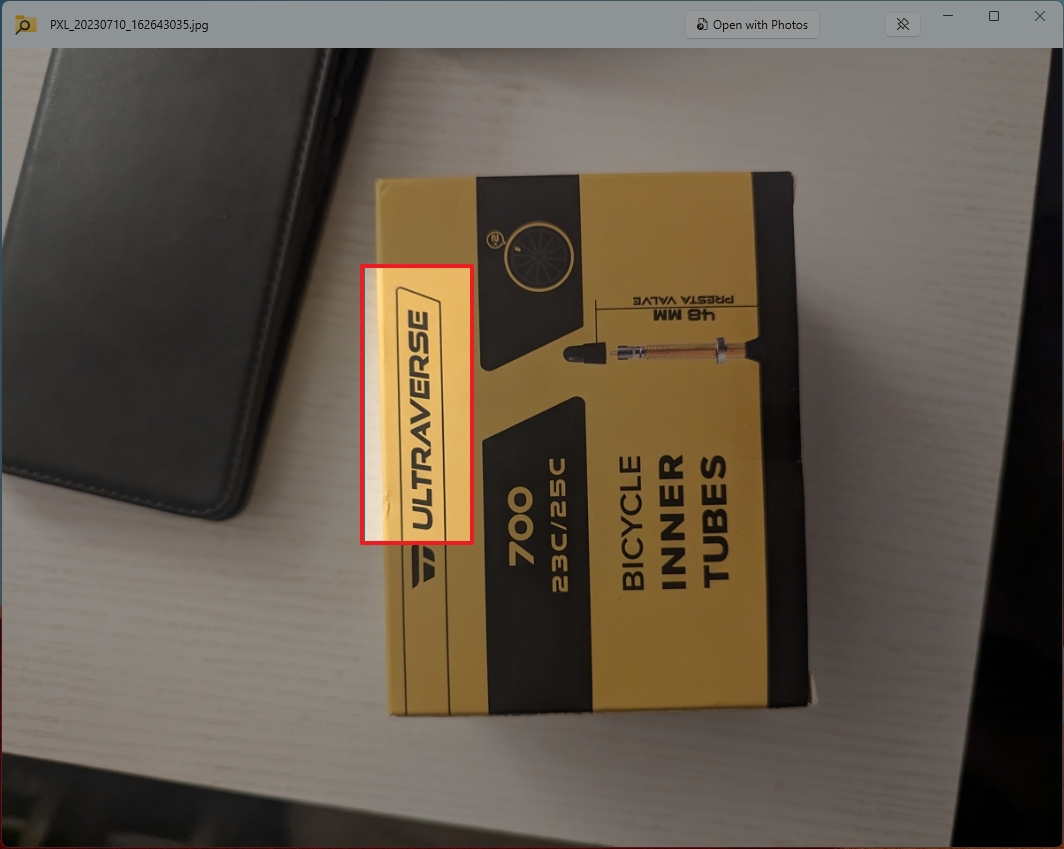
As the name implies, "Text Extractor" is a feature that allows you to select a portion of an image to extract its text and copy it to the clipboard, which you can paste on any application.
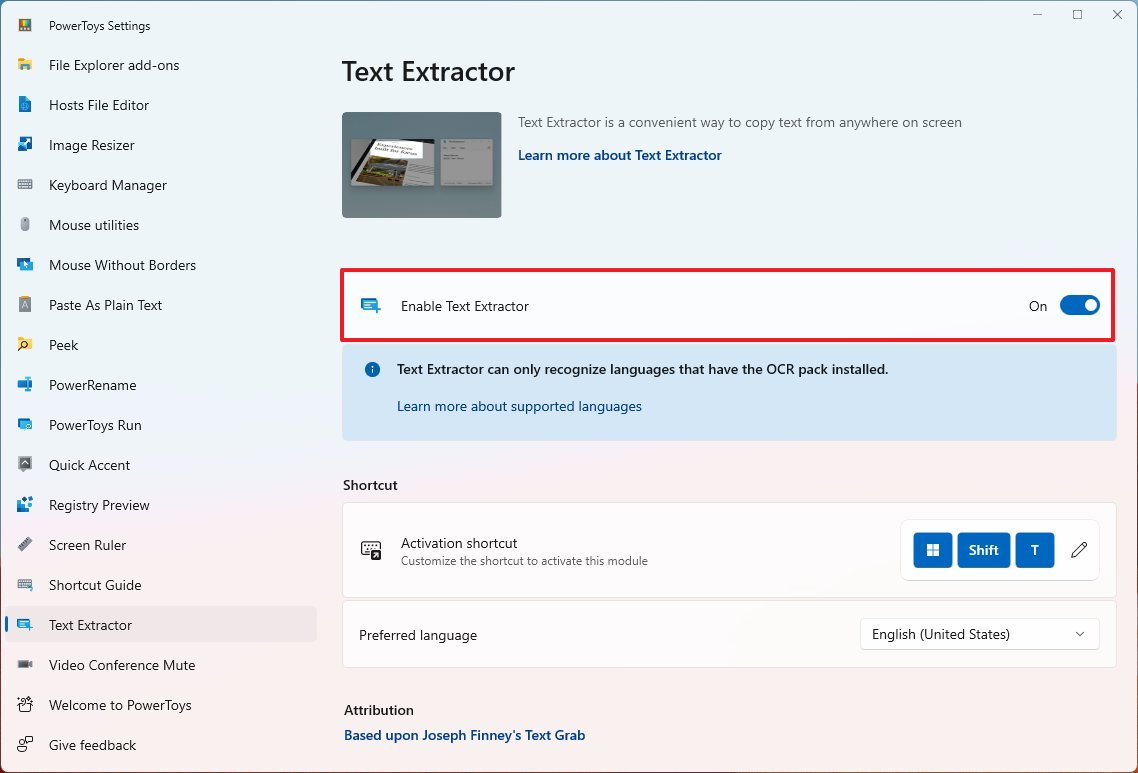
To enable Text Extractor on PowerToys, use these steps:
- Open PowerToys.
- Click on Text Extractor.
- Turn on the Enable Text Extractor toggle switch.
Once you complete the steps, you can select an image (or an image embedded on a web page) and use the "Windows Key + Shift + T" keyboard shortcut to open a preview without launching an application.
According to Microsoft, Text Extractor recognizes languages that the OCR pack installed.
Registry Preview
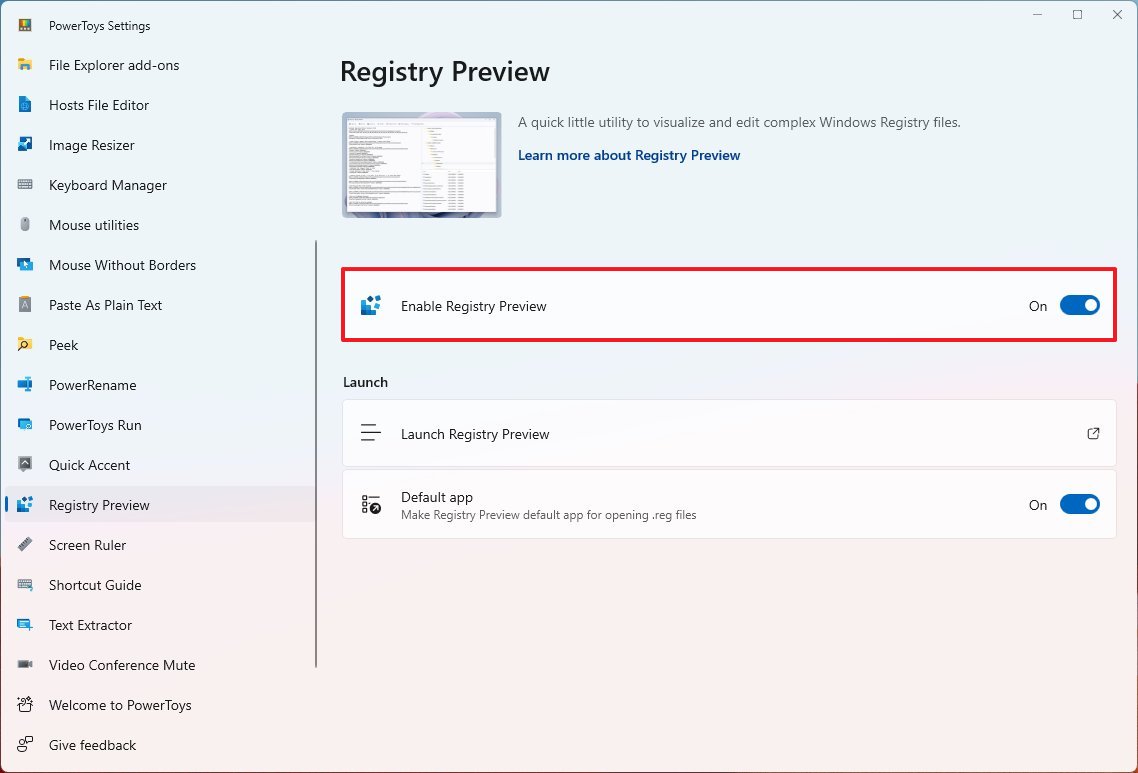
The "Registry Preview" tool allows you to preview and edit the contents of a ".reg" file before applying the changes to the system.
To enable Registry Preview on PowerToys, use these steps:
- Open PowerToys.
- Click on Registry Preview.
- Turn on the "Enable Registry Preview" toggle switch.
- (Optional) Under the "Launch" section, turn on the "Default app" toggle switch to make the tool the default application to open ".reg" file extensions.
- Click the "Launch Registry Preview" option.
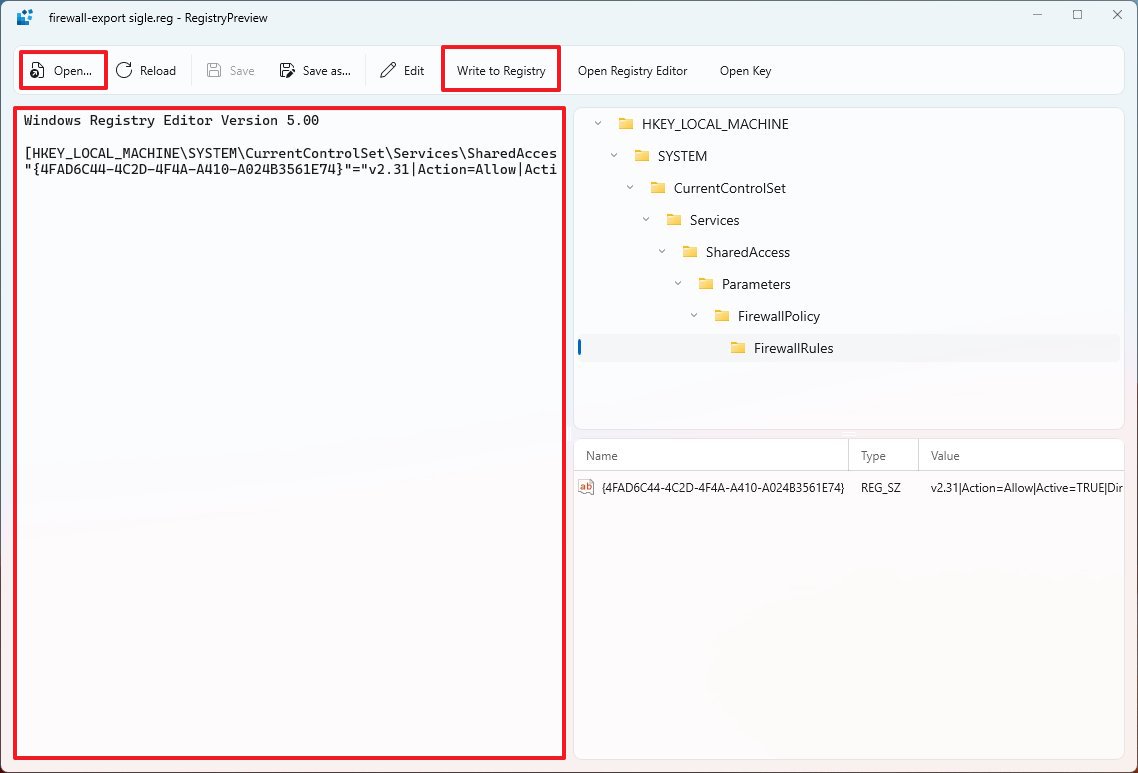
Once you complete the steps, the Registry Preview app will open, and you can use the "Open" option to open a file. Since you also change the default app settings, double-clicking the ".reg" file should also open the file.
The only way to launch the tool is from PowerToys. However, if you'll be using the utility frequently, it is best to pin it to the Taskbar.
In the interface, the raw contents of the file will appear on the left, and the Registry view will appear on the right. On the right side, you can preview the changes, but any modifications can only be done from the left side. Once you're ready, you can click the "Write to Registry" to merge the changes.
File Locksmith
PowerToys also comes with the File Locksmith utility that allows you to view the applications and services currently accessing a specific file or folder. The feature is handy when trying to delete or transfer a file (or folder) to another location. However, the system shows you a warning telling you that it's not possible to complete the transaction because another program is accessing the file.
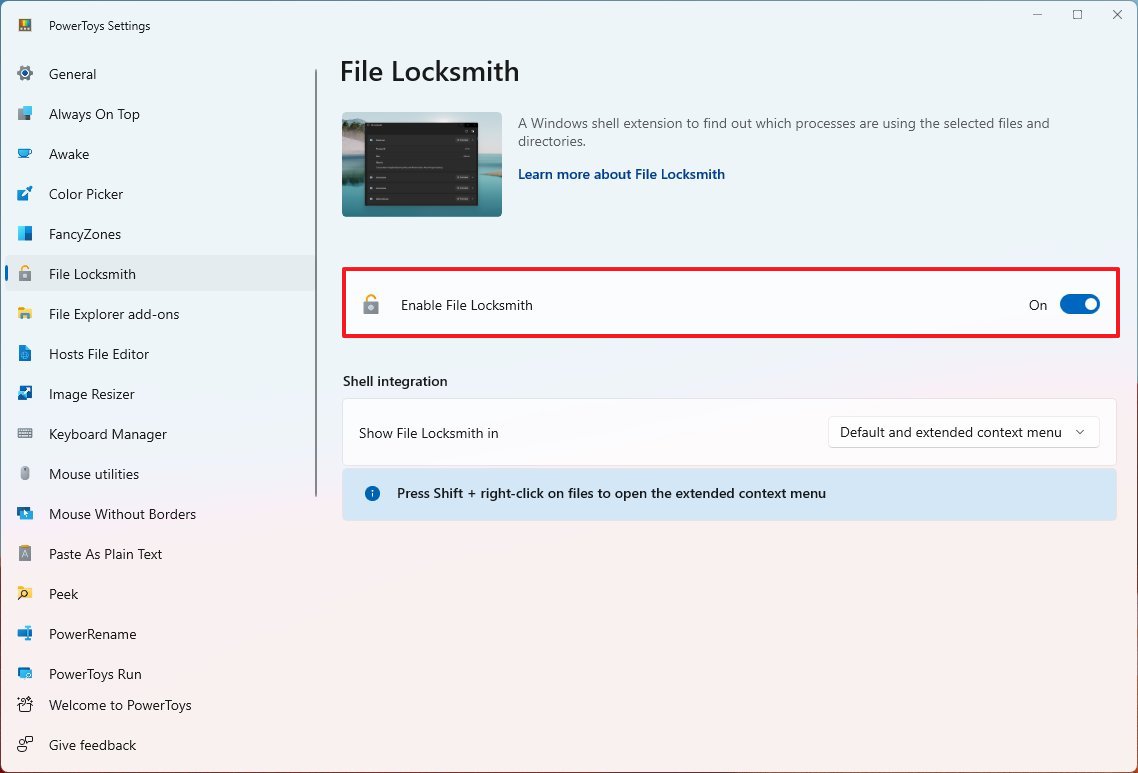
To enable File Locksmith on PowerToys, use these steps:
- Open PowerToys.
- Click on File Locksmith.
- Turn on the Enable Locksmith toggle switch.
- (Optional) Under the "Shell integration" section, choose the "Default and extended context menu" option in the "Show File Locksmith in" setting.
After you complete the steps, on File Explorer, use the "Shift + Right-click" action on a file or folder, and choose the "What's using this file" option from the legacy context menu.
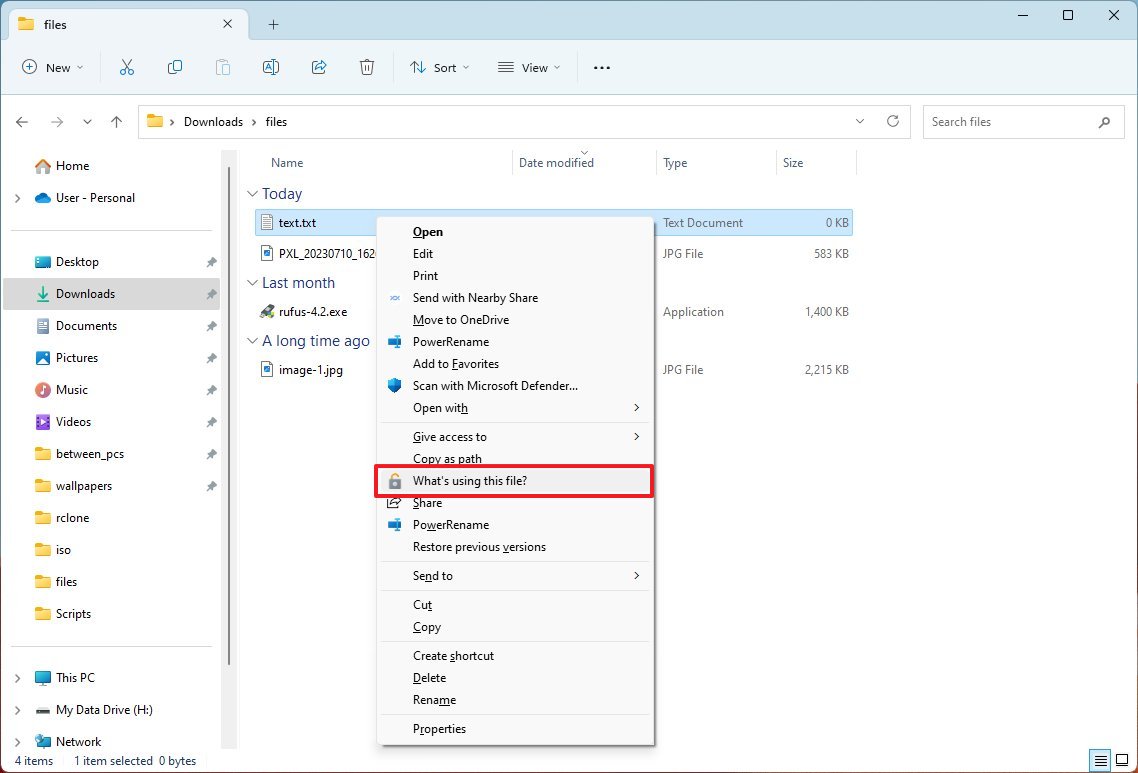
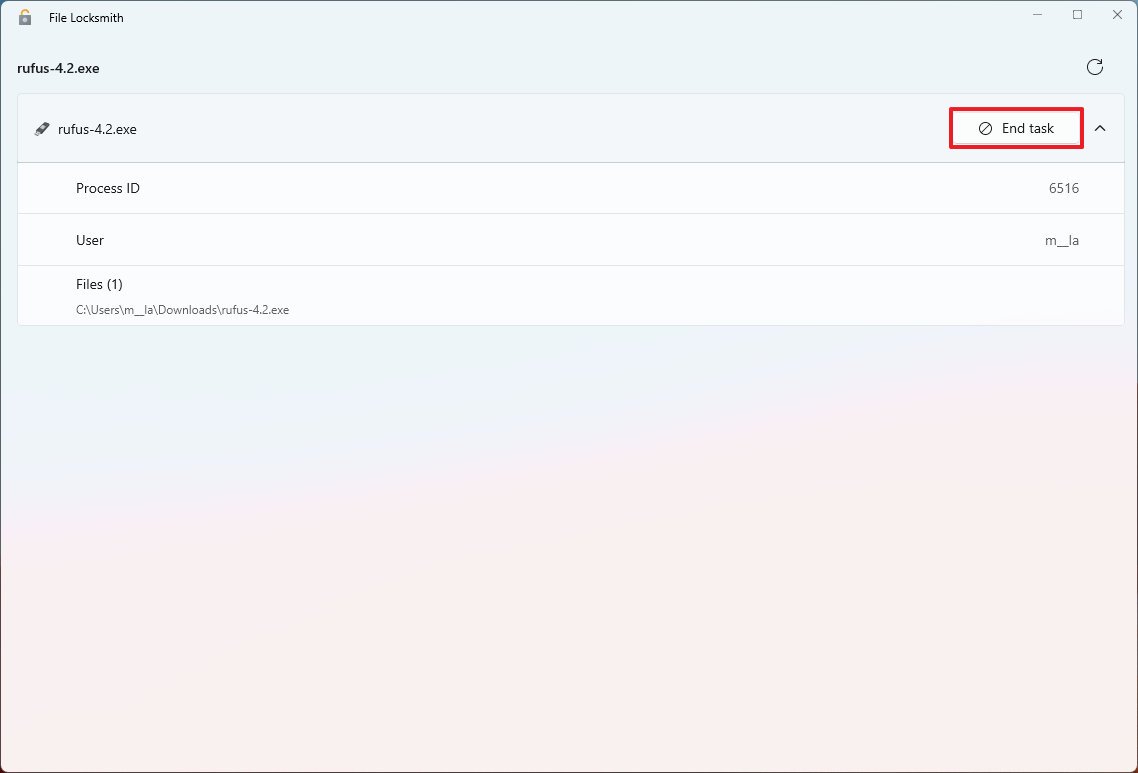
In the File Locksmith interface, you will be able to see the processes accessing the file. If you want to clear the file from any process, click the "End task" button.
If required, click the button in the top right to run the tool as an administrator.
Mouse Without Borders
Although "Mouse Without Borders" won't win an award for the best name choice, it's an amazing feature that allows you to share the mouse and keyboard with other computers in the same network.
The feature requires some configuration on all the devices sharing the peripherals.
To enable and configure Mouse Without Borders between two computers running the same version of PowerToys, use these steps:
- Open PowerToys on the primary computer.
- Quick note: We're referring to "primary" to the device sharing the keyboard and mouse and "secondary" to the device you plan to share the peripherals with.
- Click on Mouse Without Borders.
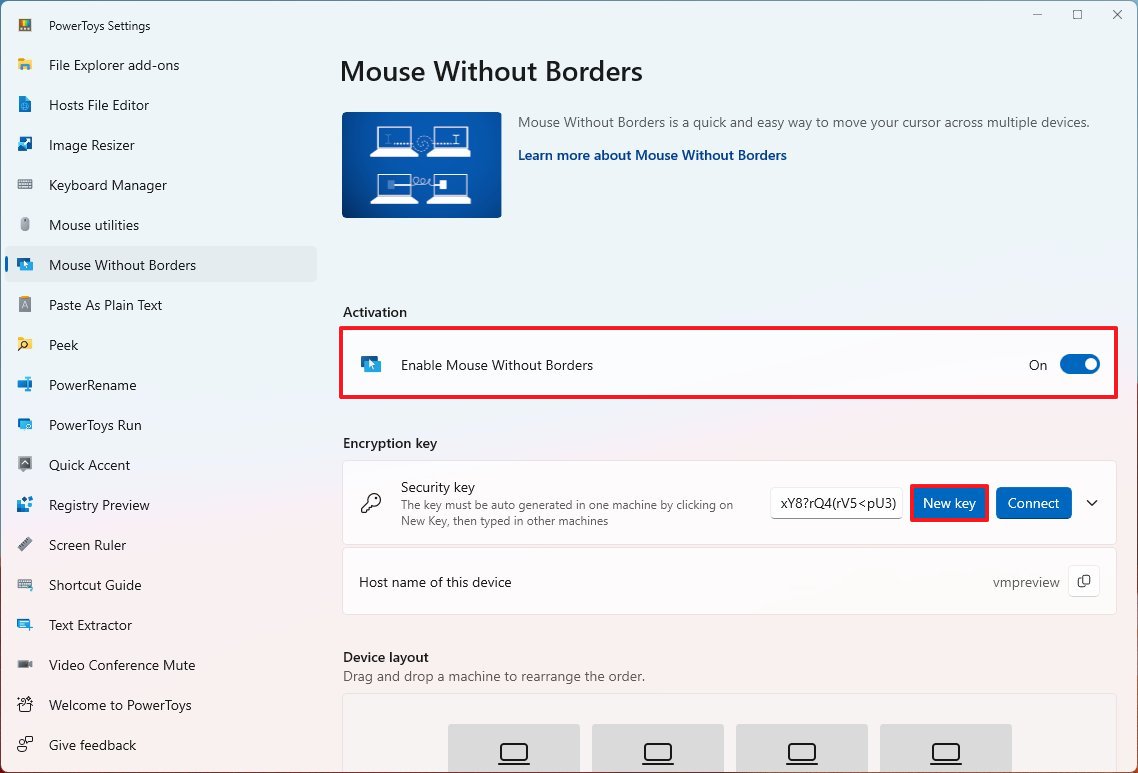
- Turn on the "Enable Mouse Without Borders" toggle switch.
- Under the "Encryption key" section, click the New key button.
- Copy the feature encryption key.
- Quick tip: You will also need the computer's name to connect. You can find this information on Settings > System > About.
- Open PowerToys on the secondary computer.
- Click on Mouse Without Borders.
- Turn on the "Enable Mouse Without Borders" toggle switch.
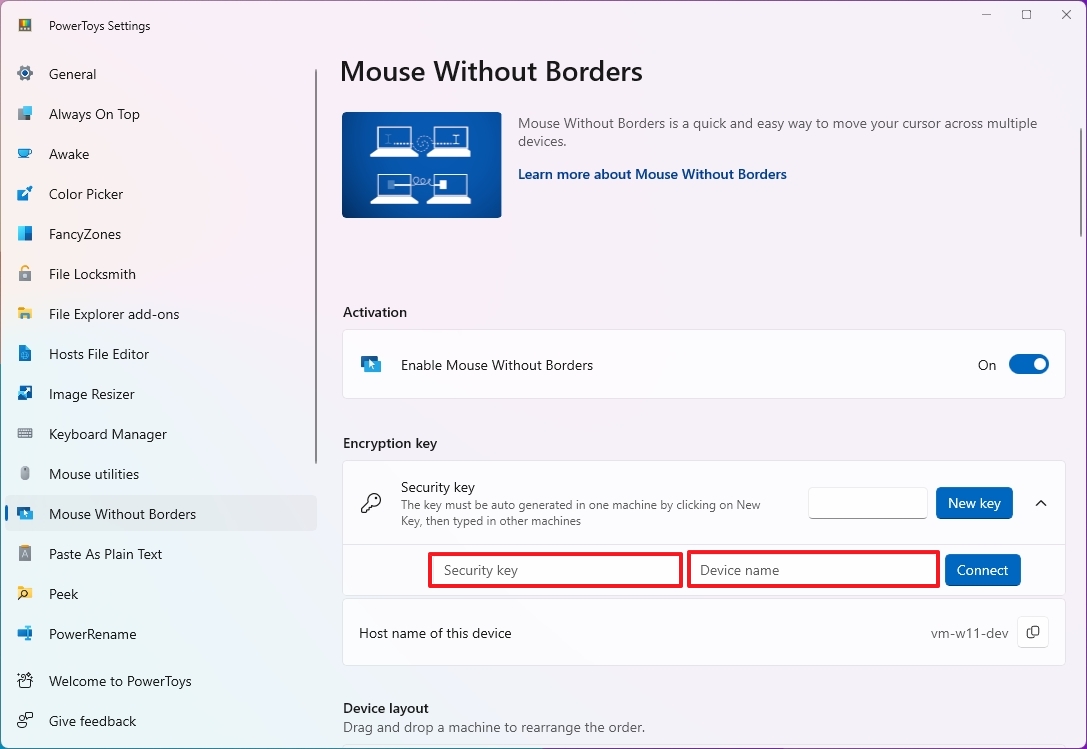
- Under the "Encryption key" section, click the "Security key" setting.
- Confirm the computer name and security key from the primary computer.
- Click the Connect button.
Once you complete the steps, you should be able to move the mouse freely from one computer to another and use the keyboard on both devices.
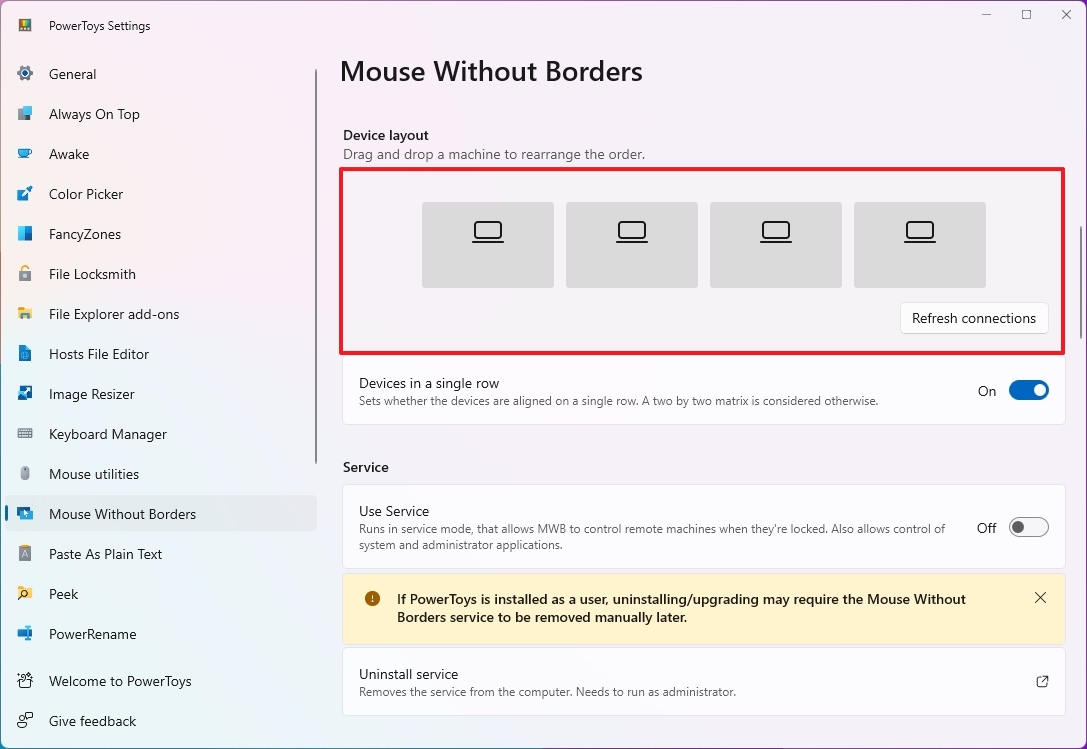
After the connection is made successfully, under the "Device layout" section from the "Mouse Without Borders" page, you will be able to make logical arrangements for the displays to match their physical location on the desk.
If you don't already have PowerToys on your computer, you can download it from the Microsoft Store. Or open Start, launch Command Prompt (admin), and run the "winget install --id Microsoft.PowerToys".
More resources
For more helpful articles, coverage, and answers to common questions about Windows 10 and Windows 11, visit the following resources:
- Windows 11 on Windows Central — All you need to know
- Windows 10 on Windows Central — All you need to know

Mauro Huculak has been a Windows How-To Expert contributor for WindowsCentral.com for nearly a decade and has over 22 years of combined experience in IT and technical writing. He holds various professional certifications from Microsoft, Cisco, VMware, and CompTIA and has been recognized as a Microsoft MVP for many years.
