How to reduce document size in Microsoft Word
Do you need to reduce the size of a Word document? Here's how on Office from Microsoft 365, Office 2021, and older versions.
All the latest news, reviews, and guides for Windows and Xbox diehards.
You are now subscribed
Your newsletter sign-up was successful
Although Microsoft Word documents are not usually large in size, sometimes, you may need to compress a file to make it more manageable when sending it over the internet or have to comply with file size upload requirements.
Whatever the case, the popular word processing application from the Office suite includes several options to reduce the size of the document without third-party compression tools. For example, you can compress images by deleting cropped areas. You can also lower the resolution that the app uses to save documents. And it's possible to exclude fonts you used in the document from saving on decreasing the file size.
This guide will walk you through Microsoft's recommended methods to reduce the size of Word documents in Office from Microsoft 365, Office 2021, and older versions that you may be running on Windows 11, 10, or older versions
How to compress Word documents
If you use Microsoft Word, you can compress and lower the resolution for images and excludes font embeds to reduce the size of documents.
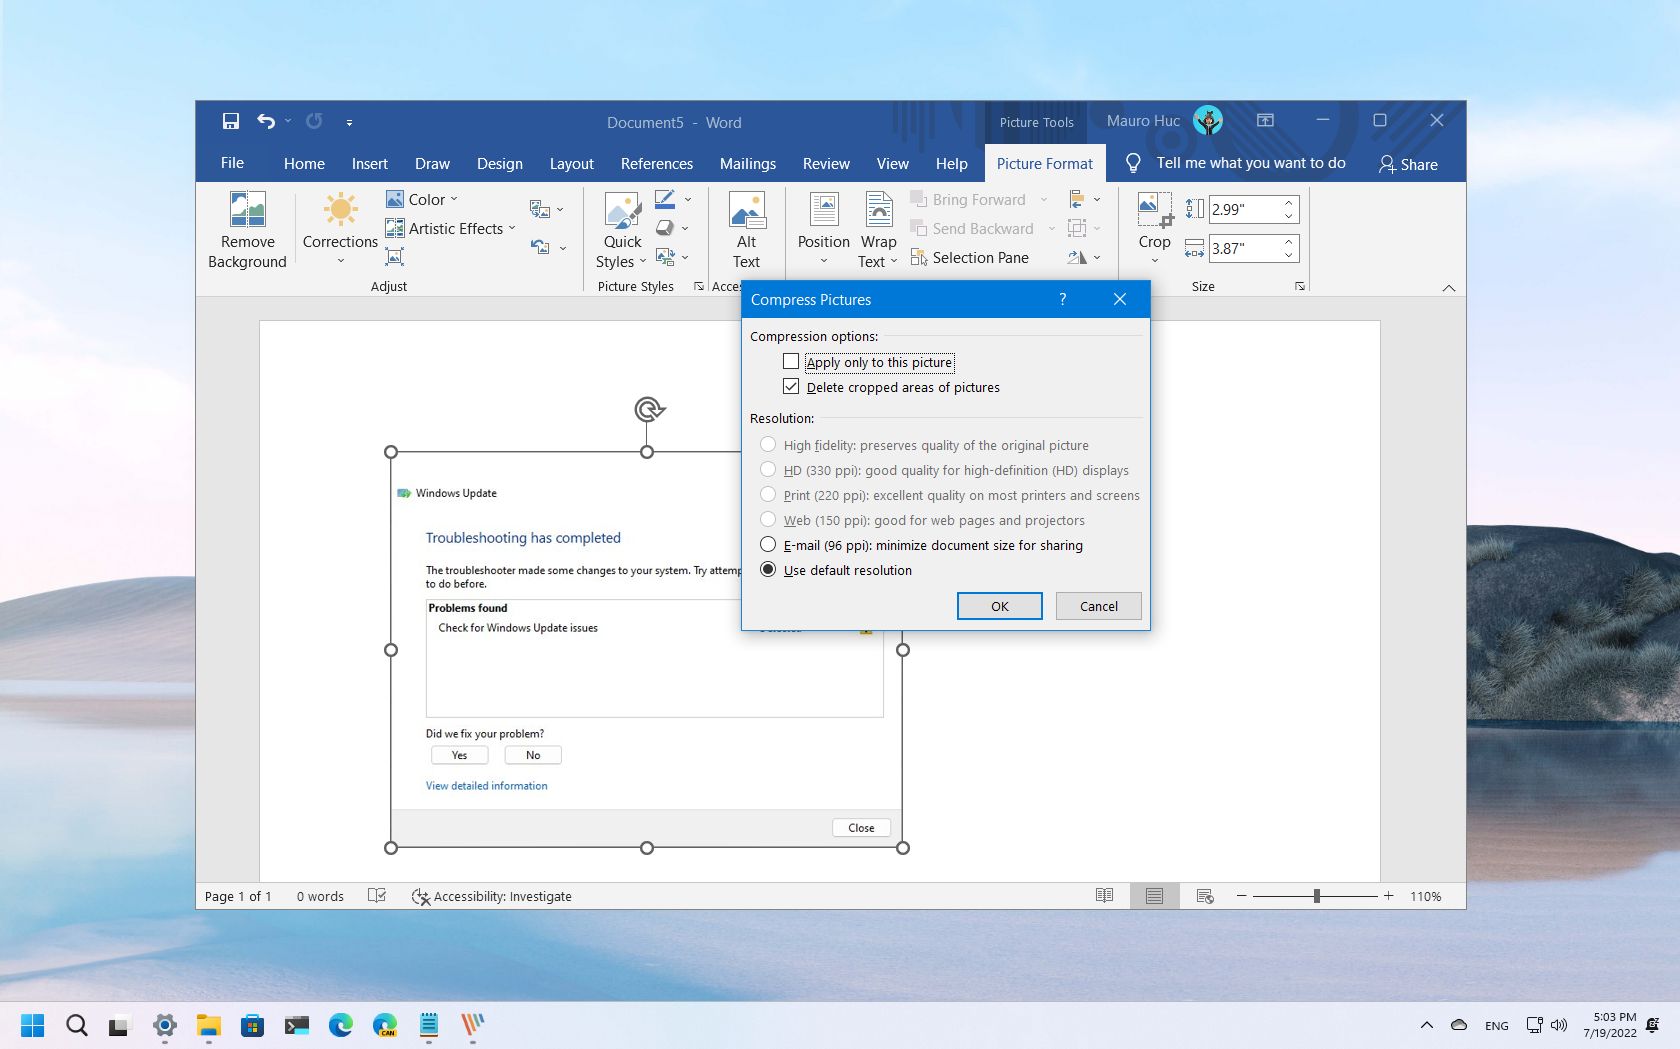
Compress images
To compress images added to a Word document, use these steps:
- Open Microsoft Word.
- Open a document.
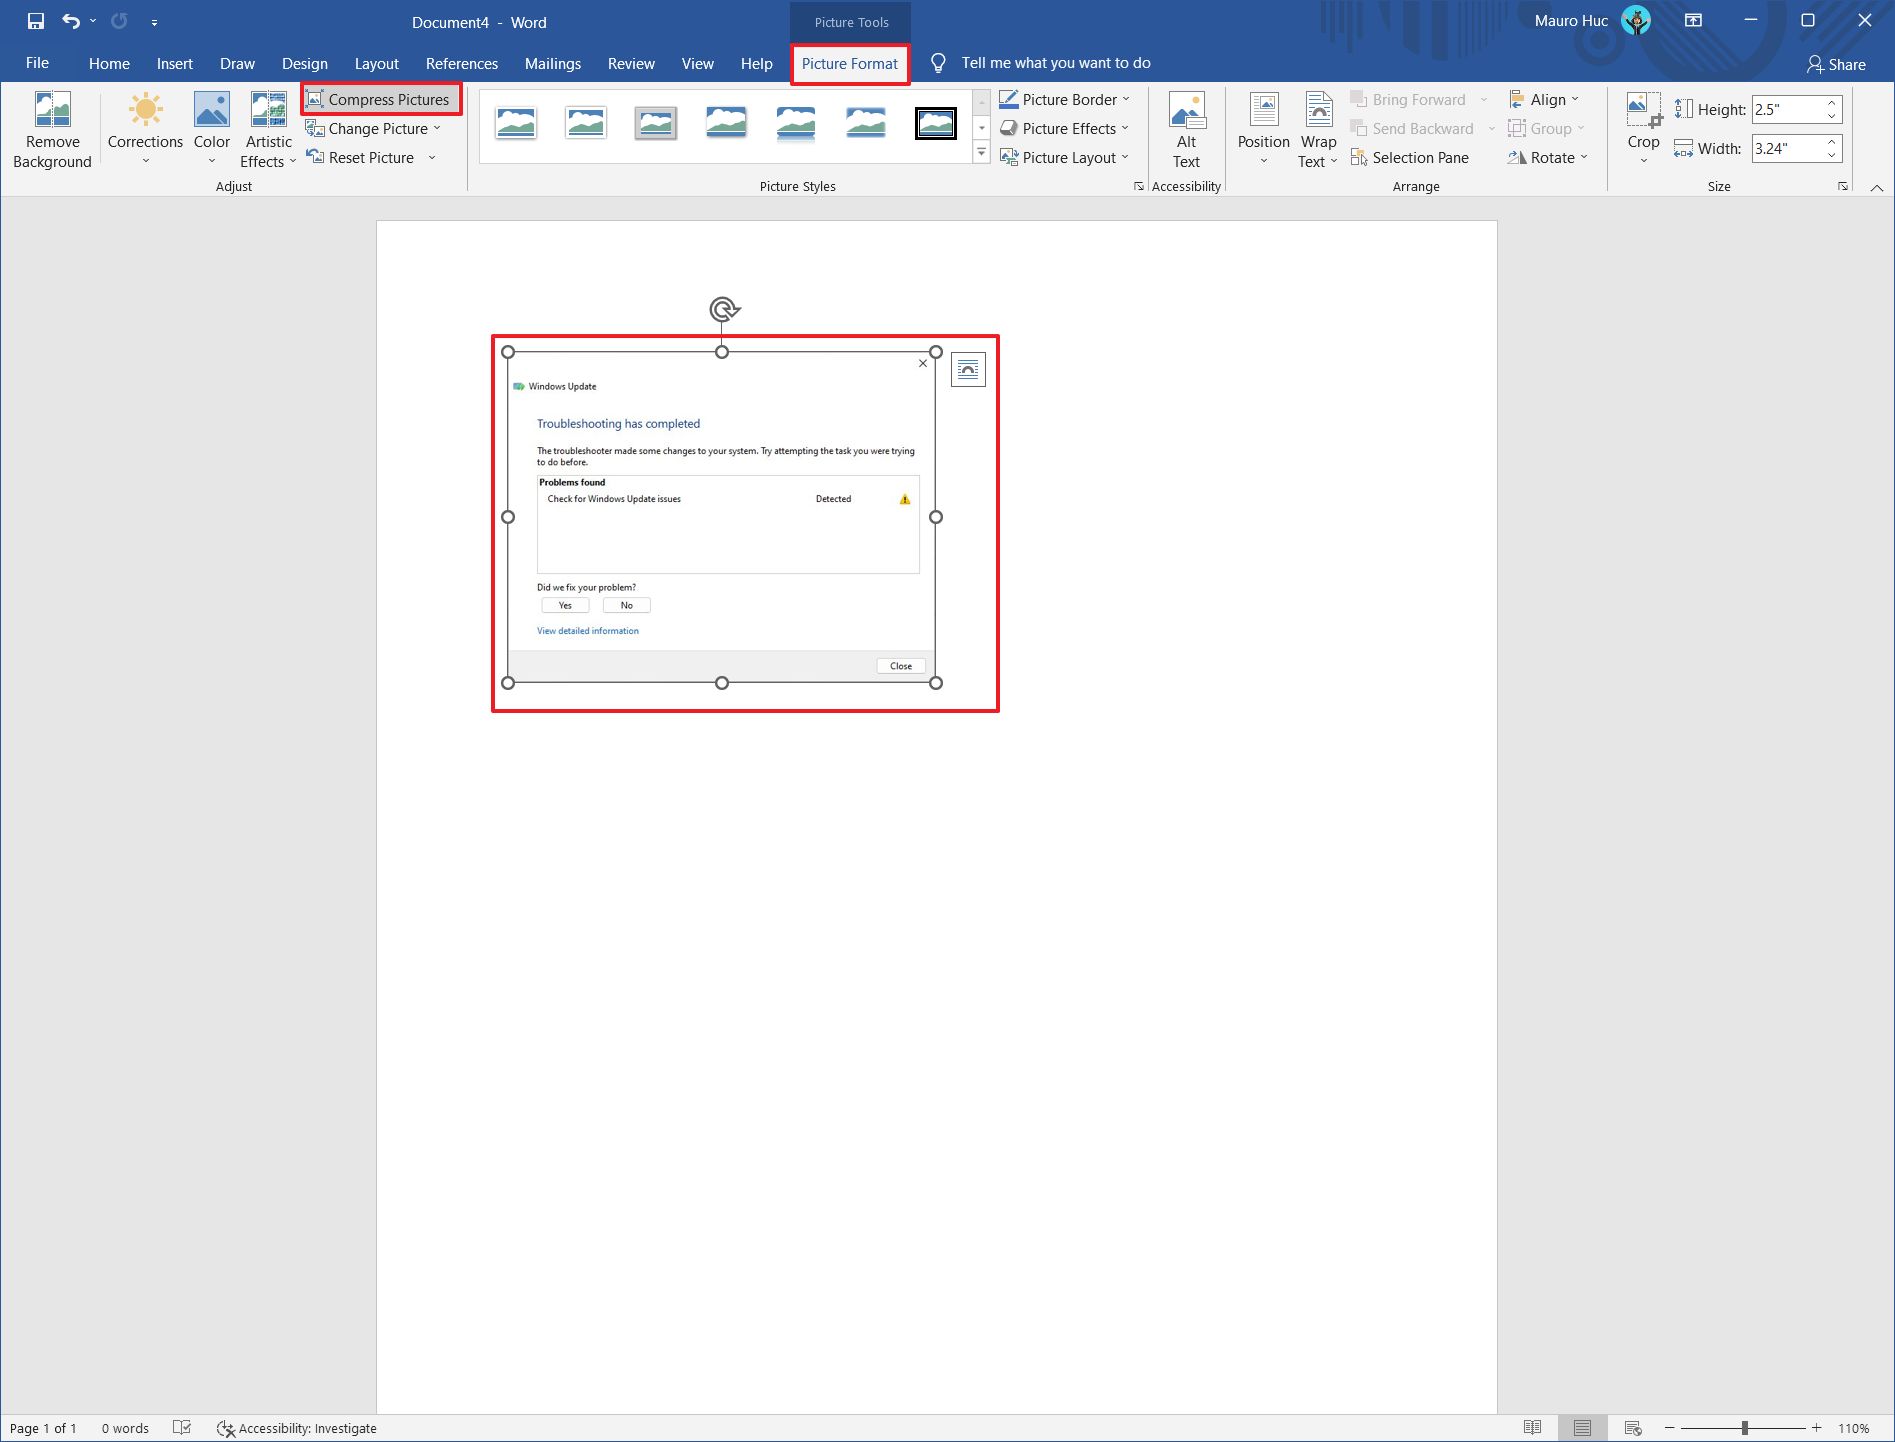
- Select the image embedded in the document.
- Click the Picture Format tab.
- Under the "Adjust" section, click the Compress Pictures button.
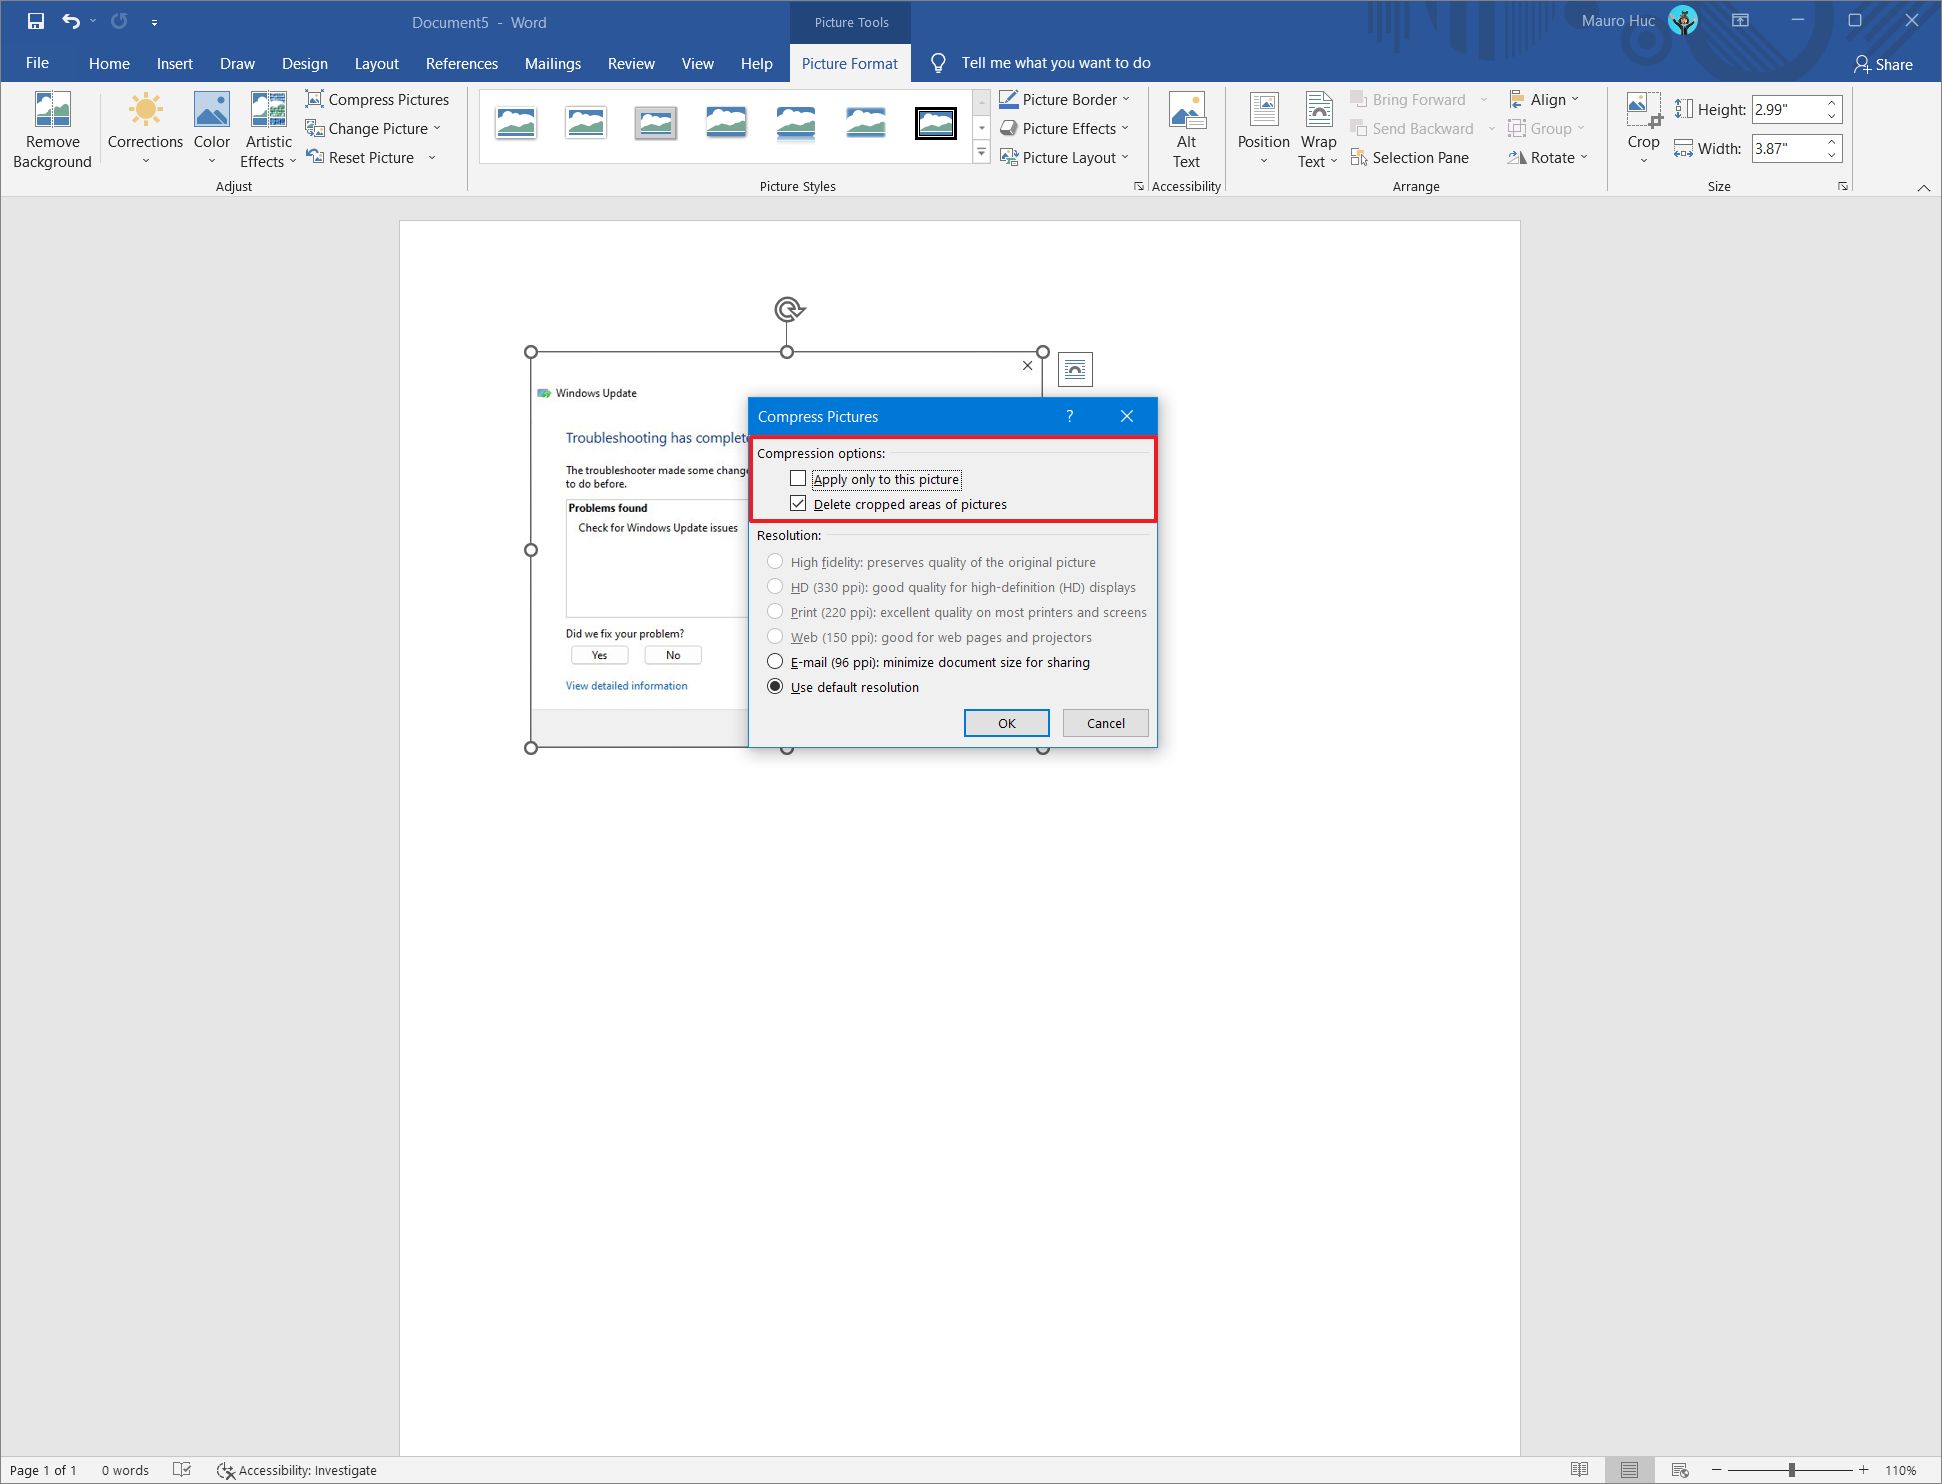
- Under the "Compression options" section, clear the "Apply only to this picture" to allow the same setting to apply to all images in the document.
- Check the "Delete cropped areas of pictures" option.
- Click the OK button.
Save at lower resolution
All the latest news, reviews, and guides for Windows and Xbox diehards.
To lower the resolution of images to make a Word document smaller, use these steps:
- Open Microsoft Word.
- Open a document
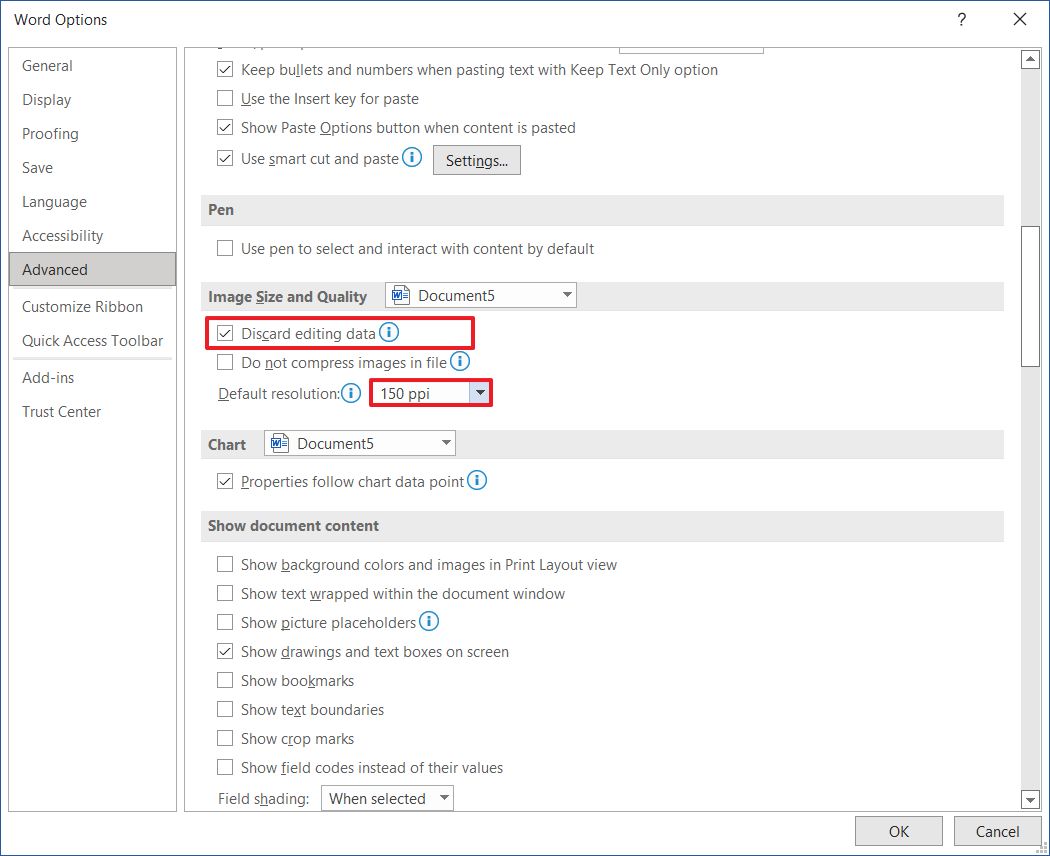
- Click on File and select Options.
- Click on Advanced.
- Under the "Image, Size and Quality" section, check the Discard editing data option to remove data that enables the restoration of the image from its original state.
- Clear the "Do not compress images in file" option.
- Select 150 or lower ppi using the Default resolution setting.
- Click the OK button.
Remove fonts
To prevent including special fonts to reduce the size of a Word document, use these steps:
- Open Microsoft Word.
- Open a document
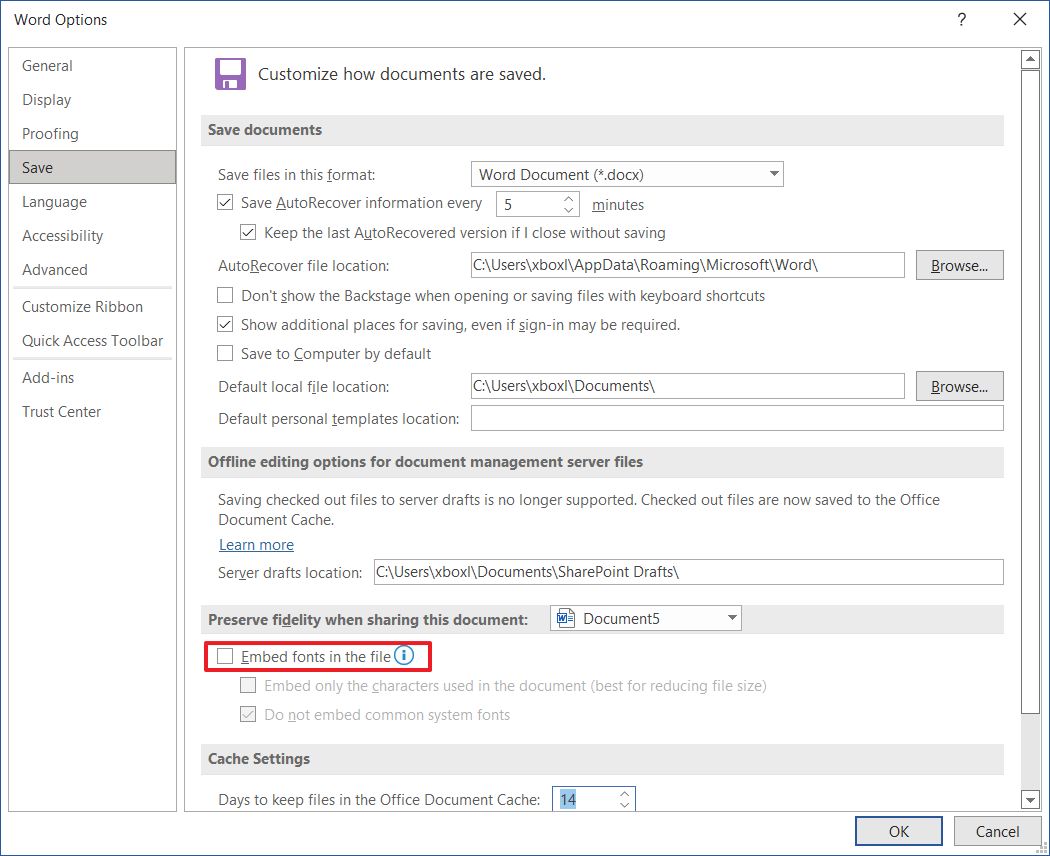
- Click on File and select Options.
- Click on Save.
- Under the "Preserve fidelity when saving this document" section, clear the "Embed fonts in the file" option.
- Click the OK button.
Alternatively, you can check the "Embed fonts in the file" option, but if you do so, then select the "Embed only the characters used in the document (best for reducing file size)" and "Do not embed common system fonts" options.
Once you complete the steps, the Microsoft Word document will have a smaller footprint, making it easier to send over the internet or comply with the requirements if you must upload the file to a specific service.
More resources
For more helpful articles, coverage, and answers to common questions about Windows 10 and Windows 11, visit the following resources:

Mauro Huculak has been a Windows How-To Expert contributor for WindowsCentral.com for nearly a decade and has over 22 years of combined experience in IT and technical writing. He holds various professional certifications from Microsoft, Cisco, VMware, and CompTIA and has been recognized as a Microsoft MVP for many years.
