How to use DISM to repair local image on Windows 11
Here's how you can use the DISM and SFC tools to replace missing and corrupted system files to fix problems on Windows 11.
All the latest news, reviews, and guides for Windows and Xbox diehards.
You are now subscribed
Your newsletter sign-up was successful
On Windows 11, the Deployment Image Servicing and Management (DISM) tool is a powerful built-in utility designed for advanced servicing, modification, and repair of system images using commands. While it's commonly used by network administrators, you can also use it (especially when combined with the System File Checker (SFC)) to troubleshoot and resolve persistent system issues.
Typically, when your device experiences performance degradation, unexpected errors, or startup problems, you start by running the SFC tool. This command scans and replaces missing or corrupted system files using the local image. However, if the underlying image is also damaged, SFC won’t be able to complete the repair successfully.
In such cases, you can turn to DISM to restore the system image to a healthy state. Once the image is repaired, running SFC again will allow it to properly replace any corrupted system files, effectively resolving the issue.
In this how-to guide, I'll outline the steps to use command-line tools to fix most problems on Windows 11.
Important: This is a non-destructive process, but it's still recommended to create a system backup before proceeding.
These instructions has been updated to ensure accuracy and reflect changes to the process in the operating system.
How to use DISM to fix image problems on Windows 11
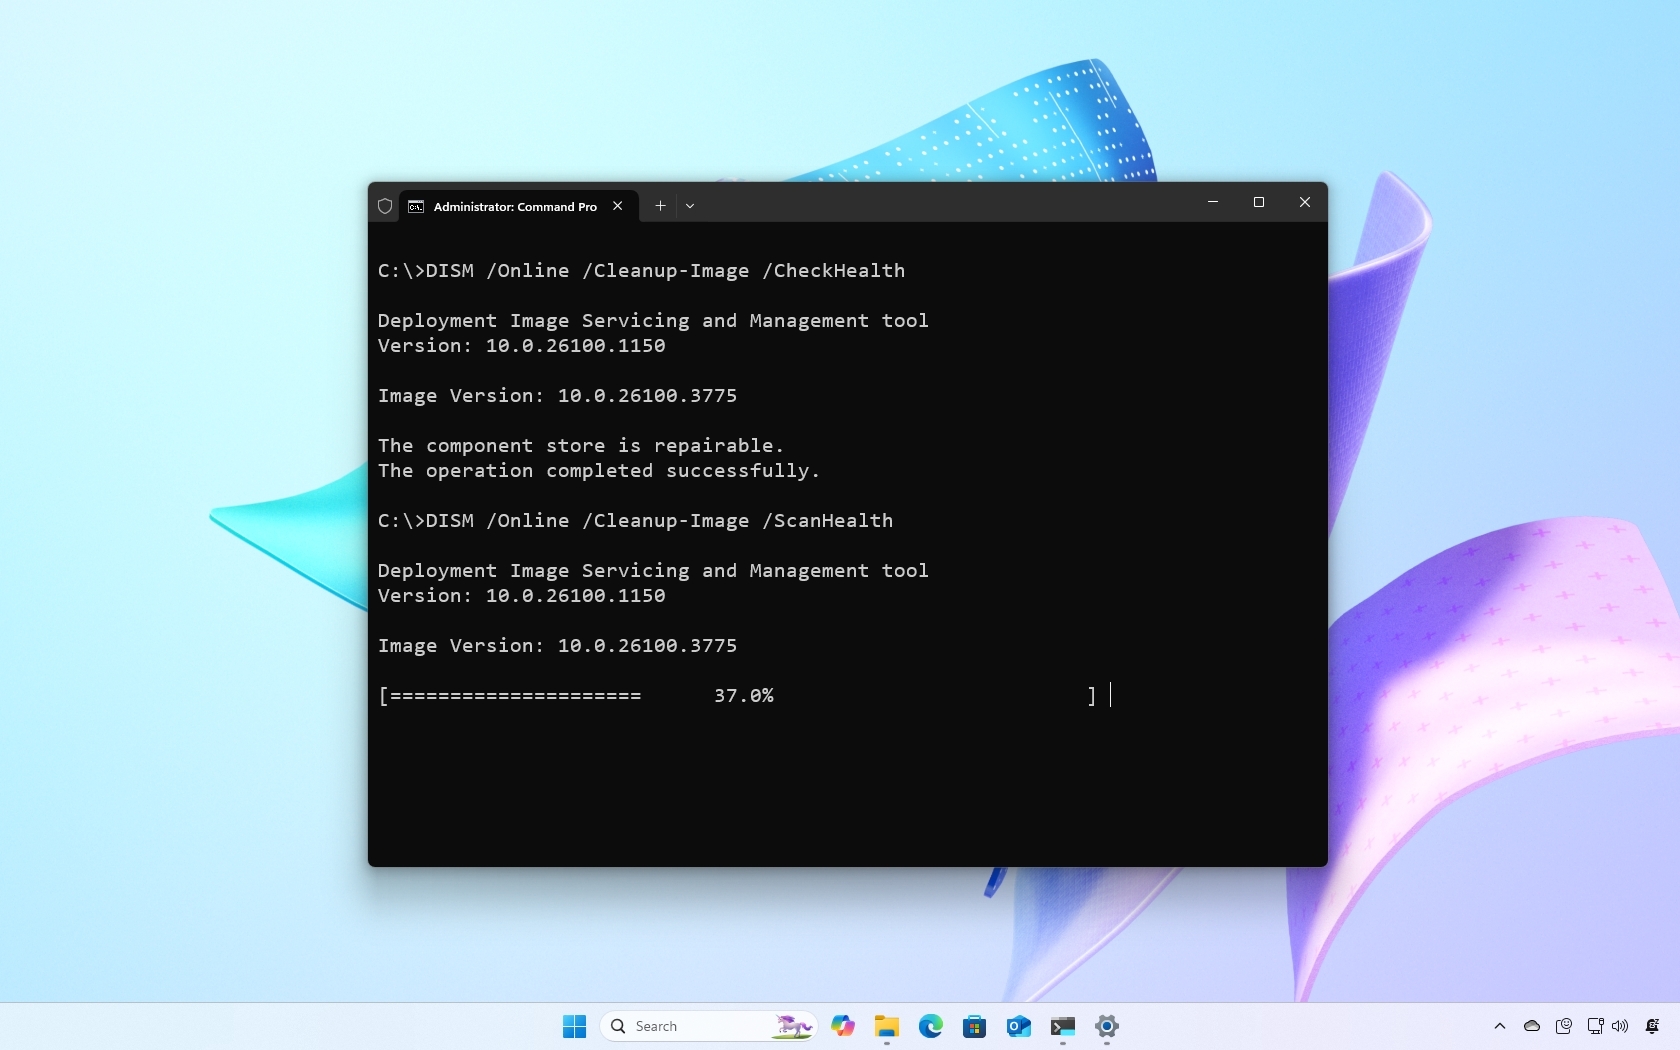
The DISM command has the "CheckHealth," "ScanHealth," and "RestoreHealth" options to scan and detect issues, and you want to use them in order. If the scans return errors in the image, you can use the "RestoreHealth" option to fix them.
Check health option
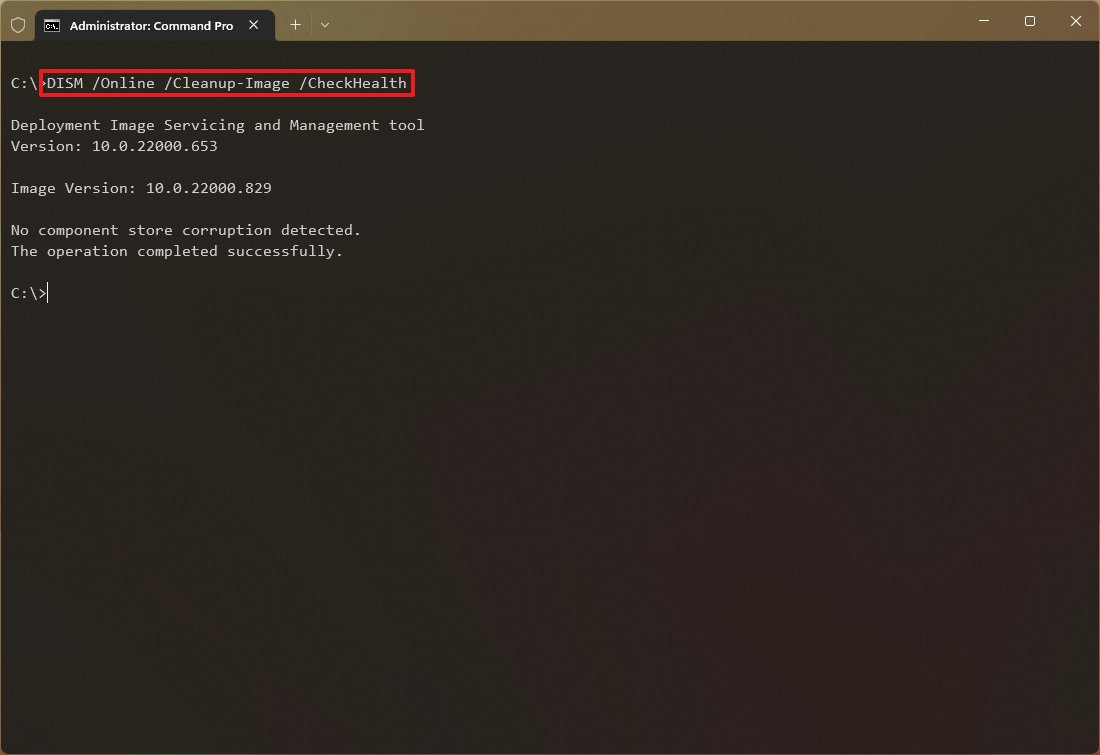
The DISM's CheckHealth option helps to determine any corruption inside the local image. However, the option does not perform any repairs.
All the latest news, reviews, and guides for Windows and Xbox diehards.
To check the Windows 11 image for issues with the DISM command, use these steps:
- Open Start.
- Search for Command Prompt, right-click the top result, and select the Run as administrator option.
- Type the following command to perform a quick check and press Enter: DISM /Online /Cleanup-Image /CheckHealth
Once you complete the steps, the Deployment Image Servicing and Management tool will verify any data corruption that may require fixing.
Scan health option
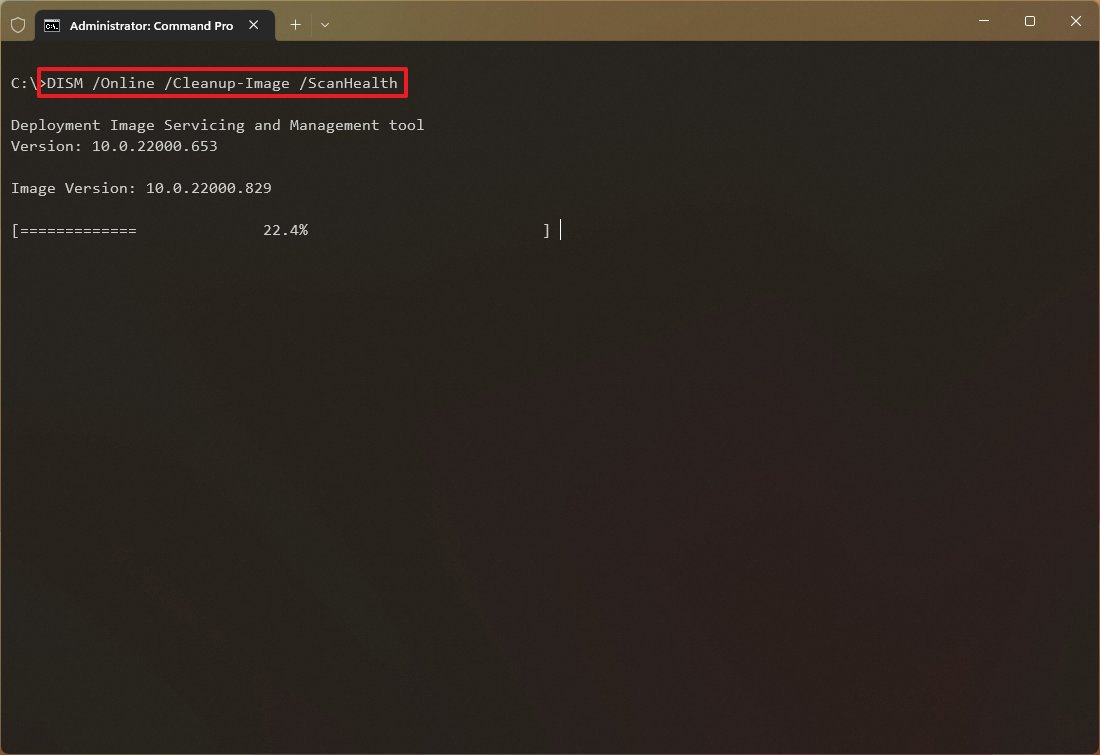
The ScanHealth option performs an advanced scan to find issues with the image.
To check image problems with the ScanHealth option, use these steps:
- Open Start.
- Search for Command Prompt, right-click the top result, and select the Run as administrator option.
- Type the following command to perform an advanced DISM scan and press Enter: DISM /Online /Cleanup-Image /ScanHealth
After you complete the steps, the scan could take some time to check whether the operating system needs any repairs.
Restore health option
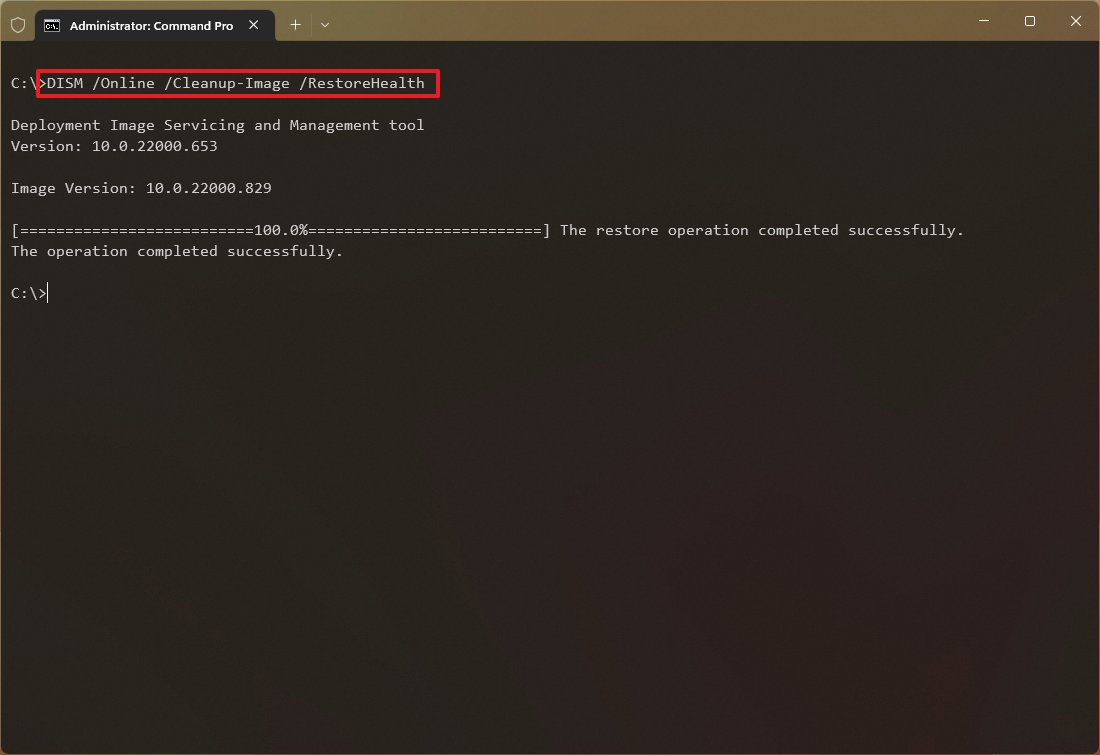
The DISM's RestoreHealth option automatically scans and repairs common issues in the current setup.
To repair system problems with the DISM commands, use these steps:
- Open Start.
- Search for Command Prompt, right-click the top result, and select the Run as administrator option.
- Type the following command to repair the Windows 11 image and press Enter: DISM /Online /Cleanup-Image /RestoreHealth
Once you complete the steps, the command tool will download and replace damaged files from the "Windows Update" online service (as necessary).
If the command seems stuck, this is normal behavior. After a few minutes, the process will be complete without further action.
Install.wim image option
In rare cases, DISM may be unable to replace the corrupted files, especially if the system lacks internet access or the local repair content is unavailable. When this happens, you’ll need to manually specify a clean source using the /Source option.
A reliable way to do this is by mounting a Windows 11 ISO file to provide the necessary repair files. However, it’s critical that the ISO matches the exact version, edition, and language of the installation you're repairing. Using a mismatched image could cause the repair process to fail or introduce compatibility issues.
Download Windows 11 ISO
To download the Windows 11 ISO file, use these steps:
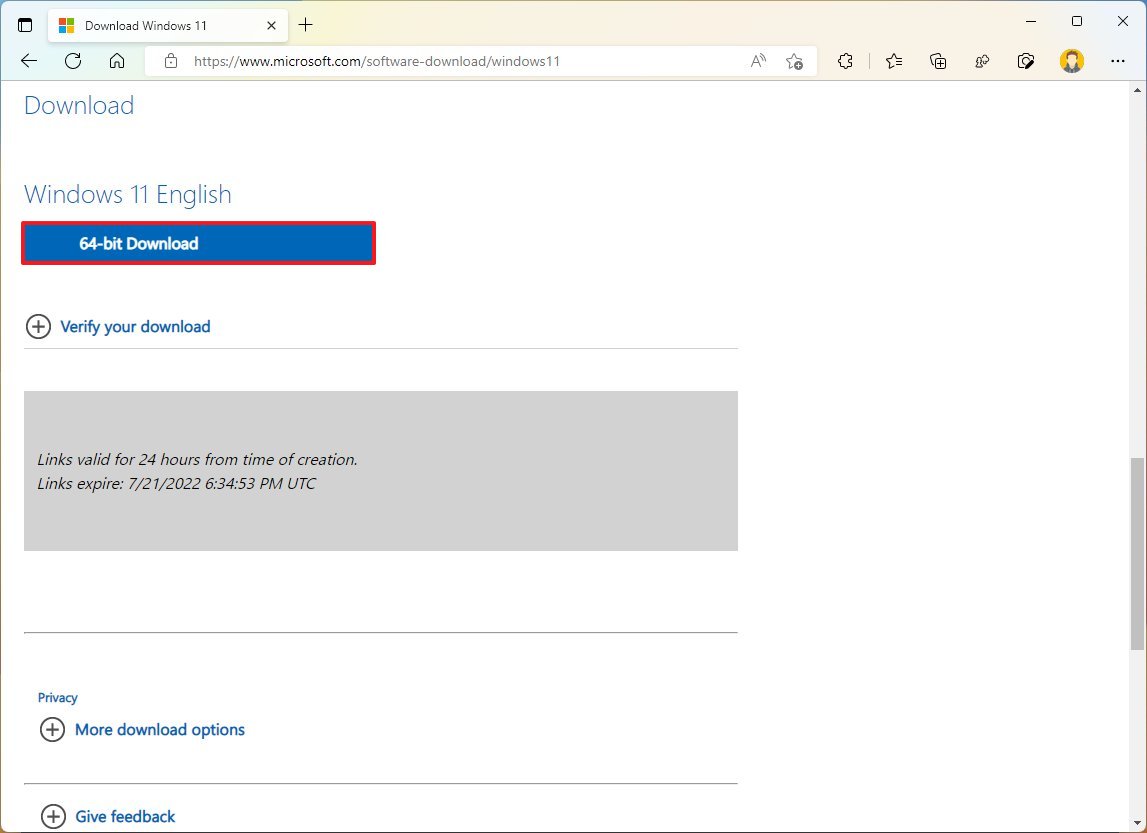
- Open the Microsoft Support website.
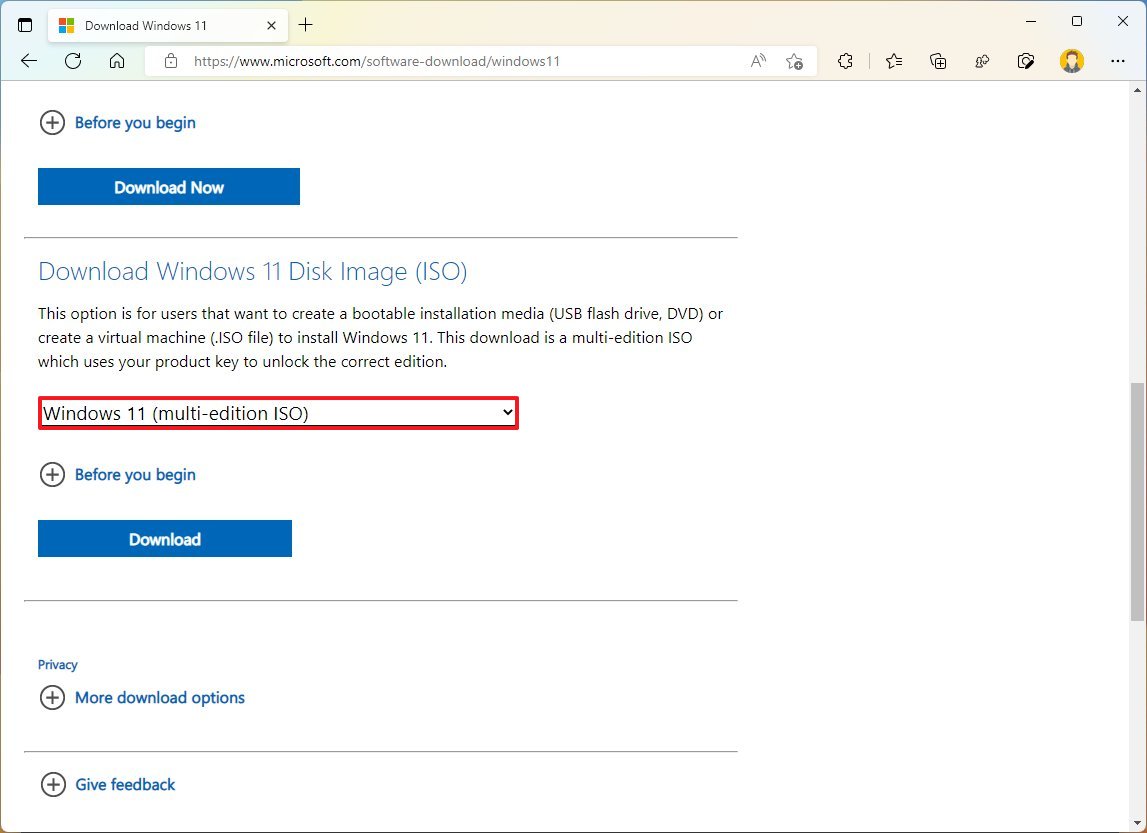
- Select the Windows 11 option under the "Download Windows 11 Disk Image (ISO)" section.
- Click the Download button.
- Select the installation language.
- Click the Confirm button.
- Click the Download button to save the ISO file on the computer.
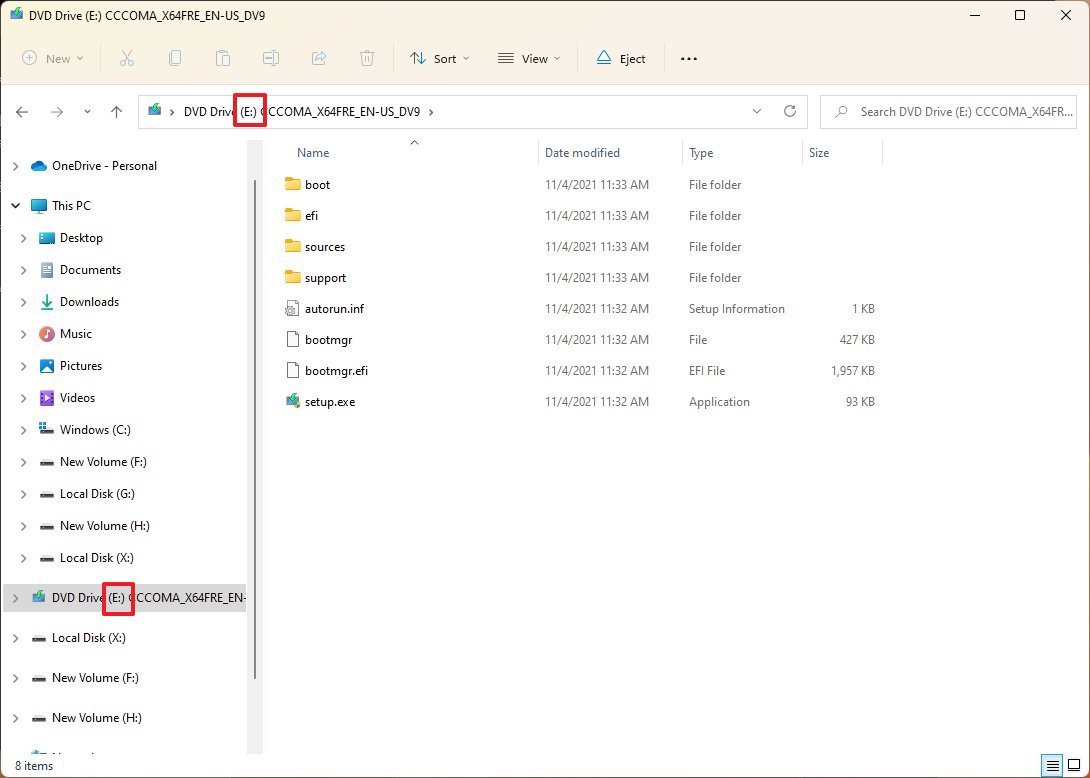
- Double-click the ISO file to mount it to File Explorer.
- Confirm the drive letter of the mount from the left navigation pane.
After you complete the steps, you can use the "Source" option to repair the local image.
Repair image with recovery image
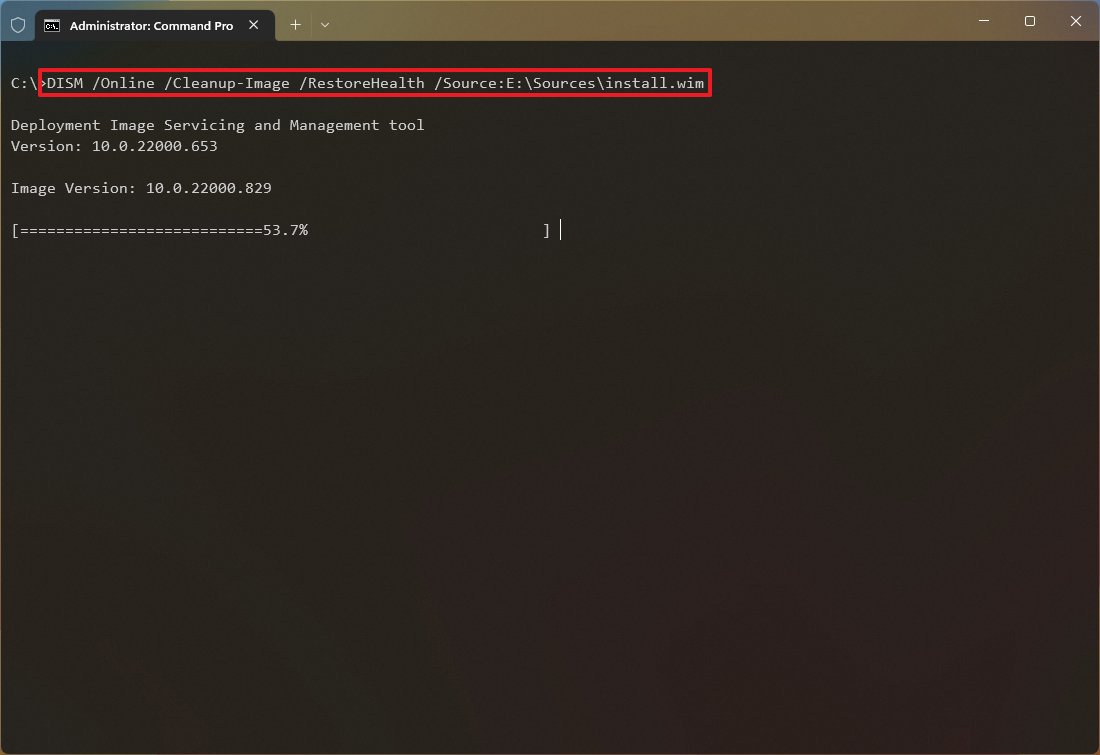
To run DISM with the install.wim image to repair Windows 11, use these steps:
- Open Start.
- Search for Command Prompt, right-click the top result, and select the Run as administrator option.
- Type the following command to repair the local image and press Enter: DISM /Online /Cleanup-Image /RestoreHealth /Source:E:\Sources\install.wim
In the command, replace "E" with the ISO mount point drive letter in File Explorer.
- (Optional) Type the following command to limit the use of Windows Update and press Enter: DISM /Online /Cleanup-Image /RestoreHealth /Source:E\Sources\install.wim /LimitAccess
- (Optional) Type the following command variant to accomplish the same task and press Enter: DISM /Online /Cleanup-Image /RestoreHealth /Source:wim:E:\Sources\install.wim:1 /LimitAccess
In the command, change "E:\Sources," for the path to the "install.wim" file location.
Once you complete the steps, the Deployment Image Servicing and Management command will scan and repair the problems using the ".wim" file.
How to use SFC to fix problems on Windows 11
The DISM commands will help to resolve issues with the system image, not the problems with the setup. Once the local image is restored to a healthy working state, you can use the System File Checker (SFC) command to repair the Windows 11 installation.
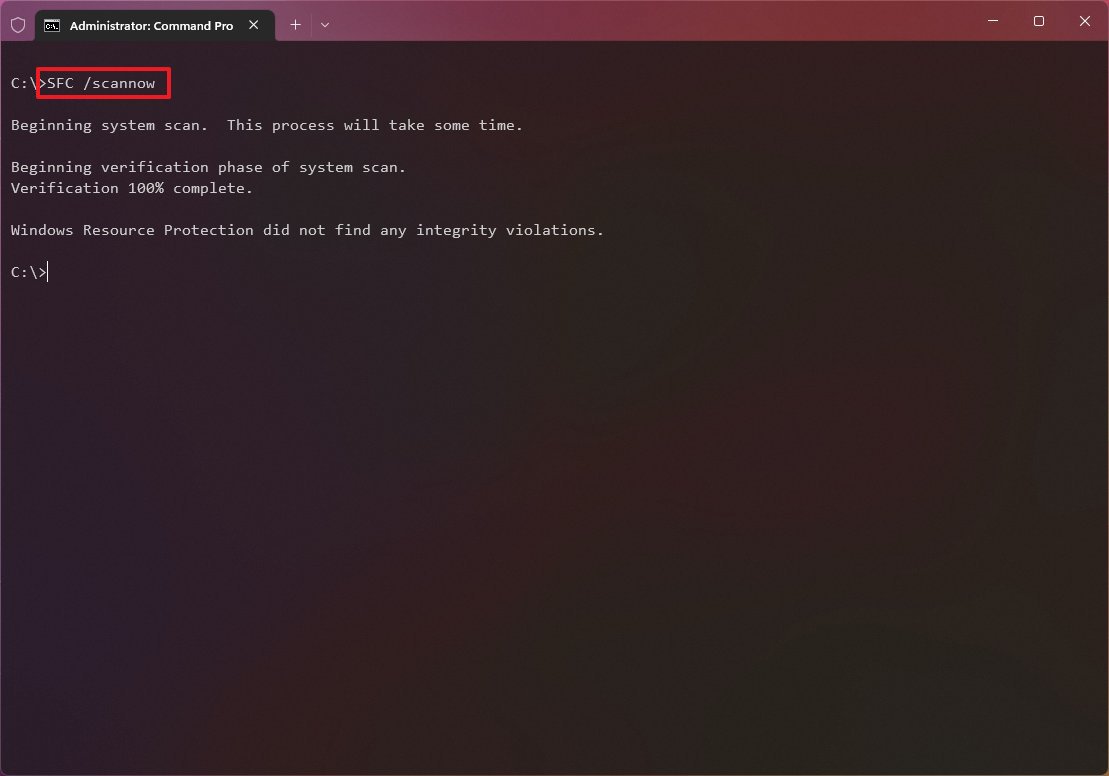
To use the SFC command tool to repair problems on Windows 11, use these steps:
- Open Start.
- Search for Command Prompt, right-click the top result, and select the Run as administrator option.
- Type the following command to repair the installation and press Enter: SFC /scannow
- Quick tip: If the tool determines that the system has errors, it's recommended to run the command several times to ensure that everything was fixed correctly.
Once you complete the steps, the System File Checker tool will repair the system files using the local image files, and the log files will be created on "%windir%/Logs/CBS/CBS.log" and "%windir%\Logs\DISM\dism.log," which you can review to get more details about the repair.
More resources
For more helpful articles, coverage, and answers to common questions about Windows 10 and Windows 11, visit the following resources:

Mauro Huculak has been a Windows How-To Expert contributor for WindowsCentral.com for nearly a decade and has over 22 years of combined experience in IT and technical writing. He holds various professional certifications from Microsoft, Cisco, VMware, and CompTIA and has been recognized as a Microsoft MVP for many years.
You must confirm your public display name before commenting
Please logout and then login again, you will then be prompted to enter your display name.
