What's Quick Machine Recovery, and how to set it up? Windows 11 recovery feature explained.
Windows 11 has a new recovery feature that uses the cloud to fix boot issues automatically. Here’s how QMR works, how to set it up – and why it’s different from Startup Repair.
All the latest news, reviews, and guides for Windows and Xbox diehards.
You are now subscribed
Your newsletter sign-up was successful
On Windows 11, Quick Machine Recovery (QMR) is a feature that has been designed to quickly restore your computer from a critical boot failure that prevents it from starting correctly.
Actually, it's part of Microsoft's Windows Resiliency Initiative and aims to reduce downtime and the need for manual intervention by network administrators during large-scale recovery scenarios. However, the company is also making this feature available for consumers running the Home or Pro editions of Windows 11 starting with the August 2025 Security Update for version 24H2 and higher.
Quick Machine Recovery process explained
When your computer repeatedly fails to boot, it automatically enters the Windows Recovery Environment (WinRE), and it automatically connects to the network using the internet connection.
After the network connection is established, the system will upload the diagnostic data to Microsoft's servers to identify the problem. If a known fix exists for the issue (especially for widespread outages), the company can deliver a targeted remediation.
Then, the system will download and apply the fix using the Windows update mechanism and reboot. If the fix is successful, the device boots directly into the Windows 11 environment. If not, it reboots back into the recovery environment and provides the user with additional ways to continue troubleshooting the system.
Quick Machine Recovery comes enabled by default on Windows 11 Home and Pro, as long as it's not managed by a network administrator.
Also, this feature is an evolution of the Startup Repair feature. If it's enabled, the device will connect to the network and download the remediation using Windows Update. In contrast, when QMR is disabled, the computer will try to use the legacy Startup Repair feature to recover.
All the latest news, reviews, and guides for Windows and Xbox diehards.
In this how-to guide, I'll outline the steps to configure the Quick Machine Recovery feature on your computer.
These instructions have been updated to ensure accuracy and reflect changes to the process in the operating system.
How to set up Quick Machine Recovery on Windows 11
To configure QMR on Windows 11, use these steps:
- Open Settings.
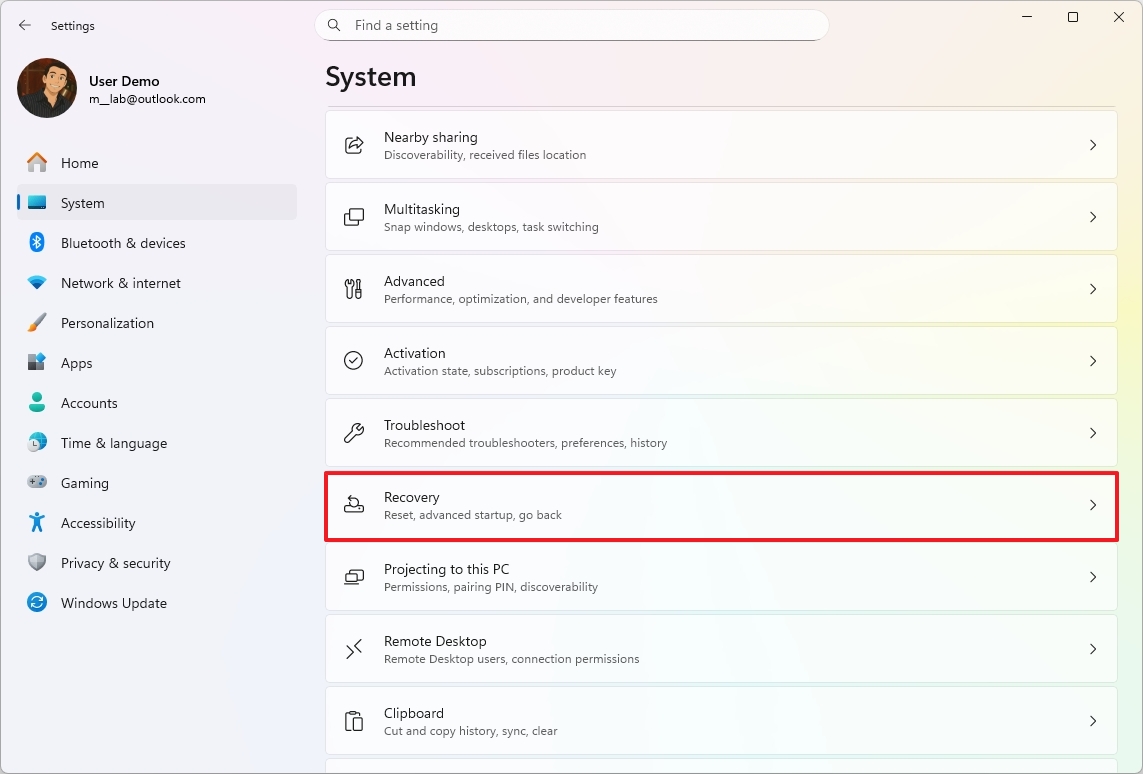
- Click on System.
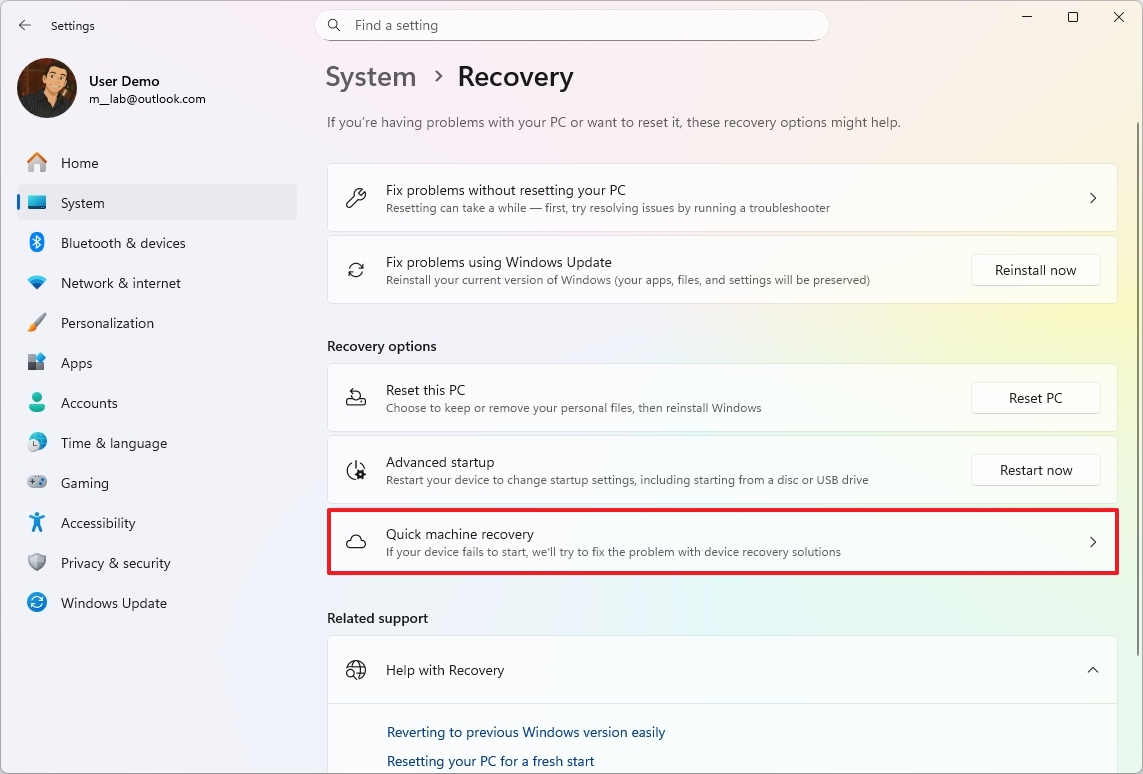
- Click the Recovery page on the right side.
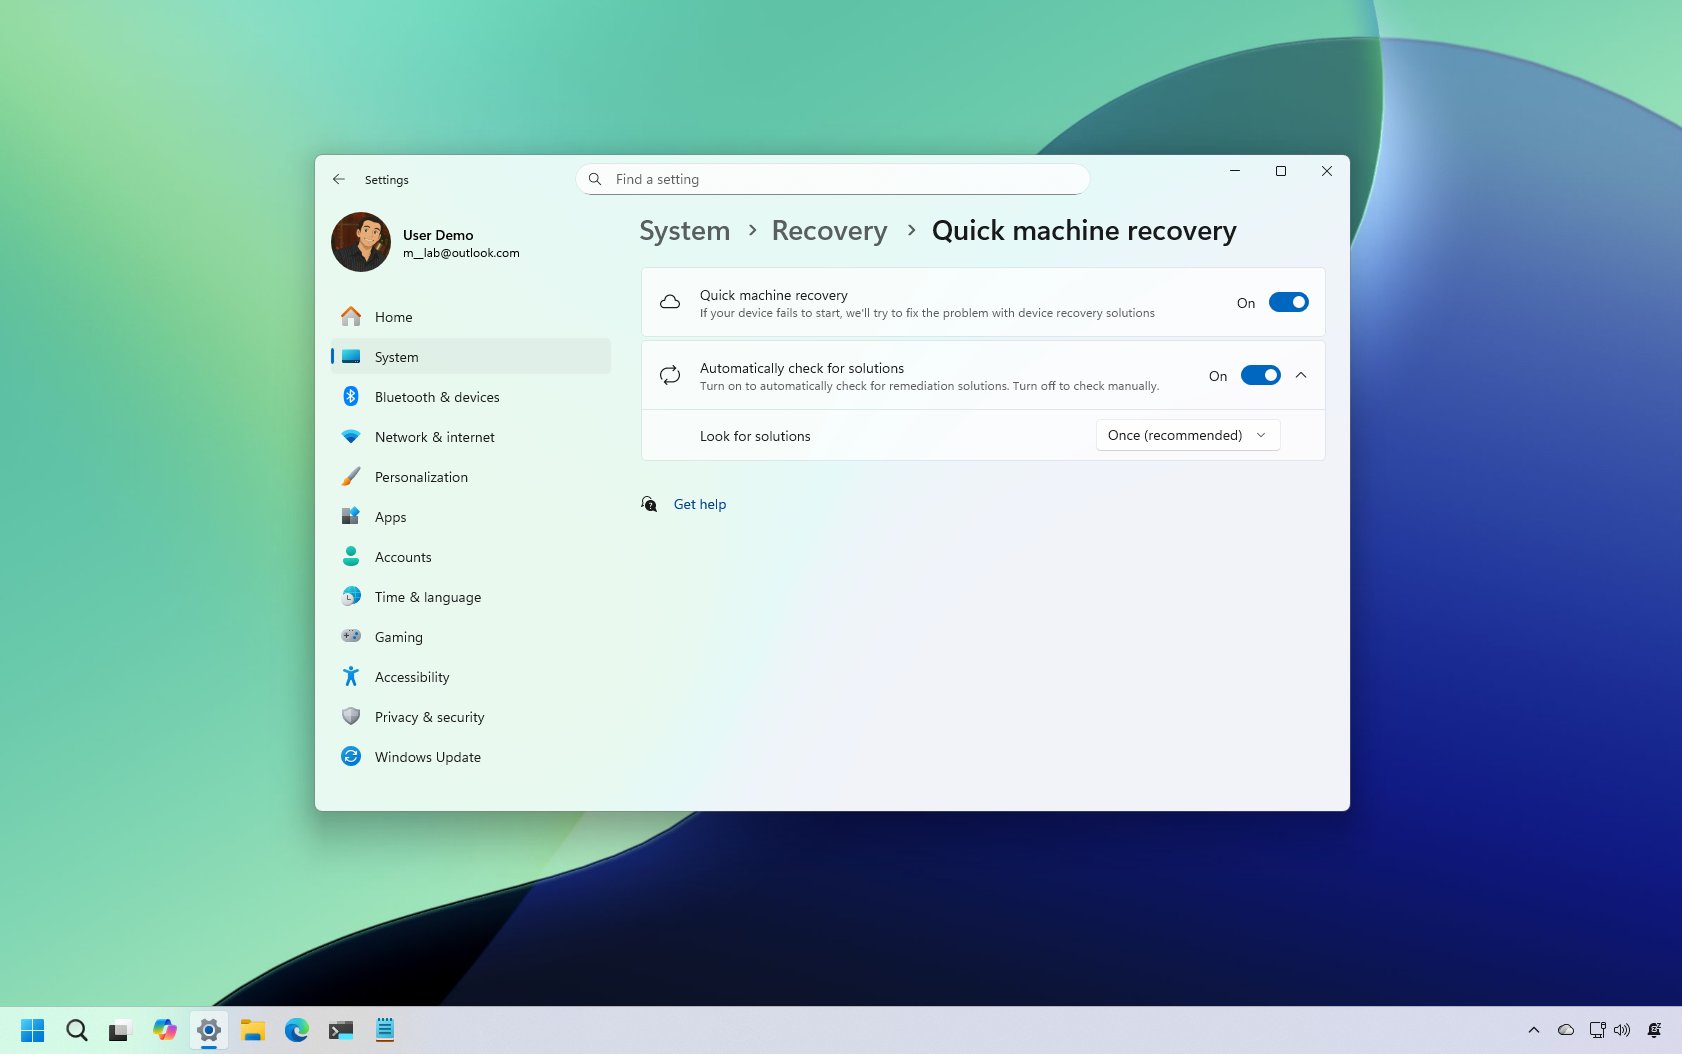
- Click the Quick machine recovery setting.
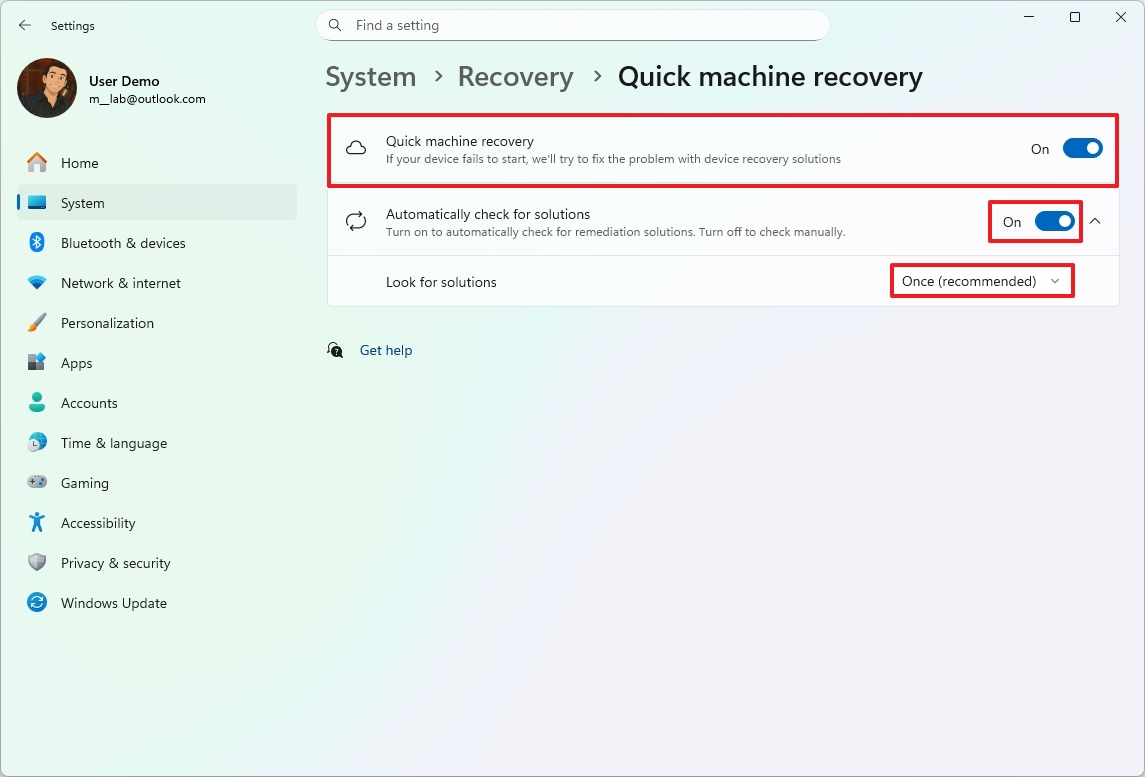
- Turn on the "Quick machine recovery" toggle switch to enable the feature.
- Turn on the "Automatically check for solutions" toggle switch to control the feature behavior.
- Choose how long the system has to wait before checking for fixes using the "Look for solutions" setting.
Once you complete the steps, the feature will be turned on, and it should kick in automatically when the computer fails to boot repeatedly.
It's important to note that in the "Home" edition, the "cloud remediation" experience is enabled by default, while "auto remediation" is disabled by default. On the other hand, in the "Pro" edition, both "cloud remediation" and "auto remediation" are disabled by default.
For a little more clarification, the "Quick machine recovery" toggle switch corresponds to the "cloud remediation" feature. If it's enabled, it means the capability to use the internet to find a fix is active.
The "Automatically check for solutions" toggle switch corresponds to the "auto remediation" feature. If it's disabled, it means the system will not automatically re-attempt a fix and will wait for manual user intervention in the Windows Recovery Environment.
Start Quick Machine Recovery manually
If the computer doesn't trigger the Quick Machine Recovery feature automatically, you may be able to run the feature manually with these steps:
- Start your PC.
- Press and hold the power button as soon as the Windows logo appears to shut down the system.
- Continue with steps 1 and 2 two more times, and the computer will boot into the Advanced Startup settings during the second or third restart.
- Quick Machine Recovery should start automatically, and it'll attempt to repair the system.
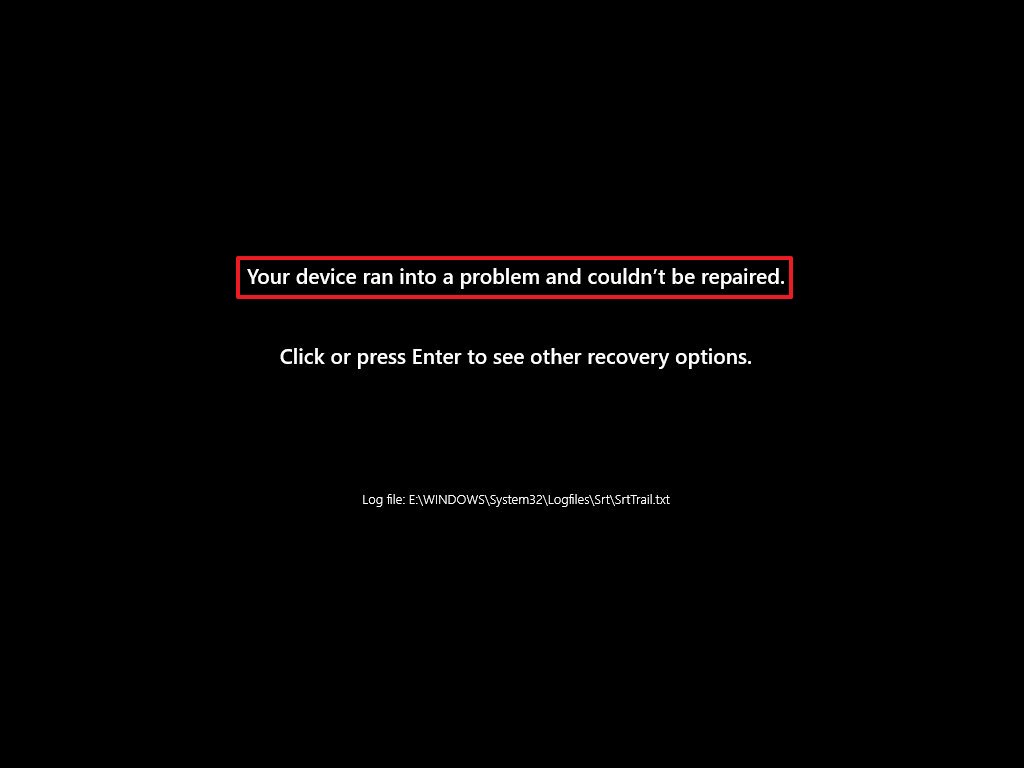
- If the recovery isn't successful, press Enter to see other recovery options (if applicable).
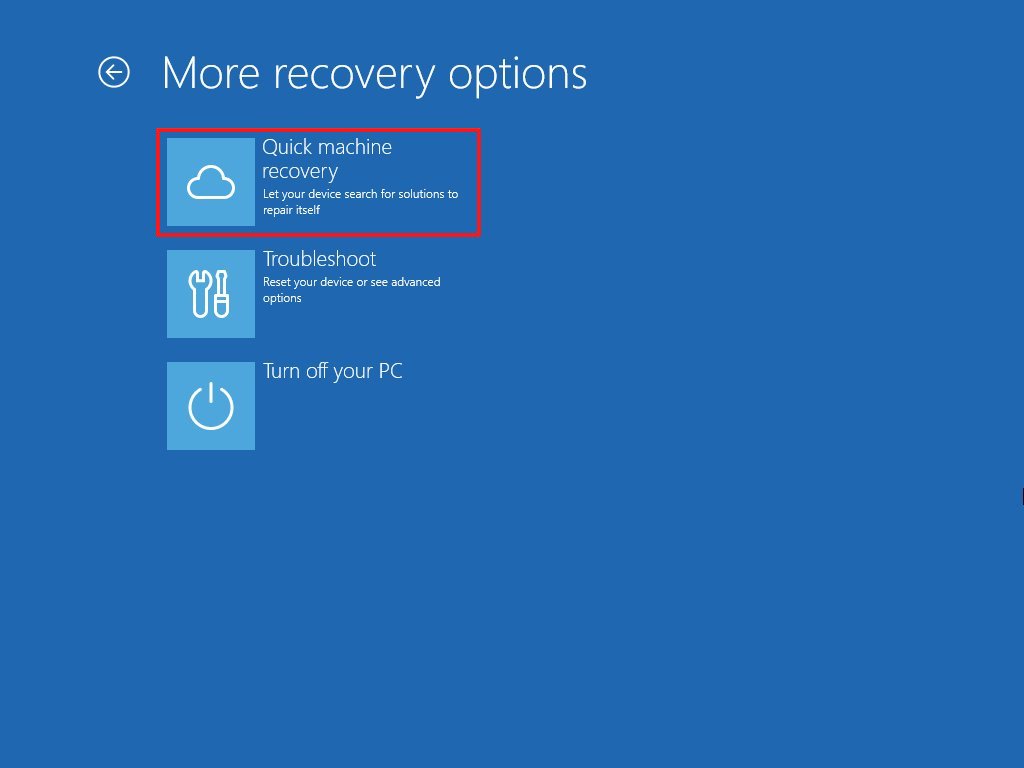
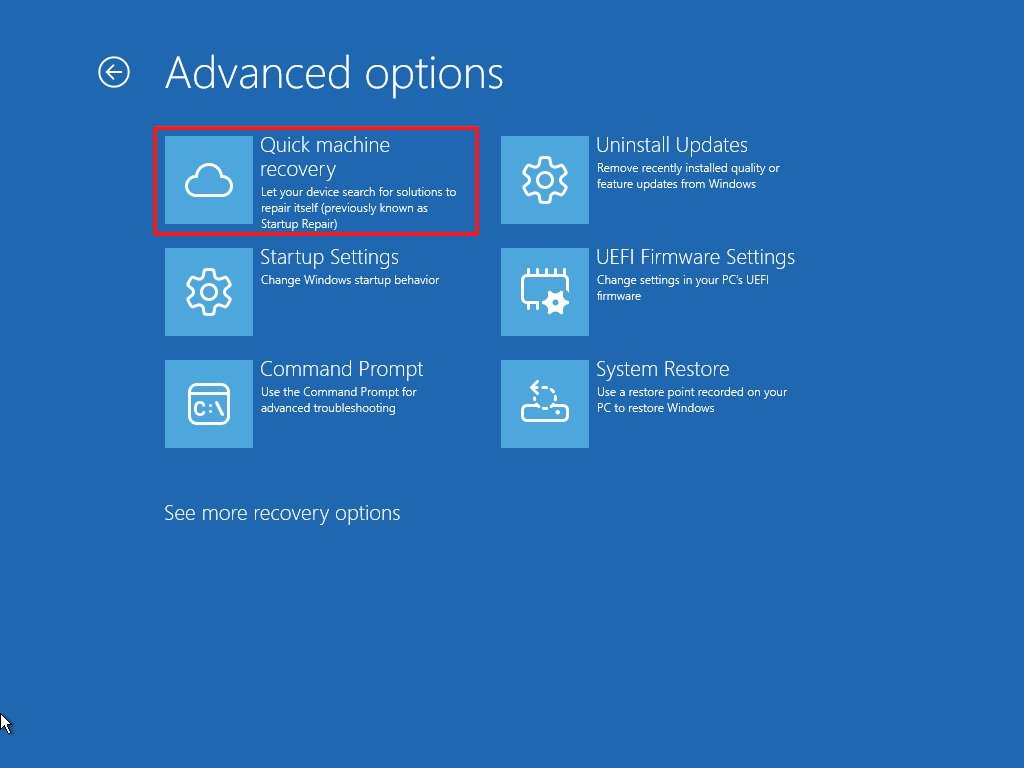
- Continue with the Advanced Startup recovery troubleshooting tools, or you can click on "Quick Machine Recovery" again to rerun the scan (optional).
After you complete the steps, the computer will search for solutions to repair itself automatically, in the same way the process would work when it is triggered automatically.
If you're in the Windows Recovery Environment, the "Quick Machine Recovery" option can appear on Advanced options > Troubleshoot > Advanced. Usually, you'll be able to access this option if you launch the recovery environment from the Settings app.
If the QMR is disabled, then the "Startup Repair" option will appear on the list instead.
If a problem is detected and a solution is found, the computer will download and apply the remediation. Otherwise, you will see the "Your device couldn't be repaired at this time" or "Your device ran into a problem and couldn't be repaired" message, along with the path to a log file.
The default option runs a scan once, but if you manually select the option to wait and rescan, then you'll also see a timer until the next reboot.
It’s worth pointing out that Ethernet (wired) is a preferred network connection. If the device only has a wireless adapter, QMR will try to reconnect using saved credentials. If no network is available, the feature falls back to local Startup Repair.
Quick Machine Recovery is a welcome addition that improves over the traditional "Startup Repair" because it can use the internet to find and apply fixes from Microsoft's cloud, rather than relying on local troubleshooters. As a result, this makes the feature far more effective at resolving widespread, complex issues, such as those caused by a faulty update.
Finally, and perhaps more importantly, Microsoft is offering this as a "best-effort" feature, meaning that (like everything else) QMR may not always work as expected.
More resources
Explore more in-depth how-to guides, troubleshooting advice, and essential tips to get the most out of Windows 11 and 10. Start browsing here:
- Windows 11 on Windows Central — All you need to know
- Windows 10 on Windows Central — All you need to know

Follow Windows Central on Google News to keep our latest news, insights, and features at the top of your feeds!

Mauro Huculak has been a Windows How-To Expert contributor for WindowsCentral.com for nearly a decade and has over 22 years of combined experience in IT and technical writing. He holds various professional certifications from Microsoft, Cisco, VMware, and CompTIA and has been recognized as a Microsoft MVP for many years.
You must confirm your public display name before commenting
Please logout and then login again, you will then be prompted to enter your display name.
