How to enable Windows Recovery Environment (WinRE) on Windows 11 and 10
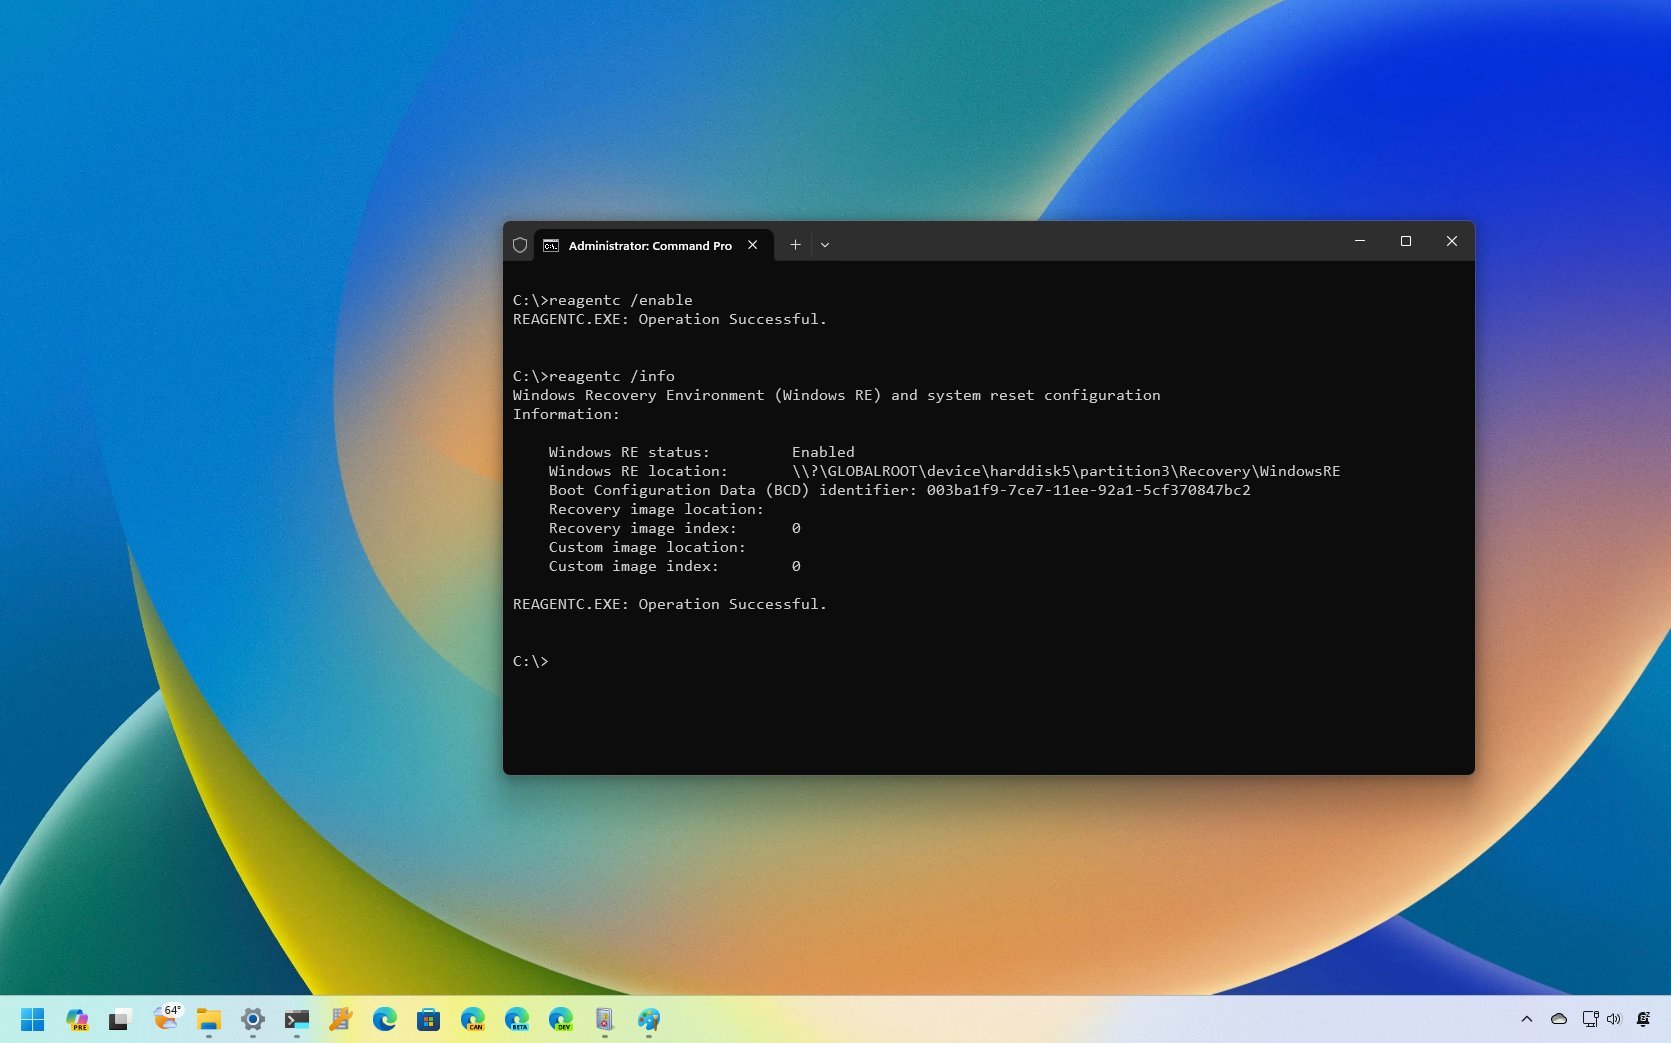
You can manage the state of the Windows Recovery Environment, and in this guide, I'll show you steps to perform these tasks on Windows 11 and 10.

All the latest news, reviews, and guides for Windows and Xbox diehards.
You are now subscribed
Your newsletter sign-up was successful
On Windows 11 and 10, the "Windows Recovery Environment" (WinRE) is an experience that houses features like automatic repair, factory reset, system image recovery, and other troubleshooting tools to resolve issues when your computer doesn't start correctly.
Although it's an essential tool to bring Windows 11 and 10 to their working condition, if you work in a network environment and want to prevent users from accessing the feature, you can disable the WinRE through Command Prompt. In the same way, if you need to troubleshoot a problem (for example, startup, performance, network, drivers, and updates) and can't access the feature, it's likely because it might have been turned off. You can re-enable it using a simple command.
In this how-to guide, I'll walk you through the steps to turn WinRE on and off your computer.
How to enable Windows Recovery Environment
The feature comes enabled by default on the Home, Pro, Enterprise, and Education editions, but if it was previously disabled for some reason, you can use Command Prompt to re-enable it.
To enable the Windows Recovery Environment on Windows 11 (or 10), use these steps:
- Open Start.
- Search for Command Prompt, right-click the top result, and select the Run as administrator option.
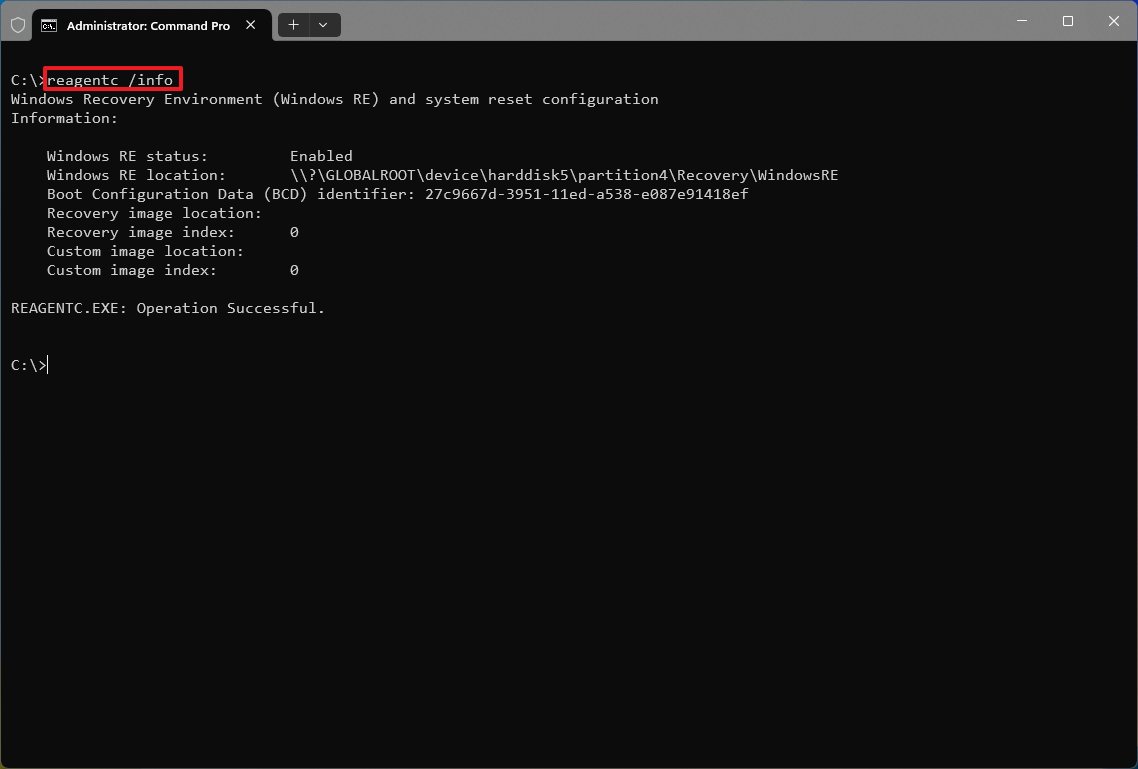
- Type the following command to confirm the WinRE is disabled and press Enter: reagentc /info
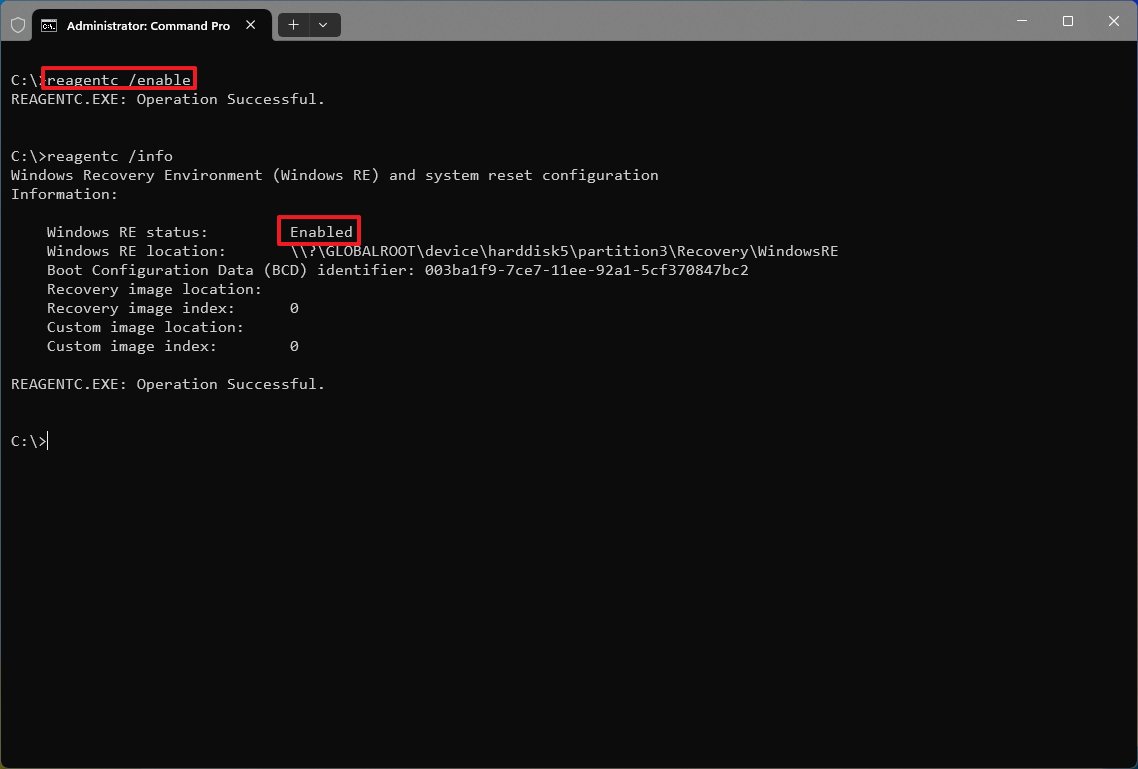
- Type the following command to enable the recovery environment and press Enter: reagentc /enable
- (Optional) Type the following command to confirm the WinRE has been enabled and press Enter: reagentc /info
Once you complete the steps, the Windows Recovery Environment will be enabled on your device, and you'll be able to access the "Reset this PC" and "Advanced options" to troubleshoot and fix problems with Windows 10.
How to disable Windows Recovery Environment
To disable WinRE on Windows 10, use these steps:
All the latest news, reviews, and guides for Windows and Xbox diehards.
- Open Start.
- Search for Command Prompt, right-click the top result, and select the Run as administrator option.
- Type the following command to confirm WinRE is enabled, and press Enter: reagentc /info
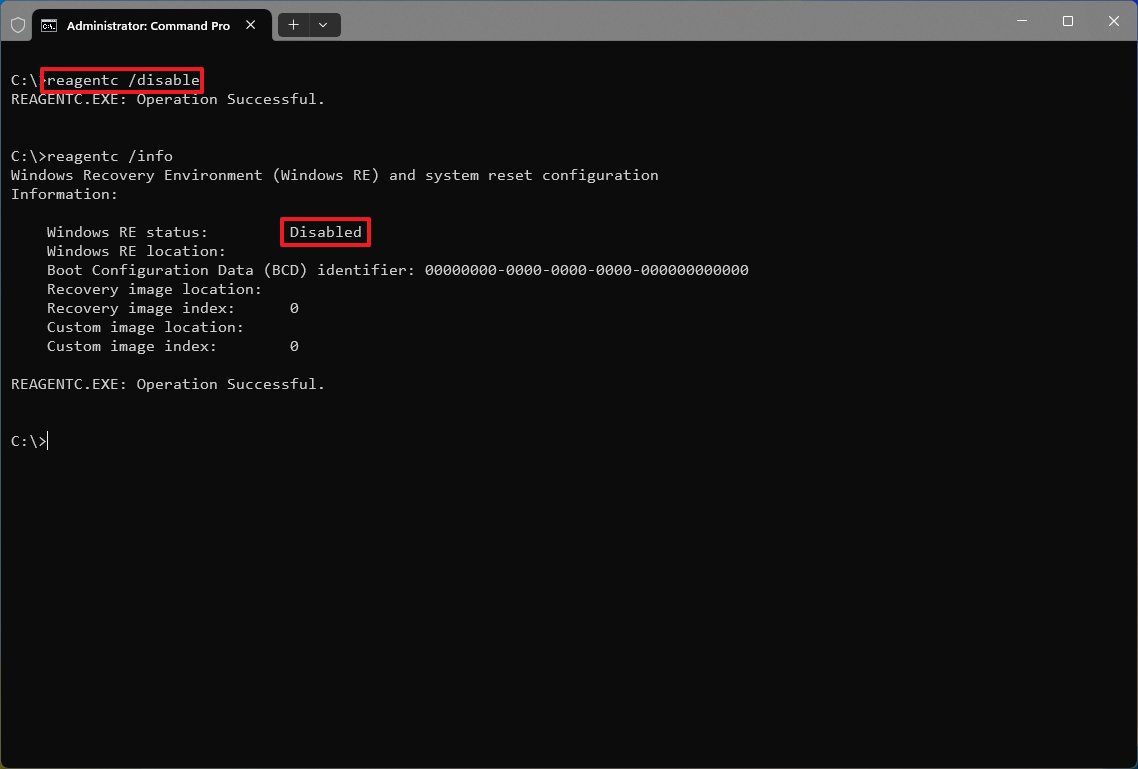
- Type the following command to enable the recovery environment and press Enter: reagentc /disable
- (Optional) Type the following command to confirm WinRE has been disabled, and press Enter: reagentc /info
After completing these steps, you will be able to access the startup settings. However, the recovery options, such as "System Restore," "Command Prompt," "System Image Recovery," and "Uninstall Updates," won't be available until you re-enable the feature.
More resources
For more helpful articles, coverage, and answers to common questions about Windows 10 and Windows 11, visit the following resources:
- Windows 11 on Windows Central — All you need to know
- Windows 10 on Windows Central — All you need to know

Mauro Huculak has been a Windows How-To Expert contributor for WindowsCentral.com for nearly a decade and has over 22 years of combined experience in IT and technical writing. He holds various professional certifications from Microsoft, Cisco, VMware, and CompTIA and has been recognized as a Microsoft MVP for many years.


