How to upgrade an ROG Ally SSD and transfer your data from a storage backup
Replacing the 512GB M.2 drive is simple if you're careful!
All the latest news, reviews, and guides for Windows and Xbox diehards.
You are now subscribed
Your newsletter sign-up was successful
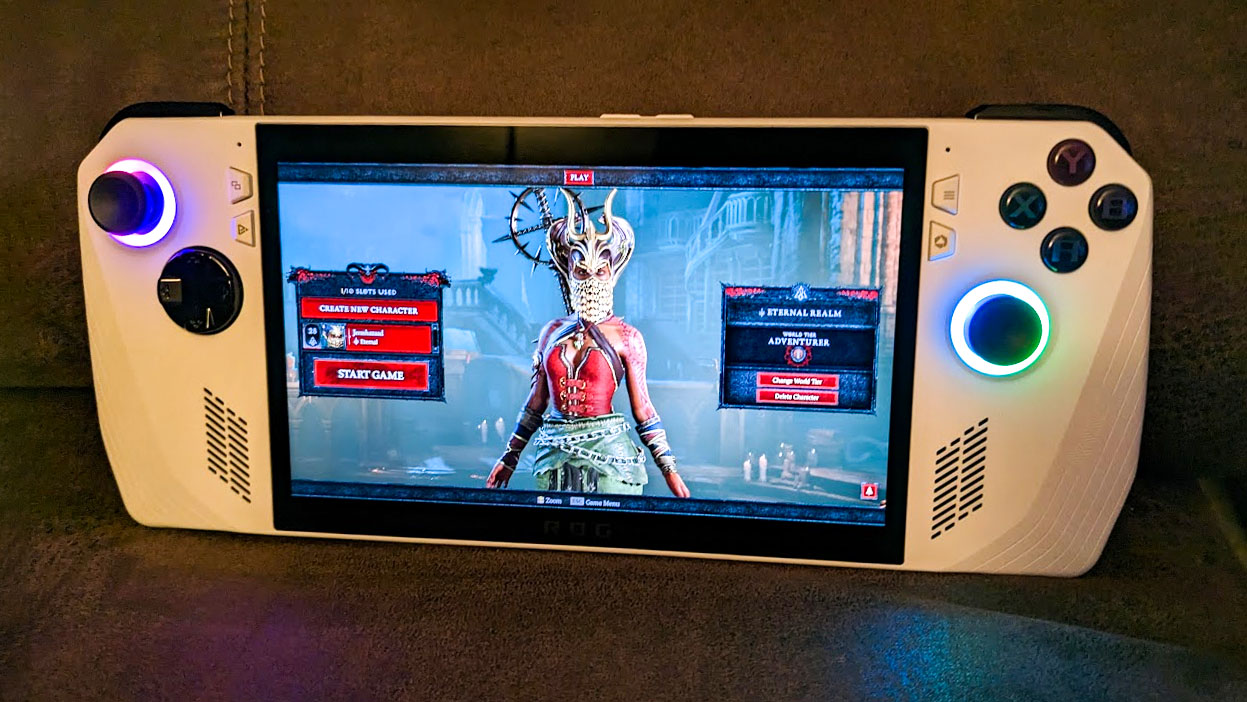
If you're like me, you probably learned that the 512GB SSD that comes in the ROG Ally doesn't provide a large enough storage capacity to hold that many games. Thankfully, Western Digital produces 1TB and 2TB SSDs specifically intended for ROG Ally and Steam Deck to make way for more programs on the handhelds.
The ROG Ally SSD upgrading process is actually really easy, as you'll see in this guide. I'll start by going over your various SSD options for ROG Ally followed by how to backup data on your original SSD and how to transfer data to the new SSD. After that, I'll walk you step-by-step (with pictures) through the process of opening the system and physically swapping SSDs in the gaming handheld.
What are my ROG Ally SSD options?
While not fully proven, some people have claimed that the ROG Ally can overheat and cause a microSD card malfunction. If you're concerned about that, it might be a better idea to upgrade the ROG Ally to a higher-capacity internal SSD rather than relying on a microSD card. There are three different ways you can go about upgrading SSD capacity:
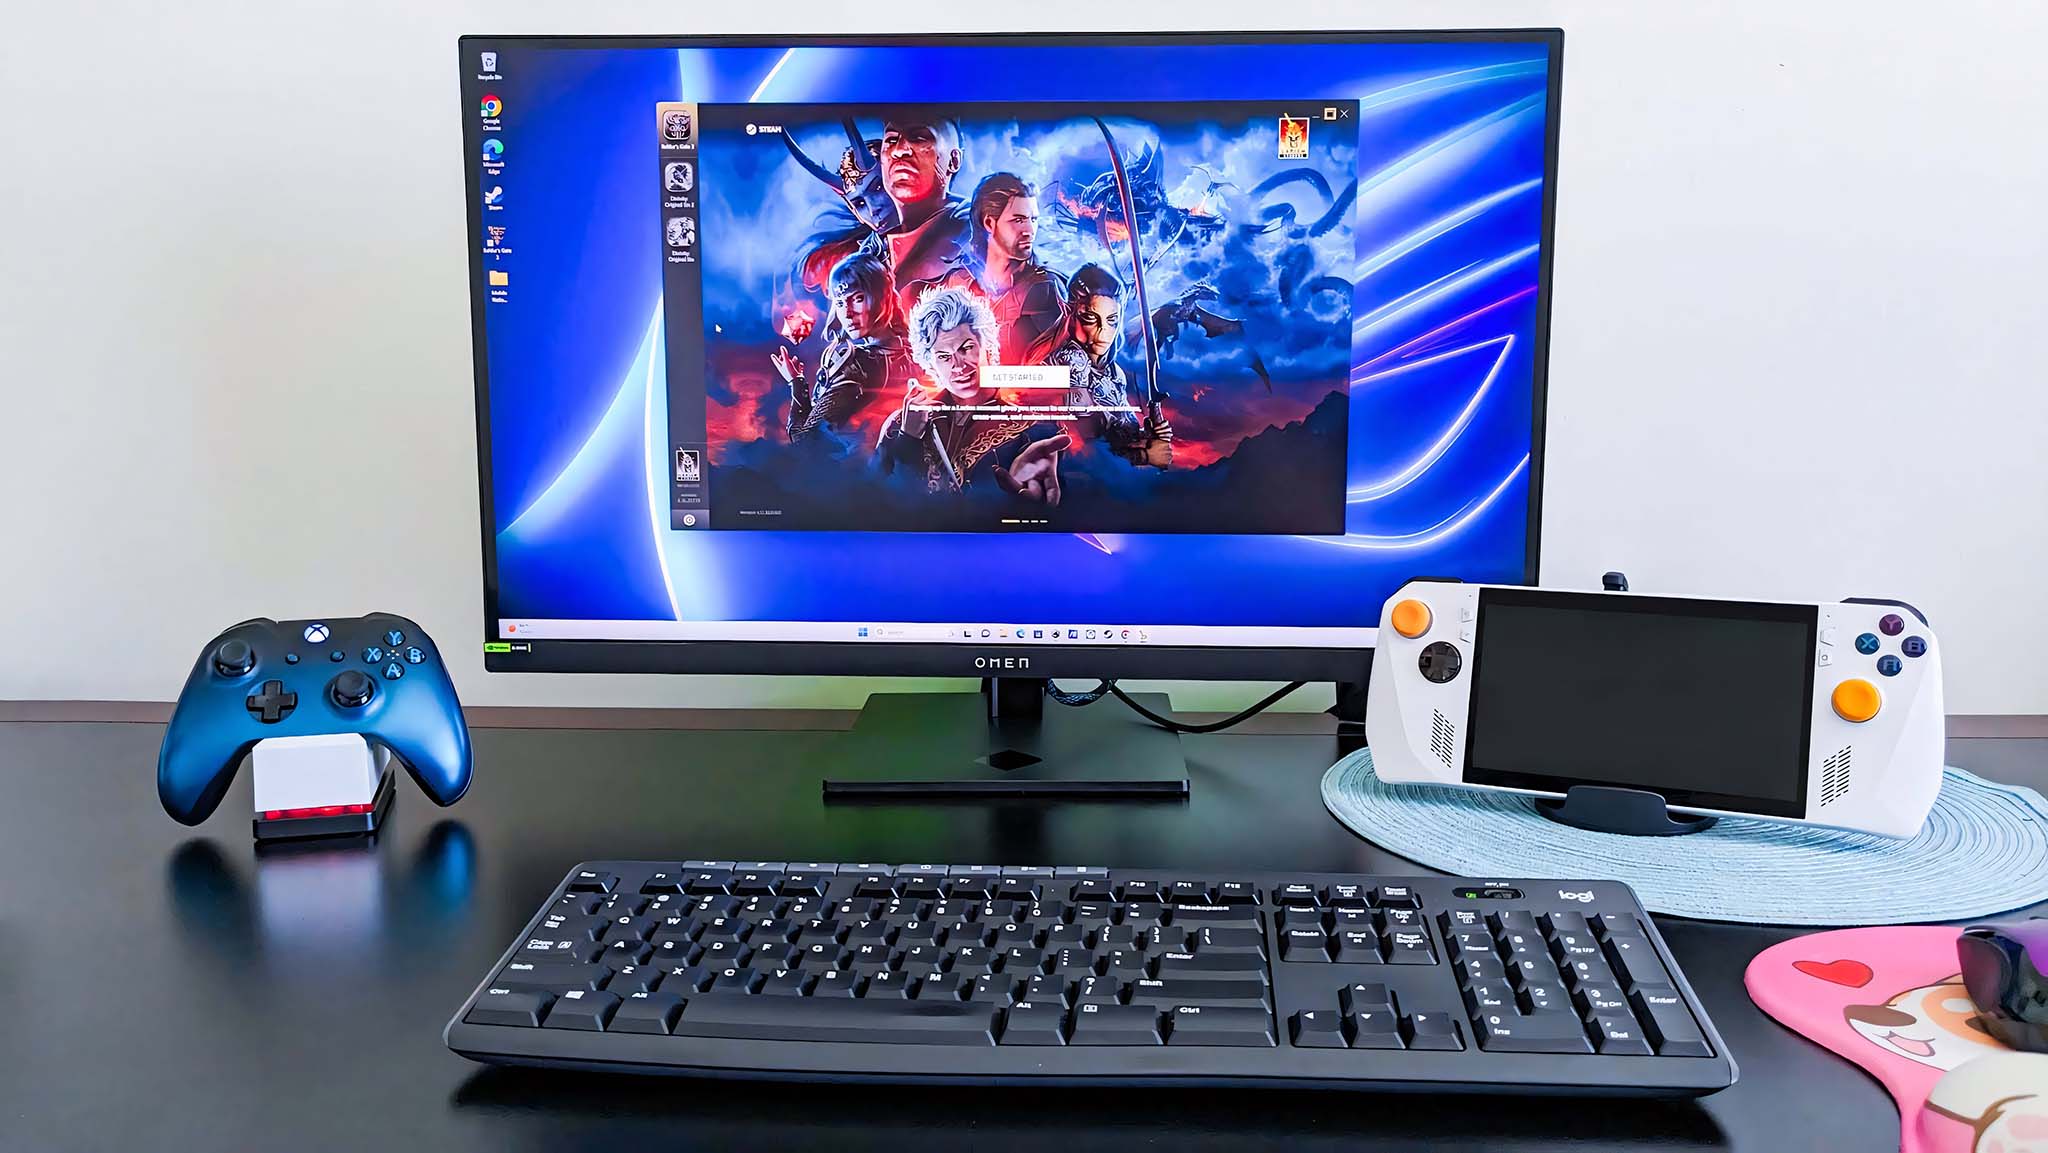
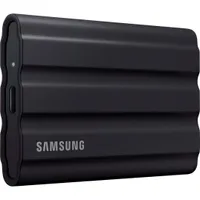
1) Connect an external SSD — Compatible external SSDs can plug right into the ROG Ally's USB-C port. If you want the gaming handheld to charge up while attached to an external SSD (like the Samsung T7 Shield 2TB External SSD), then you'll need a docking station with additional ports like the Unitek Cooling Dock I reviewed. External SSDs are more clunky than internal SSDs at times but can give you more capacity options overall.
2) Clean install with a new internal SSD — If you do want to upgrade the ROG Ally's internal SSD, it's recommended you do a clean install. This erases your settings, programs, and data but is considered the best way of doing things since it helps remove clutter from the device and helps it run more smoothly. Don't worry; ROG has built-in Cloud Recovery for ROG Ally's still under warranty, so you can easily factory reset the handheld with a clean install of Windows 11 and various ROG programs needed for the Ally.
3) Backup the original internal SSD and transfer data to the new one — If you want to keep your personal OS, settings, programs, and files, then you'll want to first backup the original ROG Ally internal SSD's data before swapping SSDs out and then transfer the data to the new SSD later. To accomplish this, you either need a laptop/desktop or an external SSD with enough space to save the backup to.
How to backup SSD data
Before you actually swap out the old internal SSD for a new one, you might want to make a backup and save it on another desktop, laptop, or external SSD. One of the easiest ways to do this is by installing a program called Macrium Reflect onto your ROG Ally, connecting your Ally to an external SSD or computer, and then saving the backup to the other device. Macrium's software allows you to fully clone your SSD or create an image backup for you to save on an external device. There's a free 30-day trial for this software, or you can pay for a subscription.
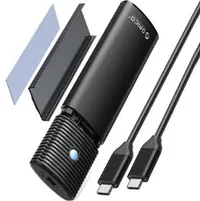
Another option that costs less money overall is to use an enclosure adapter for the SSD, such as the Orico one shown below. Put your original SSD inside, plug it into a laptop or desktop, and then backup your data to that device. Alternatively, you might find it more convenient (albeit more expensive) to attach an external SSD to the ROG Ally and save your backup to it that way.
All the latest news, reviews, and guides for Windows and Xbox diehards.
Macrium Reflect | Try free trial
Macrium Reflect is a disk imaging and disk cloning program to help you backup your data. This software is subscription-based, but there is also a free 30-day trial for you to check out if you want to see all that it provides first.
ORICO M.2 NVMe SATA SSD Enclosure Adapter | See at Amazon
If you have a computer handy (aside from the ROG Ally), then one of the most inexpensive ways to save a backup of the original SSD is with this enclosure adapter. Put the original SSD in here, plug the adapter into a laptop/desktop, and then use Macrium Reflect software to image or clone your data. Then plug it into your ROG Ally (with the new SSD installed in the handheld) and transfer the data to the new SSD.
Samsung T7 Shield 2TB External SSD | See at Best Buy
This is definitely the more expensive SSD backup route, but it's also a little more convenient. Simply plug it into your ROG Ally, and you'll have access to an external SSD. Clone or image your internal SSD and save it to the external SSD to back up your data.
How to install a new SSD in ROG Ally
What you need to upgrade an ROG Ally SSD
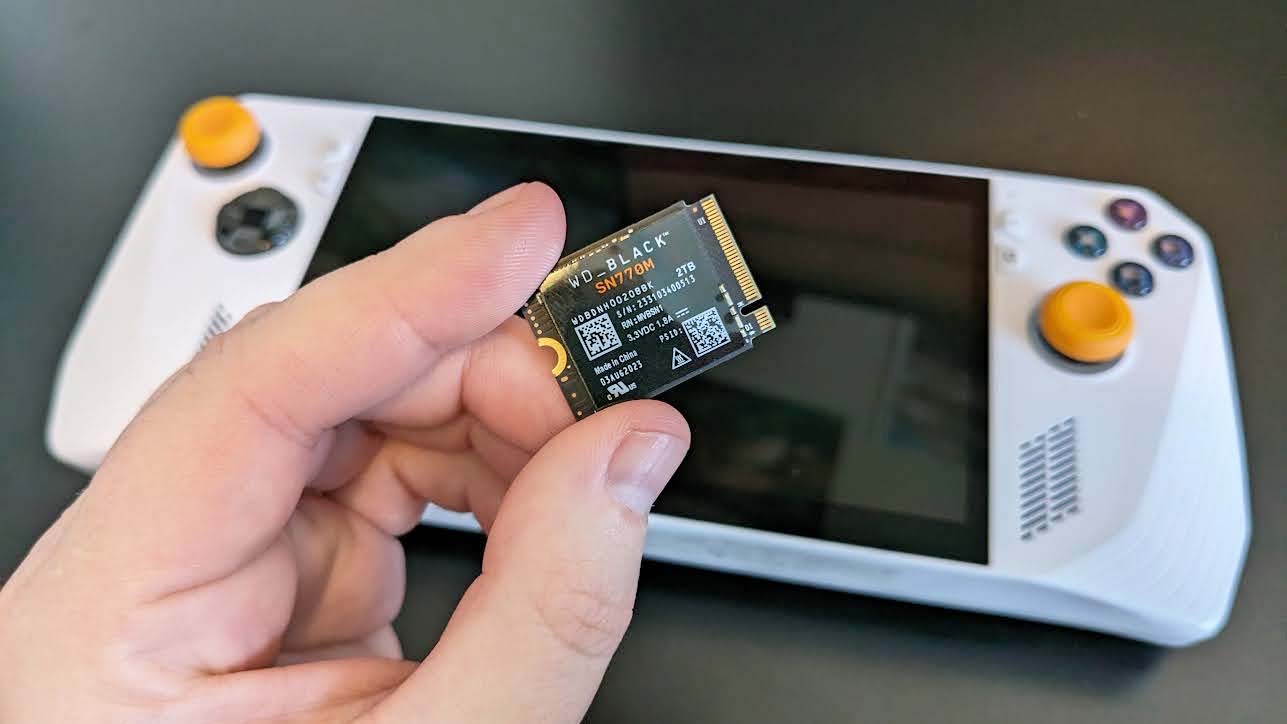
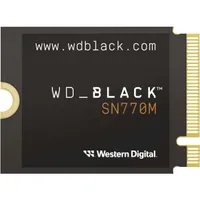
- WD_BLACK SN770M SSD (or other compatible option)
- Screwdriver (2.0 x 50mm works well)
- Plastic pick for pulling casing apart (optional)
- External drive (if you want to backup your data)
- Internet connection (for reinstalling Windows)
WD_BLACK SN770M NVMe 1TB SSD: was $129.99 now $79.99 at Best Buy ($50 off)
Increase the internal SSD storage space of your compatible gaming handheld with this upgrade that can reach fast read speeds up to 5,150 MB/s. You'll need to open your device, remove the original SSD, and then install this one in its place. This is a great product, and Western Digital has even provided an official video showing how to install the SSD into the ROG Ally.
Buy 1TB version at: Best Buy | Western Digital
Buy 2TB version at: Best Buy | Western Digital
Vastar 17pcs Screwdriver Set | See at Amazon
This handy set comes with six different kinds of magnetic tip screwdrivers, which are ideal for working with various gaming handheld devices. There are also tweezers and a plastic triangle casing opener to help you interact with specific components or to help open casings more easily.
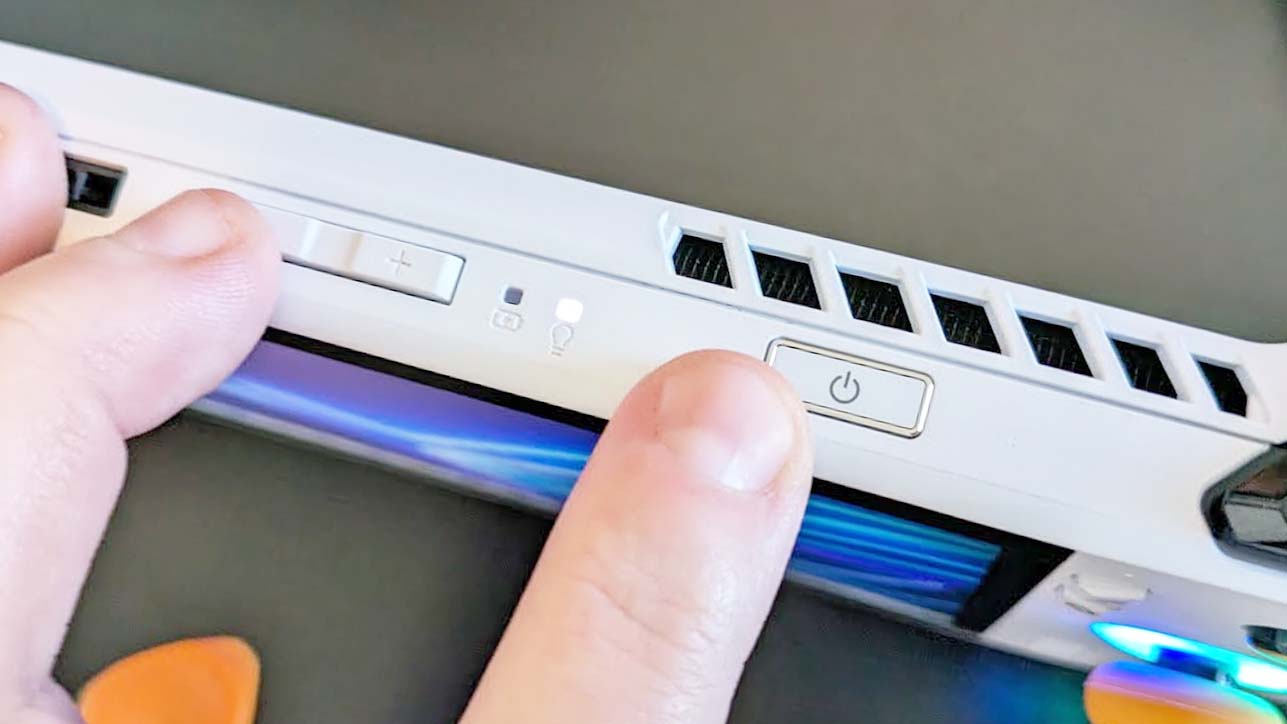
- Completely turn off your ROG Ally. You can quickly do this by holding down the volume down button and the power button for a few seconds.
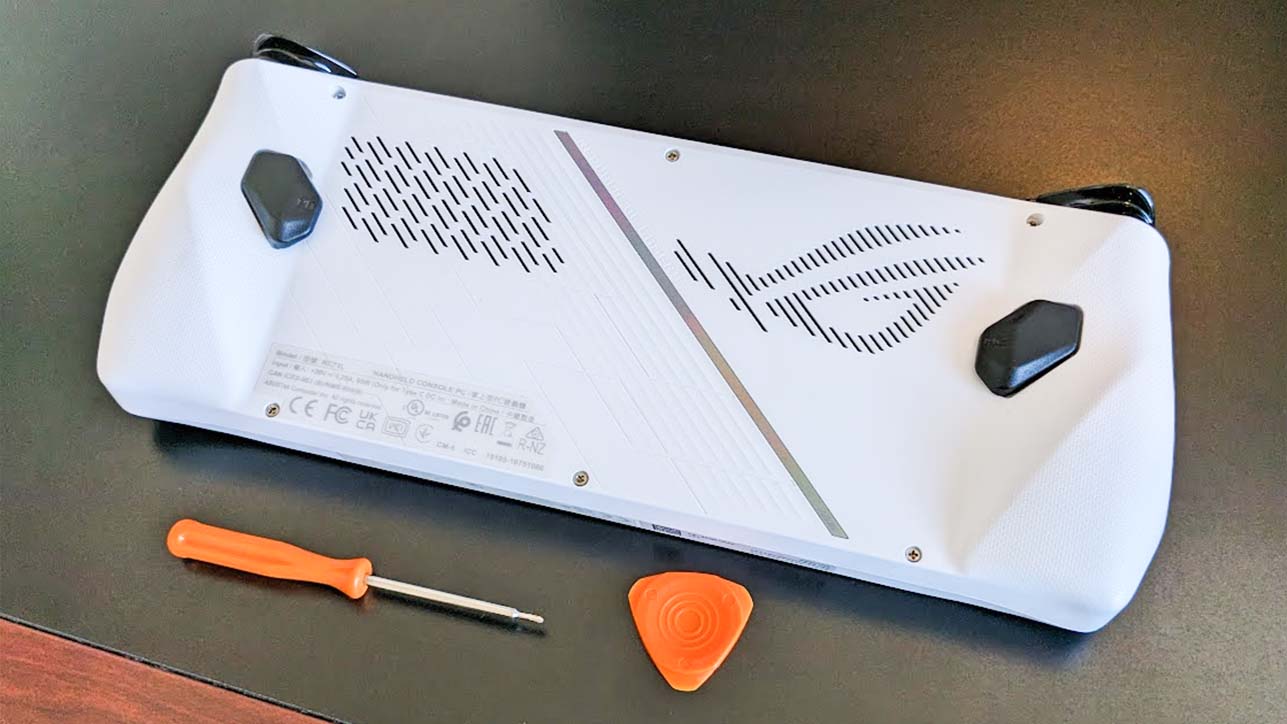
- Place the handheld screen down on a clean, flat surface.
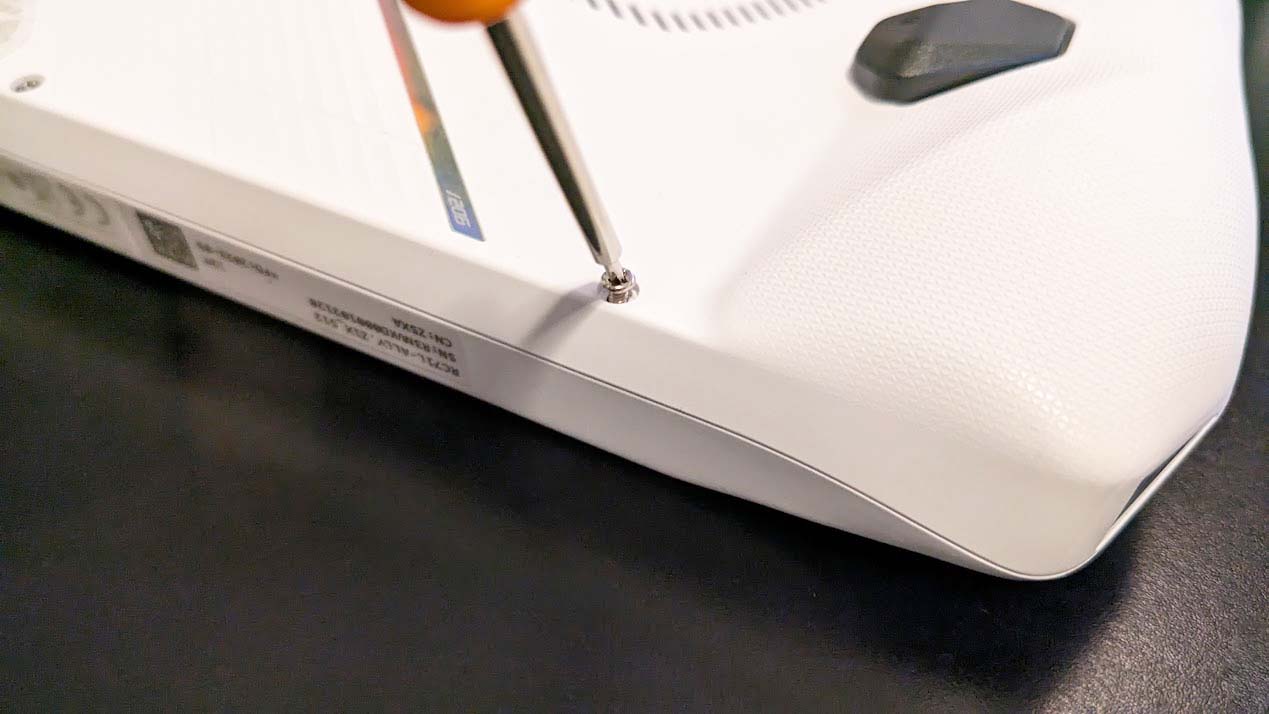
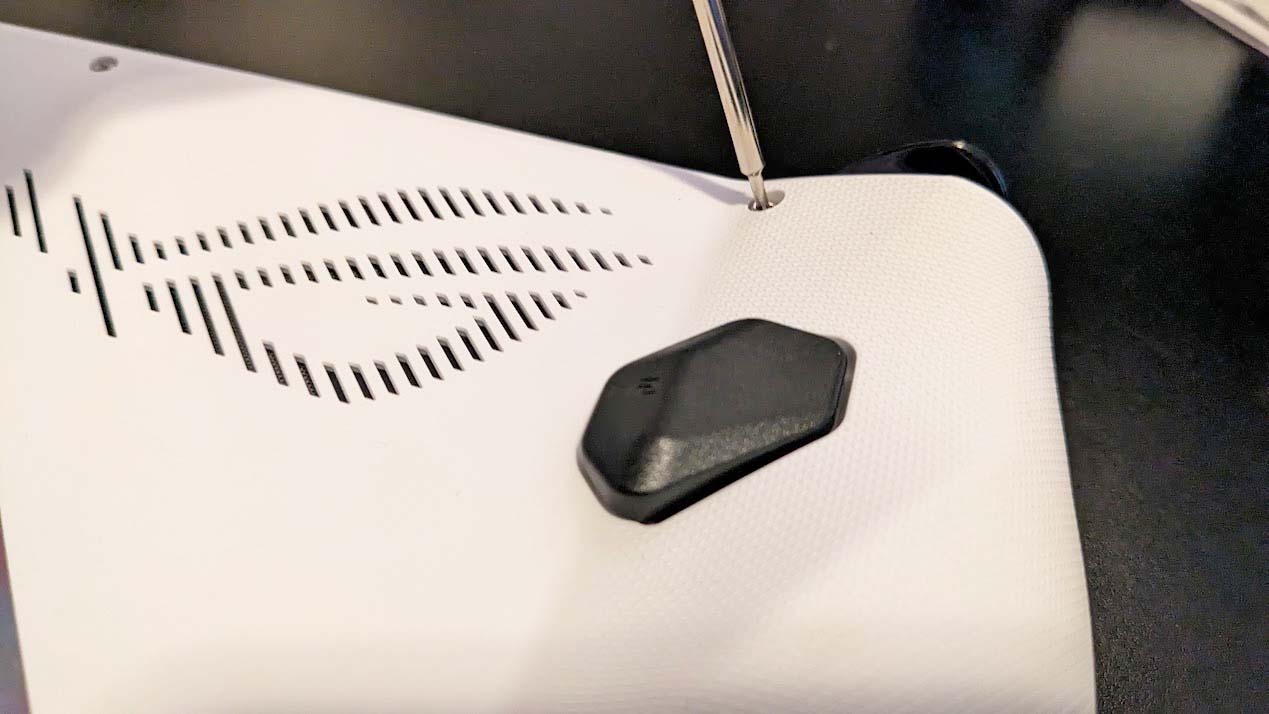
- Remove the six screws on the back side, leaving the one on the bottom center for last. This last one isn't as long as the others and will stay in the casing.
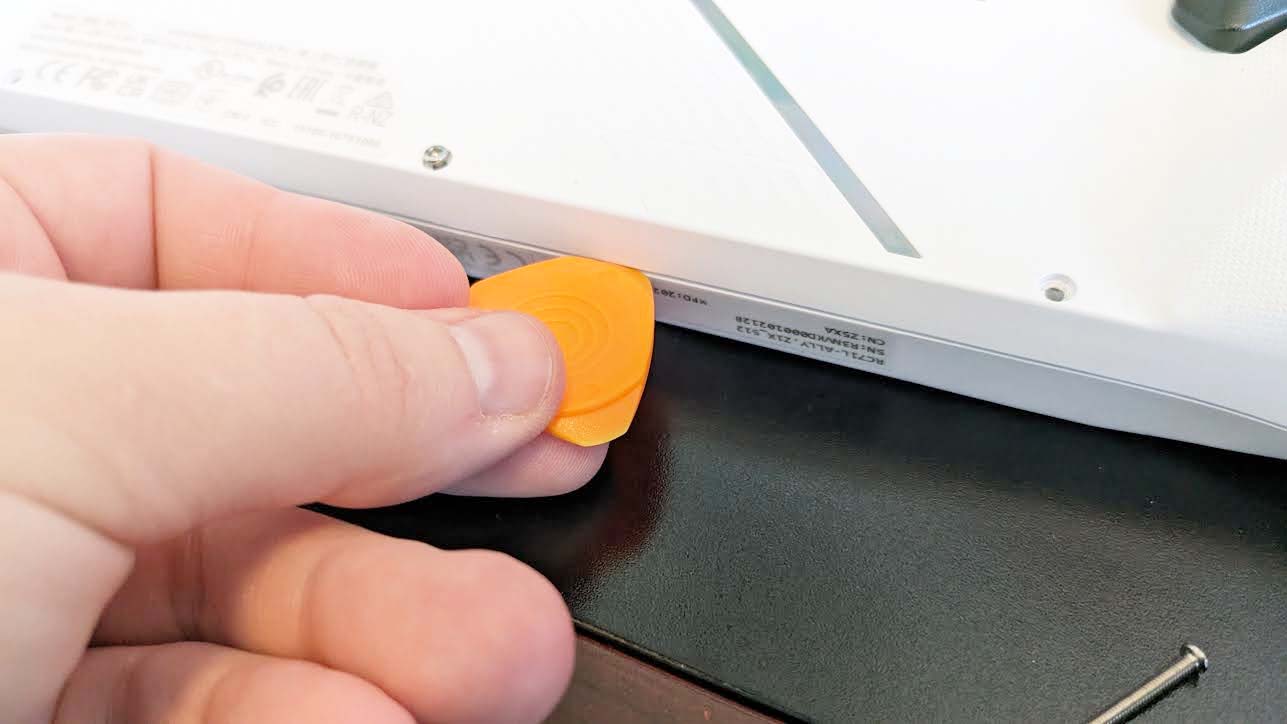
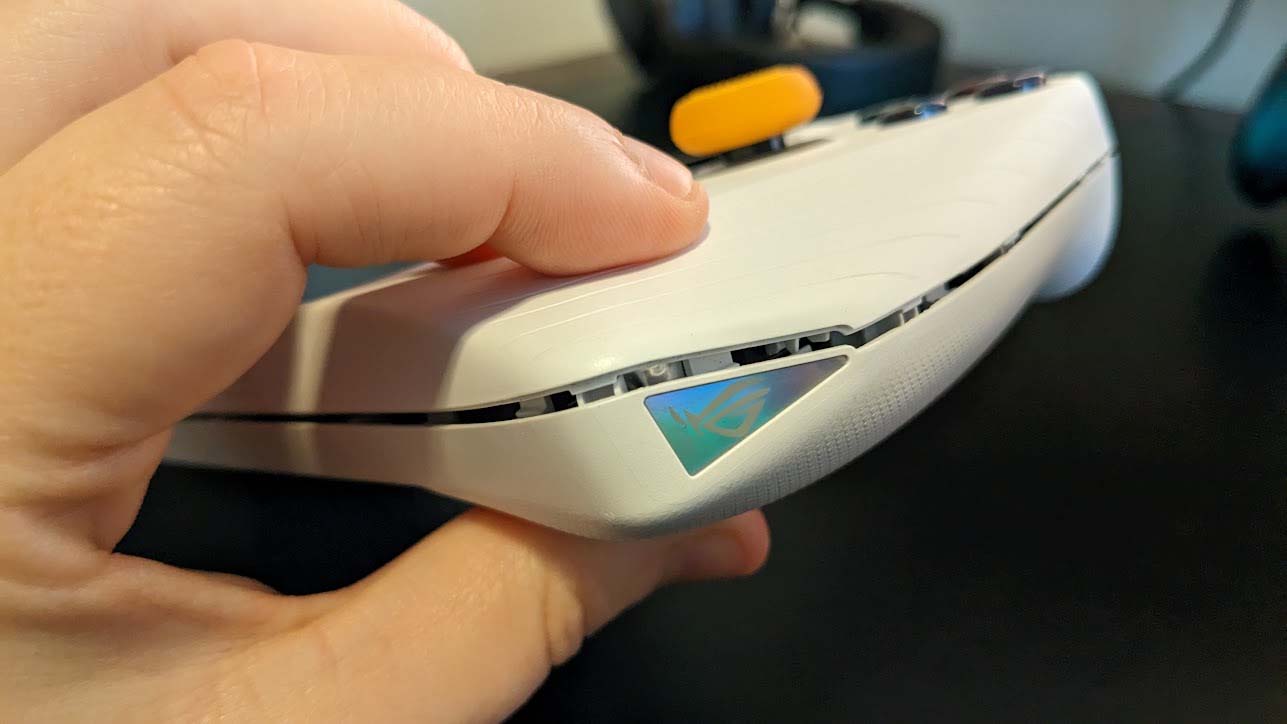
- Carefully pull the casing open. I found it easiest to place my triangular plastic pick (that came with my screwdriver set) in the bottom and then slide it left and then right as this disengaged the clasps holding the casing together.
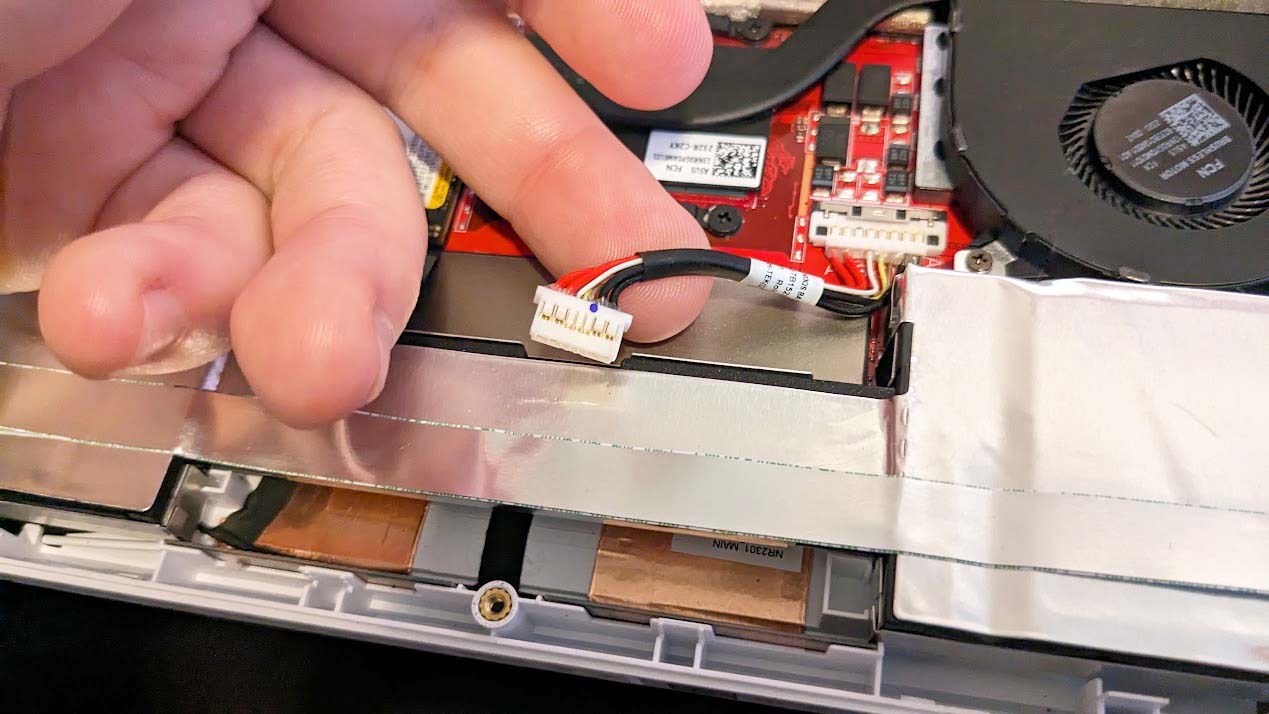
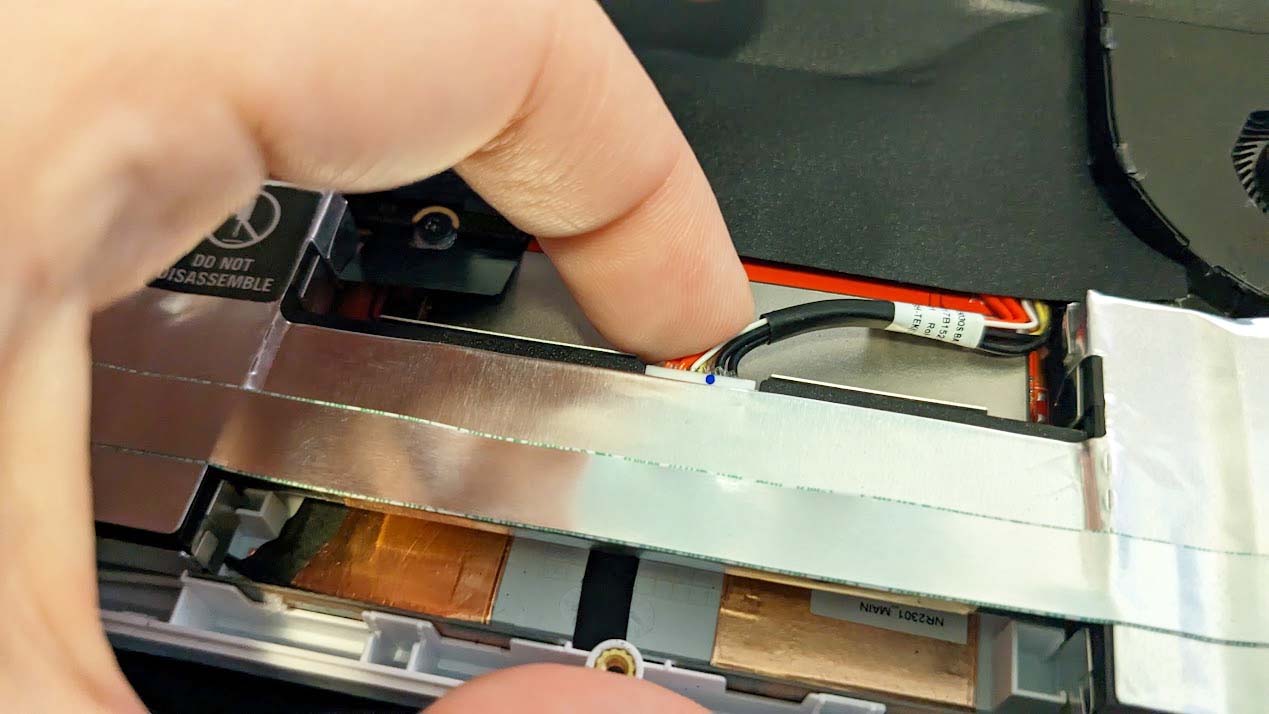
- Safely unplug the battery. It's located near the bottom of the casing.
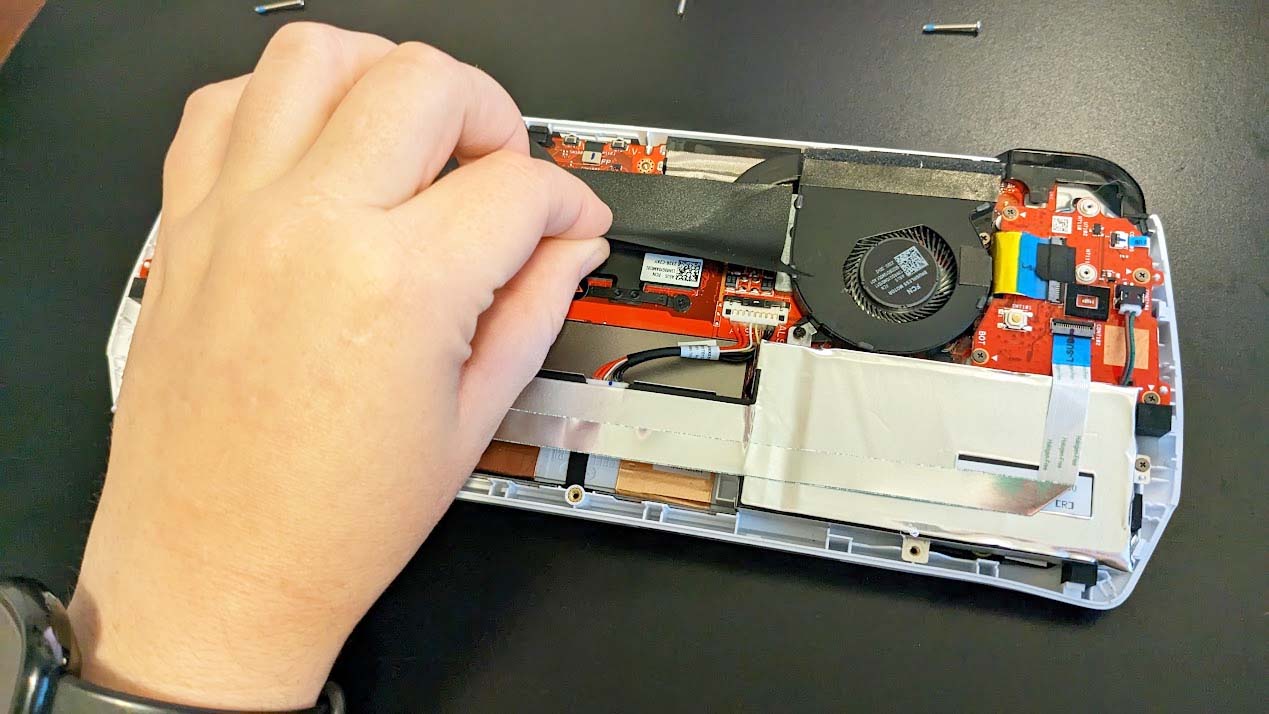
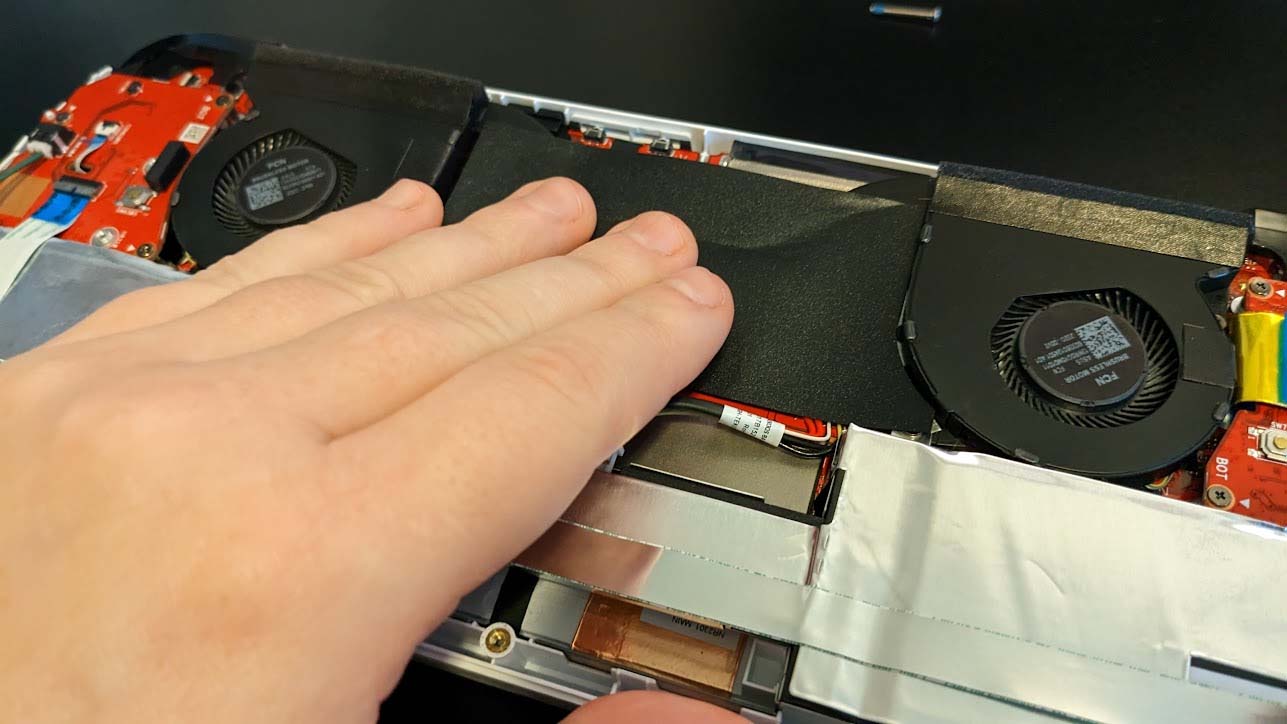
- Remove the flat black sticker on the top. Make sure to set it down in such a way that the adhesive doesn't get dusty or dirty.
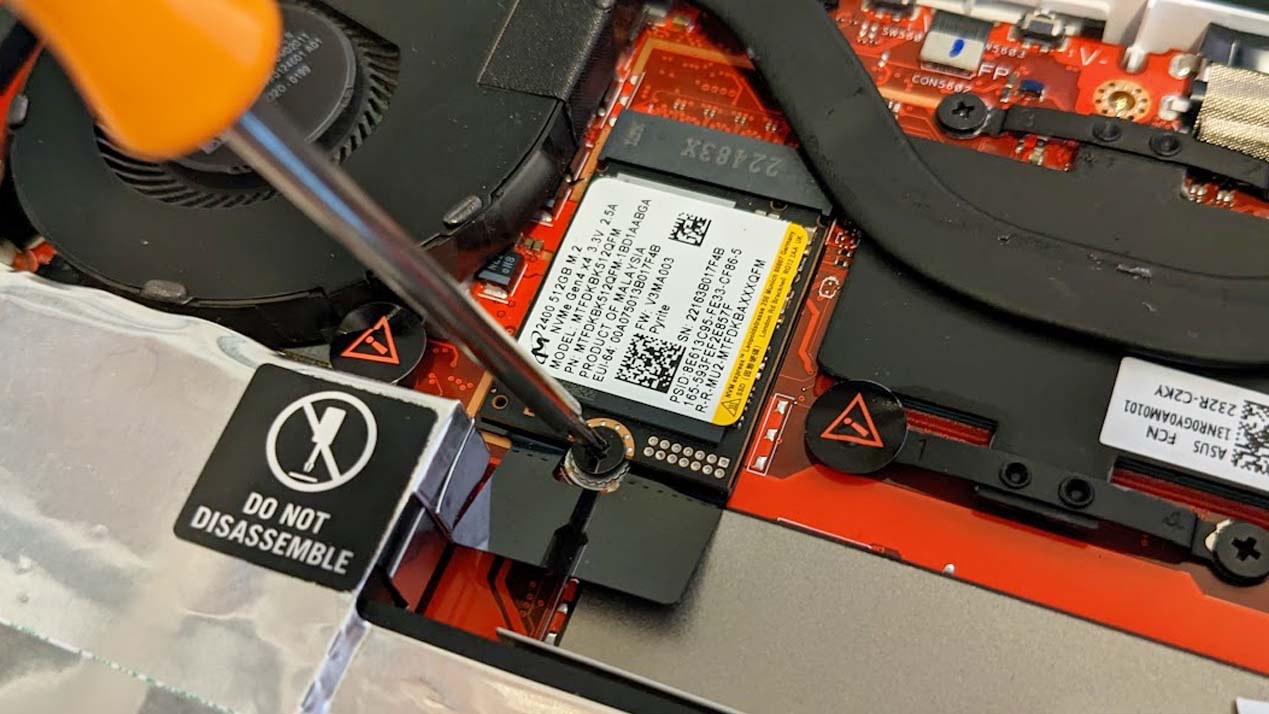
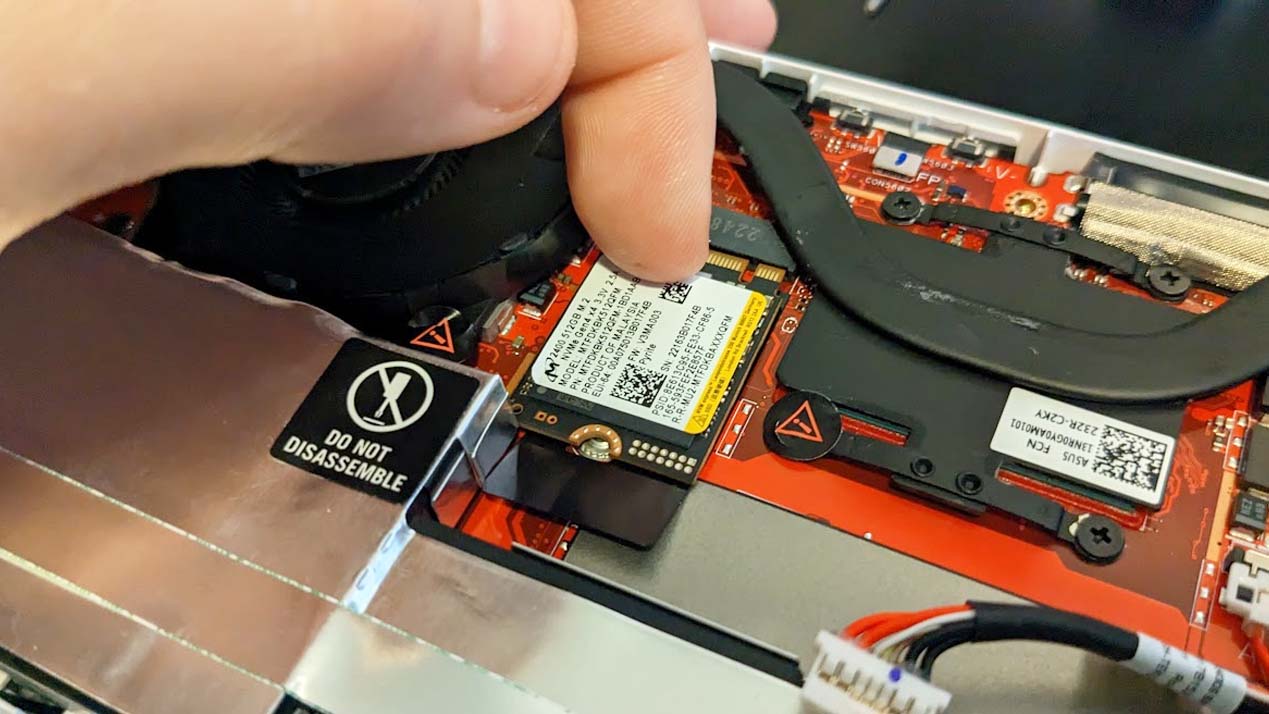
- Unscrew the M.2 screw that holds the original SSD in place. Be careful so you don't strip the screw while doing this.
- Carefully pull the original SSD out by pushing it down and away from its contact points. If it gets stuck on the screw area, use the black tab underneath to pull it up and then pull it out.
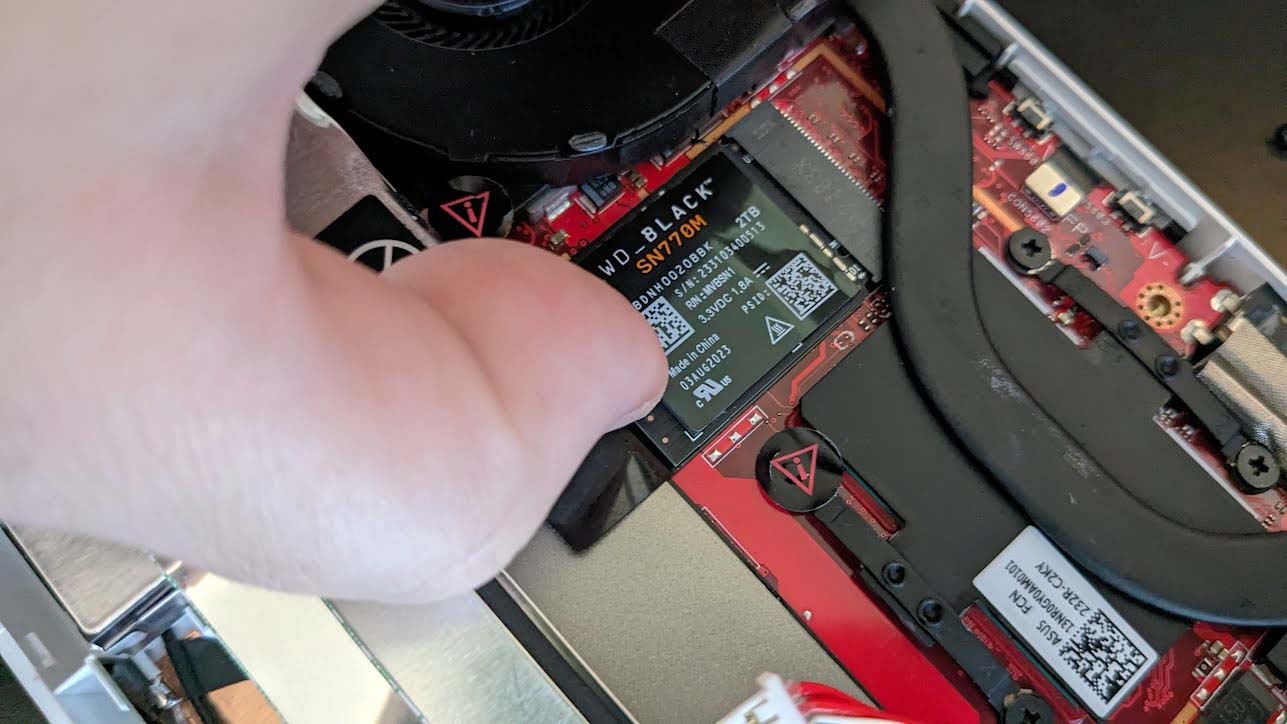
- Install the WD_BLACK SN770M SSD by carefully pushing it up into the contact points and then carefully screw the small M.2 screw back into place.
- Put the flat black plastic back where it belongs.
- Plug the battery back in.
- Put the casing back in place and squeeze the plastic around the edges to pop it back together.
- Screw the six screws all back into place.
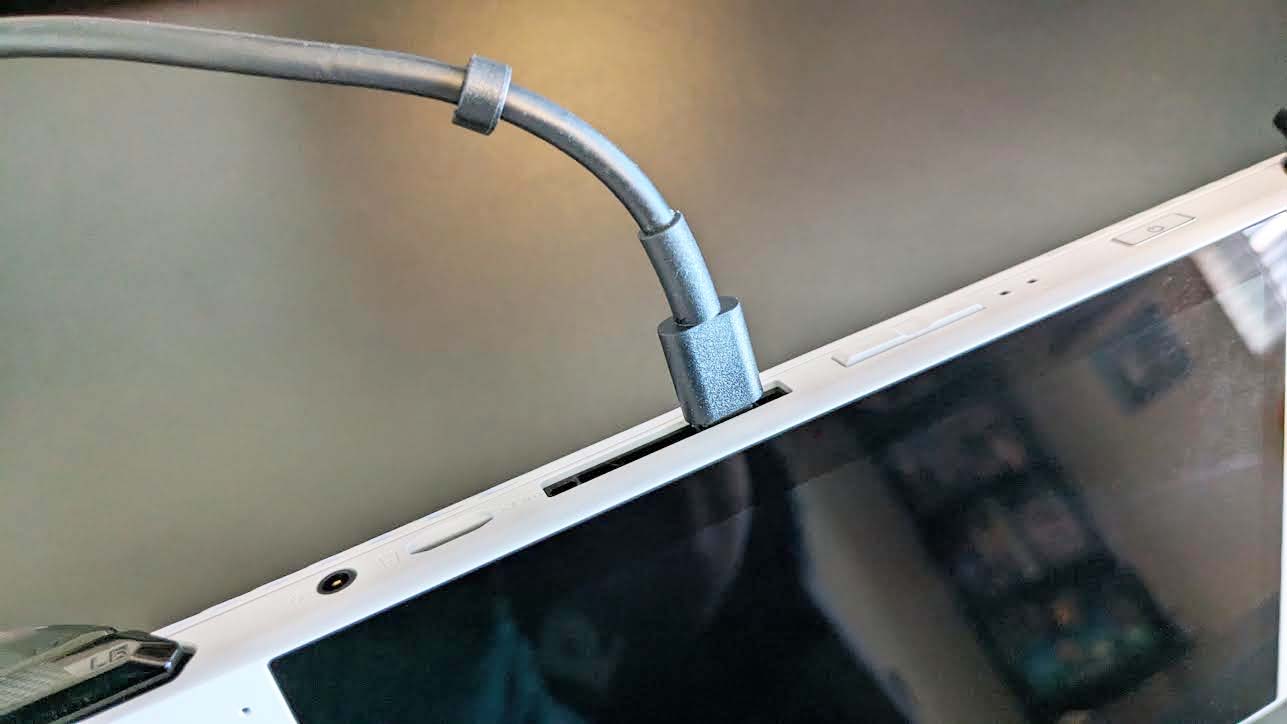
- Plug the official charging adapter into the ROG Ally (it won't turn on unless you do this).
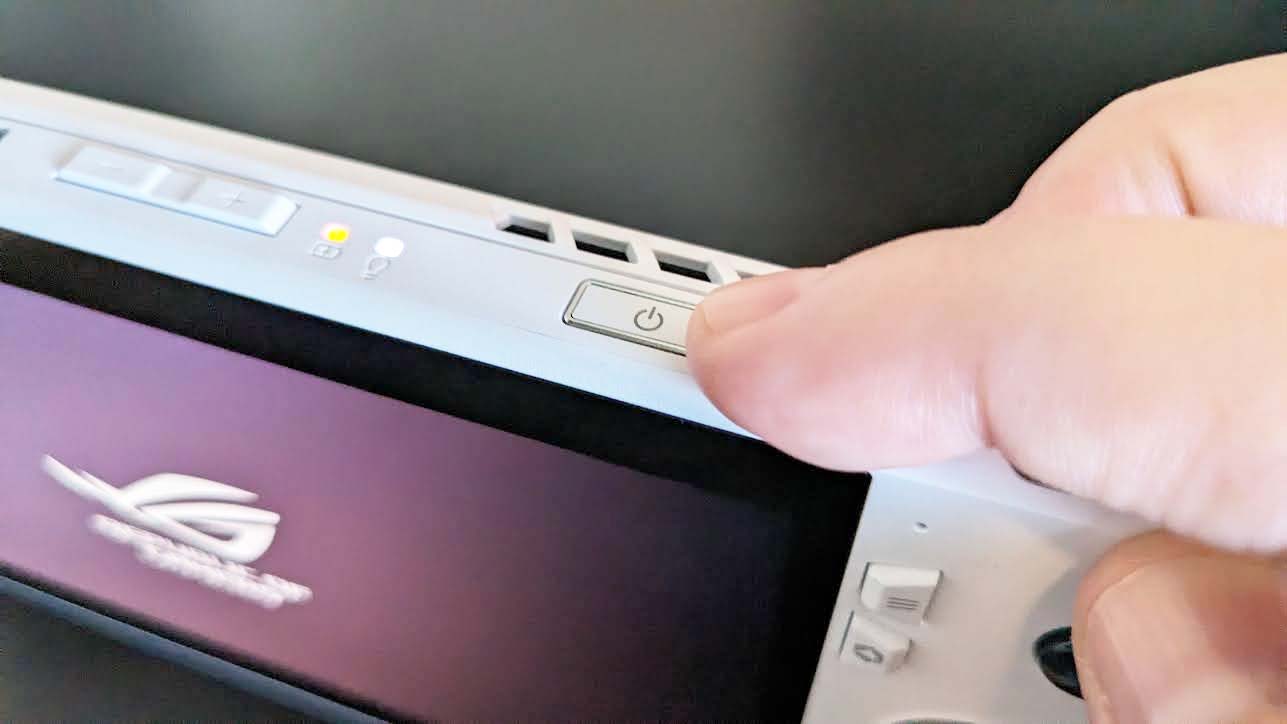
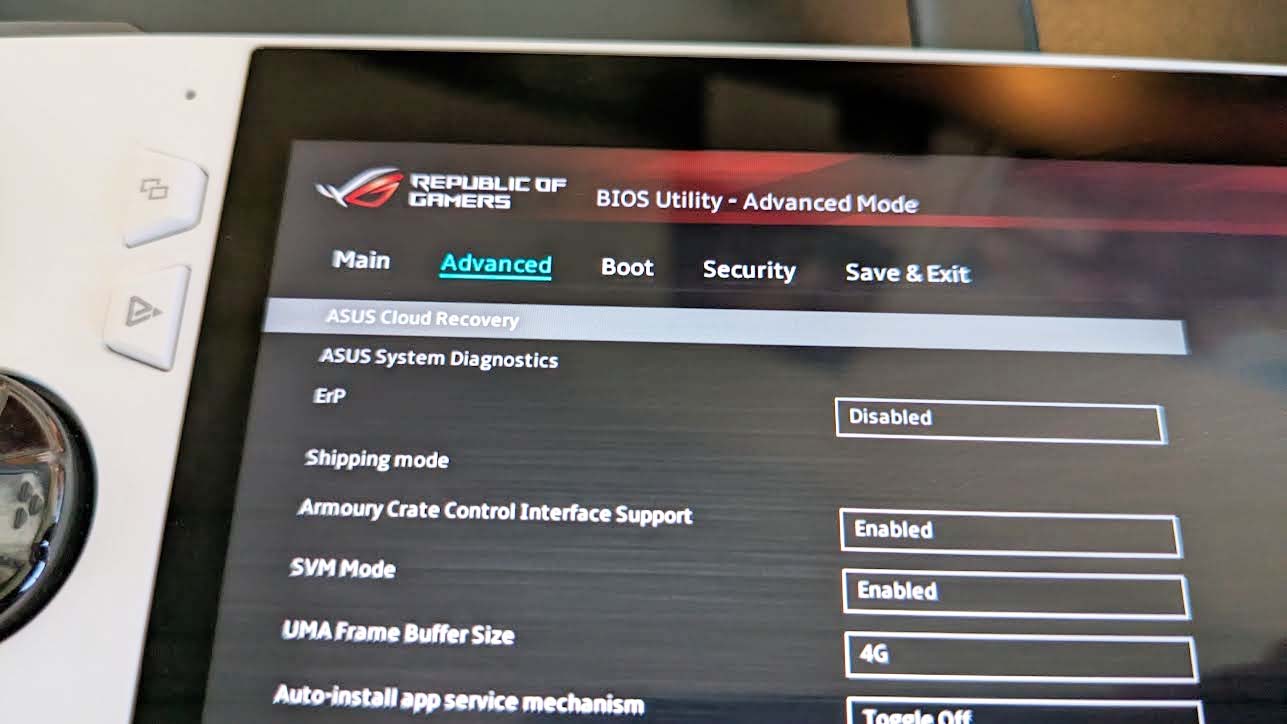
- Turn your ROG Ally back on by holding down the power button, and it should boot the BIOS when it detects the new hardware.
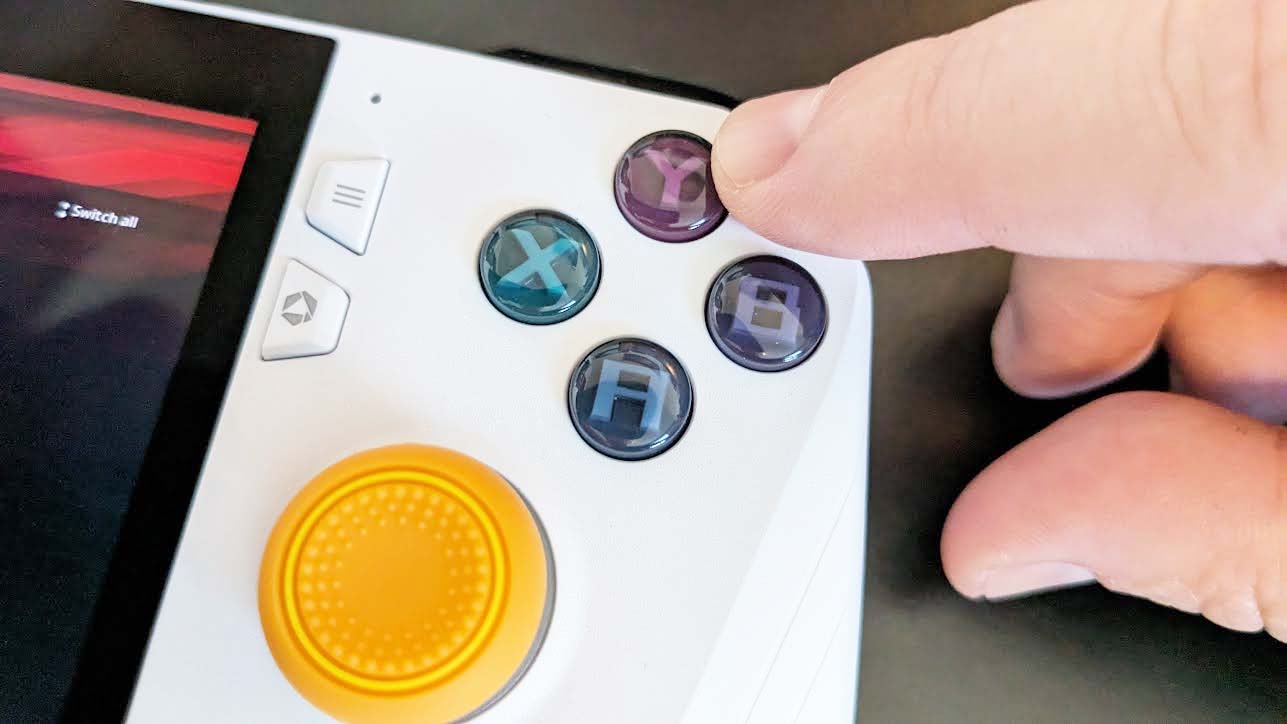
- Press Y to go to Advanced Mode.
- Tap on the Advanced tab and select ASUS Cloud Recovery.
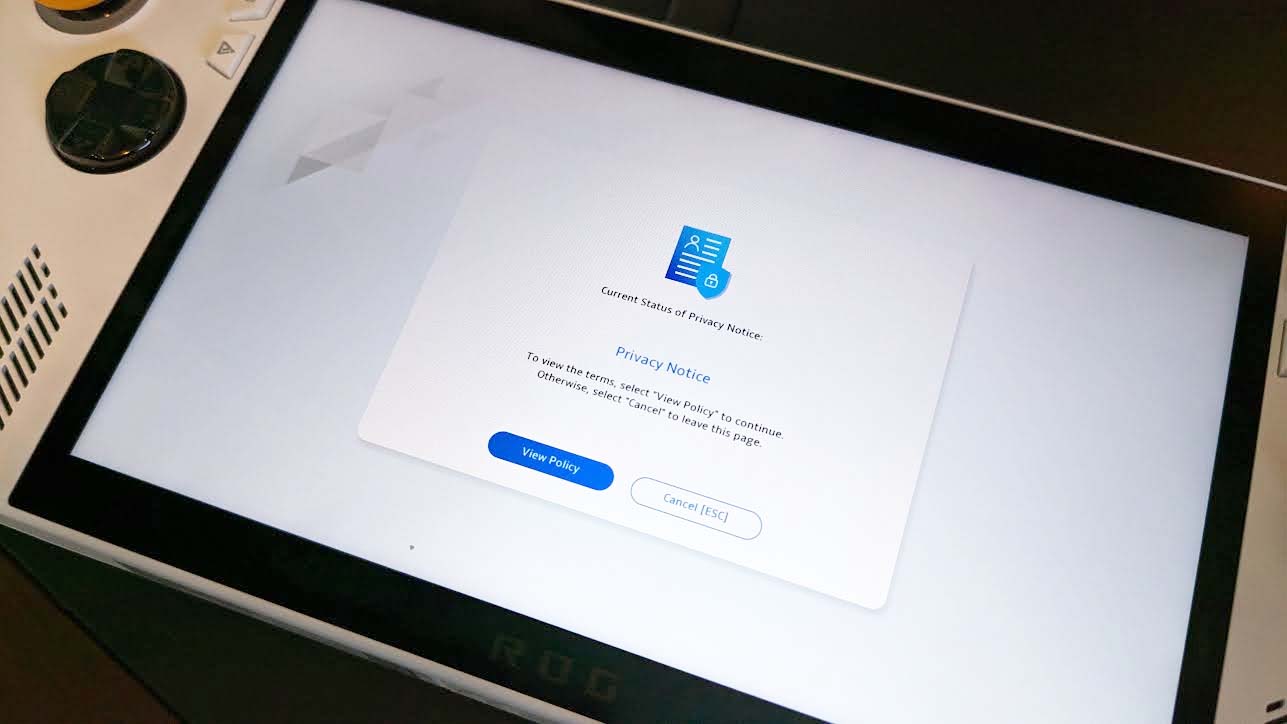
- If this is your first time doing this (and it likely is), you'll need to select View Policy to get acquainted with the Privacy Notice.
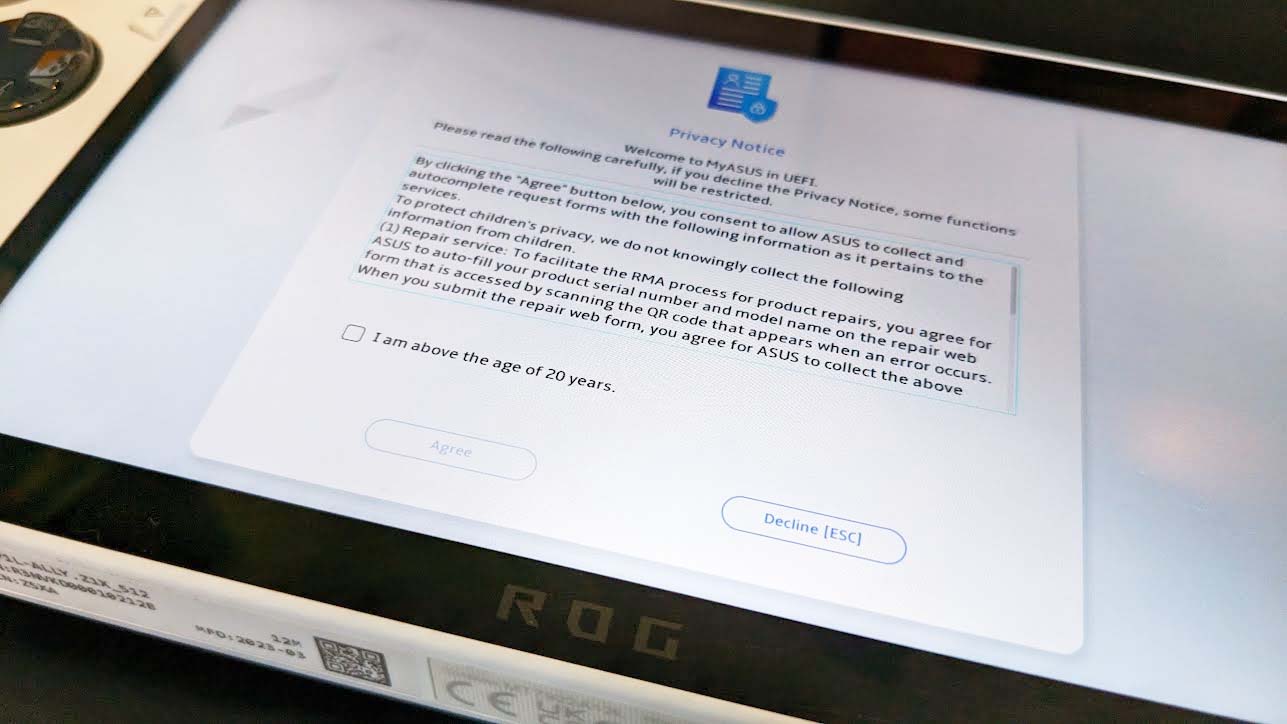
- You will then need to check the box to confirm that you are over 20 years old then select Agree.
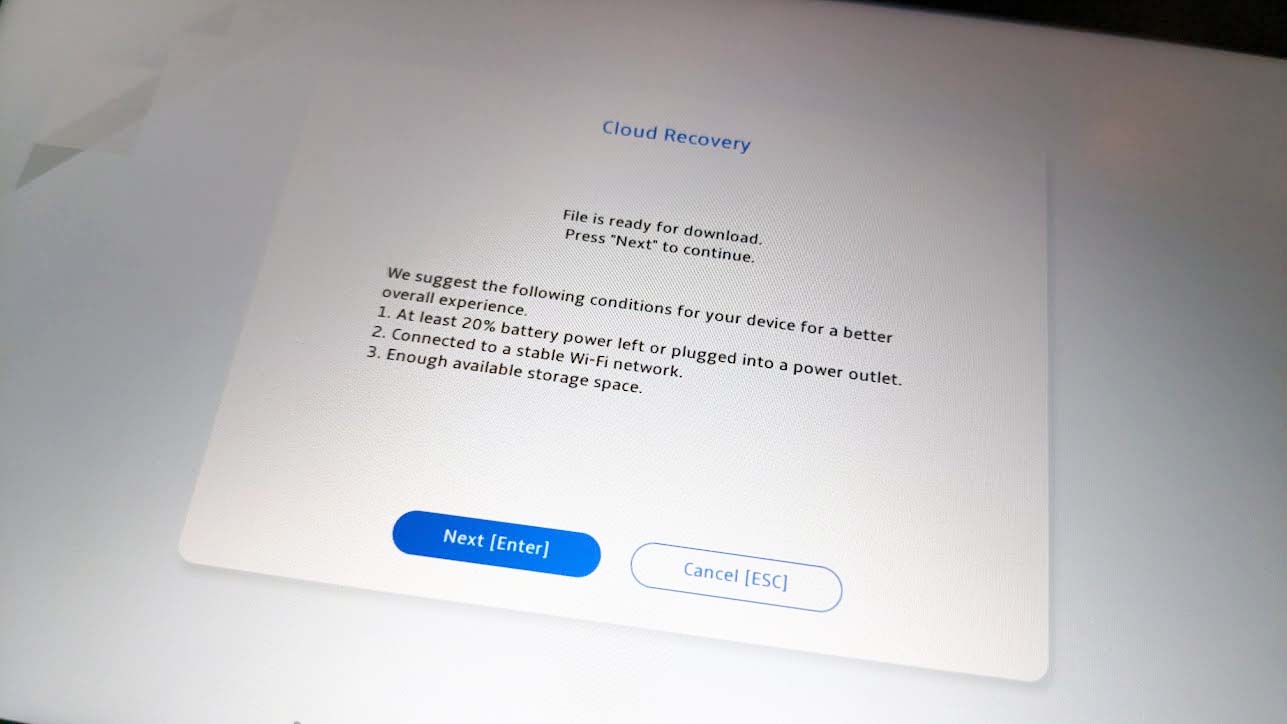
- Select Next [Enter] to initiate Cloud Recovery downloading.
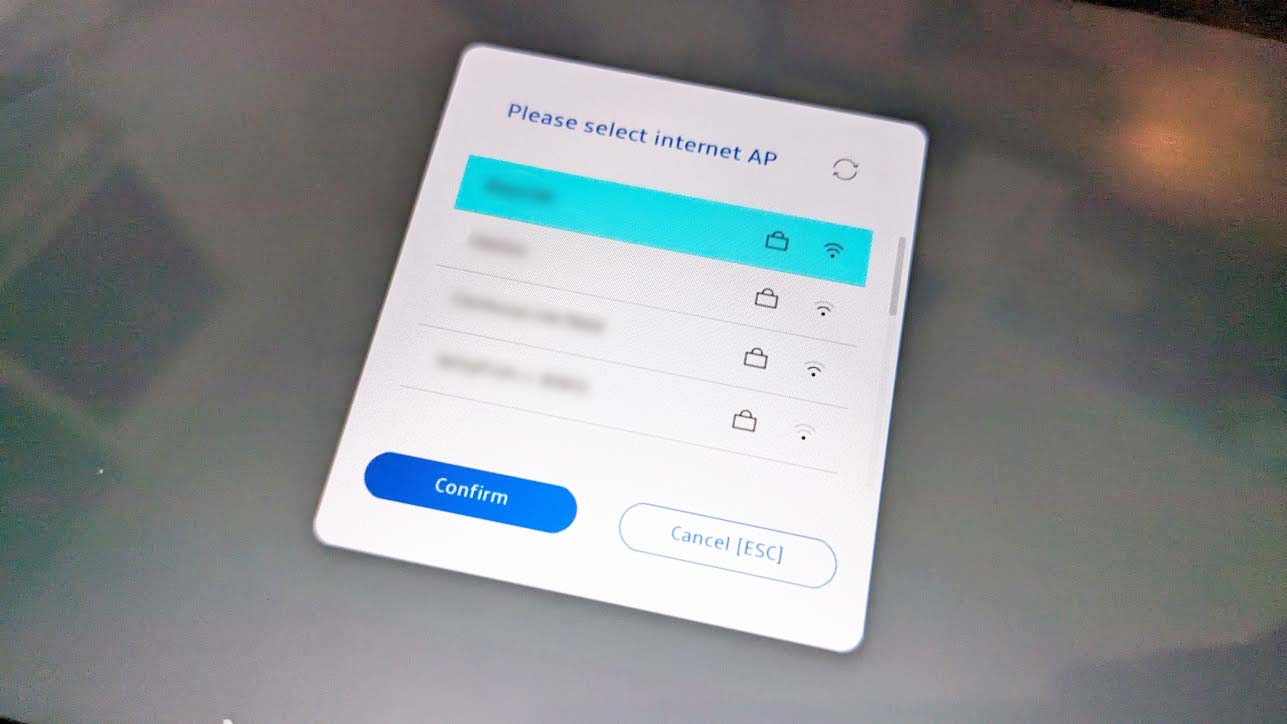
- Then you'll need to select your Internet AP and click Confirm.
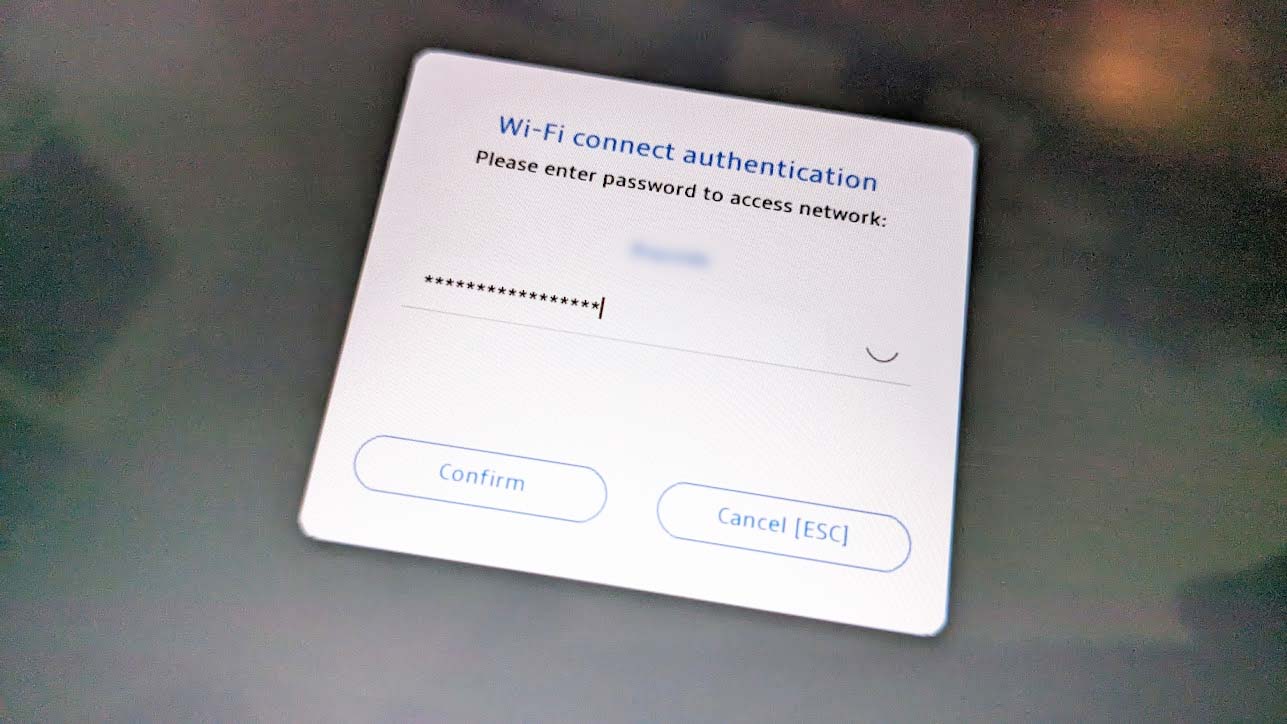
- Enter your Wi-Fi password then click Confirm again.
- Click OK [Enter] to continue.
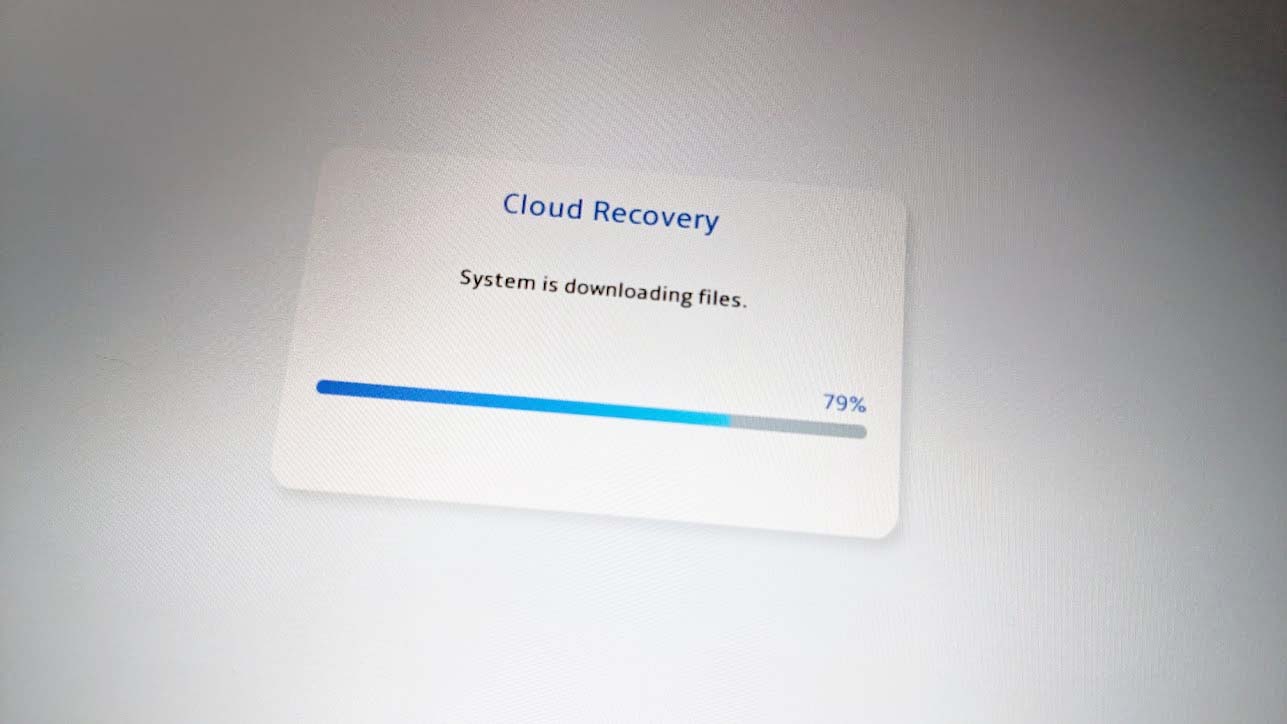
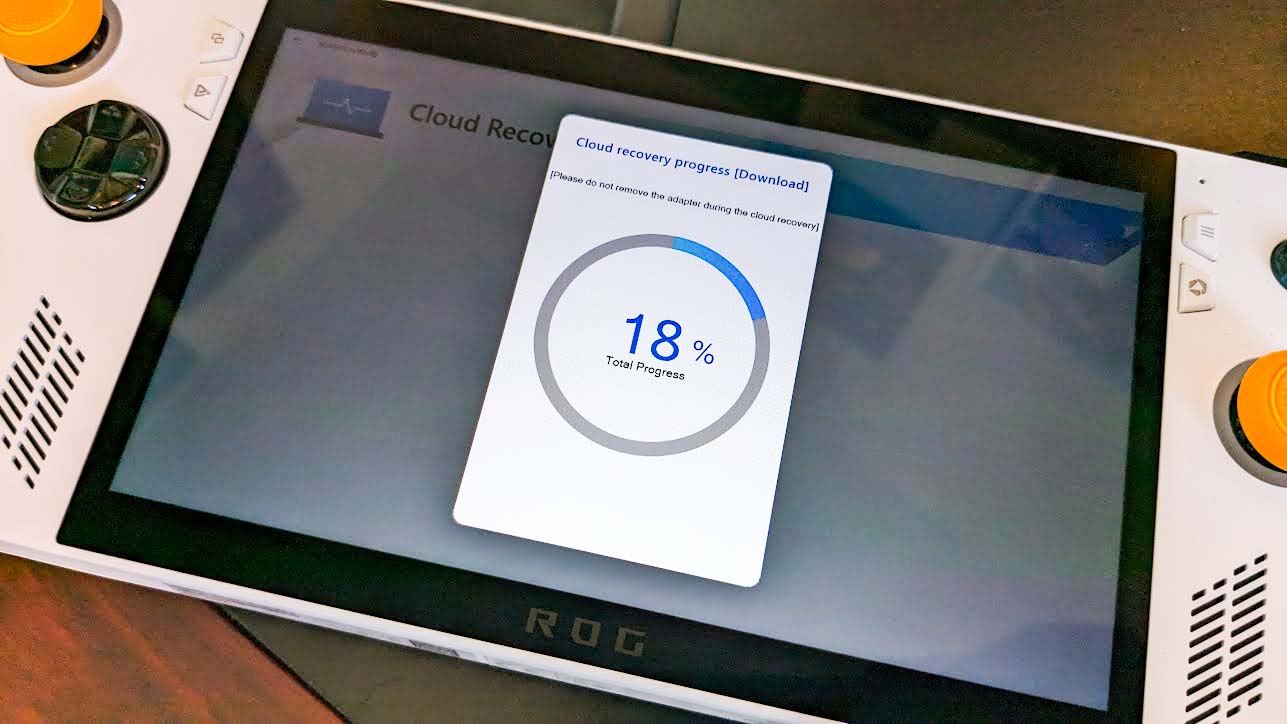
- A new box will show up, click Next [Enter] to start the download (this could take several minutes).
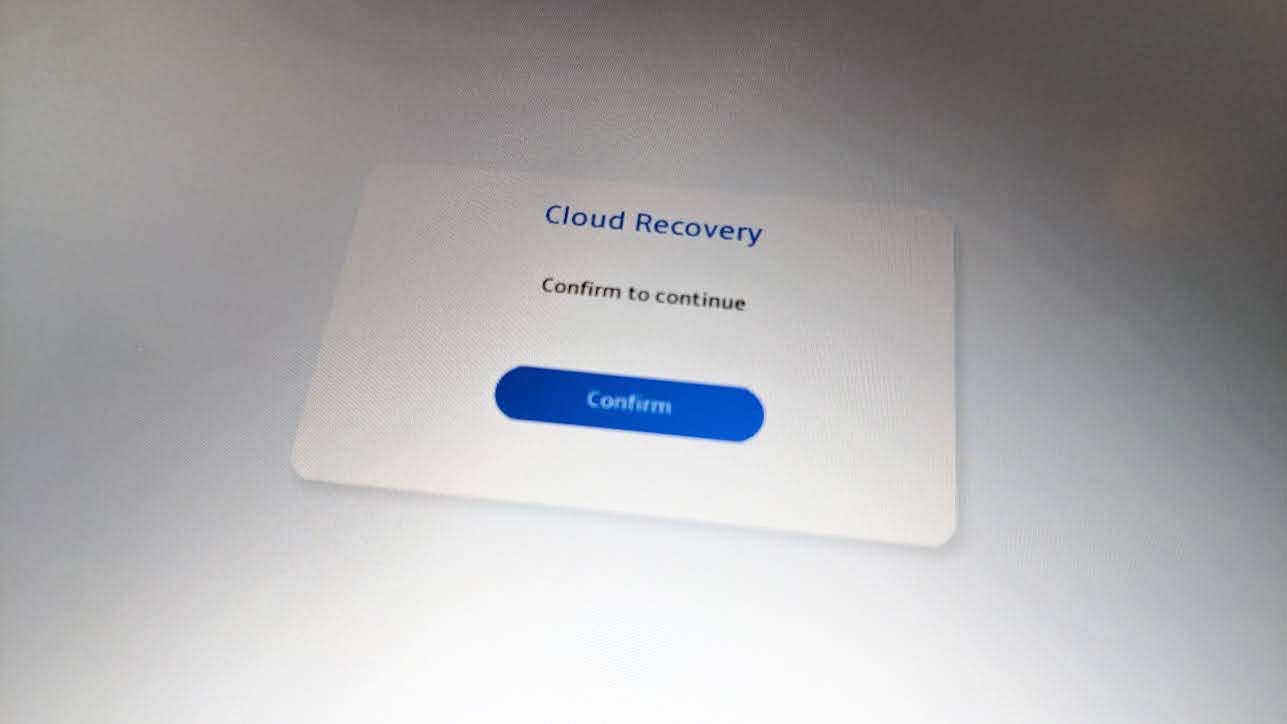
- Once it finishes downloading, click Confirm.
- Wait for the system to restart so it can connect to Cloud Recovery again. This could take several minutes.
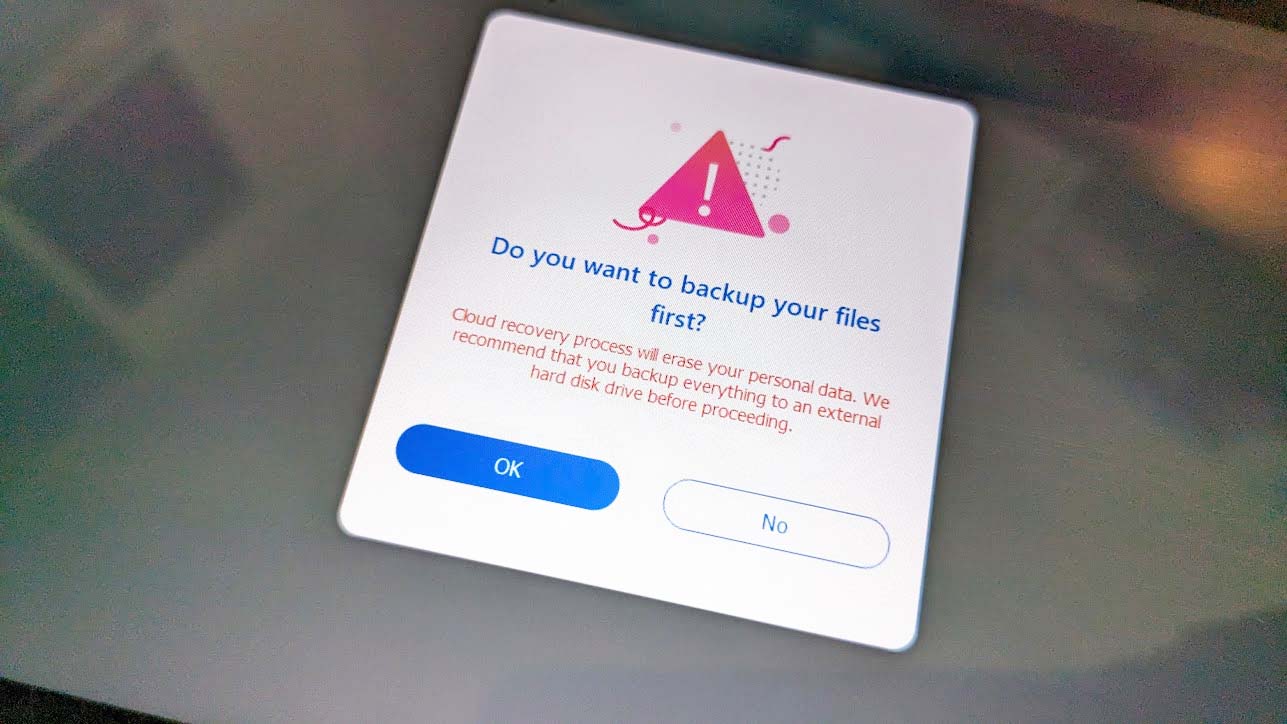
- A notice will come up telling you that all personal data will be erased from the ROG Ally and it will recommend that you backup everything to an external hard drive. If you want to backup data and haven't done so yet, connect a compatible external hard drive to the ROG Ally's USB-C port, select OK, and complete the process. Otherwise, select No and then Yes to factory reset the handheld, which erases your data and does a clean install of Windows 11/ROG programs. ROG recommends doing the clean install.
- Wait again while the Cloud Recovery process happens. This once again can take several minutes and involves making the ROG Ally restart several times, so it's best to leave the handheld somewhere safe and not touch it until it is completely done. If you choose to erase your data, you'll know it's done with the process when it asks you to choose your country or region.
- If you backed up your data on an external hard drive, take time to transfer your backup data to the ROG Ally.
Now you're good to play your ROG Ally with the new WD_Black SN770M SSD installed. If you encounter any issues during the WD_Black SSD installation process, reach out to Western Digital customer support for assistance.
ROG Ally SSD upgrade FAQ
Does ROG Ally support external hard drives?
Yes, there are external SSDs and hard drives that can work with the ROG Ally, such as the Samsung T7 Shield 2TB External SSD.
What kind of SSD comes installed in the ROG Ally?
The ROG Ally comes with a Micron 2400 512GB m.2 NVMe Gen 4 SSD installed. There isn't a lot of room for game data on this SSD, so it's a good idea to upgrade to a higher-capacity SSD if possible.
What is an image backup?
Image backups are a way of backing up data that doesn't take as much room as a complete clone. You don't have to worry about it being a lesser backup option, as image backups save all of your programs, system settings, files, and the OS. You'll just have to have somewhere to keep the image backup, such as on a computer or external SSD.
Does ROG Ally have a microSD card malfunction problem?
Yes. Due to the location of the ROG Ally's vents and the way that the gaming handheld heats up when in Turbo mode and charging, it is possible for inserted microSD cards to overheat and malfunction. As such, it's a good idea to install a higher-capacity SSD in the handheld rather than a microSD card if you want more storage space.
Give yourself more game space
- ROG Ally accessories
- ROG Ally battery packs
- ROG Ally games and optimization
- ROG Ally screen protectors
- Ways to improve ROG Ally battery
As you can see, the process for physically swapping out the original ROG Ally SSD and putting in a new SSD is relatively simple. However, there is more to do on a software level. ASUS ROG specifically recommends doing a clean install, but if you don't like that idea, then you'll want to make a backup of your original ROG Ally SSD before doing the upgrade. This can be accomplished with an SSD enclosure adapter and computer or with an external SSD. But you'll also need to use a helpful disk backup program, such as Macrium Reflect, in order to clone or create an image backup of your SSD.
The adapter route is far more affordable, but the SSD route is more convenient. So you'll have to decide which one is a better fit for you. Of course, you could just opt to use an external SSD with your ROG Ally rather than swapping out an internal one. This can make the gaming handheld a bit more clunky to use at times, but you can also give yourself far more space this way and enjoy the portable gaming benefits I described in my ROG Ally review.

Self-professed gaming geek Rebecca Spear is one of Windows Central's editors and reviewers with a focus on gaming handhelds, mini PCs, PC gaming, and laptops. When she isn't checking out the latest games on Xbox Game Pass, PC, ROG Ally, or Steam Deck; she can be found digital drawing with a Wacom tablet. She's written thousands of articles with everything from editorials, reviews, previews, features, previews, and hardware reviews over the last few years. If you need information about anything gaming-related, her articles can help you out. She also loves testing game accessories and any new tech on the market. You can follow her @rrspear on X (formerly Twitter).


![ROG Ally SSD upgrad: Select Next [Enter] for Wi-Fi.](https://cdn.mos.cms.futurecdn.net/o4xKSamgU5BSNGpRMe9qEi.jpg)
![ROG Ally SSD upgrade: OK [Enter]](https://cdn.mos.cms.futurecdn.net/4i9yo64w8YCPRmri7N9wMi.jpg)
