


If you ever need to crop an image to trim parts of the canvas, focus the image on a specific area, or change the aspect ratio for printing, Windows 10 includes at least four tools to complete the task, including Photos, Paint 3D, Snip & Sketch, and even using the legacy Paint app.
Although all these tools give you quick access to a cropping tool, the options and steps are slightly different.
In this Windows 10 guide, we'll walk you through four different ways to crop images on Windows 10 without third-party tools.
- How to crop image using Photos on Windows 10
- How to crop image using Paint 3D on Windows 10
- How to crop image using Snip & Sketch on Windows 10
- How to crop image using Paint on Windows 10
How to crop image using Photos on Windows 10
To crop or resize an image using the Photos app on Windows 10, use these steps:
- Open Start.
- Search for Photos and click the top result to open the app.
- Click on the picture.Quick tip: If the image is not available in the collection, using File Explorer, right-click the image, select the Open with option, and click the Photos option.

- Click the Crop button from the top-center toolbar.

- Use the pins in corners to select the area you want to crop.

- Click and drag the image to center it in the cropping area.
- (Optional) Under the "Crop & rotate" pane, use the Aspect ratio drop-down menu and select one of the predefined cropping options using aspect ratio, including:
- Square.
- 3:2.
- 4:3.
- 10:8.
- Make a portrait.

- (Optional) Under the "Crop & rotate" pane, use the Straightening tool to use a small rotation to straighten the image.
- (Optional) Under the "Crop & rotate" pane, use the Rotate button to rotate the image 90, 180, or 360 degrees.
- Click the Save a copy button.
Once you complete the steps, the image will be cropped to the region you specified.
How to crop image using Paint 3D on Windows 10
To crop an image file with the Paint 3D app, use these steps:
- Open Start.
- Search for Paint 3D and click the top result to open the app.
- Click on Menu.
- Select the Open option.
- Click the Browse file option.

- Select the image you want to crop.
- Click the Open button.
- Click the Crop button from the top-left toolbar.

- Use the pins around the image to select the area you want to crop.

- Click and drag the cropping area to center the image.
- (Optional) Use the framing options from the left pane to crop the image using the different aspect ratios:
- 16:9.
- 5:3.
- 3:2.
- 4:3.
- 1:1.
- 9:16.

- (Optional) Use the Width and Height options from the left pane to crop the image to an exact size.Quick tip: Checking the Lock aspect ratio option allows you to enlarge or reduce the size without affecting the aspect ratio.
- Click the Done button.
- Click on Menu.
- Select the Save as option.
- Select the Image option.

- Specify the name of the image.
- Click the Save button.
After you complete the steps, the tool will produce a new image with the region you cropped.
How to crop image using Snip & Sketch on Windows 10
To crop pictures using the Snip & Sketch tool on Windows 10, use these steps:
- Open Start.
- Search for Snip & Sketch and click the top result to open the app.
- Click the Open (folder) button from the top-left.
- Select the image you want to crop.
- Click the Open button.
- Click the Crop button from the top-center toolbar.

- Use the pins in corners to select the area you want to crop.

- Click the Apply (check) button from the top-right corner.
- Click the Save as (floppy) button from the top-right corner.

- Specify the name of the image.
- Click the Save button.
Once you complete the steps, the snipping tool will crop and save the picture as a copy.
How to crop image using Paint on Windows 10
Alternatively, you can still use the legacy Paint app to crop images on Windows 10.
To crop images with the legacy Paint app, use these steps:
- Open Start.
- Search for Paint and click the top result to open the app.
- Click on File.
- Select the Open option.

- Select the image you wish to crop.
- Click the Select option from the Home tab.
- Select the region of the image you want to crop.
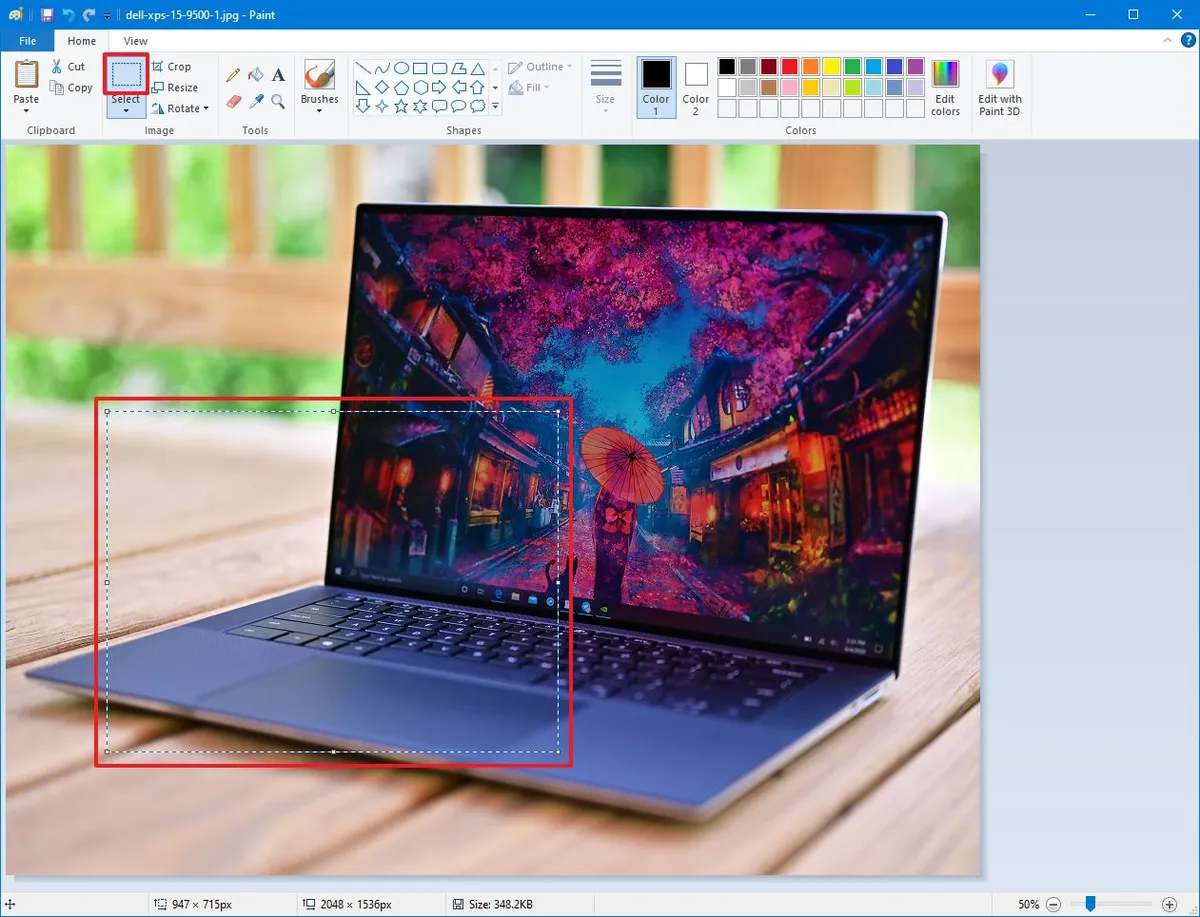
- Click the Crop button from the Home tab.

- Click on File.
- Click the Save as option.
- Specify the name of the image.
- Click the Save button.
After you complete the steps, the Paint app will crop the image depending on your selection.

