How to make text easier to read using ClearType on Windows 10
Is the text on your screen looking fuzzy? Then use this guide to enable ClearType on your Windows 10 device to make text sharper and more readable.
All the latest news, reviews, and guides for Windows and Xbox diehards.
You are now subscribed
Your newsletter sign-up was successful
On every major release of Windows, starting with Windows XP all the way to Windows 10, Microsoft includes ClearType, a feature that let you make text more readable on your display.
ClearType font technology was developed by Microsoft specifically to improve the readability of text on LCD screens, like the one on your laptop, tablet, and desktop monitor. Using ClearType will smooth the edges of the words on your device making them sharp and clear, very close to what you see printed out on a piece of paper.
While in Windows XP, ClearType wasn't enabled during installation, starting with Windows 7 and later versions the feature came turned on by default, as most computers today come with an LCD screen. However, this is not the case on every device. In addition, the default configuration may not be the correct settings for your optimal text readability.
In this Windows 10 guide, we'll walk you through the steps to enable and set up ClearType on your device to make fonts look as great as they can possibly be.
How to use ClearType Text Tuner
- Open Start, do a search for Adjust ClearType text and click the result.
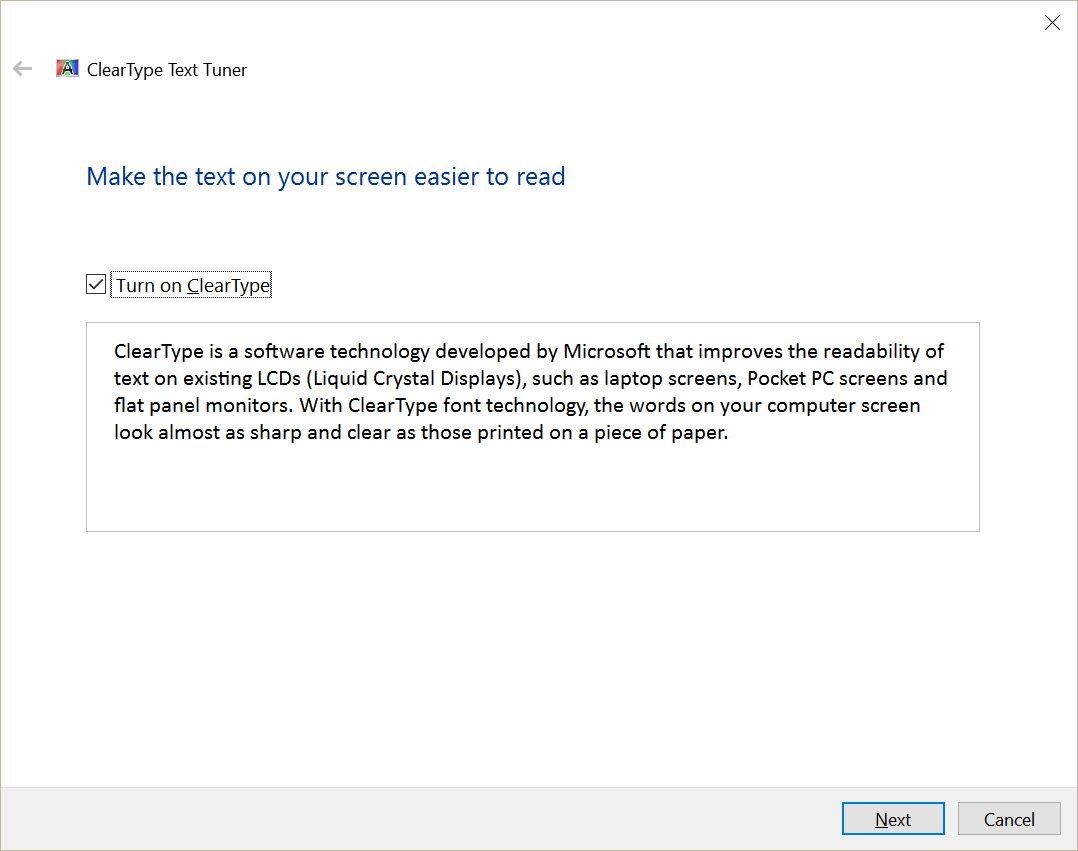
- Make sure to check the Turn on ClearType option and click Next.Quick Tip: You can quickly check and uncheck the Turn on ClearType option to see a preview of how the text would look like with and without ClearType.
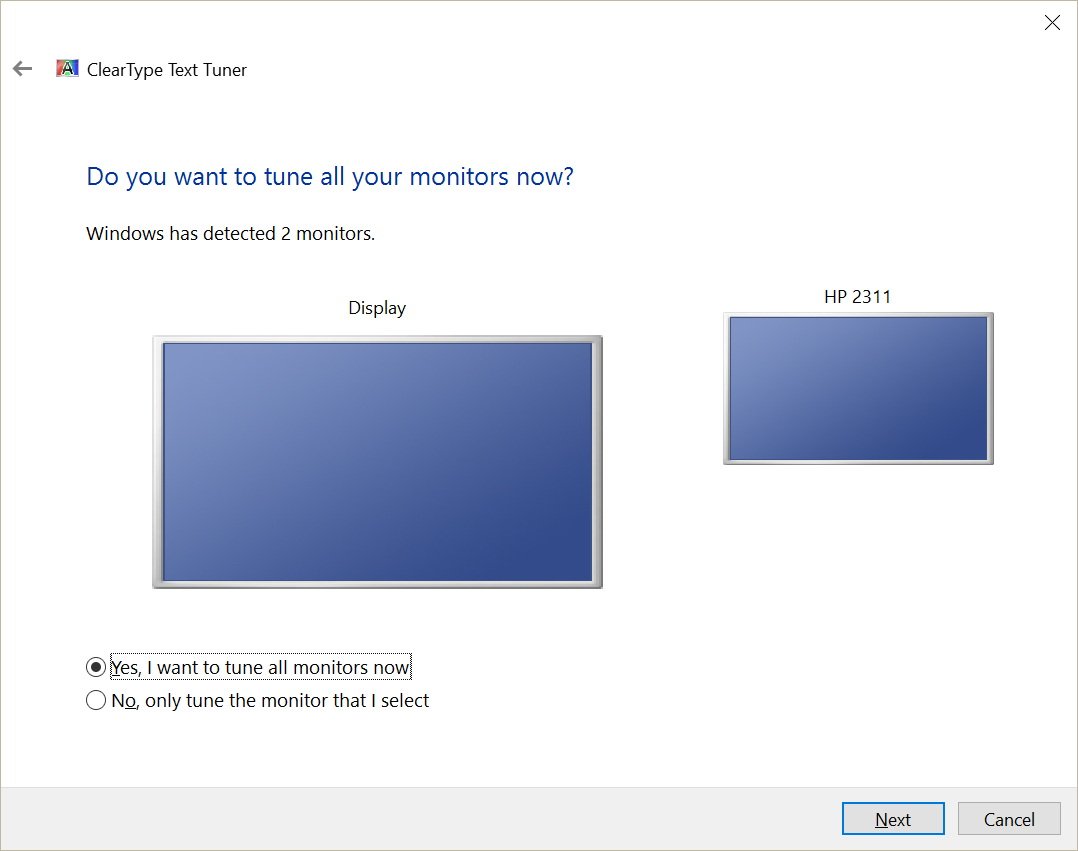
- If you have multiple monitors, you'll be asked whether you want to tune all your displays or only one. If this is your case, it's recommended that you enable ClearType on every monitor. Make your selection and click Next to continue.
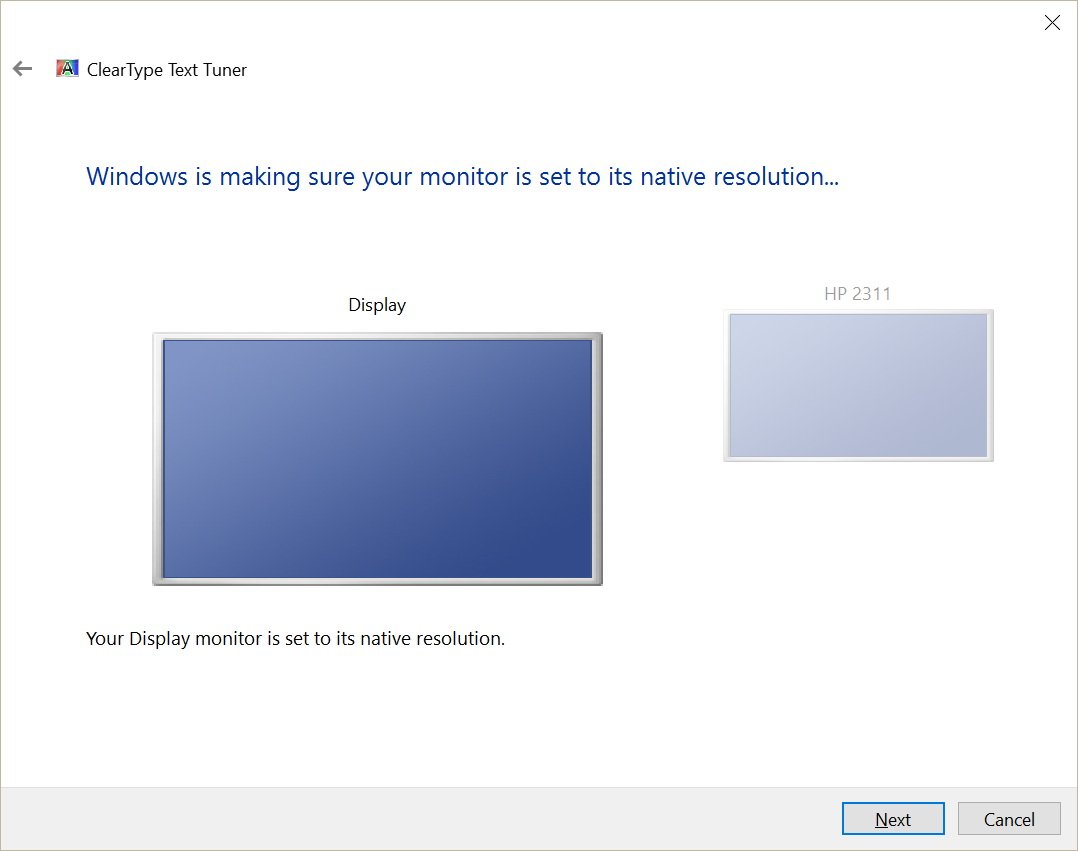
- Windows will also check that your monitor is using its native resolution. (If this isn't the case, you'll have to go to Settings > Display > Advanced Display Settings and check the screen resolution to recommended settings.) Click Next to continue.
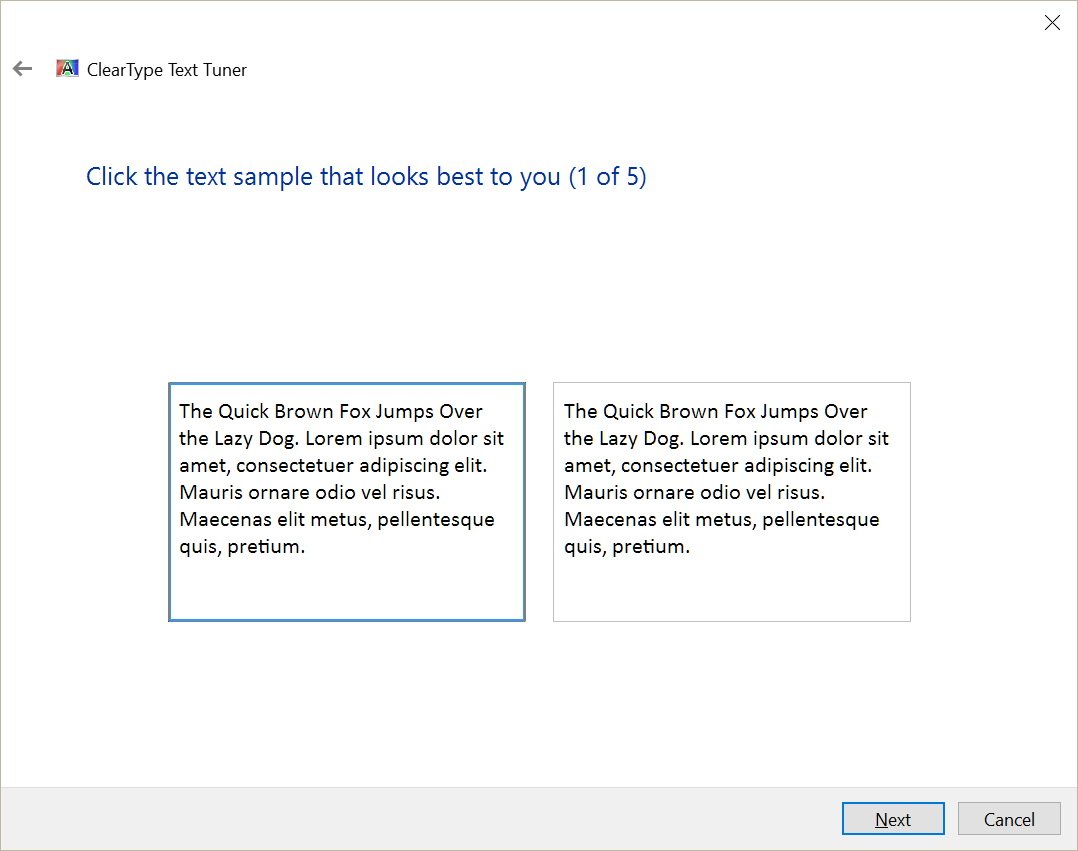
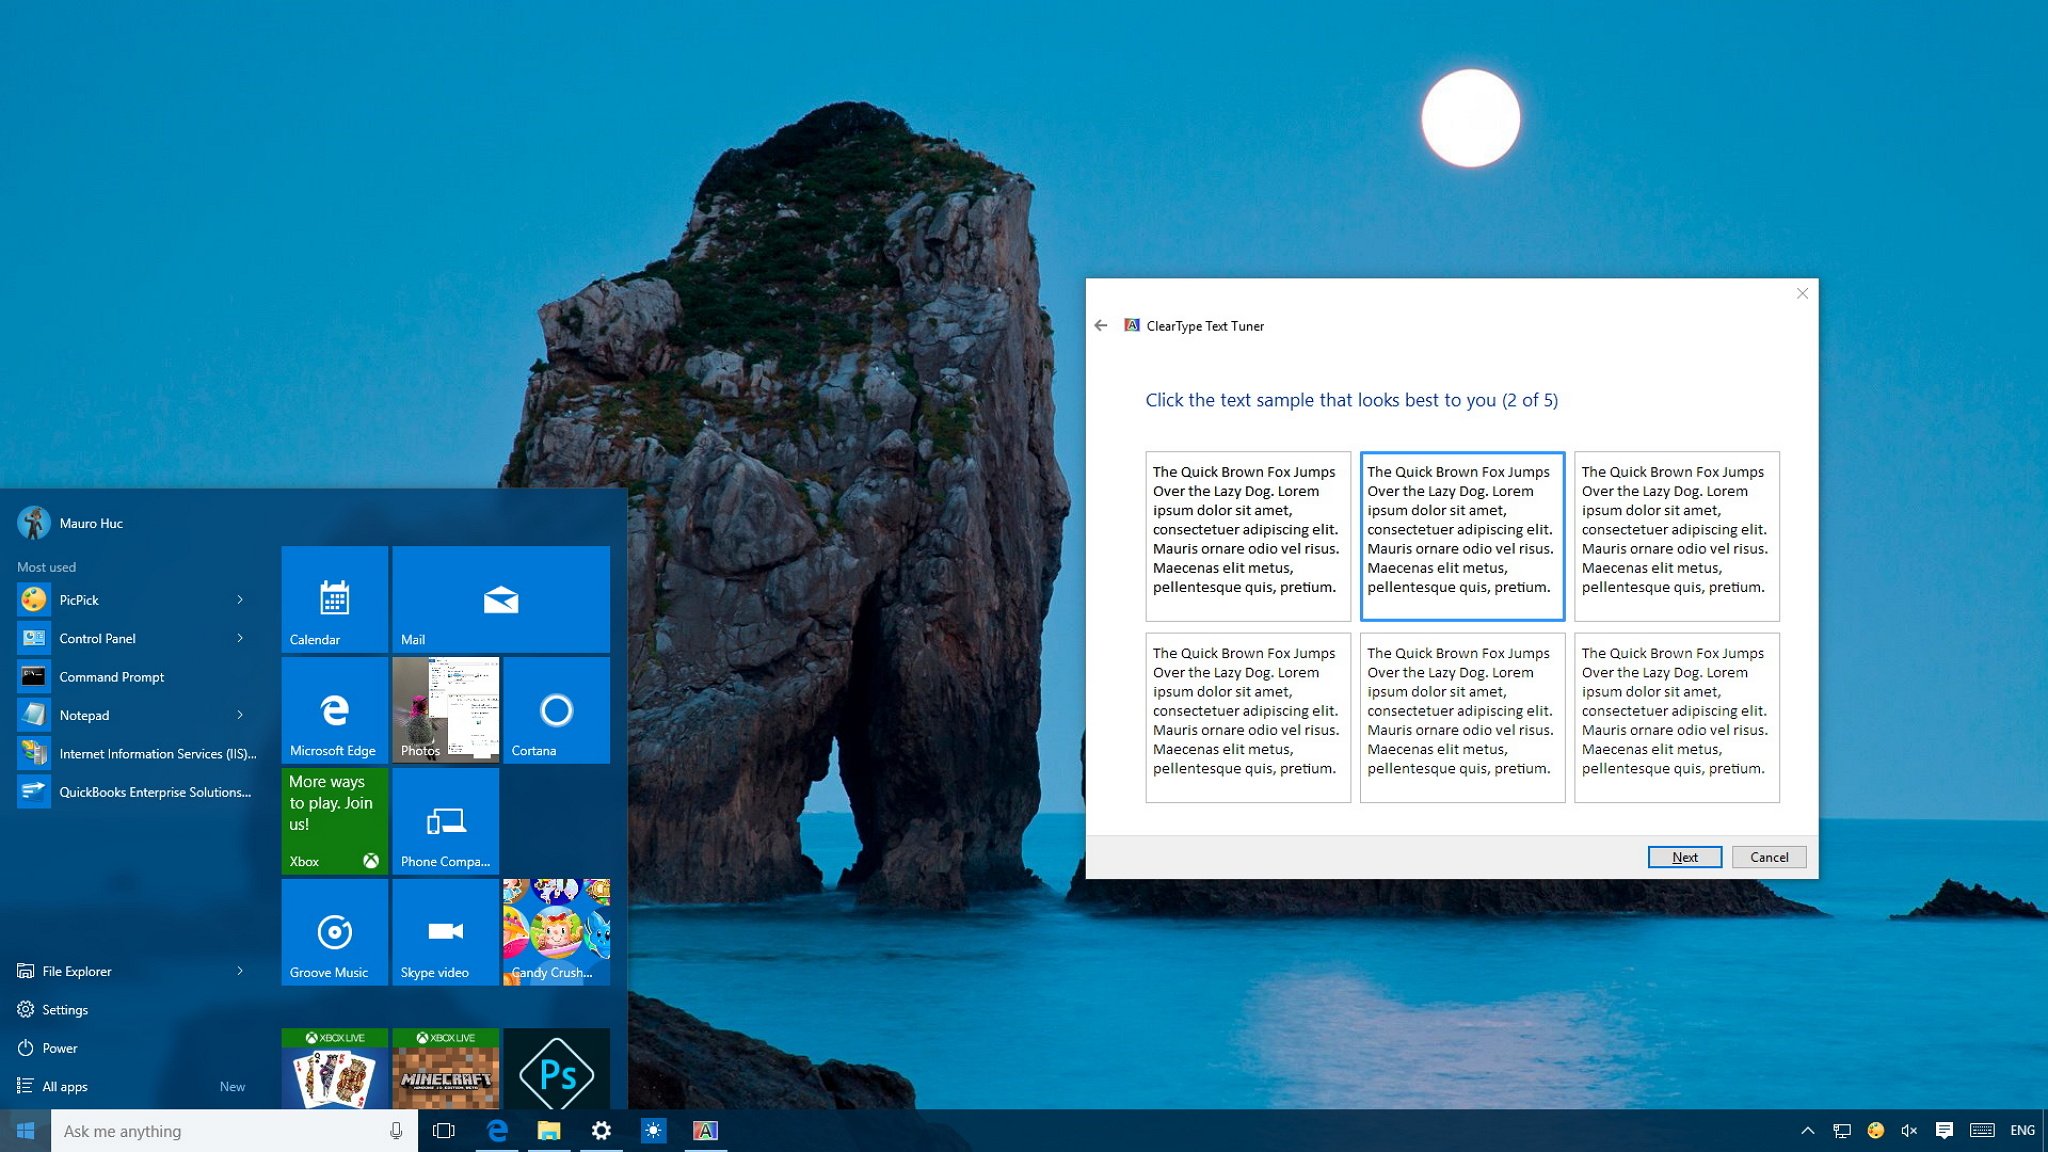
- On a set of five samples, you'll be asked to select the text that you feel most comfortable reading. The highlighted text is the current settings for your device. Pick the text that looks best on each sample, and click Next.
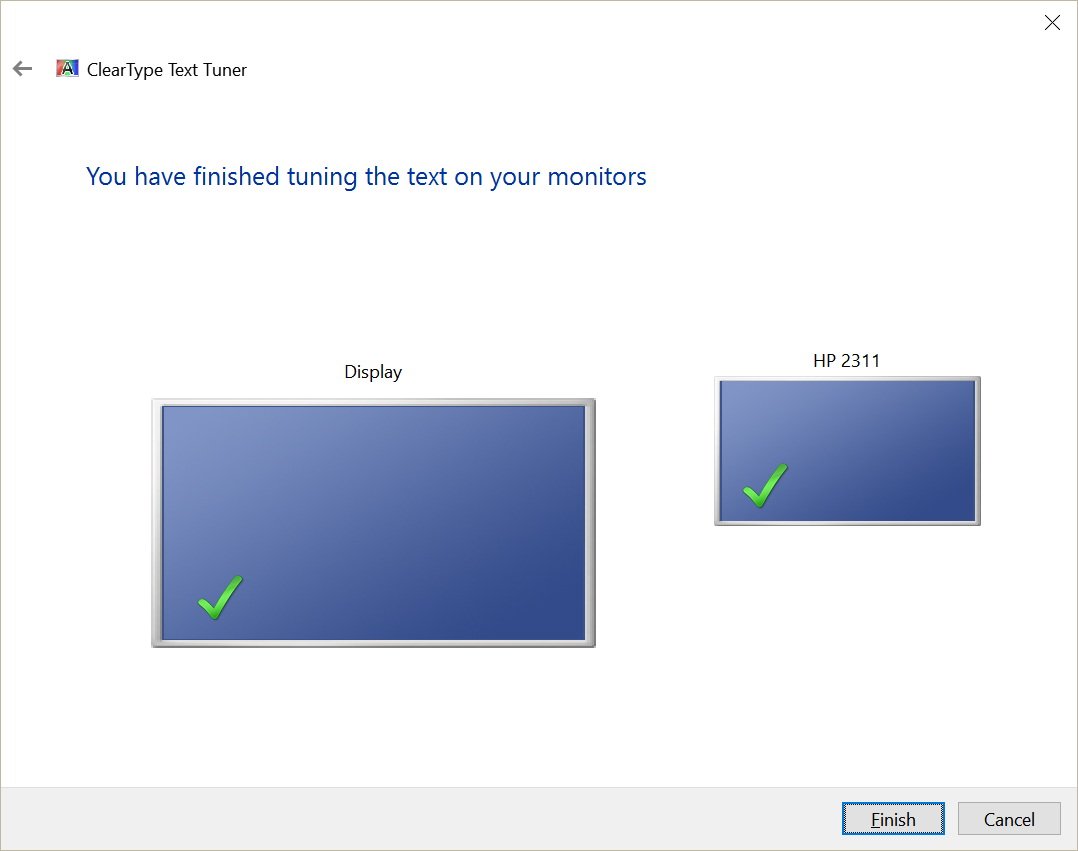
- If you have multiple monitors, you'll need to run the same set of steps for each monitor. Once you completed the steps, click Finish to apply the new settings.
It's worth pointing out that this feature goes hand in hand with Display Color Calibration. This is another recommended feature you should use in combination with ClearType to calibrate your display settings to make sure your monitor is set to display the most accurate colors and black levels.
Did ClearType improve how you view text on your screen? Tell us in the comments below.
More Windows 10 resources
For more help articles, coverage, and answers on Windows 10, you can visit the following resources:
All the latest news, reviews, and guides for Windows and Xbox diehards.
- Windows 10 on Windows Central – All you need to know
- Windows 10 help, tips, and tricks
- Windows 10 forums on Windows Central

Mauro Huculak has been a Windows How-To Expert contributor for WindowsCentral.com for nearly a decade and has over 22 years of combined experience in IT and technical writing. He holds various professional certifications from Microsoft, Cisco, VMware, and CompTIA and has been recognized as a Microsoft MVP for many years.
