How to record a PowerShell command session on Windows 10
Yes, you can save all the commands you run and their output to a file in PowerShell — Here's how to do it on Windows 10.

All the latest news, reviews, and guides for Windows and Xbox diehards.
You are now subscribed
Your newsletter sign-up was successful
On Windows 10, if you work with PowerShell commands and scripts regularly, you probably want to keep a record of those commands and the output you see on the screen to a text file for troubleshooting or documentation purposes.
While you can always copy the information you need manually, or use different commands to export outputs individually, PowerShell also includes a much simpler command that allows you to create a transcript of an entire console session. Also, the transcript command has different options to control various aspects of the output file.
In this Windows 10 guide, we'll walk you through the steps to create a transcript of a PowerShell command session into a text file.
How to record a command session in PowerShell
To create a transcript of every command that you type in PowerShell in a particular console session, use these steps:
- Open Start.
- Search for PowerShell, click the top result to open the experience.
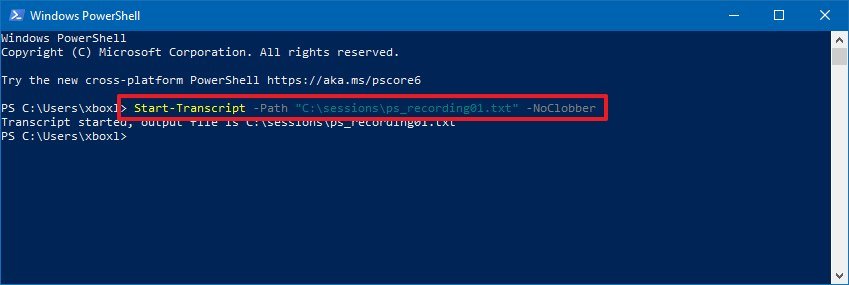
- Type the following command to start recording the session to a text file and press Enter:
Start-Transcript -Path "C:\FOLDER\PATH\POWERSHELL_TRANSCRIPT_FILENAME.txt" -NoClobberIn the command, make sure to update the text output file with the location and filename that you want to use. The-NoClobberswitch will prevent overwriting an existing recording.
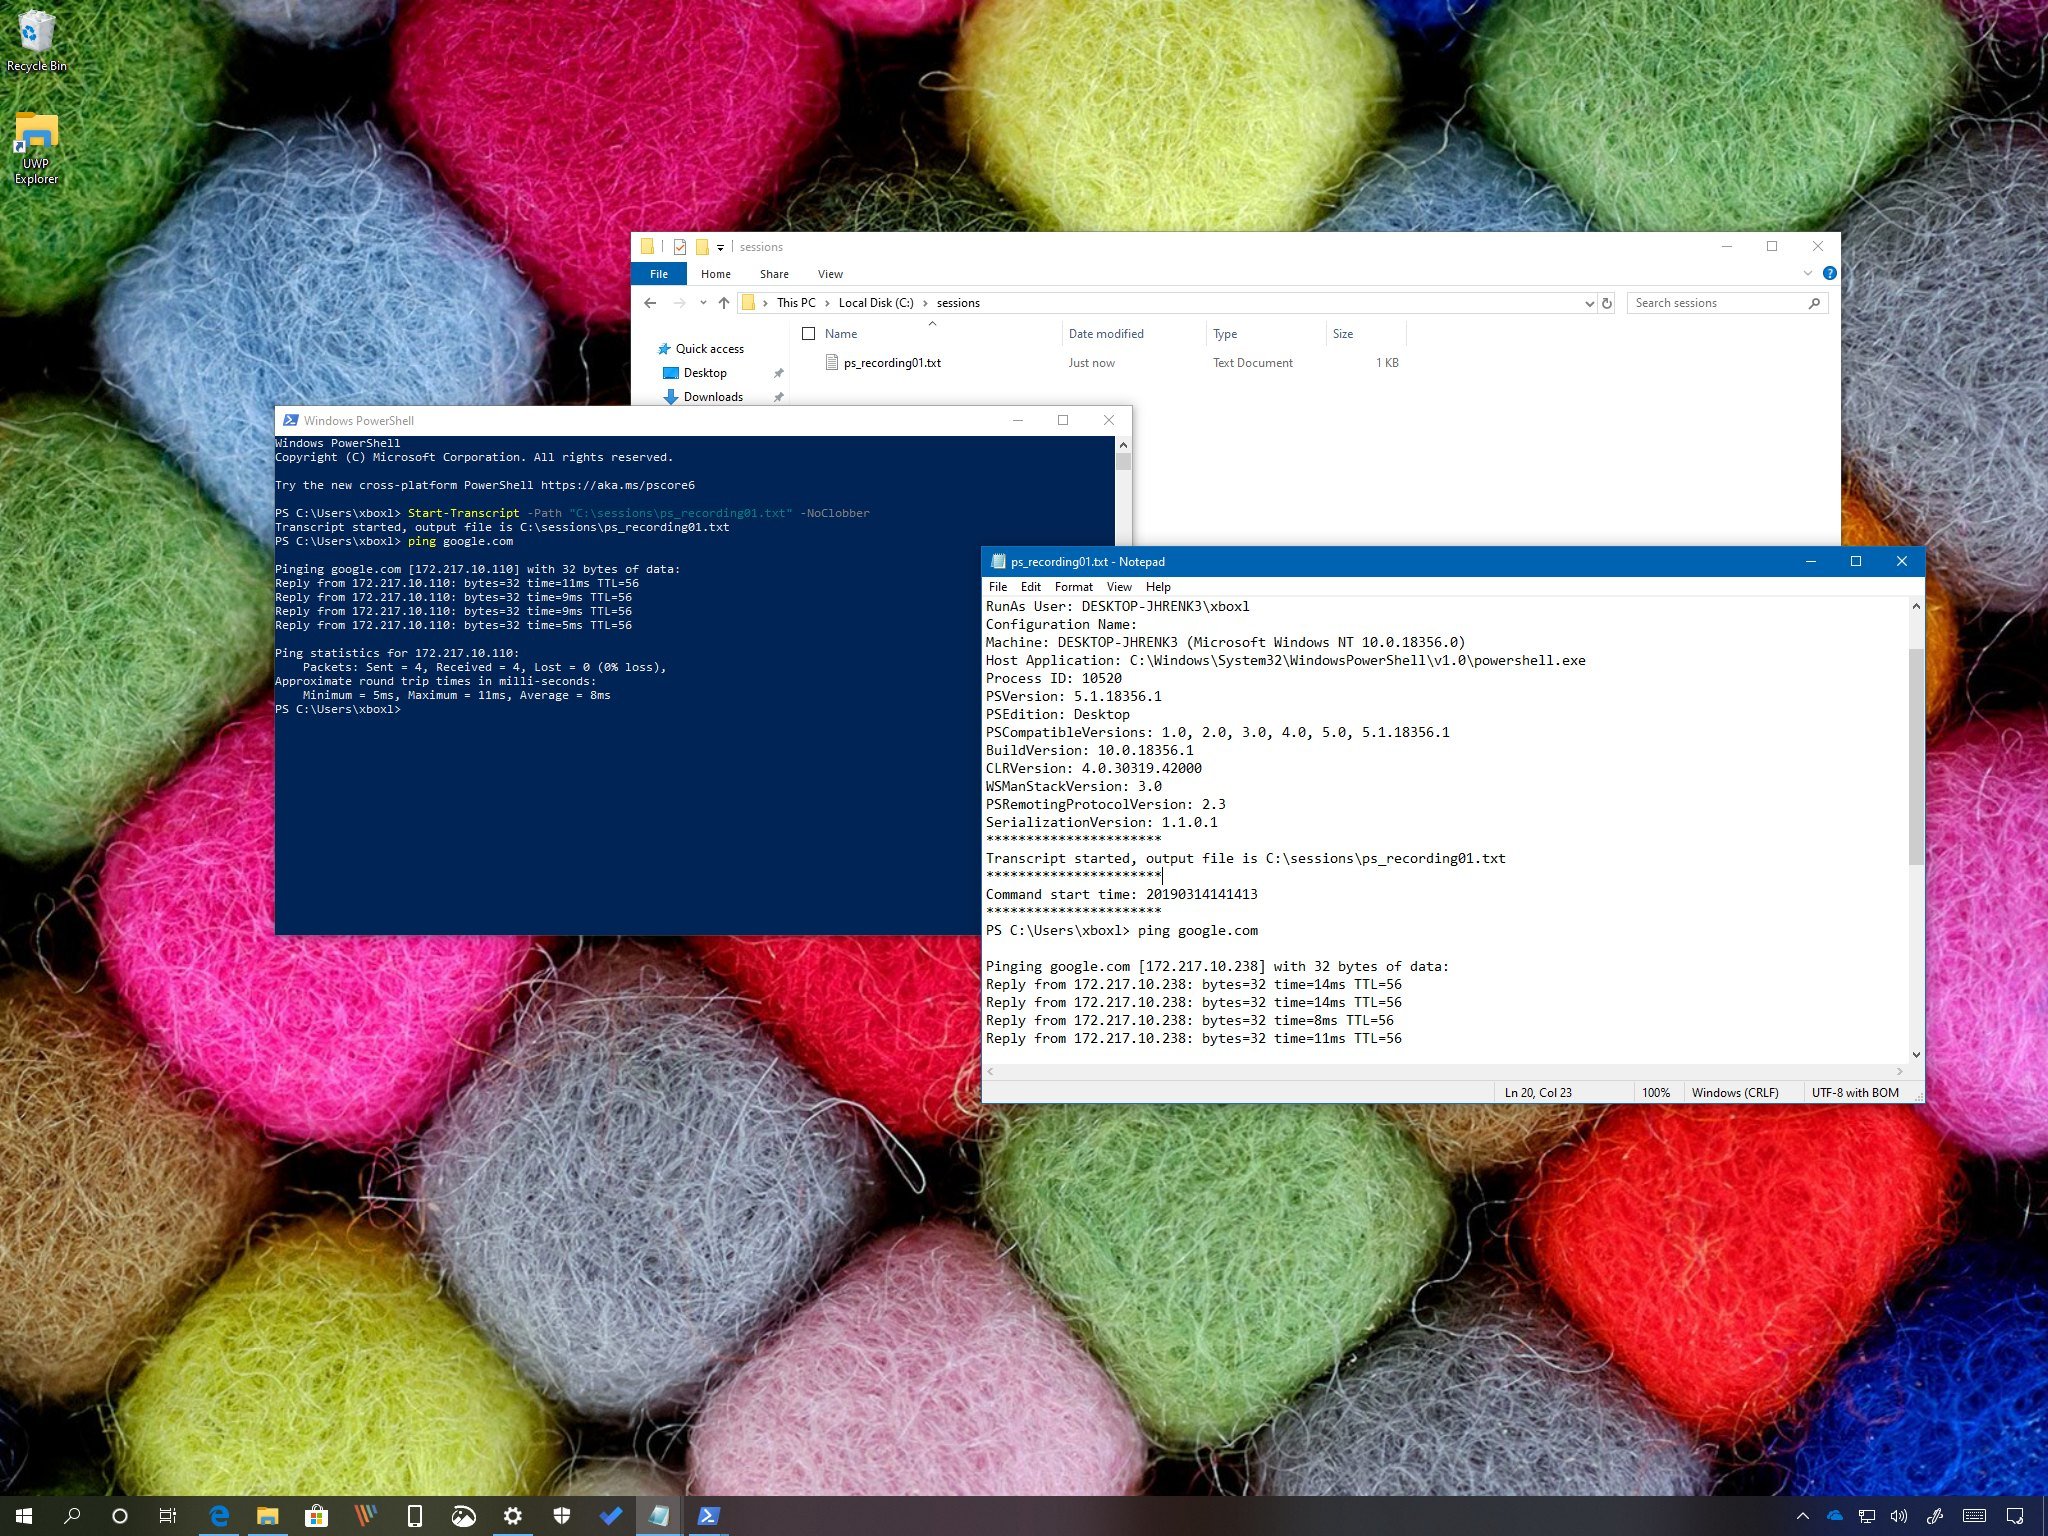
Once you complete the steps, you can continue running commands normally, and in the background, PowerShell will create a transcript in a text file, and it'll save it in the path that you specified in the command.
After you finish using PowerShell, you can close the console or use the
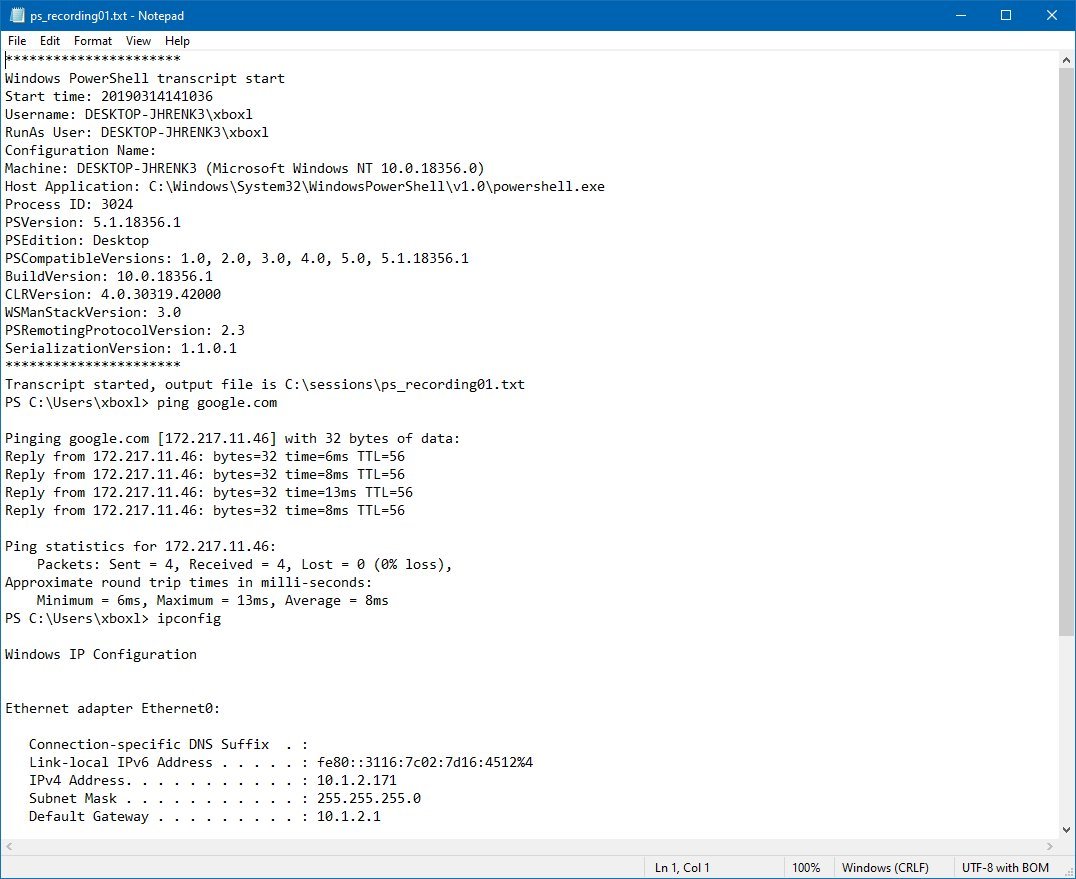
Stop-Transcriptcommand to terminate the recording. Then you can open the text file with any text editor to see all the commands you typed as well as their output as they appeared in the console.
All the latest news, reviews, and guides for Windows and Xbox diehards.
In addition, you'll notice that the command also saves other relevant information, such as start time of the transcript, whether the console was using elevated privileges, computer name, version of Windows 10, and more.
Additional parameters
The Start-Transcript command also includes a number of other switches to control the behavior. For instance, if you use the
-Appendswitch in the command instead of the
-NoClobber, then the new session will be saved at the end of the existing output file.
Example:
Start-Transcript -Path "C:\sessions\ps_recording01.txt" -AppendYou can also use the
-IncludeInvocationHeaderswitch at the end of the command to log the exact time when each command in the session was executed.
Example:
Start-Transcript -Path "C:\sessions\ps_recording01.txt" -NoClobber -IncludeInvocationHeaderIf you don't want to deal with filenames, then you can use the
-OutputDirectoryswitch, instead of the
-Pathswitch, in the command to allow PowerShell to name the output files automatically.
Example:
Start-Transcript -OutputDirectory "C:\sessions"Other available switches include:
- -Confirm: Instructs PowerShell to ask for confirmation before starting the recording session.
- -Force: Allows you save the commands you type and output to a read-only file.
- -LiteralPath: Lets you specify a path literally without identifying any of the characters as wildcards.
- -WhatIf: Allows to test the command before starting a transcript.
We're focusing this guide on Windows 10, but you can also use these instructions in older versions of the OS, and other supported platforms, including macOS and Linux.
More Windows 10 resources
For more helpful articles, coverage, and answers to common questions about Windows 10, visit the following resources:
- Windows 10 on Windows Central – All you need to know
- Windows 10 help, tips, and tricks
- Windows 10 forums on Windows Central

Mauro Huculak has been a Windows How-To Expert contributor for WindowsCentral.com for nearly a decade and has over 22 years of combined experience in IT and technical writing. He holds various professional certifications from Microsoft, Cisco, VMware, and CompTIA and has been recognized as a Microsoft MVP for many years.


