How to record video of an app on Windows 10
You can screen-record any app, and this guide, we show you how to complete this task on Windows 10.
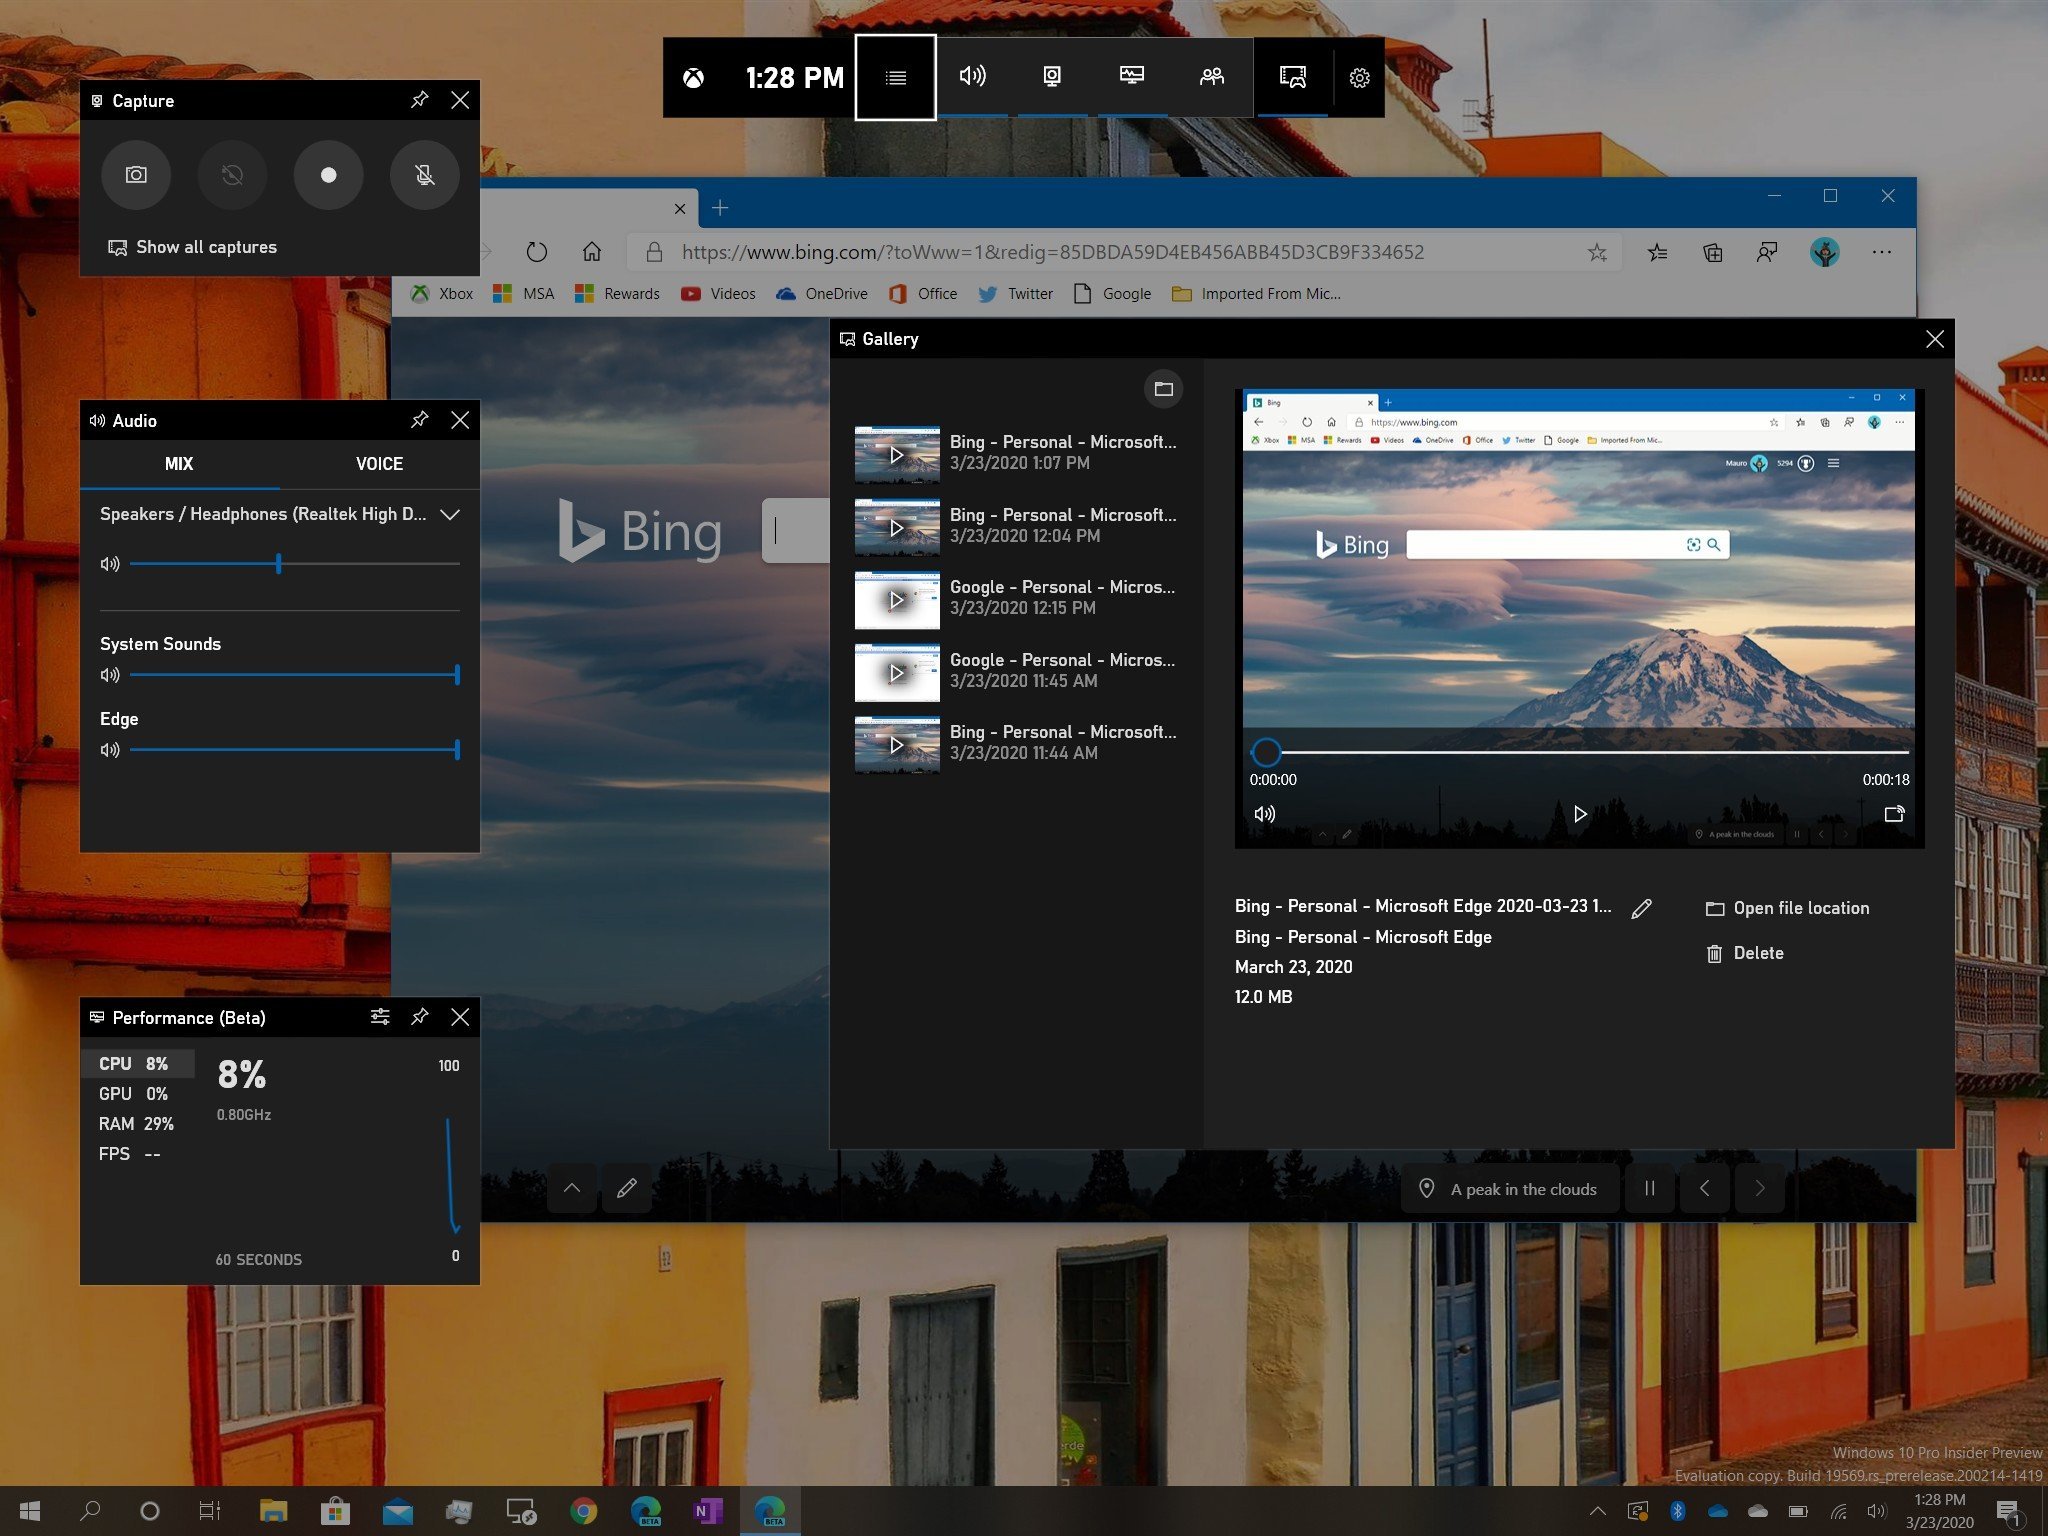
Although Windows 10 doesn't include an app designed specifically to record or capture your screen, the Xbox Game Bar app features an option to capture gameplay, which also works to record apps.
If you search around, there are plenty of other solutions with many additional features that you can use. However, if you need something quick and straightforward to make a video tutorial, create a presentation, or record a problem that you can send to tech support, the Xbox Game Bar experience is a good (enough) alternative.
In this Windows 10 guide, we walk you through the steps to record a video of an app without the need to use third-party software with the Game Bar experience. Additionally, we also outline the steps to edit the screen capture using tools built into the OS.
- How to enable screen record on Windows 10
- How to record app with Xbox Game Bar
- How to edit video recording with Photos
How to screen-record on Windows 10
To start recording an app on Windows 10, you must enable the option in the Settings app using these steps:
- Open Settings.
- Click on Gaming.
- Click on Game Bar.
- Turn on the Record game clips, screenshots, and broadcast using Game Bar toggle switch.
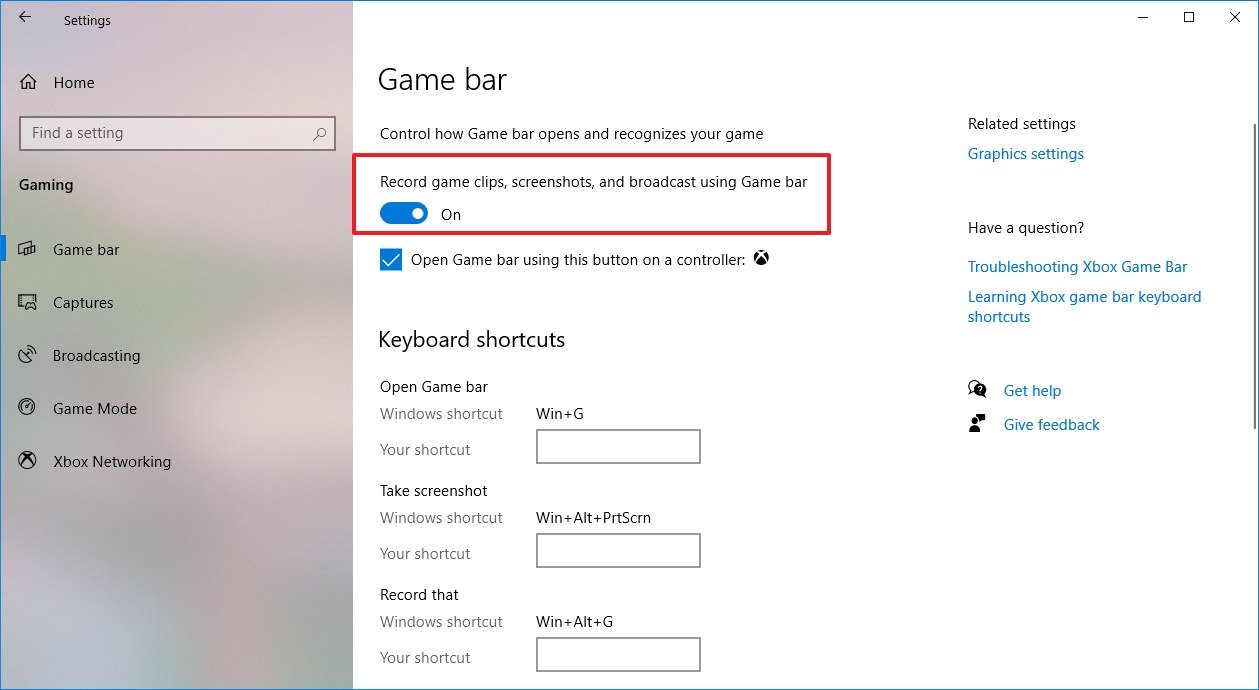
Once you complete the steps, you should be able to use the Xbox Game Bar app to screen-record apps on Windows 10.
How to record app with Xbox Game Bar
To record a video on Windows 10, open the app that you want to capture, and then use these steps:
Quick note: Although you can use the Xbox Game Bar experience to record apps, there are some limitations, and you can't record File Explorer or the desktop. Only applications.
All the latest news, reviews, and guides for Windows and Xbox diehards.
- Open Start.
- Search for Xbox Game Bar, click the top result to open the app.
- In the "Capture" module, click the Record button.Quick tip: If you don't see the Capture module, click the Capture button from the main toolbar (the one that includes the clock). Also, you can use the Windows key + Alt + R keyboard shortcut to start recording immediately.
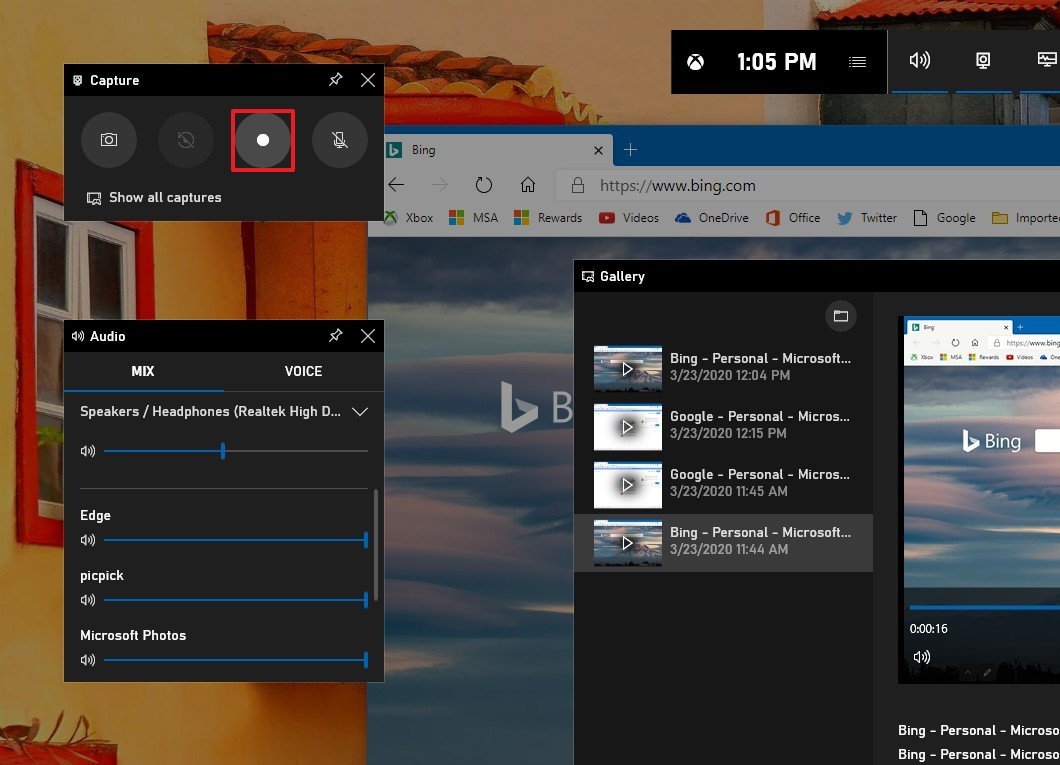
- Click anywhere to dismiss the Xbox Game Bar interface.
- Continue with the screen capture.
- (Optional) Click the microphone button using the available controllers to narrate while recording the video.Quick tip: If you're unable to record sound, it's because your privacy settings are blocking the app. You can fix this issue using Settings > Privacy > Microphone, and then make sure to turn on the toggle switch for Xbox Game Bar to allow access to your microphone.
- Click the Stop button (or minimize the app) to terminate the session.
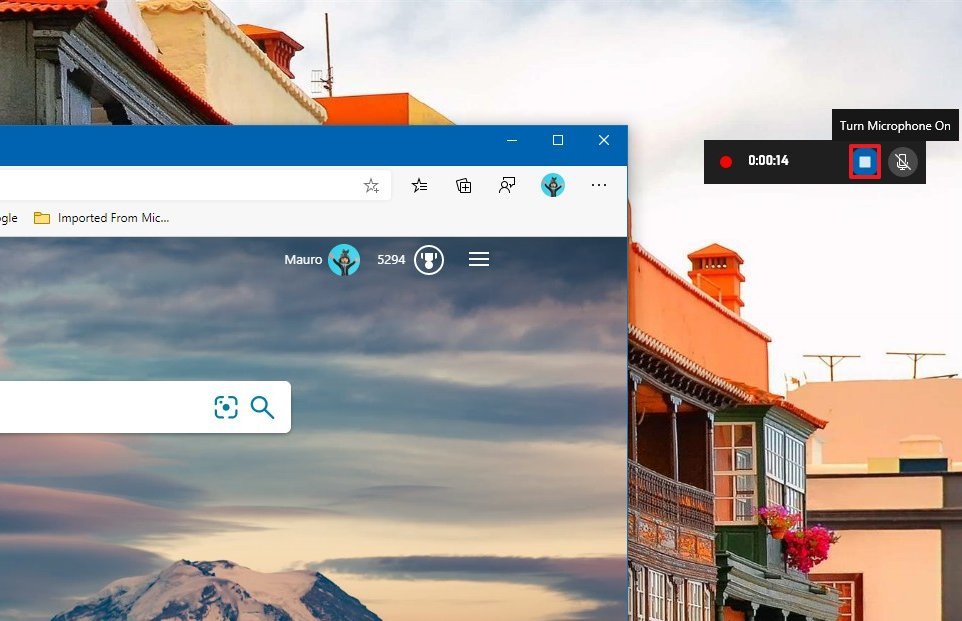
After you complete the steps, the video recording will be saved automatically in the Captures folder, inside your "Videos" library.
You can alternatively use the Windows key + G keyboard shortcut, click the Show all captures option, and in the "Gallery" module, click the Open folder location icon.
How to edit video recording with Photos
While the Xbox Game Bar app has limited functionality, you can still edit some aspects of the screen recording with the Photos app for Windows 10.
To edit a screen capture using the Photos app, use these steps:
- Open File Explorer.
- Type the following path in the address bar and press Enter:
%HOMEPATH%\Videos\Captures - Right-click the .mp4 capture file, select Open with, and click the Photos option.
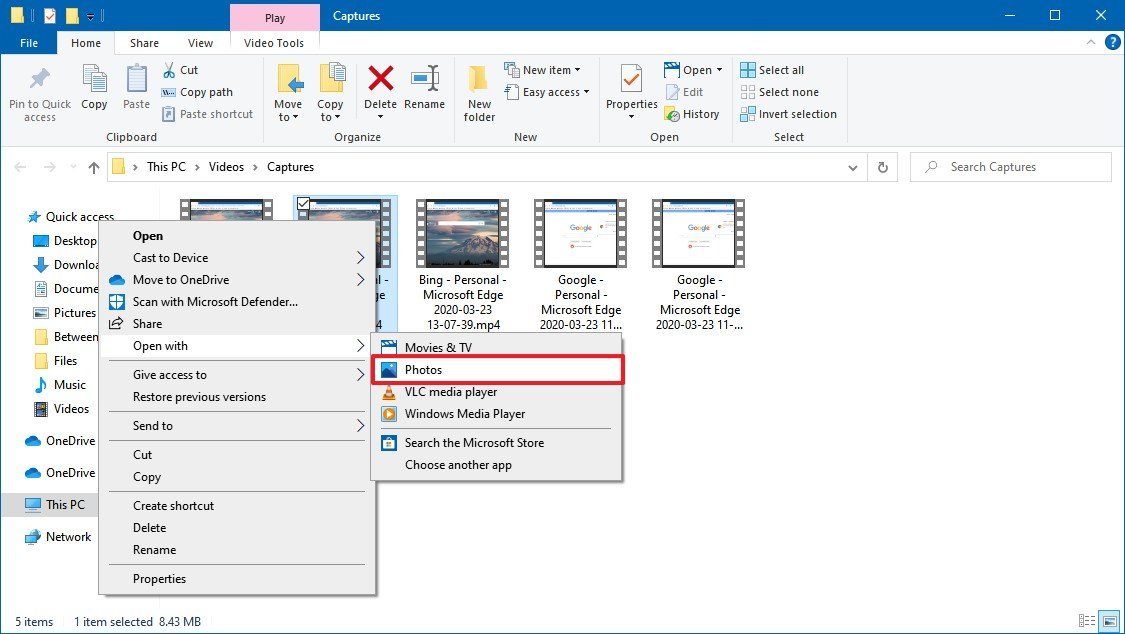
- Click the Edit & Create menu to access the available editing options:
- Trim — Shorten the recording.
- Add slo-mo — Adds slow motion to the video.
- Save photos — Saves a frame of the video as a photo.
- Draw — Annotates using touch.
- Create a video using text — Allows you to access various additional features to edit the video.
- Add 3D effects — Adds effects on top of the video.
- Add animated text — Add animation effects to the video.
- Select the Trim option (as an example).

- Use the white pins in the track to select the beginning and end of the recording.
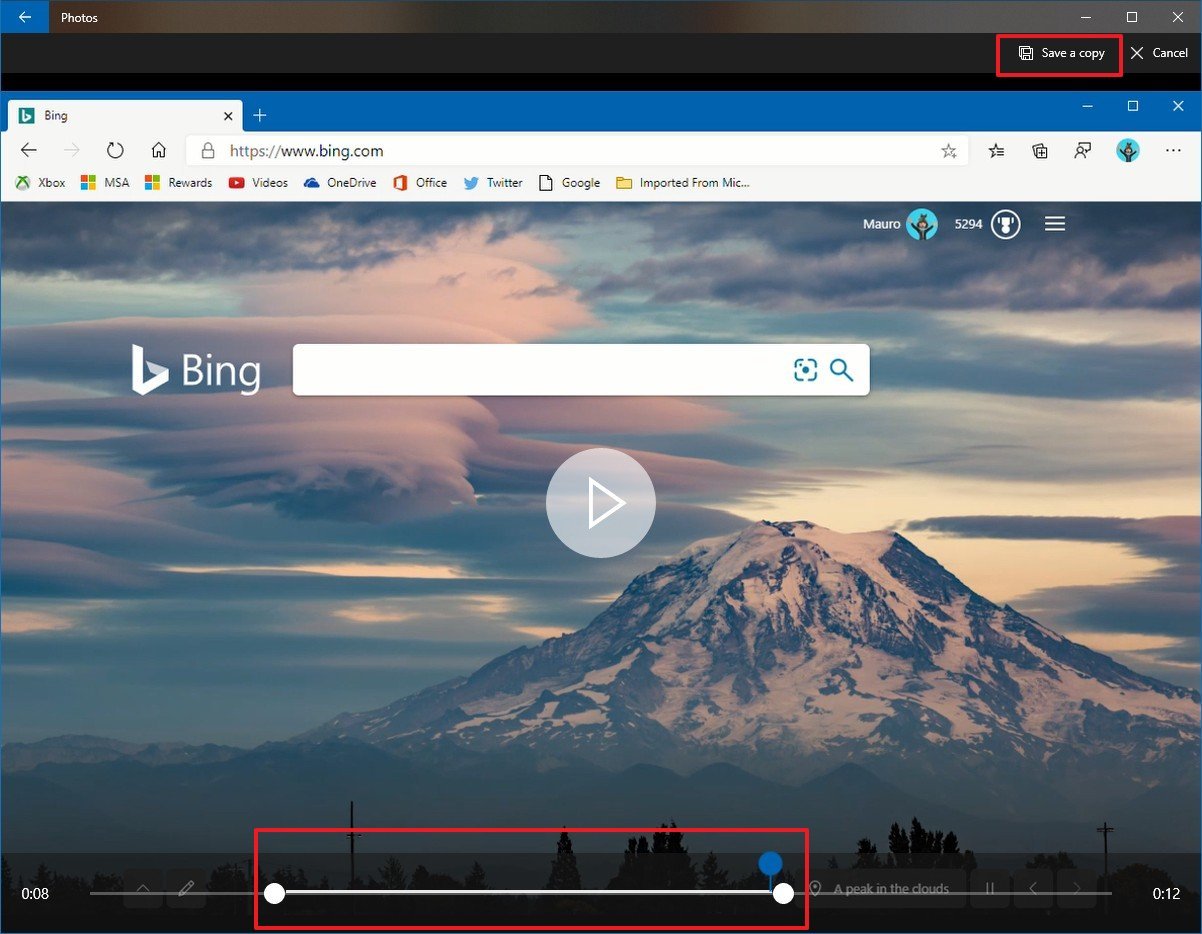
- Use the blue pin to scrub the footage to make sure you're trimming the right parts of the video.
- Click the Save a copy button from the top-right corner.
Once you complete the steps, you'll end up with an edited version of the video, which you can upload to YouTube or share it with other people via email or other mediums.
If you're looking to record voice instead of video, you can use the Voice Recorder app on Windows 10.

Mauro Huculak has been a Windows How-To Expert contributor for WindowsCentral.com for nearly a decade and has over 22 years of combined experience in IT and technical writing. He holds various professional certifications from Microsoft, Cisco, VMware, and CompTIA and has been recognized as a Microsoft MVP for many years.
