How to set custom icon for a removable drive on Windows 10
Have some fun adding a custom icon and label to removable drives on Windows 10 -- Here's how to do it.
All the latest news, reviews, and guides for Windows and Xbox diehards.
You are now subscribed
Your newsletter sign-up was successful
Whenever you connect a device or drive to your computer, Windows 10 will quickly recognize it and display its name and default icon. The operating system in many cases can even detect exactly which device is connected and download the icon that matches the physical design of the device.
However, if you're bored of seeing the same default icon every time, the correct icon is missing, or you want to add something more fun or see an icon that matches the content inside the drive, it's possible to customize your removable drive to show a custom icon and label.
In this Windows 10 guide, we'll walk you through the steps to add a custom icon and label to your external drive.
How to set a custom icon for a removable drive
The process to display a custom icon on a removable drive involves supplying an icon file and an autorun.inf file, which you will be storing on the removable drive.
Before you begin, you'll need the icon file (.ico) you want to use. You can find tons of icons on the web, many of which are freely available. For the purpose of this guide, I'll be using a USB icon from IconArchive, but you can download different icons from many other websites.
Once you downloaded the .ico file, you'll need to copy the icon and create autorun.inf file on your removable drive using these steps:
- Connect the removable drive you want to set a custom icon.
- Using File Explorer, open the removable drive.
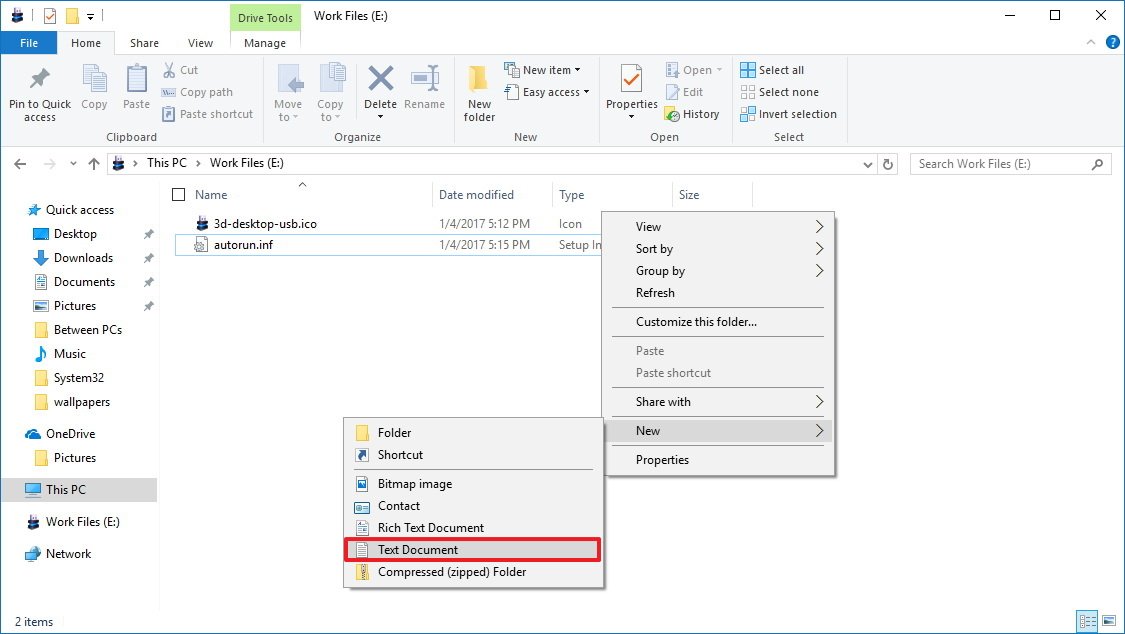
- At the root of the drive, right-click, select New, and click Text Document.
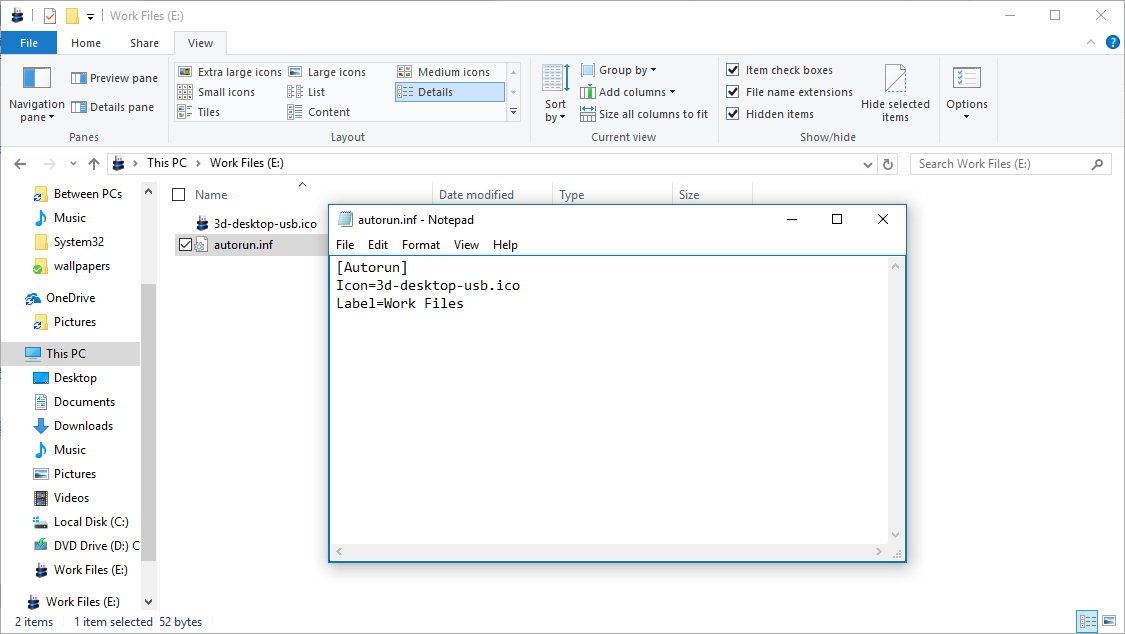
- Name the file autorun.inf and press Enter.Quick Tip: If your system isn't displaying extension for files, you need to open the View tab on File Explorer and click the File name extensions option to rename the text file autorun.inf properly. Otherwise, after renaming the file, you'll end up with autorun.inf.txt, which isn't correct.
- Click Yes to confirm the rename.
- Double-click the autorun.inf to open the file and copy and paste the following:[Autorun]Icon=icon-name.icoLabel=drive-labelOn Icon make sure to change icon-name.ico with the name of your icon, and on Label change drive-label with the drive label you want.
- Click File.
- Click Save.
- Close the text editor.
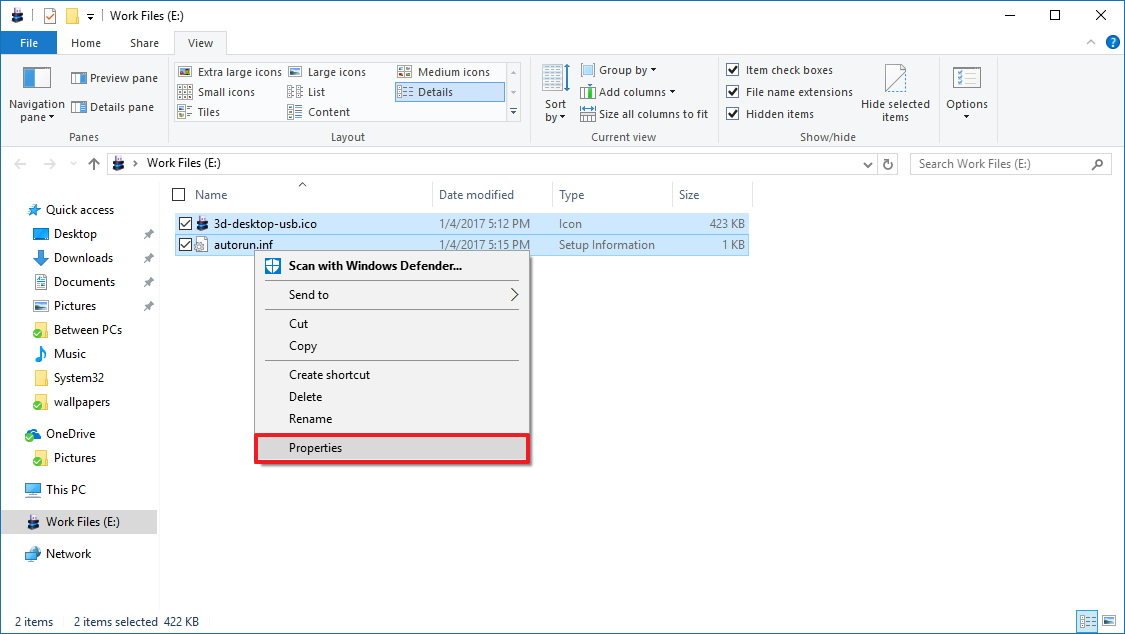
- Select the autorun.inf and the icon right files.
- Right-click the selection and click Properties.
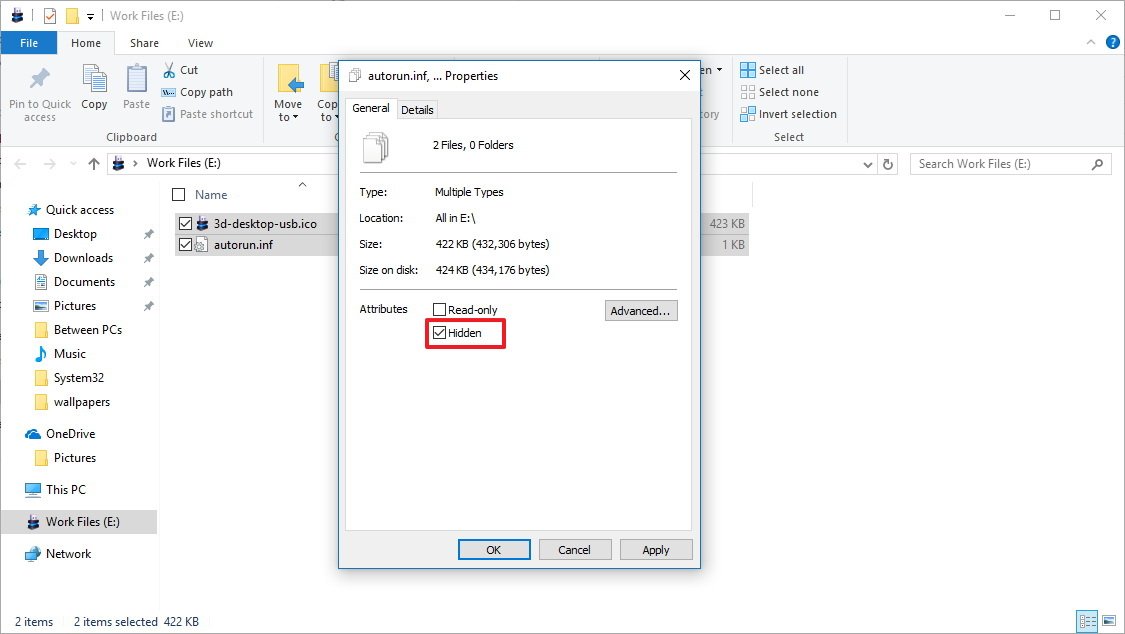
- Under Attributes, check the Hidden option to make these files invisible inside the drive, so you don't delete them by mistake.
- Click Apply.
- Click OK to complete the task.
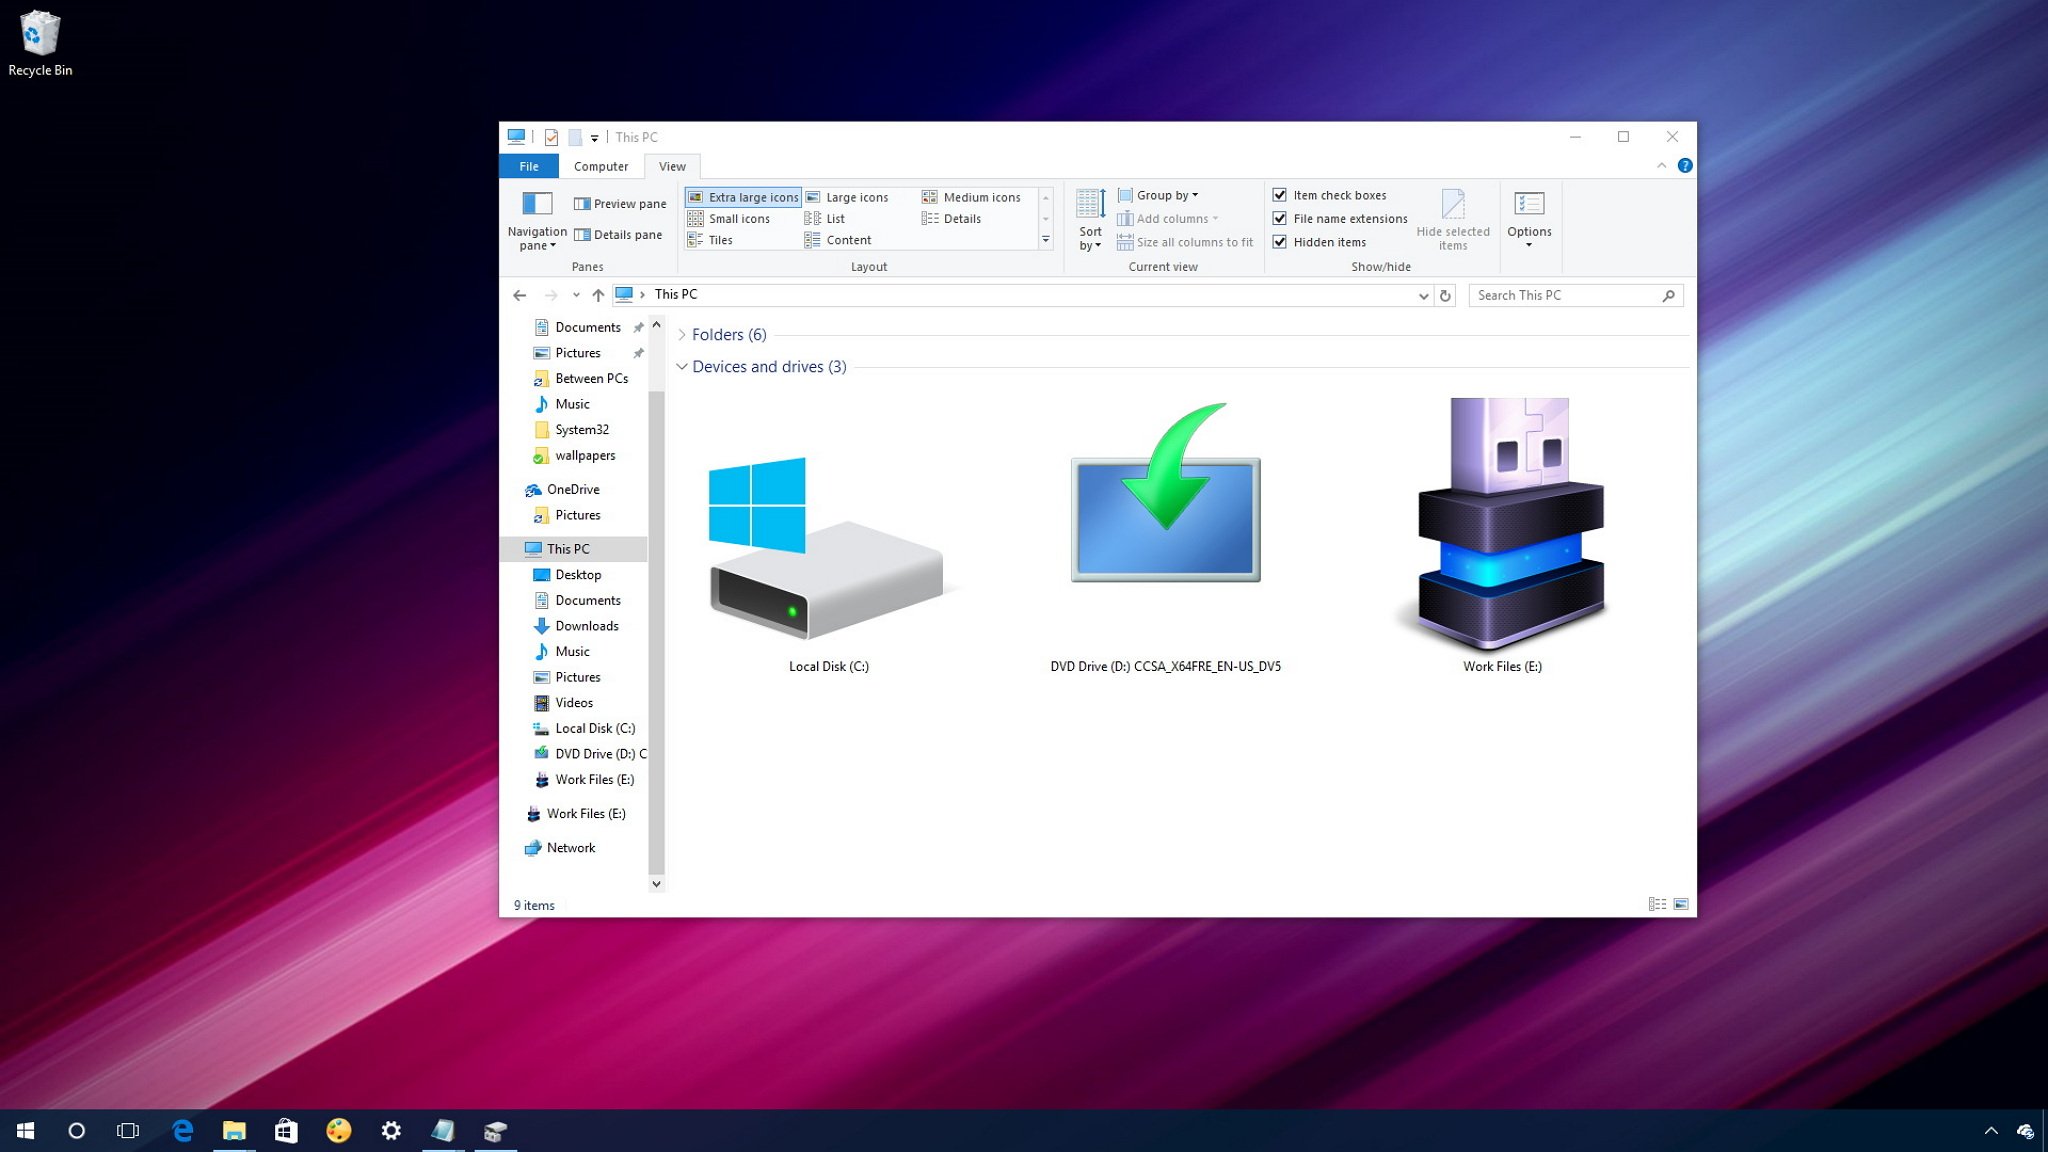
Once you completed the steps, you can disconnect and reconnect the removable drive, and now on File Explorer, you'll see the drive with the new icon and label.
All the latest news, reviews, and guides for Windows and Xbox diehards.
If you want to revert the changes, simply open the removable drive with File Explorer, make sure in the View tab "Hidden items" is checked, and simply delete the icon and autorun.inf files.
More Windows 10 resources
For more help articles, coverage, and answers on Windows 10, you can visit the following resources:
- Windows 10 on Windows Central – All you need to know
- Windows 10 help, tips, and tricks
- Windows 10 forums on Windows Central

Mauro Huculak has been a Windows How-To Expert contributor for WindowsCentral.com for nearly a decade and has over 22 years of combined experience in IT and technical writing. He holds various professional certifications from Microsoft, Cisco, VMware, and CompTIA and has been recognized as a Microsoft MVP for many years.
