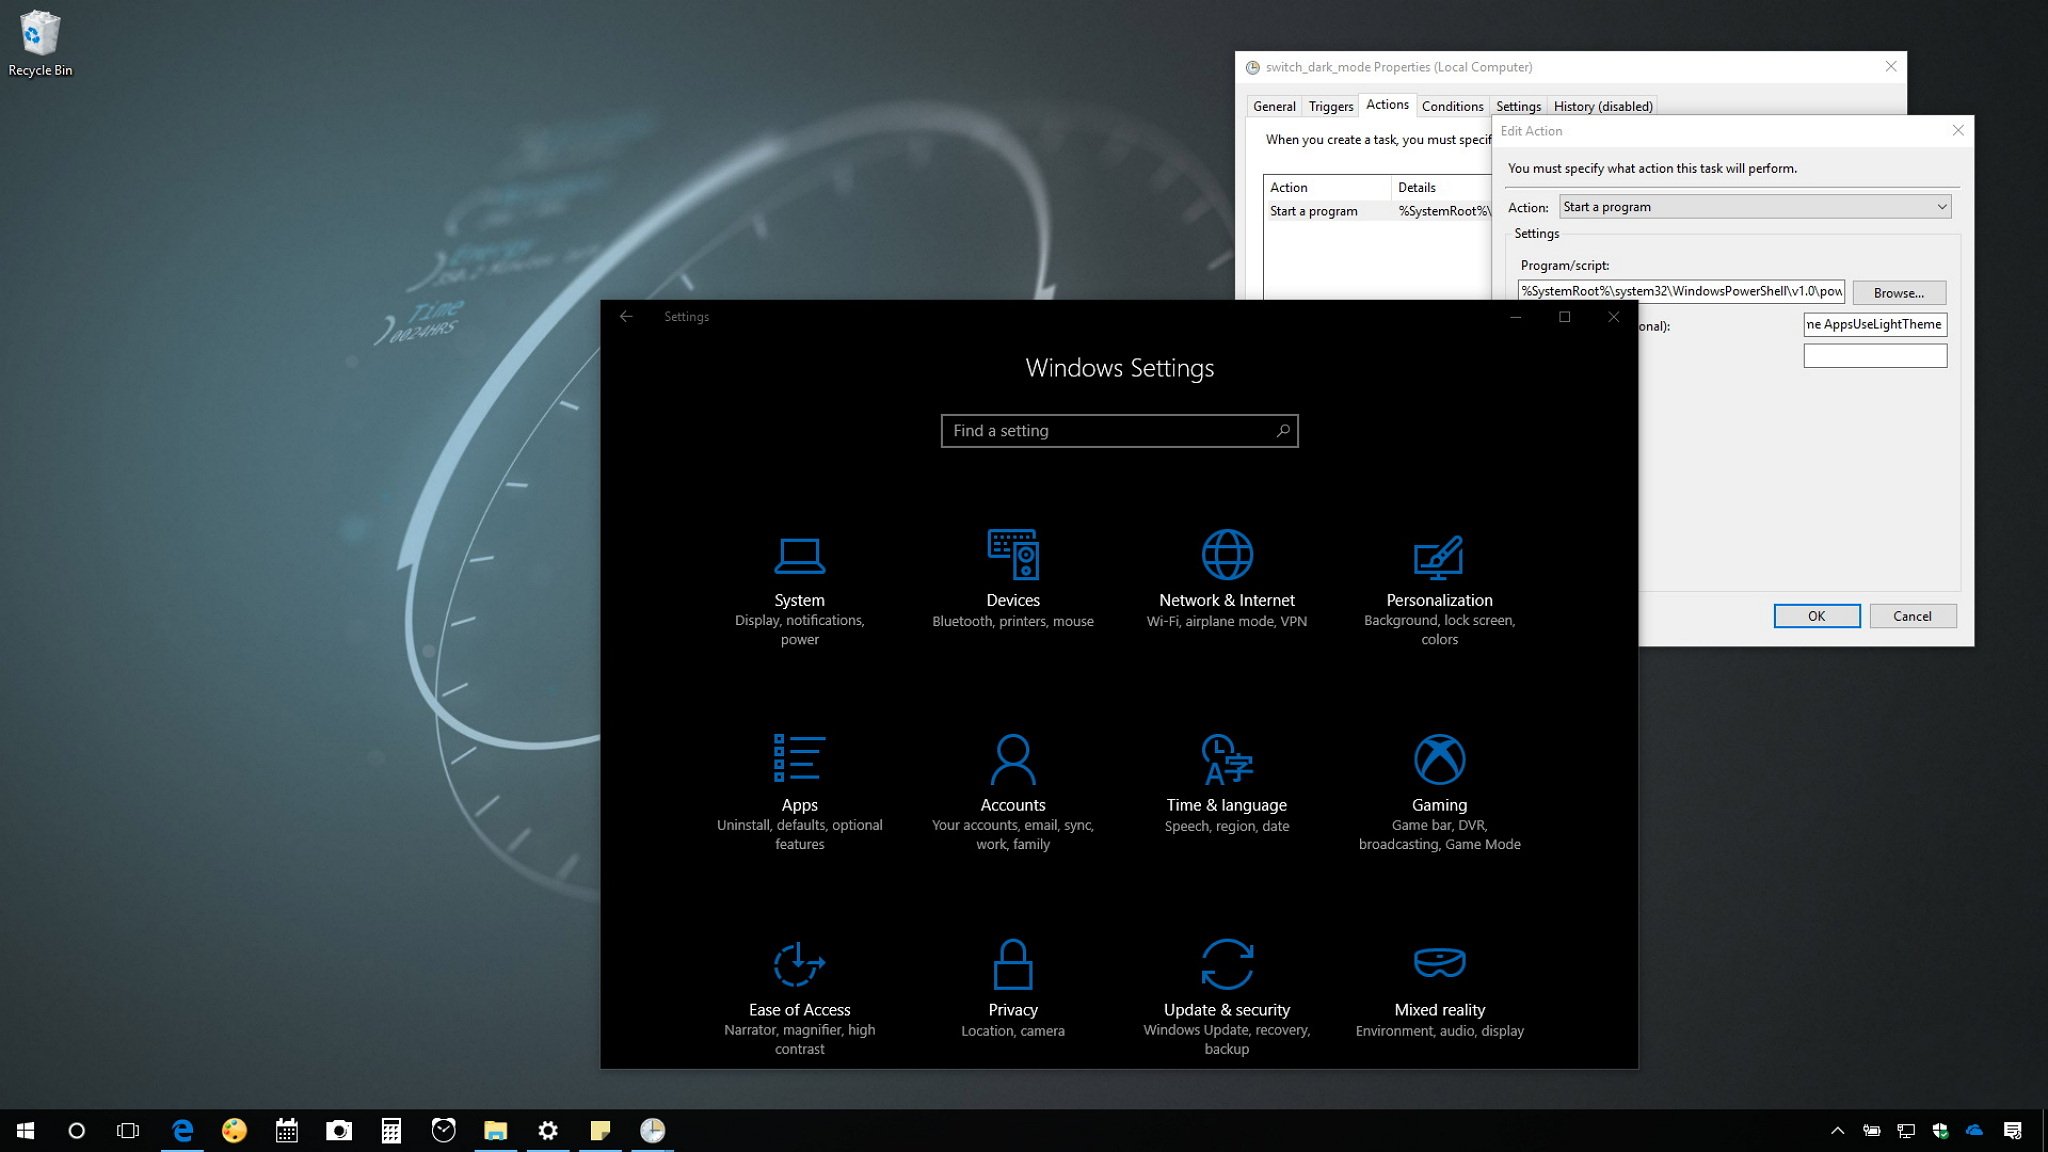
How to switch to the dark mode automatically on Windows 10
It's possible to enable the dark mode automatically on Windows 10, and in this guide, we'll show you how.
All the latest news, reviews, and guides for Windows and Xbox diehards.
You are now subscribed
Your newsletter sign-up was successful
Windows 10 comes with two personalization modes ― the light mode, which is the bright default mode on every installation, and it works very well during daytime; and the dark mode that tints parts of the OS and supported apps with a dark color scheme, and it's more suitable for low-light conditions, such as when working late at night.
Although you can quickly change modes using the Settings app, unlike Night light, Windows 10 doesn't include an option to use the light mode during the day and automatically switch to the dark mode at night. However, it's still possible to create an automated process using a couple of PowerShell commands and Task Scheduler to automatically switch to the dark mode at a particular time of your choosing.
In this Windows 10 guide, we'll walk you through the steps to configure your computer to switch to the dark mode automatically using PowerShell and Task Scheduler.
How to switch between light and dark mode on Windows 10
In order to switch back and forth between light and dark mode automatically on Windows 10, you'll need to schedule two tasks, each one running a different PowerShell command that will change the Registry setting that controls the personalization modes.
Warning: This is a friendly reminder that editing the registry is risky, and it can cause irreversible damage to your installation if you don't do it correctly. It's recommended to make a full backup of your PC before proceeding.
Creating task to switch to the dark mode
The first thing you need to do is to set up and schedule a task to enable the dark mode at a specific time at night, which you can do with the following steps:
- Open Start.
- Search for Task Scheduler and click the result.
- Expand the Task Scheduler Library folder.
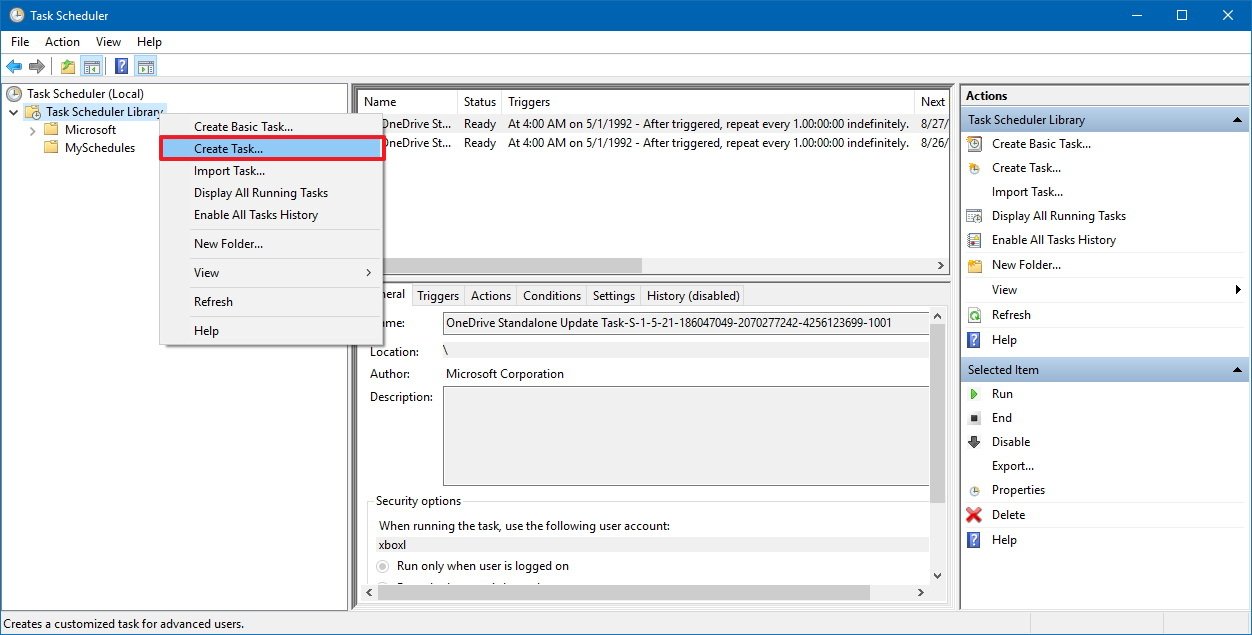
- Right-click Task Scheduler Library and select New Folder.
- Enter a name for the folder (e.g., MySchedules), and click OK.Quick Note: We're creating a new folder to keep yours and system tasks separate, which makes it easier to manage tasks.
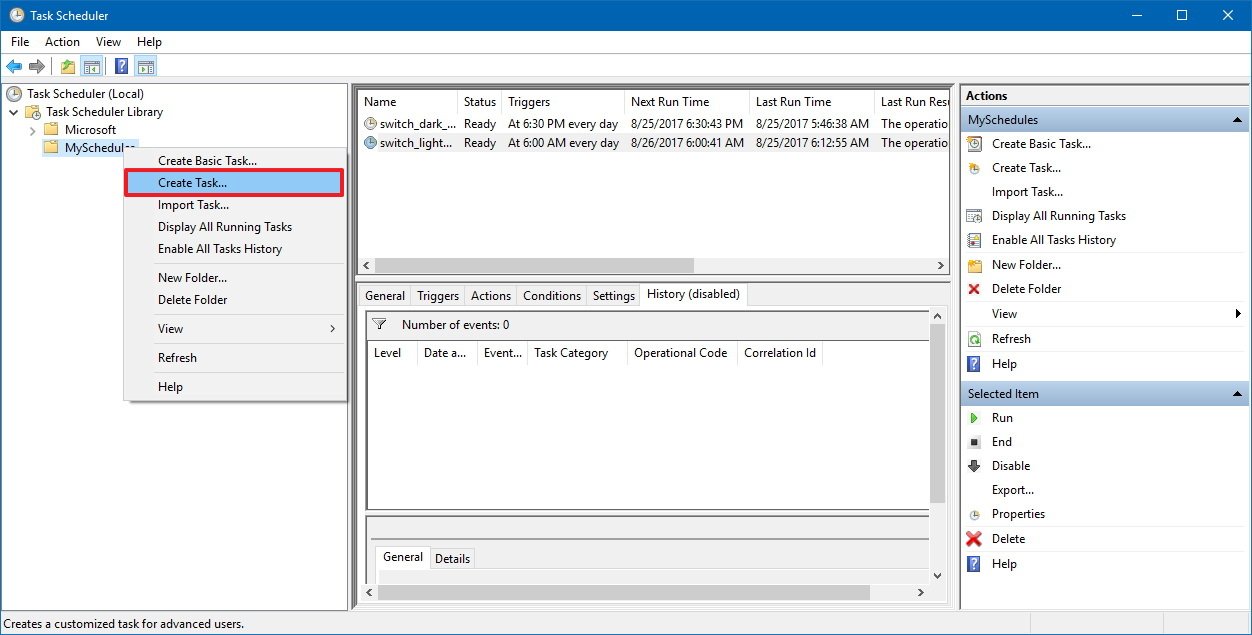
- Right-click the newly created folder and select Create Task.
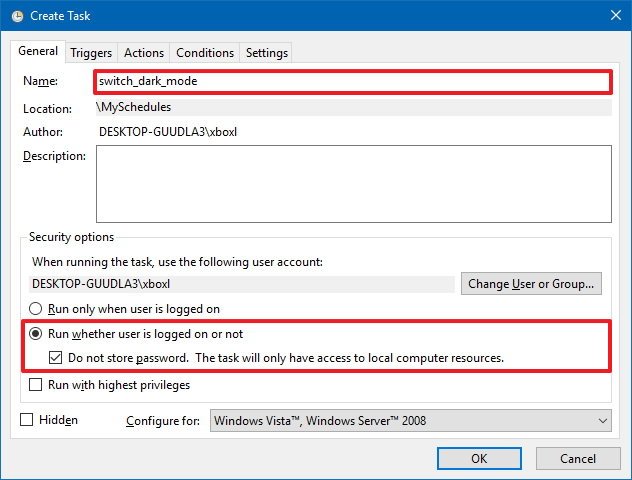
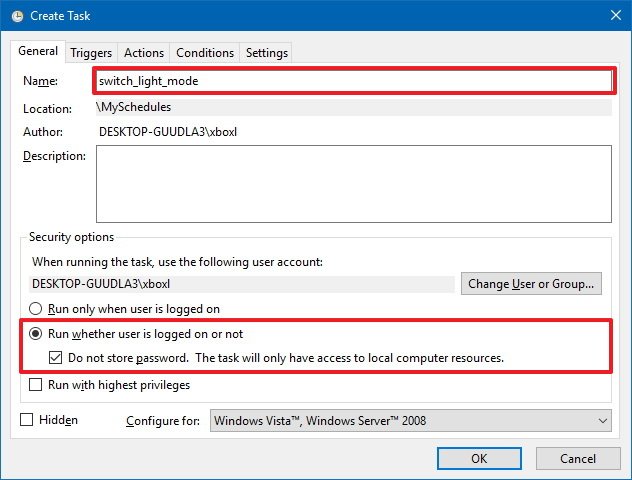
- On the "General" tab, under "Name," enter a descriptive name for the task (e.g., switch_dark_mode).
- Under "Security options," select the option Run whether user is logged on or not option.
- Check the Do not store password option.
- Click on the Triggers tab.
- Click the New button.
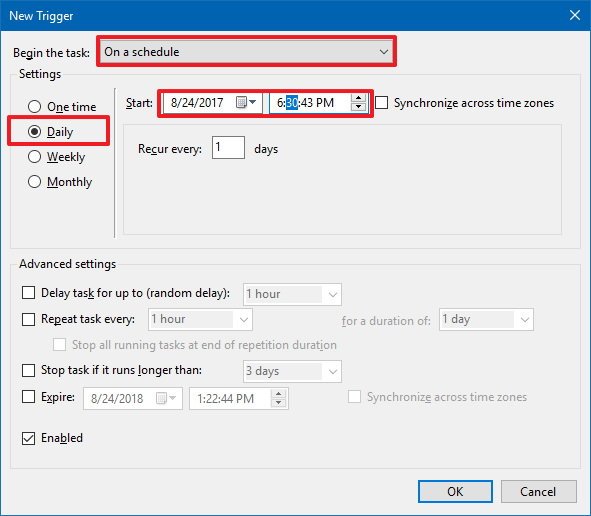
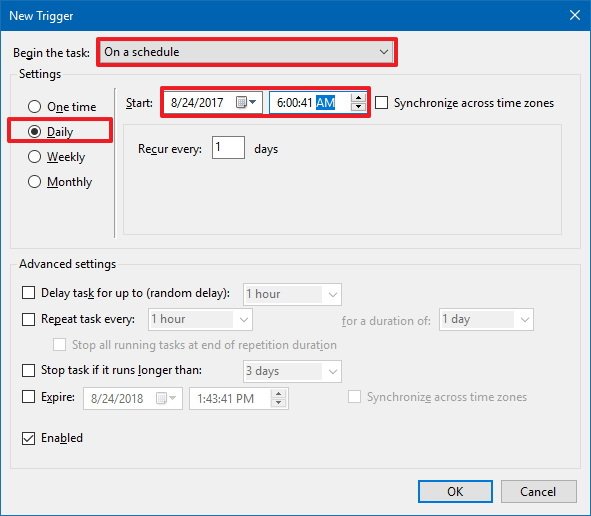
- Under "Begin the task," select On a schedule, but you can configure any trigger you want.
- Under "Settings," select the Daily option.
- Set the time (e.g., 6:30 PM) you want Windows 10 to switch automatically to the dark mode.
- Click OK.
- Click on the Actions tab.
- Click the New button.
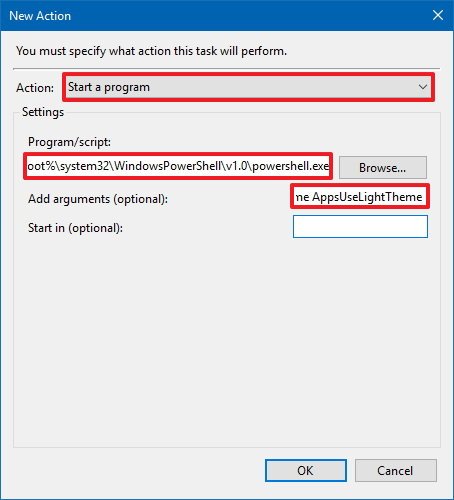
- Using the "Start a program" action, under "Settings," copy and paste the following path:
%SystemRoot%\system32\WindowsPowerShell\v1.0\powershell.exe - Under "Add arguments (optional)," copy and paste the following PowerShell command:
New-ItemProperty -Path HKCU:\SOFTWARE\Microsoft\Windows\CurrentVersion\Themes\Personalize -Name AppsUseLightTheme -Value 0 -Type Dword -ForceThe above command will try to create a AppsUseLightTheme DWORD in the Registry and set its value to 0, which disables the light mode and enables the dark mode. - Click OK.
- Click on the Settings tab.
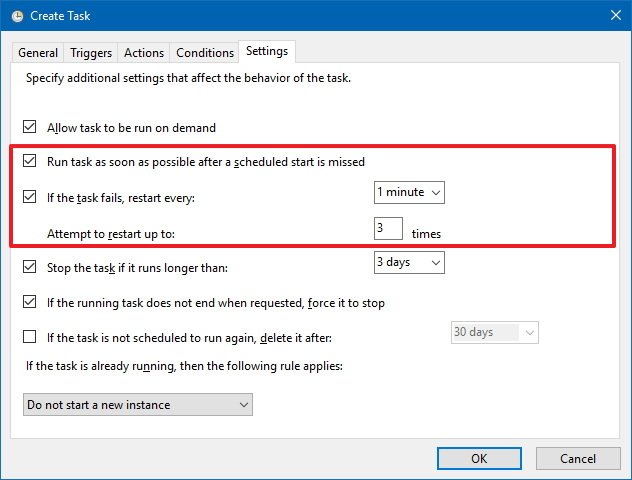
- Check the Run task as soon as possible after a scheduled start is missed option, which should help to run the command if Task Scheduler misses the schedule because your computer was asleep. (Just remember that according to Microsoft's documentation, using this option, Task Scheduler can take up to ten minutes or so to run missed tasks.)
- Check the If the task fails, restart every option, and make sure it's set to 1 minute and only 3 restart attempts.
- Click OK.
Once you've completed the steps, every day at the time you specified, Windows 10 will switch to the dark theme automatically.
All the latest news, reviews, and guides for Windows and Xbox diehards.
Creating task to switch to the light mode
The last thing left to do now is to create another task to change from the dark to the light theme, which you can do with the following steps:
- Right-click the folder created to store your tasks and select Create Task.
- On the "General" tab, under "Name," enter a descriptive name for the task (e.g., switch_light_mode).
- Under "Security options," select the option Run whether user is logged on or not option.
- Check the Do not store password option.
- Click on the Triggers tab.
- Click the New button.
- Under "Begin the task," select On a schedule, but you can configure any trigger you want.
- Under "Settings," select the Daily option.
- Set the time (e.g., 6:30 AM) you want Windows 10 to switch automatically to the light mode.
- Click OK.
- Click on the Actions tab.
- Click the New button.
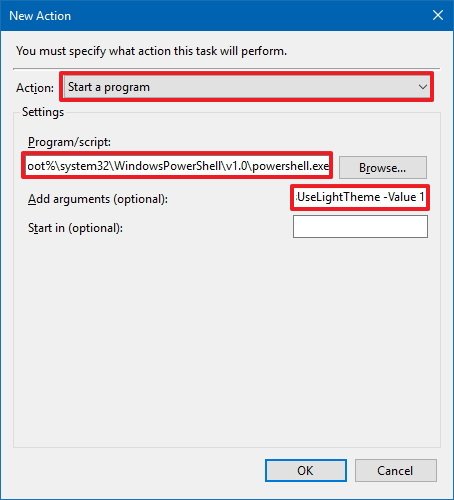
- Using the "Start a program" action, under "Settings," copy and paste the following path:
%SystemRoot%\system32\WindowsPowerShell\v1.0\powershell.exe - Under "Add arguments (optional)," copy and paste the following PowerShell command:
Set-ItemProperty -Path HKCU:\SOFTWARE\Microsoft\Windows\CurrentVersion\Themes\Personalize -Name AppsUseLightTheme -Value 1The above command will update the AppsUseLightTheme DWORD in the Registry with the value of 1, which enables the light mode and disables the dark mode. - Click OK.
- Click on the Settings tab.
- Check the Run task as soon as possible after a scheduled start is missed option, which should help to run the command if Task Scheduler misses the schedule because your computer was asleep. (Just remember that according to Microsoft's documentation, using this option, Task Scheduler can take up to ten minutes or so to run missed tasks.)
- Check the If the task fails, restart every option, and make sure it's set to 1 minute and only 3 restart attempts.
- Click OK.
After creating both tasks, Windows 10 will automatically switch between light and dark theme on the schedule you specified without having to restart your computer for the changes to take effect.
If you no longer want to use this feature, you can simply go to the Task Scheduler folder you created, right-click, and delete each task. Then you can continue to use the Settings app to switch modes from the Personalization section.
More Windows 10 resources
For more helpful articles, coverage, and answers to common questions about Windows 10, visit the following resources:
- Windows 10 on Windows Central – All you need to know
- Windows 10 help, tips, and tricks
- Windows 10 forums on Windows Central

Mauro Huculak has been a Windows How-To Expert contributor for WindowsCentral.com for nearly a decade and has over 22 years of combined experience in IT and technical writing. He holds various professional certifications from Microsoft, Cisco, VMware, and CompTIA and has been recognized as a Microsoft MVP for many years.
