How to disable the 'Pause updates' feature on Windows 10 May 2019 Update
Do you need to restrict user access to delaying updates on Windows 10? Here's how to do it after upgrading to the May 2019 Update.
All the latest news, reviews, and guides for Windows and Xbox diehards.
You are now subscribed
Your newsletter sign-up was successful
Starting with the Windows 10 May 2019 Update (version 1903), Microsoft is doing a lot of things right with updates. In this release and moving forward, Windows Update will stop forcing feature updates on devices, and it'll let you choose when to install new versions. Also, the option to pause updates will be easier to find in the Settings app, and the feature will be available for Windows 10 Home users.
Alongside these new changes, the May Update will also allow you to take full control and decide if users can pause updates, which is an option that can come in handy in many scenarios. For instance, it'll be useful when sharing a computer with multiple users when you're already managing deadlines for automatic updates and restarts. Or when you're working in a network environment and you need to comply with the policies of your organization.

Windows 10 May 2019 Update full reviewHow to get the May 2019 Update ASAPMay 2019 Update common problems and how to fix themFull list of changes in the May 2019 UpdateAll of our May 2019 Update resources in one place
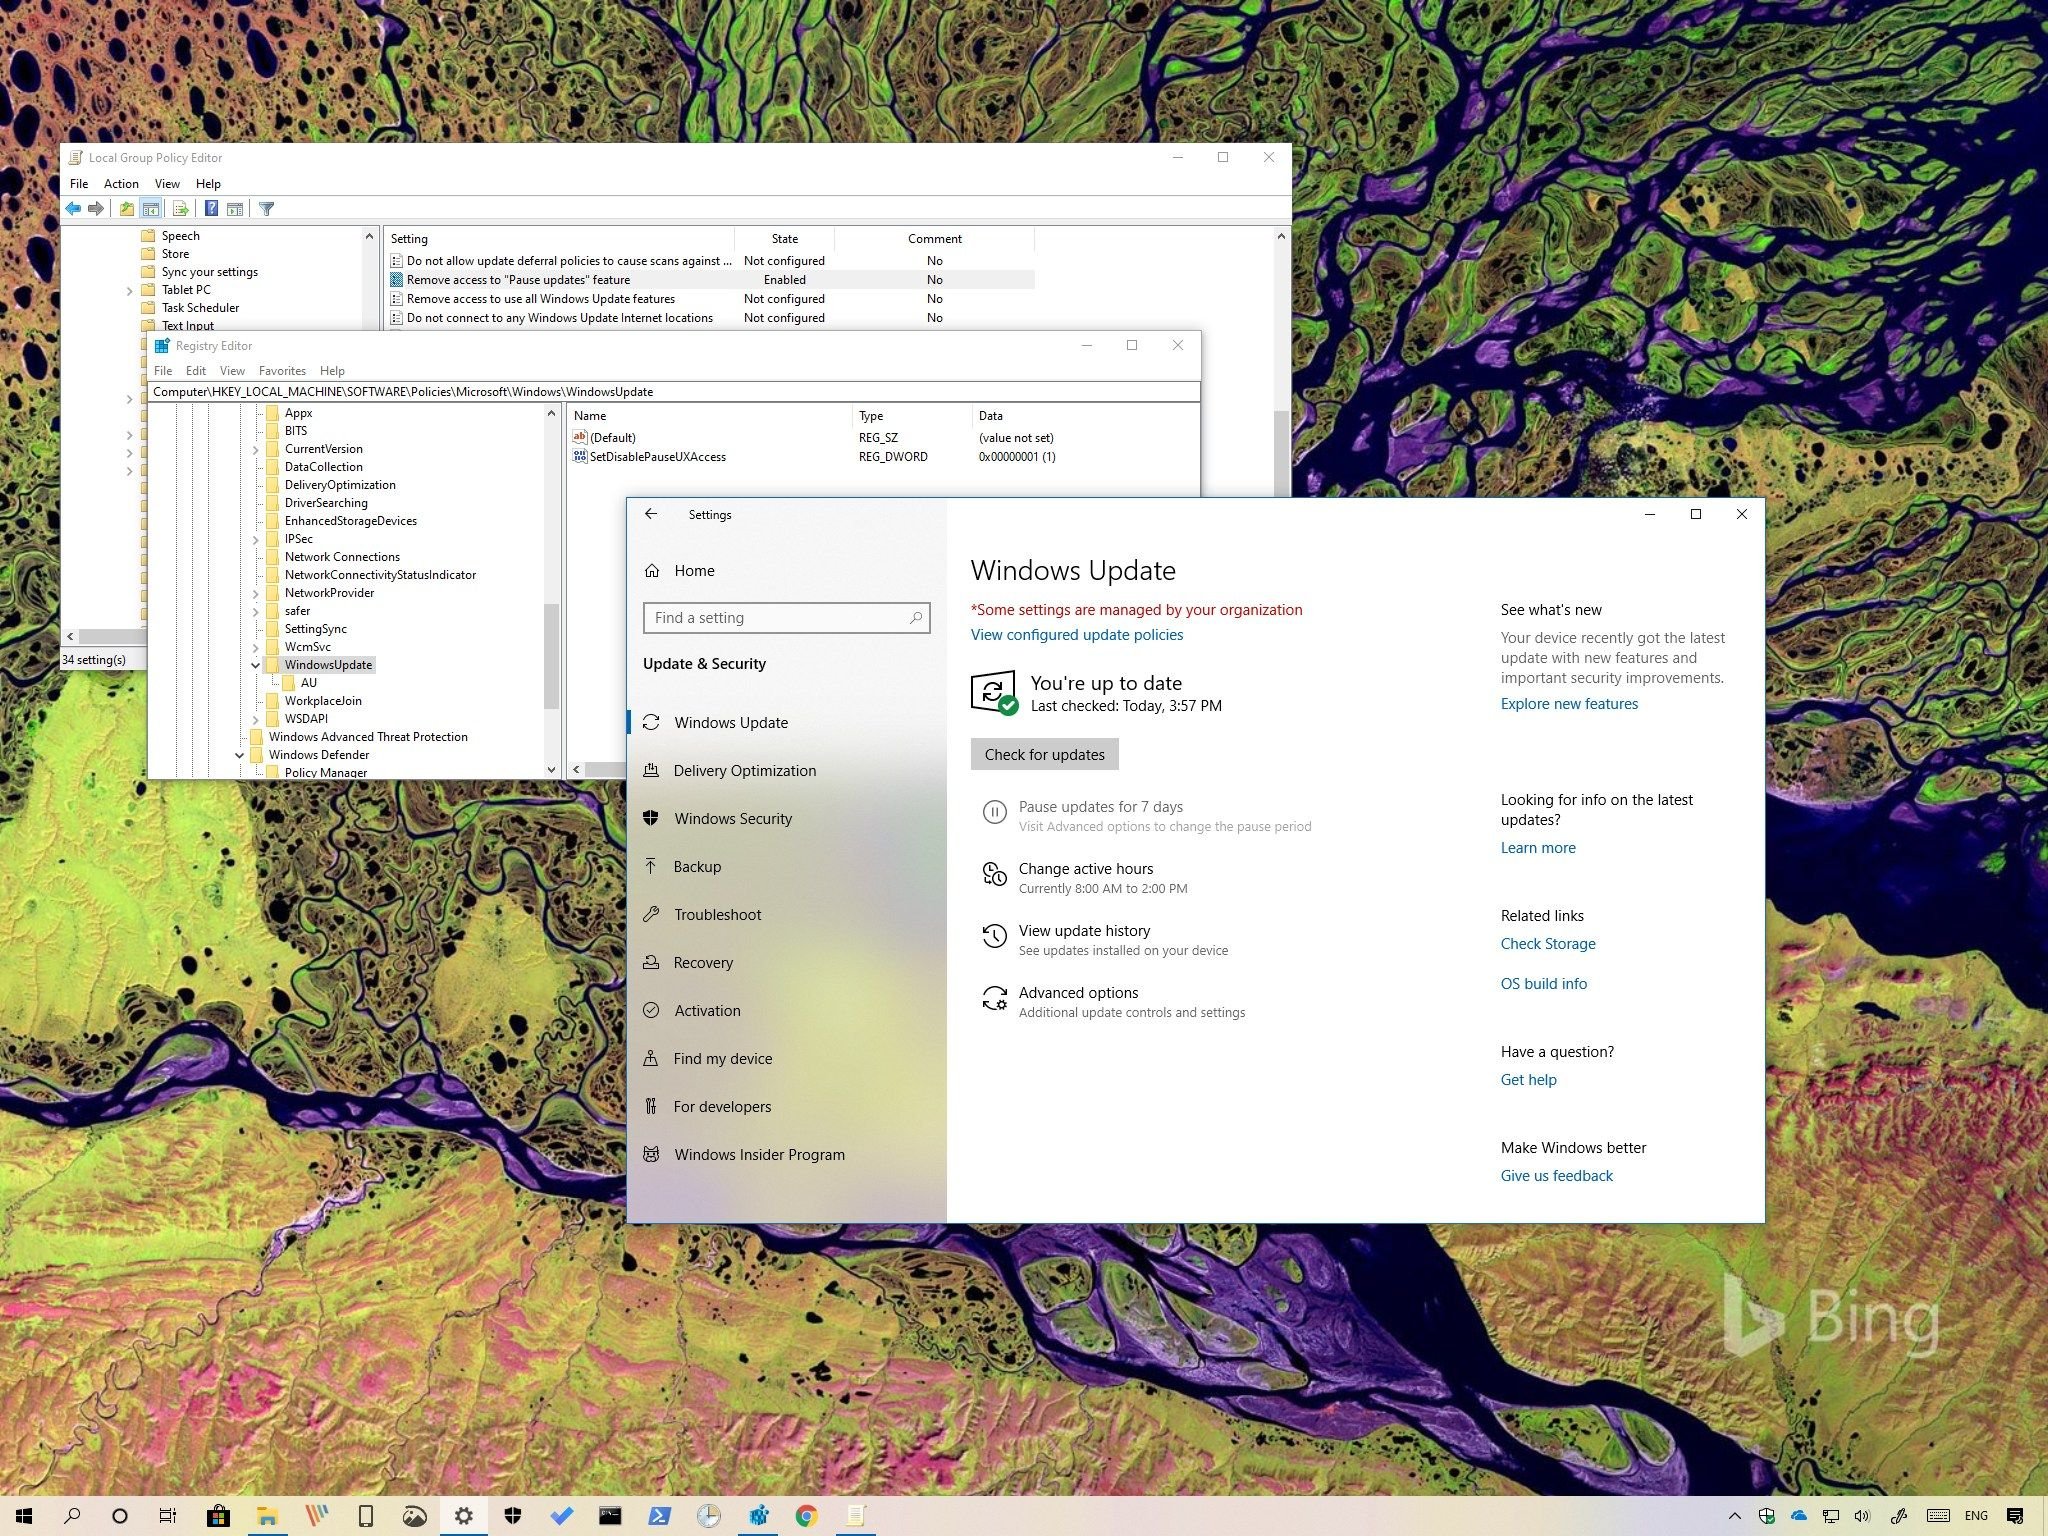
Whatever the reason, if you must remove (or re-enable) access to the feature to pause updates on Windows 10, you can accomplish this task using the Group Policy Editor and Registry.
In this Windows 10 guide, we walk you through the steps to disable the option to pause updates with the settings available with the May 2019 Update.
- How to disable Pause updates option using Group Policy
- How to disable Pause updates option using Registry
How to disable Pause updates option using Group Policy
If you're running Windows 10 Pro, the easiest way to remove access to the "Pause updates" feature is using the Local Group Policy Editor with these steps:
- Open Start.
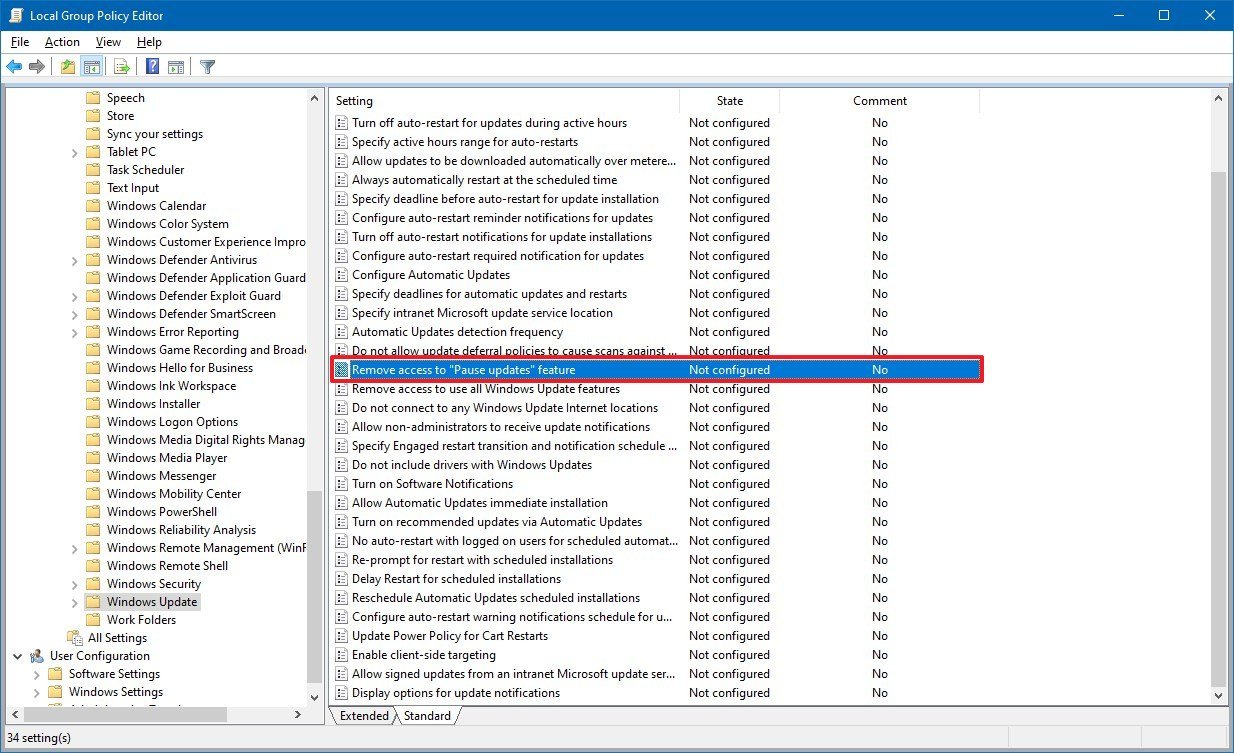
- Search for gpedit.msc and click OK to open the Local Group Policy Editor.
- Browse the following path:
Computer Configuration > Administrative Templates > Windows Components > Windows Update - On the right side, double-click the Remove access to "Pause updates" feature policy.
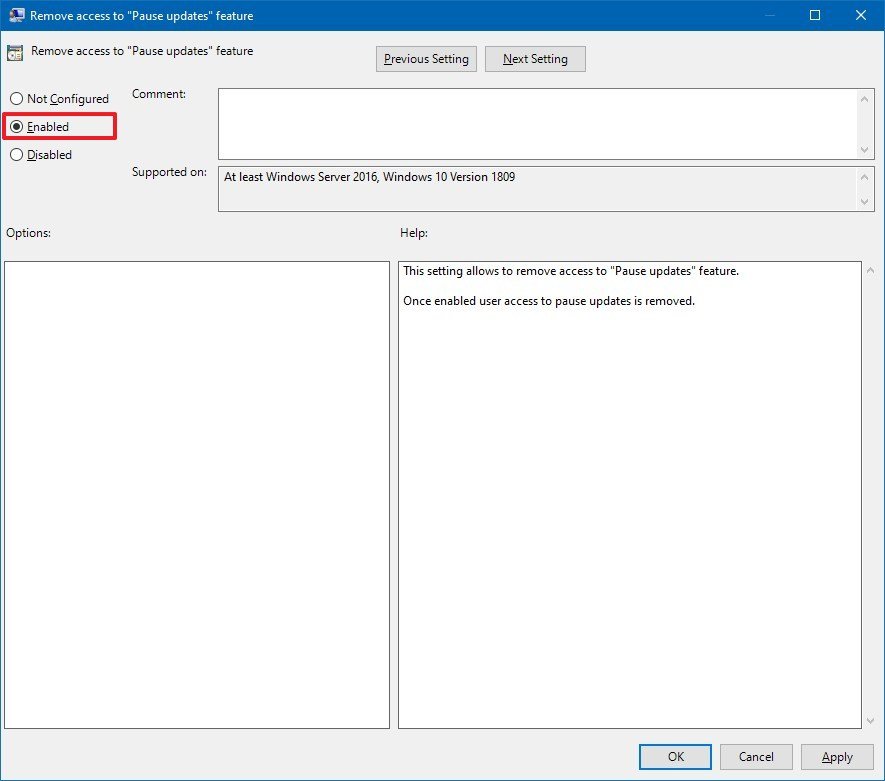
- Select the Enabled option.
- Click Apply.
- Click OK.
- Restart your computer.
Once you complete these steps, the "Pause updates" option will no longer be available in the Windows Update settings page, or in the Advanced options page in the Settings app.
If you want to revert the changes, or the "Pause updates" is grayed out even though you didn't change the settings, you can use the instructions outlined above, but on step No. 5, make sure to select the Not Configured option.
All the latest news, reviews, and guides for Windows and Xbox diehards.
How to disable Pause updates option using Registry
Alternatively, if you're running Windows 10 Home, or you don't have access to the Group Policy Editor, you can modify the Registry to disable the option to pause updates on the May 2019 with these updates:
Warning: This is a friendly reminder that editing the Registry is risky, and it can cause irreversible damage to your installation if you don't do it correctly. We recommend making a temporary full backup of your PC before proceeding.
- Open Start.
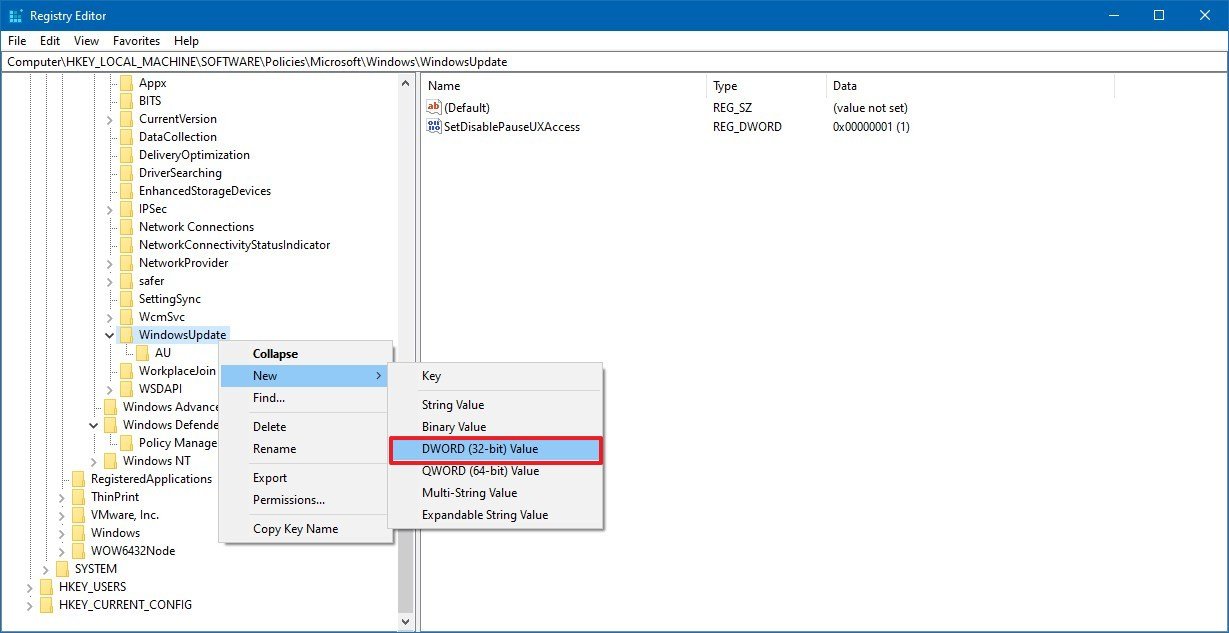
- Search for regedit and click the top result to open the Registry.
- Browse the following path:
HKEY_LOCAL_MACHINE\SOFTWARE\Policies\Microsoft\Windows\WindowsUpdateQuick tip: On Windows 10, you can now copy and paste the path in the Registry's address bar to quickly jump to the key destination. - Right-click the WindowsUpdate (folder) key, select New, and click on DWORD (32-bit) Value.
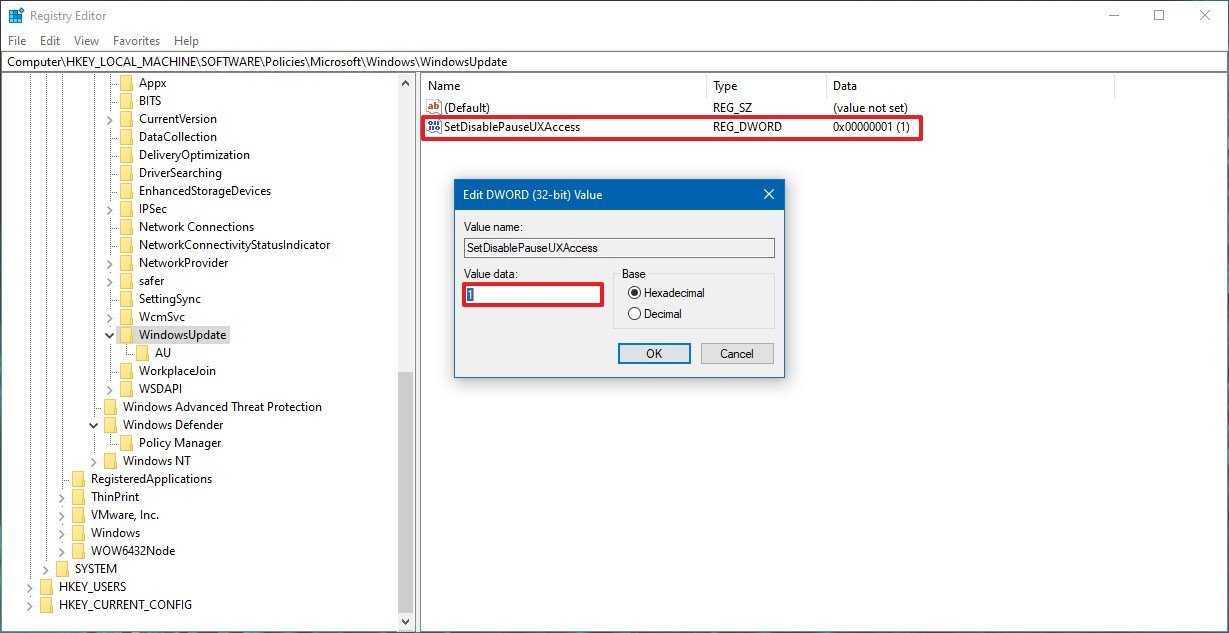
- Name the key SetDisablePauseUXAccess and press Enter.
- Double-click the newly created DWORD and set the value from 0 to 1.
- Click OK.
- Restart your computer.
After you complete the steps, users will no longer have access to pause updates using the Settings app.
At any time, you can undo the changes using the same instructions, but on step No. 6, make sure to set the value from 1 to 0, or right-click the SetDisablePauseUXAccess key and select the Delete option.
While we're focusing this guide on disabling the update feature, you can also refer to these instructions if for some reason the option becomes disabled without warnings, and you need to re-enable the setting again.

Mauro Huculak has been a Windows How-To Expert contributor for WindowsCentral.com for nearly a decade and has over 22 years of combined experience in IT and technical writing. He holds various professional certifications from Microsoft, Cisco, VMware, and CompTIA and has been recognized as a Microsoft MVP for many years.
