How to set up Outlook out-of-office replies for an email account that doesn't support them
If you're using an account that doesn't support automatic replies, you can configure a rule in Outlook to overcome this limitation, and in this guide, we'll show you how to do it.
All the latest news, reviews, and guides for Windows and Xbox diehards.
You are now subscribed
Your newsletter sign-up was successful
Automatic out-of-office replies are useful for more than just clogging up inboxes — but not every email service offers them, But if you use the Outlook desktop app, you can still create a rule to automatically push out-of-office replies during your time away, even if your email service doesn't support it, all thanks to the magic of rules.
In this Windows 10 guide, we'll walk you through the steps to send out-of-office automatic replies on non-Outlook email accounts using Outlook 2016 and earlier versions.
How to create a rule to set up out-of-office replies
If you have an email account that doesn't support automatic replies, you can use the following steps to set up a rule using the Outlook desktop app to respond to emails while you're away:
Quick Tip: You can confirm whether your account supports out-of-office replies on File > Info. If you don't see the Automatic Replies button, your account doesn't support the feature. If you see the button, then follow these steps to configure Automatic Replies.
- Open Outlook.
- Click the New Email button.
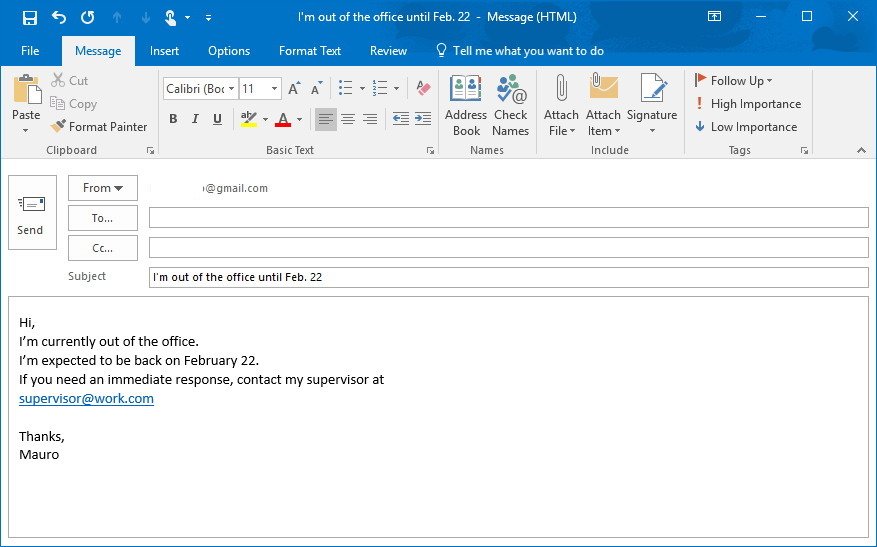
- Use the "From" drop-down menu and select the email address you want to set up with auto-replies.
- Compose a new email with the message people will receive, and don't forget the subject line.
- Click on File.
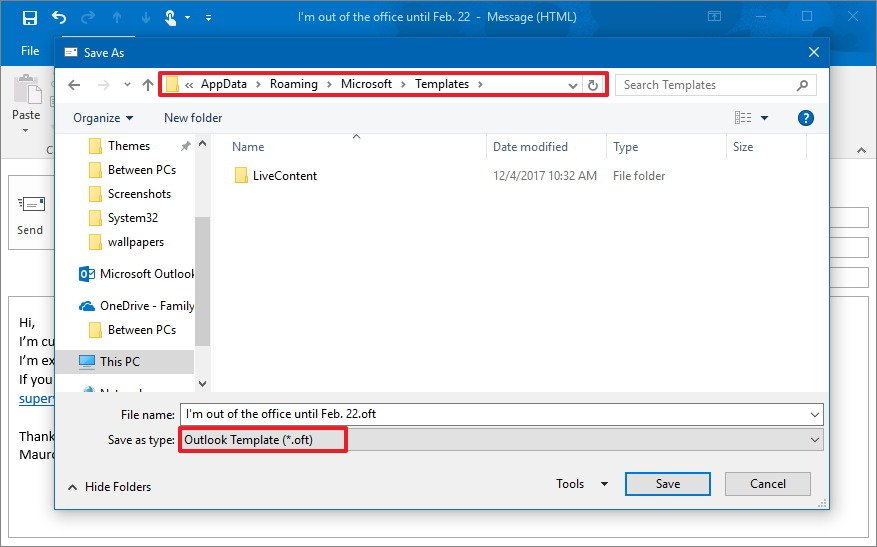
- Select the Save As button.
- Use the "Save as" type drop-down menu, and select the Outlook Template (*.oft) option.
- Save the template in this location:
%APPDATA%\microsoft\templates
- Close the message composer.
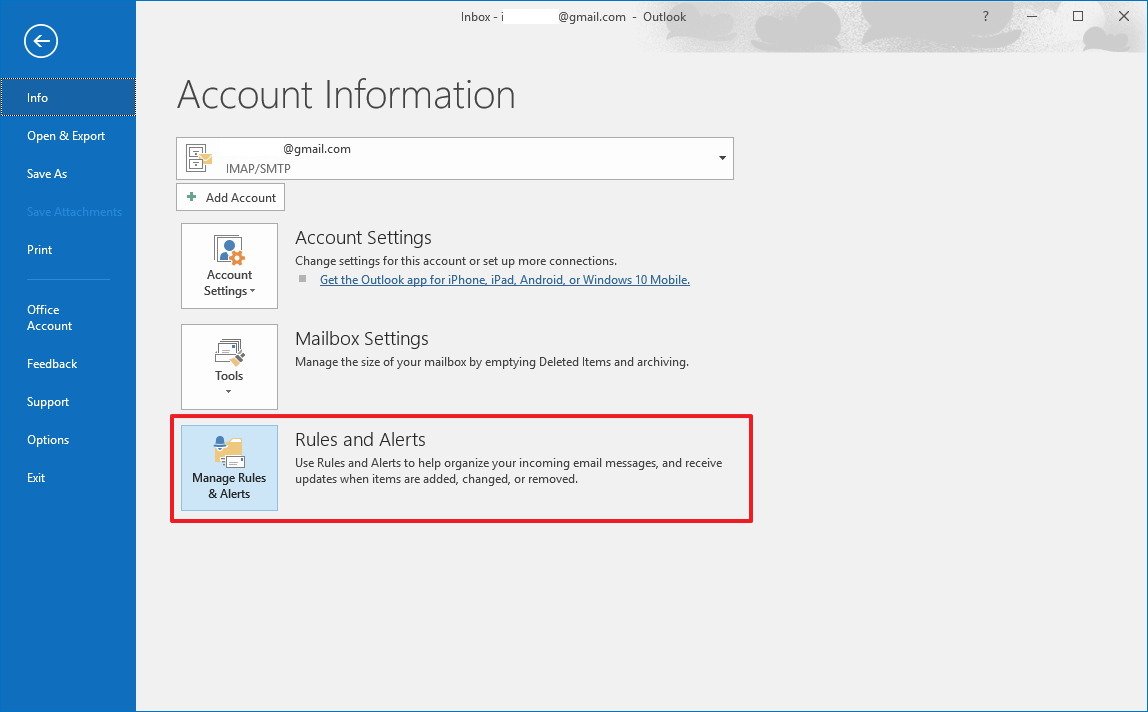
- On Outlook, click on File.
- Click on Info.
- Select your non-Outlook account using the drop-down menu.
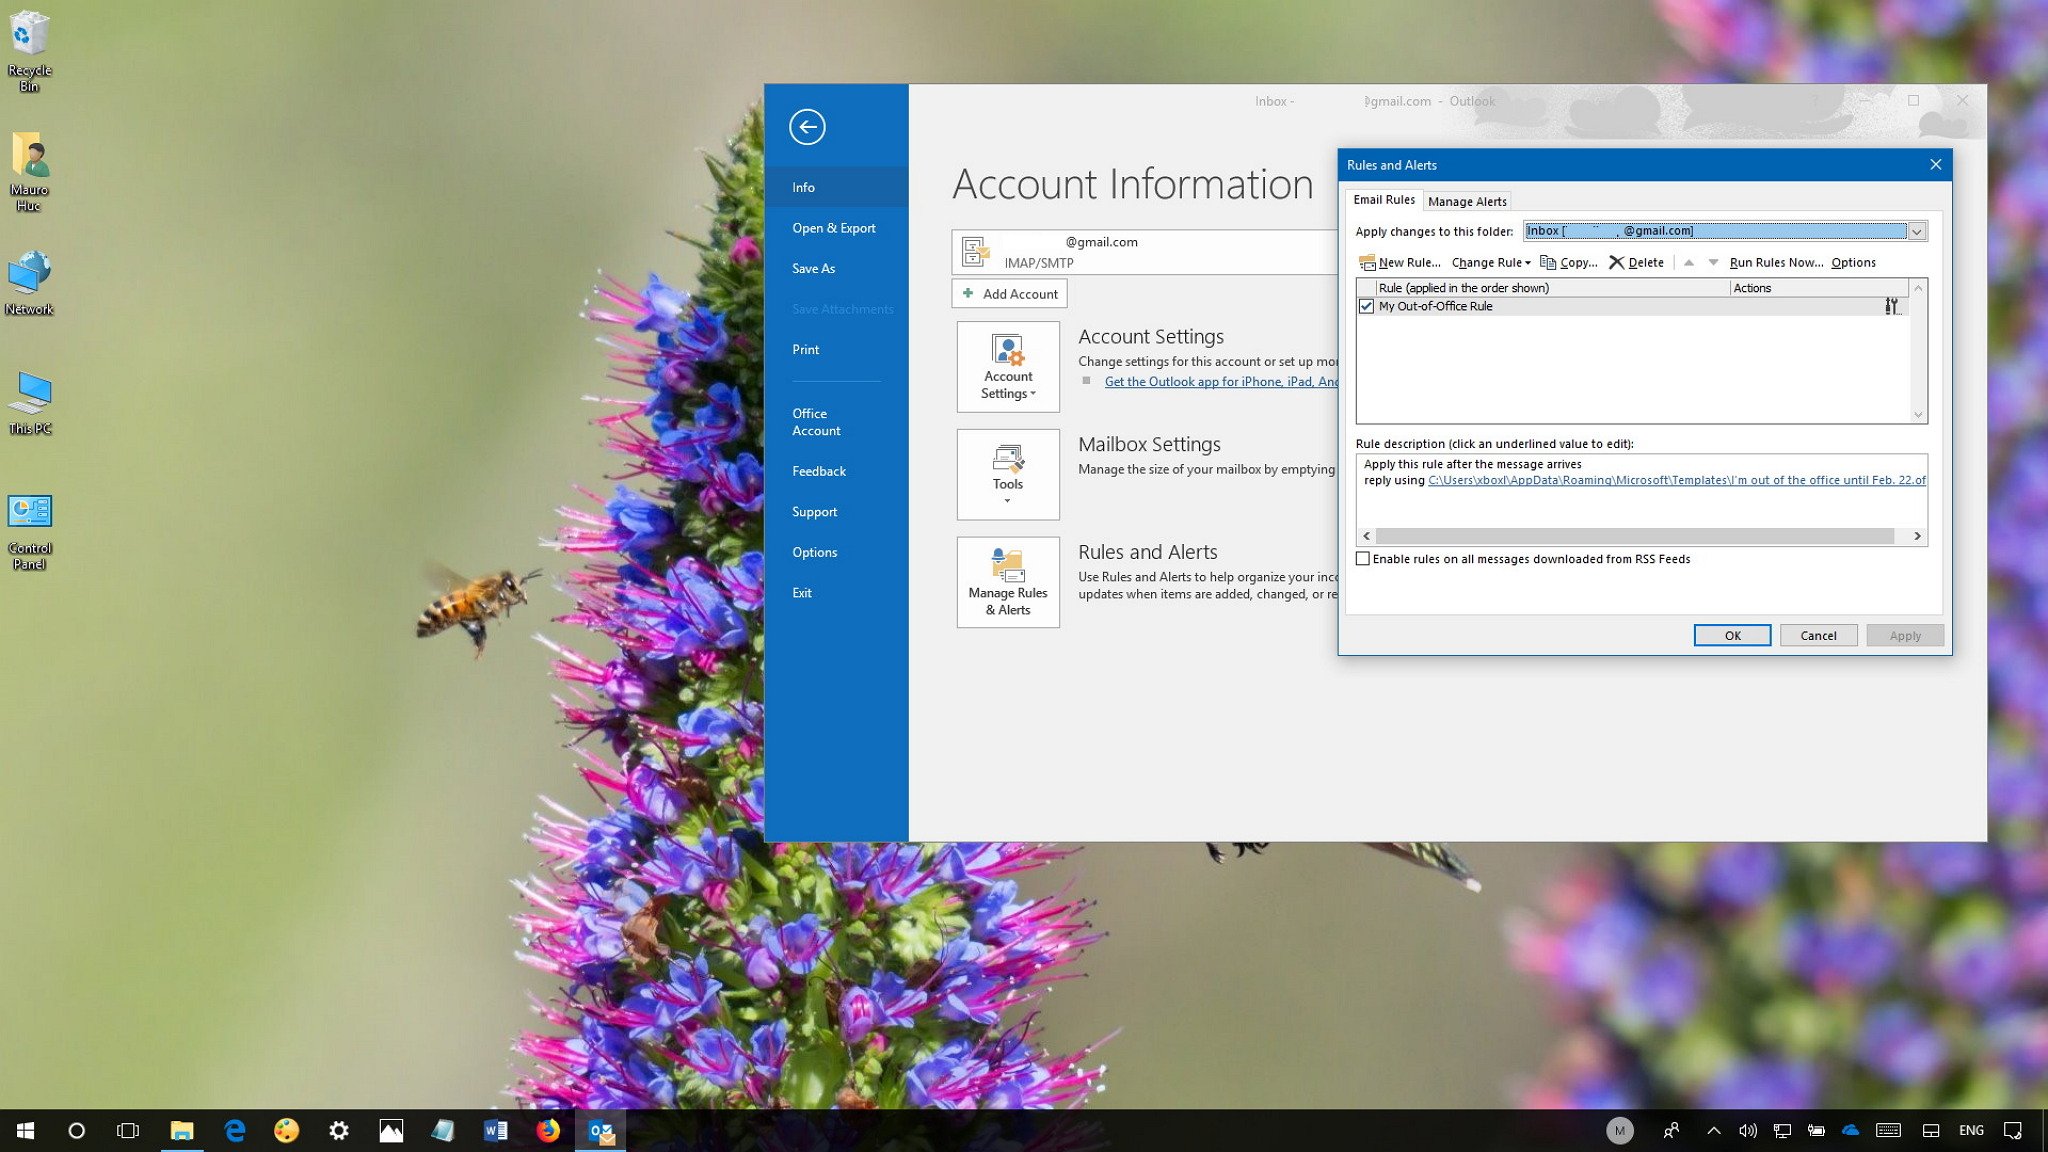
- Click the Rules and Alerts button.
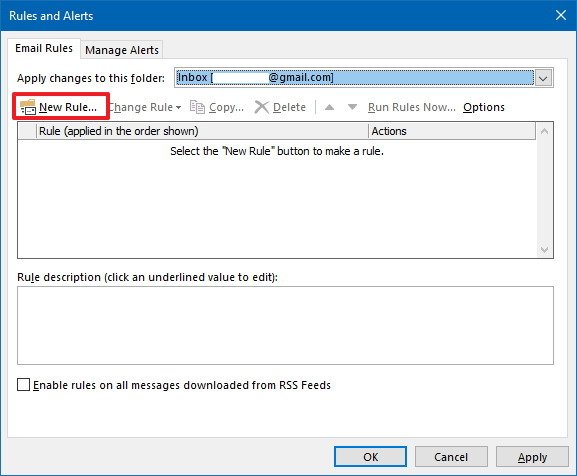
- In the "Email Rules" tab, click the New Rule button.
- Under "Start from a blank rule," select the Apply rule on messages I receive option.
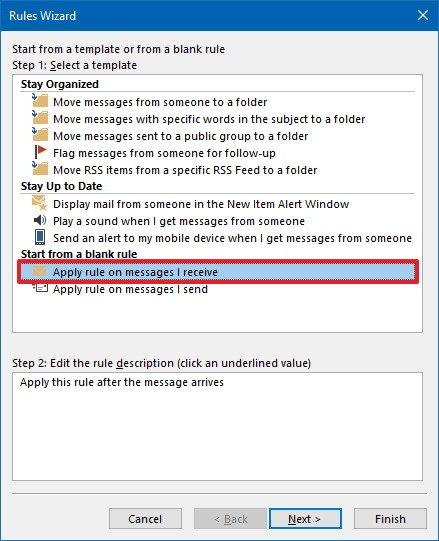
- Click the Next button.
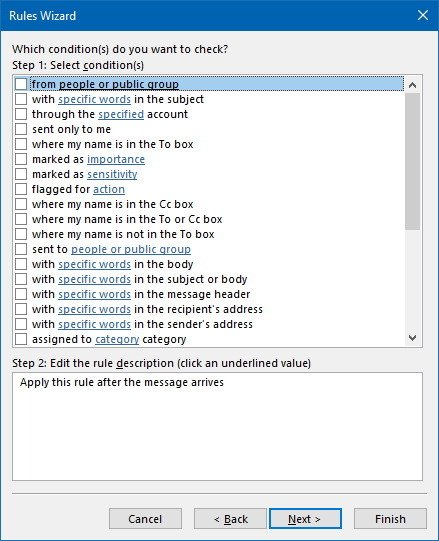
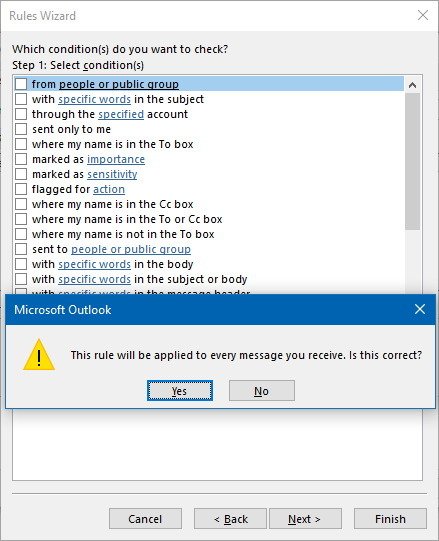
- If you'll be replying to every email you receive, make sure no option is selected under "Which condition(s) do you want to check?" and click the Next button.
- Click the Yes button to confirm.
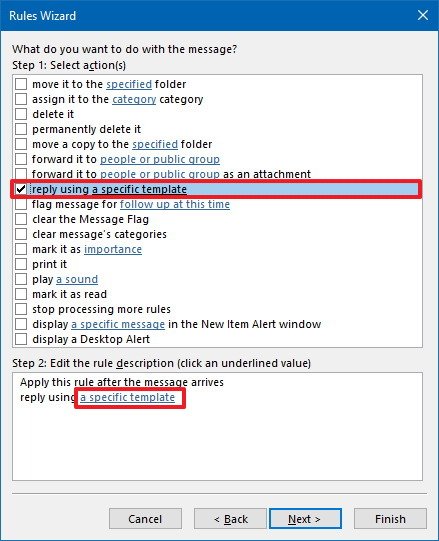
- Under "What do you want to do with the message?" on "Step 1," select reply using a specific template.
- On "Step 2," click the a specific template link.
- Use the "Look In" drop-down menu and select User Templates in File System option.
- Select the custom template that you created earlier.
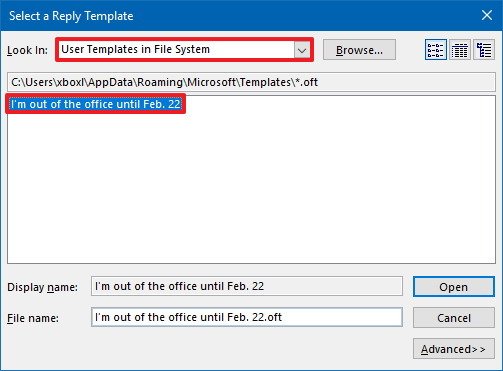
- Click the Open button.
- Click the Next button in the Rules Wizard.
- Check any exception you may want to use.
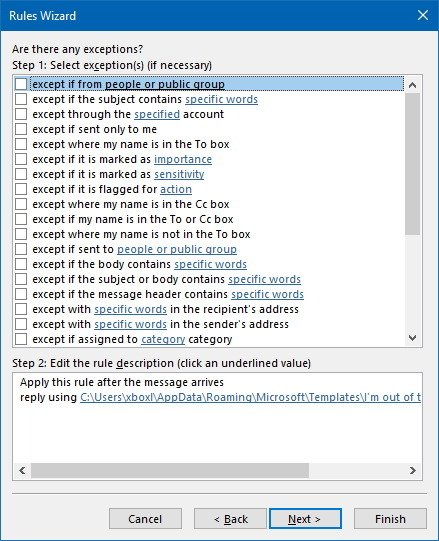
- Click the Next button again.
- Specify a name for the rule. For example, My Out-of-Office Rule.
- If you're ready to enable the rule, leave the Turn on this rule option checked.
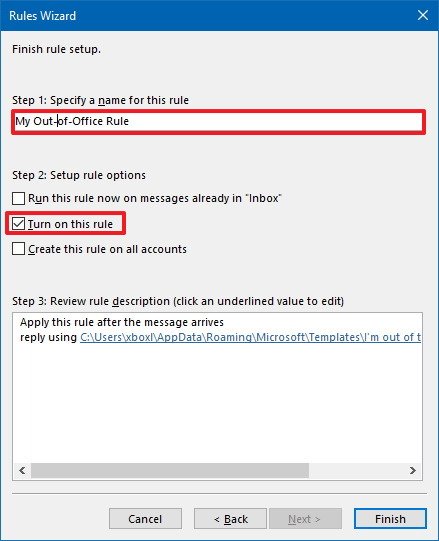
- Click the Finish button.
Once you've completed the steps, Outlook will start sending out-of-office replies automatically immediately, but it's important that you leave the Outlook app running while you're away. Otherwise, the rule won't work, because this is not an online service.
If you didn't enable the rule using the above steps, you can turn it on File > Info > Manage Rules & Alerts, and in the Email Rules tab, make sure to check the rule you want to activate, and then click Apply and then OK.
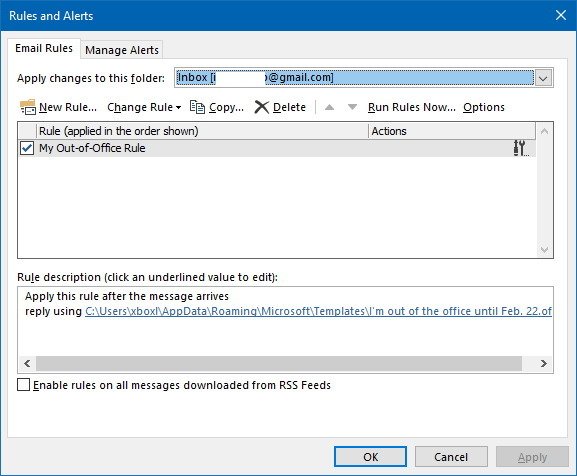
When you no longer need to send out-of-office replies, remember that you have to manually uncheck the rule to turn it off on File > Info > Manage Rules & Alerts.
All the latest news, reviews, and guides for Windows and Xbox diehards.
Although we're focusing this guide on Outlook 2016, you can also refer to these instructions for Outlook 2013 and 2010.
More Windows 10 resources
For more helpful articles, coverage, and answers to common questions about Windows 10, visit the following resources:
- Windows 10 on Windows Central – All you need to know
- Windows 10 help, tips, and tricks
- Windows 10 forums on Windows Central

Mauro Huculak has been a Windows How-To Expert contributor for WindowsCentral.com for nearly a decade and has over 22 years of combined experience in IT and technical writing. He holds various professional certifications from Microsoft, Cisco, VMware, and CompTIA and has been recognized as a Microsoft MVP for many years.
