


Lenovo's ThinkPad X1 Extreme (Gen 2) is a formidable 15-inch Ultrabook, with up to a 4K OLED touch display and a dedicated NVIDIA GTX 1650 graphics card. It also includes dual M.2 slots for plenty of speedy storage, which can be upgraded after purchase. Whether you saved some money while initially configuring or simply underestimated your storage needs, we'll guide you through the process of adding more storage to your X1 Extreme.
Hardware and software to get the job done
- M.2 PCIe SSD: Samsung 970 EVO Plus (From $70 at Amazon)
- Cloning tool: Macrium Reflect 7 (Free at Macrium)
- SSD enclosure for cloning: ElecGear M.2 PCIe enclosure ($45 at Amazon)
- Prevent damage: Rosewill anti-static wristband ($7 at Amazon)
- All required tools: ORIA PC toolkit ($33 at Amazon)
- Powerhouse 15-inch Ultrabook: Lenovo ThinkPad X1 Extreme (Gen 2) (From $1,722 at Lenovo)
How to upgrade the SSD in Lenovo's ThinkPad X1 Extreme (Gen 2)
Note: Before beginning any upgrades on a PC, it's a good idea to back up your data in the unlikely event something should go wrong. You'll also want to ensure you're not working in a static-filled environment, as it can cause damage to a PC's internal hardware. Consider investing in an anti-static wristband to avoid unnecessary damage.
The second-gen ThinkPad X1 Extreme is an easy laptop to like straight from the factory, and the fact that you can upgrade RAM and storage with relative ease only makes it more user friendly. Most models ship with a single M.2 solid-state drive (SSD) unless specifically configured, which leaves one slot sitting open inside the X1 Extreme. By adding a secondary M.2 SSD, you'll not only have more storage space, but you'll also be able to configure a RAID 0 or RAID 1 setup for improved performance or improved data protection.

If you're simply adding a new M.2 SSD to an empty slot to complement the existing boot drive, there should be no need for cloning any data. However, if you're replacing the boot drive, you might want to create a clone on the new SSD so that everything is more or less exactly how it was before the upgrade. Thanks to the X1 Extreme having two M.2 slots, you can install a new SSD in an empty slot and clone data over from the old SSD with no need for an external enclosure. We've had much success using Macrium Reflect for cloning, and there's even a free version you can test out.
If both M.2 slots are already full and you'd like to replace the boot drive without removing any other hardware, investing in an external SSD enclosure can help. You plug it into the laptop, put the new SSD inside the enclosure, and clone data from the SSD you're looking to replace.
Finally, if you just want to replace the existing SSD and start over fresh with a new install of Windows 10, check out our guide to ensure you've completed the necessary steps — like creating bootable USB media — before proceeding.
For an SSD upgrade, we recommend Samsung's 970 EVO Plus. It's fast, it's competitively priced, and it'll last for years. Once you have the upgrade SSD in hand and you've completed any cloning or data backups, clear out a well-lit space, power down your X1 Extreme, and proceed with the steps below. Our X1 Extreme only has one SSD installed, but we will go through the entire process of swapping out the hardware. If you're just adding an SSD to an empty slot, you can skip step 4.
- Unscrew the seven fasteners on the bottom of the laptop using a Phillips-head screwdriver.

- Pry up the back panel using a pry tool. Start at one corner and work your way around, loosening as you go.

- Unscrew the single fastener at the end of the M.2 SSD using a Phillips-head screwdriver.

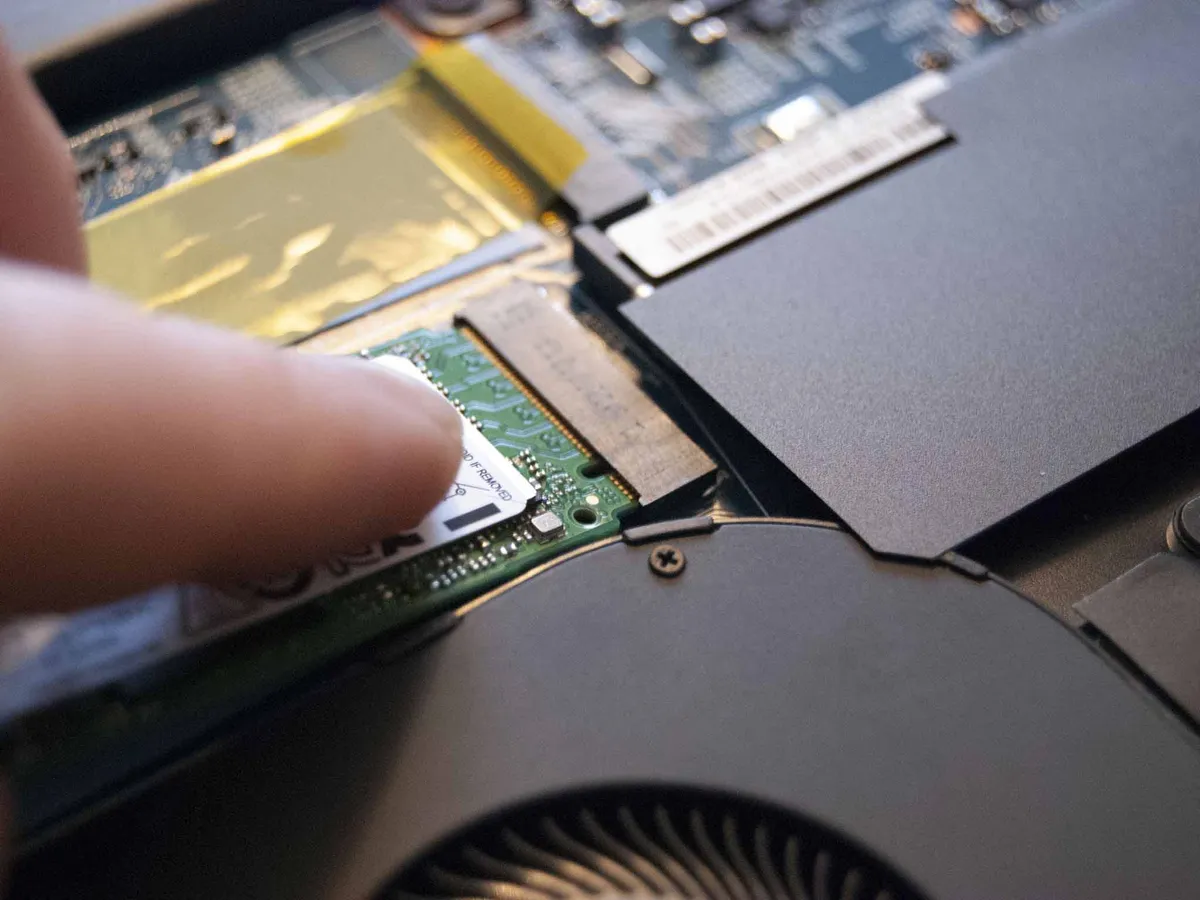
- Pull the old M.2 SSD away from the slot.

- Insert the new M.2 SSD into the slot at about a 20-degree angle. Notice it is keyed and will only fit one way.
- Screw in the single fastener at the end of the M.2 SSD. Be sure you don't overtighten.

- Replace the bottom panel of the laptop by applying pressure. You should hear it click back into place.

- Screw in the seven fasteners on the bottom of the laptop.

You can now go ahead with a fresh install of Windows 10 or, if you cloned the drive beforehand, you can boot up the PC to see if the upgrade went according to plan. If you were simply adding an M.2 SSD to the laptop alongside the original SSD, start the laptop and go ahead with any necessary formatting.
Our top hardware and software picks
Our pick for an upgrade M.2 PCIe NVMe SSD is Samsung's 970 EVO Plus. It's incredibly fast, long-lasting, and relatively cheap for the performance you're getting.

Unreal performance up to 1TB in size
Samsung's 970 EVO Plus brings blistering read and write speeds, a competitive price, and a five-year warranty, which altogether is an impressive package. Sizes start at 250GB and go up to 1TB.
Lenovo's ThinkPad X1 Extreme (Gen 2) is one of the finest laptops we used in 2019, and it's a great choice for anyone who wants a 15-inch device absolutely loaded with performance hardware and extra security features.

A generous and powerful Ultrabook
With 9th Gen Intel Core CPU options, NVIDIA GTX 1650 dedicated GPU, 4K OLED touch display, and some added features that only up user satisfaction, the ThinkPad X1 Extreme (Gen 2) is a top pick for anyone in search of a potent 15-inch Ultrabook.
Additional Equipment
To make the upgrade process easier and less risky, consider investing in some of these affordable PC tools, and don't forget about Macrium Reflect and an external enclosure for those who want to clone drives.

ElecGear M.2 PCIe enclosure ($45 at Amazon)
If you'd like to clone the existing SSD's data to a new SSD without installing it in the X1 Extreme, an external enclosure is required.

Macrium Reflect 7 (Free at Macrium)
We've had success cloning drives with Macrium Reflect 7. A free edition is available, but you can purchase a full edition with a bunch more features for those who truly take backups seriously.

ORIA PC toolkit ($33 at Amazon)
Having the proper gear to work on your PC will always make the job much easier. Here you get a plethora of tools contained in a portable case.

Rosewill anti-static wristband ($7 at Amazon)
Static electricity can damage sensitive PC parts, so remove the risk with an anti-static wristband. Fasten it around your wrist and clip it onto your PC for peace of mind.

