


The world of Dragon’s Dogma 2 is home to a large bestiary of monsters and unholy abominations that plague the land. These beasts can range from hordes of barbaric Goblins, Harpies, and Undead Zombies to gigantic monstrosities such as Griffins, Cyclops, Ogres, Minotaurs, and Dragons. The most mysterious among these creatures is the riddle-giving Sphinx who is located on an unmarked area of the map — she's so tucked away that you might completely miss her on your first playthrough.
Luckily for you, we at Windows Central have found the Sphinx and have mapped a route to her location. What's more, we've provided answers to her challenging riddles. So read on with our Dragon’s Dogma 2 Sphinx guide.
Spoiler warning: In addition to riddle answers and the Sphinx location, there are additional spoilers on this page. Do not read unless you are okay with learning spoilers.

Dragon's Dogma 2 Sphinx Guide: Tips, tricks, and info
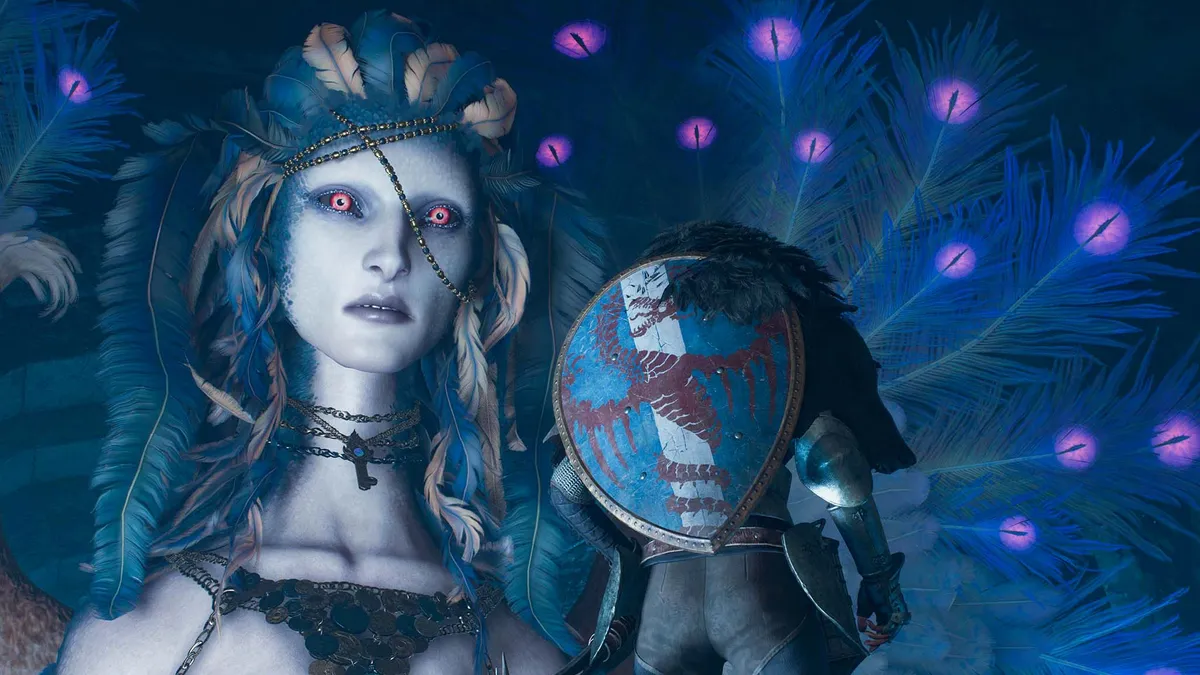
The Sphinx is one of the most mysterious and rare of the Dragon's Dogma 2 beasts, an amalgamation of a human woman, a lion, and a bird that likes to challenge intruders to games of riddles. Here are some things to keep in mind when interacting with her:
- You only get one shot at a riddle, so save at an Inn first: The Sphinx is not open to second attempts. If you answer incorrectly you cannot guess again. This being the case, you should save at an Inn right before going to see the Sphinx. That way, if something goes wrong you can purposely get yourself killed, reload at the last Inn, and then try the Sphinx's riddle again.
- She's more lenient at the first location (Mountain Shrine): If you get a riddle wrong at her first location (Mountain Shrine), you'll still be able to try to answer the rest there. However, if you fail a riddle at her second location (Frontier Shrine), she'll immediately leave and you won't be able to try the rest of the riddles.
- Place a Portcrystal near her: The Sphinx is located up in the mountains (in both her locations) and isn't the easiest place to reach. So, if you have one handy, place a Portcrytal near her so you can quickly fast-travel with a Ferrystone if you want to.
- You can hear a riddle as many times as you like: The Sphinx is happy to repeat her riddles for you as many times as you ask. If you don't have the item she requires, you will not be able to try and give an answer.
- You can decide not to deliver anything yet: She won't punish you if you get to the deliver screen and then decide you actually don't want to try to solve the riddle yet. Just back out and all will be well.
- The Sphinx will fight if provoked: If she is attacked, the Sphinx will unleash a storm of magical mayhem to confuse her enemies before unleashing fiery attacks. If you happen to get her health down in battle, she will fly away unless you can complete the job.
- You can kill the Sphinx, but the chests won't open: Feel free to do what you want, but if you destroy the Sphinx or make her fly away before riddles are solved, the treasure chests will remain sealed and you won't be able to get what is inside.
Dragon's Dogma 2 Sphinx Guide: Locations

Those looking to challenge the Sphinx or solve her riddles will be in for an arduous journey. The Sphinx’s location lies way off the beaten track from the main story, hidden by mountains and dens of monsters.
- Location 1 — Mountain Shrine: Northwest of the Misty Marshes, which is northeast of Checkpoint Rest Town. You'll need to travel through the Ancient Battlegrounds and a couple of caverns to get to her.
- Location 2 — Frontier Shrine: She only shows up here if you get through the first five riddles. The shrine is found along the river that runs west of Checkpoint Rest Town and into Battahl. When on this path, you'll need to jump over a fallen column in a narrow passageway to find her.
Dragon's Dogma 2 Sphinx guide: How to get to the Mountain Shrine Sphinx
The first time you can encounter the Sphinx is in the Mountain Shrine northeast of the Misty Marshes and northwest of the Ancient Battlegrounds. It's kind of a hidden area, so we'll go over specifics on how to get to her.
Step 1: Take the main road toward Battahl, but turn at the fork to the Ancient Battlegrounds

To find the Sphinx, you will need to start your journey at the capital city of Vernworth and travel to the west en route to the Battahl region. Keep moving west along the path until you come to a fork in the road as seen in the screenshot above.
From there, take the right-hand path and you may come across an NPC requesting your help escorting him to a location called the Ancient Battleground, which lies further up the path. There are some tricky enemies along this path, so we'll take you through this path with additional tips in the next section.
Step 2: Traverse the Ancient Battleground and wind through the ruins

Keep going straight without any detours and you will arrive at the Ancient Battleground, which looks exactly like what it says on the tin – the site of an ancient battle that was waged eons ago, littered with broken weaponry and the ruins of a fortress built into the mountainside.
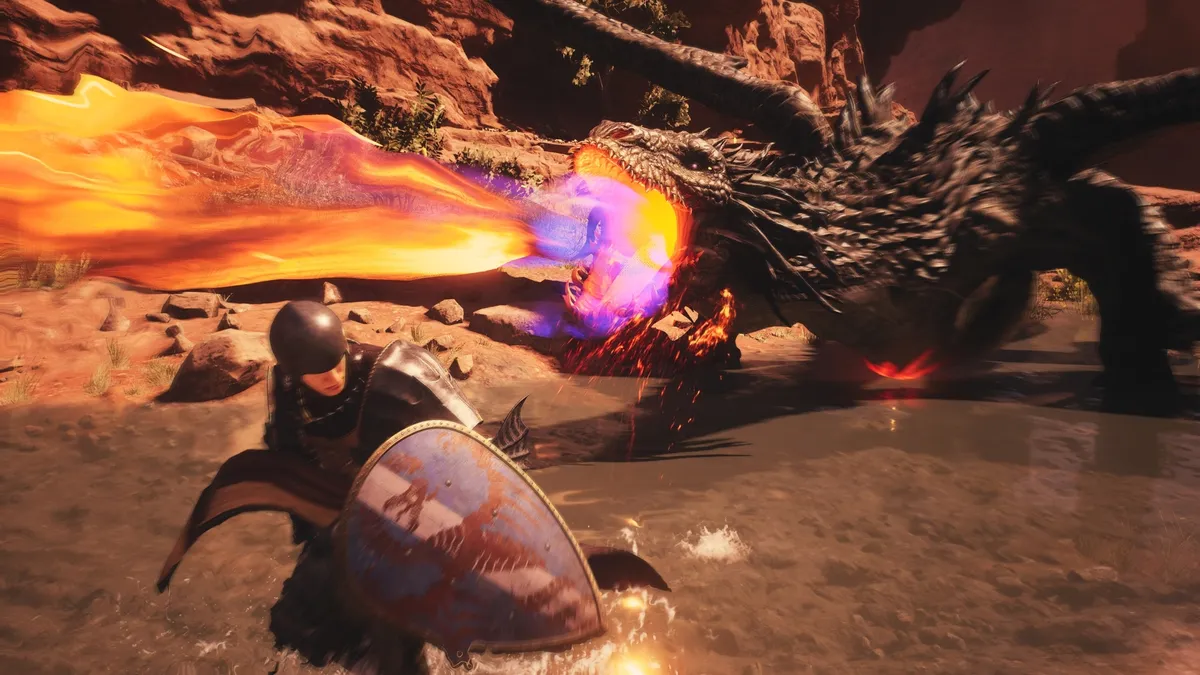
While humans may no longer inhabit the area, it is filled with all manner of deadly creatures to watch out for including Goblins, Harpies, Undead Skeletons, and a couple of Cyclops. On top of all that, a large Drake routinely roosts in the large open area outside the fortress. You can freely ignore the Drake as it isn’t guarding the fortress perse but be fully prepared to fight or flee if the Drake spots you.

After escorting the NPC into the ruins of the Ancient Battleground’s fortress, he will hand you a key you can use to unlock one of the rooms in this area to claim some loot, including a weapon for the Mystic Spearhand Vocation.
Once that’s done, make your way up and through the fortress climbing various staircases and ledges until you reach the top of the fortress where an armored Cyclops is resting. After defeating the Cyclops, make your way behind the walls at the top of the fortress and you will find a cave leading to the next stop on your journey – the Worldsend Cavern.
Step 3: Get through the caverns and demolish the Golem


• Best Xbox / PC headsets in 2024
• Best upcoming Xbox / PC games
• Best Xbox controllers
• Best Xbox accessories
• Best small gaming PCs
• Best gaming laptops in 2024
The Worldsend Cavern is a relatively straightforward but no less dangerous cave that is inhabited by Evil Spirits, Goblins, and even an Ogre who will slaughter unsuspecting adventurers who wander onto their turf. There's also a Campsite where you can put up a tent and rest to recover any health you've lost so far on this trip. I would recommend resting here as there will be more difficult battles ahead.
Once you have rested, make your way through the cavern by going straight (while taking some detours along the way to mine valuable ore) and you will come to the cave’s exit which leads into an area called the Ancient Ruins.
This is a small area littered with large boulders and an ancient stone relief carved into the wall. Your next destination lies at the end of this area but as soon as you approach the exit, the large boulders will suddenly start to move on their own, forming a giant Golem intent on blocking your path.

Golems are nasty foes whose stoney bodies are impervious to all attacks and can deal devastating damage to your party by firing laser beams from their heads. The Golem’s main weak spots are the giant blue magic seals covering their bodies.
These seals are designed to hold a Golem’s body together so if you manage to break them all, the Golem will fall apart and die. Be careful when one is about to die however as the Golem will start randomly exploding in a desperate attempt to take you out with it.

After dismantling the Golem, you are free to proceed to the next area, the Shrine Corridor, a safe passage that leads to the final destination of this journey – the Mountain Shrine.
Upon exiting the safe passage, you'll see some rocky ledges to your right which lead to a campsite. Feel free to rest here if needed. Finally, make your way up a series of staircases and you'll find yourself facing the Sphinx.
Dragon's Dogma 2 Sphinx Guide A Game of Wits: Mountain Shrine riddle answers

Remember, the Sphinx is a bit of a trickster as well as a wise being. You'll have to think carefully to solve her riddles and get through her Game of Wits. If you answer correctly, she'll unseal a treasure chest behind her and you can pull out the rewards.
#1 Riddle of Eyes

Riddle: "Our eyes are our allies, yet oft do they betray, for eyes tell lies, so I advise, and thence do lead astray. Yet how will your eyes advise you? Venture through yonder door, and retrieve that which is of greatest value."
Answer: A Sealing Phial — Go "through yonder door" and open the treasure chest just above the entryway. Then deliver the Sealing Phial to the Sphinx.
Chest Reward: 1x Wakestone and the Sealing Phial you found.
#2 Riddle of Madness

Riddle: "Love is as twin to madness, they say. They are bound fast, as night is to day. So bring forth your most beloved to me, that I might gauge the depth of your insanity."
Answer: This isn't as tricky as you'd guess. You just need to grab one of your Pawns and then bring them back to the Sphinx. Then talk to her to tell her who your most beloved is. It doesn't actually have to be true.
Chest Reward: 1x Portcrystal
#3 Riddle of Wisdom

Riddle: "The parent knows the child, yet the reverse is far from true. The child knows not the parent: such is the parent’s due. I am a lost child; for kinship do I yearn. So bring to me my “Parent,” that I might better learn."
Answer: You need to go to a Riftstone, search for a Pawn that has "SphinxParent" as its Pawn Moniker, and bring it to the Sphinx.
Previously it was thought that the SphinxParent had to be a Pawn created by Capcom, but as long as the player Pawn Monicker is set to SphinxParent, SphinxMother, or SphinxFather in the status screen, they will also work. An easy way to do this is to go to a main Riftstone at a major settlement, and View Linked Rifttones. Use the Riftstone of Fellowship to find Pawns with a "Special Moniker."
Chest Reward: 1,200x RC
#4 Riddle of Conviction

Riddle: "Life is an enigma – a lender of mortal debt. Yet lighter pack makes fleeter foot and challenge nimbly met. So grant to me what you most prize, and thence elude your ponderous demise."
Answer: Give the Sphinx anything from your inventory and she will double it. As such, you want to give her something rare and useful like a Portcrystal.
Chest Reward: 1x Portcrystal
#5 Riddle of Rumination

Riddle: "It’s ever the first we keep fond in our breast, and ever the first that eclipses the rest. You know of the Seeker’s Tokens, I trust? Those keepsakes of a fondly remembered journey? Yet where was it that you found your first? Retrace your steps, if you can – you might make a new discovery. Seven days shall we say, ere you return? May your journey be a pleasant one."
Answer: Literally, go back to the very first place where you found a Seeker’s Token. You’ll find another Seeker Token there. Pick it up and bring it back to the Sphinx before seven days are up so you can deliver it to her. You're on a time limit so move quickly!
Chest Reward: 3x Ferrystones

Get ready to fly on the Sphinx!: After giving your answer for the last riddle, the Sphinx will fly off. If you're quick, you can grab her, climb onto her back, and get a ride to her next location. You will have to move very quickly. It can be easy to fall off during the flight, so try to stay between her shoulder blades and grab onto her neck when she steeply flies up or down.
Dragon's Dogma 2 Sphinx Guide: How to get to the Frontier Shrine Sphinx

After solving the Sphinx's riddles (or at least attempting them all), she will leave the Mountain Shrine and fly to the Frontier Shrine. If you are fast, you can grab hold of her, climb up on her back, and get a ride to her next destination. Otherwise, you will need to meet her there for the Riddle of Reunion quest.
Getting to this Sphinx location by foot will take some hard work. You can either access it by gowing through a cave near the waterfall in Enoa'Battahl Forest or from traveling along the riverbed starting at Checkpoint Rest Town. This guide will explain the latter.
Step 1: Get to Checkpoint Rest Town and get down in the riverbed
As much as it sounds like a placeholder name that the devs put in, Checkpoint Rest Town is a real place located to the west of Vernworth. Make your way there and stop at the bridge leading into the town. Next, make your way down the rocks to the left of the bridge and into the mostly dried-up river. Then head southwest.
Step 2: Get on top of the cliff and defeat the powerful monsters you encounter
When the riverbed leads you into the cave area, take out the Saurians and then use the rocks to climb up on the right side. Now that you are on the cliff above the river, continue along the path and duck into a small opening to continue forward. You can encounter several difficult enemies here including a masked Cyclops, Chimera, and two Minotaurs. You can either rush past them or defeat them. I suggest defeating them to get special materials and experience points, if you can.
Step 3: Climb over the slanted column and travel down the hidden path

After a while, you'll notice a faded path on the map that leads west. Head this way and you'll see a tilted column blocking a narrow passageway. Clamber around the column and continue forward to get to the Frontier Shrine Sphinx location. Depending on where you are with Sphinx riddles, the Sphinx may not be here and you'll only see the sealed treasure chests.
Dragon's Dogma 2 Sphinx Guide Riddle of Reunion: Frontier Shrine riddle answers
Once you find the Sphinx again, she will give you five additional riddles. I highly recommend placing a Portcrystal near the Frontier Shrine Sphinx location once you get to this new location.
Note: If you answer a riddle wrong at the Frontier Shrine, the Sphinx will fly off and the riddle game will be over even if you haven't heard all the riddles yet. Additionally, you cannot choose in what order you receive these riddles.
#1 Riddle of Reunion

Riddle: "Five riddles have I posed, and five answers have you given. Perhaps you expected more, but I'm afraid that's that. Our next game shall have to take a different tack. Though constant this world may seem, in truth, all is in flux. And so the time has come for me to fly. If you are not yet satisfied, seek me at my new abode."
Answer: Go to the Sphinx at her Frontier Shrine location.
Reward: 100,000 G and the opportunity to solve additional riddles.
Note: Place a Portcrystal near this Sphinx location to make the following riddles easier for yourself.
#2 Riddle of Differentiation

Riddle: "So vast is this world, and full of life; you are but one of many. Indeed, in the grand scheme, we are as distinct from one another as pebbles on a beach -- yet we do so love to extol our differences. But are these differences so great? If you believe so, this next task should prove exceedingly simple. I seek this man[shows an illusion of a man]. If men are so distinct, I'm sure you'll meet him in a trice."
Answer: You need to carefully look at the image of the man that is shown to you then bring that man back to the Sphinx. The game will try to trick you by having more than one man that looks similar but are slightly different. So pay attention to their hair, eyes, standout scars, and more. Remember, you can check your NPC Logbook in the History tab of the menu to see any new NPCs. After hearing this riddle, you should be able to see a new entry for both the Dante and Vergil NPCs. These characters are nods to Capcom's Devil May Cry characters.
You need to bring Vergil from Checkpoint Rest Town's Battahl side of the border to the Sphinx. Don't get confused by Dante from Checkpoint Rest Town side of the border. Dante looks similar, but he has slight differences. Both NPCs hang around the inn area on their respective sides of the border. You can make the processes of bringing Vergil to the Sphinx easier by grabbing the NPC and then using a Ferrystone while you're still holding them to travel with that NPC to a Portcrystal you previously put near the Sphinx. Note, the main difference between Dante and Vergil is the direction they part their hair.
You can bring them dead or alive so don't worry about that... yeah, I accidentally verified that.
Chest Reward: Whimsical Daydream (Weapon for Trickster Vocation)
#3 Riddle of Futility

Riddle: "How easily the mind unravels! Some say it's pain that does it best, others darkness -- but I say neither. Rather, I say a mind cannot be more soundly broken than when it beholds its earnest efforts laid low in a single stroke. Could you survive such despair? We shall see. Here I have an amphora destined for Ser Maurits in Battahl. Deliver it to him, but beware; it's rather fragile. I do hope your struggle will amuse"
Answer Option 1 (Hard mode): Save at an Inn before attempting this so you can reload a save if something goes wrong. You must carry a fragile vase to the destination specified by the Sphinx - Ser Maurits location is in Battahl at the Mural Byway above north of the Inn. While carrying the case, you cannot be attacked, you cannot fast-travel with Ferrystones, and you cannot drop or throw the vase or else the quest will end and you won't have the opportunity to do any additional riddles. So set the vase down whenever you suspect an enemy is ahead, defeat the enemy, and then keep going.


Answer Option 2 (Easy mode): The easier method is to grab the Ser Maurits NPC using the Sealing Phial from his spot in Battahl and bring him to the vase where it's safely kept next to the Sphinx. Alternatively, you can grab Ser Maurits and use a Ferrystone while holding him to bring him to the Sphinx. That way, you don't have to worry about bringing the vase through extremely dangerous areas.
Chest Reward: 1x Eternal Bond (ring): Increases affinity when gifted to an NPC.
#4 Riddle of Contest

Riddle: "Though ours is a battle of wits, tests of mettle are more to your strength. Is that not so? Come, try your arm—though he shall be your opponent, not I. However, I am not one to be amused by a simple duel. Bear this ring into battle, that I might gauge your true strength."
Answer: While wearing the Ring of Derision, your attacks won't do much damage. To get this battle over with quickly, you need to knock your enemy down, pick them up, and then throw them off the nearby cliff to defeat them. Remember to unequip the Ring of Derision when done.
Chest Reward: 1x Ring of Ambition (slightly increase experience earned)
#5 Riddle of Recollection

Riddle: "Now, questions beget questions, and I have one for you: How many riddles have you solved thus far? My memory fails me you see. Remind me, and make it plain. Let yonder statues be your means. For every question aptly answered, bring one here before me."
Answer: This is a bit of a trick question. You literally need to place a statue on the raised dais for each riddle you've solved correctly up to this point. So if you've solved four riddles correctly, put four statues down. Note, the Riddle of Reunion (finding the Sphinx again at the Frontier Shrine) counts as a riddle. To make sure you answer correctly, think about how many treasure chests you've gotten the Sphinx to unlock and that's the correct answer for you.
Chest Reward: 1x Unmaking Arrow
BONUS: Defeat the Sphinx after all 10 riddles are solved (or attempted)

Riddle: "And with that our game comes to an end, as amusing as it has been. I shall now take my leave of you, to await the next courageous soul who would test their wits against mine." [Hit her with any of your weapons when she starts getting up] "Well, you are a persistent one. Did my prizes fail to satisfy? Truly your greed is boundless, but soon you will learn; those who live by their greed tend to die by it. Though it is a pity... I had taken rather a liking to you. It will bring me no pleasure to spill your blood, but nor can I ignore so bold a challenge."
Answer: Fight her, until her health goes down to 0. She'll now attempt to fly off and she won't let you climb on her back. But don't let her fly away. Using the Unmaking Arrow you received as a reward or that you purchased from the Cave-dweller Hermit in Battahl, shoot the Sphinx as she attempts to fly away. She will dissolve and drop a key for the final large treasure chest.
Reward: Gold and Key of Sagacity to get an Eternal Wakestone. The Eternal Wakestone is a special single-use Wakestone that has the power to revive multiple NPCs at once. It will disappear from your inventory when used.
Dragon's Dogma 2 Sphinx Guide: Defeat the Sphinx in battle with an Unmaking Arrow

Yes, it is possible to defeat the Sphinx, if you don't like this riddle business. The easiest way to ensure this is by having an Unmaking Arrow handy. However, I suggest doing the riddles first and then defeating her to get the most rewards. You won't be able to open her riddle treasure chests if you kill her, but you will be rewarded with a key to one specific treasure chest if you take her down.
The easiest way to defeat the Sphinx is with a special Unmaking Arrow. However, players have found that in-game clues also provide the hints you need to defeat her without the arrow. Without further ado, let's go over how to kill the Sphinx.
🎮TIP: I highly recommend you save at an inn before attempting to defeat her. If something goes wrong, you can revert back to your last inn save.
Option 1: Defeat the Sphinx by avoiding hitting her head
As pointed out by @UnamedUser1 on Reddit, defeating the Sphinx is a riddle in and of itself. There are clues throughout your Sphinx journey that hint at how to defeat her. Specifically, there are two murals (one near her Mountain Shrine location and one in Battahl) as well as the Riddle of Futility vase that provide visual hints. To defeat the Sphinx, you're not supposed to hit her in the head.
The thing is, your Pawns might strike her cranium. Additionally, magic attacks or AoE attacks might also accidentally cause damage to her noggin. So, you'll want to tell your Pawns to Wait and then fight her solo while only jabbing at her body, legs, and wings. If you accidentally strike her face, she will apparently heal back up and then you'll be able to try over from the beginning. Eventually, she will be defeated and won't fly off because you fought her correctly.
Option 2: Get the Unmaking Arrow from the Sphinx and then shoot her with it later
You'll be given the Unmaking Arrow if you solve the Riddle of Recollection. So complete that riddle at the Frontier Shrine to get it. Then when you're ready to fight her, loose the Unmaking Arrow on her when she attempts to fly off. Note that she will simply shake you off of her back if you attempt to catch a ride this time.
Option 3: Get the Unmaking Arrow from the Cave-dweller Hermit and then shoot the Sphinx
Not interested in solving the Sphinx's riddles? It takes a lot of work, but you can get the Unmaking Arrow another way:
- Defeat dragons to collect eight Wyrmslife Crystals.
- Go to the Cave-dwelling Hermit on the east side of Battahl near the ocean. Trade the eight Wymrlife Crystals for an Unmaking Arrow.
- Fight the Sphinx until her health bar gets to 0.
- When she attempts to fly away after the battle, shoot the Sphinx with the Unmaking Arrow to end her.
Answer: You can either fight the Sphinx solo while only attacking her legs, body, and wings. But make sure to avoid her head! Or, you can use the Unmaking Arrow to shoot the Sphinx when she attempts to fly away.
Note: The game saves when you shoot the Unmaking Arrow at the Sphinx, so there's no going back. But she will drop a key that will let you open the final treasure chest. She will not allow you to catch a ride on her back when she attempts to fly off this time.
Reward: Gold and Eternal Wakestone
Riddle me this, player
• Dragon's Dogma 2 review
• DD2 FAQ
• The Nameless Village quest
• DD2 on gaming handhelds
• Greatsword and Archistaff quest
Now you know where to find the mythical Sphinx in Dragon’s Dogma 2. From here, you can challenge the Sphinx to a battle or attempt to complete the Sphinx’s riddle quests. Each riddle is an extremely difficult quest that will test the limits of your brain power and observation skills.
If you manage to solve them, the Sphinx will unlock special chests she is guarding which yield unique rewards. Whether you choose to tackle the Sphinx’s riddles or slay her is entirely up to you. Now go forth and discover the Sphinx for yourself in one of the best Xbox games and best PC games Capcom has produced in recent memory.
Dragon’s Dogma 2 is now available for purchase on Xbox Series X, Xbox Series S, PlayStation 5, and PC via Steam after releasing on March 22, 2024.


