How to trim video using Windows 10's Photos app
If you want to make a video shorter or remove unwanted parts, in this guide, we'll show you the steps to perform this task using the Photos app.
If you recorded a video using your phone or digital camera, and you ended up with a very long video, or you want to crop off unwanted footage, you don't need to spend money or install complicated third-party tools.
The Windows 10 Photos app includes a powerful video editor that allows you to trim one or multiple parts of a video quiet easily.
In this Windows 10 guide, we'll walk you through the steps to trim videos using the Photos app.
How to trim a video using Photos app
To trim a video using Photos on Windows 10, use these steps:
- Open Photos.
- Click the video you want to edit.
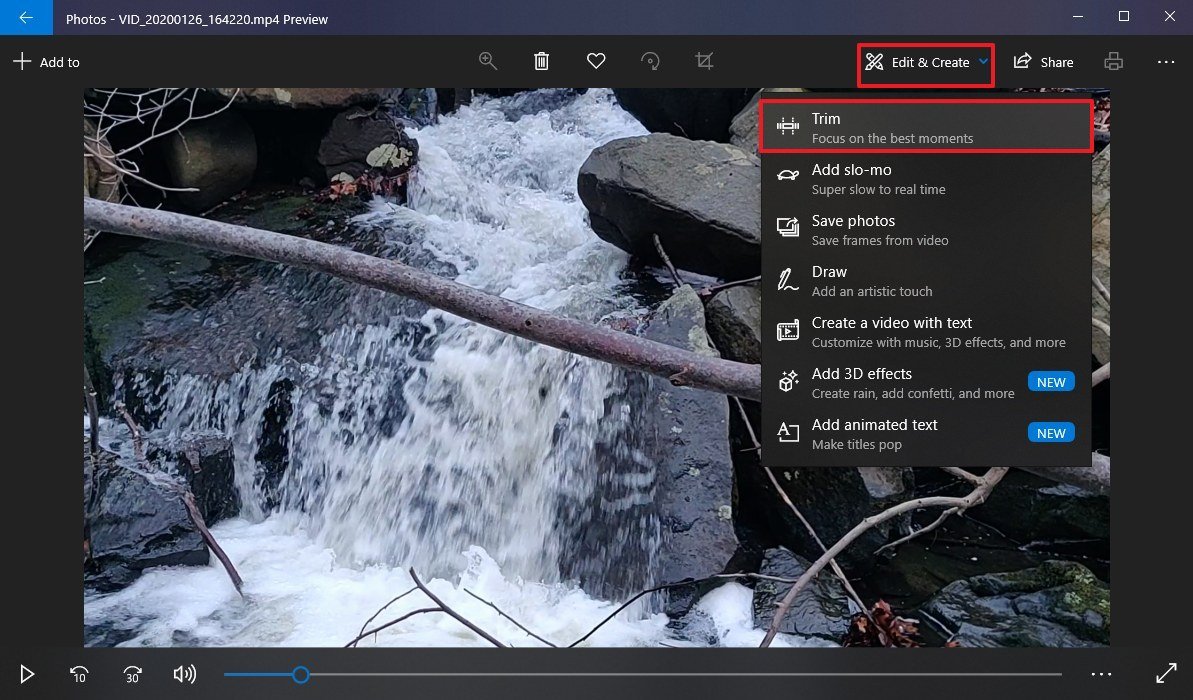
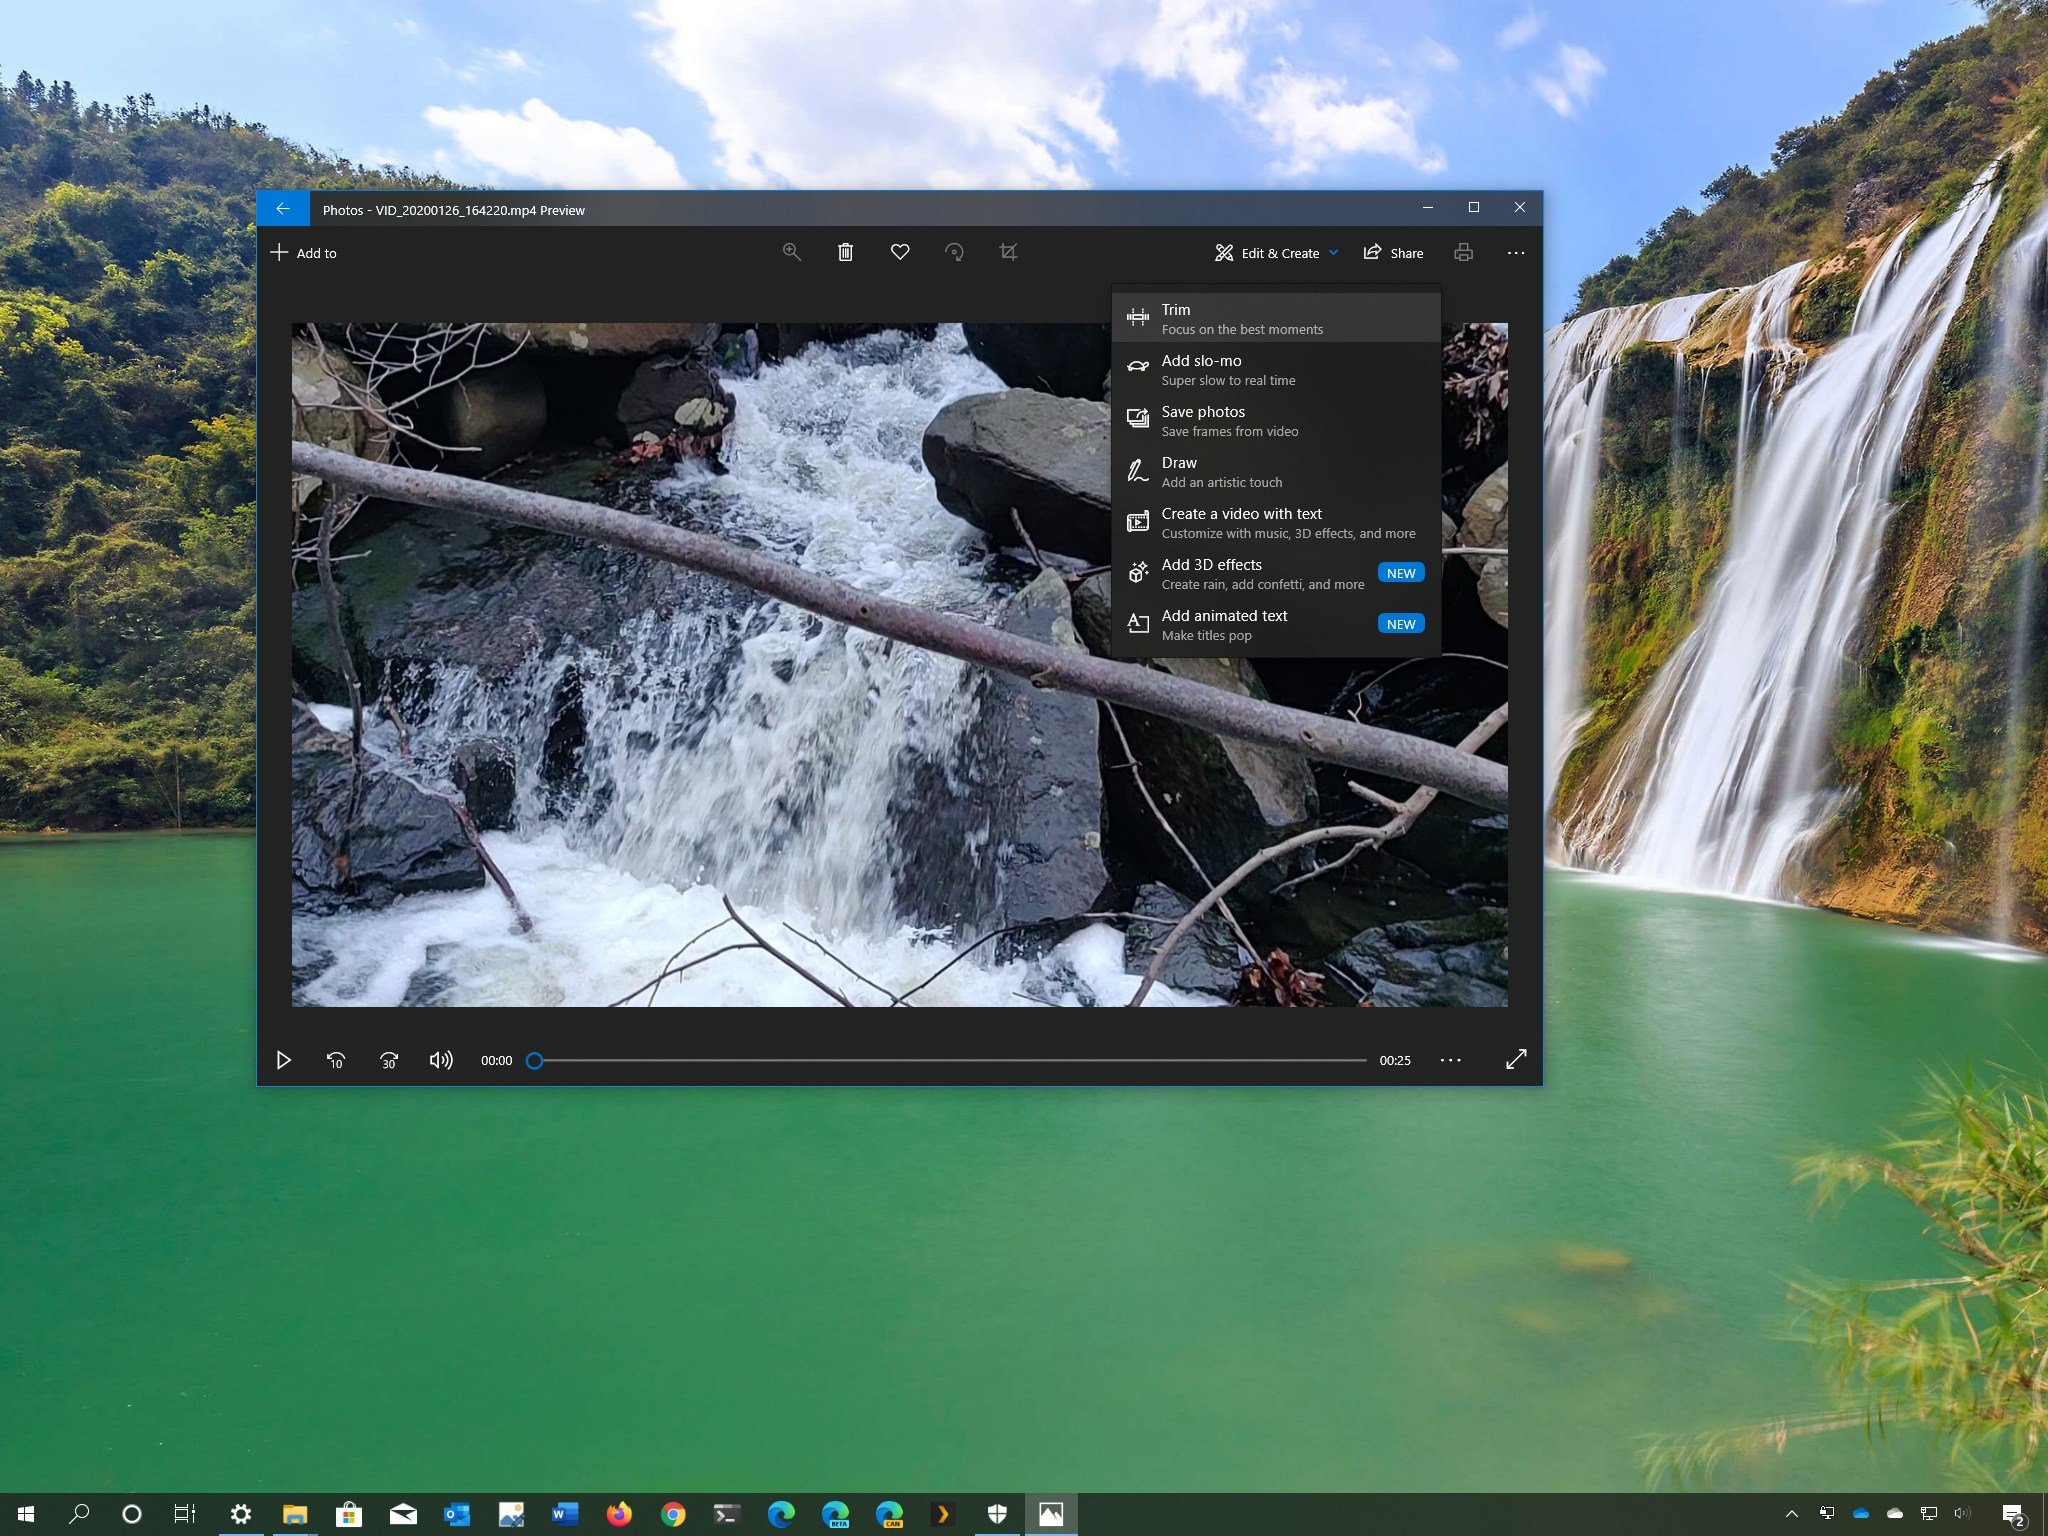
- Click the Edit & Create button from the top-right corner, and select the Trim option.
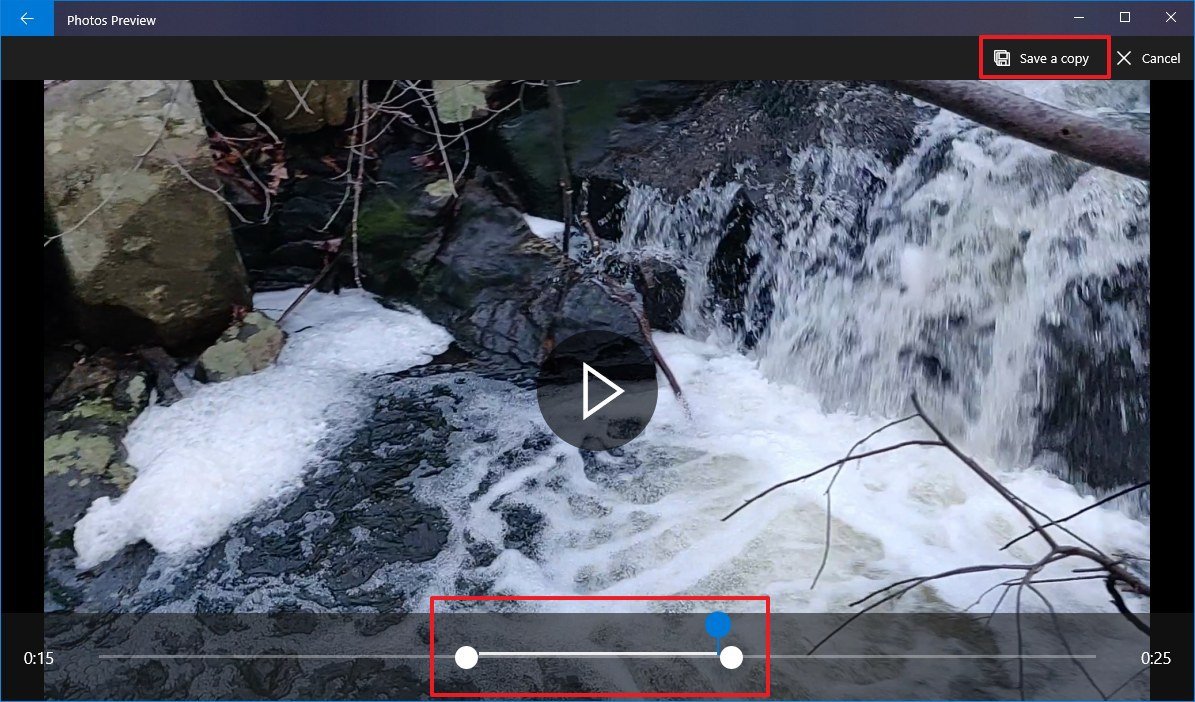
- Use the white (right and left) pins to select the part of the video you want to trim.
- Use the blue pin to scrub the footage to make sure you're trimming the correct section.
- Click the Save a copy button from the top-right corner.
Once you complete the steps, the Photos app will process the video, and you'll end up with a trimmed version of the file with only the part you want to keep. However, the feature will not edit the original video. Instead, it'll create a new file with the new footage.
If you're trying to save some space, after completing the trimming process and making sure the video is the way you want it, remember to delete the original video from the Photos "Collections" tab.
How to trim multiple parts of a video using Photos
Although the trimming option doesn't allow you to edit multiple parts of the video, you can use the video editing tool to accomplish this task.
All the latest news, reviews, and guides for Windows and Xbox diehards.
To trim multiple parts of a video, use these steps:
- Open Photos.
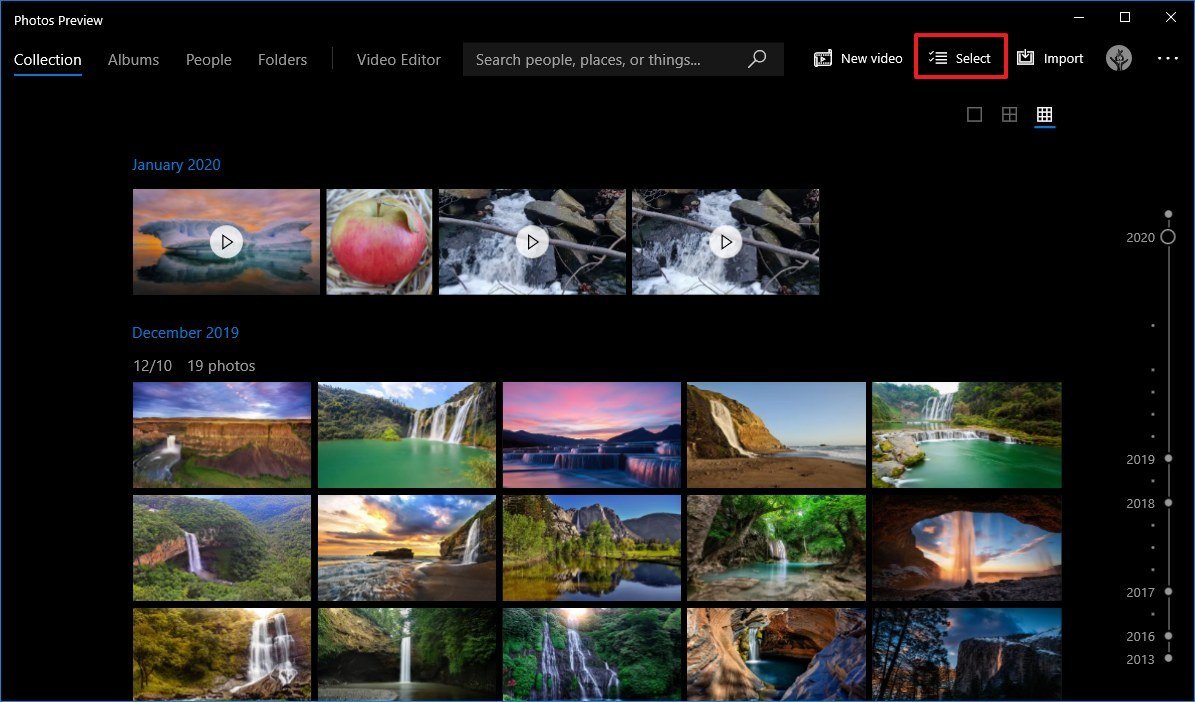
- Click the Select button from the top-right corner.
- Check the video you want to edit.
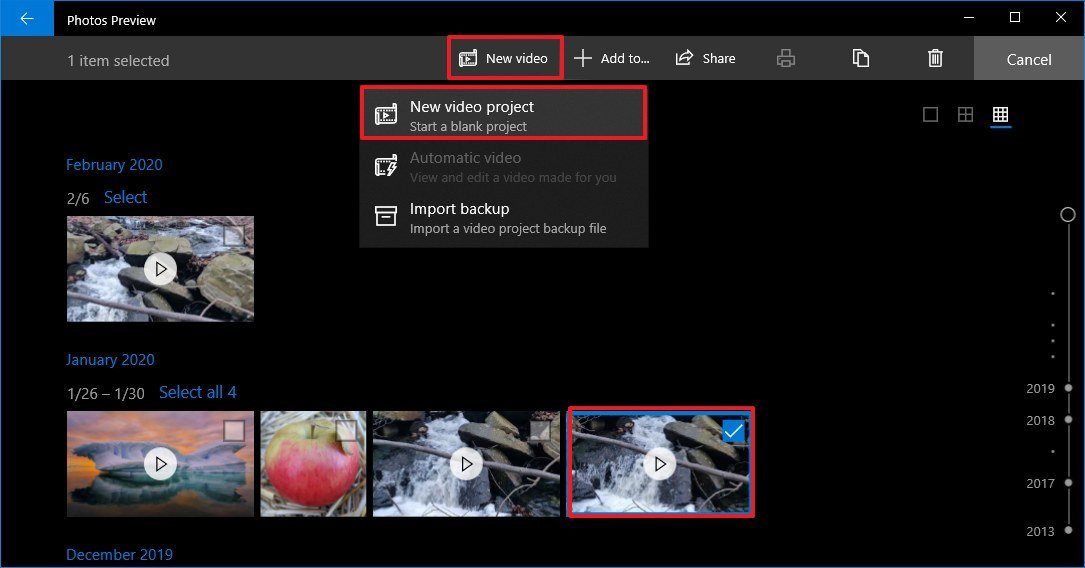
- Click the New video button from the toolbar.
- Select the New video project option.
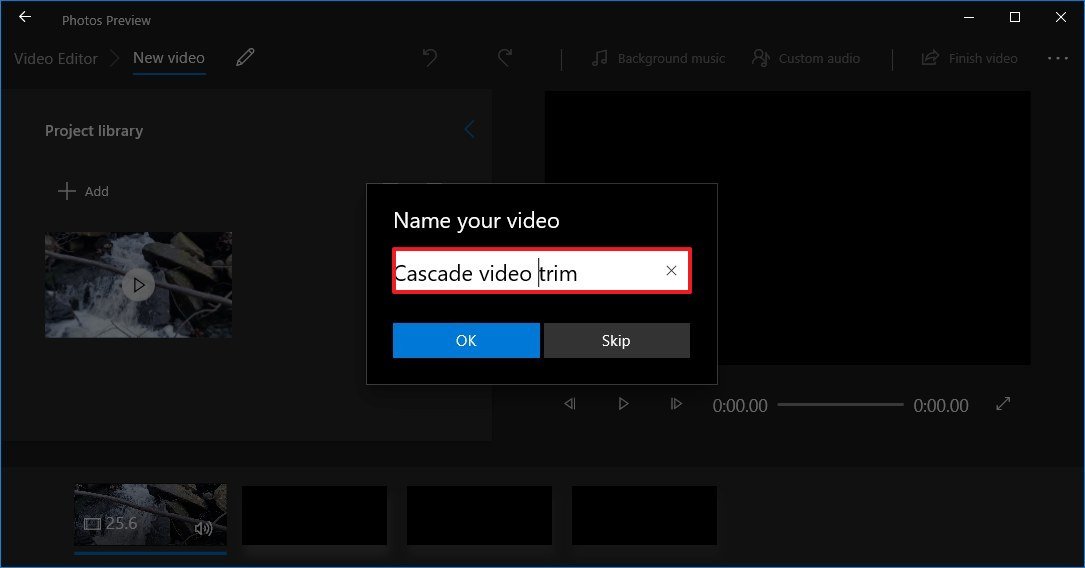
- Specify a name for the project.
- Click the OK button.
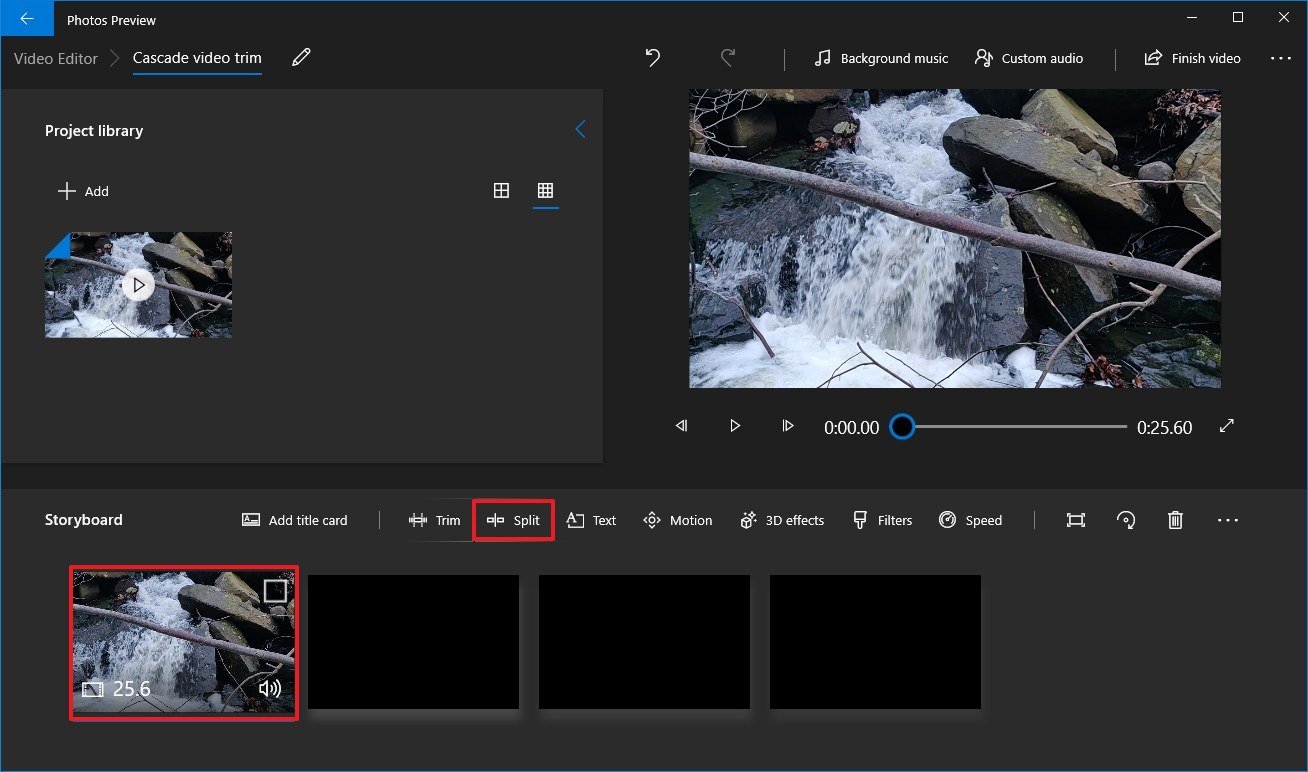
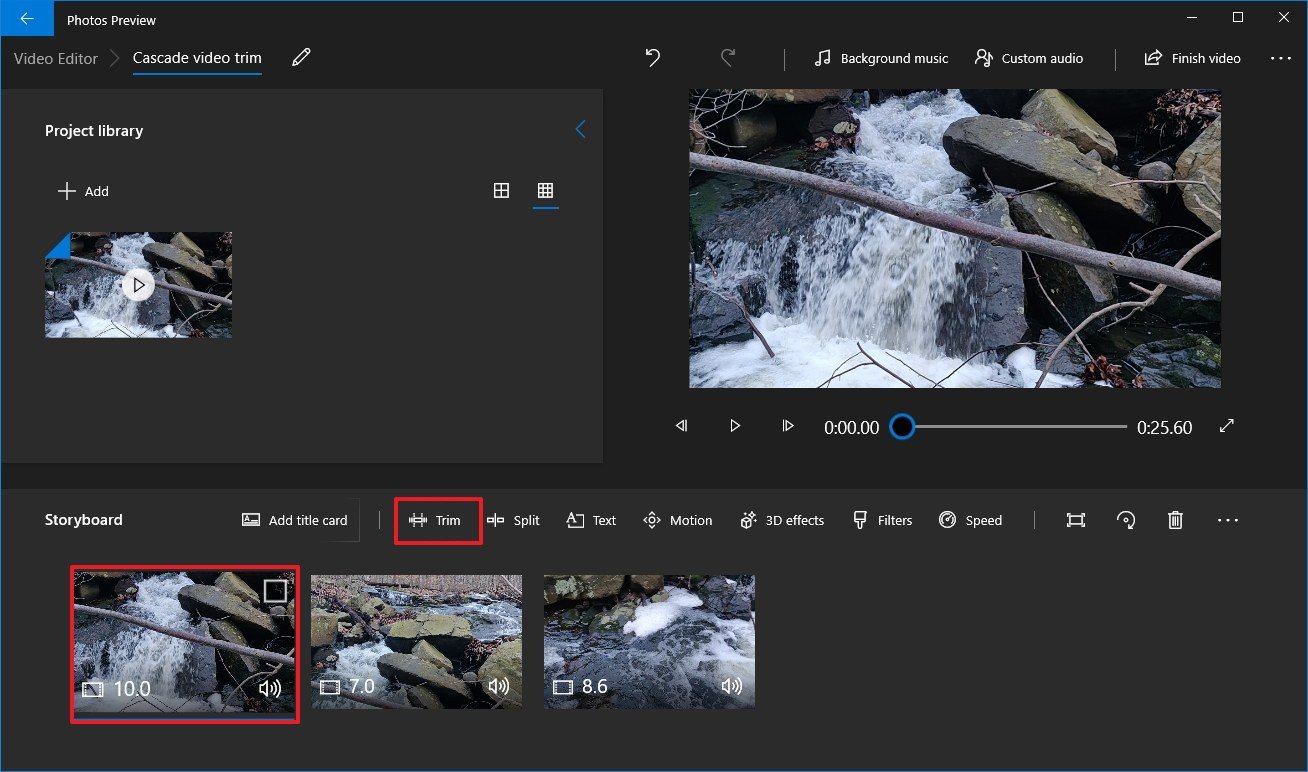
- Select the video clip from the Storyboard.
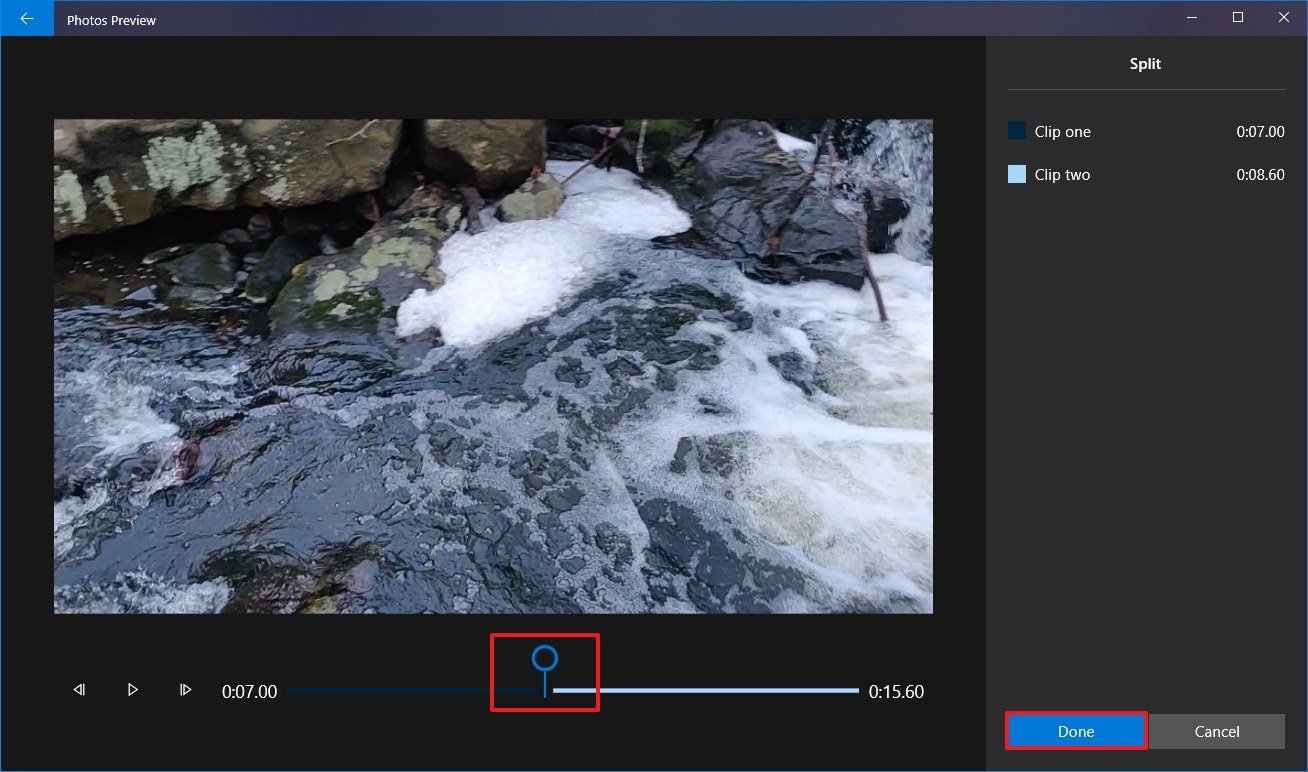
- Click the Split button from the toolbar.
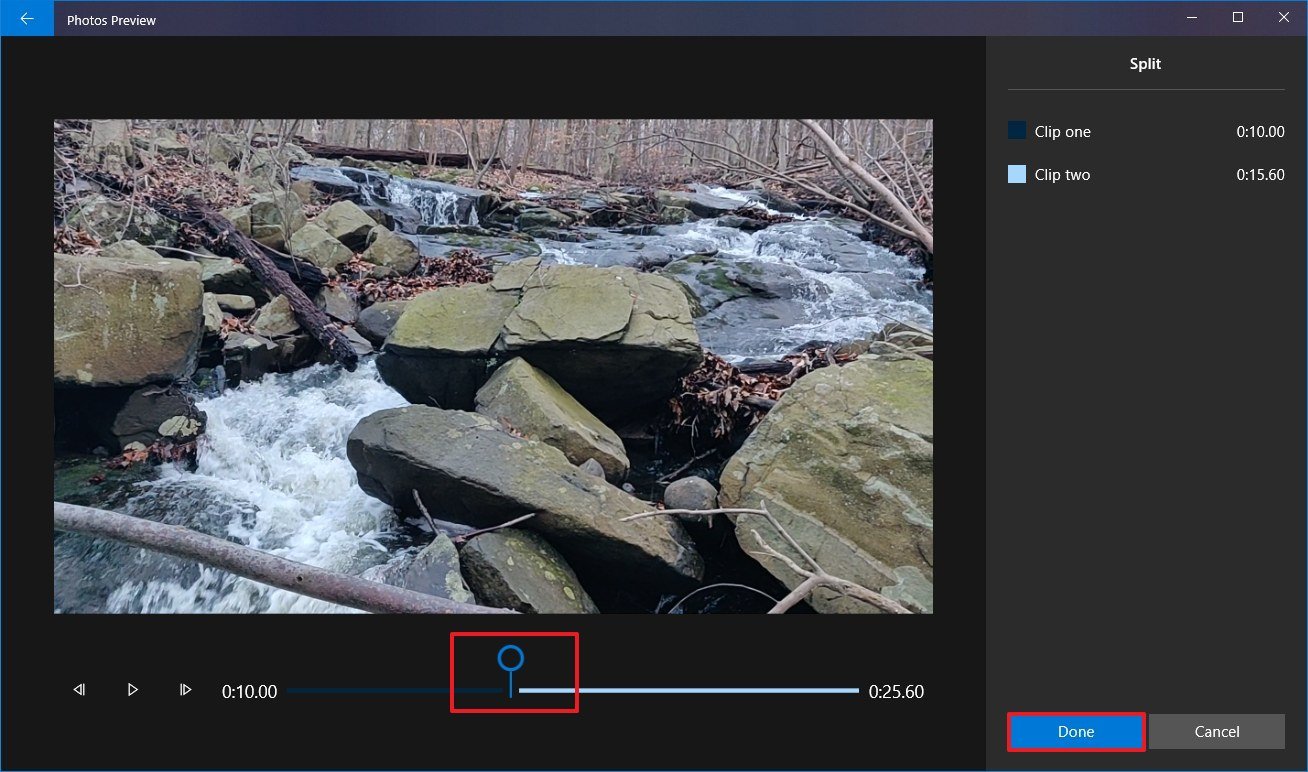
- Select the section that includes the first part of the video you want to trim.
- Click the Done button.
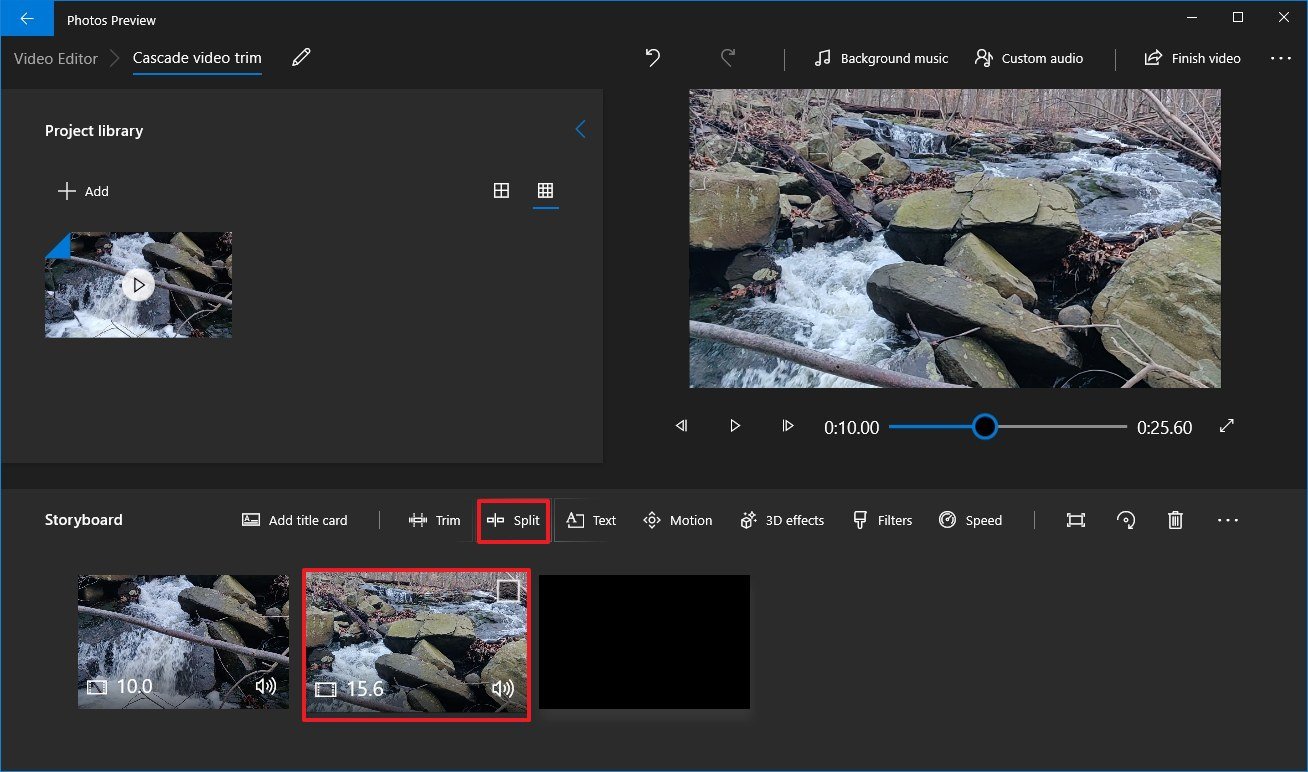
- Select the remaining part of the video. (Usually, the one on the right side.)
- Click the Split button again.
- Select the section that includes the second part of the video you want to trim.
- Click the Done button.
- Repeat steps No. 12 through 15 to partition the entire video.
- Select the first split clip from the Storyboard.
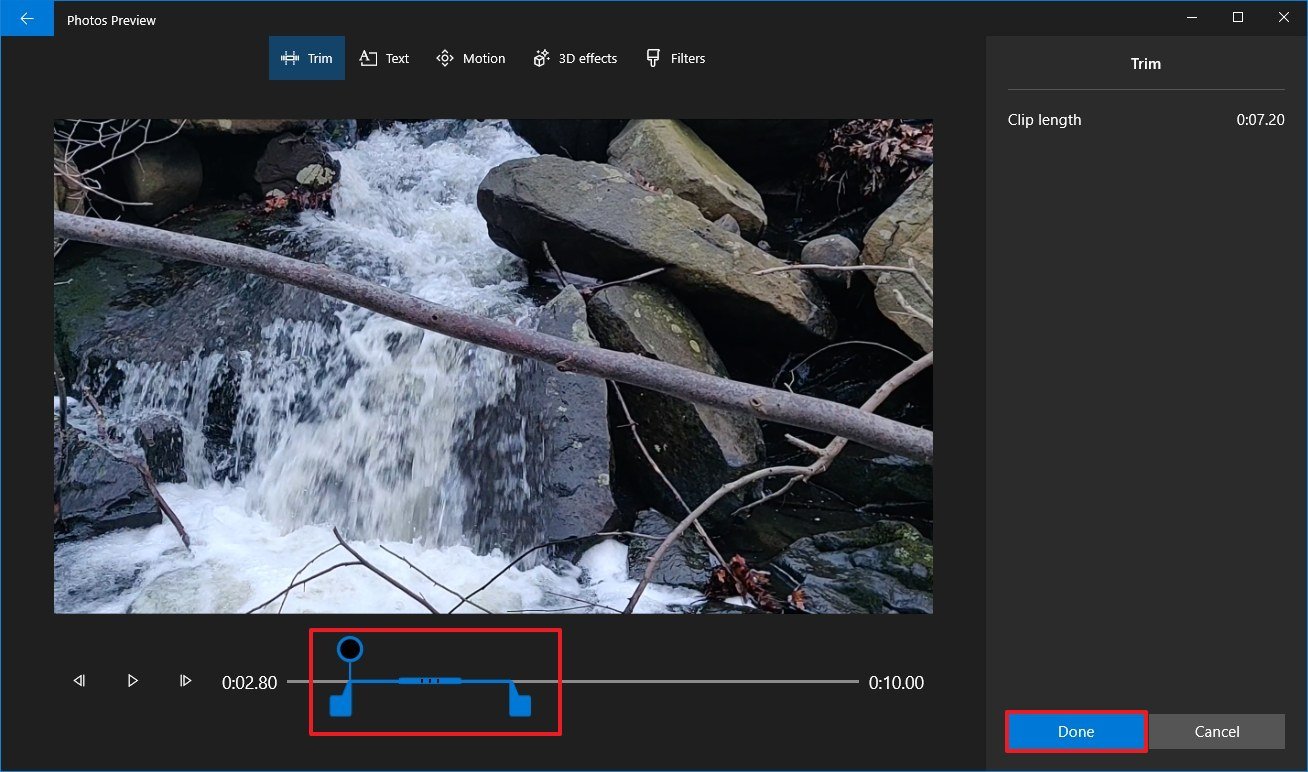
- Click the Trim button from the toolbar.
- Use the blue pins to adjust the section of the video to trim.Quick tip: While trimming the video, make sure only to move the pins inwards, as if you move the right pin outwards, you could end modifying the previous split settings for the clip.
- Click the Play button to preview the clip.
- Click the Done button.
- Repeat steps No. 17 through 21 to trim the remaining clips.
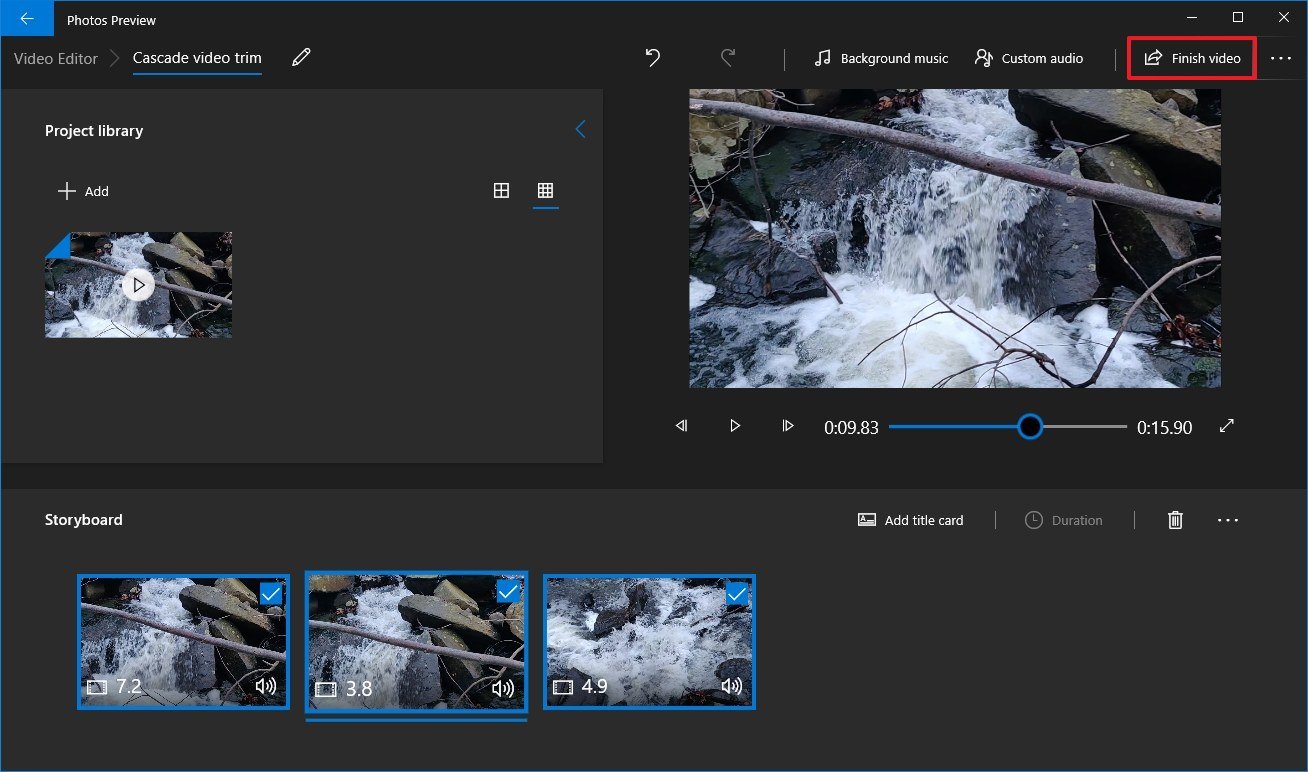
- Click the Play button from the preview section.
- Click the Finish video button from the top-right corner.
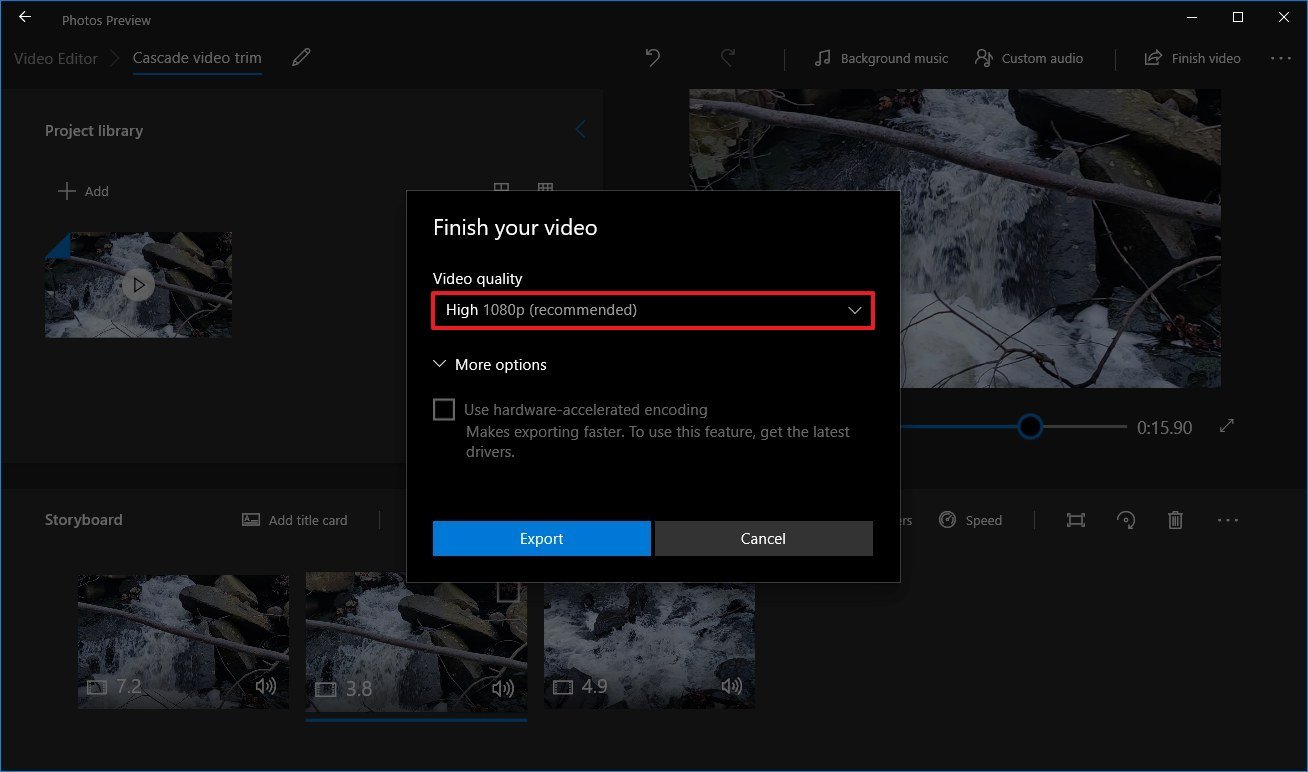
- Use the "Video quality" drop-down menu and select the quality of the video. For example, High 1080p (recommended).
- Under the "Move options" section, check the Use hardware-accelerated encoding option (if available).
- Click the Export button.
- Select the destination folder. For example, Pictures folder.
- Click the Export button.
After you complete the steps, the Photos app will process the project, and it'll create a new video only with the parts you trimmed.
We're focusing this guide on the steps to trim a video, but the Photos app offers a lot of features for creating a video project. You can learn more using our comprehensive guide with everything you need to know to use the video editing tool included with Photos.

Mauro Huculak has been a Windows How-To Expert contributor for WindowsCentral.com for nearly a decade and has over 22 years of combined experience in IT and technical writing. He holds various professional certifications from Microsoft, Cisco, VMware, and CompTIA and has been recognized as a Microsoft MVP for many years.
