How to master Snap Assist on Windows 11
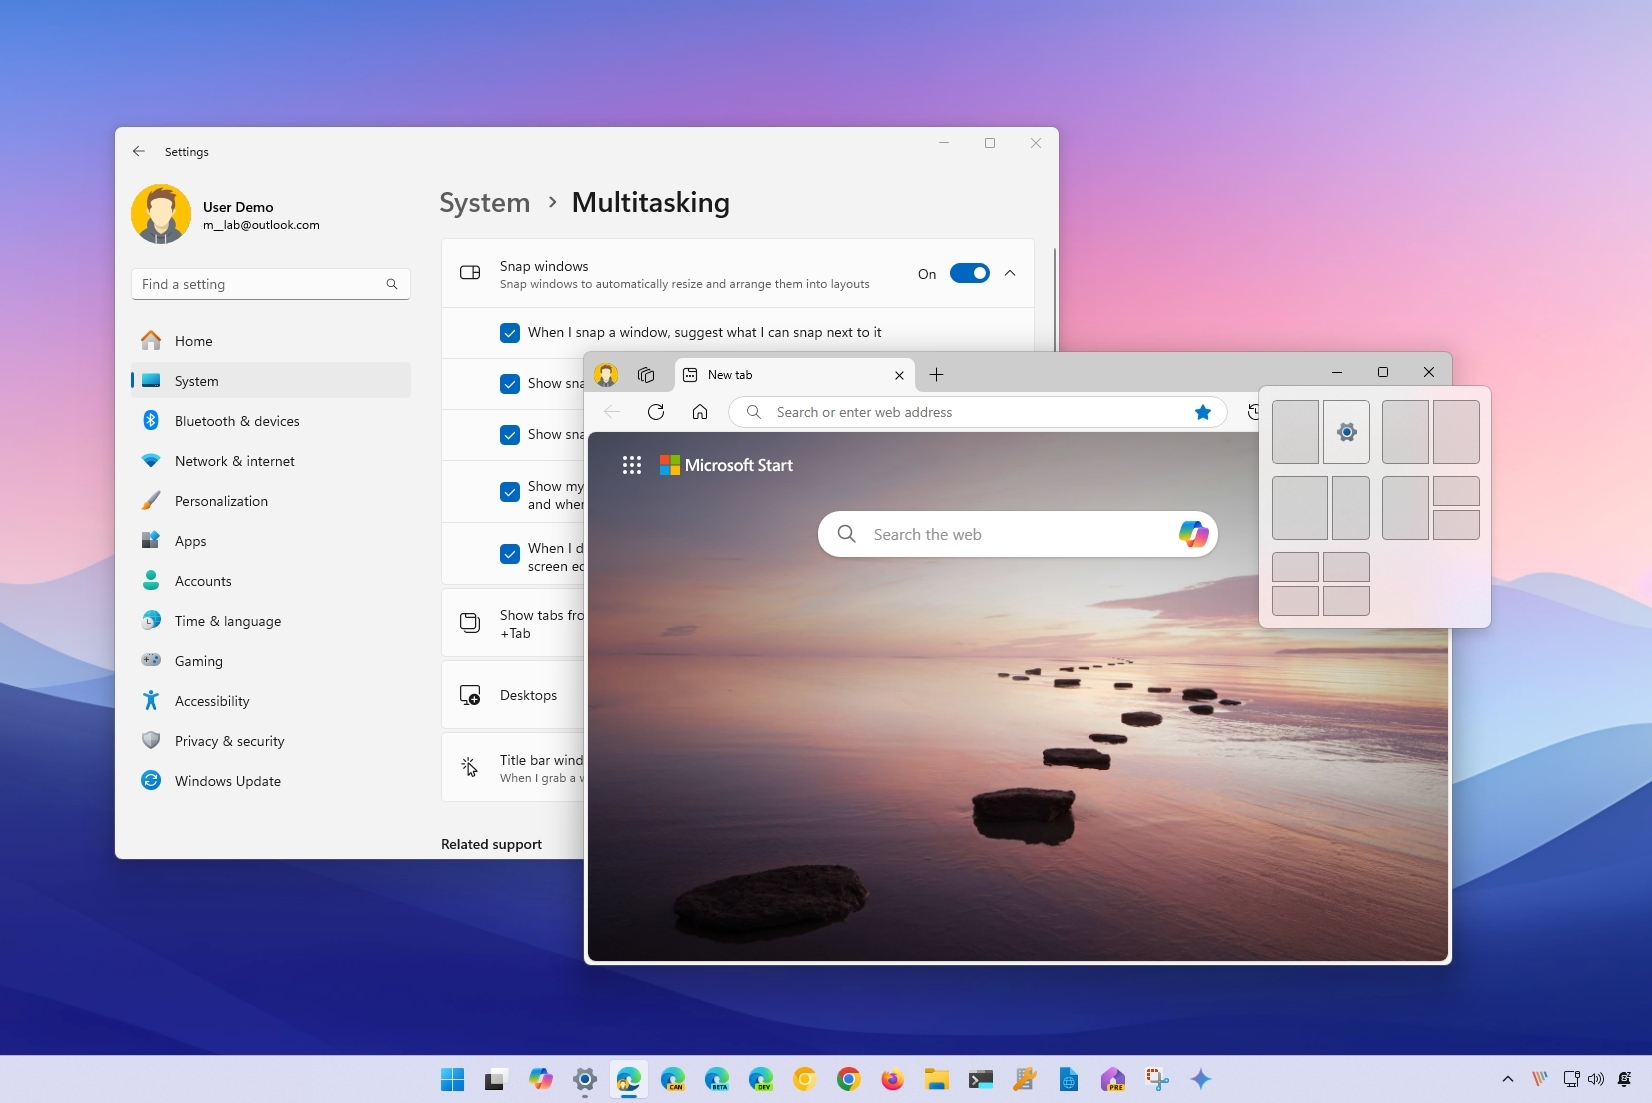
Windows 11 Snap Assist helps you organize apps on your screen, and here's how.
All the latest news, reviews, and guides for Windows and Xbox diehards.
You are now subscribed
Your newsletter sign-up was successful
When you multitask with more than one app on the screen, you know how frustrating and time-consuming it can be to arrange the windows manually. However, Windows 11 comes with Snap Assist, a feature that makes it easy to organize your desktop windows using the mouse, keyboard, and touch to work more efficiently while improving productivity.
The feature isn't new, it's been available since Windows 7, but it only offered the option to snap two windows side by side. On Windows 10, Snap Assist was improved to support up to four snaps. And, on Windows 11, Microsoft is yet again updating the feature with Snap Layouts to add visual guidance to snap windows more easily and Snap Groups to return to previous groups of snapped windows without having to re-snap anything after switching to a different application.
In this how-to guide, I'll walk you through the steps to use Snap Assist, including "Snap layouts" and "Snap groups," to better manage windows on the screen.
These instructions have been updated to reflect the changes with the operating system.
How to enable Snap Assist on Windows 11
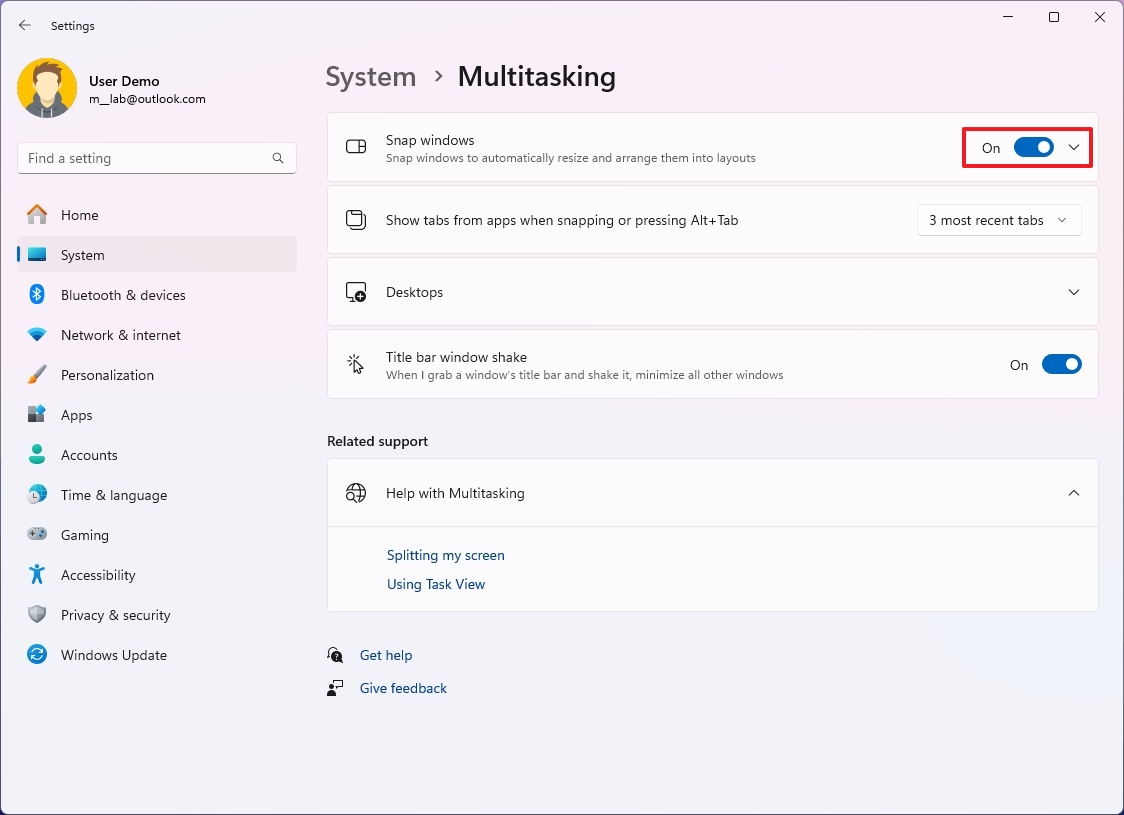
Snap Assist comes enabled by default, but you can configure it with the following steps:
- Open Settings.
- Click on System.
- Click the Multitasking page on the right side.
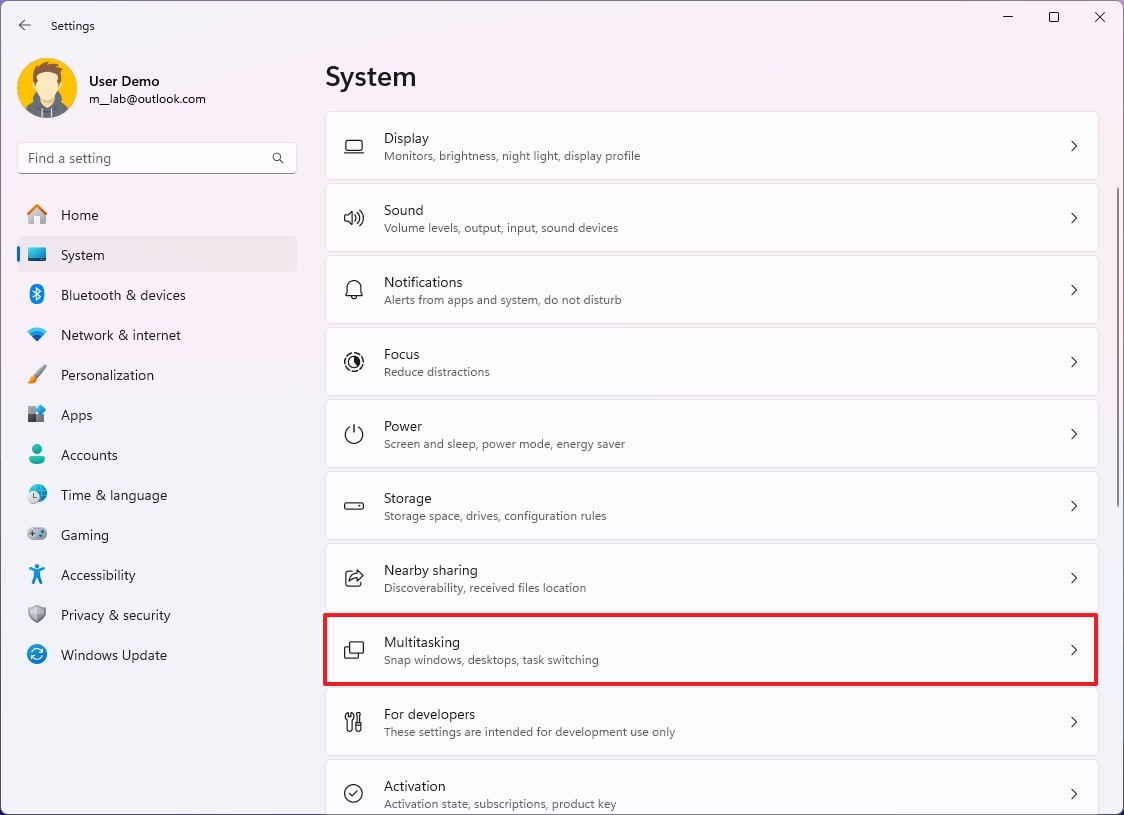
- Turn on Snap windows toggle switch to enable the feature.
- (Optional) Turn off the Snap windows toggle switch to disable the feature.
How to configure Snap Assist settings on Windows 11
To adjust the Snap Assist settings on Windows 11, use these steps:
- Open Settings.
- Click on System.
- Click the Multitasking page on the right side.

- Turn on Snap windows toggle switch to enable the feature (if applicable).
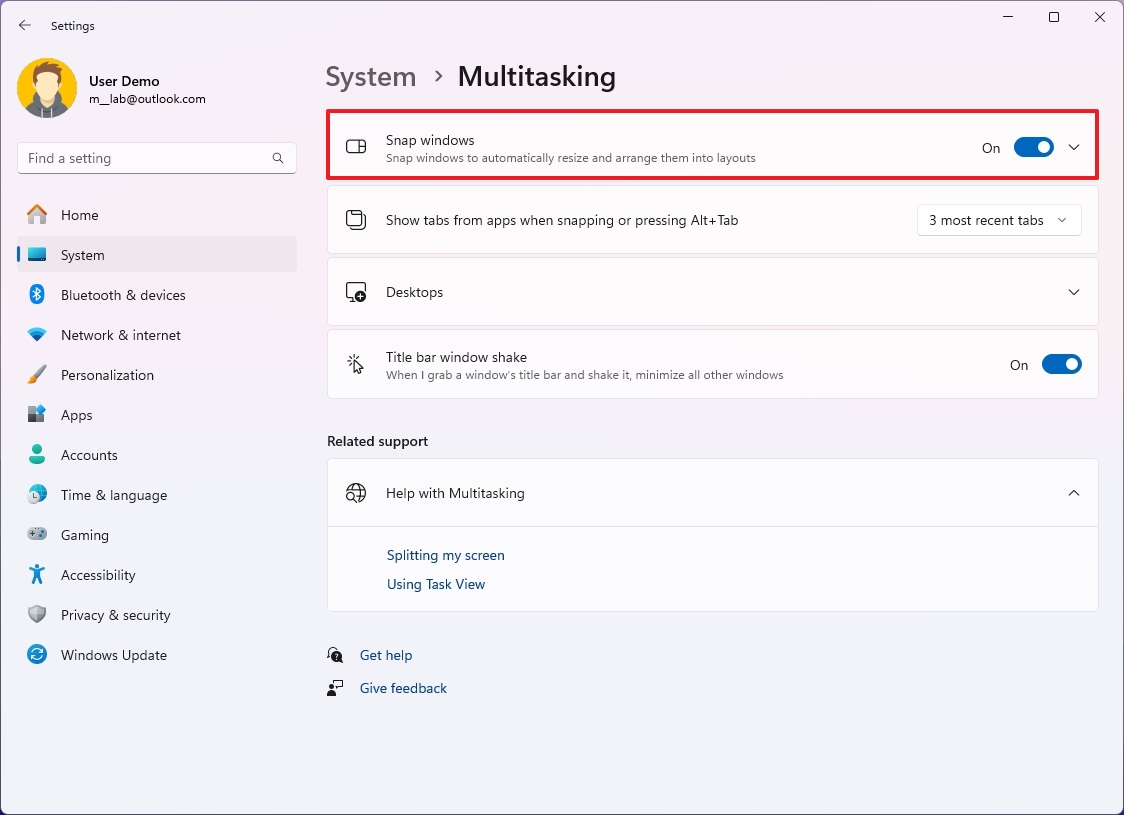
- Click the Snap windows setting to expand the options.
- Check or clear the options you want to use on Windows 11 when snapping windows:
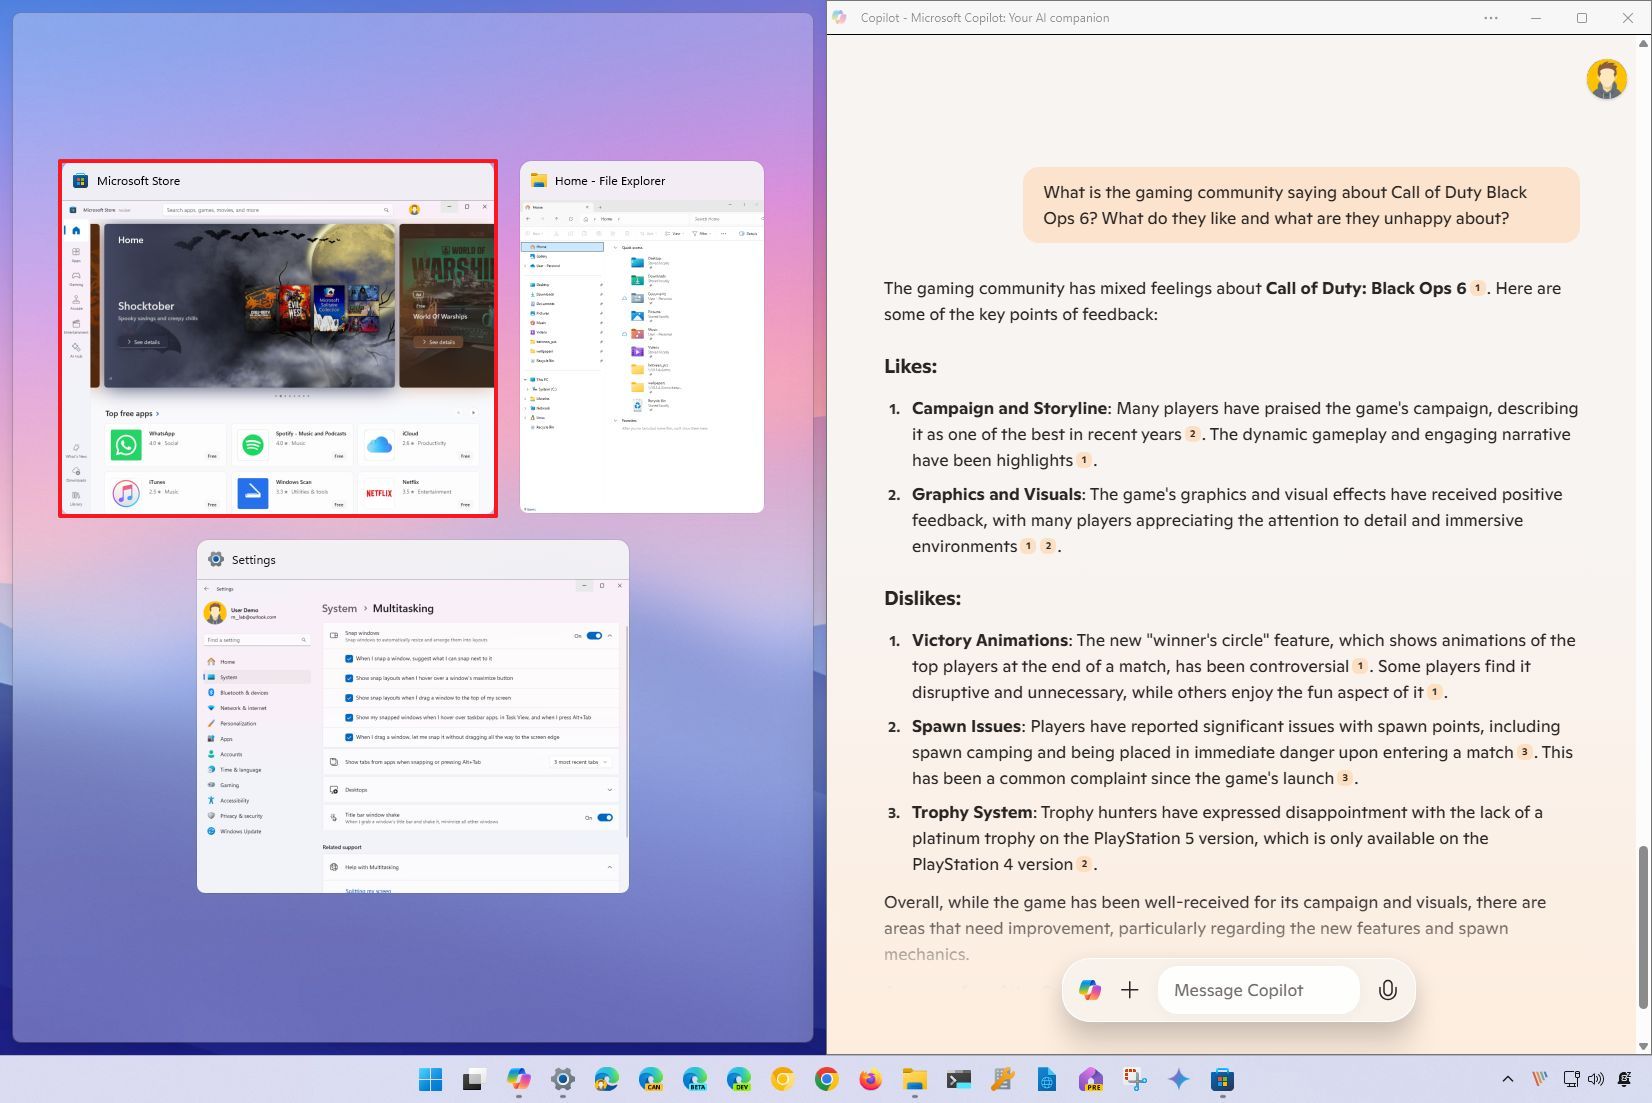
- When I snap a window, show what I can snap next to it — Controls the preview to select other windows to snap in the screen.
- Show snap layouts when I hover over a window's maximize button — Controls Snap Layouts from the Maximize button.
- Show snap layouts when I drag a window to the top of my screen — Controls the layouts menu that appears at the top of the screen.
- Show my snapped windows when I hover over taskbar apps in the Task View, and when I press Alt+Tab — It controls the preview of snapped windows when in Task View or Alt+Tab.
- When I drag a window, let me snap it without dragging all the way to the screen edge— If disabled, you would have to drag the windows with the mouse to the very edge of the screen to snap them. If enabled, Snap Assist will react long before reaching the end of the screen.
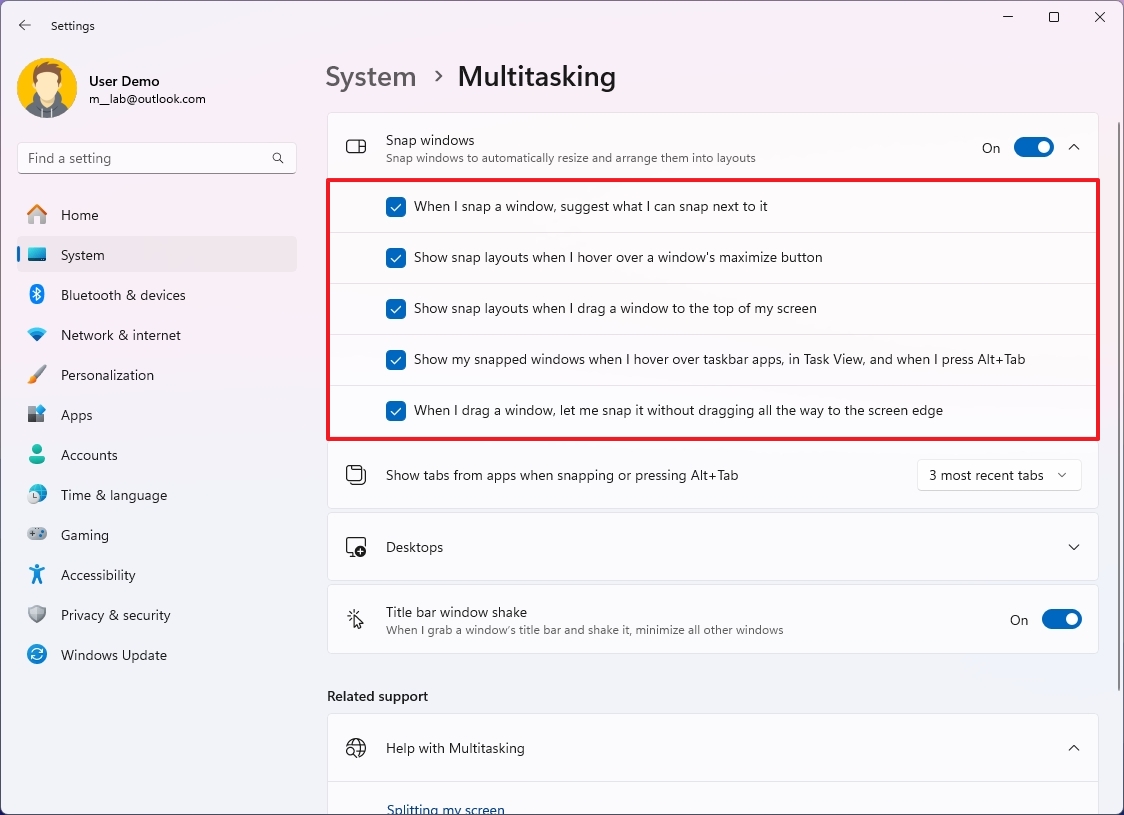
After you complete the steps, you will be able to use Snap assist according to your configuration.
Disable Snap Layouts
On Windows 11, "Snap Layouts" is enabled by default. If you don't like the feature, you can disable it with these steps:
All the latest news, reviews, and guides for Windows and Xbox diehards.
- Open Settings.
- Click on System.
- Click the Multitasking page on the right side.

- Click the Snap windows setting.
- Clear the "Show snap layouts when I hover over a window's maximize button" option.
- Clear the "Show snap layouts when I drag a window to the top of my screen" option.
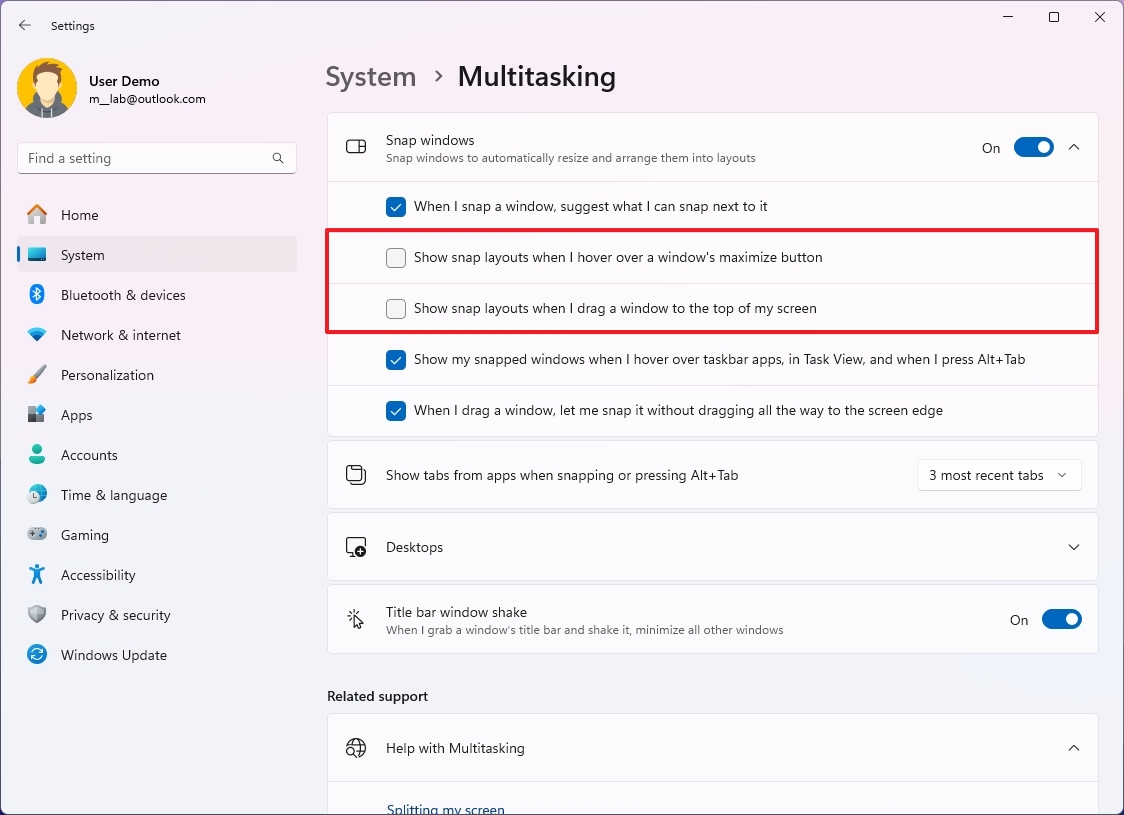
Once you complete the steps, hovering over the "Maximize" button or grabbing an app to the top of the screen will no longer show the layouts menu to snap windows.
How to use Snap Assist on Windows 11
Starting on Windows 11, there are three ways to use Snap Assist. You can use the mouse to drag and drop windows to the locations you want to snap them. You can use keyboard shortcuts to position the windows where you want them. You can also use the Snap Layouts menu from the "Maximize" button to create different snapping groups.
Snap layouts
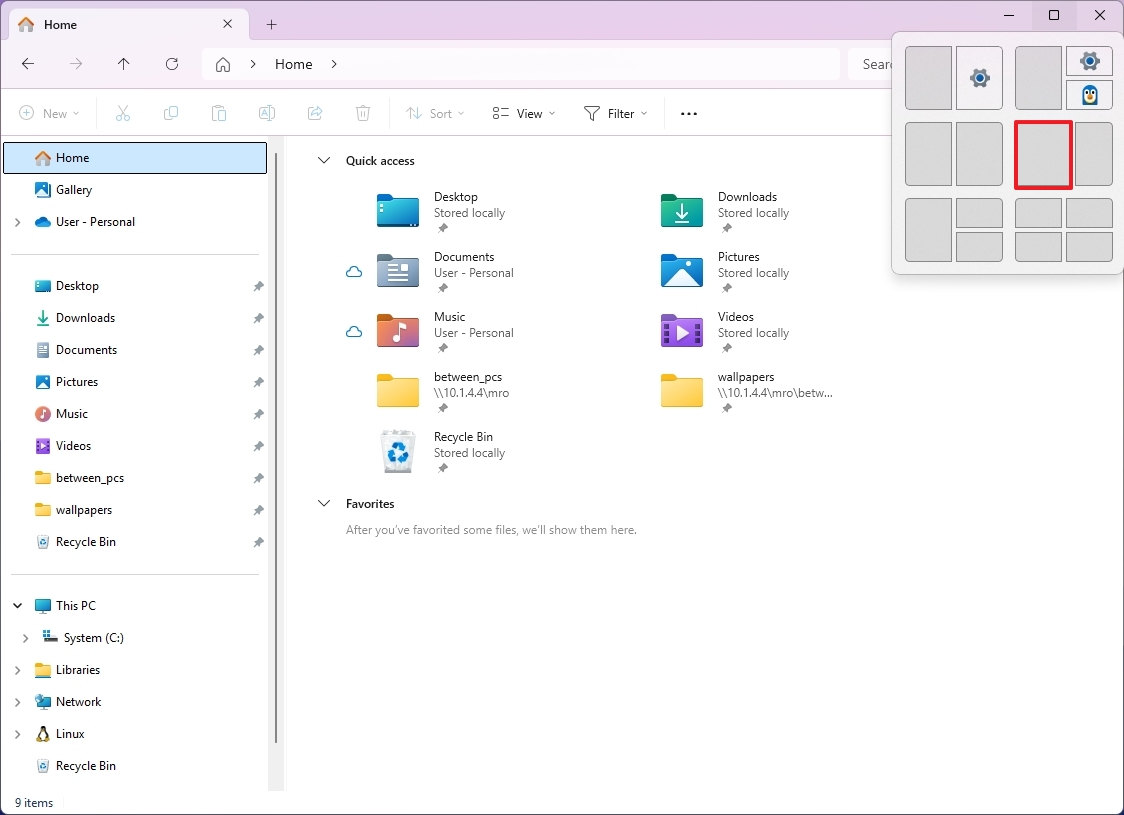
On Windows 11, Snap Layouts is a feature of Snap Assist that makes it easy for anyone to organize windows by giving them a visual aid with different layouts they can use to snap windows on the screen. This is an excellent way to help non-technical users organize windows better in wider displays.
In addition, the layouts menu can also suggest which apps to snap together. You will notice when the feature shows the icons of running applications suggesting their placement on the screen.
To use the Windows 11 Snap layouts, use these steps:
- Hover over the Maximize button.
- (Option 1) Select one of the available layouts by choosing where you want to snap the first window.
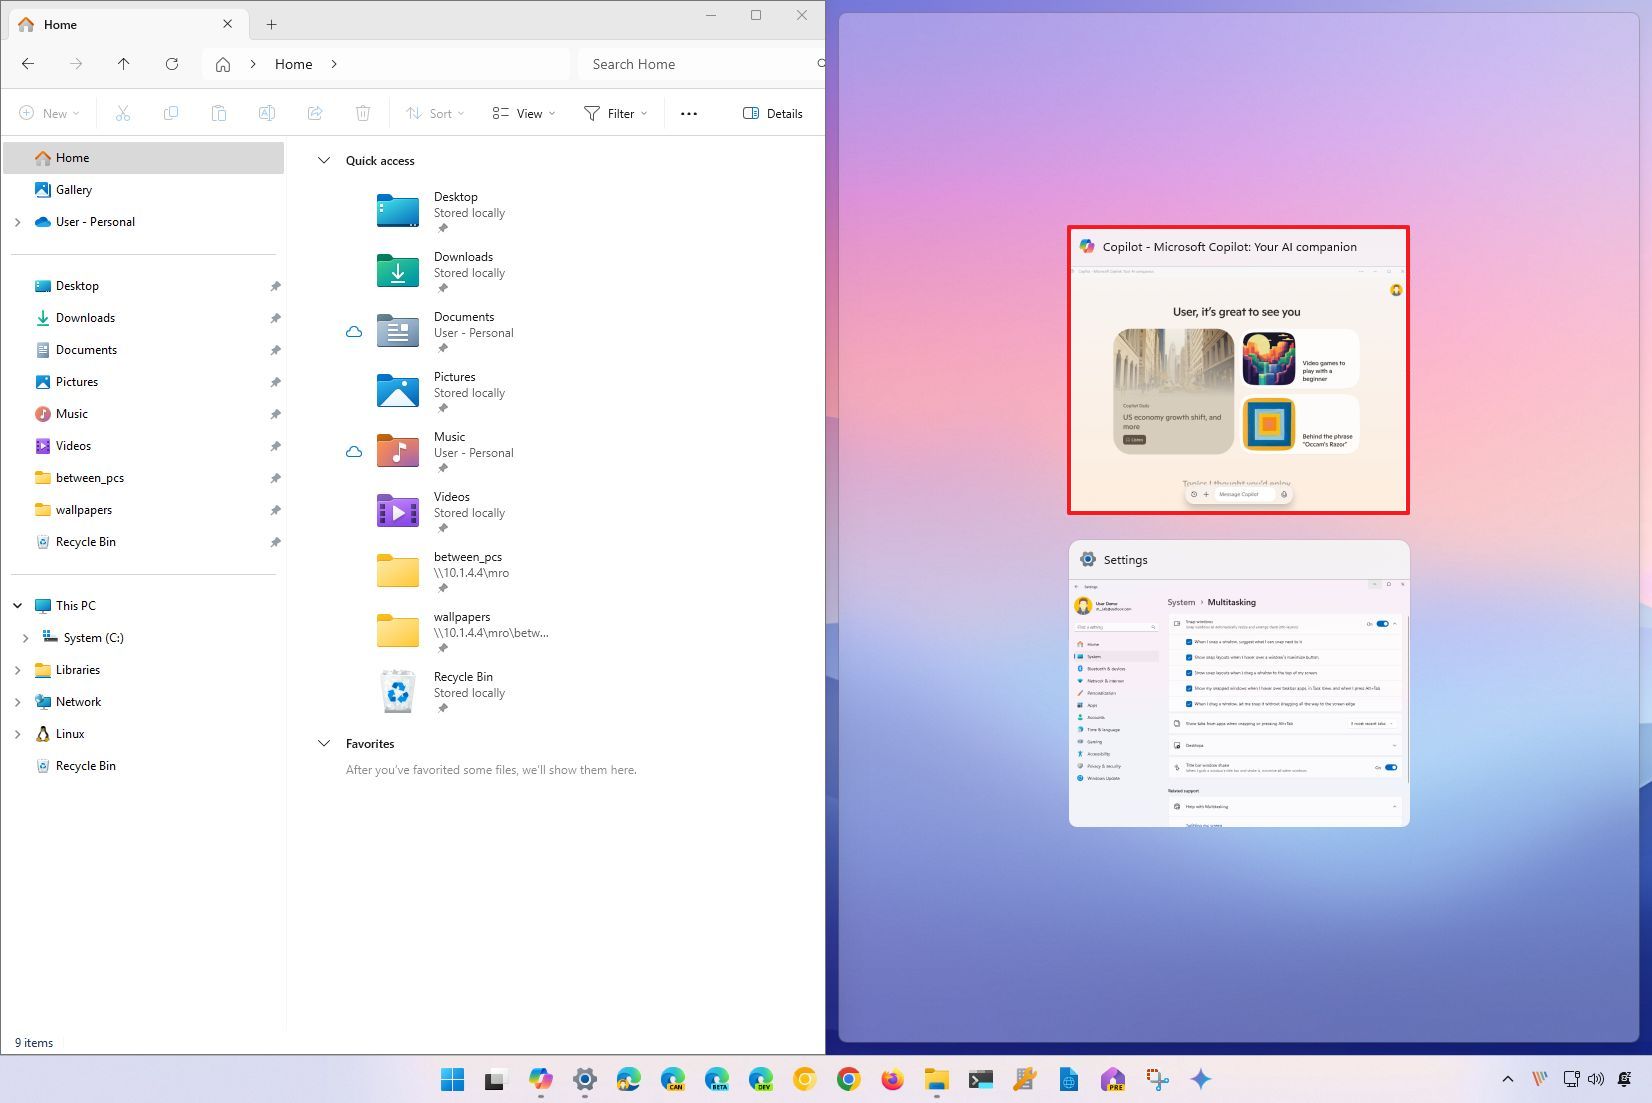
- Select the next app you want to snap from the preview.
- Continue snapping windows, depending on the layout you selected.
- (Option 2) Select the layout with the suggested applications to snap all the apps at once.
If you removed a window from the group, you could re-snap it by hovering over the "Maximize" button and selecting the same layout and location.
Snap groups
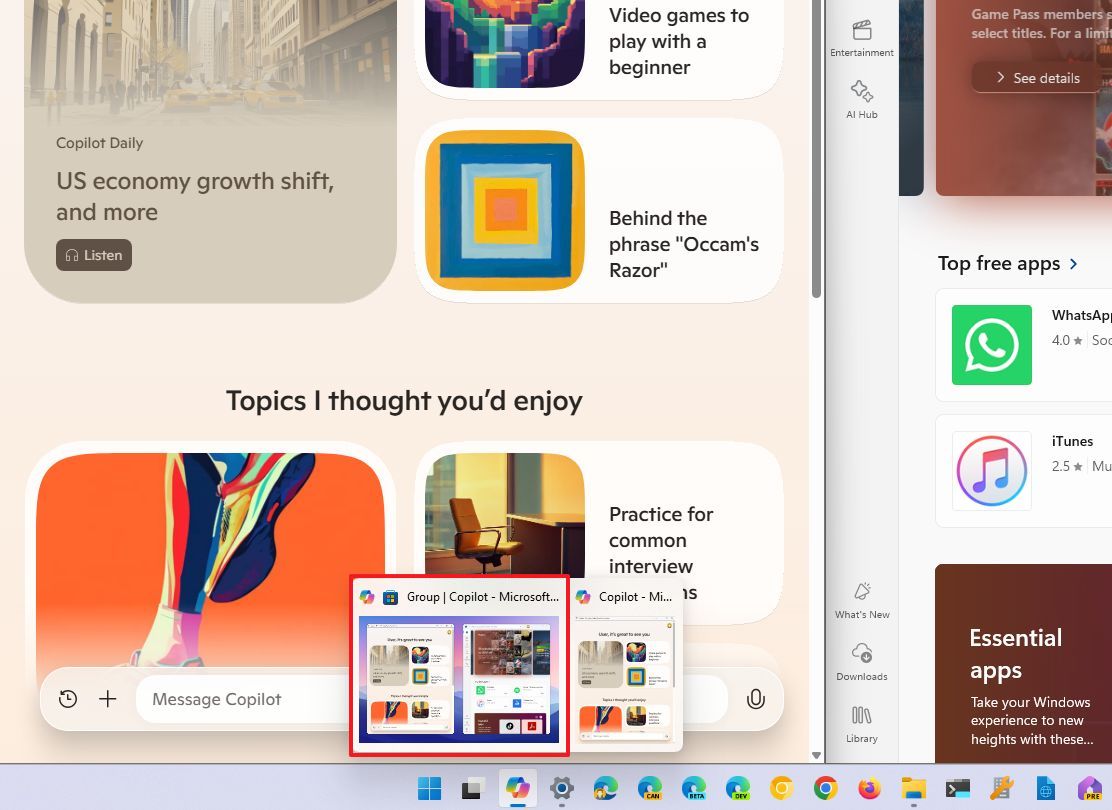
On the other hand, the "Snap Groups" group feature allows you to return to previously snapped windows without re-snapping anything. If you switch to another app, you can hover over the app that belongs to the group in the Taskbar and select the preview to jump to the group quickly.
To return to the group of snapped windows, use these steps:
- Hover over an app that belongs to one of the groups.
- Select the group preview to switch to the snap group.
Once you complete the steps, when working on a different window, you can quickly switch to the previous snap group without re-snapping all the windows again.
Snap shortcuts
On Windows 11, you can also use the mouse and keyboard shortcuts to snap windows. However, you can only snap up to four windows in four different layouts. If you want to snap up to three windows in a vertical orientation, you will need to use Snap Layouts.
Snapping two windows
To snap two apps side by side with the mouse or shortcuts on Windows 11, use these steps:
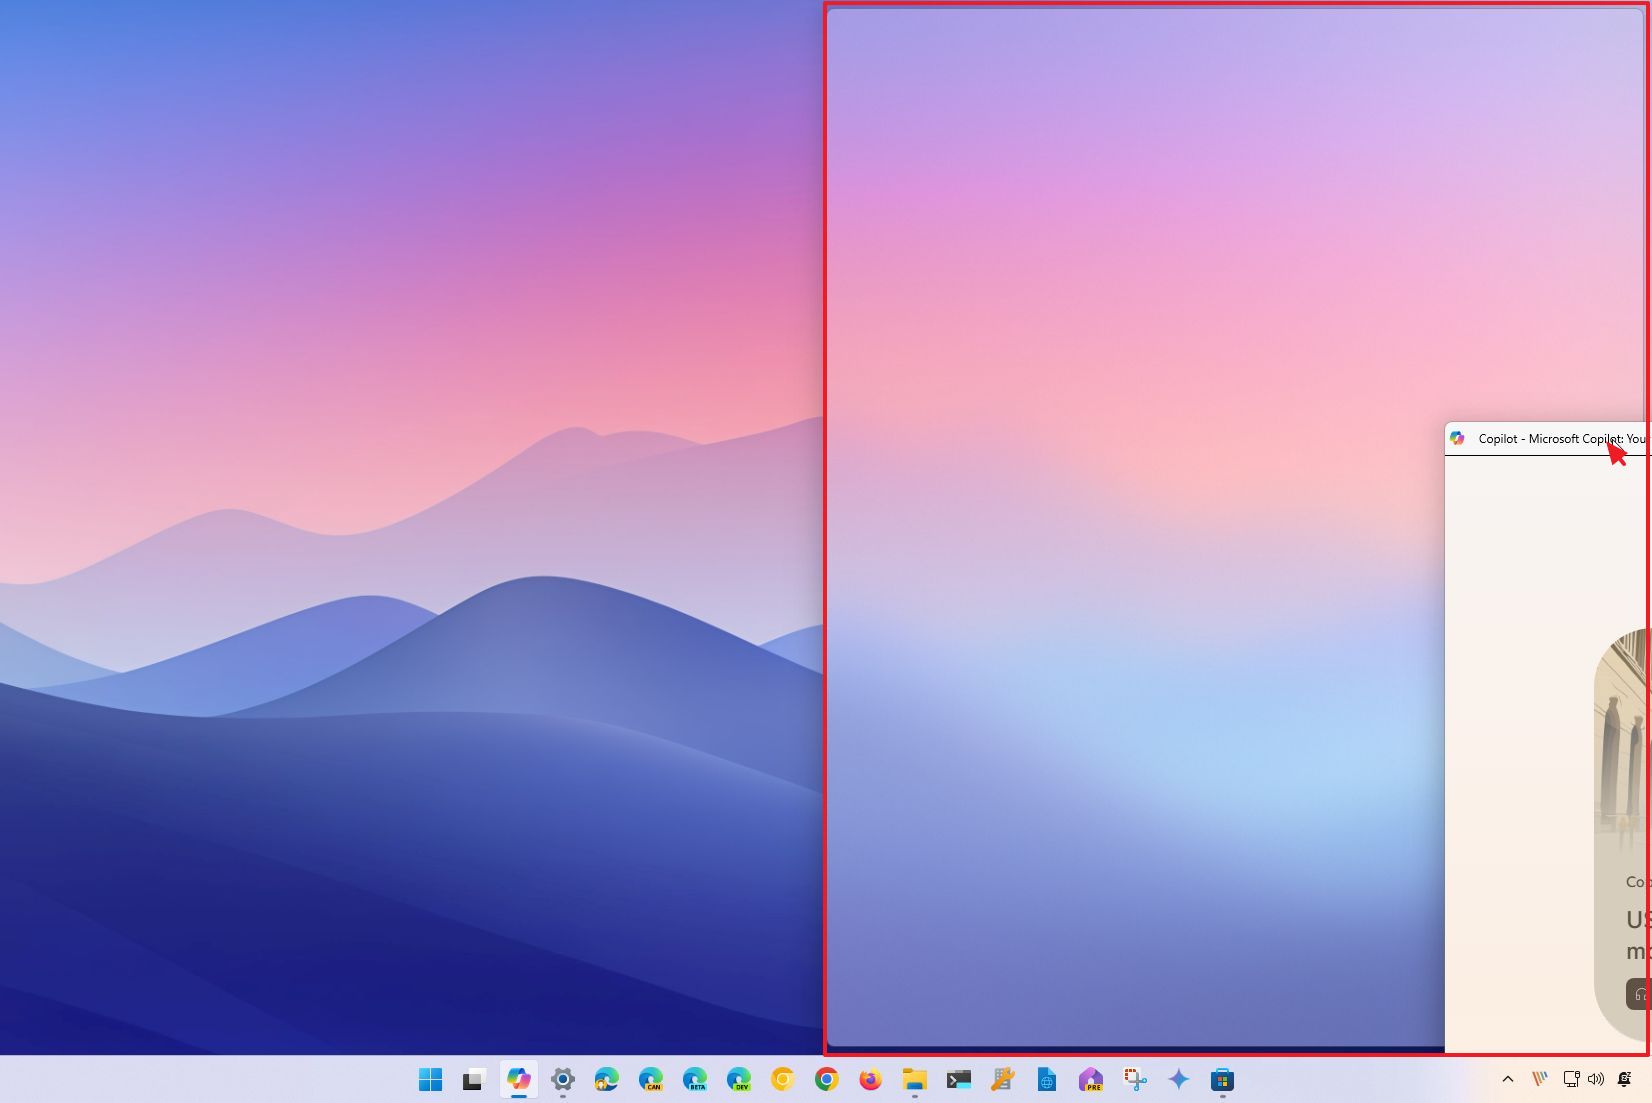
- Click the title bar of the app.
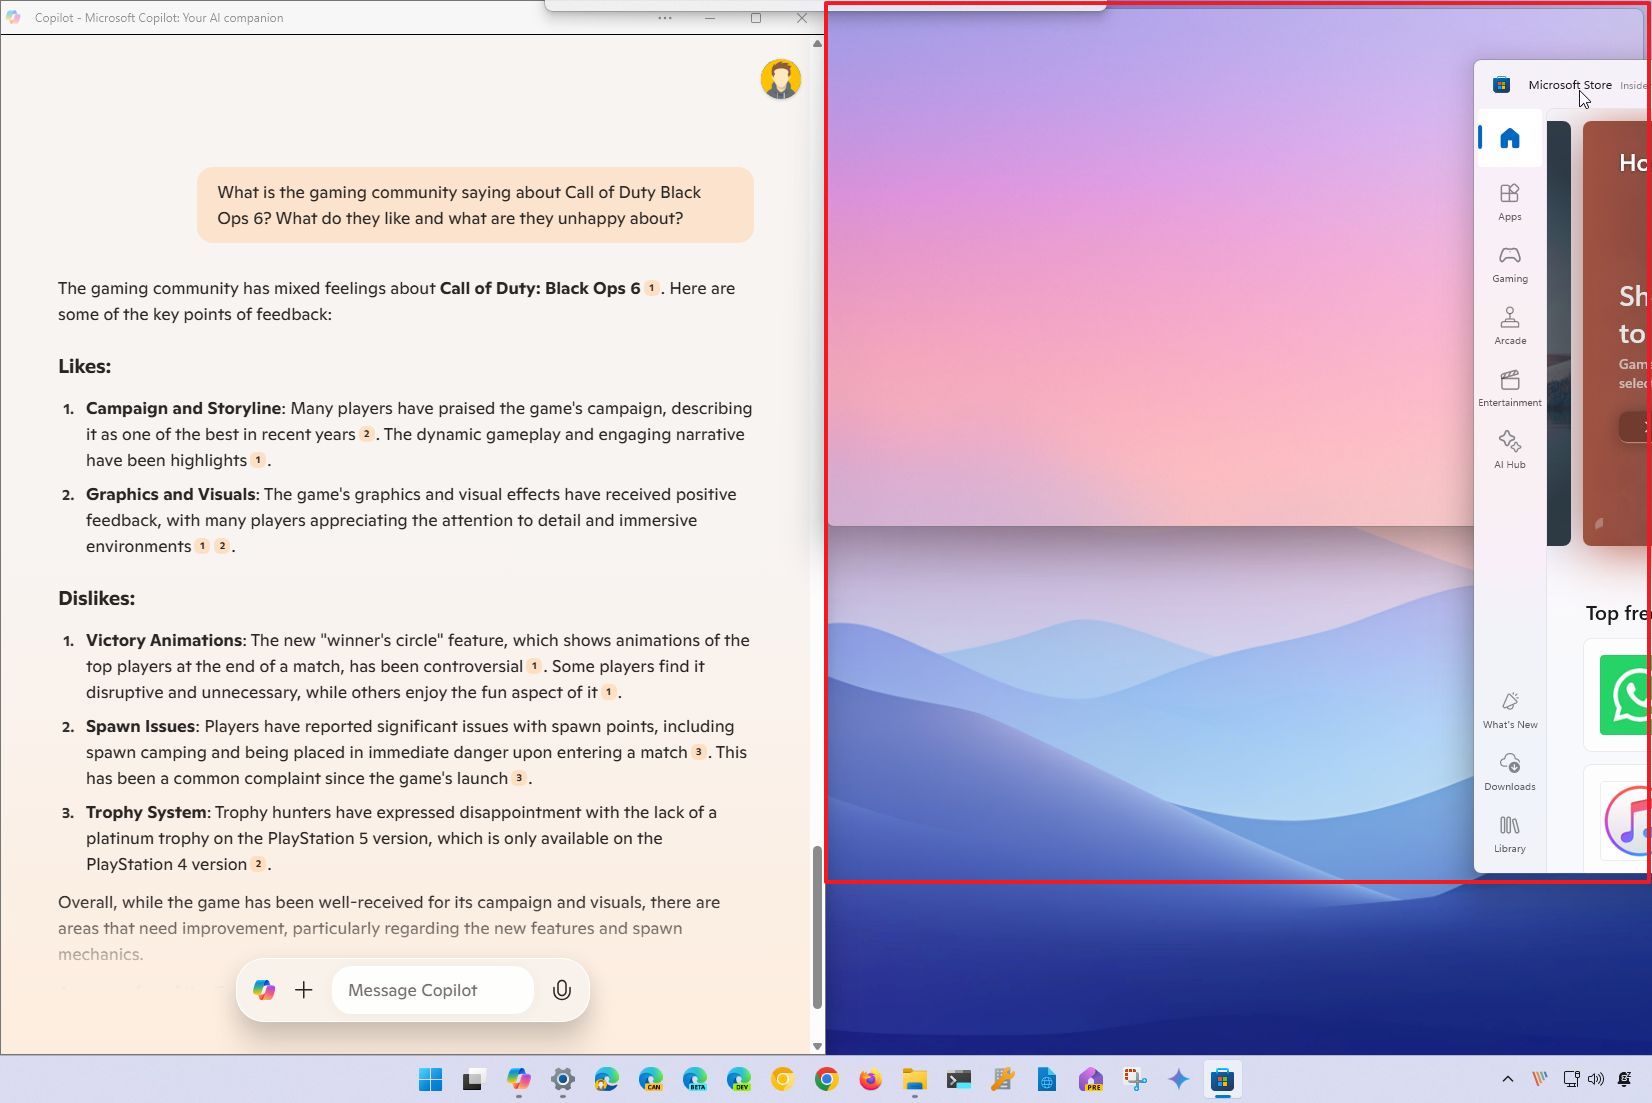
- Drag the window to the left or right edge of the screen and drop it when you see the Snap assist preview.
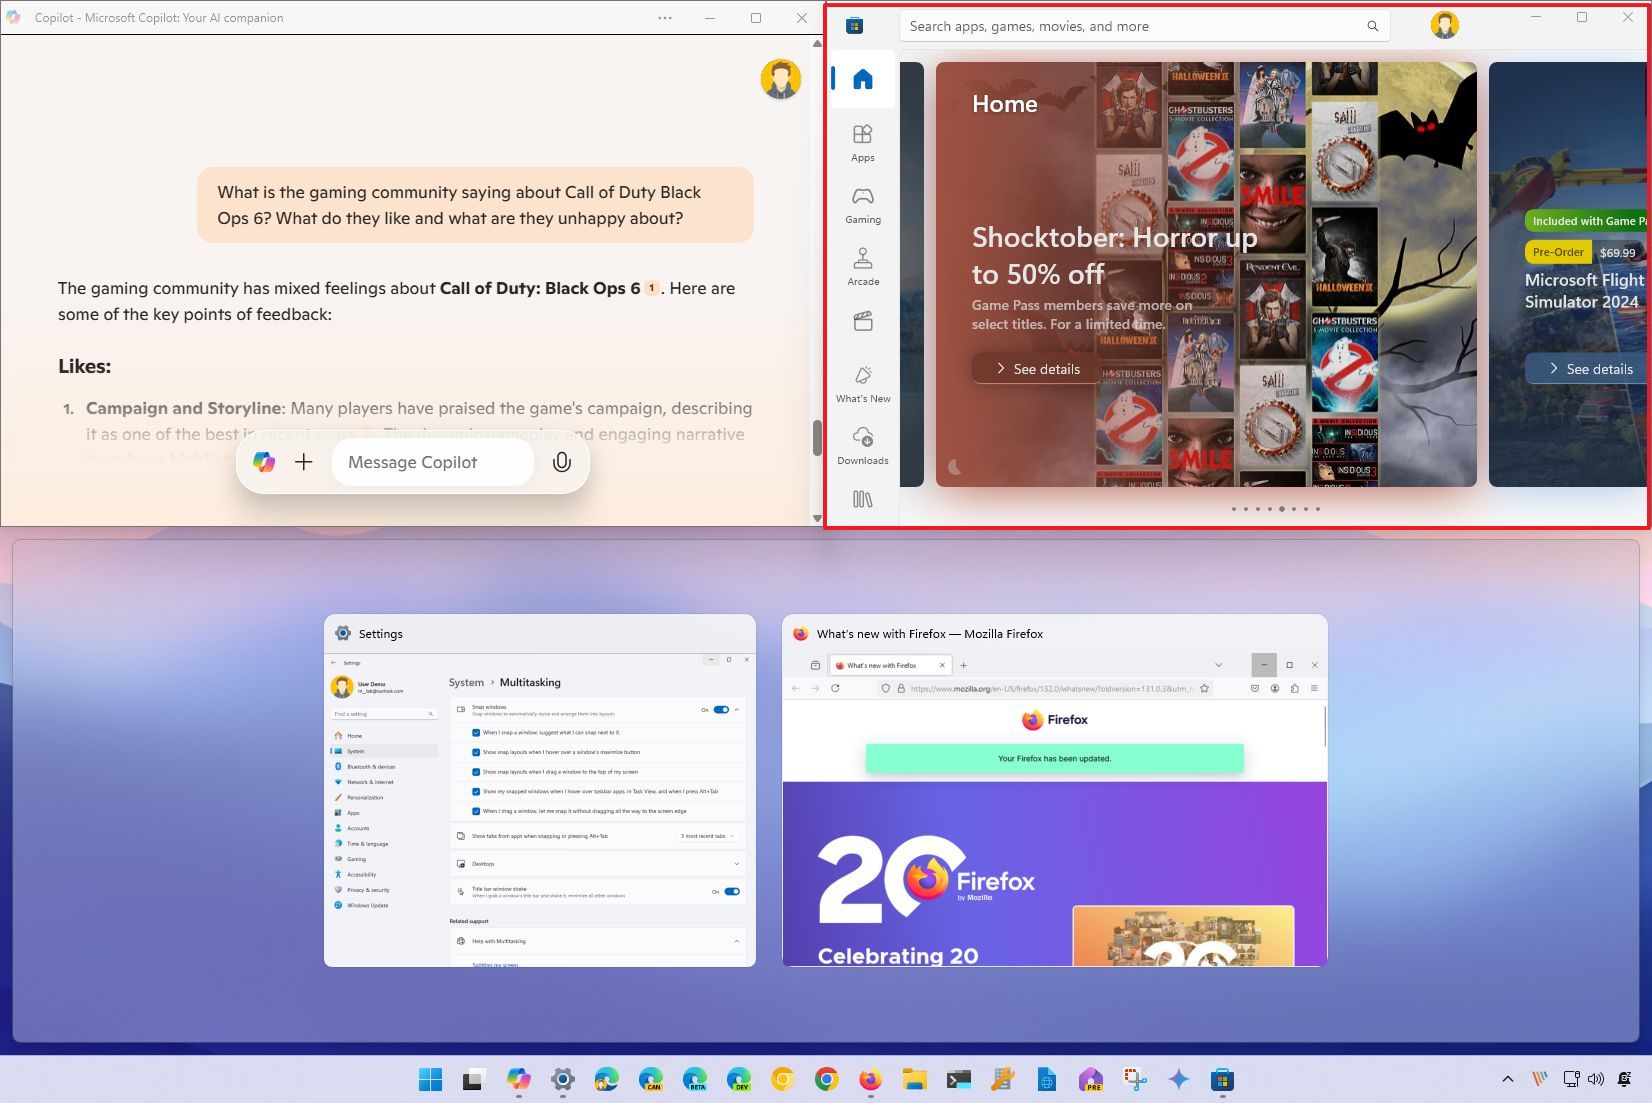
- Select the second app you want to run alongside the other one from the preview.
If you do not see the app you want, open it manually, and drag it to the opposite edge of the screen.
Alternatively, you can use the "Windows key + left arrow" keyboard shortcut to move the current focus window to the left or the "Windows key + right arrow" keyboard shortcut to move a window to the right.
Snapping three windows
To snap three windows in the screen, use these steps:
- Click the title bar of the app.
- Drag the window to the left or right edge of the screen and drop it when you see the Snap assist preview.
- Press the Esc key on the keyboard.
- Click the title bar of a second window.
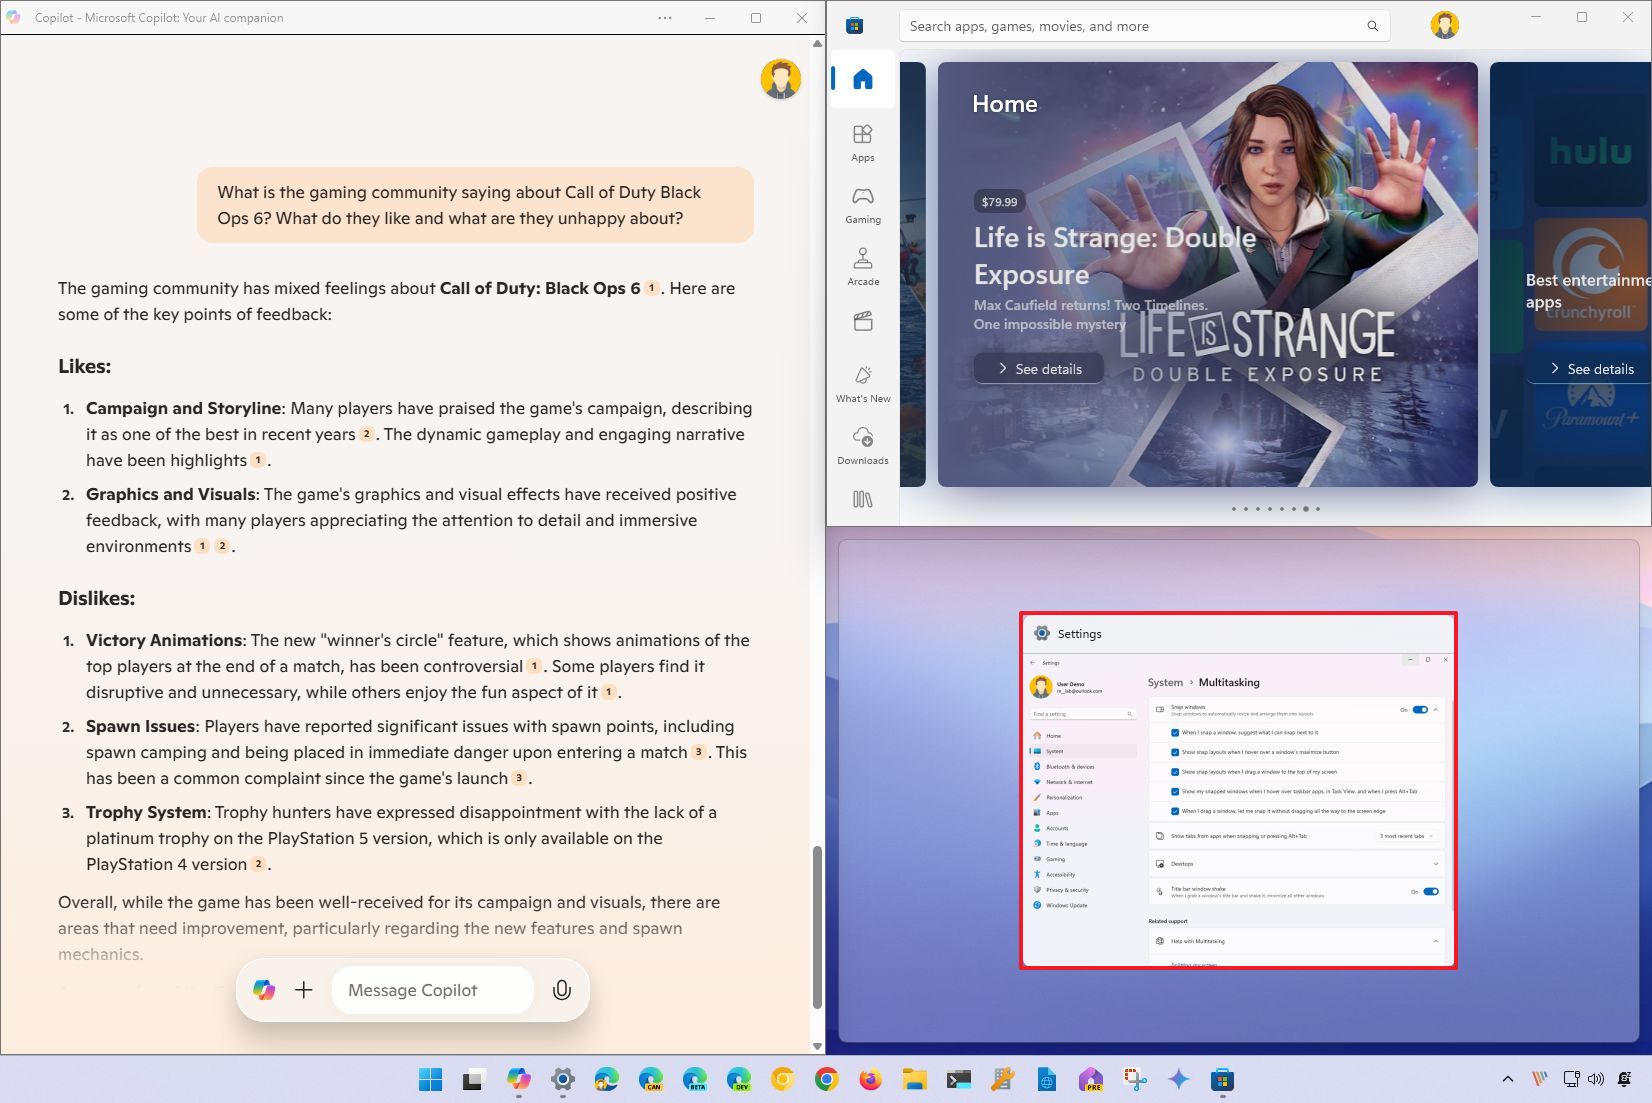
- Drag and drop the window to one of the corners.
- Select the third window to snap it to the remaining corner.
If you want to use keyboard shortcuts, use the "Windows key + left arrow" combo to snap a window to the left, then the "Windows key + right arrow + down arrow" to snap the window at the bottom-right corner, and the "Windows key + right arrow + top arrow" to snap the window at the top-right corner.
Snapping four windows
To snap four windows in the screen, use these steps:
- Click the title bar of the app.
- Drag and drop the window to any of the four corners of the screen.
- Continue snapping windows following the visual guidance to fill the screen with four windows.
You can also use keyboard shortcuts to snap windows into the corners. For example, if you want to snap a window in the top-left corner, use the "Windows key + left arrow + top arrow" or the Windows key + right arrow + down arrow to snap the window at the bottom-right corner.
In addition, you can use the "Windows key + top arrow" to snap a single app as a maximized window or the "Windows key + down arrow" to minimize the window.
Finally, you can also use the "Windows key + Z" keyboard shortcut to bring up the Snap Layouts menu, choose a number to select the layout, and then press the number to place the app on a specific zone and continue snapping other windows.
Resize snap groups
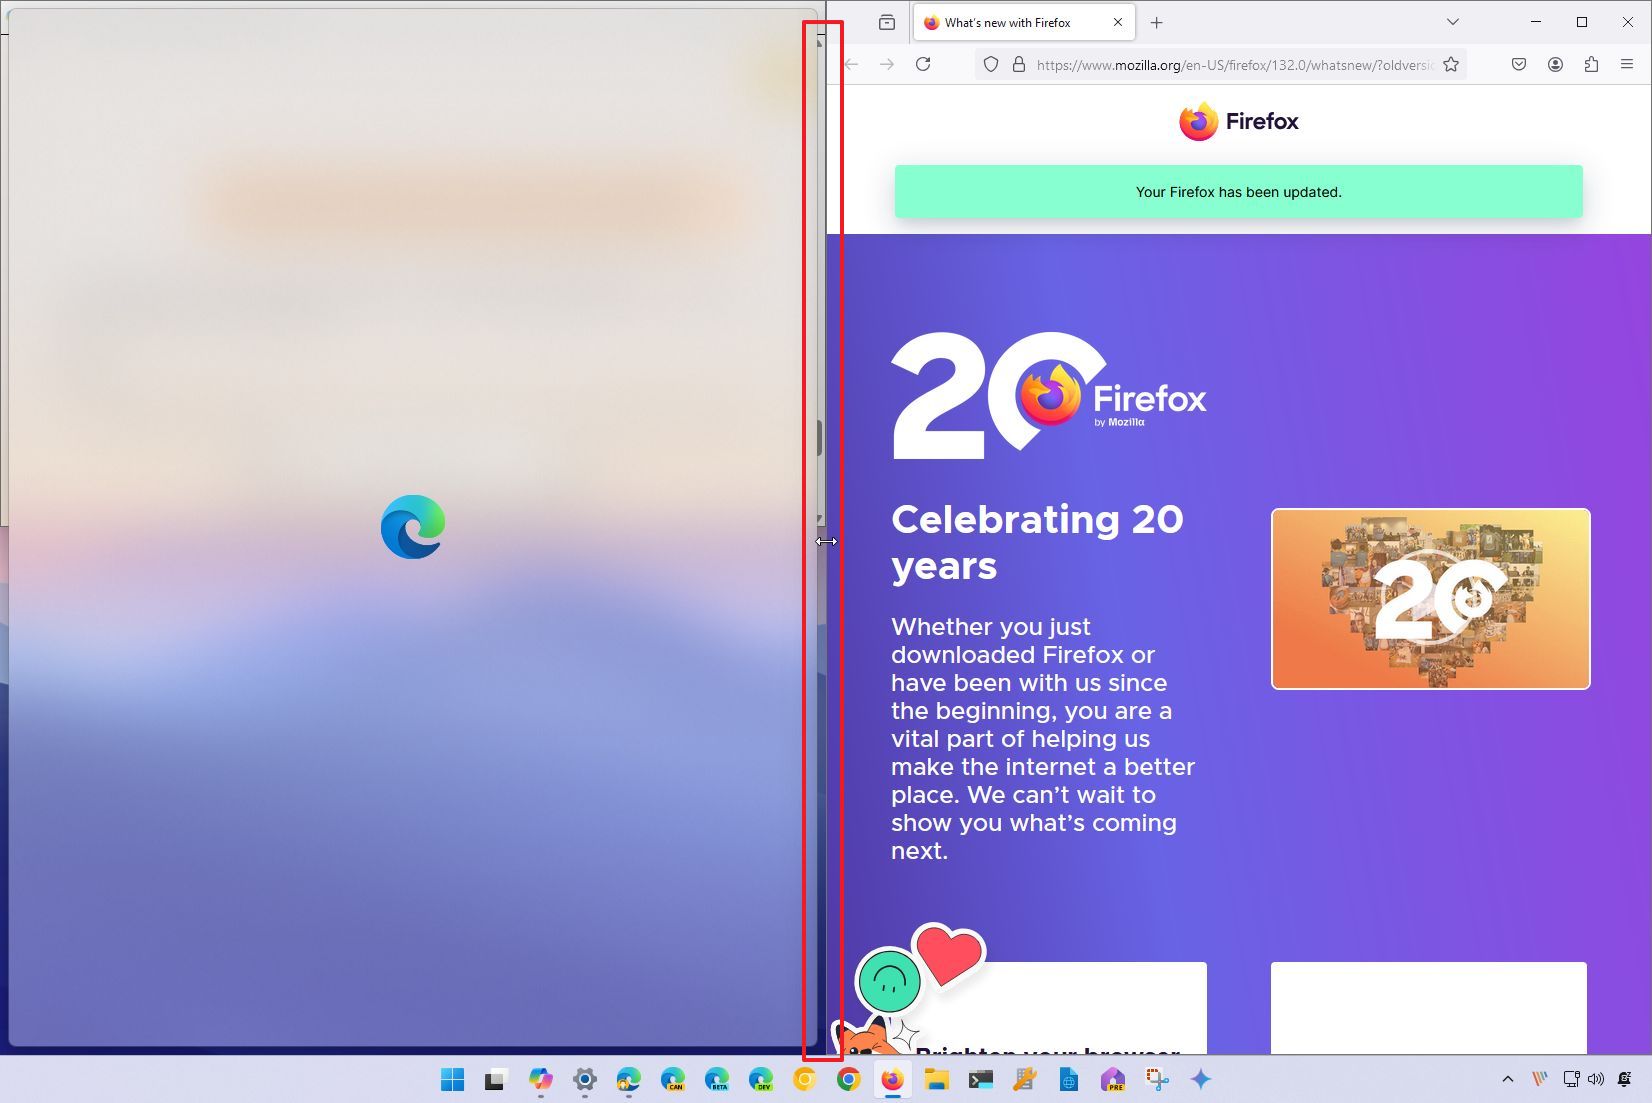
After snapping your windows in the screen, it's also possible to resize a window while resizing the adjacent window automatically. To do this, simply place the cursor on the edge between the windows, click the grip, and drag and drop it when the window has the size you desire.
More resources
For more helpful articles, coverage, and answers to common questions about Windows 10 and Windows 11, visit the following resources:
- Windows 10 on Windows Central — All you need to know
- Windows 11 on Windows Central — All you need to know

Mauro Huculak has been a Windows How-To Expert contributor for WindowsCentral.com for nearly a decade and has over 22 years of combined experience in IT and technical writing. He holds various professional certifications from Microsoft, Cisco, VMware, and CompTIA and has been recognized as a Microsoft MVP for many years.
